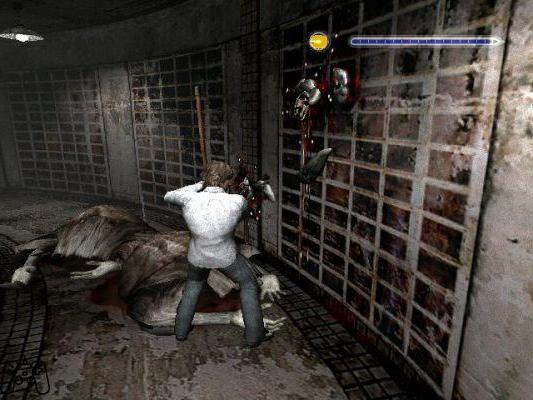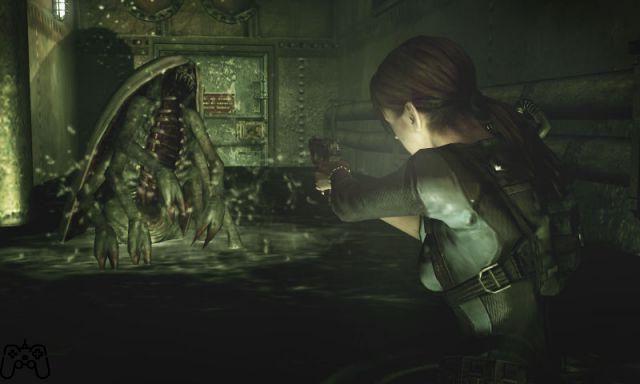
World 1-1
Proceed hopping towards the checkpoint. So, look up, you will notice the first coin near three boxes. Use the Propeller Suit, found in one of the crates below you. Immediately after the second checkpoint, go straight to the section where the ground turns on itself; at a certain point, you will locate an opening: go down the pipe to get the second coin. At the third checkpoint, prefer the way up; you will notice the coin just above the signal.
World 1-2
Once down in the underground area, use the platform below (waiting for its left section to move up) to launch yourself towards the coin. For the second, wait until you have reached the platform whose inclination you can manually control. Look up to the right, you will see a pipe. Move the right side of the platform up, jump to the invisible blocks on the left, hit the P switch, and go up the steps that will lead you to the coin. So, forward to the third checkpoint; near the green brick pipe, make a hole with a jump-and-culata, then press the switch to drop the coin.
World 1-3
Before the checkpoint, use Yoshi to jump from one of the first pipes to get the first coin. After the checkpoint, locate a tunnel hidden by the pipes; drop down to find the coin, it can be reached with a Yoshi jump. You will notice the third one just before the end of the level, above a red tube. Again, use Yoshi to jump and reach it.
World 1-4
Move slowly over the pool, freezing Cheep Cheep as it tries to reach you; you will thus arrive at the first coin. For the second, wait until you are between the two pipes that emit water; freeze a Cheep Cheep there, using it as a cart to automatically reach the coin. The third coin will be located a little further on; it is placed in a small space between an Urchin and yet another tube that emits water. Having eliminated the Urchin (freezing it), pass the water-shooting pipe with skill, reaching the coin.
World 1-5
At the circular tracks, you can fly to the walkway above you with the propeller suit. Hit the block on the left, using the walkway it revealed. This will bring you to the first coin. Once you reach the rotating green block, you will locate the second coin near the first gear. By staying on the right edge you will make it yours automatically. So continue along the rotating red blocks; above the Paratroopa there will be the coin, the propeller suit is perfect to make it yours.
World 1-6
Just before the checkpoint, jump on top of one of the Paratroopas occupying the area with the moving terrain to get the coin. The same method will be used to trace the second coin, just before the checkpoint, between different pipes. Immediately after the checkpoint, jump to the left side of the moving ground to reach an alcove; go down the only tube here to get to the third coin.
World 1: Castle - prelude
At the first platform, jump to the wall on the left. The platform immediately above contains the first coin. Therefore, always forward; before the checkpoint, there will be three trading platforms; aim for the upper right corner, there will be the second coin. Past the checkpoint, there will be other platforms of the same kind. In one of the two shelf-like immediately below, there is the third coin (on the right). Use the wall on the left as a lever point to reach it.
World 1: Castle
Right at the beginning of the level, at the top of the gear, jump to grab the first coin. Immediately after the checkpoint, the second: wait for the boulder to come down, using it as a launching pad towards the coveted prize. Next, proceed to the boss door, locating a green colored pipe. Use the gear, downwards, to get inside the tube, where there will be a switch that will allow you to use bricks to get to the coin.
World 2-1
Immediately use the sand below you to reach the first coin. Go past the checkpoint, then go down the wall, keeping to the left, and then jump to the alcove on the right. The third requires the propeller suit; in that case, you will see it inside a ravine: drop down, then use the propeller suit to avoid the danger.
World 2-2
Jump into quicksand, then flip the switch, use the pipe, continue to the second yellow switch. Platforms will appear leading to the coin. Go through the checkpoint, then hit the leftmost block. Climb the path thus revealed, arriving at another switch that will reveal the coin to you. The third is towards the end of the level; use Mario in small version to go down in the small tube, press the umpteenth switch for the umpteenth coin (wall-jump to get there).
World 2-3
Take a quick look at the base of the pyramid, you will find a coin; therefore, pass the checkpoint; after the fire-breathing enemy, drop down to the left to get to the second one. Proceed to the long inclined plane, before the end of the level; from here, use the nearby platform to get up to the ceiling, it has a secret passage that leads you up to the coin.
World 2-4
Immediately up on one of the first platforms (at the second of the ladders). You will find some hidden blocks, use them to make a new bean string. Repeat the procedure to get to the coin. It is therefore advisable to make the propeller hat yours, to facilitate the achievement of the following coins. Go down the tube, arriving at an underground area. You will notice the coin in front of you, to exit use the propeller. Near the end of the level, run up the hill; at the top, use the propeller hat to get the coin.
World 2-5
Count the trees; at the third, use Yoshi to get to the cloud containing the coin. Also before the checkpoint, locate the piranha; take him out, then use the secret passage he was trying to hide. Using Yoshi, you can both shed light on the area (with the special block), and reach the coin above you. For the third, locate the cactus-shaped enemies; So, take a Lakitu cloud, and climb up to the right.
World 2-6
Go past the first crate of items, you will see the coin above you - just jump to get it. Also before the checkpoint, make your entrance into the green pipe (above the bricks), towards the end of the path. The coin is a bit high, any propulsion system will put you in a position to reach it. After the checkpoint, the third coin will be near the P-shaped switch.
World 2: Castle - prelude
At the top of the first room, on a platform cut in half, you will find the first coin. Use the moving gate to reach it. Arrive at the checkpoint, look to the right to see a hidden section where you will find the coin. Before the boss door, jump along the fences, on the last one you will find the third coin.
World 2: Castle
As soon as the level begins, use the thruster to reach the platform above you, which contains a coin. So, pass the section where the path splits into three, then destroy the bricks and perform a wall-jump that brings you to the vicinity of the coin. Immediately after the second part of the path divided into three, press the switch P, walk through the bricks that will be created, and make the coin yours.
World 3-1
The first coin can be found just before the checkpoint; take the penguin suit, using it to walk the series of blocks that separate you from the coin. Now cross the checkpoint, locating the lower path near the warp tube. Still using the penguin suit, freeze the piranha plant, using it as a lever to get to the second coin. Continue forward, up to a group of blocks that do not allow you to get to the pipe; here, equip the penguin suit, to let yourself be carried along the pipes, freeze one of the penguins, and use it to get to the coin.
World 3-2
Just before the checkpoint, you will notice the coin right above you. Use a Bullet Bill to jump up to her. Once you have passed the checkpoint, proceed inside the green tube, then using the similar-bullets to get to the coin immediately above you. Still ahead for the third, you will see it at the top, near a platform; you can choose whether to take a very long run, so as to make a jump that allows you to reach the coin, or use one of the stray bullets.
World 3-3
As soon as the game starts, look under the platform to get to the secret lair, home of the coin. So, go through the checkpoint; look up, one jump will be enough to make the coin yours. Also after the checkpoint, use the warp tube to get to a barrel. Proceed to the ice block, toss the barrel at the coin to make it yours.
World 3-4
Just before the checkpoint, you will find yourself sliding along a platform: jump with the right timing to reach the coin, which will reveal itself in front of you along the descent. The second, also before the checkpoint, will see you head under the platform immediately preceding it to reach a secret alcove, with the coin. After the checkpoint, therefore, the third coin will be immediately after the self-propelled platforms that precede the conclusion of the level.
World 3-5
As soon as the level begins, the first coin will be immediately on your right. For the next ones, you must have activated the red switch on the Mondo Map. At this point, go up to the red pipe at the top of the first section of the level, use the pink block to reach the second coin. A little higher the third.
World 3: House of Ghosts
Looking carefully to your left, you will notice a secret area where you can go to get the coin. In the second room, a series of ropes will allow you to reach an alcove on the wall to your left, where you can take the second coin. The latest in the series: use the secret door in the room with the rope on the ceiling; to access it, use the rope to reach the same position as the leftmost platform, letting yourself fall. In the room, the floor will fall, and you can reach the alcove.
World 3: Castle - prelude
Just before the checkpoint, you will come to a spinning square. Start on its right side to jump, waiting for it to be at its highest point, reaching an alcove. Second: use the elevator right after the checkpoint, activating the first POW before it makes contact with the balls, and taking the second POW up with you to prevent it from destroying the quills. The third, as has become tradition, is found immediately before the boss; jump from the top of the spinning blue platform, then lever up the wall to proceed to the right, left, and off to the alcove with the coin.
World 3: Castle
Pay attention to the moment you are on the moving platform: looking up, you can jump to a platform containing the coin itself. As for the second coin, you will have to clear the water walls just before the checkpoint with the help of the bo-ombs. The third is towards the end of the level, easily visible, a simple run-up jump will put you in the right conditions to make it yours.
World 4-1
The first coin is before the checkpoint; locate the penguin suit, freeze the plant, then use it as a lever to reach the coin. After the checkpoint, perform the same procedure on the next plant. Near the exit from the level, use the top pipe to get to the coin.
World 4-2
Immediately after starting it will reveal itself in front of you. Immediately after the checkpoint, look down, you will notice the coin: let yourself hang from the edge to reach it. Just before the boss, locate a moving platform that proceeds vertically; wait for it to get close to you and then use it to climb up to the coin.
World 4-3
From the start of the level, jump on the enemy to get to the block where the first coin is located. So, always before the checkpoint, use the penguin suit with the star to walk on the water and quickly get to the second one. The third is immediately after the checkpoint; you will need mario-small, he will have to go through the tube corresponding to his size.
World 4-4
Go through the checkpoint, using the switch above to prevent the nearby pipes from continuing to emit liquids. Follow the blue coin path that leads to the yellow pipe, quickly; therefore freeze the Cheep Cheep with the penguin suit to finally reach the coin. The second is immediately after, you will not have to make any special efforts to make it yours. The third is towards the end of the level, one of the walls in the last section contains a hidden area, right next to the exit pipe.
World 4-5
Immediately jump on Yoshi, flying to the top of the first section, where the first coin is also. The second is near the column of coins above the tree; here too, the use of Yoshi is absolutely recommended to speed up the process. For the third one, you will have to pass the checkpoint, as well as the third tube; you will find yourself in front of a very tall tree, climb up and jump into the hole at the top.
World 4: House of Ghosts
The first coin is in the second room; place yourself on the sixth of the series of platforms, waiting for it to drop low enough to allow you to retrieve the coin. The second is in the third room, immediately after the final door there is an easily identifiable secret passage that allows you to get to its surroundings. Third: Locate the hidden door, using the descending platform under the item box. The coin is near the ceiling of this room.
World 4: Castle - prelude
Let the crate carry you to the conveyor belt; at the end of the path, jump, thus reaching the coin. The second is in an alcove just below the checkpoint. For the third one, immediately after the checkpoint, wait for the platform above to descend, and then "climb" the coins.
World 4: Castle
Behind the first gate in the vicinity of which you will arrive immediately after the start of the level, there is the first coin. Use the nearby panels to get through it unscathed. The second is shortly after the first, between two similar-elevators surrounded by spines. Use the lower gate to drop down towards them, thus quickly taking possession of the coin. The third, just below the boss door, requires the use of the nearby warp tube.
World 4: Flying Ship
The first coin is immediately after the flames, as soon as they leave the scene you can retrieve it very easily. After the checkpoint, smash the crates and go down the pipe. Using the gears you will reach the nearby coin. So, locate a blocked pipe, use a bob-omb to make it accessible and go through it to the third coin of the lot.
World 5-1
Just before the checkpoint, you will notice a slightly convex section of land; break it with your weight to get to the first coin. The second will be inside the Koopa turtle's shell. For the third, climb the vines near the tube, just after the checkpoint, and then get inside another shell; another tube will take you to the coin.
World 5-2
Walk along the first game area, crossing it in its entirety. So, use the nearby Wiggler to rise up to the height of the coin. Forward, until you reach underground; here too, you will arrive at the coin with the indirect help of the Wigglers. For the third one, wait until you reach the section where you will have to get on the Wiggler; at the end, jump on the platform, it will take you to a secret area containing the coin.
World 5-3
Immediately after the start of the level you will see it, to reach it you will have to jump on the heads of the enemies. After passing the checkpoint, you will notice a block of bricks that does not allow access to the second coin. Launch the Koopa Troopa to destroy them and grab the loot. For the third coin, drop down to the nearby platforms; staying placed on one of the two, it will drop down, making you get straight to your target.
World 5-4
You will see it immediately after taking the raft; jump on an enemy's head to reach it. Then continue until you get to the POW block; wait for the raft to move to the right, you will notice a column of two coins; throw the POW block at them to get the coin. The third: in the vicinity of the exit pipe, destroy the bricks with a bo-omb.
World 5-5
The platform near you, near the checkpoint, will provide you with the first coin. Go through the checkpoint, looking up: you will notice a cloud, above which the coin is located. Using the propeller you will reach it without problems. For the third, you will have to wait for the end of the level. You will see a POW block behind a Manta Ray, use it to get to a group of W-shaped coins; using the block in this area you can activate the coin.
World 5: Haunted House
After passing the very first ravine, enter the first door. The back of the second room will reveal a hidden area, which contains the first coin. Instead for the second, always from the first room, go down along the two consecutive ravines, and then enter on the left. Next to the new room is the Star Coin. For the third, we start again from the first room. Still down at the first ravine, jump over the second, and start climbing the nearby stairs. Down again, take the door on the right. The second circle contains the coin.
World 5: Castle - prelude
At the third section of moving platforms, look to the right to locate the first coin. Pass the checkpoint, then jump to the platform on the left, you will automatically reach the second one. At the top, look to the right of the boss door, entering the only hole there; break the blocks to get to the third coin.
World 5: Castle
Go down the wall, grab the coin, then jump right away to avoid the lava. So go on up to the circular grate. Jump to the platform on the left, enter the door, and wait for the gate to go up to get the second coin. For the third, pass the checkpoint, then use the chain of gates that go up and down.
World 6-1
Pass the cave; you will notice an enemy capable, literally, of "throwing balls". Use the propeller hat to get close to him and retrieve the coin. The second is immediately after the checkpoint, in the middle of the group of platforms that surround it. The third, immediately after exiting the last cave; look up near the flag pole, and use the propeller hat to get to the coin.
World 6-2
After the Piranha Plant, you will notice the coin partially hidden by a brick. Throw the nearby Spiny at the brick, destroying it, granting you access to the target. The second is located just above the green tube after the checkpoint; lure one of the bats nearby and jump on it to get to the coin. So, still ahead; wait for the tunnel to be visible near the moving ground, entering it to press the switch that will allow you to get your hands on the coin.
World 6-3
Kill the Piranha Plant, using the previously haunted platform to climb up to the coin. For the second, the method is the same, the platform immediately after the first. For the third, start from the corridor filled with piranha plants. Use the elevator-like on the right to get to the coin.
World 6-4
Before the checkpoint, locate a horizontal line of coins just above a Koopa Troopa's head. Using Yoshi you can walk it to get to the coveted coin. Immediately after the checkpoint, you will find a small ravine. Using Yoshi, go to the hidden tube inside. so, still with Yoshi, go up to the POW block to get to the coin. The third is in the final cave; you will find yourself in front of a platform-scale, make the right section rise to allow Yoshi to reach the secret tunnel above you.
World 6-5
You will practically go on it following the standard route; still try to kill the fish to avoid getting hit as you jump towards her. The second is immediately after the checkpoint, inside the cave; drop off the lower platform, you will come to the coin. Still ahead, look for the hidden block among the small group of four blocks; you will bring up a path of beans, at the end use the Propeller to get to the Star Coin.
World 6-6
The first coin will be before the checkpoint; near one of the first green pipes, use the POW block to reach it. The second is after the checkpoint; use the spring to climb up, where you will find the star. The third is in correspondence with the propulsion block; cling to it to reach a platform at the top, where the last coin will be.
World 6: Castle - prelude
Pay attention to two slightly indented parts on the left section of the wall. You will have to take an in-depth look at the second in the series, its interior contains the coin you coveted. For the second, you will initially have to pass the checkpoint; therefore, wait for the sharp platforms to leave you space to make a wall-jump that allows you to reach the object of our desires. Always forward, up to the group of self-propelled platforms; stay to the right, going up, to see the coin and make it yours.
World 6: Castle
Before the checkpoint, locate the walkway made up of a large amount of bricks. To get there, you'll need to use the boxes just behind the last of the set of rock platforms. A little further on, on a rocky platform, you will be able to see the second star; just use the two crates to get there. For the third one, jump off the right edge of the very last platform, just before the boss door.
World 6: Flying Ship
A group of crates will protect the first coin (you can see it from the main path), break it with your typical culata to access the object. The second will be shortly after; you will notice a tube completely covered by boxes, they will be destroyed with the same method, and then walk the tube to the coin. You will then find some crates that, this time, cover a hole. Here too, smash them with your powerful buttocks to get to the goal.
World 7-1
The first coin is before the checkpoint; you will need to locate a purple block, and quickly run towards it, jumping when its right side is in the highest position. Then use the wall to bounce towards the coin. The second: after the checkpoint, go down the yellow pipe, crossing the platforms. Use the green platform to reach the coin. The third: immediately above the level exit pipe; use the purple platform to climb towards her, jumping as she reaches her highest altitude.
World 7-2
Before the checkpoint, you will be able to locate a coin, access to which is however prevented by a fairly large barricade. It is advisable to free the Chain Chomp when it is facing right, it will head directly towards the barricade, destroying it. For the second, pass the checkpoint, then locate the green tube slightly obscured by some clouds. Its interior contains the coin. The third is immediately after; you will see two Chain Chomp, the coin is right between them; it is recommended to use the water ball to go down to the goal.
World 7-3
Along the main road, before the checkpoint, the first coin will be easily accessible without having to make peculiar jumps. You then pass the checkpoint, noting a section with a large amount of overlapping tracks. Climb to the top left corner, using the hidden block to create a ladder of beans, flip the switch and grab the coin. So go ahead, go down the platform, and you will see the last coin in front of you, a short detour will be enough to get it.
World 7-4
At the end of the first section, you can use Banzai Bill to jump to the first coin. Immediately after the checkpoint, jump off the middle platform - as it moves to the right - to land on the space below, where the second coin is. Now, go past the last red pipe, to notice a pipe immediately above. Use one of the Bullet Bills to get there, go inside, then left for the coin.
World 7-5
Before the checkpoint, at the second cloud emitter, you can find the first coin. It will be slightly obscured by emissions from the aforementioned emitter, but you should still be able to track it. For the second, you must first pass the checkpoint; therefore, hit the bricks, exposing a switch; press it, and you will see that the coins below will become bricks, you can use them to get to the coin. The third is also near the checkpoint; there will be three cloud emitters, you will have to locate the lower one and discover the tunnel in its correspondence, following it to its end will lead you to the coin.
World 7-6
Continue forward to the second para-beetle, thus jumping on its shell to reach the first coin; for the second, pass the long line of para-beetle, and then climb the cloud near the nearby platform. The third is near the insect "ladder"; you will have to use one to go down; to go up, you will almost necessarily have to have a propeller hat at your disposal, otherwise you will get stuck in the ravine.
World 7: House of Ghosts
The coin is located just below the starting point. You will have to lure an enemy to the wall, he will break it and you will be able to access the gold. Then go down the path, entering the door in the upper right corner. Lure the Boo from the other side, then use the rope to get to the second coin. For the third, you will have to go up to the first room, arriving at a secret passage. So, use an enemy to break through the wall on the left; walk through the new area, climbing along the next room until you reach the door in the upper left. Use the door on the ground to get to the coin.
World 7: Castle - prelude
At the top of the first elevator, under the pipe, is the first coin. Turn the platform slightly to the right to reach it. The second coin must be reached from the first room; you will have to reach the top with the elevator, then turn the platform completely to the left; jump to the hidden block, reaching the roof on the right, jumping into the pipe that leads to the coin. The third: just before the boss door, completely to the left, blocked by a group of bricks vulnerable only to the bob-omb; you will have to try to catch one and bring it there, you need extreme precision in the jumps as you will have to be very fast.
World 7: Castle
At the beginning of the level, look up, locating a group of bricks; tear them apart and then use a wall-jump to reach the first coin. Pass the checkpoint, then the hammer bro; locate the tube hidden by a cloud, go down to it using the platform below, proceeding towards the inside. The coin is at the top right, wait for the two spiked elevators to be out of the scene before proceeding. The third is near the last crate of items, use it to get to the hidden alcove, then wall-jump to the coin.
World 8-1
For the first coin, you'll need to jump to the right side of the platform just before the checkpoint when it turns right. Go through the checkpoint, locating the POW block; use it on the brick platform to reveal the second coin in the sequence. So, pass the green exit pipe, you will find yourself in front of a brick wall; jump over it using the nearby platform, destroy (using Super Mario) the bricks that encapsulate the coin to make it yours.
World 8-2
For the first coin, climb the platforms just after the goombas. At the end of the climb you can get your hands on the object of your wishes. For the second, you'll need to locate the alcove beyond the pipes just after the checkpoint; is behind them, you will easily spot it. For the third, you will have to try to reach a secret tunnel, under the exit pipe from the level: knowing where to look, it is easy to find.
World 8-3
You arrive at the second suspended platform; immediately below, you will find the first coin; it is advisable to wait for the lava to stop for a moment before making the jump, on pain of death. The second coin can be found in the hole in the lava flows immediately following the checkpoint, visible on the left. For the third coin, you will have to run fast as soon as you see a moment of interruption in the lava flow near the exit from the level.
World 8-4
Immediately above, towards the ceiling, immediately after using the pipe that leads to the second room. After the third enemy you will find the passage that will allow you to go and get it. The second is in the third room, surrounded by boxes; a P-shaped switch is located immediately above this group of containers, pressing it will allow you to break them and access your target. The third is in the fourth room; inside an alcove under the second tube, on the left.
World 8-5
Just before the checkpoint, you will be able to see the first coin with the naked eye. Make the platform (from which you can view it) to turn in its direction, then jump and grab it. For the second, you will have to go through the checkpoint, and take the bob-omb and then throw it towards the goal. The third: you will come to a platform that descends to a secondary path below, jump from it when it has not yet reached the end of its run to get to the coin.
World 8-6
Locate the source on a self-propelled platform. The coin is near the alcove on the left, just above the platform. The use of the propeller suit is recommended. The second coin is always before the checkpoint, near the immediately preceding tube; here too, the propeller suit is indicated. The third is after the checkpoint, use the platform just before the exit pipe to locate it on the left.
World 8-7
The first coin can be picked up during your ride with the kind of bone roller coaster; just before throwing yourself into the lava, it will bring you significantly closer to the coin, you can make it yours right at this juncture. The second coin is located immediately after the checkpoint, at the second in the series of jumps. So, at the second roller coaster juncture starting from the checkpoint, you will notice the appearance of an additional rail above your head. You stay on the path, you will take the coin automatically; jump only later.
World 8: Castle - prelude
Before the checkpoint, shortly after the level starts, wait for the fiery contraption to move to access the first coin. So, at the checkpoint, jump into the alcove immediately below to retrieve the second of the series of coins. Pass the checkpoint, wait for the fiery contraption to proceed forward, then jump over the mini-ravine, crouch before completing the jump, arriving inside a passage that ultimately leads to the coin.
World 8: Flying Ship
Before the checkpoint, at the first cannon battle, you can use a loose ball just to jump towards the coin. So, past the checkpoint, jump to the nearby platform, trying to lure the enemy from the other side so as not to take damage while performing the maneuver. For the third, you will have to use the gear, then activate the propeller suit to launch yourself upwards, where you can get your hands on your coin.
World 8: Castle
You will notice the first coin under one of the platforms, just use it to go down towards it. The second coin, always before the checkpoint, is in correspondence with a conduit completely full of lava; stay on its right-hand section to literally "meet" the coin itself. The third coin will be found during the final chase with Bowser; stay on the upper path, as the coin is immediately after the second chest containing items.
World 9-1
Jump off the yellow platform, bouncing towards the three Para-Troopas; you will come in front of the coin. The second: the situation will be similar, you will find yourself on a platform with Para-Troopas right below you, and you will have to use them as a lever to get to the coin. Then locate the third fire-sprouting piranha plant by entering the tube corresponding to it; jump on the para-troope, and make the coin yours.
World 9-2
For the first coin, use one of the first platforms, letting yourself be transported to the lowest point of its path. For the second: locate a platform that, in the lower point of its run, allows you to get to a tube - inside it there will be the coin. The third: you will notice two brick walls blocking it, you will have to use a Koopa Troopa as a missile to destroy the wall and have access to the precious material.
World 9-3
Immediately after the second arrow, there will be a ravine. Locate a pipe inside it, enter it. Use the switch at the top of the room, run down to the coin and make it yours (quickly). The second is immediately above, immediately beyond the clouds. Use a bullet to climb up there (the exact location is marked by the presence of two coins in correspondence with it). Here, too, there will be a P-switch to press, just like in the previous zone. The third: pass the fifth platform of the Banzai Bill area. Use a propeller hat to walk the "path" marked by the four coins nearby.
World 9-4
Proceed to the POW block; Wall-jump using the blue tube as a base to reach the first one. You will see the second one under a platform, which will sink as soon as you step on it; you will have to freeze a bom-omb, throw it at the coin, only then you can make it yours. Third: Locate the middle pipe between the small group of three at the end of the first section. Warning: freeze the piranha plant placed for its protection.
World 9-5
Go down the mountain, locating the hole between the penguins, there will be the first coin. For the second: a little further on, you will notice a question mark switch; do not press it for now, stay behind the platform that protects the coin, then jump straight and make a jump on the wall that projects you right towards the "container" of the coin itself. For the third, visible from the main path, you will have to freeze the Fuzzy below, jumping on it towards the coin.
World 9-6
From one of the first platforms, jumping down towards the circular path that ends in the lava, leading in the second place to a hidden alcove, where the coin is located. The second is immediately after, near the mini-volcanoes; wait for them to stop, to make the wall-jump that will allow you to reach it. The third requires a propeller hat; if you have it, you will locate it from the main path and just use it to get to your goal.