One of the great pillars of the new Infinity Ward production is also one of the most interesting new features of this chapter. Spec Ops combines the stunning story of the main Call of Duty: Modern warfare campaign with the vibrant and vibrant online community of players from around the world under one name. These missions connect intriguing operations together that offer an extension of the main story experience. If you are a veteran of the franchise you will also find the Classic Special Ops, shorter missions that wink at the old chapters. To Play the Spec Ops you will have to select them from the Co-op menu of the main menu and after a small movie here's what you will face.
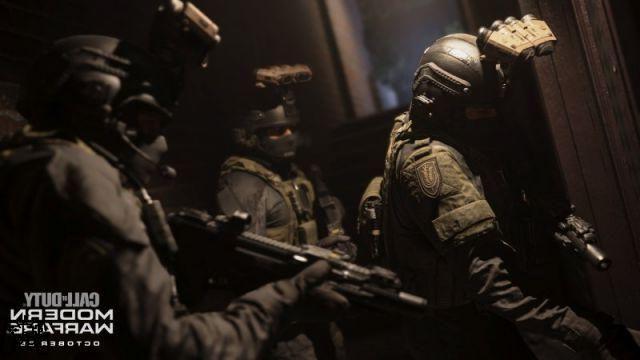
The history of the Special Ops
The city of Verdansk was conquered by a group of terrorists. By indiscriminately wiping out all those who try to stop their ideals of corruption, this global organization has gained economic, intelligence, hardware and weapons advantages, some of which could threaten the peace of the entire globe. Regardless of their differences, Kate Laswell of the CIA and FSB Sergeant Kamarov have decided to unify some soldiers of the Alliance and the Coalition under a single name: Armistice (The Armistice).
Operations Analysis
After choosing which side to enter the battle, you will be sent to the Verdansk field alongside 3 other operators, thus forming a team that will have the objective of completing the "Ops", special multi-level missions that can be faced in many different ways.
At launch, your team will need to:
- Infiltrate, track down and eliminate the terrorist network of Almalik, a landowner in the pay of Al-Qatala, in theHEADHUNTER OPERATION
- Assault the operational base of Almalik and mark the weapons in its possession for an air attack, removing the traces of Al-Qatala in Verdansk, in theKUVALDA OPERATION
- Go beyond the enemy line and extract Dr. Linda Morales, use her information to hunt down "Mr. Z", a sidekick and supplier of Al-Qatala's new arsenal, in theOPERATION PALADIN
- Infiltrate the Al-Qatala-occupied Verdansk airport, board the hijacked 747 and retrieve its cargo in theTRANSVERSE WIND OPERATION
- Collect information on the current position of the MAGE informant and investigate a "large cargo" departing from Verdansk as indicated in its reports in theOPERATION HERALD
- Reach the railway yard of the El Traficante train full of explosives, recall it and detonate it in theSULFUR OPERATION
The story won't end with these six Spec Ops either; it is already known that there will be several free expansions, the first of which, very full-bodied, on December 3, which will mark the beginning of the first official season, and with each season new and stimulating Spec Ops will arrive that will deepen and expand the events of our heroes.
In these operations you will have the possibility to customize the equipment, just like in all other multiplayer modes and in addition you will have three Ammo and a role to define:
Ammunition: Just like the kill streak in multiplayer modes, before the start of an operation, you will have the option of equipping three ammo to use using the points earned in the game. Initially you will only have the grenades, armor and classic ammunition available. The more you play this mode, the more you will earn points to spend, via the pause menu or between operations, to buy increasingly stronger ammunition such as UAV, Cannoneer or even the super tough Juggernaut. Also during matches, additional Ammo will be scattered around the field to be found and used.
the Roles: they basically work like field upgrades; an operator can choose from six different roles, each with a unique passive skill and an active skill that recharges over time. An example is the "Heavy" role which has double the ammo of weapons in the "Launchers" category and can give the entire team heavy protective armor as an active ability.
Quick Tips on Operations
Operations revolve around a group of four players who must collaborate in the way they prefer. Know that the most important thing to take into consideration is the fact that walking around alone, like lone wolves, will make it extremely difficult to get to the end of the mission. Whether you have your own team or are part of an online team with matchmaking, communication and team play can do wonders in Special Ops. This is really important when one of your teammates dies as you always have a chance to revive him. If the distance is too great it will be very difficult to do this. Another reason that makes the Spec Ops is the fact of having extreme freedom of approach to missions. You can face them openly or trying to infiltrate in silence, changing your equipment, ammunition and roles according to the different cases. Speaking of ammo and roles, be sure to build as diverse a team as possible before a mission begins. Better to have a team with multiple roles and different abilities than to have a "TANK" team, which attacks head-on.
Cross-Level up: Sharing EXP between Special Ops and Classic Multiplayer
In Call of Duty: Modern Warfare Spec Ops share both unlocked gear and any progress made with multiplayer. Each operator or weapon experience point obtained in the Special Ops will also be obtained in the multiplayer and vice versa. You will be able to see the progress in the barracks and customize your identity, see the challenges, change operators and create new sets of equipment just like in multiplayer.
Spec Ops Solution: Operation Headhunter
Main points for the progress of the mission
- Preparation of the team inside the starting room
- Go down into the elevator shaft and proceed to the point indicated on the mini map
- take out the commanders of Al-Qatala
- Make your way to the central building
- Hack and disable 5 jammers
- during the violation of the third jammer, enemy tanks will begin to arrive
- destroy the wagons and finish disabling the jammers
- destroy the enemy helicopter
- advance to your extraction helicopter
- once everyone is on the helicopter, it will take off, marking the end of the mission
Operation Head Hunter: tips and tricks
Things to remember before the mission
Use voice chat
Voice chat is extremely useful in this mode. Activating it will allow you to coordinate with your teammates.
Choose the roles
Roles are sub-classes that will give you unique passive and active skills. Be sure to choose different roles in order to deal with every game situation. Recommended roles for Operation Headhunter
- Medical
- Heavy
- Assault
- Engineer
Preparation
choose your equipment before leaving the room
Go to the table in the center before going down the elevator shaft. Here you can choose to change equipment before proceeding
Take out the commanders of Al-Qatali
Move as a team
The best thing to do is to move from building to building as a team. This will allow you to quickly clear the buildings of enemies. Advancing together will also allow you to quickly resurrect injured teammates.
Watch out for the Equipment Boxes
As you move around the map, pay attention to the boxes you can interact with. They will provide you with different bonuses such as kill streak, weapons and more. Remember that you can only have 3 active bonuses at a time.
Violate and disable the jammers
It is recommended that you stay close to the jammer while you are violating him to increase the speed of the violation, reducing the time to accomplish the goal.
Destroy the tanks and helicopters
Use the launchers to destroy them quickly
Bring a launcher with you. The JOKR is particularly useful since it can instantly frame the target, fundamental for helicopters, historically difficult to lock.
Use the Engineer's EMP drone
Emp drone can seriously help you destroy enemy vehicles. Disabling them will render them unusable, allowing you to focus your fire on them safely. It also has a fast reload speed, so you can use it repeatedly.
Spec Ops Solution: Operation Kuvalda
Main points for the progress of the mission
- Get ready with your team and get out of the house
- Go to the point highlighted on the map and log in to the Server
- Look for computers in the barracks
- Mark the goals with the same labels in the barracks
- Look for the computers in the repository
- Mark the objectives with the same labels in the deposit
- look for computers in the warehouse
- Mark the objectives with the same labels in the warehouse
- Head to the top of the control tower and push the red button to open the hangar
- Reach the hangar and mark the missiles
- Enter the tank and head to the destination marked on the map
- Wait for the helicopter to arrive and get on it as soon as it lands
- The mission ends when the whole team is on the helicopter
Operation Kuvalda: tips and tricks
Things to remember before the mission
Choose roles for offensive and subsistence
The best thing to do is to choose roles that increase your team's offensive power and sustainability. This operation is particularly difficult to complete, having against many waves of enemies.
Recommended roles for Operation Kuvalda
- Medical
- Heavy
- Assault
- Engineer
Turn on voice chat
it is better to keep the microphone on and communicate as the mission has many objectives. You will certainly have to be able to coordinate as best as possible to complete them all.
Access the server
Watch out for the Juggernaut nearby
There will be a Juggernaut guarding the Server. Focus the fire on him to bring him down quickly. Once defeated, you can take possession of his minigun.
Stay close to the Server
Your team should stay as close to the server as possible to expedite the breach process. The more people there are near the server, the faster it will finish, allowing you to proceed quickly.
Use the room as a strength
The room where the server is located can also be used to your advantage as it only has two entrances.
Look for Computers (Barracks, Warehouse, Warehouse)
You can do these goals in any order. However, since the barracks are closest to the server room, we recommend that you start with those.
Look for the "Manifesto" folder
Computers have several folders in which to search. Each folder takes you time, which you can save by immediately searching for the "Manifesto" folder
Ask for coverage while searching the Computer
Keep in mind that searching computers will take time, exposing you to enemy fire. Ask your companions for cover to be able to survive.
Mark the plates
Once you find the plate labels in your computer, immediately search for plates with the same labels. Those are the plates that you will have to mark during the mission.
Create your own escape route
Use both tanks
There will be two Chariots waiting for you in the hangar. Each of them can carry 2 players. Use both of them to arrive safely at the extraction point.
Destroy the enemies that will come
The tank features a small cannon and machine gun for players to use, use them well to knock out enemies before they can get close.
Spec Ops Solution: Operation Paladin
Main points for the progress of the mission
- Prepare yourself as you are initiated into the mission
- advance towards the warehouse
- Locate and deactivate the jammer signal
- Find Dr. Linda Morales
- Take Dr. Morales to the point on the map and wait for the helicopter
- Load the Doctor into the helicopter and leave the area
- Once you land, follow the Havoc and provide support
- When you arrive at the car park, go to the weapons depot
- Defend the plate from the enemies
- Go to the next plate and defend it
- Detonate the bomb
- Advance to the third plate and defend it
- Destroy the tanks that will come
- Open the header
- Head to the helicopter and enter it
- The mission ends when the whole team is in the helicopter
Operation Paladin: tips and tricks
Things to remember before the mission
Turn on voice chat
it is better to keep the microphone on and communicate as the mission has many objectives. You will certainly have to be able to coordinate as best as possible to complete them all.
Choose roles for a versatile team
Be sure to choose different roles in order to deal with every game situation. You can resurrect fallen squadmates and deal extra damage to armored targets.
Disable the Jammer signal
Stay close to the jammer to increase the breach speed
It is best to stay as close to the violation signal as possible. The more players there are, the faster the signal will be hacked.
Transport Dr. Morales
You can only shoot without aiming when carrying it
You can't even aim down or throw grenades. Have a teammate precede you to clear the area in front of you.
Defend Dr. Morales
Use the shield turrets to hold the territory
Look for the crates with the shield turrets. You can place them while you wait for the helicopter to help you against the hordes of enemies that will attack you.
Shoot the Kamikaze in the head
The suicide bombers will appear when you defend Dr. Morales. Immediately shoot them in the head before they get too close and their explosion can hurt you.
Support the Havoc
Destroy the mines along the way
Be very careful about the path the Havoc takes. There will be several proximity mines scattered around which could seriously damage the vehicle. Shoot them before reaching them to avoid damaging it.
Concentrate on killing the soldiers with RPGs
Watch out for soldiers with RPGs. Concentrate your fire on them so as not to damage the wagon too much.
Destroy the enemy tanks.
Use explosives for massive damage
Explosive weapons such as launchers and proximity mines can do wonders against opposing tanks. Used in conjunction with the role of Engineer they will have them destroyed in the blink of an eye.
Spec Ops Solution: Crosswind Operation
Main points for the progress of the mission
- Exit Home Base and head to the airport roof
- Disable the enemy communicators on top of the roof
- Enter the building and breach the enemy's main terminal
- Infiltrate the enemy plane
- Find and secure the core
- Escape the plane
- Take out the enemy helicopter
- Head to the extraction point and hold the territory until the helicopter arrives
- Enter the helicopter to end the mission
Operation Crosswind: tips and tricks
Things to remember before the mission
Recommended weapons:
Light machine gun PKM: Excellent firepower, perfect for armored enemies like juggernauts
Sniper Rifle Dragunov: Semi automatic shotgun that will allow you to kill different targets from a distance
Turn on voice chat
it is better to keep the microphone on and communicate as the mission has many objectives. You will certainly have to be able to coordinate as best as possible to complete them all.
Before leaving Home Base
Put silencers on the weapons
Before leaving Home Base, be sure to place silencers on your weapons. This will allow you to be more difficult to track down in the first part of the mission. It is recommended that you stay in hiding as long as you can during the mission.
Deactivate the enemy communicators on top of the roof
Shoot the enemies before reaching the communicators
Shoot the unsuspecting enemies to make your way to the roof. They will immediately alert their allies if they see you. As soon as you have a clear view, take them out.
Stay close to the communicators
Be sure to stay close to the communicators while you hack them. The more people close to you, the faster you will copy files.
Hacking the central communicator terminal
Watch out for juggernaut
There will be more juggernauts in this area. It is advisable to focus the fire on them to bring them down quickly. Killing one will also allow you to get hold of their minigun.
There is a secure room behind the communicators
Use the small room behind the communicators as a safe spot. Enemies will try to enter, but you will have an easy time as there is only one entrance.
Infiltrate the plane
Use the means to reach the plane
Use the quads near the tent to quickly reach the plane before it takes off. It will go down a ramp at some point, and at that moment you can go up it.
Find the core
Beware of time!
Once on the plane, a timer will start to search for the core. You will have about 3 minutes to find the core and escape from the plane. Ready to run?
You will fight in tight spaces
Encounters in this section of the mission will take place in tight spaces. Use weapons that excel at short to medium range to get the better of the enemy.
The core is in the lowest plane
The core can be found in a warhead in the lowest plane of the plane. It will be just before the queue. Be sure to grab it and get out before 3 minutes.
Destroy the hatch to escape from the plane
Once you reach the end of the plane, look to your left to locate a hatch. Place the charge to open it and escape.
Take down the enemy helicopter
Use the launchers to destroy the helicopter
Take out the launchers and use them against the enemy helicopter. Launchers like the JOKR are especially useful as they can block the target.
Hold the territory
You cannot shoot if you are carrying the core
If you carry the core you will be unable to shoot in this section. Ask your companions to cover you. If you get killed you will obviously drop the core as well, make sure someone else catches it.
Spec Ops Solution: Operation Herald
Main points for the progress of the mission
- Get ready with your team and listen to the briefing
- advance to the three houses and look for information on the informant
- defend the position against the enemies
- Make your way to the next building and find more information
- Hold your position while the information is decrypted
- Head to the informant's location
- Stop the convoy and retrieve the informant
- Proceed to the extraction point and position the informant
- once the informant has been picked up from the plane, go to home base
- The mission ends when the whole team is safe
Operation Herald: tips and tricks
Things to remember before the mission
Choose the offensive roles
It would be better to choose roles that maximize the team's offensive capabilities. You will have to deal with many armored enemies such as chariots and juggernauts. One team member can be a medic, but the others need to focus on the offensive.
Recommended roles
- Breaker: Termite can melt armored enemies
- assault: especially useful with many enemies together
- Engineer: The drone is useful for knocking out vehicles, a common enemy in this mission
- Medic: Can resurrect faster to get out of unpleasant situations
Turn on voice chat
it is better to keep the microphone on and communicate as the mission has many objectives. You will certainly have to be able to coordinate as best as possible to complete them all.
Seek information
Beware of cash and documents
Watch out for cash and documents while defending the position. Scanning them will give you 30 seconds less scanning time. This will allow you to get to a safe spot faster.
Beware of wire traps
Pay close attention to the wire traps scattered throughout the buildings you explore. Triggering one will guarantee you immediate death. Move carefully and turn them off.
Use buildings as choke points
once inside the buildings you can use them as chokes to kill the enemies that will enter through the main doors or sometimes through the windows. Use this tactic to multiply your kills while defending.
Assign a member of the Anti-Tank squad
The wrecker and engineer can use their special abilities to quickly take down the tanks that shoot at you from outside the buildings. Both the termite and the drone can take out these armored vehicles quickly.
Use launchers to cause a lot of damage to vehicles
Otherwise you can take a PILA with you as part of your equipment to solve the tank situation yourself. If none of you have a launcher or a hermit, collect the enemy RPGs!
Retrieve the informant
Use the kill streak to stop the convoy.
The convoy will move around the map making it difficult for you to retrieve the informant. However, using a kill streak such as the cruise missile will allow you to easily destroy the convoy as it is headed by you. Don't worry, the informant won't do anything.
Carrying the informant will slow down the movements
Carrying the informant will not allow you to move easily nor to aim the objectives. Better get your teammates ahead of you to clear the territory in front of you as you carry the informant.
Head to the extraction point
Focus the fire on the juggernauts
There will be some juggernauts blocking your way to the extraction point. Focus your fire on them to eliminate the worst threat of the whole mission.
Reach the Home Base
After the informant is extracted, you will need to make your way to home plate. Focus your attention on running and avoid firefights. Equip yourself with a bulletproof vest to absorb as much damage as possible.
Spec Ops Solution: Operation Sulfur
Main points for the progress of the mission
- Get ready with the team and listen to the briefing
- Advance towards the quarry while avoiding the enemy mortars
- hacked the three communication matrices of AQ
- Proceed to the control room
- Defeat the three Juggernauts to get the three keys
- Go back to the control room to call the train
- Go back to the quarry and wait for the train to arrive
- Get on the train and place the C4
- Gather the team and prepare for the escape
- Destroy El Traficante's helicopter
- Survive to the end
Operation Sulfur: tips and tricks
Things to remember before the mission
Defense and support roles are highly recommended
Half of the mission will be to get and protect three points with the team. These spots will be studded with enemies so your best bet is to bring defensive and support equipment with you.
Recommended roles
- Heavy: Support the team with armor
- Demoman: The termite can take out groups of enemies with a single throw
- Medic: Revives squadmates killed by constant enemy fire
Turn on voice chat
it is better to keep the microphone on and communicate as the mission has many objectives. You will certainly have to be able to coordinate as best as possible to complete them all.
Head to the quarry
Destroy the teams at the mortars
Use a sniper rifle or ranged scope to kill the enemies lurking in the middle of the quarry to stop them bombarding you with mortars.
Hack the three communication matrices of AQ
Use the portable cover
You can position yourself guarding an active communication matrix and use your shield to protect yourself from enemies attempting to stop the breach's progression.
Use the smoke bombs to cover yourself
Another useful tactic is to use smoke bombs to avoid enemy suppression of your position. Also set up a grenade reload house to fill the area with smoke.
Survive the third violation
during the third violation you will be attacked by suicide bombers and elite soldiers. Shoot the suicide bombers in the head before they get too close.
Fight the 3 Juggernauts
Use the shotguns to defeat the Juggernauts
Shotguns do a lot of damage to juggernauts unless they're too far apart. Kill the 3 juggernauts to get the 3 keys to advance.
Riot shields work well too!
You can use the shield to protect you and your team from minigun hits. Be careful not to get too close to the juggernauts as their close attack can break through your defenses
Open the train door and place the C4
Control an enemy helicopter
You can call a helicopter to support the team while obtaining the controller located in the third communication building of AQ. Beware of the helicopter's fuel and also the fact that you will be exposed to enemy fire during use.
Survive and escape
Advance slowly and survive
Enemies will come in droves as the team attempts to escape. Use covers and avoid exposing yourself. Decide on a squad member who will cover you from side fire as you advance.
Tell us in the comments if you have already tried some Spec Ops and if you have managed to complete them maybe thanks to our guide.


