Please note:
The solution is based on the US version of the game for PlayStation 3. There may be deviations from the Spanish version and / or for other platforms.
Make a Break for It
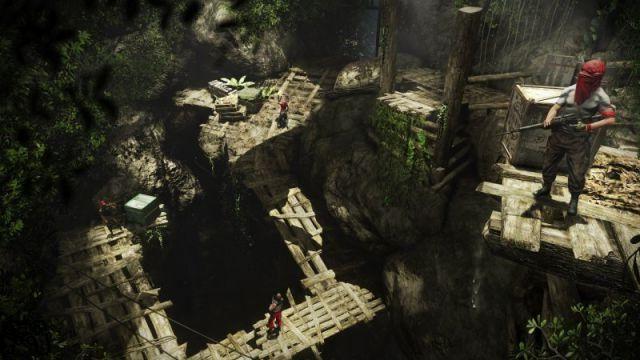
After the cutscenes, you will need to follow your brother until you reach the cabin. Pick up the items from the table. Collect the items, then throw a rock at the item. This way, the guard will be distracted and you can proceed. Go through the window, then continue towards the area with dense vegetation. Hide inside them, then throwing an additional rock, distracting the next guards. Jump on the boxes, then crouch to reach the bridge. Proceed to its opposite side, then observing the cutscene. You will therefore have to flee: hold down the run button, following the path that is shown in front of you. At the next nearby space, crouch to proceed. When, on the opposite side, an enemy will try to hit you, we recommend that you quickly press the key that will be shown on the screen, to eliminate it quickly. Then cross the bridge to quickly complete the level.
Down in Amanki Town
After your conversation with Dennis, go into the shop and buy a gun. So get out, following Dennis around town. Before starting the climb, we recommend that you take the objects contained in the buildings around you. So begin to proceed along the path that leads to the Radio Tower. At the top, remember to quickly take out the snake that will hook onto your arm. Then take the contents of the crates around you. So start climbing the tower. At the top, deactivate the mechanism, then use the rope to return to the ground. Then activate the map, listening to the instructions.
Harvest the Jungle
Jump into the nearby vehicle, starting to move towards the marker on the map. When you reach your destination, you will notice objects on the map - the leaves indicate the presence of plants that you will need to recover. You will generally need two green leaves, one red and one blue leaf. The blue leaf can be recovered by throwing yourself into the watercourse, while the other two from the ground. Having collected everything, start examining the play area to locate the wild boars. Having found them, shoot from distance to KO them, then recover their skin. Activate the map, proceeding to Amanaki. Locate Dennis, talk to him. It will therefore be necessary to create two medicines, as well as learn the ability named "Takedown", and one that you can choose freely. Once this is done, you will be called on the radio (which you stole in the early stages): jump on the truck to start the next mission.
Secure the Outpost
The mission will begin as soon as Dennis leads you to your destination, starting at the end of "Harvest the Jungle". Proceed along the path, then use your camera to examine the play area. You will notice the presence of a total of five enemies in the area; together with a dog. It is not possible to eliminate all subjects in a single "round", so we strongly recommend that you go in and start hitting them. Having knocked them all out, the outpost will now be vacant, and you will need to examine the main building to locate Liza. After the cutscene, pick up the contents of the crates nearby. Return to the warehouse, retrieving the Memory Card from the table, and then proceed to the next mission.
Mushrooms in the Deep
Kill the two pigs, recovering their entrails. You can use them to create a kind of wallet, which increases the maximum amount of money you can keep. Your goal, therefore, will be to talk to Earhardt - you will have to proceed west of Amanaki (activate the map and project yourself towards that location). Then activate the Radio Tower along the way, revealing the rest of the map. Earnhard's house sits atop a large hill. When you get close, pay attention to the wild leopards that populate the area - they can kill you very quickly. Then enter the back building to view an intermission scene.
Enter the house, go up the stairs; your friend will tell you that he is sick, he needs some mushrooms recoverable from a cave, the only way to heal. However, you will have to proceed east to reach the target area, using the hanging rope as a shortcut. So swim around the rocks, jump into the water to locate a cave. Swim up, then follow the path until you reach a wide descent. Jump into the water, then straight ahead, climbing the ivy. You will find yourself in front of a group of mushrooms - pick them up. After the cutscene, go straight until the hallucination ends. Grab some more mushrooms, exit the cave and return to Earnhardt's house. Talk to him, then go up the stairs and talk to Daisy. The next mission will then begin.
The Medusa Call
Once the mission begins, make your way to the Amanaki outpost, recovering a vehicle. It will now be necessary to delete the radio operators, recovering their information. Jump behind the nearest cover, located at the top of the nearby hill. You will now notice the position of the radio operators, indicated by a yellow index. We recommend throwing a rock to distract the closest guard (next to the containers on the left). So when they are distracted, use the takedown on the main enemy. Bring the second guard (next to the ship) towards the container, repeating the same procedure. Enter the ship, thus luring the radio operator to the ship - you can then use a takedown. Examine the corpse for information.
The next two operators are on the opposite side of the ship, we recommend using the approach outlined above to KO them too. Having recovered all the information, make your way to the Medusa control room.
Once inside, you will have to approach the radio. You will then hear part of a conversation. You will be told that some men will come to the area to investigate; your goal will be to eliminate them. First use your altitude advantage to eliminate them more easily, perhaps luring some to the ship, and then steal their guns. When they are all dead, Dennis will call you, telling you to go back to the Amanaki village.
Playing the Spoiler
Proceed to the camp to the south (called "Logging Camp"). Pay attention to the wild animals in the area - especially the tigers. So take out the camera, trying to "tag" a large amount of enemies. You will therefore have to try to enter the camp, to deactivate the alarm (use a Takedown on the subject waiting for you near the fence). Enter the camp, get rid of the enemies on the left. So try to reach the ammunition depot (in the building to your right). Proceed beyond the door, place the bomb in the marked area. You will now have 15 seconds to escape, reaching a safe area. After the bomb explodes, take out the pirates around you, then continue to the next area.
Prison Break-In
Proceed along the stream until you reach the radio tower; at the same time try to avoid the sharks in the area. Once in the target area, try to KO the enemy present there, and then activate the nearby alarm. Grab your car, to tag all enemies in the area. After you've killed them all, collect the operator's keys and start exploring the prison. Given the large amount of enemies in the area, we recommend taking one of the weapons visible in the area, especially if you don't have a lot of ammo.
Then go up the stairs, and use them as cover to take out the enemies below. Approach the checkpoint, go through the door. Walk the path; you will be ambushed, after which an intermission scene will appear, which will cause the mission to end.
Trailer - Cooperative mode
Island Port Hotel
Having taken control of the character, you will have three minutes to go get Lise and free her. Proceed along the only path available, thus being blocked by a wall of fire. Shoot at the pipes to proceed. Continue forward, walking along the tube, thus reaching the next section of the game. Shoot the next pipe, then reach the next large room. Walk towards its center, climb along the ivy, observe the cutscene. Then press the keys that will appear on the screen, causing the truck to move, gaining access to the following section of the mission.
Press the fire key to retrieve the grenade launcher next to you. You can then use the GL-94 to protect the truck: shoot repeatedly at the vehicles trying to reach you, waiting for Lise to move outwards. Several enemies will then approach you, kill them while waiting for Liza to re-initialize the truck. Observe the following cutscene to complete the mission.
Keeping Busy
Proceed along the nearby path, trying to reach the cave. After the cutscene, head to the goal marked on the map, then dive into the water. Take the piece, near the barrel colored in yellow. So go back to Daisy. After the cutscene, go talk to Lise to complete the mission.
Meet Citra
You will first have to proceed to exit the cave. Having received the call from Dennis, proceed to the temple of Citra. After the cutscene, you can follow Dennis into the temple. At the goal, observe the cutscene, and then walk along the only path available. When you get to the house, go inside. Approach the altar, take the knife, return to reality. Exit the temple.
Bad Side of Town
Travel (using "fast travel") to Badtown in the north-east. So activate the radio tower, north of the city. Go back to the center by going to visit the bar. There you can play poker. You will therefore have to start following the man dressed in white, without him being able to reach you. Go through the door, coming to the outside. Your "target" will be right in front of you; every time he leaves your field of vision, you need to remember that you only have 20 seconds to "re-enter" him. When it stops, we recommend that you throw the closest cover behind you. When he enters the last building, the mission will be considered completed.
Kick the Hornet Nest
Enter the building, talking to the man dressed in white. After the initial conversation, go up the stairs to reach the secret area. Exit the building, then head to the radio tower southeast of the drug fields. Having interacted with the radio tower, continue towards the fields. Use the camera to locate two subjects positioned exactly in their center. Approach them from behind, using a "Chained" type takedown. When the way is clear, continue to the next area, which will be heavily populated by enemies. Use your camera to "tag them"; therefore, if you have a weapon capable of striking from afar, use it to hit the barrels from afar.
So go to the fishing village. As you approach it, you will find other enemies. Before projecting yourself towards them, examine the surroundings of the area to understand which is the most "strategically" appropriate direction. When you have approached the boat, take the RPG from the crate and shoot, causing the boat itself to be destroyed, and completing the mission.
A Man Named Hoyt
Quickly return to Badtown to talk to Willis. Proceed to the point with coordinates 726 - 796 to locate a rope that will lead you to the marked building. After the cutscene, use the sniper rifle to kill the two men in the area.
Having killed them, you will have to proceed towards Rongo: however, we do not recommend running directly ahead, as the stream is full of mines. Instead, we recommend walking slowly in the water, paying attention to the potential presence of mines. When you see one, you'll have to move quickly in the opposite direction, then shoot and detonate it. When you arrive at Rongo, press the button marked on the screen to free him. You will therefore have to defend it from the attack of various enemies (its HP will appear at the top of the screen). When / if they reach zero, you will be automatically returned to the previous checkpoint. We highly recommend trying to take out the enemies as soon as they appear on the screen. Once at Rongo's house, the next part of the mission will begin.
While Rongo starts looking for the objects, you will have to protect him from the enemies that will come towards you. The first group of opponents will come down the hill, the second from the front of the house. Having eliminated them, you will be able to observe the cutscene that marks the end of the mission.
Saving Oliver
Once the first goal is reached, a timer will appear (starting from 1 minute, 40 seconds). Jump into one of the nearby vehicles to reach the elevated area. You will find two enemies placed to guard him: kill them, then continue towards the checkpoint. You will therefore have to use the video camera to identify Oliver: wait for the helicopter to arrive, Oliver will be in the second vehicle, and will be indicated by a blue outline above his head.
Continue to observe the play area, then equip a sniper rifle, equipped with unlimited ammo. Then shoot the guard who moves Oliver towards the helicopter, thus shooting all the other enemies nearby. Oliver's HP will therefore be visible at the top of the screen and, as already done previously, you will have to avoid that they are completely reset. At the same time, try to keep an eye on the enemies moving towards Oliver, who will then proceed to the boat at the end of the harbor, while you take out the enemies. When Oliver goes down the stairs, and reaches the second section of the game, the enemies will start swarming from the buildings around you. We therefore recommend taking advantage of the explosive barrels in the surrounding area.
When Oliver gets on the boat, you need to jump into the water and take possession of the turret. So, Oliver will take care of the guide, while you will have to take care of shooting the enemies around. Try to always keep track of your HP level, then aiming with sufficient tranquility, so as to be able to hit the objects in the surroundings (consequently causing "useful" explosions).
Piece of the Past
Upon exiting the cave, you will be called by Willis. Travel quickly to Buck's bar in Badtown; after entering, you will have to locate a specific knife, necessary to be able to "bring back" Keith. Buck will also ask you to locate a boat that Vaas entered, and then take it. The boat, named Nostalgia, can be clearly located on your map - in the center of the shark-infested water. Then proceed towards the coast to look for it, then continuing towards the goal.
Since you will most likely be located by the enemies aboard, stand along the south area of the boat, using the ladder to climb up. Killed all the standard enemies nearby, proceed to the east side of the ship, where there is the door that leads inwards. Perform a quick takedown on the enemy that comes on stage, then go down the stairs, opening the door that leads to the next room. Use a Takedown on the subject that you will see walking around, then go through the next door to locate three more enemies (two in the center, one in the side area). Continuing to the next room, you will arrive at the final objective. After opening the door, however, you will find a Heavy Gunner guarding him: shoot him in the head, until he is KOed. He then proceeds to the computer, hacking it.
After the cutscene, you'll have to escape at maximum speed. Start swimming by holding the "run" key to swim even faster. Follow the path, thus activating the quick-time event. Once this step is complete, continue straight to the oxygen tank, using it to trim down your air level. Then continuing towards the second tank, use it to project yourself to the window, exiting the ship and completing the mission.
Down in the Docks
Approach the checkpoint to begin the mission. After Buck finishes the history lesson, go through the door in front of you. Swerve to the right, examining the Japanese letters on the wall. Climb along the rope.
When you reach the stairs, go down and let yourself fall into the water below. Swim down the tube, then proceed to swim towards the enemy above. Having killed him, also take care of the remaining opponents in the area. Then go through the tunnel on the left. Drop down to the next area, killing the enemies in the area. So approach the detonator associated with the stone door, activate it, creating a hole along which to proceed. Follow the path, then dive underwater. Kill the crocodile, proceeding to the opposite side of the play area. Go up to the door, interacting with the seal to open it. Drop into the water, exiting to the opposite side. Continue to the large outdoor area. Go down the only path present, cross the ravine, then swim towards the opening.
Continue to the sealed door on the right, pressing the seal. Enter the room, split the three pieces of wood using the knife. The water level will rise, go back to the previous room and swim through the hole in the wall to the opposite side. Smash the three pieces of wood in the room, causing the water level to rise further. Trying to get out of the play area, a boulder will fall down, blocking the way. Swim up, clearing the previously blocked path, then returning to the previous room. Proceed to the treasure room, take the object near the altar, then approach the edge and project yourself to the left, arriving at the external area. So interact with Buck, who will be waiting for you in the area.
The Motherlode
Proceed towards the indicated objective to begin the mission. Enter the mine, then head towards the elevator. Go down to the cave below, then remove the cart. Throw yourself behind the enemy in front of you, using the takedown to "finish" him.
Killed all subsequent enemies, push the cart forward to introduce some explosive barrels. As you approach the next room, you will notice lasers - these are sniper sights. Place yourself behind the cart, and press it forward, then follow it and use it as a "cover". When it stops, quickly kill the enemies on the left. Move to the next cart, then follow it forward. Kill the enemy above, who will try to throw the Molotov cocktail. Begin to proceed along the bridge to the left. Kill the enemies that will come down the ramp, then go up yourself, going through the next tunnel.
Stop before reaching the large room: on the opposite side there is a sniper, exit only slightly and shoot him at speed, before he manages to hit you. With all the enemies dead, follow the path to the door, entering.
Shoot the Komodo dragon, go down the path, approach the center of the room. Having opened the secret door, follow the path, killing another Komodo dragon. Go over the ravine, then jump on the elevator. Follow the following path, then jump forward to clear the ravine. Go down again with the elevator. Forward along the next path, take the item from the altar and quickly run forward to the exit, locating Buck.
Li Cong I Presume
Travel to the Amanaki outpost first, then proceed north. Once in the water, use the ivy to return to the mainland. Use the "Death from Above" ability to take out the enemy below. Then proceed towards the back of the enemies, knocking them out silently. Shoot the two dogs, to avoid being located. Proceed to the drawbridge. Place a mine (or C4) near the path, then continue to the next area - it will be populated by five enemies, we recommend using the Chain Takedown to finish them quickly.
Enter the nearby small room, take the armor from the chest, then use the nearby "rope" to reach the area below. You will therefore be located, quickly kill the two subjects on the same "level" as you, then move on to those above. Now go down to the next platform. Throw forward using the wire, then kill the enemies around you, and throw forward again using the wire. Get off the scaffold, kill the two enemies in the area, trying to stay away from the acid. Go down again, then forward towards the entrance. In the distance you will therefore see an enemy equipped with an RPG: hit him with the sniper rifle, together with the two enemies next to him. Enter the large open area, walking along the rocks. Hit the next three men in the distance with the sniper rifle. Climb along the ivy, kill the subject hidden there, then open the door marked on the map.
Open the door, go down to the cave below. Follow the path to the right. Once you reach the ivy, climb it, then go up the ropes, then approach the statue and hold down the nearby switch to activate the stairs.
Down the stairs, you will find a Komodo Dragon: kill it, then find two more in the area below. Go up the coffin, take the knife. Beware of the fire trap that appears: run forward as fast as possible, thus sliding into the nearby opening. Move slightly forward, pressing the various keys on the screen to arrive at a wide plain. The mission will therefore be over.
Unhappy Reunion
After Buck's call, head towards Badtown. Proceed to the goal (aka Buck's residence). Once inside, he will give you the key to find Keith's whereabouts. He went down the stairs, you'll find Keith. After the fight with Buck, he presses the keys that appear on the screen, then hit Buck and escape with Keith.
This Knife's For You
Exit the cave; you will now have to bring the knife to Citra. Quickly travel to the temple, thus viewing the cutscene inside. After the story, you can go straight out of the temple.
Ambush
Your first objective will be to meet a group of allies, together with whom you will have to ambush some prisoners. Once at the checkpoint, talk to the leader of the Rakyat. Exit the church, approaching the cart, placing some C4. You will then have 40 seconds to get to the top of the water tower: run in the area, climb the ladder. When the convoy arrives, you will have to shoot the enemies in the area, to protect the Rakyat (we recommend always aiming for the head). Killed enough opponents, a second timer will appear. Go down the ladder, proceed to the checkpoint, enter the truck and start traveling towards the convoy. Once in the area, get rid of the remaining enemies, then open the doors of the convoy, locating Vaas.
Warrior Rescue Service
Very quickly press the keys that will appear in sequence on the screen. So swim to the surface. Approach the target, crouching as soon as you arrive in the area, to avoid the guard's gaze. Grab his weapons, then approach the next two enemies, KO them too and recover their weapons. Climb up the slope, letting the helicopter pass. Watch out for the sniper at the top of the building, as well as the RPG. Then kill the opponent on the opposite side, return to the platform, then kill (from above) the enemy who proceeds along the road below.
Repeat this on the RPG-equipped subject visible in the next building. Approach the alarm, deactivating it. Run to the bridge, enter the water, then continue forward to locate some enemies with your camera. Since it won't be easy to take out enemies without being tracked, quickly run forward and immediately shoot the ones on the ground. Take a sniper rifle from a dead body, then use it on opponents along the nearby rooftops.
Approach the helicopter, enter. After the cutscene, you'll need to complete 2 quick-time events to escape. You will therefore have to bring back the objects taken by the pirates: turn around and proceed towards the first objective. We recommend that you approach the camp from the hill, so that you can hit the nearest enemy from behind. Use the Takedown on the subject with Molotov cock, then approach the door and take out the other enemy, sitting on the chair.
Pick up the C4 from one of the buildings, then continue to the next. Quickly hit the dogs that come towards you, so that they do not detect you. Launch the C4 once you are near the door; when the Heavy Gunner approaches, detonate to take him out. So go inside, taking the items from the closet, completing the mission.
New Rite of Passage
You will now have to return to the temple of Citra: travel quickly in the area, then approaching the target signal. So fight the giant shadow visible behind you, while getting an unlimited amount of arrows. Its weak point corresponds to the mask, that's where you'll have to shoot. Keep doing this, until darkness comes. Various shadows of smaller dimensions will therefore arrive in the area, which will try to hit you with the melee.
Keep shooting at them using the arrows. Having killed enough of them, the ink monster will reappear. It will start throwing giant spheres towards you - to avoid them, we recommend running along either side of the arena, creating "circles". So after you've dodged three orbs, the monster will stop and you can quickly shoot at the mask. The monster will then try to hit you with its lethal breath, and then move sideways at speed. So run along the arm, starting to press the keys that will appear on the screen, until the opponent leaves.
Payback
Tag the enemy near the harbor by heading towards him and knocking him out. So use the "Death from Below" Takedown on the enemy himself, continuing towards the ground. Approach the building, paying attention to the sniper on the tower to the right. Having the crossbow, use it to kill the two guards in front of you. Head towards the wall of the complex, following it to the left. Once you have located the rope, use it to proceed upwards. Go through the door next to you, then activate the various TVs. Continue straight, falling through the floor below. Turn the corner, climb the ladder to the roof. Jump to the ground below, trying to make the most of the cover around you. When you reach the following doors, throw some Molotov cocktails to avoid direct contact with the Gunner. Enter the building, go straight and shoot Vaas' illusions. At the end of the path, press the keys on the screen to complete the level.
Citra's Favor
Proceed to the outside of the temple. Hear the story of Dennis, then exit and proceed to Earnhardt's mansion. Once in the area, enter the cave with your friends. Talk to Keith and Oliver. Exit the cave.
Fly South
Once out of the cave, go talk to Agent Willis. Proceed to the Amanaki outpost; after the cutscene, you will need to project yourself towards the airport. You will have five minutes to reach it before Wills' plane leaves. When you get close enough, the timer will go to zero. After a while, Wills himself will call you, saying that the pirates are attacking him - get close and take out, to prevent his HP from dropping further. You must therefore protect Willis while he proceeds to repair the plane. The first wave of enemies will come directly from the south, the second from the west, while the third wave from the south and west at the same time. Remember to take the stationary machine gun next to the plane, easy to use on the opponents, who will initially come from the south. Having killed them, proceed to the area where Willis is positioned, jumping into the plane.
Three Blind Mice
You will get two new items, namely the wingsuit and the parachute. As soon as you are prompted to use the wingsuit, extend it and then pull "back", so as to proceed to the island. So activate the parachute, landing on the island itself. Your goal will therefore be to be able to take a truck from the group of pirates near your current position. Using the grass and trees as cover, you will need to examine the surrounding area, noting that there are a total of 6 enemies near the truck. Two of them will be equipped with RPGs: you will have to eliminate them with the highest priority. With all of them killed, jump into the truck, traveling to Thurston Town. Once inside, proceed to the "Crazy Cock" bar. Talk to the bouncer to be invited to the poker game. During the second hand, you will have to decide to end the game with Sam, then enter the nearby alley to talk to him.
Video - The story trailer
Doppelganger
Approach Sam, then proceed towards the camp. Then go down the stairs, but paying attention to the guard sitting on the chair next to them. Use a rock to distract her. So start going down the path. You will hear two people talking, both below you: "tag them" to understand their positioning. So as soon as you have the opportunity, wait for the boy to proceed to the bathroom, and then follow him.
Then throw another rock, so as to move the next guard to the right. Throw left, drop down, then use a rope to reach the platform above. Again, it will be necessary to eliminate another guard using the rocks. Lure her to the open area, then continue to the checkpoint and jump into the water. In this way, the guards will be distracted almost "permanently", and you can proceed straight to the goal.
When you reach the next room, two guards will turn their backs on you: tag them, then go past the leaves on the right, and tag the enemies in the next room. You will then have to proceed through the leaves on the left, throw a rock to distract the guard in the previous room, proceed under the ramp and beyond the harbor. So let yourself fall into the water, reaching Hoyt's boat. Climb upstairs, silently killing the recruits and picking up their uniforms. After calling Sam, head over to the soldier and have the pass analyzed. Climb with the other recruits, then dive into the water, getting on the other ship, completing the mission.
Triple Decker
Using the new uniform, you will have to kill Hoyt's traitors. There will be three captains; one of them has all the names of the traitors. They are located near the old time, clearly marked area on your map. You will now also have the opportunity to travel quickly, near the South Island. Project yourself towards the Romo camp, from here going north-west, arriving at the checkpoint. When you arrive at the camp, you will be advised to use stealth (as much as possible), since in this way the mercenaries will not go to suspect you. Once at the camp, the captains will be "marked" by the presence of a yellow marker above their head.
One of them is positioned near the small cave at the top, while another goes in circles near the top. The third is located in the area below, walking at ground level, then climbing the stairs to reach the snipers. When you have killed all three, you can pick up the warning and exit the game area.
Defusing the Situation
Quickly travel to the Alpha Camp, proceeding east to meet Sam. You will now have to take care of disarming three bombs. Follow Sam to the first one, knocking back the enemies who will try to hit him. Then follow it towards the second. Also kill the next opponents in the area (you will need to kill them all, otherwise Sam will not proceed to the next bomb).
When you reach the third, you will have to continue in the work of pushing back the enemies. Having completed it, a helicopter will arrive in the area: keep shooting in its direction, until it explodes. So talk to Sam to finish the mission.
Deeptroath
Once near the ravine, follow the checkpoints, avoiding contact with the mercenaries, using the ropes to throw yourself forward. When you reach the flights of stairs, take your camera, thus zooming towards the bridge in the distance. You will therefore have to take a photo of the meeting; you then have 50 seconds to locate an RPG, using it to prevent the pirates from leaving.
Then proceed along the wire, then take the RPG near the landing area. So aim at the vehicle on the left and shoot, preferably destroying it on the first shot. So be careful of the mercenaries, who will quickly project towards you: you will have to immediately try to destroy the other vehicle visible on the bridge. You will therefore have to proceed straight, along the various "ropes", until you find yourself in an area immediately in front of a bridge. Get rid of the rest of the enemies, therefore, as soon as you have taken the list from the corpse, several enemies will come from the area behind you, as well as from the one directly in front. Jump sideways along the bridge, then using the wingsuit and parachute to reach the objective, where the mission will end.
All In
Head to the Hoyt building. Having reached it, proceed to the main gate, talking to Sam. You will both go inside. After the dialogue with Hoyt, it will be necessary to torture a prisoner, in order to obtain a large amount of information about him. Then go down the stairs, re-meeting Sam near the basement. After the cutscene, press the keys on the screen to quickly complete the mission.
Paint it black
Quickly make your way to Camp Charlie, then veering southwest. Once in the marked area, we recommend that you focus on eliminating the snipers (as always positioned on the roofs of buildings), and then move on to the "standard" opponents. So after killing both the "standard" enemies and the snipers, you will have to make your way to the Heavy - we recommend using grenades, Molotov cocktails and similar explosives. When all the enemies are gone, proceed upward, placing a charge of C4. Jump behind one of the nearby objects to get some cover, then enter the first room, proceeding along the next and through the nearby corridor. Once through the door, dodge the explosive barrels that will come from above.
Climb up the ladder to reach the top of the outside area. Jump to the satellite dish, placing the explosives in the area. You will therefore have to wait until Sam comes to take you, while pushing back the enemies that come in your direction. When Sam arrives, run to the helicopter and then cause the C4 to detonate.
Black Gold
Jump out of the helicopter, landing on the ground. Then proceed towards the following objective, north-east of the Delta field. Once you reach Sam, you will now have to cause the explosion of 4 different game zones, by placing some C4. You will have 20 seconds each time to escape. Start from the south-east area - the area where to place the C4 is surrounded by a fence; as soon as you enter, two enemies will try to stop you, but you will have to / can kill them at speed.
So place the charge, and then leave quickly. The next one will therefore be located to the north-east; pay attention to Sam along the way, given the presence of an RPG. As you approach the reserve, more enemies will arrive on the scene. Pass the fence to the east, locating a path towards the C4; also quickly kill the enemy with a flamethrower. Once the charge is in place, get out quickly.
The following target zone is to the southwest. Kill the enemies around the building. Proceed east to find a ladder. Climb up, reaching the outside of the building where the C4 is located. Enter, killing the enemies around you. Go down the stairs next to the window. Place the next charge, exit the building along the route used to enter.
The last charge will be located in the north-east; pay attention to the vehicle equipped with the machine gun that will approach you in the meantime. Having placed the charge, go outside. You will then have to take Sam to the petrol reserve. Proceed to the rear of the vehicle, where he is at the machine gun. Eliminate the enemies that will come from the side areas, then pulverize the helicopter that will descend from above. After the helicopter is destroyed, shoot the explosive barrels, thus having you transported to the end of the level.
Aced in the Hole
The time will therefore come to project yourself towards Hoyt. Quickly make your way to the building complex, so talk to Sam. When you are ready, tell him about your willingness to continue. After the cutscene, you agree to bet your life. Repeat the bet. You will therefore have to overcome some interactive events: you will need to press the keys that will appear on the screen. After Hoyt's death, you will gain access to the next level.
Betting Against the House
You will now have 12 minutes to escape from the complex, reaching the area where Riley is located. We strongly recommend that you ignore the enemies present, it is preferable to run directly ahead. At the gate, interact with the checkpoint.
When you get outside, take the vehicle and start walking through the grass. You will therefore have to cross a bridge, which will rise as soon as you start walking on it: maximize the speed of your vehicle to be able to cross.
When the helicopter arrives, you will have to take control of the machine gun and fire repeatedly, until it explodes. Proceed inside the aera area. Immediately jump behind the nearest cover, thus starting to systematically kill the enemies. Move left, then throw an explosive towards the building marked in yellow, to take out the enemies nearby. So approach the door, freeing Riley. You will therefore have to flee, progressively making your way towards the exit of the building. Several subjects will arrive in the area, including a Heavy with a rocket launcher, which must be eliminated with the highest priority. Riley will therefore have to learn how to use the helicopter, while you use his machine gun to kill the enemies in the surroundings. The mission will end shortly after.
The Doctor is Out
Head to the checkpoint, locating Earhardt on the ground. So go back to the helicopter, jump up, and make your way to the temple of Citra.
Hard Choice
Landing at the temple, observe the cutscene. Proceed into the fog, thus taking the knife from Citra's hands. Back to reality, you can freely choose one of the two options, a choice that will however affect the ending!


