


Please note:
The solution is based on the American version of the game, so it is possible to find differences in the Spanish version.
Tutorial
The start of the game will not require a direct interaction as the character will do everything necessary automatically. As soon as you enter the heart of the tutorial, however, you will have to pay attention to the fact that the commands to be used vary depending on the platform you are on.
1 block
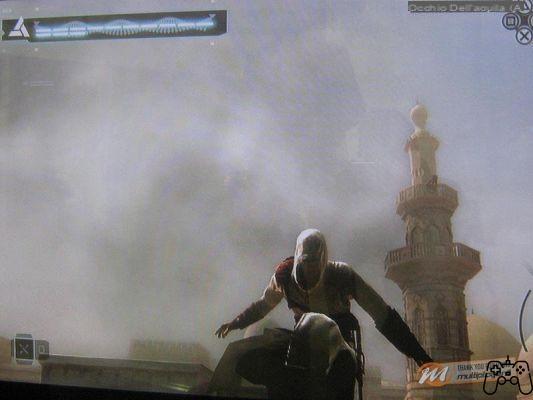
Solomon Temple
Your mission mates are Malik and Kadar, who will help you recover the treasure that is hidden inside the temple that gives the game its name. The first section will almost only require you to jump, then climb the ladder and proceed forward, to other ladders which this time lead downwards. Follow the instructions given to you to escape after the failed attack attempt.
Failure
You will find yourself at the fortress of Al Mualim, you will be shown on your compass the direction in which you will have to move to find the owner of the place, however you can also help yourself by using the map. You will talk to him and then proceed with the mission.
Guardian
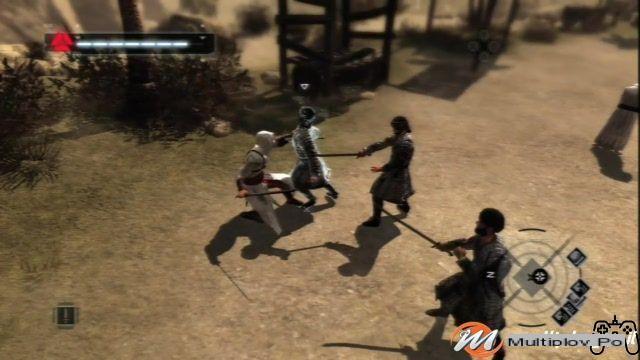
You will be attacked by the Templars. You will have to distract them by entering the village so that your troops can evacuate the residents. Fight all over the map (it will be your first fight), arriving at the gates of the village.
Glory
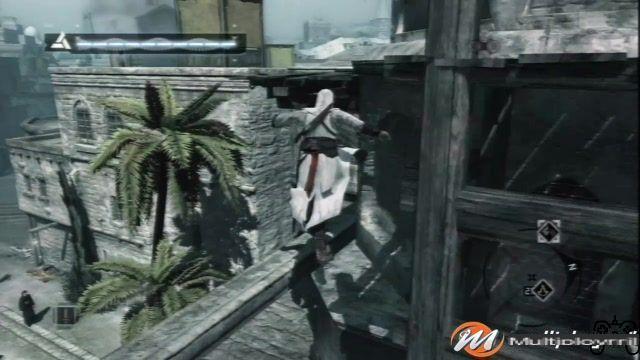
Climb the ladder here, you will be ordered shortly after to perform a Leap of Faith, after which you will have to jump up to a wall to climb, which will take you to a tower, where you will have to destroy the pillars in order to proceed. arriving at the headquarters of the scientific community. Hide in the bedroom closet to overhear their conversation, then go to bed when instructed to.
2 block
Masyaf Traitor
You will have to follow your traitor, who is in the heart of the city - so exit the fortress. You will notice that you no longer have any weapons available, so you will have to rely on your investigative skills.
When you arrive at the village together with your target, sit on one of the benches, then aim at the targets that are indicated by pressing the button that is suggested to hear their conversations; you can also try shoplifting even if in this case it will be easier to get caught. Therefore it is better to limit yourself to executing it on civilians. Follow Masun after listening to his whole conversation; as soon as you can (that is, as soon as you are with him in a space from which he cannot escape), start beating him to death for questioning.
Towards Damascus
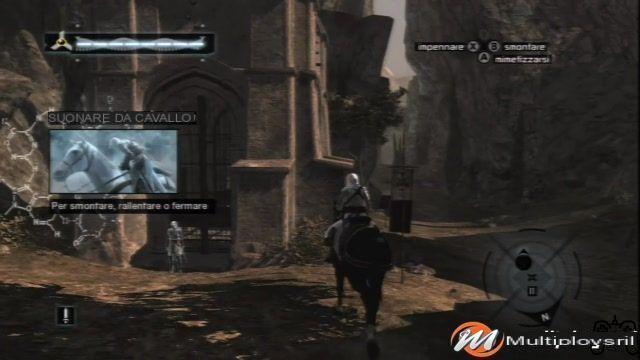
Here you will be asked to go to Damascus, the seat of your new mission, which consists in killing nine enemies, the first of which is in the city of your target. Grab all the flags as you proceed towards the central sections of Mysaf, at some point you will find yourself near the main gate of the town, where you can jump on the back of a horse. You can then locate a city on your left; on its top use Eagle View so as to have a better view of the rest of the map, before proceeding to the destruction of a new templar bandwagon; one way to facilitate the overcoming of this section of the game is through the use of the "blend" function, so as to pass them while remaining unnoticed. Every wiev point that you find on your path will have to be passed.
Damasco: Poor District
Getting off the horse you can immediately participate in the mini-game that allows you to get the help of the citizens. It consists of killing a variety of soldiers - you may have some problems due to the lack of availability of some skills that you previously took for granted. It is however possible to pair the soldiers in order to make their elimination more efficient; this strategy combined with the possibility of throwing them on the ground allows you to speed up the process. You can then proceed to the city gates, as the citizens will provide you with cover; you will find yourself in the Poor District. There are tasks that, if performed, are able to increase the maximum level of life you have available. They consist in the rescue of 12 citizens, combined with the search for nine particular points of view (the latter will also provide you with the advantage of a better knowledge of the city map). You can easily see them marked on the map, and as before the conquest mode is to climb to their top. As for the first of the two activities, also in this case you can use the help of the map, to fight the guards as soon as you arrive at the indicated point. You may also have the opportunity to be helped by vigilantes. A good tactic is always to use stealth skills to thin out the group of guards before proceeding to face-killing the rest; however it is good to try to serialize the latter too by creating a bottleneck through, perhaps, a narrow passage or a ladder, depending on what is made available in the level.
Tamir
You will need to go to the assassins office before attempting the subquests that are made available to you in this location, by talking to the guy inside, so that you can then start investigating. In fact, you will be notified of the locations in which to go and look to find the information you need. Remember that only two investigations are absolutely necessary to then proceed with the assassination, even if you can still complete as many as you like.
Investigations
The first consists in going to look for two men in an alley; you'll have to steal the letter from the guy he has in his hand, which contains information about an expedition that Tamir plans to carry out. Pay attention to the (rare) moments when your potential victim will stop and look around as if you attempt to shoplift in those instances you will be caught. The second investigation will be the protagonists of an attempt to obtain information from the three men who are indicated to you. Again you will get news about Tamir (apparently ubiquitous), and more specifically about the fact that he has decided to hold a conference. The third is a question; look for your target, who will be in the middle of a conversation - you have to finish him. He will immediately move towards an alley, you will have to follow him inside and beat him to hell to get the information you need, which is that Tamir has in mind to create weapons for other people besides Saladin. The next three investigations are all focused on eavesdropping, and are also the easiest (if your goal is simply to get to carry out the assassination). For the fourth, you will have to listen to the two men who are at the market, who will inform you about the weak point of the Tamir fortress, which is that you can access it through the pipes that are located throughout the central courtyard. In the fifth mission, you will have to overhear the conversation of two guys who are near the fountain, who will inform you about the guards (about their escape, more specifically), that is, that the distraction from your friends could be enough to make you proceed. As for the sixth, you have to go and listen to the guy who is near the fountain; in this specific case you will also have to follow him as soon as he has finished talking, so as to obtain a new map capable of revealing a secret link.
Assassination of Tamir
After completing the investigations, go back to your boss, who will immediately give you permission to kill Tamir, who is in Souk, easily located on your map. Avoid getting involved in trying to help the beggar, focusing instead on eliminating Tamir, avoiding being noticed by the guards as soon as the latter kills his friend. The best way to kill your target is, as with almost all your previous victims, to use the hidden blade, which has the option for the purpose of assassination, able to instantly eliminate your enemy. . A small problem that arises with this command is that, unfortunately, you will attract the attention of a large number of guards in this way. The method to overcome this section does not consist in trying to kill them all, but more simply very quickly head towards the Bureau trying to avoid their shots, without even trying to hide too much since first, most likely the guards would find you anyway and second, given when this is just stated, you would lose further time with the consequence of suffering an increase in damages. One way could be to proceed along the rooftops, but it is not easy at all: let's say that it is only attemptable if you already have a good knowledge of the map configuration of that place. Once you arrive at the Bureu, the mission will end as soon as you enter it, waiting a moment to avoid being tracked down by the guards who will still be groping around you.

3 block
Talk to Lucy then go back to bed after you finish reading the email, and return to the Animus as soon as you wake up.
Return to Mualim
Among the new skills that will be assigned to you upon your return to Maulin you can proudly list the counterattack, one of the pearls of the game that will be of immense use in the future, together with the possibility of accessing the Maulin garden (the private one , containing some flags). So talk to Mualim. He has two new missions to assign to you, both of which will see you move to a new city, Acre and Jerusalem. Both are centered on the murder of a character residing there, who will be respectively Garnier de Naplouse and Talal. The order in which you decide to undertake the two assassins is not important, therefore it is not necessary that you be faithful to what is listed below.
Assassination of Garnier de Naplouse
Pay particular attention to one thing: as the game progresses, the ability of the guards to fight you increases more than proportionally, even if of course you have an increasing amount of techniques that can help you in their elimination - so let's say that the accounts they are thus equalized. Proceed to rescue the citizen, a requisite for entering the city of Acre (through the trust conferred on you by the Scholars following your act of courage). There will be some enemies that will be easily eliminated by making extensive use of the new counter-moves that have been made available to you. There will still be citizens to save once you get inside the city. The positioning of the archers in this location has two sides: on the one hand, the fact that they are directed towards the street makes you very vulnerable in case you choose the direct approach; on the other hand, in this way it will be much easier for you to catch them by surprise by throwing them off the wall in order to get their instant kill. The same thing applies to the thugs you have to save your citizens from, you can easily destroy them with the same method.
Investigations
Whistleblowers will always give you a physical challenge to overcome. The first of them will tell you to proceed along a path that you yourself will have to define by taking all the flags that are along it; the reward will be new information, which will be provided to you as soon as all flags return to their rightful owner; fortunately in the vast majority of the level the paths you will have to follow will be easily traceable as they are unique and without particular deviations. At the end of it all, the revelation will be the location of Garnier: he is in the fortress of the Hoteliers. The second investigation consists of a question, which will provide you with information that is not particularly relevant (i.e. Garnier's cruelty), followed by a rather relevant one, namely his most vulnerable point, which consists of the moments in which he is visiting his patients. The third will see you struggling with a shoplifting, also with the aim of obtaining information, which will consist in the connection between Tamir and Garnier. Also in the fourth you will be the protagonists of a shoplifting; the information may appear useless at first but then you will need it, and it consists in the fact that the candelabra in the castle of Hotelier are about to be replaced. In the fifth you will have to eavesdrop on a conversation, more specifically the one that sees the two guards in the vicinity of the entrance gate as protagonists, who will let you know that some of the roof guards have disappeared (and therefore you will have the possibility to access from that section); In the sixth you will have to carry out an assassination that involves two targets, the first of which is in a nearby building, and is a Templar; fortunately he is completely alone inside the building and therefore you do not run the risk of being discovered while you proceed to mow down him. The same cannot be said of the second objective as you will have to eliminate it in the middle of a walk in the middle of the street - always make sure that you are not surrounded by beggars who could act as witnesses to your misdeed. At the end of the fair, you will learn that Garnier's patients are given permission to roam freely throughout all the corridors, so you shouldn't have any particular trouble getting confused with one of them and enter.
Assassination of Garnier
The hospital that you will have to reach to kill Garnier is near the north gate of the city, and you will have the possibility to enter using two different possible methodologies, the first of which is to hide among the Schoolchildren and proceed inside while disguising yourself for one. of them; that is, it is only possible if you have saved a citizen, thus earning the trust of the group of schoolchildren. The other possibility is to reach the goal via roofs, the starting point of your climb could coincide with the building on the north-east side of the hospital, which sees some archers stationed on its roof but which will be easily eliminated by an attack. behind them. Therefore hide by letting all the other guards pass, and then go down when you are sure not to be caught. Once inside it will remain "only" to kill Garnier. Activate the "Blend" mode immediately, always paying close attention to the guards, who know the dangers of the area well and are therefore always alert. The difficulty will not be so much getting close to him, but trying to put up with all the madmen who will try to hit you while you are around him, risking to blow up your cover (which would correspond to a general alarm with all the guards present in the vicinity who would arrive towards of you with the sole aim of, well, killing you!). The preferential choice is to kill with the hidden blade so as not to have to put up with the fight, which could prove to be quite difficult. In that case, go up the ladder to get to the attic so you can face the enemies one by one and with a height advantage. With a little persistence, as usual, the kill won't be anything too big, but it would still be preferable to use the hidden blade. To exit you can use the windows located on the newly named attic, it is certainly the wisest choice that can save you a great deal of time. Back at the Bureau, go over to Masyef to talk to Mualim before leaving for Jerusalem as a reward awaits you, in the form of the ability to pull knives.
Assassination of Talal
As the city is about to be besieged, you will notice that a large number of subjects on the outside are trying to escape; you can do whatever you want with them, if you are especially bad you could make your horse play football with their heads. Once you have finished wasting time, go to the rich district of Jerusalem to finally be able to proceed with the killing of Talal, not before having executed the killers.
Investigations
The first consists of an assassination, which is located within the market, and which sees as the protagonist two targets of your informant that you will obviously have to eliminate to receive the information in his possession. Unfortunately they will not both be stationary (one of them moves across the market), however both will be easily eradicated via an attack from behind. The second is identified in an interrogation, and your target is near the city gates; as usual you will have to beat him to death to learn that Talal keeps all his slaves in a warehouse, from which they are then sent to Acre, via a link that is provided (among other things) by Garnier. Off to the third which will be a very simple shoplifting which will provide you with the placement of the guards in Talal's palace. Then forward towards the fourth, also in it as in the previous one you will play the role of a neighborhood thief by shoplifting to get Talal's hiding place when he is about to die. Now the fifth, in which you will have to retrieve some flags for your informant: they are eighteen and the first is on the wall behind your friend. You should have no problem finishing the objective in a minute despite the number of flags as they are all in your vicinity anyway. The information you will get is about Talal's bodyguards, who are ready to sacrifice themselves in order for Talal to escape in the event that the enemies manage to break through the walls. The sixth and last consists of a hearing exercise (poetic license to say that you will have to eavesdrop); save the citizens around the church, then modify your appearance to become a Scholar so you can easily enter, to get the information you were looking for, which is that Talal is a chief archer who can attack you with arrows.
Murder of Talal - Execution
You will have to proceed to the north-east corner of the affluent section of the city to find Talal; let's say that coming from the west your mission will be easier thanks to the lack of massive surveillance. However, it is always possible, in case you feel like it, to follow the path of the roofs by assassinating all the archers. It could be considered an exercise in skill more than anything else. Once inside, Talal will likely be attacked by a group of vigilantes, assuming you have saved all the townspeople. Unfortunately you will be immediately trapped by the enemy as soon as you enter; you obviously have two choices: focus on killing him, or focus on killing his men and then calmly eliminate him too. The second is generally considered better, thanks also to the availability of counterattacks that allow you to reap serious damage in the enemy ranks, and then climb the ladder and start your search. However, climb up and then jump with the help of the candlesticks so as to reach the ladder from which Talal escaped. Once at the roof, proceed to Talal's location and then prepare to use the hidden blade. Once you get Talal, it will run away and sadly it's pretty fast. So it is good that you have saved all the citizens (you did it right?) So as to have around the vigilantes who will block him when he tries to escape. Killed, go back to the Bureau.
4 block
Take a look at the locker located in the headquarters as soon as you return: in this place you can easily earn the access code that you will need in a later section. Spent the night taking a flash drive to a doctor (or alternatively an access card).
Return to Mualim
In this level you will be given the skills Cactch Ledge and Grab Break, both very useful: the first in case you are thrown to the ground by the action of rocks (makes you able to catch the edge of a building on these occasions), the second when you are under the grip of an enemy will allow you to easily escape by pressing all the buttons a bit at random.
Assassination of Abu'l Nuqoud
The Damascus Bureau awaits you with a mission, namely to kill Nuqoud, which is located in the Rich District of Damascus.
Investigations
Given the presence of a large amount of checkpoints / guards, it will not be easy to follow your objective, unless you opt for the solution of fighting with the guards one by one after using your stealth ability to get to theirs. shoulders: this is a solution that can be commendable if and only if you have more than good fighting skills. However, follow the guy you have to question, beat him up, and extract the information that he can give you, which is Nuqoud's weak point: he is easily attacked when he invites guests to his house. The second investigation will be a very simple eavesdropping in the east section of the town, which will inform you of how Nuqoud is organizing a festival in his palace. In the fourth of the six investigations you will be ordered to carry out a stealth assassination, with a time limit of two minutes, and targeting two different subjects. However, it is not difficult thanks to the fact that both are clearly indicated on your map, so thinking about the fastest route for a moment should not have particular problems. You will be provided with a map that will show you where Nuqoud's personal guards are. The fifth investigation sees you grappling with the espionage of two merchants, with the aim of stealing information from them to gain access to the private rooms of the Nuqoud palace. The sixth and final investigation in this series consists of trying to catch some flags; apparently easy, but complicated by the fact that some of them are positioned in such a way as not to allow them to be reached through a movement in a straight line, instead forcing you to descend from above to be able to appropriate them. At the end of this spiel you will be informed that you can access the building via the main fountain, climbing it.
Assassination of Nuqoud - Execution
Go up the fence, kill the guards near the gate. Their killing is easy, but it seems that there is no direct access to the top of the building. Continue along the main corridor, hearing Nuquod's oratory at the same time, and then witness a great deal of chaos being created by all the guards moving in all directions.
Nuqoud's killing could also happen, if your mastery is sufficient, via stealth, so you don't have to worry too much about a large number of guards sneaking in between you and your target. Two different procedures are made available: climbing the fountain, you can then head (jumping) to one of the columns that are located along the corridor, and then jump again to the balcony where you can see Nuqoud. You may encounter some difficulties caused by the large number of archers and also by all the bodyguards in the area, maybe do some natural selection between them before going straight to your target, which unfortunately has the characteristic of being quite fast as well as big.
However, another equally effective method is available, which consists of walking southwards, staying well away from the fountain, and then after having turned the corner go up on the gazebo, from which you can then easily reach the archer who is on the balcony. , who will therefore have to be killed. On the south side, there is also a path leading to the roof; climbing along it you will come to a scaffolding from which, going down, you can reach your goal and complete the assassination from this side. Both solutions present an entirely similar degree of difficulty.
Return to Mualim
The usual time has come when new skills will be added to your already vast repertoire, which consist of an increase in damage by sword, and the ability to avoid incoming enemy shots combined with the possibility of carrying out a counterattack.
Murder of William de Montferrat
Your target is in the affluent district of Acre, look for it with the usual eagle's eye perspective. The pillars are the only access to the upper section of the cathedral, so look for a way to take full advantage of them. You may encounter some difficulties; the most suitable method is to move towards one of the sections in which the roof folds on itself, surrounded by a large number of pillars. From here, climb up towards the roof, then continue up along one of the pillars, so as to reach their upper section, then move along them in a circle and easily reach the roof, just as you wanted.
Investigations In the first, once again you will have to take flags, which are however all close to the starting location (which will still correspond with your informant, so do not be afraid). The only problem could be the archers who are on the roofs all around, do not waste time killing them but simply move as fast as possible so as not to give them the opportunity to aim precisely. The information you get is that William will return to the citadel bunker after he meets Richard.
Go straight to the second one, one of the usual boring and derelict shoplifting, very simple and fast but which will still provide you with good value information: it would seem that William is nothing more than a puppet, not even very reliable; there is also talk of a man in the harbor trying to get out of history, and that there are two "parties" who have to agree on the division of something stolen. Rest assured that everything will clear up before the end of the level. Immediately after that you will have to proceed to the third, which consists of a query. Follow the man on the church steps to throw him off to one side, then start beating him to get a revelation about King Richard, who is going to visit William today; the latter will then do his utmost in a speech to his men. The fourth investigation is an assassination, you will have to kill the two knights who will be shown to you by the informant, to know that once you enter the palace you can only leave via walls. And off again to steal wallets in the fifth mission, to get a map of the locations of the archers at the top of the tower. The sixth is always on the same line, although this time fortunately (?) A little more complicated. In fact, you will have to go in search of your target, which is located inside a small fort, access to which is prevented by the presence of a good number of guards in its surroundings. However, you will get a map that suggests a perfect path to be able to enter the citadel in a completely easy way without being bothered by any enemy.
Murder of William - Execution
Wait for the end of William's long speech, luckily no one will notice your presence. In the courtyard of William's fort you will soon see Richard and your target, who will return to his residence immediately afterwards. Enter through the main gate, there is no other obstacle to your entrance, unless you have a bounty on your head or similar problems that shouldn't be present at this point in the game assuming you have followed a linear path. To be able to overcome a lot of guards near the gate without falling victim to them, you can follow the path outlined by the map, to the left of the gate. Continue to the westernmost corner to get to William's training location. Climb up to the highest roof so you can get there unnoticed; to get there you have a variety of access points - some may require you to kill an archer, but nothing particularly rough except this. Let us then proceed to the heart of the mission, namely the murder of William. There will be no particular difficulty in eliminating him if you have a little patience - you will immediately hear him screaming at the guards as soon as you approach him; you will need a few minutes to get to the end of the course, time that you can productively employ in the destruction of various archers scattered along all the walls. As soon as the speech is over, William's men will leave en masse to leave him alone for his studies; at this moment you can proceed to the corner of the fort, just above William, and take a look over the platform, and then go down there as soon as he is turned in the opposite direction, then go down and hit him with the hidden blade. Unfortunately an alarm will sound immediately, trapping you inside the fort (the gates will close automatically). Proceed south-east taking his body as a starting point and then climb the scaffolding, run south-east, arriving at a ladder that leads to the top of the wall, then climb the towers, then proceed to the north corner of the fort, where you will see a certain amount of birds along all the edges of the wall: this is the location you will have to reach, jump towards there then go back to the Bureau where Masyef awaits you.
Assassination of Majd Addin
His place of residence is the poor part of Jerusalem, there will not be much to do since the citizens to be saved are not numerous, thanks also to the not considerable size of the district. Most buildings are at ground level, so you may have some difficulty knocking out your opponents to kill them. However, you shouldn't have a problem with taller buildings.
Investigations
The first, which takes place in the south-east section, consists of an interrogation, which will get you information regarding the ruler over Jerusalem, who turns out to be Addin. You will then have to kill the informant. The second will see you for the umpteenth time in the role of a murderer, and then make you go back to your informant so as to also know that there is a group of schoolchildren whose periodic objective is to enter the execution area. In the third investigation, you will have to deal with a shoplifting; it won't be that easy as your target moves across an area lined with guards - try to get the letter just before it enters this clearing; another available option is to simply kill the guards. The fourth is also about shoplifting, and the positioning of Majd Addin's guards will be revealed to you at the time of execution. In the fifth, you will be ordered to kill three soldiers by your informant, who are on his trail. The only problem could be given by the conspicuous presence of guards, who would be better to kill before proceeding so as not to cause a real swarm at the time of execution. One of your objectives is on the roof, so you will have to climb through the alcove so as to find yourself behind it and kill it with the hidden blade avoiding useless and energetically expensive fights. In the sixth you will have to eavesdrop again, and you will learn that Majd Addin is participating in an execution right now.
Murder of Majd Addin - Execution
The large garden is the location chosen for Addin's execution. Given its size, you shouldn't encounter any difficulties with regards to accessing it. Use the rooftops in case you have a hard time getting past the guards through a breakthrough action, then drop down and get to its center.
You will enjoy the protection of schoolchildren until you get close to your target, which will provide you with an easy way to eliminate it by turning away from you as soon as its preaching begins; you will be helped in this lowest task by the schoolchildren, who will distract the guards and allow you to proceed straight to your goal. At the base of the platform, stay in blend mode waiting for Alladin to give you his back. It will be easy once you learn his timing. Once the assassination has been carried out, you will find yourself very close to the Bureu but stalked by a large amount of enemies. Run along the rooftops to avoid being mowed down.
5 block
At this moment you will understand why it was useful to take the code from the locker by shoplifting Vidic: you can in fact exit your room immediately using the latter, and then proceed to the Vidic PC, and log in with usr and pass, to have a look at the contents of his mail. There will be several interesting objects, look far and wide so as not to miss anything.
Return to Mualim
The return serves to obtain information about the treasure that was taken by the Assassins, as well as to make you give the task of killing two other characters in that of Acre and Damascus, aided by a new ability, typical of these levels: Defense Break, in able to unhinge the guard of your enemies; particularly useful also in virtue of the fact that, as you progress with the game, the number of guards increases more and more, as well as their propensity to attack you.
Assassination of Sibrand
By killing the Templar you see in the port you will gain access to a save point; from here, it will be easy to reach your target location, namely the lighthouse: just jump from rock to rock (the rocks we refer to are those in the water near the lighthouse) to get there very easily. To go up, go around the lighthouse until you arrive on the opposite side to the one you come from, it is the only one from which you can access the upper portion since the main path is interrupted.
Investigations
There will be a variety of tasks in the investigations of this quest block. The first will consist in eavesdropping on a conversation, which concerns Sibrand; he is a bit paranoid about the possibility of being murdered, which is why he hides near the harbor. The second will see you once again the protagonists of a shoplifting, which will reveal to you that Sibrand will soon leave for his private vessel which is in the port. The third is an interrogation-beating in the eastern part of the city; Hit your target a little, to get a revelation of Sibrand's plans, namely his attempt to avoid an enlargement of Richard's troops. In the fourth you will see four objectives, all four will have to fall under your murderous fairy hands, which will however be bound in their work by a time limit of execution equal to four minutes, as many as the victims, who will have to be hit from behind. . Once they are all dead, go back to your informant to get a map showing where all of Sibrand's guards are. You may have some problems completing the fifth of the investigations: it will be difficult to distinguish your real target from all the others, since they are the same as you. Freeze them a little at a time to kill them more easily, as dealing with them all in one session could be a bit traumatic. The sixth investigation will see you protagonists of a shoplifting, which will inform you of the absence of guards on the north side of the port.
Assassination of Sibrand - Execution
In the tower there is a guard that you can kill, and then proceed to Sibrand's boat beyond the pipes; your target can be reached via the boat located on the platform further south of the harbor. It is the largest boat in the whole port, and has a red flag; the top of the ship will be used by Sibrand to shoot arrows at all the assassins who attack him, and you will have to get close enough to kill him for all the arrows that will be inflicted on you. Kill all of Sibrand's guards as you approach.
Take a look at everyone on the boat, and kill Sibrand as soon as he turns around. It's not actually that easy; let's say that it would be better to get to the stern of the ship to be in an optimal position. You will have to jump to the watchtower first, then to the pole, then to the boat, then back to the bridge. It could also be the case that he notices you, and he will probably take flight to go to the city center. He will immediately head for a watchtower, and the best option would be the one where you manage to catch him before he climbs onto it, throwing a hidden blade on his neck, perhaps even hitting his smear guards to complete the job. 'art. The next step is to escape from the boat, a very easy operation in case you have killed the enemies that occupied it, since you will practically not have to do anything, and you can easily return to the office without any worries.
Assassination of Jubair Al Hakim
This is the location of the game that marks an increase in difficulty, especially as regards the number of guards present. The investigations to which you will have to undergo will be detailed below.
Investigations
The first one focuses on shoplifting, you will need to take a piece of paper that tells you the location of Jubair; it will be correspondent within the Madrash Al-Kallash. Go straight to the second one, this instead consists in eavesdropping on a conversation, which will reveal to you that Jubair always holds meetings with his followers in that of madrasah. The third is nothing more than a query, which will see you as the recipients of a revelation regarding the city's books: they are about to be destroyed (but you already knew that!). Now off to the fourth, which consists of a murderer. There is a time limit to be respected, and you will be rewarded by the informant with a map detailing Jubair's location in the next few moments. Arrived now at the penultimate (ie the fifth), you will find yourself facing a great challenge, consisting in killing three targets in a time limit of 3 minutes. It is not particularly complicated except that one of them is on top of a roof, and therefore you will have to first locate a ladder so as not to waste time finding it while the timer runs towards zero. The sixth investigation consists of a shoplifting, you will have to avoid all the idiots present and take the wallet, you will get an information regarding Jubair, who awaits you inside a garden, further inside Madrasah.
Assassination of Jubair Al Hakim - Execution
Proceed to the top of the madrasah, the first cutscene of the game section awaits you; immediately afterwards the screen will show you the location of some books that can be found along the roads throughout the surrounding area; Jubair himself will position himself near one of the books as he launches an invective with the citizens as an audience, having as its object the rightness of his mission. Small problem: the enemies are all dressed in the same way, so it is difficult to recognize the real Jubair from his clones. The method to be able to understand if it is a real target or just a feint consists in the repeated use of Eagle View, as the first of your enemies will take on a yellow color (ie "real" Jubair), while all the others will take on a red coloring. The best way to kill is by approaching from the tops of the rooftops, always knowing that Jubair always appears positioned in the south-east corner of the map, easily accessible from the north and then descending via the ladders. The killing must take place via hidden blades to be truly effective. You will therefore have to take care of a quick escape, which will be easy if you use the tops of the roofs so as to reach the Bureau very quickly.
6 block
Talk to Animus and Vidic, sleep, and go back inside the car.
Muali
You will be immediately ordered by Mualim to kill Robert de Sable; you will be provided with an increase in the ability to inflict damage by the sword.
Assassination of Robert De Sable
There are many archers in the area, as well as a large number of guards.
Investigations
The location of the first is near the cemetery, and you will have to limit yourself to completely killing everyone present. Proceeding towards the second, you will be informed in detail on the locations of all the guards in jerusalem, which are also your targets (as always, your killer fury). Off to the third. Beware of enemy shots that are able to take away a large part of your life points; since it is not even easy to avoid them, it is better to focus on a quick and painless killing to limit the damage; in fact, you won't get any particularly useful information either. Now towards the fourth. This will not prove particularly easy as if an enemy finds the body of a fellow soldier, they will come together to look for and kill you. So you must have perfect timing to kill so that opponents do not know of your misdeed; this is made even more difficult by the fact that the paths of the guards overlap. In the fifth section you should not encounter similar problems since all of them are in locations quite far from each other, and you will also have help thanks to the ladder that is on the map. In the sixth it will be sufficient to take the map from the priest through shoplifting so as to be able to understand Rober's position in the funeral.
Murder of Robert De Sable - Execution
Kill all the archers on the roof, as you won't be able to use stealth abilities this is one of the few ways you will be able to limit the damage. You will be immediately seen as soon as you enter the graveyard, and you will have to deal with all the guards who have decided that you are a target to be pursued. Then continue to the roof, where there will be other enemies to pulverize. So you just have to hit Robert a few times with your greatsword to kill him. A small (euphemistically) problem is caused by the large amount of guards in the vicinity, which also include a large amount of Templars who, as you have probably already experienced before, are able to inflict a good amount of damage even with a single sword strike. Furthermore, no easy escape routes are provided, which forces you to continue the fight until you have killed Robert. However, it is recommended to position yourself at the top of the ladder so as to have a height advantage, and then jump when the enemies begin to surround you, and start killing those who are on its lower section to make all those above fall with domino effect. This applies to everyone except Robert who is unfortunately immune to falling damage. As with all difficult enemies, the advice you are given is to avoid prolonging the fight too much and therefore aim for the immediate elimination of him, maximizing the damage against him rather than minimizing yours. Then the time will come to escape, immediately after the fight ends, after discovering that it is not Robert. Your objective will be the Bureau, where it will be revealed to you that the real Robert is in Arsurf, which will therefore be your next location of choice.
Assassination of Robert De Sable - 2
The location of the town to which you must go is near Acre, however easily traceable through the use of your map. Immediately enter the town noting the large amount of corpses scattered along the battle site. This is a typical battle, similar to many you have faced previously, with the small difference that the Templars present can prove to be a real nuisance. A good tactic is to try to counterattack as much as possible (along with the attacks you make) in order to double the total damage. It is also a good opportunity to use knives. Continuing with the level you will finally arrive at the final battle with the two half-brothers Robert and Richard, who unfortunately will be helped by a host of Templars that are anything but easy to eliminate. Among them, the easiest are those without a helmet, so prioritize their elimination if possible. Avoid getting hit by their friends with the helmet as much as possible as they are capable of inflicting frightening amounts of damage which, multiplied by their number, make you very vulnerable. The killing of all the soldiers will lead Robert to attack you of his own free will; also in this case the best strategy would consist in speeding up and killing it only through your hidden blade, also trying to be fast so as not to suffer too much damage. One way to recover some life points in case you notice that you are in too much trouble is to start running in circles avoiding enemy shots: this is enough to restore a certain amount of your HP.
7 block
Talk to Lucy right away, then get a good night's sleep and get back to reuniting with your mates to get the latest news.
Masyaf: Al Mualim
Take out all the enemies at the top of the building, this is the fastest way to take them out, so as soon as you arrive in the city you will notice that you are practically forced to kill most of the enemies that are at the top of the hill. For the second group of enemies the strategy will simply be to take them off the roof as you did with those outside the town of reference. Then go back to the back yard.
Boss
The first of the bevy of fights that you will have to face sees you going against the nine bosses you previously killed; each of them has a better shot that can destroy two life bars, however the secret is that a counterattack on your part will be enough to kill one. Throwing swords at enemies is a good way to take them out with ease, but will need to be used sparingly as the level is still long.
Mualim multiplies
Unfortunately, the story here will be different than before, and you will have to hit them over and over to kill them, despite their ability to inflict damage is exactly the same as that of their previous friends. The bird's-eye view is probably the best choice for locating your final target, Mualim, who is hiding within the great mass of his clones. It is in fact traceable by the fact that he is indicated by a yellow target. Anyway, as far as the combat strategy is concerned: it is good that as soon as your HP starts running low, you start running around the whole balcony, throwing knives at the enemies while you recharge your HP through running. At worst, there's always the option to jump into the pool while you wait for your enemies to follow you, so you can trap them and get out and start stoning them from the outside.
Teacher Teacher
Each blow inflicted on Mualim will coincide with his sudden and quick disappearance; he will be able to reappear at will along the entire terrace so it is only up to you to try to guess a pattern within his moves (and it does not necessarily exist, so do not waste too much time in elecubrations in case you are not immediately successful) . He shines with a yellow light however, so it's not hard to spot him when he reappears. The (negative) peculiarity of this battle is that a single hit from your opponent will be enough to kill you, in all cases in which this will not be a counterattack (that is, in the event that you hit him and he counterattacks, not you will be immediately dead; but otherwise, yes). The final phase of the fight will be marked by the disappearance of the stars that appear all over the screen. The fight will obviously not be easy, as he is able to destroy your defenses at will, as well as dodge your blows. His weak point is his lack of agility, so a good strategy is to circle around him to hit him on the back before he can turn himself into the proper position.
Video - Gameplay of the game


