Chapter List
Checkpoint
----------
Climb the wall in front of the door to get on the net. Sneak to the left of the net on the side wall and drop into a small room. Go out the door. Checkpoint
----------
In the courtyard, you will be approached by two policemen. Your goal will be to get them to end up in the garbage cans. One of the two bins, once closed, will show you your escape route. This is the only rather challenging match of the level. So if you want to complete the Wild Cat, Scaredy Cat and Pussycat objectives, you'll have to play with the cops a bit. Once settled, climb the large shaft and climb the wall. Run along the ledge, climb the wall and you will come to a second ledge, where you will encounter many fans. The police will start shooting at you so, hurry up. If you want a Bling, go down the wall, and run up to a small alacova. Climb the Climb wall behind the alacova, and jump to the ledge on the right. Climb the wall behind the ledge and grab the Bling. Go back to the area where you dropped, and look for a pole. Stand under it, jump, grab with the whip. Swing, and when the time comes, jump over the wall, and you'll find yourself in the area where you fought the cops. Go back to the ledge with the fans. Run into the niche at the end of the ledge, and climb the wall as high as possible. Jump to the opposite wall and keep jumping back and forth until you reach the top. If you're not interested in collecting the Alley Cat bonus, or collecting Bling Shards, run left over the wooden beams and skip the next two paragraphs. After going up the niche, run to the right and climb the wall to another ledge. Run to the end of the platform, and jump to the bright purple cabin. Go to the next cabin, and drop down onto a small platform. Jump to another platform nearby and grab the Bling. Go back to the first platform, and jump to the pole at its lowest level. Swing with the whip, and jump to the other pole. Climb it and collect the Bling Shard. Once at the top, jump to the ledge on the right. Find another alacova along the wall, and climb it. Once here, another movie will start which will mark the end of the first level.
2. Landfill
Level objectives:
- 6 Mosse Wild Cat
- 2 Mosse Scaredy Cat
- 2 Moves Alley Cat
- 1 Mosse Pussycat
Shards of Bling: 11
At the beginning of this level you will be introduced to the Hunt mode. This mode is a first person perspective that you can use whenever you are standing still. (Cannot be used while climbing a wall or swinging from a pole.) Hunt mode not only allows you to look around, but also to be able to see special objects. Objects that light up white can be both destructible objects (useful for earning Wild Cat bonuses) and escape routes (also very useful for earning a few more points). You can also get help on where to go by finding a Midnight's Trail — some paw prints that have a peculiar smell, represented by puffs of green smoke rising from them. Take a ride around using Hunt mode for a while; then look for a path in the garbage that will allow you to climb the wall up to a ledge. Crouch and go through the hole in the staccato. Go down to the next courtyard, and look for the wall with the Midnight's Trail and climb it. Run along the small ledge and go down to the courtyard. Turn right, climb onto another bin, jump to the ledge, and go through the gate. Go to the back of the courtyard and climb the metal fence. At the top of it, sneak to the right until you are on a ledge. Let yourself fall down. Go towards the end of the ledge, and go down to a very small courtyard to avoid damage jump on the fence and then go down. Go to the alacova and climb the ledge. Keep going down to another small courtyard, and reach the tangle of cables. Sneak to the right and jump while holding the right control stick. Jump over another fence. Sneak right again and jump right to a ledge. Climb the fence above the ledge, and use the whip to make your own another Bling. Go back to the ledge, whip the purple-lit hatch to open it. This will open up a shortcut that will come in handy if you ever fall off doing the next jump. From the ledge, jump right onto another ledge, and use the whip to open the trap door. Go down to the courtyard and go up to the alacova you opened earlier. When you reach the tangle of wires, go up until you find the ventilation ducts. Jump to the wall near the whip attachment, then reach the other points being careful to swing a lot to reach them. After the third point, swing as far as you can to reach the net and when you're ready press the Jump button to release the whip and grab on. Go down to the ledge, and sneak into the ventilation shaft. Go down the stairs, climb the wall, and look for a spot to grab onto with the whip. Make sure you give yourself a good boost. Try to grab the wall to the left, grab the Bling and swing the whip back to the previous point. Now take a good push and grab onto the right wall. Jump over the tangle of wires. Sneak right along the net, jump back and grab the whip. Push yourself to the right, jump and grab the wall. Go down to a walkway. At the end of it, kick the barrel, and jump to the other walkway. Jump back to the third walkway, and reach a large net on the wall. Sneak to the bottom left of this net, grab the Bling with the whip. Now go to the top right and hook yourself with the whip. Swing, reach two more points to grapple with the whip, and step onto another net on a wall.
2. Landfill
Climb on the pole, and swinging with the whip take the Bling and drop down. Jump to the wooden platform, and climb to the top. (Note: if you fall off the wooden platform, go around the corner and climb the tunnel until you get to where you were pushing the whip.) From the wooden platform, jump to a pole, grab the whip and reach another pole, and try to get to another small walkway. Go right and whip a Bling. Go down to the courtyard. Go up the tunnel at the end of the courtyard. When you reach the small ledge near the top, jump over the tallest wall, jump until you reach a small ledge and grab the Bling that is in mid-air. This step is quite complex, so only do it if you want to reach the Maximum score. Now walk into the clearing, climb the opposite wall beyond the fence and jump by pressing to the right.
Checkpoint
----------
Leaving the corridor, you will find yourself in front of a rather high ledge. Follow it to the end, climb the wall, and whip the Bling on the right. Go back to the ledge, jump to the nearby pole, push yourself to reach another one and jump down onto the abandoned car. Go down to the landfill. On the side of the car wreck is a purple-lit panel. Give him a whiplash to open the doors of the machine. It will be an escape route for future combat, and is easier to open now than later. Run to the opposite side of the clearing, jump over some craters and grab the pole. Climb to the top and whip to the other pole. Give yourself a boost and join the other Bling. Reach the last pole and land on the tops of some freight wagons. Go down to the side clearing, hit the control panel near the conveyor belt, go up it and jump from the compressed cars to a ledge with craters. Continue to the left and jump to the light pole. You will drop it, thus opening a new path. Climb the conveyor belt and jump onto the purple-lit pole. From here jump onto the walkway, then onto the pole. Climb to the top to reach a Bling. Get off and get to the bottom of the walkway. Jump to the pole. In the middle of the jump, use the whip to grab onto it. Give yourself enough push to get to the other pole, and try to get on the freight wagons from the top of the clearing. From the freight wagons, jump to the top of the car hanging from the machinery, and whip up a Bling. Jump downstairs, hit the pile of barrels nearby, to hit the car and land it in a panel that opens the gate into the main courtyard. Enter the main courtyard, and take out the two guards at the spot you opened earlier. When you're done with them, another guard will arrive. Take care of it and run to the exit it opened. Climb the brick wall as high as possible, and jump back and forth until you reach a small ledge. Go down to the small ledge under the iron plate.
Checkpoint
----------
Climb the net on one side of the ledge and whip a Bling. Use the control panel to release the iron plate which will crash into the opposite wall. Use the poles to go through it. Go through the glass and go down to the courtyard where you started this level.
Checkpoint
----------
You will find yourself in the grip of a policeman. Kick the policeman who comes at you, and a head butt at the policeman who holds you. When you are free, the cops will escape. Follow them through the door and once near the garbage cans, throw them in. There are bottles on the floor that you can use to earn some extra points by throwing them at the cops. Once you have them settled, another one will arrive. Take him out, and run to the door he came from. In this courtyard you will be targeted by guns, so be quick and head to the right, jump into the police car, run through the gate and follow the alley to the end of the level.
3. Parking
Level objectives:
- 15 Mosse Wild Cat
- 6 Mosse Scaredy Cat
- 10 Moves Alley Cat
- 1 Mossa Pussycat
Shards of Bling: 10
You will start in a rather dirty area and have to fight three security agents. There are pieces of wood on the ground that can be used against the guards. Once they are defeated, kick the fence near the agents' hut. Run to the back of the area, climb onto a concrete pillar, and whip up yet another Bling. Climb to the roof of the agents' hut and jump to the pole. Use the whip to reach the third pole. Here jump to the pole above you, climb to the top to retrieve another Bling, drop down and turn right. Then swing and go ashore. Run along the ledge, jump over the ditch and continue along the platform. You will see an intermission cutscene introducing your "nine lives". In each level from now on, you will have to look for the Midnight. Each time you find one, you can die 8 times, and the Midnight will resurrect you. If you die a ninth time… well it's time to reload the game. You have found the Midnight for this level, so you can climb the nearby wall where you went down. Climb on the pole, reach the ledge. Walk between the buildings, climb the brick wall and use the pole to climb over the next wall.
Checkpoint
----------
Go down to the courtyard. Keep going down until you reach the lowest point, where you will also find a Bling. Climb the wall opposite where you roughly got to the top, jump and grab the Bling. Now you can go up to the highest open space, use the whip to reach the poles and enter by breaking the windows. As you move into the room, the floor will collapse from under your feet. The same thing will happen in the room below. IN all ways remember to take the Bling that you will find at the bottom. Examine the room very closely and you will see a different texture indicating some part of the floor will collapse. Go over that patch of floor jump and use the whip on a beam in the ceiling. Swing until you are pushed and reach the lowest floor. Sneak into the cramped space of this room and jump into the garage.
Checkpoint
----------
After the cutscene, run down the ramp to the back corner of the garage. Climb the wall near the ledge and jump on it. Climb up the wall along the ledge and make the Bling yours. Go to the opposite side and start climbing the wall. When you can no longer climb up, jump off the wall by holding UP on the joystick, so that you can catch the pole nearby.
3. Parking
Swing between the poles until you are on the net of the opposite wall. Sneak to the left, look for a spot to be able to use the whip and get a good momentum. At the highest push to the left, press the jump button to release the whip and grab the wall. Immediately jump by pressing UP to grab the nearby pole. If you feel like you are missing the pole, feel free to use the whip. It is a very difficult leap: do not be discouraged if you do not succeed at the first. Give yourself a push until you get to the alacova opposite. Go up to the tunnel. When you reach the ledge, jump back onto the other wall to pick up a Bing. Now run to the ledge and jump to the pole. You will be under fire from enemies for many parts of the level, so avoid standing still. Make your way up to the walkway, and follow the road until it ends. Look for sections of the walkway that could cause you to fall. In case you fall, you have to repeat all the previous actions. At the end of the catwalk, jump onto the pole and try to get to the third pole. Climb on it, use the whip to attach to the pole in front and giving yourself a good push to reach another walkway. On this walkway, at the first concrete pylon, climb the wall and use the whip to get the Bling. Proceed on the walkway again, avoiding the holes that will appear on it. When you reach the end, use the poles to reach the highest point of the walkway. From here on you will no longer be the target of gunshots. (Good thing). Carefully jump over the large hole in front of you. At the end of the walkway, go down to another lower walkway. Run to the bottom, climb the wall and get the Bling. Once collected, jump and use the whip to grab onto the nearby pole. Climb to the top, and jump to the nearby pole. From here go to the garage roof. Enter through the door on the side and take your time to take out the bad guys. Try slamming them against the concrete wall, so that it breaks. If you can't break it this way, kick it. Follow Armando. In the next room, take out the criminals, trying to break the wooden barricade. Follow Armando again into the small hole you have just discovered.
Checkpoint
----------
Keep going down, sneaking through the small openings you will see, until you come to a land with a fence and a power generator. You have to walk along the path. First, however, go downstairs, and kill the guards you find, thus collecting the Bling. Retrace your steps and climb the fence. Sneak to the left until you can get off the ledge. Go to the other end of it, and jump between the poles until you get to another ground. Climb the wall at the other end of the area and grab the Bling. Return to the area, and jump to the area to the right. Use the pole to get past the fence and sneak to the left. Once above the sight, go down and around the corner. Before going down, however, go up one of the walls, jump up and grab a Bling. Return to the alley.
Checkpoint
----------
Follow the alley, and go up the fence in the parking lot, outside the night club. There are 4 guards waiting for you. The exits are a garbage can, a pick up on the left and two crates on the left. You'll need to be sure you've completed your Wild Cat and Scaredy Cat goals before this point. After taking out the guards, use one of the light panels near the door. This will open a passage with a few more poles to use. Climb the wall near the garbage cans and jump to the pole. Use it to get to a nearby clearing and exit the doors marked EXIT.
4. Scene 83
Level objectives:
- 25 Mosse Wild Cat
- 8 Mosse Scaredy Cat
- 3 Moves Alley Cat
- 1 Mosse Pussycat
Shards of Bling: 9
As you can see from the objectives, there is a lot to fight in this level. Here you will also meet Armando towards the end, colliding with the first Boss. Drop to the ground and take out the two guards in the room. There are 3 exits: two bins on the right and the window on the left. The room is full of broken crockery, so enjoy! After you take care of the two guards, a third one will break in. Take him out, and go through the door he left open. Cross the room with the red sofas and go to the bar. There will be 4 guards waiting for you, one with firepower. Throw them into the four bins, or scare them away. This area is also flat with broken crockery and hundreds of bottles that you can use. Once you've cleared them, climb the wall in front of the bar and grab the Bling that awaits you. To the left of the bar is a wall with two pipes running through it about halfway. At the height where the pipes enter the ceiling, jump and grab the pole. Climb to the top, get the Bling. Give yourself enough push, get to another pole. From here, climb onto the grate of the nearby crate. Look down and make the Bling for you. Still holding on to the grid, go to the right, go down to the edge and jump to the pole nearby. Push yourself to reach the platform and run down the corridor. Enter the office from the balcony. In the corner is a wooden box, destroy it and open the panel that was hidden there. Congratulations, you have found the Midnight of the level! In the opposite wall is a glass cabinet that hides a Bling. Get it. Now whip the control panel on the table to open a door in the bar.
4. Scene 83
Exit the office. You can pass the laser beams: they are there to avoid the presence of intruders. When you pass through it, alarms will sound. And you will alert the guards, so go back to the balcony and across the room, look for him. When you have taken care of the guard, go down and exit through the door you just opened.
Checkpoint
----------
Follow the service room, sneak through a hole in the fence until you come out into the courtyard.
Checkpoint
----------
Head to the end of the courtyard and climb the scaffolding panels. Jump to the pole. From here, head to the other pole, and pushing yourself to the ledge. Run along the ledge, breaking or jumping the boxes, and climb the wall you will encounter at the end. Jump to the other ledge. In this section you will be sexually and willingly under enemy fire, so move constantly. Jump on the pole, climb it and make the Bling yours. Push yourself to the other pole and do the same to retrieve the other Bling. Finally swing and try to reach the ledge and sneak along a small opening. From the ledge, jump onto the wooden platform and climb the wall to retrieve yet another Bling. Now go to the large room, and take care of the armed guards who will arrive shortly thereafter. When you have 4 defeats, three more will come, so keep an eye out. Head to the open doors and follow the corridor until a cutscene starts where you meet Armando outside.
Checkpoint
----------
It's time for your first boss fight. To tell the truth, you will not collide with just one boss, but four. The fights are not all the same but they differ in some details: when they are not stunned, the bosses can block your normal attacks. So you have to run around them and try to throw whatever comes your way at them. This way, in addition to causing damage, you will stun them and you can then get close to beat them with basic attacks (kicks, punches). There are a few interesting things to throw at the bosses around there. Try to prevent him from moving and throw him at something that breaks before he does. Be sure to hit him when stars appear on his head. About halfway through the fight, some guys with guns will arrive and shoot you from the roof. This will make the second half of the fight more fun. Once Armando is defeated, the level is over.
5. Perimeter of the establishment
Level objectives:
- 8 Mosse Wild Cat
- 4 Mosse Scaredy Cat
- 8 Moves Alley Cat
- 1 Mossa Pussycat
Shards of Bling: 16
Begin by walking among the wagons and defeating guards. The garbage can is your escape route. Go to the back corner of this section of courtyard and climb the wall opposite the scaffolding. Jump to a wooden platform, reach the pole and from there give yourself a push to reach the mesh panel. Sneak to the left of the net, hook with the whip in the appropriate place and reach the other section of the net. Go left until you reach the end of the net, jump on the floats you saw as soon as you entered. Go left, jump and reach the new part of the net. Sneak to the left. Once you reach the end, head down (be careful not to let go!) And jump to grab the pole. Swing to the last pole, climb to the top and collect the Bling above it. Arrive on the ledge and take the Midnight released by the purple-lit panel. Jump downstairs, walk between the vans, and whip out the security camera. Kill the Four Guards who will come towards you from the office. The only way out is one of the wagons. After the guards are nice you go, jump to the top of the wagons with the back-and-forth jump. From the left wagon, jump onto the mesh panel, hook onto the whip in the appropriate spot and push yourself over the ledge. Climb the wall and make the Bling yours. On the ledge, between the two columns there is a guard. Take it out, and use the back-and-forth jump to climb the column (look for a Midnight's Trail on a column). Jump to a small platform on the left. Walk in front of the mesh panel (on the side facing the building) and wait for the green vapor to stop escaping. Jump on the panel and climb it to the top. Wait as before for the green steam to stop coming out, and jump to the mesh panel on the building. Sneak to the right and drop down into the ventilation ducts. Go to the platform on the right. Wait again for the green steam to finish and jump over the tangle of wires. Climb it. Suddenly a guard on your right will start shooting at you from a window. Approach slowly, use the whip to hurl it underneath. Keep going up the fence, use the whip where possible to reach the other part of the fence. Another guard will start shooting at you from a window - treat him like the previous guard. Go left, grab the whip and jump to the next fence.
5. Perimeter of the establishment
Climb as far as you can, and head to the right. Use the whisk at the appropriate point to reach another section of the fence. Sneak to the right, and jump to the nearby platform. Walk to the end of the platform and jump onto the pole. Drop down to the bottom and jump to the lower platform. Take out the guard and go up the wall next to the pillar and grab the Bling. Climb up the column to return to the first platform. Use the poles to reach a column. Climb as high as possible, jump to another column. Repeat until you come to a small platform. Jump onto the vertical fence, and head to the left. Jump to the fence panel of the building and use the whip on the appropriate spot on the left. Take a good momentum (you should pick up a Bling during this stretch) and let yourself go to the other handhold for the whip. Try to give yourself enough push to get to the small platform and jump through the ventilation shaft. Go left and drop to the platform. A guard will break in from a window. Treat it like the previous ones thanks to your trusty whip. Once eliminated, jump to the wall near the window and look for a handle for the whip. Push yourself towards the L-shaped lattice and head left and then up. Jump onto some ventilation ducts and drop onto a small platform that hides a Bling. Sneak under the vents and return to the large platform at the start. Repeat the steps to get to the L-shaped lattice. Attach to the poles and swing to reach another lattice. Climb to the top and drop down into the ventilation shaft. Climb the wall and find a grip for the whip. Push yourself to the left to attach to another reticle. Head left to find another whip grip. Jump onto the lattice and climb it to the top. Wait for the gusts of green steam to wear off and come to the ledge. Walk along the platform until you come to a security door. Defeat the guards that will come out the door and destroy the camera. Climb the wall to the left of the door and climb up the ventilation ducts. When you get to the alacova with the bling, use the forward-backward jump to climb higher and grab another bling. Drop down into the lower shaft, go left onto the lower shaft and use the whip to collect a Bling. Go right and go up the shaft until you reach a balcony.
Checkpoint
----------
Save the game. Getting to the next Bling could be a complex. Use Hunt mode to figure out where the Bling is along the balcony on the left. There is a wall that separates you, but there is a fallen door that hangs from the balcony. You have to position yourself to jump from that door. The poor choice of camera angles doesn't help. If you fall you will have to make your way back through the security door. The advice is to reload the game instead of redoing the route. If you don't want to struggle and don't want to complete the game with the highest score, forget about this step and continue. Return to the main balcony, and go through the open doors. Follow the corridor until you have to go down into another corridor.
Checkpoint
----------
Continue along this path until you reach a large room. Defeat the guards and disable the security cameras. The exits in this room are behind panels on the walls. Look for the purple-lit panels, and use the whip on them. This way you can also kick the guards into them. Find the control panel with the three lights: red, yellow and green. Hit him: a barrel will crash into the central machinery. Go to the opposite side of the wall and hit the small control panel 3 times to move another barrel to the center of the room. Find the door you came through, and climb the wall nearby to make your own a Bling. Go to the opposite corner and climb the brick wall which is next to a lattice column. Climb to the top of the column, jump to the wall and pick up another bling. Jump to the column, and use the pole to reach a walkway. Jump to the top of these barrels you moved earlier and then onto a pole to get to the nearby fence. Sneak to the left and go down the walkway. Head to the end of the walkway and kick the barrel to move another large bin towards the center of the room. Swing on the pole and reach the top of the bin. Use the pole on the left to reach yet another fence on the wall.
Checkpoint
----------
In the next room, go down to the center, and walk down the corridor to reach the factory roof. Kill the guards and destroy the security cameras. Find the two large bins on the opposite side of the glass ceiling. Whip the panel next to the bins to move the bins forward and then use the panel again to blow them up.
5. Perimeter of the establishment
To the left of the bins, you will find the emergency exit in an alacova. Climb the wall to the left of the door and jump onto the walkway. Jump from the top of the wall to collect a Bling. Run along the runner and jump over the first bin. Jump to the wall and make the second Bling yours. Go down and go back to the runner. Jump back off the wall and grab the third Bling. Go back to the catwalk. Run along the walkway, climb the wall and jump onto another runner. Jump against the wall and pick up a Bling. Back on the runner run, jump to the pole, give yourself a push towards the platform and land on yet another walkway. Jump to the wall, collect the Bling, and return to the catwalk. Run along the walkway, jump on the pole, and push yourself to get to the platform. Jump to the wall and get the Bling. Jump to the next pole and swing to the catwalk. Wait for the steam to stop blowing and sneak past the vents. Keep walking down the walkway until there is a cutscene where you see the walkway give way below you. If from now on you fall down you will have to return to the starting point, climbing the fallen part. You will find yourself in front of a steam valve. Turn it with the whisk. Three poles will come out of the pipes next to you. Jump on the first one, climb it to the top, and do the same with the second. Once at the top jump to the platform and hit the valve. Jump back onto the pole, and drop down to the lowest pole. Swing to the new pole and jump to the platform. Hit the Valve. Repeat the sequence of the poles above to reach the last valve in the upper right. The boiler will fall through the glass ceiling and the level will end.
6. Hedare factory
Level objectives:
- 6 Mosse Wild Cat
- 2 Mosse Scaredy Cat
- 4 Moves Alley Cat
- 1 Mossa Pussycat
Shards of Bling: 11
Destroy the panel and enter the hole. Go to the control room on the left and use Hunt mode to see steps on the floor, describing the sequence you need to use to activate the control panel. Here you may encounter some guards - take care of them. First hit the panel near the door with the whip, and then the wooden panel furthest from the door. Then hit another panel, and finally the large panel on the side of the room. Carts full of boxes will start moving along a path in the main room. Return to the main room and wait for a wagon to be nearby to jump on it. Jump from wagon to wagon until you reach the far side of the room. If you fall, you can get back up thanks to the nearby ledge. There are two Bling Shards here, which you can collect as you jump from box to box. When you reach the bottom of the room, hit the panel to open the door.
Checkpoint
----------
Walk through the hall and hit the control panel to open the door. In this section there will be safety lasers crossing the room. You can run through it, but every time you cross one there will be guards. You can also turn off the lights so the guards don't see what's going on. If you want to fight the guards for a while, you can. Otherwise, avoid the lasers by crouching and jumping to get to the back of the room. On the right are several boxes and a security door with a control panel next to it. Grab one of the boxes with the whip and throw it at the control panel. The lasers will turn off and a door will open on the other side of the room. Go through the door, hit the control panel to move the crane near the pickup truck. Jump onto it, then onto the pole, push yourself towards the crane and climb onto the platform. Hit the control panel and return to the main room. On the wall you entered you will find a panel that hides a Midnight. Grab it, and head to the other side of the room. Climb the wall next to the boxes and jump onto the walkway. Jump to the platform and hit the control panel. Climb on the cartons with the boxes, climb the wall and jump to the platform. Climb the wall behind the platform. Use the whip to the left to get a Bling. Look for a grip for the whip on the right, push yourself to find another grip and try to get to the platform.
6. Hedare factory
Now comes the fun. From the top of the boxes, jump onto one of the moving bins. Stay on top and collect the Blinges you encounter. When you get close to the other track, jump to another bin. Now you have to be quick and jump from bin to bin to get to the other side. You can collect two more Blings if you have the foresight to jump and use the whip at the same time. If you fall you will have to go back and climb the wall behind you. When you're done, hit the control panel, go through the hall and hit the control panel to open the next door. The next room is filled with green laser beams. Green rays can hurt you, so don't go through them. First, climb the fence and sneak near the opening to get the Bling. Go down, jump the first laser, go under the second, jump the third, turn left, jump over the laser and hit the panel to open the door.
Checkpoint
----------
Proceed down the hall, hit the panel and go through the door.
Checkpoint
----------
You are in a control room above the warehouse floor. Control panels on the wall control a crane. The panel on the right moves the crane on a path, the one on the left rotates the boom. You will use the crane to jump over the holes in the next room. Hit the left and right panels twice. Go under the control room and go to the platform. Near the edge where you climbed to get onto the platform, climb the iron wall and jump up to get a Bling. Now stand in the direction of the crane and jump using the whip to grab onto its arm. Push yourself to get to the next platform and open the hatch. Jump downstairs, go back and go up to the control room. Now hit the left panel twice to position the crane for the second jump. Drop into the room, jump over the lasers and stand between the two platforms far from each other. Climb the left platform through the trap door you opened earlier. Climb the iron pipe on the edge of the platform and jump up to collect a Bling. Now use the crane to reach the other platform. If you don't want to collect the last Bling, please skip this paragraph. Open the hatch on the platform. Return to the control room, use the right panel twice and return to the platform. Use the crane to climb to the roof of the control room and collect the Bling. Exit the doors on the last platform. Climb the wall to the left of the green lasers and use the whip grip to walk over them. Hit the panel to open the door and finish the level.
7. Lands of the estate
Level objectives:
- 20 Mosse Wild Cat
- 6 Mosse Scaredy Cat
- 6 Moves Alley Cat
- 1 Mosse Pussycat
Shards of Bling: 13
The action resumes in the Hedare estate, which is a good thing: finally the background has a different color than usual. Run straight towards the main door of the Gymnasium (the large white building on the right). Climb the wall above the door, jump up and grab the whip to the pole. Give yourself a push, jump and grab the whip to the other pole. Try to land inside the garden (you will collect a Bling). Defeat the guard: if you don't throw him at the lighted electrical panel during the fight, hit him with your whip. The panel that hides a Midnight is located at the bottom of the wall, near the box. Open the gate and take care of the guards waiting for you outside. The exit routes are two large boxes near the off-road vehicle parked outside the gym. Jump onto the 4WD and then to the top of the trellis. Run all the way to find a Bling. Get out and take out the guards who will come for the off-road alarm. After they have passed away, kick the electrical panel in the garden, in front of the SUV. This will open a side door to the gym. Head there and enter. You will have to fight XNUMX guards inside a large gym, so have fun! After defeating them, a fifth guard will descend a ladder leaving the trap door open. Go up the stairs once you are defeated. Run down the balcony path and take out the two guards. Try to throw them against the glass windows: you will have to destroy them in every way so go for it. Once they are in place, hit the panel on the back wall three times to lower the board. Go back to the ground and climb on the crates near the bars. Jump to grab the pole, and push yourself towards the board. Head right, towards the center of the board and climb to the top. Jump and grab the pole, push yourself towards the Hedare sign. You can scale it like a normal lattice.
7. Lands of the estate
Climb the billboard to the right and jump inside to land on a balcony. Use the poles to get to another balcony. In the center of the ground, climb the wall and use the whip left and right to collect a Bling. Continue by opening the door. Go out on a porch, jump and grab the whip to the pole, swing until you get to a fence. Throw what you find in the toolbox at the generators until the door opens. Exit the fence and go through the gate. Climb the brick wall on the right and go down until you see the sky.
Checkpoint
----------
Climb on top of the boxes and go to the next room in the shed. Go up the other boxes and make your own two pieces of Bling. Go down, leave the shed and enter the gate in front of you.
Checkpoint
----------
Take out the two guards and throw them in the garbage cans to open the next gate. For now, ignore it and turn the corner. Climb the brick wall to the right of a park bench and jump to collect a Bling. At this point, enter the gate. As soon as you enter the gate, collect the two Blinges. Climb to the nearest wall and jump to collect them. Take care of the guard, and when he runs away the next gate will open. Before you go through it, go to the large porch and climb the wall to the right of the door. Make the Bling yours. Run through the gate, go down the stairs and take out the two guards by throwing them into the bins. Go through the next gate and take out the other two guards that come. The way out is on the ground floor in a small window. Run to the end of the garden, climb the brick wall to the left of where you collected the Bling, climb the brick column and make another Bling yours. Run to the end of the garden above and fight the guard (the way out is a window); Climb the wall with a Midnight's trail and jump left to get to the roof. Go up to the balcony and disarm the guard before you hit him and knock him off the roof. Jump over the bar to get to the roof and collect two Bling Shards using the whip. Return to the balcony, use the poles to reach another balcony.
8. Interior of the estate
Level objectives:
- 15 Mosse Wild Cat
- 4 Mosse Scaredy Cat
- 5 Moves Alley Cat
- 1 Mossa Pussycat
Shards of Bling: 10
You will start in a bed, and the doors will close. Use any object on the shelf, or open the minibar to pick up a bottle. Either way it knocks out the security camera beyond the next door. The door will open and a guard will break in. Push her into the box and a door below will open. Exit the room, turn left and approach the green lasers. Swipe between them to collect the first Bling. Go through the open doors on the opposite side and hit the left window to collect a Midnight.
Checkpoint
----------
Go down the hall and open the minibar. Throw a bottle at the security camera to open the library door. Enter and find a shelf with footprints lit up in purple. Hit it three times with the whip: a domino effect will occur that will cause an evening of bookstores to fall. The result will be the breaking of a glass door. Go through this door, pick up the Bling, and whip the purple lit book. A secret passage will open from which two guards will arrive. Take them out. Go through the secret passage, and make the Bling yours. Kick the table with the figurine to switch between the lasers. Open the round mini-bar, and throw bottles at the two security cameras and the electrical panel facing the wall. The lasers will start to turn on and off - when they turn off completely go through them. Go through the doors you will find once you go down the stairs. Hit the electrical panel so that the lasers turn on intermittently. Go back up the same stairs and hit the control panel to open the opposite door. If you go down the stairs the door will close. Then jump to the lattice panel on the wall.
8. Interior of the estate
Sneak left to the end of the panel, wait for the lasers to go off and jump to the screen. Head right, wait for the lasers to go off and jump to the nearby mesh panel. Head left, wait for the lasers to go out and go through the doors (always when the lasers go out, of course). Open the sphere-shaped minibar in the room and throw a bottle at the security camera. Go through the door into the bedroom. After the gas is released, go up the stairs, destroy the antiques showcase and toss the artwork to the opposite window. Go through the window and jump into the Koi Pond. Go to the opposite side of the pond and look for an electrical panel. Pick up a stone from the fountain and throw it against the panel. A path will open before you, and the water will electrify. Jump along the small platforms to the ground. Use the whip on the little dog to make your own bling. Climb the wall under the window you jumped from and jump to the pole. Swing between the pylons and go to the right. hit the machinery to pass. Jump off the pole and grab another trellis. Sneak to the left and jump to another pole. Make your way along the poles, stop just to collect the Bling and jump to another trellis. Go left, jump to the pole, and get to another trellis. Go left, getting the machinery out of the way. Be careful not to stand under them when you hit them, otherwise they will fall on you. At the end of the trellis, jump onto the central trellis and sneak to the right. Jump on the pole and push yourself towards the glass ceiling. After the scene, take out the guards by throwing them out the window and enter the next room which has many crystal sculptures that are lit in purple.
Checkpoint
----------
Walk through the glass door and use the whip to collect a Bling. Now hit each pedestal you find in the room with the crystals to make them rotate. Once the job is done they will no longer be illuminated. Once you are sure you have turned them all, hit the electrical panel. Watch the lasers destroy everything, buy the door that takes you to the next area.
Checkpoint
----------
You will now have to fight 3 waves of 5 guards at a time. The only advice is to disarm them first, and then hit them as you know. After the last wave, head to the balcony and jump down near the door to collect a Bling. Climb upstairs, stand in front of the candlestick and make your last Bling. Now go through the open doors on the balcony.
Checkpoint
----------
Now it's time for the first fight against Laurel Hedare. In this level she is a pretty poor opponent. With four hits you will beat it. Open the cabinet with the antiques to throw something more at him. The level ends when you finish the fight.
9. Building in ruins
Level objectives:
- 8 Moves Alley Cat
Shards of Bling: 15
As you can see from the objectives, there isn't much to do in this level aside from jumping, running and whipping. In fact it is quite difficult to describe this area, as it is quite chaotic. The level begins quite quietly, in the vicinity of an abandoned building. Go up the stairs on the opposite side from where you started the level, run along the platform and jump to the pole. Grab another pole, and try to get to a platform. Go left and grab the Midnight behind the panel next to the box. Jump back onto the pole, and reach the top pole. Climb to the top of the pole and jump to the platform. Go up the stairs and climb the small wall in front of you. Oh what a surprise! Laurel has hired snipers to take you out! You will pass the rest of the level under snipers, so try to move to avoid getting killed. While they are shooting at you, avoid using Hunt Mode. Essentially you will run blind. At the beginning of the level you will hear Catwoman say: "The roofs are my natural habitat". Never as in this level will it be true. The idea is to stay on top of the roof. There is a short path and one containing a fragment of Bling: coincidentally it is also the most difficult route. You will start from the top, so at least you will always be on the right path. Being there, at the top, is another matter. All platforms are targeted by snipers below you. There are long jumps to be made ... and all under fire. I will describe the way as best I can. If you fall, move forward until you find a point on the wall to climb. At that point, if you want the Bling, you can run back to the beginning of the trail to make it yours. Start by jumping from the ledge onto the wooden platform below. You will remain unconscious for a moment because it is a big leap. But keep pressing the jump button and get up. Head right as soon as you get acquainted. Keep moving, jump over the hole and grab the Bling. Run through the door and jump to the platform. Do you see the dark wood? It means that soon they will hit it and it will fall .... while you are on it. Jump again to reach the next ledge. Run through the door to find some peace and quiet. Don't fall! The lower part of this part is roughly where you entered. Exit the door which is at the top of the room, go down and climb the fence opposite.
Checkpoint
----------
You will be under fire again. Run through the door, down the small corridor and out of the courtyard.
Checkpoint
----------
You will have a long line of shelves to walk through. There are two bling fragments on the upper street; but they are really hard to take. The floor will be targeted from below as soon as you try to reach them, so you need to take your time. If you fall below you may find the path blocked at the end of the shelves. You just need to find a cave in the wall and use it to return to the top of the ledge.
9. Building in ruins
Checkpoint
----------
Run through the door, and once out on another shelf. Run and pick up another Bling (HOW MANY ARE THERE ???) and turn the corner. Eventually there will be another Bling; pick it up and jump to the pole. If you fall, when you reach the lower pole, use the whip to return to the higher pole. Push yourself with the whip to collect the Bling on the pole. Push yourself a bit through the poles until you get to the other shelf and grab another Bling. Turn the corner and run until you find a hole in the wall, thus collecting another Bling. If you fall, there is a fence that you can climb. Run across the room and look for another shelf. Run close to it and collect two new Bling's until you get inside a room. Don't fall! If this happens to you, you should go up the whole piece… Go through the doors and climb the fence.
Checkpoint
----------
This part is a bit complex. Go down until you find a rope walkway. The glass room looks inviting, but the roof will fall on your head if you jump into it. There are two Bling Shards to collect. Go ahead and jump to the roof of the room below, and drop to the road you came from. Go up the ramp and reach the platform, collecting a Bling. Climb the wall on the left and jump to the ledge of the glass room to get another Bling. Run to the bottom of the room and look for a ramp. Go up and about halfway up the second. Jump on the ledge to reach the lattice panel on the wall, and climb it to the top. Jump to the glass ceiling and keep jumping to prevent it from falling from under your feet while you are on it. Eventually there will be a Bling, so grab it while jumping onto a small platform. Immediately jump to the nearby platform and keep jumping (they will fall under your sweet weight). There is another Bling when you reach the wall at the end of the platforms. Climb down the wall, drop down the ledge on the right and jump over the hole to collect a Bling. Continue to the right, go down to a ledge and go down a ramp. Go ahead and make another Bling yours. Now go back to the branch and go forward on the ledge, climb the wall, jump the hole and climb the next wall to go back to where you went before. NB: if you fall before or onto the small platforms, you will return to this ramp and only collect the Blinges when you go back. Now continue to the right, climb the ledge jump onto the walkway and climb another ledge. This ends the hardest picture of the game (again in my opinion, of course!)
10. Theater
Level objectives:
- 25 Mosse Wild Cat
- 8 Mosse Scaredy Cat
- 4 Mosse lley Cat
- 1 Mosse Pussycat
Shards of Bling: 10
This level is pretty short - it only has one area and one end-of-level boss fight. BUT like anything short it's pretty complicated. Tap the light near you with the whip to turn it on. Climb the high panel and jump to a pole. Go around it and push yourself to a ledge. Hit the panel to release a Midnight, then jump back to the pole and swing to get a Bling. Go to the center of the room and hit another light to turn it on. Before the guards come to you, climb the stage panel, jump onto the pole and collect a Bling. Around there are some large fish and dragon heads. Use them for the guards… As soon as a guard comes from a small enclosed room in the corner, take them out and hit the control panel in that room. Climb the wall near the control panel and jump to the left to get on the elevator that just went down. From the platform, jump to the wall and grab the Bling. Return to the elevator platform. Swing through the poles to reach a walkway. Run along it, jump over the holes and defeat the guards that will come towards you until you reach the corner. Hit the hatch to open it to open a shortcut in case you fall. Go ahead and drop to get a Bling; retrace your steps. Swing between the poles until you reach a runner, grab the Bling and hit the control panel. Go back to the runner with the trap door and jump to the central walkway. Jump to the pole, and swing to the lighted platform. Go right and climb up the mesh panel. Sneak to the left, pick up the Bling and jump to reach another reticle on the wall. Go to the right, grab the whip at the predefined point and push yourself to the other panel. Sneak to the right and jump to the other panel. Go left and jump to the lit platform. You have to take the routing loops around the platform: go around the corner, jump over the hole, use the pole to cross the ditch, jump over the two holes and use a pole again to reach the runner near the wall.
10. Theater
Defeat the guards, go left, jump over the hole, hit the control panel, go up the elevator and hit the control panel again. Defeat the guards, head left, climb the wall and jump to collect a Bling. Go back to the right, go up the alacova to the platform, hit the control panel, jump to the fence above and grab yet another Bling. Drop down and jump to the pole in the center of the runner and swing to the lighted platform. Walk up, use the poles to get through the holes, go around the corner, jump on the fence panel, head left and get the Bling. Jump to the lattice, head right to another panel. Go left and drop to the platform. Go around the corner and use the poles to give yourself a push. Turn the corner again and use the poles to get to the runner near the wall. Defeat the two guards, go left, jump to the wall and climb it. Jump onto the catwalk to get a Bling. Head to the right side of the runner and exit the door marked "Exit".
Checkpoint
----------
After the cutscene, run down the hall until you reach the third boss, Tom Lone. Hit the lighted panels on the sides of the platform to make sure that some street lights fall. Use the lights to keep Lone away. When he reaches 50% health, press a button that will cause lights to fall in random places, so hurry ..
11. Hedare HQ
Level objectives:
- 15 Mosse Wild Cat
- 4 Mosse Scaredy Cat
- 8 Moves Alley Cat
- 1 Mossa Pussycat
Shards of Bling: 10
You'll start off by fighting three waves of models (yes, you read that right). First three, then four and finally five. The exit routes are near the elevator shaft. Take them out. After the third wave, climb the wall near the door the models used to enter and collect the Bling. On the opposite wall, climb to the top of the main entrance to collect another Bling. Go to the wall with the broken glass and climb it. Jump to the platform and jump to the wall to retrieve the Bling. Jump back to the platform and make your way between the posts to the wire fence. Climb up and then to the right; finally jump to the balcony. Kill the two models and take a walk on the balcony. Climb the wall, jump on the pole and make your way up to the platform. Be careful to stand on the edge of the platform and jump to the pole. Push yourself to the next platform and jump to the balcony. Kill the models and keep moving forward. Near the elevator break the glass and jump to the pole. Make your way up to the lattice panel and head left. Jump on the pole, get to the balcony and kill the models. Go right, jump to the panel with the HEDARE logo, jump to the other panel and then to the pole. Swing to a mesh panel and head left. Jump to another panel, sneak left, jump to the pole and get to the balcony. Defeat the model. Climb the wall to the right of the door and jump to collect the Bling. Walk left to the edge of the balcony, destroy the scenery and make the Midnight yours. Jump over to the HEDARE sign and get the Bling. Go through the elevator doors.
11. Hedare HQ
Checkpoint
----------
After the cutscene, run around the room until the snipers destroy a large block that will allow you to reach the purple-lit hook. There are bits of Bling on both walls. Climb them to collect them. There is another Bling on the wall to the right of the closet. Climb the concrete column and grab it. Once one of the blocks falls, climb the wall it fell from and whip the hook to release a runner and break the closet. Run through the door.
Checkpoint
----------
Stand between the two turbines and jump first on one and then on the other to reach the mesh panel next to the closet. Climb on the panel and drop down on the other side of the closet. Go through the door.
Checkpoint
----------
Laurel Hedare will continue to tease and shoot you… be careful, she has a good aim. You break the boxes on the opposite wall and look for a control panel. Hit him to make the lights go out and prevent Laurel from targeting you better. Run around and wait for her to drop a panel under her blows. Climb up, jump on the pole and climb up the ledge. Jump to the other poles and stop just to get the Bling. On the next ledge, break the stacks of cardboard boxes to reveal a toolbox. Grab an object and throw it at the light on the left. Keep moving forward once the light is off, and go down to the lowest level.
Checkpoint
----------
Jump to the net of the first turbine, jump to the other turbine and repeat until you are on the other side of the hole. Climb the wall and go through the door.
Checkpoint
----------
And here we go! final fight against Laurel Hedare. Hit the box with the cosmetics to find items to throw at her. When it reaches 50% health, the fight will move out, and a helicopter will start shooting at you, Hit the control panel on the wall to make objects fall to the ground, and keep moving looking for something to throw. against Laurel. It's a fun part because Laurel's hair will always change color! Well done, you are done Catwoman.
Chapter List
1. JEWELERY STORE
2. DISCHARGE
3. PARKING
4. SCENE 83
5. PERIMETER OF THE ESTABLISHMENT
6. FACTORY HEDARE
7. LANDS OF THE ESTATE
8. INTERIORS OF THE ESTATE
9. BUILDING IN RUIN
10. THEATER
11. HEDARE HQ
In this solution, we will refer to directions as "right", "left", "forward" and "backward". These directions take the screen as their reference point, not the character you control, that is Catwoman. Even if the camera angle is more or less fixed no matter what Catwoman is betting, the previous method is the most convenient for orienting you during a game.
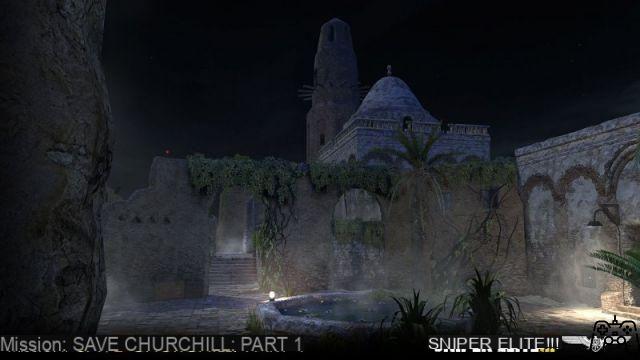
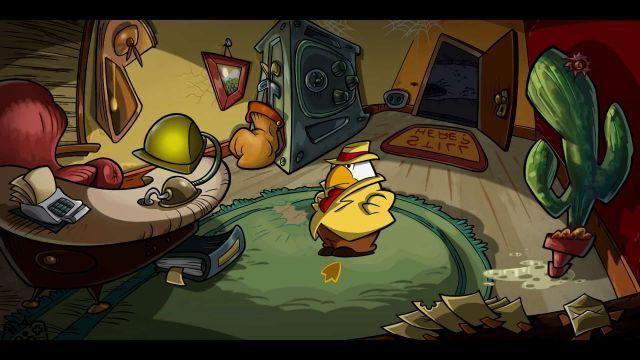
1. Jewelery shop
Level objectives:
- 4 mosse Wild Cat
- 2 mosse Scaredy Cat
- 2 moves Alley Cat
- 1 mossa Pussycat
Shards of Bling: 5
After a long cutscene, you will start on a balcony inside the jewelry store. This level, like the next one, is the game's tutorial. You will learn all the basic movements and to control as best you can CatwomanIf this is your first time playing this level, you will not be able to reach the Pussycat achievement, as you have not yet acquired the Pose or Taunt skills. While the level unfolds, you will not be able to use Hunt mode, and you will not be able to use your whip until you reach the second checkpoint. Start by running along the balcony, knocking the criminals out of the windows with a blow. Once another cutscene ends, you will encounter another criminal. Throw it against the cabinet near the wall and once you get inside the doors will open. After another cutscene, there will be another criminal. There will be another one up the stairs that will shoot you, so try to keep moving. Head past the candlestick on the ground, take out the thug waiting for you in front of another locker. Be careful: he is too far away from you, so wait for him to get up and hit him again. You will encounter another criminal, but when you knock him down, a rather long cutscene will start in which you will see the police arriving. After the cutscene, collect the Bling and then head to the opposite corner of the shop. Eliminate criminal through the door and enter the room.