Please note:
The solution is based on the American version of the game, so there may be differences for the Spanish version.
The Heretic
No interaction on this level.
Armory
In this level you will become familiar with your new onesie, you will get to know new characters and you will meet old ones. As soon as you finish the section, the Covenant attack will start.
Cairo Station
Grab an assault rifle and SMG from the wall and follow your teammates down the stairs.
Objective - To repel the onslaught of the Covenants
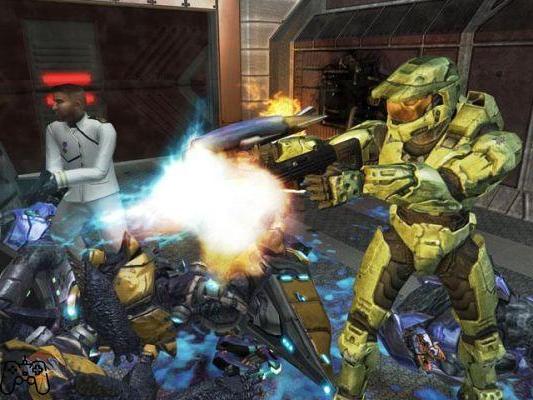
The first part of the game is pretty straightforward, nothing to worry about, you'll have to deal with a few groups of Covenants (a few Grunts and a handful of Elites). The larger area presents some more problems as the Covenant come from the rooms around and attack, therefore, from various sides. However, even here no problem if you use the turret next to the dead marine. Watch out for the stairs behind you on the right when you are at the turret as you could be attacked by an Elite from there. Go down to the marines and go left. Kill other Grunts and Elites and then go up the stairs. Arrive at the hangar where you will have to fight helping the marines already engaged against the Covenant. After the COM message will come another wave of enemies that must, of course, be shot down. Once this is done, go to the corridor they came from and follow it. You will arrive in an area controlled by Covenant. Take down the Grunt on the plasma turret first and then think of the others.
Objective - Find the Covenant bomb
You will start your searches from the lowest floor of the MAC WAREHOUSE. Be careful inside because you will find yourself fighting with Elite equipped with optical camouflage. When you hear a marine being killed on the stairs, be careful as there are three elites. Avoiding their shots in the narrow corridors of this area is not easy. The outside area is controlled by the Covenant and from the entrances come Grunt and Elite. Beware of the plasma turrets that you will find before and after climbing the stairs on the other side of the area. Proceed with caution and kill the enemies as they stand in front of you as, if you advance quickly, you will immediately find yourself surrounded. Climbing the stairs you will arrive outside the station and you will have to fight in 0 gravity. Your enemies, unfortunately, are prepared for the situation and have equipped the Elite with equipment that allows them to move nimbly without gravity. Go north. As a reference point, look for the sign on the ground that says SHIPPING. Enter when you have reached the door. Kill the enemies that stand in front of you. Take the downward elevator and go outside again. Kill the Elite in the plasma turret and then think of the others. Then go ahead and enter the door on the left. You found the bomb. Too bad it's heavily protected by the Covenant. Use the covers and grenades to disinfect the area.

Outskirts
After defeating the Covenant you will be given a new objective.
Objective - Defend the marines until help arrives
Typical defensive mission. Kill the waves of Covenant that come against you by remembering that blowing up a vehicle at them can do a lot of harm. Beware of the Covenant warship full of very bad turrets. After this phase, follow the instructions of the COM.
Objective - Meeting with the Pelican
Kill the Hunters who will attack you after the gate is destroyed. Try to keep them at a distance and get help from the marines.
Objective - Find the Marines of the second downed Pelican
In the next area, watch out for the snipers. When you arrive at the hotel, enter following the Marine. Hidden in the darkness, some Elite and Grunts await you. Once outside you will find yourself in a large area where a Phantom is coming. Go to the beach and get the Ghost.
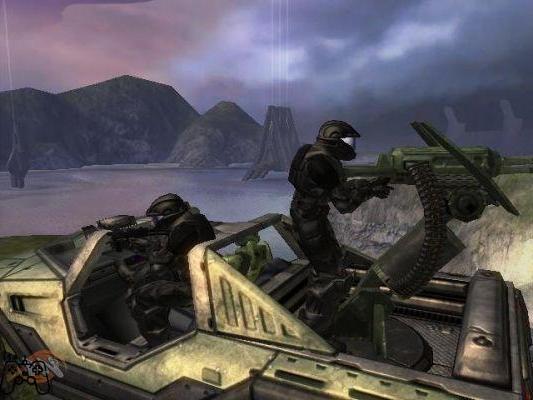
Objective - Destroy the Covenant along the coast
Use the Ghost to destroy the two opposing Ghosts. Advance along the coast destroying the Covenant fields. Watch out for snipers and plasma turrets. Along the way you will be joined by two marines and will receive a visit from a Phantom.
Objective - Take the highway tunnel towards the bridge
Go up the ramp to get to the highway. Follow it until you get to the bridge. You'll have to fight a lot along the way and you'll also encounter a Covenant transport vehicle, the Shadow.
Metropolis
Objective - Destroy the Covenant resistance on the bridge
Climb on the Scorpion and follow the bridge. Towards the end you will encounter two Wraith chariots, three Ghosts and four Banshees. Destroy the latter with the missile launcher that you can get from one of the marines. Then think about the rest of the gang.
Objective - Make your way to the surface Nothing else to do but fight in the tunnels that reach the surface. You will be helped by the marines.
Objective - Regroup with the marine forces in the center of the city
From the position you are in, do some healthy sniping. Get off and hang out with the Ghosts. Mount as a gunboat on the Warthog and let the marine lead. In the meantime, take care of the various Ghosts, snipers and Wraiths. On the way you will meet up with other reinforcements. Continue on your way until you collide with the two Wraiths. Once you have eliminated the beasts, enter the building.
Objective - Climb aboard and destroy the Scarab
To get on the Scarab you have to use one of the bridges below it. The Scarab is teeming with enemies, so be very careful and try to eliminate as many as possible from the decks. Once up, grab a heavy weapon from the table. Once the interior is cleared, go to the control panel to finish the mission.
The Arbiter
Objective - Locate the Heretic Leader
Follow your commander's advice to make life easier. Enter the facility by fighting against the usual Grunts and some Elite. Your group will support you heavily in order to make your life quite simple. In the hangar you will find more resistance and things will get complicated. After a first, vast, wave of enemies, you will be attacked by a second. After taking care of this too, go on and on to find more resistance. When you find the Heretic Leader, the Marrano will be fleeing on a Banshee. Take the other vehicle and chase it.
Objective - Pursue the Heretic Leader
An air assault! Nice. You will have good support. If your vehicle is damaged too much there is another one you can use. You must survive until another way is found to enter the facility. Obviously go there once it has been indicated to you. Clean up the area before entering.
The Oracle
Objective - Escape the haunted laboratory
Your allies won't be of much use to you in the lab. After the initial meeting proceed to the lobby. You will be immediately attacked and, as soon as you arrive on the platform, you will have to survive many waves of enemies that will arrive until you have reached the bottom. Go through the hall to get to an area with glass windows where you will hear fighting going on. You can wait for someone to win or get in the way. However, as soon as you open the door, be prepared for more waves of enemies. Throw a grenade as soon as you open it to reduce the problems.
Objective - Find the Heretic Leader
Once outside you will receive reinforcements. Advance and enter to find what you are looking for.
Objective - Cut the three cables holding the station
Reach the top of the station and cut the cables with your blade. Watch out for the Covenant resistance who will try to stop you. However, think about the cables first and then the enemies. For each cable it will take three strokes of the blade which, however, will not suck energy.
Objective - Pursue the Heretic Leader Take the elevator down to get to the bowels of the facility. You will find that you have to chase the Heretic Leader again aboard a Banshee. Once you reach the hangar, get ready for the fight.
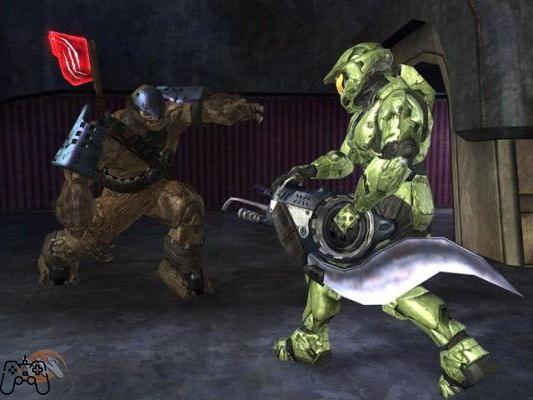
HERETIC LEADER
Beware of his holograms which really hurt. Destroy them all. When the Heretic Leader is left only he will charge you. Simply: kill him.
Delta halo
Objective - Clean the landing area for the Pelican
Neutralize the turrets. The closer you get to the temple, the more resistance you will encounter. Before the Pelican arrives you will collide with other enemies.
Objective - Extend the bridge to cross the chasm
Climb into the Warthog with two men and head into the hills. It is a narrow area for vehicle combat, but with the enemies that will appear in front of it, it is necessary to use it. As soon as you have extended the bridge you will get a Scorpion.
Objective - Advance through the ruins controlled by the Covenant
The ruins are spacious enough for you to move the Scorpion easily. Don't leave it as the place is teeming with Covenant. Go through the ruins making a massacre.
Objective - Reach the towers in the lake
Kill as many enemies as you can with the sniper rifle before being attacked by drones. There are a lot of ammunition and weapons around you. You can choose the ones you prefer. When you think you've cleared the area well, go under the ramp where many Covenants are waiting for you. Don't be scared and kill them all without getting stuck in the corners.
Regret
Objective - Make your way through the first set of towers
The hunt begins. While you are reloading you will be attacked by a swarm of drones. Keep advancing through the ruins by eliminating the various enemies. To get to each of the towers you will have to use a gondola to cross the ocean passing from one to the other. Before you can get on the first one, a Phantom will arrive and some Hunters will come down from it. After you kill them the gondola will come towards you. Press the button at the bottom to make it move. Objective - Stay on the gondola to the furthest of the towers
On the way to the tower you will be stopped by another gondola with Covenants on it. To start again you have to kill them all. On the first tower is a plasma turret with some snipers around it. Kill in the order you spot them. You will then enter the temple. Objective - Go through the submerged structures
When you start the first fight, be careful not to fall into the elevator in the center of the room. Before entering the elevator you have to clean it up. Once done, go down. After killing the Grunts you will arrive in a large badly lit room. In the shadows snipers and elites are hidden. After killing them you will be attacked by hunters. In the next room you will find disguised enemies. Take the next elevator. You will find more Grunts and Elite. Exit after killing the other enemies. Collect supplies.
Objective - Reach the main temple
There are Covenant troops along the ruins. Exterminate them and exterminate the next wave. Another ride on the gondola. The prophet is in the main temple. Eliminate the defenses. Before entering the temple make sure you have a missile launcher and a decent amount of ammo.
Objective - Kill the Prophet of Regret and escape
PROPHET OF REGRET
To damage the Prophet you must be able to get close to it. Watch out for his beam and watch out for the Covenants who come to give him support until you kill him. Wait for him to shoot, then approach, and climb into his chair. Use the blade to do more damage.
Sacred Icon
Objective - To weaken the containment shield
At first the structure will be poorly defended. Go ahead and activate the pistons to be able to descend. You will get to know the Sentinels. They will keep attacking you until you destroy the panel on the wall. You can only destroy them when they are open. Once this is done, activate the next piston and move on. Kill the new sentries and cross the bridge. Continue like this for all pistons.
Objective - Upgrade the two absorbers to weaken the containment shield
In the center of the room is a new enemy called "Enforcer". He is protected by a shield up front, so use your strafe to dodge his blows until he drops the shield, then attack! Keep going until you destroy it. Once this is done, complete your goal.
Objective - Make your way along the haunted wall
Kill the new Enforcer and Sentinels and go through the large hole in the wall. In the next area you can choose whether to run away or join the fighting. The piston you need to activate is at the end of the room. Enemies will come in endless waves. Fight us only what is necessary and keep using the various pistons. When you get to the outside you will have to deal with another Enforcer who, soon, will be busy doing something else. Look for another piston. You are back inside. Keep activating the pistons as fast as you can. When you get to a dark conduit you will have arrived.
Objective - Meet with your allies at the Covenant Camp
Eliminate all enemies along with your allies.
Quarantine zone
Objective - Go through the quarantine area to the library
Choose a vehicle that allows you to have more support from your troops and go. An Enforce will arrive along with some Sentinels before you can advance. You shouldn't have any problems getting rid of it. Come in. You will find yourself in a large-scale battle, be very careful and above all try to make some of your allies survive. Don't stop in the room except to fight. Narrow passages are uncomfortable for vehicles but provide excellent coverage. Watch out for a tank on the left that fires shots that are not too precise. Once you have done your work, go to the tunnel. As soon as you pass it you will be attacked from behind and a very annoying Enforcer is placed at a certain distance. Reach the area below him but be prepared to fend off attacks from all sides and watch out for the cliff. From now on, you don't need to kill all the enemies. Except in case you need ammo, try to avoid the fight. As soon as you pass one of the two arches you will find three tanks in the distance that seem not to care about you and three Enforcers. Destroy the nearest Enforcer first, then switch to the tanks that have activated against you and then destroy the other Enforcers. Enter the tunnel full of debris. Once outside you will be attacked by a Ghost and a Covenant armed with missile launchers and with a hellish aim. Back off into the tunnel and use a sniper weapon against the missile launcher. When you are done you will have to think of the enemies on the other side of the bridge, including another one armed with a missile launcher. Go through the cave on the left. You will be attacked by Ghosts and Sentinels. Upon exiting, you will encounter other Sentinels, an Enforcer and two Tanks. From this moment on you will have to proceed on foot. Get to the other side of the crater. Watch the clashes from the balcony, stock up on weapons before continuing (the corpses in the hall are for you). As soon as you enter the room you will find that it is teeming with enemies. Run to the tunnel on the other side avoiding a fight so as not to take too much damage. You will find an Enforcer in front of you. You know what to do. Exit through the cave on the right. As soon as you enter you will be charged by the enemies.
Objective - Connect with the leader of the Spec-Ops and cross the barricade
Crawl into the next area as best you can. When you arrive in the tunnel full of crates be prepared to be attacked from the front and from the back. In the next area you will find a Warthog, a Ghost and an Enforcer. Try to throw at least one over the cliff to save some time. Continue by taking out other enemies, including many tanks and Enforcers. Approach the building and kill the many Ghosts. You must be able to enter by paying attention to the attacks of the enemies and the turrets placed in the building itself. Once inside go to the center.
Objective - Find the Sacred Icon
Wait, don't shoot the enemies on the edge. The rule is to make them come towards you. You will be attacked from all directions. Your only goal is to survive. Once you arrive, exit to the right.
Gravemind
Objective - Locate the Prophet of Truth and the Index
Collect the best weapons from corpses. Walk to the end of the room. You will be attacked from behind. Use cover properly and don't mess with these new enemies. Do what the woman says. And go through the doors. Get ready to fight continuously from here to the outside. Beware of a plasma turret. In the next area you will fight long range and get a new weapon.
Objective - Rescue the Marines held captive
Fight through the halls below. You have to rescue two groups of marines. After doing this, go back to where you came from. You will find a welcoming committee that you will need to take care of.
Objective - Follow the Prophet of Truth to the furthest tower
Get ready for a long sword and grenade battle. Watch out for the Hunters in a small area that could prove fatal. You will come to a canyon with various fights going on. Kill the Jackal near you and take his shotgun. Take out the snipers and then the other enemies. Make your way to the door beyond the canyon. Enter and fight until you get to the tower.
Objective - Stop the Prophet of Truth that is boarding his Phantom
You will reach another canyon. After clearing the area you will be attacked by various disguised elites. Before the mausoleum you will have to travel a long road full of clashes between the two species. In the next room there will be one of the most beautiful battles in the game. We do not reveal anything to you. Just be careful not to die.
Uprising
Objective - Defend yourself from the Brutes
Go through the forest with great caution. There are dangers at every step, that is, the enemies are really very many and they will attack you at every step. When you reach the top, near the door, you will meet with your followers.
Objective - Take revenge on the traitorous Brutes
Come in. The path is full of Brutes and Jackals. Pay attention especially to the first ones when they go to Berserk. First you will meet the Jackalls, the Brutes on the floor below. You need the sword or you are unlikely to survive. At the bottom you will find a team of Brutes. Later a room with a turret and other enemies. Destroy the turret first. Keep using the sword. After a few more fights you will find yourself outside. Climb aboard the Ghost and return the favor. In the next area the vehicles will be essential, but every now and then you will have to go down to take care of the snipers hidden in places that the Ghosts cannot reach. You will come to a building controlled by Brute, Jackal and two chariots.
Objective - Destroy the Brute camp
Kill the enemies, get into one of the chariots or destroy them while keeping your distance. When you are near the door, watch out for the wave of Brute. Enter this kind of armory and grab what you need while balancing between medium and long range weapons. When you come to a narrow cave you will have to see it with some Brutes. Go through the door.
High Charity
The return of an old threat. Kill as many enemies as possible before Flood gets close to you. Remember that it is not necessary to kill everyone anyway. This is the only section of the game where the flashlight can be useful as you need to have as clear a view as possible. Repeat with us: our sword is our best friend here. Also give it a name. Follow your goal by killing enemies ... a very simple mission to explain.
The great journey
Objective - Kill any Brute in your way
Advance, take the Wraith and destroy the Ghosts mercilessly. Go under the Scarab. To your left are two Wraiths and meanwhile a Phantom will start attacking you from behind before releasing his load. After cleaning, go inside.
Objective - Scarab
After a short way you will reach a room full of Brutes and with a plasma cannon. Clean it up and advance to the connecting bridges. While your companions attack the enemies, outflank them and kill the Brute at the turret. So cover your allies. Quickly kill the backup snipers if you still want to have a team. The next bridge is held by several Jackals and a Phantom. Once you reach the other side you will be attacked by a swarm of drones. Enter and pass the cells that cannot be opened or destroyed. You'll find Jackal on the second floor and lots of Brutes on the base. Also get ready for other Brutes. Outside you will find some Brutes in front of Scarab.
Objective - Escort Johnson's Scarab to the Command Room
Grab a Banshee and start taking out the Waraith and Specters in the area. Beware of the latter that can tear you apart with a single blow. At the top of the canyon, along the edges are a couple of plasma cannons and the closer you get to the Command Room the more Banshees will increase. When the Scarab has broken through, go through it.
Objective - Enter the Command Room and deal with Tartarus
Check it out first with a sea of Brutes. Depending on the weapon you are holding, this section can be easy or difficult. Once you have overcome the obstacle you can get to the Command Room. Once inside you will find the last obstacle ...
TARTARUS
Tartarus destroys everything in one hit and is also immune to all weapons when his shield is activated. Wait for your ally who will destroy the shield with his weapon, it will take a few hits. Then hit Tartarus as fast and as hard as you can. Shoot until the aura reappears. Repeat until you kill him.
Video of the solution - First part