


Please note:
The solution is based on the US version of the game.
Gonna Drown!
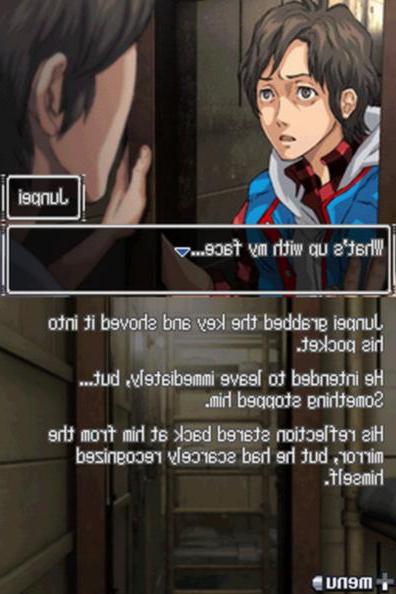
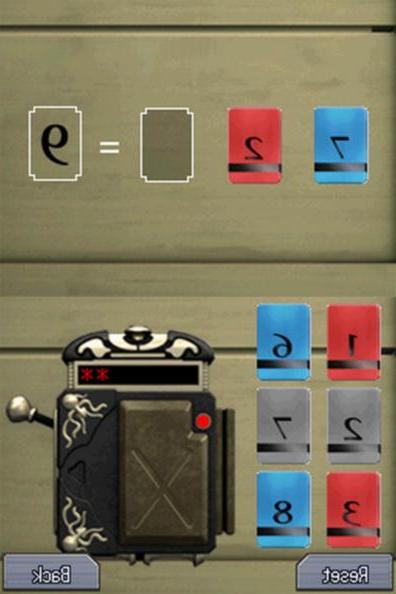
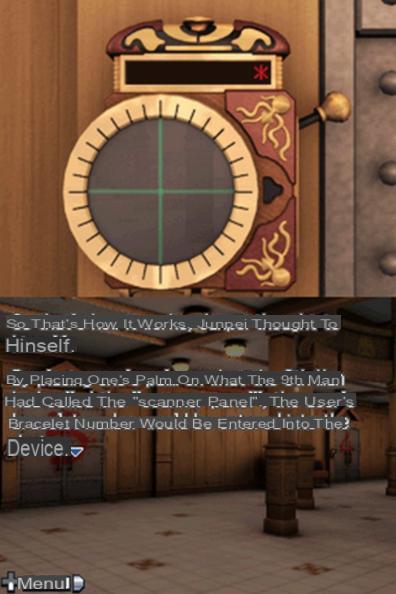
At the start of this new game, immediately click on the sink and pull the note from the top of the table; this has four triangles, two red and two blue. Now go ahead and grab the image below. Press the down arrow then go right to get to a kettle; open it and you will find a blue key. Open the stove below it and you will get a screwdriver that will combine with the image you found earlier. Go back out until you see a door; check at the bottom of the bed and then under the pillow, where you will find another note. Go back to the front of the door and hit the left side to get a red key; there will also be a Junpei cutscene right after. By comparing the notes on the back of the image, you will get the solution of the briefcase lock. The red triangles for the red case and blue for the blue case; so the solution is cut in half between the two notes and you just have to combine them. Now go back to the beds and click on the briefcase. Open it with the blue key, then enter the code 0263. You will be given a magnetic card with a six, seven and eight on it and you will be told something about the fingerprints. Hit the wall above the kettle to find a red briefcase and insert the red key, then enter the code 7485. Now you will get a magnetic card with one, two and three. Time to get to the door and try both sets of keys and then enter code six, seven and one.
Door 4
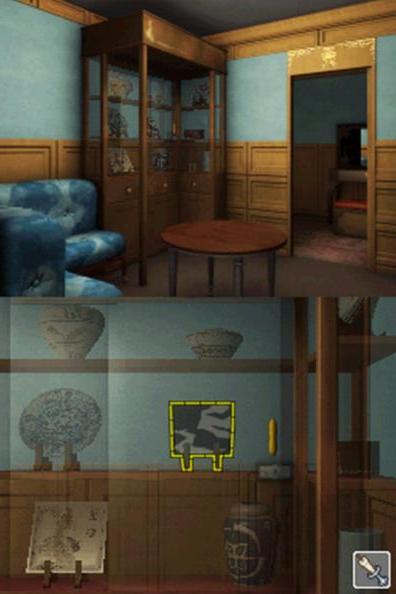
Walk around the room a bit. You can talk to June for a bit and then enter through the door you see there and then hit the picture on the wall. You will then get the map and the map menu. It is now convenient to play June together, as her conversation is interesting. After the conversation, go around a bit and open the cupboard where you will find a key. Now you can go out and go to the Lotus room. You will notice the abstract art right away. Take the candle near the table and combine it with matches to then enter the open room. Use the cupboard key to open another cupboard and earn dishes. Then go to the bed and grab the curtain. Eventually the candle will burn out and you can then take the key out of the candlestick, which will allow you to open the display case and grab a plate. Eventually, Santa will offer you a bookmark and accepting it is necessary to get to the true ending. Remember that these dialogue options are very important. Move down the corridor and enter another room you find there. Take the curtain and hang it on top. Now go to the bathroom in the other room and hit the tile in the other bathroom shown, where you will have the last plate. Exit and look at the photo before releasing it to go to another frame to compare the images. After that you will get a key and a conversation. Now go to the kitchen and click on the tile for a reference. Behind the service table, you will find a sink and next to it there will be a stone. Go left from here and enter the door. Remove the cloth and open the chest to find a knife; combine it with the sink. Then move the central cheese to obtain the cooking oil. Throw it at the bolted door and untie it. The cooler is open and as soon as you enter, you will be trapped. Open the large door to get the frozen chicken and dry ice. When you pick up the ice from the net you will surely want to know why it won't melt. Hit the shelves to get some pork; Then check the floor for a rope and a bottle. Once this is done, turn to the door, combine the dry ice and the chicken, and then crush the dry ice and the water bottle. Then combine the bottle with the rope, drag the bottle and push the door to exit. Go to the grill and place the meat, then cut it with the knife. The card will give you a start to open the lock (enter 43). Grab the Saturn key and use it to exit.
Door 5
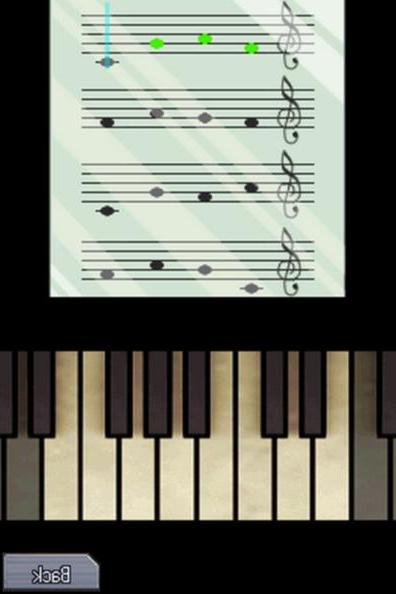
Look under the pillow of the bed and you will find a sheet of music with notes. In the same room, look up the floor to find a naval map that will allow you to access the map screen. Go to the doors and open the one on the right and then approach the cabinet. You will get points. Open the door on the left and then open the one in the distance to get to another room. Turn around until you find a vase; head to where you came from and then enter the door on the right. Enter the closest one and you will be in the bathroom. Fill the jar with water and unplug the drain to get a plate. Go back to the fire and put it out again. Open the door on the left here, then go inside and open the cabinet to get another plate. Return to the piano and hit the rates in the following order: 3, 4, 5, 6,3, 5, 4, 3,4, 3, 5, 6,6, 5, 4, 3. Do you recognize the melody? After exiting, you will be stuck in another room. Check the table in front of you to find five cards ... Hit the bar and look at the counter for the seven cards. Under the glasses is the fourth card. Go back outside and head to the fireplace. On the mantle is the sixth card. Turn on both lights to see a Club, Diamond and Heart. Look under the mantle to see a handbag. Insert a coin in the center of the slot machine and hit the buttons in this order: Club, Diamond, Heart. You can get a Venus key and the second card. Now look around to find the baccarat table to find the third card. Seven will say something about the blue part on the table. He will explain the rules of the game to you when you hit that part. Play and insert cards two, three and four. Ask for the eight card as a reward. Head to the white thing on the wall near the slot. Insert the eight card into the slot itself and place the remaining cards in the new slot that will open. Now you can leave.
Door 3
Go immediately to the right and look in the garbage above for luminol and toilet paper. Look for a screwdriver in the central box. The first stall has a bucket and a broom; the container of the third stall has a red key. Turn right and then hit the small thermometer. Go through the showers and turn them on; you can open the thermometer to find a piece of paper and then fill the bucket. go to LLR and spray the luminol; you will see LLR and then LRL after turning off the lights. Go back to the shower and open the small door and then arrange the valves in this way. Turn left and open the drain to find the Mercury key card. Combine the broom with toilet paper; open the toilet tank and use hot water to flush. From all the clues you found 957 + 634 + 185 = 1776. At the door, enter the key card and then the number. Now you can go out and there will be door two for you.
Door 7
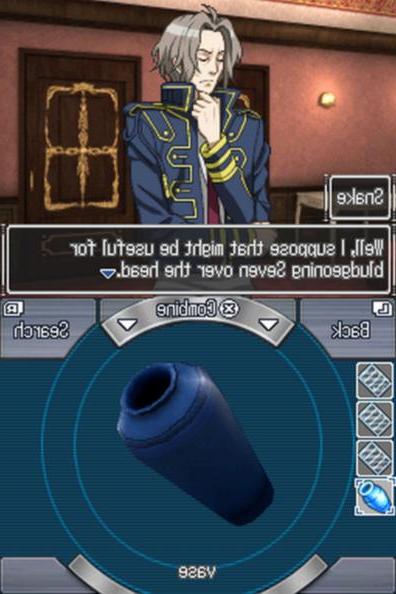
Now when you get here, you will find a doll that has a name. Here you will find John and Lucy; next to Lucy is a table with scissors just above it. Go right from there and there is a fake box on the board. To the left of the original doll is a mannequin from which you can grab the lungs with scissors. Go to the table and take the scalpel to combine it with the lung. This will allow you to obtain an organ key. Go right behind the curtains and open the door. There will be a note on the table, some red liquid and some blue liquid. The note is about the number of atoms in each compound and the missing ones are the combination. Enter 349 in the safe to get your right arm and heart. Seven will speak to you the moment EDT left. You tell him about ice-9 and he will tell you about All-ice. This is important for the true ending. You will have a part of the conversation if you have passed by door five. Now go left behind the curtains and use the key. Inside the room, open the drawer to find the medicine notes. Take a look at the table and then turn on the light and pour in the red liquid. Go back outside, look to the right and open the red door to find a leg. Do it again for the blue and purple one to get the other leg and a stomach. Go back to Lucy and there will be a time exchange. Jhon is 51.3, Lucy is 53.2. Reverse everything but the hearts and then focus on John. You will thus obtain the key of Jupiter. Try to open the door and Clover will vanish. Give her the bookmark that was given to you by Santa. Again, door five will have a similar scene, but you will miss the important bookmark.
Door 8
On the left side of the doors is a car; look to the right to get a power cord. Take it to the computer monitor and now you can see where Clover is. Hit the object near the mannequin to start a conversation about the power cord. Go to the bars to get the 2-Prong plug. Put the plugs together and take them to the monitor. After a cutscene, you will come to a puzzle and have to hit the lockers in a certain way. Once this is done, take the activation key and go to the car. There will be nine monitors to play with. You will gain power for the area below; click at the top of the screen a couple of times to start a fire. This will allow you to open the door.
Door 1
On the desk you will find a stack of nautical charts. Turn the map on the wall to find a new file and then tap the books to find more. Open the desk to find a clock. Ace will now appear and you will have a conversation with Clover. SS is the only combination that will be added. Go through the door and then turn into the second room, where first you have to hit the compass. Follow the order: South, West, Southwest, Northwest, East, North. A handle will appear and use it on the device on the left. Go up to the displays with the clock and it will tell you that it will be 10 seconds after three o'clock. Now go through the door that was locked. Hit the radio on the bedside table and then also the stuff on the desk. Open the drawer to find a new file and Zero will be shown to you on the screen. After hitting the screens, you should have a single conversation with Clover that will be about the captain. Otherwise you will be well on your way to a fun ending. Now go to the other room and on the desk in front of you you will find some screwdrivers. These will combine with the radio and you will get a cylinder. Open the drawer to get some ink and then turn the counter. Open everything until you find some paper and then combine the ink with the cylinder, then the cylinder with the paper. The game will allow you to go to the telegraph and enter the pattern. Open the drawer for Allice, where there will be the Uranus key card and a unique key. Go towards the lock, insert the key and then insert the value 35,14,27,24 which will then be converted from Zero to hexadecimal values. Now you will find a text different from Allice's book. If you don't qualify for the true ending, there will be a bad ending. If not, there will be a different conversation with Clover and you will go to door nine. To get the answers you need, do right, left, right, left, right, left.
Door 2
Once here we might as well start with the door on the right in front of you. Turn the handle and enter the toilet. Touch the toilet paper and then the paper holder, then join it with the handle and make a screwdriver. Go to the desk where you will find some screws. In the second room you will find a towel on the bed. Go around the desk and take the drawer then replace with the one from the first door. Now combine the screwdriver and drawer and take the knob from the sink. Go from the first door to the tile. Door number 3 is dark. Touch the mirror and you will be allowed to reflect the light around, so you can see 4 and 7, the sun and the moon and the other symbols in the toilet. Go to door 2 seven times, door 1 four times and go back to door 3 to open the drawer and get the tiles. Door 4 says "emergencies". The third toilet has above the tip E = 14, which is a hex conversion. The tiles have 14 written on them and then replace the E in "emergencies" with the tiles and that's it. There will be a green thing next to the chair, hit the bottom right, top left and then the left button. The bloody cloth has a key on the top. Under the walkway there is something circular. Use the key and you will get the Sun key. Pull the right lever on the machine and an EDBF will appear. You will already need to know what you are going to hit and then use the Sun key to unlock the locks on the chair. Both must be on one side of the head. On the other hand, only one should be on. Now you can go out; as you will notice this is the only door that has a guaranteed ending.
Door 6
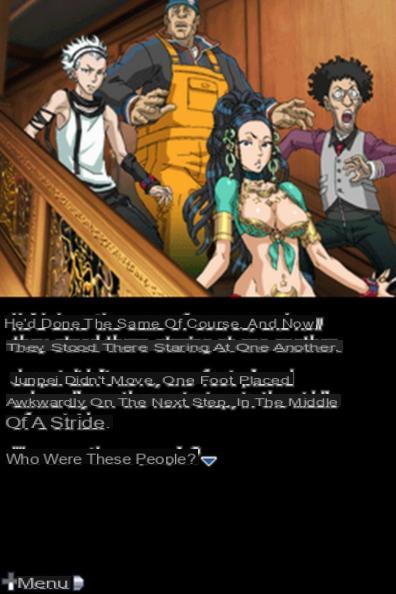
You will start in front of something with a small door. This will have a slot to allow you to put something inside. Either way, turn around until you see something that looks like a ladder. Go up and you will come to four cursors. Keep going until you find a wheel with an A on it and go further. From there go over a B. Turn the wheel until you see the B. Go back through the door and go through the C. You can operate a winch with the wheel you just got. It is below you now. You should now have some text regarding June and Rats. Go back through door C and A. Next to the car at the beginning is a box. Take the control panel inside towards the small door. Perfect, the conveyor belt will move. Get the coal box now. Look at the corridor and hit the circles on the wall. You can put the coal there and then go to the four sliders to light the coal. You will have to check three gears to get some discs. Then go to the thing that will operate the door lock. The gold disc goes on the bottom left, the bronze disc on the bottom right and the silver disc on the top. Now line up the red lines to open the door. You will now be launched towards a new puzzle. Hit the boxes in front of you and claim the contents of the bags. Open the other bags to get a Sant card. On the left will be the Clover and Snake cards. Open the box to find the Ace card. Turn to the other side of the room to find the Seven card. Hit the blue boxes to get Lotus and then the big boxes to find Junpei and June. Go back to the blue numbered boxes and after reading a bit, Junpei will open them. You will thus get in the pin numbers. At the top of the stairs, enter the pin numbers into the machine in the following order: 712, 713, 914, 913, 345, 854, 862, 456. The hatch will open and reveal an F. You will then need to convert the F value to 15 hex. . Then insert other pins in this order: 8, 1, 6, 3, 5, 7, 4, 9, 2. Now do up, down and a diagonal combo all equal to 15. This will allow you to unlock a puzzle. After unlocking it, go to the enclosure below, climb up on the crates and take a look at Coffin. Use the Rusty key and see for yourself: it's not a body. Take the key to the upstairs door and open it. The left hand is on the left and therefore you will understand if you are on the right pass.
Door 9
Go ahead and click on the note on the table in front of you and then hit the lower right part of the book. Hit the wall next to it and you will find a light bulb. Turn right and hit the lower right part again to find a book. Face the iron door and hit the right side and center. From the table, go left and look for the books in the upper left where there will also be a light bulb. Go down, from the yellow pit, turn twice now and touch the left side of the books. Look for a new book at the bottom right. Face the yellow again and hit the empty part of the wall to the left and enter the code 632415 on the lock and, in the lower part of the shelves, you will find a light bulb. Go back to the hole and put the light bulb first and then the books. After the grenade, go right twice from the pit and hit the books. Bottom right is Shelldrake, go through the fifth passage and watch things move. Then go up to the center of the new doors as well. The numbers will be as follows: XIII, XIV, X, XII and you will need to convert them to hexadecimal. Enter and open the door on the right. Grab the yellow card to get a new file. Turn left and go to the car. Clover will give you a piece of paper on which you will need to enter a code. You will now get the cross emblem from the right side of the car. This machine is very similar to the morse code machine, so be careful not to confuse them. Go to the left of the car, open the double doors to get a new file. Go right once more and go to the car on the left. The puzzle should be familiar and you will need the map. Claim the Helm Emblem from the machine now. Then hit the machine in the middle and insert the ice. Get the Emblem code and go back. Go to the hatch on the back of the screen, open the coffin to get the Neptune key and the Coffin Emblem. Now hit the trio of monitors on the right so you can see the back. Under the keyboard you will find the identity of the captain and among other things also the magnetic card to then go to Neptune. Now you will have to solve the last puzzle which consists of a sudoku puzzle. Solved the sudoku, you will have really finished the game and enjoy these last moments.
Video - Game Trailer


