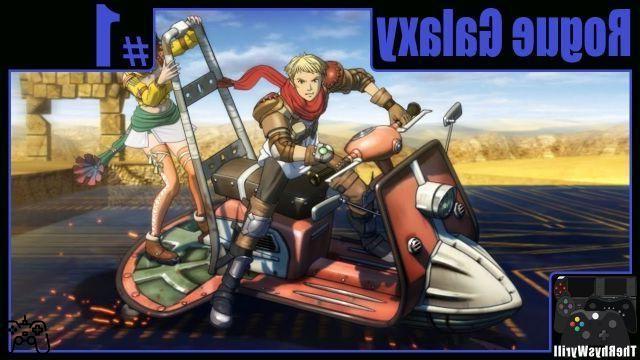
CHAPTER 1
You will have to fight against monsters to take control of the controls. Then enter the church, take the items, then go to the transporter. Save, and take the upper path once you get to the intersection. You will not be able to open one of the items before getting the Star Key. Proceed by taking another item in the house. Climb the ladder, taking the next item. Cross the broken bridge. Kill the two giants. Symon and Steve will join your party. Pick up the items in the house, then on to the next transporter. At the end of the corridor you can jump onto the metal boxes and then onto the pipe. Grab the item box, then go ahead, save and continue towards the gate.
Boss: Salamander Type 8
Destroy his legs, then you can hit his weak spot until the blue panels are destroyed. Have Jestar put up his Monograph shot. Shoot again. Then have Jestar attack the monster, on the head. If you own the Flash Sword, use it. Then go to the church talking to Raul. Explore the town. Pick up the items next to the next transporter. Once in the residential area, you can track down 3 more. If you avoid talking to Katahari you can continue exploring the northern part. There are five other objects at the port. Once ready, go back to the residential area and talk to Katahari. Choose the first option.
CHAPTER 2
Save, then go to Steve. Enter north, exit to the bridge, fight with monsters. Kisara and Zegram will join you. Use the platform on the harbor to get off. Take a box of items. Keep going to get two more. Go down the river, then take either east or west, it's the same. Proceed to the house to the west. Get the Power Glove from Firio. Go back to the north gate. Enter the "Thinking Circle" and use the Power Glove to proceed forward. Take the other two boxes, then towards the river, take the path that leads to the transporter. Back, and West, take the first item that comes your way.
Continue west, then go down the ramp and take the Bomb. Go back to the Thinking Circile, then move on to find another box of items. Continue east, take the boxes next to the transporter. Advance going north from the intersection. Continue on, finding another box of items. Go down the ramp, get the bomb from Dario. Use the bomb at the "Thinking Circle". At the intersection, east to get items, and north to progress through the game. Other Mimic nearby. Meet with Fable to get the collection cage 1, the protective cage and the sanchez fruit. They are used to catch insects. Continue to the village. Go back to the intersection. Go east. Savalte, then enter the swamp.
BOSS: MAD WUPER
You will not be able to use Kisara, but you will have Ruruka as a new member. Shoot from distate first. Use the Flash Sword with Jestar in case he gets close to you. Continue to heal yourself. Continue on to find Mazel. You will soon arrive at the Ridge Crusher. Go back to the village.
CHAPTER 3
Go up to the upper floors of the house to find various items. Go up the stairs to the upper level of the village. You will find the shop and the boss's house. Talk to him. At night, head back down to the lower right house taking the map as the focal point. Then, the next day, look for Ruruka and Millie at the lower left path. You will come to an intersection. Go north. At the ship, take the Broken Freeze Shot. Save your game and go to the Transporter. Explore. Then south, at the intersection along the river. Go past the transporter, then Sherio will start fixing the Broken Freeze Shot. Grab the items, and go back to the previous intersection. West got to the map. Grab the box of items near the shop. Use the Freeze Shot, then grab the item box. Swim to the other side and grab the item box. Zegram will walk away from your party. Save, the boss awaits you.
INDIVIDUALS
Use the Freeze Shot as your primary weapon. The Flash Sword is another one available. When it starts moving again, start freezing it again. Ruruka will then join you. Repeat it all until his death.
CHAPTER 4
Ruruka and Symon will join the party. Collect all the boxes in the Dorgen Ark area. Then two more at Universal Harbor. Back on the street, continue to the shop. Go west on the map and grab another item. West, following the path, there are three objects, then east, then others, then climb up to the Insectron Hall, where you can find yourself with Fable. Back in the middle of the road, go North. East, two more boxes to take. Enter the Galaxy Corporation to the north. Save the game, then you are boxed. You will return to the prison. Talk to the prisoner. So east, then down to the elevator. Third level of the prison. Look for the red door, then to the item boxes. In the second area there should be another box. Near the door, there should be a shop and a transporter. After the fight, go ahead, take the item. Head to the red door. Use the Prison Barrier Key, and enter the next section. Enter the red door using the key, then forward. Climb up towards the left side of the map. Enter the doors, take the elevator. Second level, shop. Two doors, of which the south leads to the map which leads to four boxes. Then to SE another, in the middle level. In the short pass there are other boxes. The right one is the EV startup Chip. Use it on the Thinking Circle to access the elevator. First level, save. Enter the door, then take the item box, then enter the doors. Top level now, then to the top. Here you will find the Prison Barrier Key. Near the door, a Thinking Circle. Save the game. Get off, then take the passage to the right. Go up, then take the chip. You will have to use it on the usual Thinking Circle. Save your game, and use the elevator. Continue on the path until you come to another conveyor belt. Enter the room at the end to fight a boss.
BOSS: Rose Custer
Don't get too close, use the Second Weapon. Watch out for his missile. Move and heal frequently. Finish him off once his HP is low enough. Before returning to the central road, turn around and walk back to Rozen Custer Prison. A conveyor belt and two objects will be waiting for you.
CHAPTER 5
Meet with Chie and Miyoko. Then go to the Galaxy Corporation, then go back to the central road. Head East. At the Star Ship Factory, get the two items. You can go back to the Rozen Custer Prison through the entrance. Enter the Star Ship Factory now, drop down for a quick fight. Then enter. Two paths, which join another area. There is also a box that contains a factory key. Jump to the platforms then go southeast. Before that, go northeast. Then use the Factor Key in the Thinking Circle. Go through the door, then you will have to go through two paths. Towards the bottom right is the optimal choice. Now in the room to save the game. Jump down, then lift to get the Earth Key. Go back to the lower level. Search the upper right for two items, then enter the upper right door to advance. At the next section, save, and wait for the fight. You will be in Pokaccho's room. Go out and save the game at the transporter. Then proceed east. Save again. Take the item box, then the elevator. Southwest, then back in the middle, then to the second platform, Southeast, use the factory key on Thinking Circle. Proceed to the available path.
BOSS: Johnny DX
Avoid it as much as possible. The Flash Sword must be the reference weapon. Once enough HP has been consumed, the boss will enter gorgeous mode. You will still need to use a certain amount of items to heal yourself. You can then use the factory. Head to Mio, and you will get the Galaxy Pass. Go back to the control room, then walk to the center of it, where Jupis will join you.
CHAPTER 6
Head up to the harbor, then run around to meet Symon and Steve. Go to the control room to meet Dorgengoa. You can also move between the planets with the wheel. ZERARD: Go to the first production line of the factory, climb up, then destroy the enemies. You will get some varied items. Talk to Mio to get your hunter's license. If you need coins, you will have to win battles. While in the Galaxy, look in the shop to the north and buy some information about the monsters. Take plans while you are in the factory. Talk to everyone, then head west. Inside the ship, talk to Eimen at the entrance.
PINK: Take a look at the two objects that require the Earth Key.
JURAIKA: Get the two item boxes near where you fought. Head to the harbor by going down the platforms. There is a transporter with items.
VEDAN: Kisara will be in your party. Drop off the platform, then go to the shop, there are three item boxes and a transporter. Then enter the nearby door. Keep going until you find another item, then drop down, only to face each other in battle. Explore to get the transporter. Go south, there are two objects. You will meet Miyoko and Chie. From here, other boxes. One of them is Mimic and one requires the Star Key. There is a transporter, so go to Bar Angela. Exit the bar, go west, then take one of the two paths. There are four objects on the way, one of them on top of the train. You will have to jump on the train, then go North, then East. Go up the stairs, then north, then go east for further explanations. East, then exit to the intersection, also east, south here, then look up, go back, go down the stairs, go north to the intersection, then get two objects, there should be a Thinking Circle to the northeast of the transporter . Head back south. There are three boxes. Talk to Shukowa who is under the bridge. Then go to the transporter, then proceed west. There are two item boxes inside. Talk to Mince for a plan. Buy the ID card, and go outside. Go back to the Bar Angela, towards the bottom right, enter the door arriving at another station. Take the train to Mine. Move the three item boxes, then enter the Mines. Save your game, grab the item box, then explore the surroundings. Then go down. Explore the surroundings for other boxes. Save your game and then get off the elevator. At the mine, get a box, then fight the Old Type Mining Machine. So it will be time for the boss.
BOSS: Gale
Beware of Deego's HP. Regain life points before counterattacking. You can try to get close and stay on guard for him to attack. If Deego has a good level first-rate weapon, you can kill him with two perfect chain attacks. You will then get the Longadian Officer Silver Coin. There are five items, one of which requires the Sun Key, and another the Star Key. Use Stella's Crystal Ore to battle Billy the Picaresque. Then go back to Angela, then proceed north.
CHAPTER 7
After getting the Dorgengoa key, check out the Transporter for more scenes with Mark and Pokaccho. Before moving on, however, you will need to take a look at the various planets.
ZERARD
Head to the galaxy guild for more info on the Wanted Monster. To the east, talk to Oakton then Ruike near the Star Ship Factory. So in Pokaccho's room, then get the rare item, then talk to Ruin, then get the plan, then get the Nano Memory. You don't have any circuits for now though. Grab one of the four item boxes that require the Star Key. Go to the Star Ship factory, to go to the upper level of the 3A production line. Jump to the middle of the circle that is in the middle of the ship. Use the Cyclone Type Pump on the Thinking Cricle to fight with Strike Ogre.
ROSE GALAXY
Go up towards Dorgen Ark. There should be a Thinking Circle. Use Primeval Beef to fight Hammer Head.
JURAIKA
Pick up the item box that requires the Star Key.
VEDAN
Talk to Tiko in the item shop. You can buy the rare item, Lord Hades' timeline. Also talk to Rodurie if possible
PLANET PINK
Move to the Salgin residential area. Approach the gate leading to Silva Zard Desert. Before that, there are some tasks to do: - In the area in front of Universal Harbor, talk to Agashimo and then go to the church, where you will find Misanna. Take the plan to make the Seven Star Sword Ixion. You will need Rebulba Alloy, Izerium, Seventh Moon Ore and Edensia Ore. Continuing towards the Silver Zard Desert, there are four items and a transporter. Ready, enter the ruins. There is a shop and an object. Take the two boxes, one of which requires the Star Key. A Thinking Circle awaits you nearby. Use the Crystal Staff to fight Dark Messiah. As you proceed, another transporter awaits you, with 3 more items inside. South, jump on a rock, then get the three items, one of them requires the Star Key. Go down to the area below you. There are eight item boxes. Grab three more boxes on the transporter, save and then proceed to the boss.
BOSS: Seed
The best tactic is to run around in circles to avoid it. You can try to deal damage at will. Also be sure to stay on top of the transporter while doing so. You will then return to Dorgen Ark, where you will have to take a look at the Transporter to see more scenes with Mark and Pokacchio.
CHAPTER 8
You can choose between 3 destinations: Vedan, Juraika, and Zerard. Before we begin, take a look at the various planets: ZERARD: Talk to Luck and Chad for plans. Go to the Galaxy Corporation and buy some Wanted Monsters. Talk to Duela on the West Side. Talk to Luma at Production Line # 1. Then west to the top level of Production Line 3A. The shop contains a Cyclone Type Pump, get it for the Wanted Monster, Strike Ogre. Above the ship you will also find another Strike Ogre.
PINK PLANET: You should own the Lord Hades Chronology you bought at the item shop in Vedan. Go to the Great Slate of the Ruins. Talk to Mysterios Oldman who is there. Choose the second option. At the item shop, talk to Topanes to get a plan. You can also buy clothes for Jestar. You need the Platinum license. In the residential area talk to Alban, Yorkman and Mukajiri, other floors. Pedoc at Universal Harbor will provide you with more.
JURAIKA: Talk to Anideba in Firio's house. South of Bulkaka village, talk to Sui, then go to Spring, where you fought with Mad Wuper. Talk to Balmon.
VEDAN: At the Thrift Store, you can buy traditional work clothes for Symon. You need the platinum license. To the west of the Angela bar, talk to Surunba, then at the station talk to Suraia. At the north shop, talk to Lugei, then go southwest to talk to Gaiza. Again, to get some rare items.
JURAIKA: Go to the Bulkaka village. Exit east. You will arrive at the ruins of the Lion King. Continue up to a transporter. Take the item box, which will ask for the Earth Key. Come on, another box. Come on, another transporter. Look for a shop. When you get to the broken bridge, don't jump to the other side, but go down and explore both sides of it. Then go back to find a Mimic. On the other side of the bridge, continue along the path, arriving at an area with four boxes, talk to Mesod, then you will come to a transporter. There are two boxes of items, take them, you will arrive at the castle, then save and enter the transporter. Fight the giant, and keep going forward. Four item boxes ahead of you, then a transporter a little further. Six items in the next area, one of which is a Mimic. Also get the Star Key. Talk to Miyoko and Chie. Save, and fight the boss.
BOSS: FURIOUS WITCH
It can teleport, and it will chase you. Make sure you have a good number of items. If you get close, you can use the Flash Sword; if not, use your secondary weapon. You will get a piece of the Lion King. Look in the shop in the Bulkaka village. You can buy separate weapons for Kisara, and you will also need the platinum license. Give Jestar the Jungle Coat, then talk to Sui and Balmon. You will get a rare item.
ZERARD: Go to the Galaxy Corporation. You can proceed to the north of the map, towards the Gradius Tower. Start from the West. Head close to the barrier to get the Burst Mode Switch. So left. Use the newly unlocked mode on the Thinking Circle. Go up, enter the tower. After that, go to the galaxy corporation to buy more info. Take a look at the shops. JURAIKA: Transfer to the Streamlet along the path leading to Bulkaka. Go southeast from the map. Use the piece of tree to fight monsters. Then proceed to the final part of the path, using the mask to fight the various monsters.
ZERARD: There will be some work to be done here. The interior of the Gradius Tower will feature:
Second floor, first tower: - Elevator to the west of the central ring, upper part.
- Thinking Circle a nod, in basso.
- North conveyor, below.
- Objects: north east, upper part; north, lower part; north east, lower part; south west, lower part.
Third Floor, First Tower: - Elevator key in the upper northeast.
- Thinking Circle in the lower, west part.
- Conveyor in the lower, west part.
- Objects: upper southwest; to the west in the upper ring; in the lower part, to the north west.
Fourth Floor, First Tower: - Tower that connects the bridge to the south-east part
- Thinking Circle in basso ad est.
Fourth floor, second tower: -Lift connecting to the south-east.
- Thinking Cricle in the lower part, to the south.
- Transporter always south.
- Objects: southwest, bottom.
Fifth floor, Second tower: - Elevator key in the lower northeast
- Thinking Cricle in basso, a nord
- Conveyor in the lower, north part
- Objects: Bottom South, Southeast, Bottom.
Fourth floor, first tower: - Tower connecting the key to the bridge, south-east lower part
- Thinking Circle lower east
Objects: Southwest, high; low, north; low, east.
Sixth floor, second tower: - Elevator key in the upper northeast
- Thinking Cricle in the lower east
- Lower east conveyor
- Objects: in the lower part of the nod, in the lower southeast, in the upper southwest, in the lower southwest.
Seventh floor, second tower: - Tower connecting Bridge Key to the lower, south
- Thinking Circle in the lower west
- Objects: lower east, lower northeast
Seventh floor, first tower: -Key to the lift in the upper west
- Thiinking Circle in basso a sud
- Lower South Conveyor
Objects: lower east, lower southeast, lower south.
Eighth floor, first tower: - Lower north elevator key
- Thinking Cricle in basso a nord
- Upper North Conveyor
- Objects: bottom south, top southeast
Ninth floor, first tower: - South-east of the main ring is the bridge connection key.
- Thinking Circle in alto ad est.
On the ninth floor, first tower, entering the connection bridge, you will go back to the second tower of the same floor.
Ninth floor, second tower: - Elevator key in the lower northeast
- Thinking Cricle in the lower east
- Lower east conveyor
At the top, you will have to fight the boss. PHANTOM LORD GAZELLE
Attack with the flash sword and run after him. Jump when you have to, it will be easy.
Then go back to the transporter and use it to exit the first tower. Head back to the right of the Gradius Tower, then save and take the elevator.
Second Floor, Second Tower: -Key to the elevator in the lower east.
- Thinking Cricle in basso a nord.
- Lower North Conveyor.
- Objects: bottom southeast, top northeast, bottom north.
Third Floor, Second Tower: - Elevator key in the central-north part of the central ring
- Thinking Cricle in the lower east.
- Lower east conveyor.
- Objects: bottom north, bottom bottom always north.
Fourth Floor, Second Tower: - Key to the upper north-west connection bridge.
- Thinking Circle in alto ad ovest.
- Objects: - Lower east.
- Top southeast.
- Bottom northwest. Using the bridge you will come to the first tower on the left.
Fourth Floor, First Tower: - Elevator key in the lower northeast.
- Thinking Cricle in basso a nord.
- Lower North Conveyor.
- Objects: top east, bottom northeast, bottom north.
- Silma: lower north.
Fifth Floor (First Tower): - Key to the lower west elevator tower.
- Thinking Circle in basso a sud.
- Lower South Conveyor.
- Objects: southeast of the central ring, top southeast, bottom always southeast, and another always there.
Sixth Floor (First Tower): - Elevator key in the lower northeast.
- Thinking Cricle in basso a nord.
- Lower North Conveyor.
- Objects: top southeast, bottom east.
Seventh Floor, First Tower: - Connection key of the lower north-east bridge.
- Thinking Circle in basso ad est.
The bridge leads you to the second tower on the right. You will have to fight a boss.
BOSS: Seed
As before, it's best to avoid it, as you can't beat it.
Seventh Floor, Second Tower: - Lower northwest elevator key.
- Thinking Circle in basso a nord.
- Lower North Conveyor.
Eighth floor, second tower: - Elevator key in the lower southeast.
- Thinking Cricle in basso a sud.
- Lower South Conveyor.
Objects: - Bottom West X 3.
On the ninth floor, the connecting bridge will take you back to the first tower. Use the Perfect Reviver to fight King Raiden.
Ninth floor, first tower: - Elevator key in the upper southwest.
- Thinking Circle in the lower west.
- Lower West Conveyor.
- Objects: bottom west X 2; upper southwest, lower southeast.
The XNUMXth floor conveyor is the last on the planet, a boss awaits you.
BOSS: Phanton Lord Logan
Attack with the Flash sword. You can also stay away and use your second weapon. You will get the Horned King's Piece. Head to a transporter to watch more scenes. Buy wanted monster information from the corporation. So in the east, buy Scientists's White Robe. Talk to Wattokros on the XNUMXth floor bridge. Then Linda, and then head to the Rozen Custer Prison. Look at the corpse to get an item.
VEDAN:
Go to the transporter to the southeast. West, see the Thinking Cricle. Get Kisara and Ruruka to use the Magic Rouge. Get the Phantom Robe for Kisara. On the map, head to the star. You will then get Harry's Bell. Then move along the sewers. Explore for various items. To the northeast, talk to Niko. Then go south down the ladder. Save your game, then use the transporter. Speaking with Silma, go back to the control room. Then I pass to the Dorgengoa room. Get the Seven Star Sword Cosmo Roar. Back to the sewers, use Harry's bell on Thinking Circle, then go through the pits, then go down a ladder, and explore until you find seven item boxes and a Mimic. Go to the west sewers and then inquire about the monster. Use the rainbow to fight against Megalo Mantis. Southeast, save your game, and use the Transporter to go down and fight the boss.
BOSS: Seed
As before, run and avoid him, you can't beat him. Go down a ladder, and forward. The final area is large. There is a shop nearby. Explore the surroundings, there are three transporters. Two Mimics and ten item boxes. One of them requires a Star Key, and another a Sun Key. Drop down and fight the boss.
BOSS: Assault Walker
There are 3 of them, focus on destroying them in sequence while keeping the use of the Barrier Break Shot with Jestar. The Flash Sword will be of equal help to you. You will also get the Scissor's King's Piece in no time. The Rare Item can be found at the shop. Mark and Potaccho are in the transporter.
CHAPTER 9
Head to the control room to immediately loom in a fight.
BOSS: Zegram
The battle will end shortly after his HP has been reset by you, since it is not possible to defeat him definitively anyway.
ROSA: Another quick fight.
BOSS: Seed
Zegram vs Seed. Keep your guard up to shield yourself from Seed's attacks, from different directions. Attack a few more times quickly after that. You can't beat him, the battle here too will end in a predetermined way.
Another boss.
BOSS: Seed
Now is the time for Jestar, Zegram and Kisara all against Seed. The Flash Sword is your weapon of choice. The guard should only be used when necessary as its depletion is very fast. Look at the next two altars to get to the next stage.
BOSS: Beast Seed
Equip electric or plasma shields. Use Elec Less to heal with Tri Heal. Watch out for his attacks, stay defensive when you have to. When his HP runs out, Jestar goes crazy, just keep attacking him.
Before we go down, there are other things to do:
ZERARD: Go to the galaxy corporation to get more information.
VEDAN: Inside the item shop, talk to Rikyurie to get a plan. Go southwest from Universal Harbor to talk to Gaiza and all the other characters. Talk to him again then, for a rare item.
JURAIKA: Transfer to the sunken ship. There should be a Thinking Circle nearby if you bought the right amount of information. Use the Fire Extinguising Powder to fight the Burning Tortoise. Then move to the entrance of the Lion King's Castle. Use Zipang's ax to fight Kemkul Mook.
ROSA: Enter the labyrinth and save your game. Take the boxes, arrived at the transporter and save waiting for the boss.
BOSS: Ragna
Use the Flash Sword, the battle will be over soon. Then continue along the maze. Explore to get the ten items. One of them requires the Star Key and one the Earth Key. To the south, there is also a shop. Save again, then watch the scene with Mark and Pokacchio. Arriving at the Labyrinth of Selection, there are more boxes to take. Save, drop down, and continue to the next area. A new boss awaits you shortly thereafter.
BOSS: Sand Kraken
Be prepared to use some Antidotes. Attach the legs first, then use the monographic shot to approach the head. Flash Sword when needed. You will then arrive at the ancient circuit. Go back to the Robot, using various things, then take the key. You will then take the pendant. The church is the next step, while you are also looking for the transporter
CHAPTER 10
PINK: At the Kuje Desert, look at the nearby objects to get two boxes. So at zerard go to the Galaxy and buy more information from the Wanted Monster.
Labyrinth, then towards the Labyrinth of Confusone. Use the Nebuladon Egg to fight the monster. So go ahead. You will then meet up with Miyoko and Chie. Explore the surroundings for other teleporters. Use the Lamp of Charm to fight Ronfao. Bio Feedback will be required to build the Rare Maid Robo Yoshiko item. Answer yes to the girl. Then continue south. Look for ten items, one of them is a Mimic. At the square, the Thinking Circle awaits you. Then fight the Brutish Hawk. Head south, there are three item boxes and the final transporter. Enter the house to fight the boss.
BOSS: Johanna
Don't go near her, she's crazy. Fire the second weapon and run in circles. As soon as she duplicates herself, avoid her. Repeat until Jestar goes berskerk. Approach and attack it using the Flash Sword.
Then go back to the south house in Johanna to get two more boxes. Talk to Raidel. You will have to keep talking to him to get all the information you want to have. Look at the basket with the flowers inside it then take the Rare item, the Siska's Necklace. Go back to Salgin, head to the church, and out, to then talk to Ulbo. There will be a new item box that requires the use of the Star Key. Head to the Before The Great Slate which is located before the maze, then towards the center, using the key. Back in the control room, look at the wheel, choosing "Yes".
CHAPTER 11
An item box next to the Transporter. Save your game, go down one level, grab the pits, then north. Here, take ten items, one of them requires the Sun Key. Go back to the elevator. There are four items, continue through the door, then follow the path and save. A few things to do on various planets: Zerard: Go to the corporation to get new info on Wanted Monsters. Get the two Sun Key items. Rosa: Move to the Transfer near the ruins, then southwest, talk to Maskull, then to the last maze. Take the rare item, then open the box with the Sun Key. Enter the maze, talk to Kilalulu, look for the objects in the maze. Go to Juraika and open the Sun Key box. Go to Vedan, towards the Rock Belta mine. From the first transporter, go north, talk to Nomud, then take the pits. In the Tiaza Forest, there are eight boxes to take. Talk to Parao. So transporter, save your game. There is an item box and a shop, then a Thinking Circle. Use Alec Thunder to fight Vingarda. Save, and get ready for the boss.
BOSS: Albios
It will use wind and ice attacks, grab an item to shield yourself from them. Go close to his face, use the Flash Sword, keep attacking. You will then get the Gentle Drigelam. Go south of the map.
CHAPTER 12
Inside the Gurza shrine, look for the item boxes. Save, go to Zerard to buy the Wanted Monster, then to Rosa at the ancient ruins, from the entrance proceed southwest. Use the crystal bracket at Thinking Circle to fight with the Dark Messiah. Now go to the thinking circle on the east side, use a Lucky Clover to fight Hyokkories.
Marry Glenn
Back at the transporter in the Gurza Shrine, continue along the path to get more items. One of them is a Mimic. You will come to a transporter, use the Thinking Cricle, then the Sun Rune. You will therefore have to explore all the paths that will present themselves to you, calmly.
CHAPTER 13
Take the east path. Take the six boxes. Save. Talk to Yuban in the cave, taking the sword with "Yes". Take the two item boxes, then north, then south. Take the transporter. Explore the objects again. East, then west, transporter, and up. Four boxes of items await you, again the transporter after them. At the intersection, south you will go to mimic, then west on the map. The last transporter will stand before you: it is the last chance to upgrade your characters before going on to face the final part of the game.
BOSS: MOTHER
This boss is the typical "defensive" enemy: high HP, powerful armor. You will need the Monographic Shot. The Sacred Sword Zeo Cyclos is another good method to damage it irreversibly. After killing him for the first time, he will rise again. He will have a laser-based move, which is easy to avoid if you move in time. Run around and keep shooting. Keep your HP high and use support items. There will then be individual battles for each character.
BOSS: Walkog Hand
You will be using Deego as a character. You will have to wait for your chance to hit his eye.
BOSS: Bomb Walker.
Symon is your choice. Nothing complicated, move in circles and attack.
BOSS: Bomb Walker
Same as before, only using Steve.
BOSS: Core
Ruruka will be your puppet. Ignore the Bomb Walker, and focus on the main enemy. Move around quickly to avoid his hits and, at the same time, inflict damage on him with your own.
BOSS: Walkog Hand
You will use Jupis, but otherwise everything is as before.
BOSS: Israel
Zegram will be your pawn. Avoid all attacks, and heal yourself in case you get hit. Attack his right hand using the second weapon. Climb to the left of him, and use your sword.
BOSS: Norma
The character you are using is Kisara. Climb up and hit your face. Try some lightning waves, they should be enough.
BOSS: The Fiend Battleship
Your character of choice will be Jestar. He will be using Marry Glenn's Sword. Jump and hit. When you lock your hands to your face, split your hands apart.
The Solution Summary
CHAPTER 1
CHAPTER 2
CHAPTER 3
CHAPTER 4
CHAPTER 5
CHAPTER 6
CHAPTER 7
CHAPTER 8
CHAPTER 9
CHAPTER 10
CHAPTER 11
CHAPTER 12
CHAPTER 13


