


Louvre
With your business card and mobile phone dial 454 and you will find yourself in the toilet with Sophie. Take the soap, add it to the interception device and throw it out the window, then anagram the letters of the sentence to form MONNA LISA.
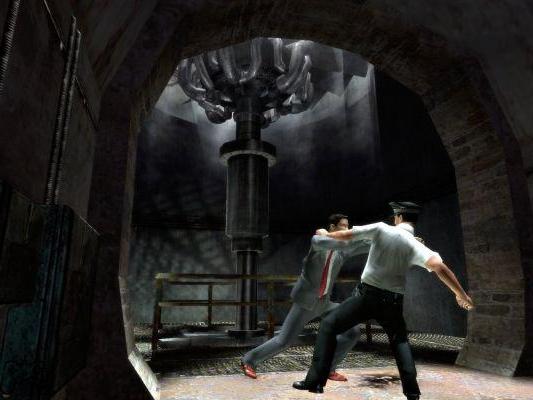
Now play with Sophie and sneak up on the entrance to get the UV beam from the investigator box. Drop down and sneak past the 2 guards, in the next room grab the pole on the floor, slide behind the third one and hit it hard. In the box you will find the UV ray that will transport you in front of Mona Lisa, where you will find Langdon.
Examine the picture with the ray to find the cryptogram, then light up each individual character to solve the puzzle by replacing the symbols with letters.
Grab the orb of Saturn from the statue in the center of the room, but first take note of the glowing symbol on it. Go back into the main room through the door and you will see the paintings of Bacchus and Uriel, after the sequence examine them as well as the area between the two and you will certainly find something useful, then lift Sophie who will take the Priory Ring.
Head to Sauniere's office by hiding from the guards in the main hall and waiting for them to leave, or hit them. Enter the office and examine the items on the desk. Grab the bandage at the top right if you need it and go to the wall to look at the map with the UV beam and you will find another clue. Go to the vent on the wall to the left of the map and lift Sophie to make her go up and open the Restoration Room.
Once inside, check your desk and read to learn how to mix chemicals, then behind you, on top of some crates, you will find another puzzle to solve.
Examine the table with the chemicals and practice what you have read to create a compound, then look for a yellow toolbox and take the towel, mix it with the chemical compound and use the resulting red rag on the dirty painting. After the sequence, grab a first aid kit in the corner behind the tall paintings and exit the room to return to the Mona Lisa.
Flatten to the left side or the guard coming from the right of the picture will see you, so head to where he came from. Go through the door behind the Mona Lisa and crawl to the left side of the two doors, then hide in the corner until the 2 guards in the next room are summoned and you can wander around without being disturbed, even if there is nothing important here so go to the hall of Nike.
Take any ladder and on the landing, as soon as you are about to go up the next ramp, a guard will come out from behind the Nike, but if you flatten, he won't see you and will turn his back to go up the stairs to the left. Carefully slip behind it and knock it out. Examine the statue by memorizing everything you see then go back to the landing where you hit the guard and on the glass display case you will see a hole where you will put the Priory Ring so that a drawer will slide out and give you a disc with a cornflower.
Now escape the Louvre: go down to the landing under the Nike and 2 guards will come to meet you, so hide to the right, wait for them to separate and hit them in the back then look on the lower landing and you will see a glowing symbol on the wall if you turn around. direction of the top of the stairs. Look at the railing and find the Lead Coin. Carefully approach the exit door at the back and you will still see a guard, but watch out because there are actually 2. Slip behind the statue on the left and with any luck you can knock one out, then head to the exit.
Saint Sulpice
After the sequence grab the blindfold from the table between the beds then exit and enter the front room. Examine the dead nun on the floor, then the desk and memorize “7:14”. Exit and enter the door on the right.
Cross the terrace to the other door and in the closet look for the oil can and the knives then go back and enter the niche with the doors.
The door on the right is that of the nuns' room and if you knock you will be given directions, go out the other door and you will see a creepy looking monk walking away. Slide behind him and hit him, then wander around there without going down the stairs and you will find the diagram on the wall that tells you which letters correspond to the symbols. Make a note of these as you will need them twice during the level, then go back to the dead nun's room and look at it.
His hand points to the bed so stand next to it and pushing it will reveal a safe on the floor. To open it, solve the puzzle, whose central row has the symbols in the cubes under the tiles, use the diagram just noted and you will know which letters to put (you have to write SION). Take its contents and return to the diagram area.
Go down the steps and enter the door, then go through another one. In the room one of the monks turns his back to you, so slide behind him and hit him, then grab the blindfold behind a round thing with a cross on it. The other monk stands near the other end of this gigantic room. Chase it and hit it and be careful because there could be a third. Now explore freely, hear the stories of the 14 seats and see the small platform at the bottom of each. Grab the Tin Coin at the alcove window between 9 and 10 and go to the end of the room between 7 and 8, where there are two fountains that look like shells. From the one next to number 8 take the key and go back to the room with the dead nun and use it to open the cabinet and find a small statue of Jesus, finally go back to the large room.
Now go to the alcove between 3 and 4 and read the book, then turn to the stone table on the floor and turn the left quadrant to "Aprilis" and the right to XI. Outside a part of the floor will have risen and you will find a small statue of Jesus carrying the cross.
Go through the large double doors next to pillar 7 and with the small knife open the one closed with a padlock then go up the stairs and enter another door behind which is the church organ. To the left is a bandage on the floor, then go to the crank next to the organ and turn it to move the clock to 7:14 revealing a small opening in the floor in front of the organ keys, take the item and return to the room with the big pillar, but be careful because a monk might bother you.
Look at pillar no. 7 and put the statue of Jesus supporting the cross on the platform, then go to pillar n. 14 and put the other figurine on it so that a trap door in the floor between pillar 10 and 11 will unlock and you can enter it.
Go down into the cellar and to the right behind a stack of boxes is Da Vinci's ornithopter. Turn to the left side of the stone table with the three lanterns and stand behind, then use the oil can on the valve and open the lanterns, put in the respective slides (the brass one in the brass lantern etc ...) and light them with the matches to see the word Jerusalem projected on the wall.
Now go to the crypt on your left and push it to the side. Behind you will find a series of keys with symbols already seen in the diagram at the beginning of the level, compose the word Jerusalem and from the door on the floor that opens take the list of the Grand Masters of the Prieure de Sion.
After the sequence, 2 monks will head towards you from the direction you came from and block you. Since it is best not to confront them openly when alone, hide in the crypt in front of the puzzle where you will find a golf club just in case. Keep an eye on them and when they head in different directions, slide behind one of the two and hit him (the easiest is the one heading towards the lanterns, then hit the other if you like). But if they find you both run away quickly and they will soon stop chasing you.
Go back to the pillar 14 room and you will find 3 monks. You can either get past them or hit them, however your goal is to go back upstairs. Knock on the door of the nuns' room and start the sequence that ends the level.
Norman mansion
Don't worry about the dogs as they won't approach you unless you head straight for them. Go behind the shed to the right and climb up the back window. As soon as you move the leader of the monks will chase you and you will have to hit him. There is a chest on the shelves and to unlock it and get the key you have to use the Fibonacci sequence written on the board. The next number is the sum of the previous two so in this case you will get 132134. Leave the shed and go to the other building, break down the door and enter a small room, take the steak from the freezer and exit to go to the open cage with the dog bowls, put on the steak, then go left to the room with the freezer and you will see a large square on the sidewalk, the shadow of the bell tower, and a rope that you will pull to ring the bell: the dogs will run to eat and from now on they will be your friends and will no longer bother you.
To lower the bridge and enter the mansion, go down to the large reel beyond the shed, grab the crank and turn it. It is quite difficult so do what the indicator on the screen tells you. Turn it 4 times then cross the bridge and don't worry about the dogs. Open the door with the key found in the shed and inside enter the niche on the left. Search the cabinet for the statue of Aeneas, then enter the room in front of the cabinet with the lion and the discs with the cornflower. One is missing, so put the one you found in the Louvre. Go to the back of the room and look on the small table on the left and take the statue of Cupid, continue and go up the stairs to the top and with the Priory Ring unlock the door and enter the room. Check the bed first and you will find another Da Vinci invention, then the chest of drawers and read the poem in the top center drawer which will give you the clue on how to rotate the discs with cornflowers. In the central drawer on the right there is a blindfold, while the one at the bottom left is closed but with the Priory Ring you can open it and find the statue of Vulcan. Go back and look at the stained glass windows.
Each of them has a deity and Sophie will tell you their story. Also above each is a panel with a cornflower rotated in one direction. Each line of the poem refers to a deity and your task is to figure out which one and which direction their respective flowers face. Go back to the discs with the cornflowers above the lion's head and turn them down, right, up and left and the lion's mouth will give you the statue of Venus. Go back to the bedroom and go through it to enter the library. Stay on the top floor, go to the table on the left and look in the box to find the statue of Jupiter, then read the note on the table and you will have the second cryptogram. The symbols represent the same letter in each cryptogram you will find. This says that Jupiter is above Vulcan, Aeneas is below, Mars is to the right of Vulcan.
Go down the stairs to the lower level and after the sequence deal with the monk and check the table the skeleton is sitting on, examine the thing that looks like a UFO and a statue will roll out. Search the floor under the table and pick up the statue of Mars, go out any door and go back to the stairs you saw when you entered the mansion and go up them.
Halfway there is a small belvedere with two paintings, in the one on the left you will find the sphere of Jupiter, then continue to the room at the top of the stairs and on the round table place the 6 statues in the pentacle putting Aeneas in the lowest point at right, Mars at the top, Cupid at the bottom left, Jupiter at the top and Venus at the center. Everyone must look at Venus and this Aeneas. After the sequence you will find yourself in the garden below, a replica of the pentacle. You have to turn on the outside and rotate the statues so that they are facing Venus. However if you reach the right position this will be confirmed by the game. There are 3 guards running around there, but luckily you can take care of one at a time. Drag them to one of the statues that you need to turn, as the others will not be able to find and wake them up. Eventually the Venus statue will lift off the ground revealing an entrance.
There is a statue on each side of the room, go to the one that looks like King Arthur and light the torch with one of the burning birds. You can also examine the other statue but you will find nothing there until the puzzle is complete. Choose whether to run and keep lighting torches until by sheer luck the puzzle resolves itself or, before starting to light anything, imagine that the torches form a clock. The one furthest away from you and in a straight line will correspond to 12 o'clock, turn it on first, then turn on the one to its left, which corresponds to 10, the one next to the door you entered and which corresponds to 5, then go back towards the one that corresponds to 10, then to the one on the opposite side next to the first one you turned on (2 o'clock), again to that of 10, finally turn on the last one, which corresponds to 7. The sequence will activate and you will recover the key.
Bank of Zurich
Talk to the guard at the desk and he will point you to the door on the right. Go through the 2 doors and arrive at the Atrium. There is nothing to look for here and the only accessible door is the one in the center on the left hand side, so head over there and avoid the guard, go straight to the gate and use the last key found. Enter and use the key again to retrieve your box, but unfortunately you will find that you need a password. Use the Fibonacci sequence: 21 + 500 = 521, 500 + 521 = 1021. This result is the password, open the box and take the Cryptex. In the box that contained it there is a small hole, so go to the table on the left side of the room and from the drawer take a paper clip which will prove to be great for rummaging through. Take the poem where the word Grail is mentioned and use it on the Cryptex. The bank manager will arrive and after the sequence go back and in the Atrium go left, near the elevators. Use the security card given to you by the manager on the elevator and you will know that you have been tricked and that you have to get out of there before the doors open, so lift Sophie to pass her through the ceiling exit then go out too and turn the crank on the wall to open the doors.
Go right, watch out for the 2 guards patrolling the floor and enter the first set of doors to get to a storage room. Find the blindfold and a glow will direct you to search the shelves to find the Sphere of Mars. Exit and continue along this side of the Atrium to the doors at the back of the hall. If you can get there and enter the Administrator's office without bumping into the guards well, otherwise just try to get rid of one of them.
There are 2 guards in the office and Sophie will not follow you, so you should fight alone. DON'T DO IT. Drop down immediately and look straight ahead so a guard will pass you from right to left without noticing you. Slip behind it and hit it. Move a little and look to the right near the lockers and you will see the other one. If you manage to sneak up on her you could slip behind her and hit her, otherwise face her openly. Now you are free to explore, go to the door you entered and turn around to look around the room, then go to the far right closet to get the clue. Check the shelf and take Da Vinci's catapult. Now go to the administrator's office, on the left hand side near the back, go through a smaller office with several compartments, go to the desk and insert the security card after the bank manager gives you the code. You will find that he is wrong so he will tell you to check outside the managers office, opposite the main cubicle room. There you will find the desk and take a blindfold from the bottom left drawer and the password in the middle one on the right. Now examine the picture with the UV ray and the fingerprints, lift it and you will see a safe that you will open with the password you just found. Take the key to the archive and leave the office.
Go right and enter the archive room at the back, go all the way and at the last set of lockers (but not the ones against the wall) find what you need. Unlock the top drawer with the key found in the safe and take the password, then go back to the administrator's office.
Put the security card in your computer and type in the found code (260924), then go back out and head back to the door you came from and in the corner you will find a Security Card Reader. Use the security card and go down the stairs. At the end go through another door and you will end up in the lower level of the Atrium.
There are guards here but if you drop down immediately and head left you will come to a door marked "deposits and servers". Enter and go through a long entrance with doors, but you can only open the last one on the left. Enter and go through another small entrance, pass an unattended security panel and enter another door. Cross the room and come to a large private cubicle room. Continue to the other side, peek left and you will see 2 guards. Choose whether to hit them or try to go unnoticed.
Go to the other corner of the room on your left, take what you find and enter the 2 private rooms, locate the glowing symbol on the wall and take the Iron Coin.
On the same wall as the door next to the player there is an air vent, go inside and push Sophie too. You arrive in a small room with a back guard. Crawl behind her and hit her, then go left and you'll see a set of doors and a doorless office. Sneak into this as there is a guard and as always take him out. Upgrade your security card by inserting it into your computer, you don't need a password anyway, then go out, walk through the small entrance and open the door at the back with the security card. You will meet Langdon and find yourself in the cubicle-private room. Go back to the Atrium, but don't worry about the guards, crouch, turn right and follow the wall near the door to the loading and unloading platform, if you want you have time to listen to the guards conversation, otherwise go inside. In this room insert the security card into the reader and the gate will go up, slide past quickly and you will see a guard walking away so that you can hit him in the usual way. There is another one that looks to your left, slide next to her and then behind her without her noticing and hit her. Behind her is a locker with a blindfold, then look in the direction she was facing and you'll see another guard walking back and forth. Get it out of the way and exit following the arrow on the floor and the vehicle key to open the doors.
Chateau Villette
After the opening sequences, go down the steps, go through the door and to the left, enter the cellar. Go to the far left corner looking for the glowing symbol, check the chairs and grab the copper coin. Go up the stairs and in the room listen to Teabing, then look at the two pictures on the wall. When Teabing has finished speaking you can either go to each of the shields at the end of the room and listen to their story, or just listen to them until they tell you how to find the shields of Gallahad and Parcival, which are the furthest to the left in any case. both series, that of Gahalland has a red cross and that of Parcival a heart.
Grab Gahalland's shield and place it on the knight closest to the picture with the knight watching the angels, while Parcival's on the knight next to the picture with the castle and the Grail suspended in the air and two doors will open. First enter the room next to Gahalland's shield and read the note on the bookshelf in the right corner, then enter the other and read the bible on the bookshelf. Go back to the previous room and enter the password on the security door. In this new room there are a piano and two doors, the furthest one takes you back to the main hall of the palace, the other in a closet where under the table is the Sphere of Venus. Go back to Gahalland's room, find the one of the Red Dragon among the goblets, take it to Parcival's room and place it on the display case on the left that says Arthur. A door will open and you will have to solve the puzzle by putting the figure back together: first press the lower left part, then upper left, upper center, lower center, finally lower right. Open the door of the library, enter and turn right, continue to the corner and look at the top of an empty case. Go past a table, grab the music and take it to the piano in the room next to Gahalland's. Use the score by pressing the key only after the note appears. Finally, go back to Gahalland's room. You will have to watch numerous sequences and find The Last Supper. Observe and listen to everything about the picture, then solve the second Cryptex by writing Maddalena.
After the sequence you will have to transport some pieces to the cellar to complete a weapon. Run upstairs to the room with the piano and fight the monk then grab the orb in the corner.
Go back to Parcival's room and fight again, grab the item you need, then go back into the room where you just locked the mad monk through the other door in the main hall. Head to the far corner and it will attack you again. Defeat him and have Langdon slam him under the bookcase so that the last piece ends up in the cellar. After the sequence continue.
Biggin hill
Push the garbage can in front of the door. In the place where it was you will find a switch, activate it and move behind the railcar. Release the brake and walk behind this as the cops will shoot you but you will be repaired. When it stops, enter the door and turn right to take the Da Vinci Bridge from the top of the crates. Nearby on the wall is a map of a bunker and next to it a toolbox where you will find some pocket knives. Go to the left side of the plane and find the gate with the lock, break it, enter and go up the ladder. Grab the blindfold from the table then activate the controls to move the crate. Go down and go back to the main area of the hangar, get rid of the 2 guards and enter the cage that has become visible now that you have moved the crate. After seeing the glows on the shelves enter the hatch and follow the stairs until the sequence activates, then enter a dark room and open the grate on the floor, drop down and continue to another set of stairs, go down to the gate with the padlock and as usual break it with knives. Go through a door, then go to the fuse holder in front of you and pick up a large amount. Turn left and go into the next room and at the railing turn right. At the bottom of the niche take more fuses, go to the opposite side without going down the stairs and up the ladder to the control room.
Find the first aid kit on the shelf, take the elevator to the control tower and there take more fuses and watch the sequences then go back to the control room.
Defeat the guard and make your way back down being careful of the patrols. It is advisable to go to the opposite side and use the ladder to go down, then go back to the bottom to find the fuse holder, switch and diagram on which to use the UV beam. Then go to the fuse panel and put the ones you collected to activate the generators, which require 300, and the door (50). Hit the switch and go back, but before going down, go behind the ladder and to the left into the alcove where you got the first set of fuses. Look for the glowing symbol on the wall and the mercury coin. Go down the stairs and sneak up to the guard walking left to right and hit him, then go to the place he came from and in the niche to the right look for the glowing symbol and the Mercury Sphere. Go to the door you couldn't open before and hit the guard from the back, then hit the switch to open the door.
Follow the path and go up the stairs until you find yourself outside in the rain. Slide behind the 2 guards to hit them, go to the cage at the back of the gas tank and break the lock with the knives. Open the valve to let the gas escape and from the ladder on the building go up to the roof and get rid of the guard, finally use the signal on the side of the building.
Temple Church
First decipher the cryptogram, then once you are alone, stand in front of the church and behind you look for a slightly sunken area, you will find a path, follow it and check the window with a garbage bag to find the silver coin then go back to the courtyard.
Go to the notice board, to the right of the main door of the church, grab the handle and take the key.
Go to the left of the church and with the key open the gate to the courtyard, enter, grab the shovel on your left and hit the guard who is walking away.
Go through the wall with the arches in front of you and enter the sixth, look for the glowing symbol and take the Sphere of the Moon from the stack of crates to the right. Continue under the arches to the stairs that go up to the right and go up silently as there are 2 guards at the top talking. Wait for them to finish and separate then slide behind one and hit it, then do the same with the other.
Go on and from the wheelbarrow take the scissors, go back to where you defeated the guards and go to the fountain. In the nursery next to the church, use the scissors to cut the roses, then use the Priory Ring on the plaque you find and take the metal fragment.
You can now switch characters and choose Langdon.
You will wake up in a cell with a guard looking out the window but sooner or later he will go off to watch TV. Turn around to look around the room: on the right is a table with a piece of cardboard, then a pallet and a metal stick on it. Turn 90 degrees and push the chair away then grab the tool.
Go to the door and put the piece of cardboard in the space below, then the metal bar in the lock, take the key and exit the cell.
The guard is watching TV so take the opportunity to slide slowly behind her and hit her, enter the room on the opposite side of your cell and find the Da Vinci Wheeled Boat at the top of the lockers to the right. Return to the guard you hit and enter the door to the right of the TV into a large shrine with a crypt to the left where 2 guards are talking. Wait for them to finish then take them both out when they separate and explore a bit. There are 2 lockers in opposite corners, and only one has doors, open them and grab the small tool then go to the other corner and grab another small tool and a blindfold. Go back through the crypt to where you hit the 2 guards and turn left. From the table take the tool then go back to the door and from there back to your cell, then go right and look for the toolbox. You should have a large tool and 3 small ones, place them in the box like this: in the upper part two small and one large and in the lower part one large and 2 small, finally press the switch and after the sequence you will be Sophie again. Take out the 2 guards silently or wait for them to come near you and enter the cellar door where you will reach Langdon.
Go down the long corridor and open the access door to the catacombs, take a blindfold from the niche on your left, then let the guards talk and when they finish they will separate. Take them out and continue until you meet more. Let the first one approach, then hit it. Look in the crypts on the wall to your left and you will find a Templar seal, go on and take care of the second guard, look for a crypt on the right with a cardboard box inside and move it to find a second seal.
Continue until you reach the guard who is complaining about the switch, hit him and quickly press the 4 green buttons in the electrical box on the wall to light up the area before other guards arrive: first the one in the lower right, then the one in the upper left , the one at the bottom left and finally the one at the top right. The power will return and you can press the switch to the right and enter a new room. Grab the blindfold and the third seal then go back carefully as 2 guards will reappear. Get rid of them and go back to the switch on the wall, press it and enter the small room where there is a puzzle: put the 3 seals in the empty spaces as indicated on the walls on the sides. Turn them from left to right and after the sequence go back to the courtyard at the beginning of the level, being careful of the guards who could be quite a lot if they have been found and awakened by others. To prevent this from happening, get out as quickly as possible.
Back in the place where you were held captive you will see that the guard who is looking for you, take him out and go back to the church sanctuary from the door next to the TV.
Together unlock the main door on the right and go out into the courtyard, go to the monument in front of you and look below for the metal fragment shown by the scene.
Immediately 2 guards will run to meet you, get rid of them and re-enter the church.
Go left into the room with the crypts on the floor and at the far right you will find a shield that is missing 2 pieces. Place the rough metal shard on top and the sharp one on the bottom and the completed shield will reveal a code to you.
Explore the crypts to find the one that says "dark effigy" and when he tells you that Marshall is lying there use the matching symbols on the shield to find the correct letters on the map and fill in the spaces at the bottom to get "Richard", then solve the three Cryptex with this word.
Immediately after the sequence the Chief of the Monks will chase you with a gun so run! Reach a door and take it down, keep running to another door with an electrical box and a switch and solve the combination as previously done, press the switch and keep running, break down another door, then the next one use the combination and as it will only open halfway, grab it and push it. Run and with the next 2 doors do the same thing. The last one opens with the usual combination and activates a sequence.
Westminster Abbey
Take a look at the directory, then go to the main doors of the Abbey and look towards the statue on the left to find the glowing symbol, then explore to find the gold coin.
Head to Newton's Tomb and as soon as you enter the room you will be told how to shock the guard. Do it quickly or the guard will leave the pool and you will have to defeat him as usual. Go through the room and on the opposite side look on the wall to find the glowing symbol then explore and get the Sun Orb.
Now check out Newton's Tomb and put the Priory Ring in the small hole next to the sun so you can get it, then go out and examine Chaucer's tomb, noting the characters high up on the tomb as you will need them to solve the next puzzle. Then examine the lower part and find the rebus with the engraved shields. Put the sun sphere on the shield to activate the rebus, then the D in the center and the other letters will slide into the correct position and you will be rewarded with a ring.
Collect an item that will come in handy later, then from the place where the Shakespeare monument should be go right to the cabinet that contains an old jacket, pull it out and take the brush then head to the cloister, checking the directory if you don't know how. achieve it. As you advance you will find a guard ahead, look left and do what Langdon says, then grab the blindfold. Continue to the restoration room at the far left, hitting the 3 guards by pressing the switches on each side of the room. The third is located near the end of the area near a closed storage room. Go inside and grab the blindfold, flip the switch and a guard will come out of the restoration room. Take care of it before it wakes up the others! finally enter the hall and examine the pallet on the right, take the knives from one of the boxes then look from the side opposite the door to find 2 boxes covered with blue clothes. Go around it until you find the clue and you will be rewarded with the Arundel Code. Examine the Shakespeare statue, go back to the cloister and go through the door you entered, then turn left to get to the room you didn't explore before.
Take care of the guard and continue to the end. Open the lock on the door and enter the closet. Check the pallet next to the door and move a box that will reveal the switch, then, after turning on the lights, look under the workbench for the marble cleaner then go back to the statue of Shakespeare, beware of the guard, and use it together. to the brush on the statue, write down the word discovered and put the last ring found on his finger. A drawer will open with a crank. Go back to the main area of the Abbey, get rid of the guard in the cloister, and go to the Tomb of Henry III with the help of the directory. Insert the crank into the hole and turn the letters to form the word on the Shakespeare statue. Grab the Symbol of the King and turn around to check the scaffolding behind you. Unlock the 2 wheels with the padlocks and push it to the side as it hides the entrance to the Chapel of San Giovanni.
Empty the boxes on the floor and grab the first aid kit, examine the Tomb of Baron Hundsen and place the King Symbol in the empty space. Press the keys in this order: queen, baron, knight, soldier then take the reward and take out the guard who will enter the room. Go back to Newton's tomb and knock the guard out with an electric shock and explore the place again. Combine the cylinder and the Sun Sphere and place the result in the tomb cavity. Add the torn parchment in the drawer to the other piece already in your possession by recomposing the figure and the word obtained will allow you to solve the last Cryptex.
However, you will have to watch the sequence and Sophie will distract Teabing to allow you to solve it. So alternate with Sophie and Langdon and be quick to rotate the Cryptex or it will restart the sequence. The first time you will have to make her say that she thought that only the deserving would find the Grail, the second that Teabing is responsible for her father's death, the third that she is no better than the Church. Each time after saying the sentence you can go back to the resolution of the Cryptex.
Cappella Rosslyn
Go to the church entrance and examine the baptisms, remove the stone lid, turn around and look behind you. Check the wooden chest of drawers and the marks on the floor then move it away from the wall and you will find a stone, pick it up and take the disk with the daisy.
Go back and go to the red curtains on the right wall, pull the rope to open them, put the stone lid in the empty space and you will get the lily disc.
Go back to the back of the church and examine the 4 angels on the wall, grab the matchbox from under that of the Faith and go back to the red curtains, again pull the rope and thanks to the matches read the inscription. Go back to the angels and check the one of Truth then help Sophie get the disk of the rose.
Go to the front of the church and examine the 3 altars. In the one on the right you will find a newspaper, remember that the daisies correspond to Innocence, the lilies to Purity, the sunflowers to Adoration, the roses to Love, and memorize the sentence. Now either talk to Sophie or go to the gate with the Star of David and solve the puzzle by placing the flower discs according to the directions in the newspaper. Enter the newly opened door and in the sacristy read the monument on the right. Look at the sphere on the right and you will see that a piece is missing, so go down the corridor to the right, check the bleeding angel on the wall and take the stone that you will use to complete the sphere in the sacristy, which will open giving you the disc of the star. Go back and enter a new room, with a stone slab and wicker basket that you have to push to uncover a trap door. Put the star disc in the slab and solve the puzzle by remembering the sentence from the newspaper so as to open the hatch.
Go to the corner next to the stack of chairs first and find the Codex Atlanticus, examine the 2 murals and the photo album, then look at the ending.
Solution summary
Louvre
Saint Sulpice
Norman mansion
Bank of Zurich
Chateau Villette
Biggin hill
Temple Church
Westminster Abbey
Cappella Rosslyn


