In this solution you will be able to read about all the stories available in Dragon Ball Budokai Tenkaichi, and I will try to give you as much information as possible about each of them. Although this is a fighting game and it is not always easy to describe a player what to do in every situation that will arise in this genre of games. In any case, if a certain saga (or story) has several battles I will not give you the details of each of them, but I will try to write information about the most serious problems that a player will be able to find there. I will divide each section into areas (consider each area as a place where you only have to press Left or Right to access other battles), then I will describe which battles you will find in each area.
General strategies
In the "Z Battle Gate" mode you will find are three types of battles, and there is a specific strategy that you will have to use in each of them:
- "Survive for X seconds" - one of the most difficult, there are some strategies for this type of battle. The idea is to block your opponent's physical attacks and then counter them, in order to spend some time. Then, push him away, and as he stands up, hit him with a Kamehameha (or any long-range special you have) to knock him back down. Keep repeating this technique, time will pass and you will win! In any case, also know that you can kill your enemy in one of these battles, but this will force you to replay the level again. Some say holding circle throughout the battle works, but I can hardly believe it. It is up to you to decide.
- "Win the battle with the Y attack" - basically you have to hold a normal battle until your enemy is in his yellow life bar, then retreat to a place away from him. Retrieve ki until you have enough energy to use the specified attack and go find it, then launch the attack as close to it as possible.
- "Defeat character" - do what you want, but ultimately your enemy must be defeated.
Considering this information, before entering a real battle you should evaluate the best strategy, then obviously use it in battle.
Saiyan saga
battle 1 - Goku vs Raditz
battle 2 - Piccolo vs Raditz
battle 3 - Piccolo vs Great Ape
battle 4 - Kid Gohan vs Piccolo
battle 5 - Yamcha vs Krillin
battle 6 - Krillin vs Yamcha
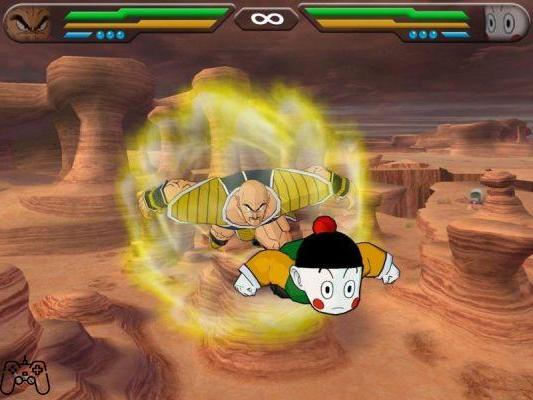
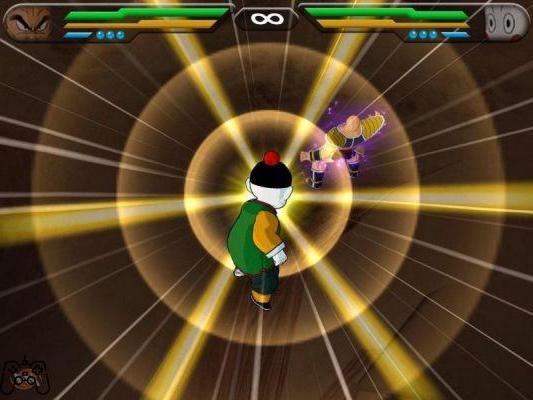
battle 7 - Chiaotzu vs Tien
battle 8 - Tien vs Chiaotzu
battle 9 - Tien vs Saibaman
battle 10 - Yamcha vs. Saibaman
battle 11 - Krillin vs Saibaman
battle 12 - Krillin vs Nappa
battle 13 - Chiaotzu vs Nappa
battle 14 - Ten vs Nappa
battle 15 - Kid Gohan vs Nappa
battle 16 - Goku vs Nappa
battle 17 - Goku vs Vegeta (Scouter)
battle 18 - Goku vs Great Ape Vegeta
battle 19 - Great Ape vs Great Ape Vegeta
battle 20 - Great Ape vs Vegeta
Area 1 (battle 1)
It will probably be your first battle in this mode and you may have some problems. Have you read the tutorial available in the practice section from the main menu? If you haven't, do it now. Also, you will only have to "fight" against Raditz until time runs out, and even if you are a professional player (like me) DO NOT try to kill him, otherwise you will have to repeat the battle. I must also say, since this is probably your first "survival" battle, that there are some strategies to keep in mind: the idea is to block your opponent's physical attacks and then counter him, in order to pass a some time. Then, push him away from you, and while he's standing up, hit him with a Kamehameha (or whatever long-range special you have) to knock him back down. Keep repeating this technique, time will pass and you will win! You have just won your first battle and the illustration of a green potara!
Area 2 (battle 2)
Really very simple, unless you know the controls. This will be the first time you will be asked to win using the X move (this will be the Special Beam Cannon) and you will lose if you don't finish the battle with that move. So keep fighting until you have enough ki (or reload it) then use that move. Twice at most should be enough. Eventually you will get a Raditz potara.
Area 3 (battles 3, 4, 5, 6, 7 and 8)
Usually people have problems with the third battle, as you will have to use Piccolo to fight Gohan in the form of a sayan ape. As soon as the battle begins, go as low as possible, recharge your ki and use all your repertoire of specials. Keep it up and soon the battle will be over.
Area 4 (battles 9, 10 and 11)
Apart from the mass attack of the Saibaman these are all easy battles, I hope you have no problem finishing them! If you win all of them you will get a "Saibaman" potara.
Saiyan saga
Area 5 (battles 12, 13, 14 and 15)
These may take some time, but the battle with Chiaotzu should be difficult as you may not know how to use the attacks that will be required of you. Keep at least one full blue orb and recharge your ki after its normal yellow bar (you'll have to recharge completely in one go!), When it reaches the end of the blue coffin you can use it. So, make sure you use the specified move when your enemy is about to die and you will win with ease.
Area 6 (battle 16)
Easy if you know how. Start attacking him, activate the Kaio-ken powerup as soon as possible (you will need at least two full blue orbs), attack your enemy and, when he is about to die, use the Kaio-ken attack to win! At the end you will get a potara of "Nappa"
Area 7 (battle 17)
Just use everything you have learned so far and you won't have any major problems. After winning you will see the final cutscene, but you should go back to this area to fight some interesting extra battles. You will also get "scouter" as a reward for your victory.
Area 8 (battle 18)
NOW, THE MOST REQUESTED BATTLE! Well, this is definitely one of the hardest battles in the whole game, so I'll try to give you enough information so that you can win more easily. At the start of the battle you will have to climb as high as possible. Then, when Vegeta climbs and you are at the right angle, do a Kamehameha attack. After that, keep recharging your ki and do the same thing. Yes, I know that following this strategy is still difficult to defeat him, but there are a couple of things you can try, like lower the difficulty of the game (if you have never entered the options you will be normal difficulty) ... but I'm sorry, that's all. 'help that I can give you, I report below a really valid strategy suggested to me by one of our readers:
"At the beginning of the battle use a Kamehameha immediately and you should gain a few seconds, now load up some ki and use L2 + R1 to shoot yourself in the air. Now comes the difficult. When it climbs towards you, just before it can hit you, do a very fast Dragon Dash to get away from him. Timing is crucial! Now if you made it you should be out of range and he will start doing his combo, which is very slow for an Oozaru, and this It will buy you time! Now charge up some ki, just enough to use a Kamehameha and a Dragon Dash. Now keep repeating the strategy: get out of its range, stop, charge the ki and walk away, after several times the you have defeated. "
Thinking about this strategy, I found a slightly better one ... while your enemy is in the air and away (or doing a combo), keep charging your ki. Then, when the combo ends and it comes towards you, throw a Kamehameha, which will knock it down and give you some more time. That way you should have a better chance of winning this damn battle.
Area 9 (battle 19)
This is also easy if you know what to do. As soon as you can get away from the enemy and start recharging your ki, then keep blasting your ki attacks at him and repeat, he will soon die.
Area 10 (battle 20)
The strategy is the same as in the previous battle, do this and everything will go smoothly. Eventually you will unlock the story "A Lonesome, Final Battle".
Frieza Saga (Freeza)
battle 1 - Kid Gohan vs Dodoria
battle 2 - Krillin vs Dodoria
battle 3 - Vegeta vs Dodoria
battle 4 - Vegeta vs Zarbon
battle 5 - Vegeta vs Zarbon Post-Transformation
battle 6 - Kid Gohan vs Guildo
battle 7 - Krillin vs Guildo
battle 8 - Chiaotzu vs Guildo
battle 9 - Vegeta vs Recoome
battle 10 - Kid Gohan vs Recoome
battle 11 - Goku vs Recoome
battle 12 - Goku vs Burter
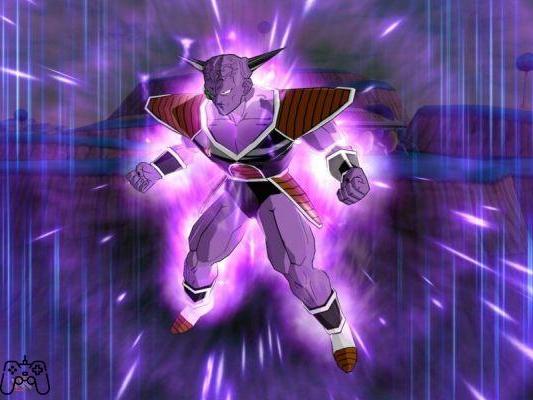
battle 13 --Goku vs Captain Ginyu
battle 14 - Vegeta vs Jeice
battle 15 --Kid Gohan vs Goku
battle 16 - Krillin vs Goku
battle 17 - Vegeta vs Goku
battle 18 - Vegeta vs 1st Form Frieza
battle 19 - Kid Gohan vs 2nd Form Frieza
battle 20 - Krillin vs 2nd Form Frieza
battle 21 - Piccolo vs 2nd Form Frieza
battle 22 - Kid Gohan vs 3rd Form Frieza
battle 23 - Piccolo vs 3rd Form Frieza
battle 24 - Vegeta vs Final Form Frieza
battle 25 - Goku vs Final Form Frieza
battle 26 - SSJ Goku vs Final Form Frieza
battle 27 - SSJ Goku vs Final Form Full Power Frieza
Area 1 (battle 1, 2 and 3)
Easy battles, do exactly what you are asked to do and I don't think you should have any problems whatsoever. Either way make sure you defeat Dodoria with Vegeta so you can get a purple vegeta potara and unlock Dodoria's potara.
Area 2 (battle 4)
Another easy battle, Vegeta will manage to win it as easily as the anime.
Area 3 (battle 5)
your enemy is now stronger, but using your ki attacks (but also the most powerful ones, if you are a beginner and you want to do it ...) you can have a much easier battle than you expect. Eventually, you will unlock a capsule of Zarbon (after transformation)
Area 4 (battle 6 e 7)
your enemy is one of the weakest characters in the game, I don't think you should have any problem defeating him, as few ki attacks will be able to knock him down.
Area 5 (battle 8)
Have you read the strategy of the previous battle? If you did, repeat it again in this one, as that is all you have to do to win this battle as well. You will get a Guldo potara
Area 6 (battle 9 e 10)
Use the general strategy for these types of battles and everything will turn out right.
Area 7 (battle 11)
Here, you will be asked to finish the battle with a Kaio-ken attack, do you still remember how to do it? I hope so, as all the rest of the things you will find here will be very easy, you will eventually get a Recoome potara.
Area 8 (battle 12)
While you will be up against the lightest character in the game, you will find that he is also weak with physical attacks and ki, so I bet he won't be able to cause you too much trouble. At the end of the fight you will have a "Burter" potara.
Area 9 (battle 13)
Another easy battle, contrary to what happened in the anime. your enemy seems to have his classic move of changing body (and therefore health level), or fortunately I don't think you'll ever be able to see it in action, as he uses it very infrequently. Proceed as usual and this idiot will go down too. Eventually you will unlock the "Captain Ginyu" potara.
Area 10 (battle 14)
Easy battle, ki attacks will be more than enough to defeat him, and you'll get a special "Jeice" capsule at the end.
Area 11 (battle 15, 16 and 17)
Since Ginyu has changed bodies with Goku you will now have to defeat him, and this will soon prove to be an easy goal. Your final ki attacks will be good enough to cause some pretty serious damage, so use and abuse them.
Area 12 (battle 18)
Vegeta's ki attacks will be more than enough to put Frieza in this form, so use them and win.
Area 13 (battle 19, 20 and 21)
Again you will be called upon to have easy battles, but when asked to survive with Krillin be very careful of your enemy's "Death Beam" as it appears to cause an enormous amount of damage. Defeat them all to get a second transformation Frieza potara as well as a purple "super transformation" potara.
Area 14 (battle 22 e 23)
These two survival missions are VERY difficult, but again you will have to be very careful with Frieza's Death Beam as it causes a serious amount of damage, in addition to its physical attacks, as they will come along in long combos and faster than you would expect. You may have some problems in the first few attempts, but you should be able to do it, even if it requires you to use some strategies, such as the one used against vegeta in the form of ape. Do you remember her? I hope so. you will get the Frieza potara in 3rd form.
Area 15 (battle 24)
This battle can turn out to be easier than expected if you are prepared for his ki attacks, which will cause unbelievable pain to our weakened Vegeta. Aside from that, try to slow him down by not only protecting yourself from his quick physical attacks, but also attacking him as soon as you get the chance, using lots of combos and the Galick Gun attack to knock him down for at least a couple of seconds. Eventually you will get the purple "Hatred of Sayans" potara.
Area 16 (battle 25)
this battle is easy to win if you use the Kaio-ken powerup as soon as possible and then proceed to attack with a heavy use of combo, or you can also try to keep Frieza away and bombard him with Kamehameha, reloading the ki and, when he is in the yellow bar , throw the required "Spirit Bomb" (I SAID REQUEST) which should be able to kill him, if used close enough to him and not dodged. Eventually you will get the Frieza potara in final form.
Area 17 (battle 26)
You simply have to defeat your enemy, but don't play with him. I know it sounds easy, but it can dodge some of your ki attacks, block SOME of your combos, and even counter your ki attacks by disappearing, reappearing and quickly launching a ki attack at you while you're not prepared, dealing a lot of damage to you. . So the best tactic is to throw a few small combos at him, then back off a bit and throw him a "Super Kamehameha" (or a "High Power Rush" if you're close enough). Keep repeating this strategy and you will soon win by earning a "Super Saiyan Goku" potara.
Area 18 (battle 27)
Frieza is impressive in this battle, huh? well, he's not that powerful, and using the same strategies I gave you in the previous battle you will have a very good chance against him. Beat him up and you're finally done with this story, but unfortunately he's not dead yet. Ho, I was about to forget that you will have to finish this battle using a "Super Kamehameha", but remember to use the SUPER Kamehameha, I would like to specify this because many people could not complete the battle because they did not use the right move. Eventually you will get two story capsules, which are "The Legendary Super Saiyan" and "The Universe Mightiest Warrior".
A Lonesome, Final Battle
battle 1 - Bardock vs Dodoria
battle 2 - Bardock vs 1st Form Frieza
battle 3 - Bardock vs Goku
Area 1 (battle 1)
This guy is definitely not strong, give him some random beating as soon as you get the chance and use the High Speed Rush. Now keep reloading your ki and as soon as possible keep throwing that attack.
Area 2 (battle 2)
This will be much more difficult, but you should be able to do it. Your enemy is a formidable attacker, so be sure to defend yourself when he uses physical attacks, then counter him with yours, but don't try to extend the combo very long, or Frieza will do the same with you. Also, he ki attacks could do you a lot of damage, so try to defend yourself (or dodge them depending on how good you are) at all costs. As soon as possible, and when you have the ki bar at maximum, move away and enter the blue bar, then go back to Frieza and use your most powerful attack ("Full Power Energy Bar"). keep repeating these steps, and soon you will defeat him. Then you will be taken to the cutscene and this story will end, but you would have to go back to fight an extra battle.
Area 3 (battle 3)
Your ultimate enemy in this story will be Goku, and as you can imagine he's a pretty tough enemy. Use the same technique used against Frieza, but be aware that this enemy is even more dangerous than him and generally also uses more physical attacks. Use the "Full Power Energy Ball" as soon as possible, but before throwing it you should stun your enemy by reaching the end of a physical combo. You will soon win the battle, earning a purple “Kakarot” potara, as well as the “The Cosmic Emperor” story potara.
The Greatest Warrior in the Universe
battle 1 - Goku vs Cooler Final Form
Here you will have to fight against the final form of Cooler, Frieza's older brother, and since you control Goku's basic form you can probably expect this to be a tough battle. Yes, he's strong and all of his ki's attacks will do you a lot of damage, so you'll have to throw everything you have at him and try to dodge all his attacks. It's hard to tell someone what to do in a case like this, but by using your Kamehameha and Spirit Bomb (from a long way off) you should damage them a lot without putting yourself in danger. After winning you will get "Frieza's Older Brother", "Z Item Fusion" and other random items.
Saga of the Androids
battle 1 - SSJ Trunks with Sword vs Mecha Frieza
battle 2 - Yamcha vs Android 20
battle 3 - SSJ Goku vs Android 19
battle 4 - SSJ Vegeta vs Android 19
battle 5 - Piccolo vs Dr. Gero
battle 6 - SSJ Vegeta vs Android 18
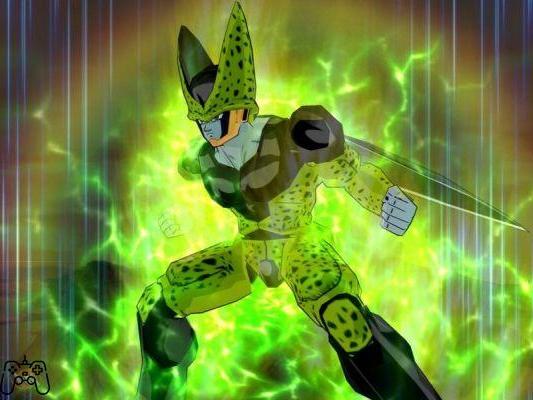
battle 7 - Piccolo vs 1st Form Cell
battle 8 - SSJ Trunks (Fighting) vs SSJ Super Vegeta
battle 9 - Piccolo vs Android 17
battle 10 - Android 16 vs 1st Form Cell
battle 11 - Tien vs 2nd Form Cell
battle 12 - Teen Gohan vs Goku
battle 13 - SSJ Super Vegeta vs 2nd Form Cell
battle 14 - SSJ Super Vegeta vs SSJ Trunks (Fighting)
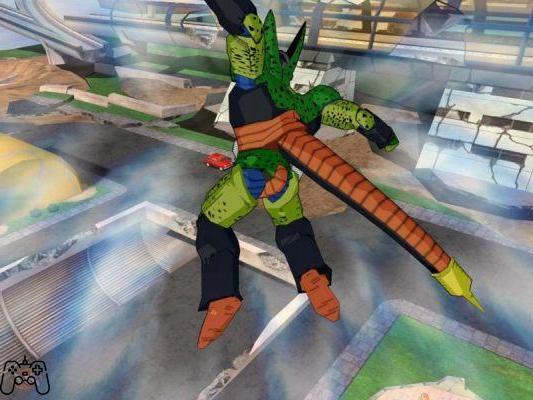
battle 15 - SSJ Super Vegeta vs Perfect Cell
battle 16 - SSJ Super Trunks vs Perfect Cell
battle 17 - Hercule vs Perfect Cell
battle 18 - SSJ Goku vs Perfect Cell
battle 19 - SSJ Teen Gohan vs Perfect Cell
battle 20 - SSJ Goku vs Cell Jr.
battle 21 - SSJ Super Vegeta vs Cell Jr.
battle 22 - SSJ Super Trunks vs Cell Jr.
battle 23 - Piccolo vs Cell Jr.
battle 24 - Krillin vs Cell Jr.
battle 25 - Yamcha vs Cell Jr.
battle 26 - Tien vs Cell Jr.
battle 27 - SSJ2 Teen Gohan vs Cell Jr.
battle 28 - SSJ2 Teen Gohan vs Perfect Cell
battle 29 - SSJ Super Vegeta vs Super Perfect Cell
battle 30 - SSJ2 Teen Gohan vs Super Perfect Cell
Area 1 (battle 1)
You will only have to finish this battle with the attack that they will tell you, "Shining Sword Attack", but beyond that it will be a very simple battle in which you will only have to be particularly careful about its combos. If you are having trouble buying enough time to recharge your ki to the point where you can use the Shinning Sword Attack, be sure to use "Full Power" and you will do it instantly. You will also unlock the "Super Saiyan Trunks" potara.
Area 2 (battle 2)
Just use the general strategy for survival battles.
Area 3 (battle 3)
Same thing here too, but you will have to be especially careful with physical combos, as they seem to really damage a lot.
Area 4 (battle 4)
An easy battle. In any case, don't forget to finish the battle with the "Big Bang Attack", which will make you win and get the "Android # 19" potara.
Area 5 (battle 5)
Since you only have to defeat the enemy, it won't be difficult. "Special Beam Cannon" will be more than enough, and with his help you will probably win without any problem, earning another "Android # 20" potara.
Area 6 (battle 6)
The usual survival mission, and of course you'll have to use the usual strategy. Eventually you will get the "Super Saiyan Vegeta" and "Android # 18" potaras.
Area 7 (battle 7)
Mainly you will have to go physical combos, but the "Special Beam Cannon" will also be of great help to win. Eventually you will get the "Absorption" potara.
Area 8 (battle 8)
Vegeta will go mostly physical combos, so your goal is to get away from him and use ki attacks. Then run away and continue like this, after not long you will win the battle, which will give you the "Super Saiyan Trunks" potara.
Area 9 (battle 9)
Aside from having to finish the battle with "Hellzone Grenade", this fight will be very easy and I don't think you have any problem ending it. Eventually you will get the "Android # 17" potara.
Area 10 (battle 10)
The character you control here is also strong against physical attacks, turning this encounter into a battle that even your younger brother, who has no experience with the game, would be able to win. Eventually you will get another "Android # 17" item along with an "Android # 16" potara.
Area 11 (battle 11)
You mostly use ki attacks, as your physical combos don't seem to take much away. So, get away, reload your ki as soon as possible and attack him with some of your ranged shots, as usual but don't forget to end the battle with the "Neo Tri Beam". As soon as you win, you will get the "Super Saiyan" potara.
Area 12 (battle 12)
Easy battle, I don't think you need help with this one. Eventually you will get the "Super Saiyan Teen Gohan" potara.
Area 13 (battle 13)
This will be easy too, both physical and ki attacks can do some decent damage to Cell, so use them and you'll win in a second. At the end of the battle you will get the "Cell 2nd Form" potara.
Area 14 (battle 14)
I will avoid giving you specific instructions for this battle, just attack Trunks as much as possible and you will win.
Area 15 (battle 15)
Unlike in the show, you will have to win this battle using "Final Flash" at the end, and it may turn out to be a little more difficult than expected. Mainly use ki attacks and move away to recharge. Eventually you will get a purple "Absorption" potara.
Area 16 (battle 16)
your character here will be very strong against physical attacks, but you will still have to use the usual strategy for this type of battles. Eventually you will get the "Cell Perfect Form" potara.
Area 17 (battle 17)
"Defeat your opponent with all your MIGHT" ?! Strangely enough this battle is very easy, just keep using your ki attacks until you defeat which won't take long. At the end you will get the "Cell 2nd Form" potara
Area 18 (battle 18)
easy enough, but don't forget to use "Instant Transmission Kamehameha" to win!
Area 19 (battle 19)
another easy battle. Although your character is not very strong, you should use his ki attacks to damage Cell while trying to avoid his, which is fortunately quite easy! Eventually you will get another "Cell Perfect Form" potara.
Area 20 (battle 20, 21, 22, 23, 24, 25 and 26)
your enemies in this area will be VERY easy, except for their ki attacks, so you'll just have to block them as you advance for physical combos or to use your ki attacks.
Area 21 (battle 27)
did you read the strategy for the previous battle? now do the same in this one, and you will get a "Cell Jr." potara!
Area 22 (battle 28)
advanced are not for doing a lot of physical combos, but also remember to end the battle using a "Super Kamehameha" at the end. On top of that, both physical combos and ki attacks work great, or at least most of the time ... Eventually you will unlock the "Super Saiyan 2 Teen Gohan" potara.
Area 23 (battle 29)
just use the general strategy for go-in battles, but be especially wary of its "Death Beam" as it will cause an inordinate amount of damage. After defeating him you will get a "Super Saiyan Super Vegeta" potara.
Area 24 (battle 30)
being the last battle in this story, it's definitely hard you'll have to finish the battle using a super Kamehameha, and you'll probably have to use "Power up to the Very Limit" to get a chance to use that attack instantly. You can get close for physical attacks, but most of the time Cell will block you, so you should aim for short combos and ki attacks from a distance. true, if you are a beginner it may take a long time to finish this battle, but i'm sure you will eventually make it. At the end you will get two story potara: "Threat of the Galactic Warriors" and "Future Super Warrior".
Super Warrior of the Future
battle 1 - SSJ Trunks (Fighting) vs Android 18
battle 2 - SSJ Trunks (Fighting) vs Android 17
battle 3 - SSJ Trunks (Fighting) vs 1st Form Cell
battle 4 - SSJ Trunks (Fighting) vs SSJ4 Gogeta
Prologue:
After saying goodbye to Gohan and the others, Trunks returns to his future ... The future that has been conquered by the androids.
Using the power he gained from training with his father, Trunks begins his fight against the androids, which are destroying all civilizations, as well as the early developments of the very young Cell.
Area 1 (battle 1)
Easy, your "High Power Rush" and some physical combos will be more than enough to easily defeat your enemy. The “Trunks (Fighting)” potara awaits you at the end of the battle.
Area 2 (battle 2)
Exactly same as the previous battle, you will get the purple potara “Android # 17” at the end.
Area 3 (battle 3)
A little more difficult, mainly because you will have to finish it using a specific attack, namely "Finish Buster". if in this battle he is a bit physically stronger than your enemies, so try to defend yourself from his combos and counter him with any of your attacks. You can use the "Burning Attack" or the "High Power Rush" as support, but when your enemy is in his yellow bar make sure to get away and recharge your ki until you are at full strength, then use the "Finish Buster. "But only when you are close to your enemy are you pretty sure they won't have a chance to dodge it. After winning you will get the" Super Saiyan Trunks (Fighter) "potara.
Area 4 (battle 4)
As you can imagine, fighting one of the strongest characters in the game can't be easy (hehe). This can become a damn difficult battle if you haven't thought of a good strategy… do you remember that this stage allows ring outs? Well, as soon as the battle starts you will have to combo Gogeta until you can push him (with the indicator at the bottom right on the red area, as usual), do this and make sure your enemy is out of the ring area , or very close. Now use "High Power Rush" and everything should come to an end, guaranteeing you an easy win! Eventually you will get the story potara “The Ultimate Android”.
The Legendary Super Saiyan
battle 1 - SSJ Goku vs Broly
Broly is here to fight Kakarot and he will prove to be a very good enemy. Fortunately, you will simply have to defeat him and since he is extremely resistant to physical damage, you may have some problems following the usual strategy. In any case, you will need to get away from him as soon as possible, recharge your ki and throw Super Kamehameha at him. Keep recharging and using this strategy and you will soon win without much effort. "Broly", "Z Item Fusion" and other random items will be there waiting for you at the end of the fight.
The Threat of the Galactic Warrior
battle 1 - SSJ2 Teen Gohan vs Bojack Post-Transformation
Here Bojack and Gohan Super Saiyan 2 will be compared, as you will have to defeat him using your Super Kamehameha you may have some problems. Like Broly, Bojack is quite resistant to physical attacks, so you better stay away from him and throw Masenko attacks on him. When he is about to die, make sure you have three blue orbs and use your "Power up to the Very Limit". Now quickly approach your enemy and use the Super Kamehameha to kill him. At this point you will get "Galactic Warriors", "Z Item Fusion" and other random items.
Saga in Majin Buu
battle 1 - SSJ Goten vs SSJ Adult Gohan
battle 2 - SSJ Kid Trunks vs SSJ Super Vegeta
battle 3 - Kid Trunks vs Goten
battle 4 - Kid Trunks vs Hercule
battle 5 - Hercule vs Android 18
battle 6 - SSJ2 Adult Gohan vs Dabura
battle 7 --SSJ2 Goku vs Majin Vegeta
battle 8 - SSJ2 Adult Gohan vs Majin Buu (Good)
battle 9 --Majin Vegeta vs Majin Buu (Good)
battle 10 - SSJ3 Goku vs Majin Buu (Good)
battle 11 - Majin Buu (Good) vs Majin Buu (Pure Evil)
battle 12 - SSJ Gotenks vs Super Buu
battle 13 - SSJ3 Gotenks vs Super Buu
battle 14 - Ultimate Gohan vs Super Buu
battle 15 - Ultimate Gohan vs Super Buu (Gotenks Absorbed)
battle 16 - SSJ Vegito vs Super Buu (Gohan Absorbed)
battle 17 - SSJ3 Goku vs Kid Buu
battle 18 - SSJ2 Vegeta vs Kid Buu
battle 19 - Hercule Vs Kid Buu
battle 20 - Majin Buu (Good) vs Kid Buu
battle 21 - Goku vs Kid Buu
Area 1 (battle 1)
You just have to defeat Gohan, turning this into a battle you shouldn't have much trouble with. You will need to aim for long physical combos and "High Speed Rush", but make sure you dodge the ki attacks your enemy might try to make. Eventually you will get the "Goten" potara.
Area 2 (battle 2)
An easy survival battle, where all you have to do is just follow the usual strategy. Eventually you will get a "Z Item Fusion" and some other unimportant items. You will also get the "Kid Trunks" potara.
Area 3 (battle 3)
Easy battle, just use physical combos on your enemy until you have a chance to push him out of the arena, then use any ki attack, he will fall and you win by ring out, exactly as you were meant to do. You will get the purple potara "Super Saiyan" and "Super Saiyan Goten".
Area 4 (battle 4)
Use the same strategy as in the previous battle and in the end you will get the "Gohan" potara as well as the "Super Saiyan Kid Trunks" potara.
Saga in Majin Buu
Area 5 (battle 5)
this time you will have to use as many ki attacks as possible (just use the least expensive ones, no matter which ones you are using) and keep using them until you knock your enemy out of the arena. Also, try not to use physical attacks, as those don't seem to work very well. Eventually you will get the "Transforming Hero Set".
Area 6 (battle 6)
use physical combos and "Masenko" ki attacks and I bet you won't have any problems with this battle. Eventually you will get the "Demon King Dabura" and "Super Saiyan Gohan" potara.
Area 7 (battle 7)
An epic but easy battle. Use "High Power Rush" and physical combos, you will have the battle over in no time, receiving "Super Saiyan Vegeta 2" and Super Saiyan 2 Goku ".
Area 8 (battle 8)
The usual battle over the revival, use the usual strategy and everything will turn out for the best. You will get the "Super Saiyan 2 Gohan" potara (both the purple and the character).
Area 9 (battle 9)
"Final Explosion" is the attack that you will have to use to end this battle, and since it will almost completely clean up your character's life you will have to be very careful when using it. Use the "Big Bang Attack" to bring down your enemy's health bar and, when he gets to the yellow bar, run away. Reload your ki to the required point and use the attack that should kill him. You will get Babidi's potara.
Area 10 (battle 10)
Use physical combos as they will damage your enemy a lot. Then, when he is in his yellow life bar, you should (as usual) run away, charge until you are in the blue bar, then use the super Kamehameha and hope to have won the battle. You will get the "Super Saiyan 3 Goku" potara.
Area 11 (battle 11)
since you only have to survive to get "Wicked Person's Bullet" and "Elder Supreme Kai", use the usual strategy and everything will be fine.
Area 12 (battle 12)
"Galactic Donut" is the attack that you will have to use this time, so you will have to finish your opponent using physical attacks and, when he has reached the yellow life bar, go with the attack specified above. Eventually you will get the "Gotenks" and "Super Saiyan Gotenks" potaras.
Area 13 (battle 13)
This is an easy battle, you just have to be careful to finish it using "Charging Ultra Buu Buu Volleyball", which is your most powerful attack. Attack him as long as you want, and when your enemy is in his yellow life bar, fly away and try to launch your attack, which will do a great amount of damage and will likely kill him. Later you will have won the "Super Saiyan 3 Gotenks" potara along with the potara for the "Super Saiyan 2 Gotenks" character.
Area 14 (battle 14)
You will be called to finish the battle with an attack again, this time it will be "Burst Rush". use the usual strategy, go to the base of physical attacks and use the attack specified at the end. All this will earn you "Absorption" and the potara of "Super Buu".
Area 15 (battle 15)
You will have to survive, use the usual strategy and you shouldn't have too many problems. Eventually you will get the "Ultimate Gohan" potara.
Area 16 (battle 16)
Again, you'll have to finish the battle using "Beam Sword Slash". it won't be very difficult since you are using with one of the most powerful characters in the game, so use physical combos and when your enemy is in his yellow bar, use the attack I told you earlier. Make sure you only use it when it's close to you, or you may miss it. Eventually you will get the "Vegito" potara and unlock the "Majin Buu (Good) character" thanks to his potara.
Area 17 (battle 17)
HERE you will start at the section of the game that many people find to be the most difficult. Technically you will have to survive in four battles against Kid Buu, and this first battle will be the easiest. Start by using small combos and push your enemy away as soon as you get the chance. If he uses ki attacks, you should either carry or move quickly to one side (depending on what you do best, and it's obviously a matter of taste) in order to avoid him, as they will do you way too much damage. Keep it up, push him away (and run away in turn using the Rush button) as soon as possible and try to avoid all the ki attacks he throws at you.
Area 18 (battle 18)
Another survival battle, this time around will be 120 seconds with Vegeta. it is a little more difficult than the previous one, but you should mainly use an adapted strategy. try to push him as far as you did with Goku, but keep moving all the time and be even more careful of Kid Buu's ki attacks. and be very careful when he breaks your guard, as he will be able to do a lot of damage after doing so, without us being able to do anything to stop him. It seems very difficult, but keep following this strategy and run far, after not long you will make it. Eventually you will be given the "Super Saiyan 2 Vegeta" potara.
Area 19 (battle 19)
You will have to survive for 60 seconds with Hercule, but it will turn out to be an easy battle that you know how to do. Try to stay away from Kid Buu and refill your ki as soon as possible. When he gets close to you, use "Present Bomb" (Use less ki than the other attacks) and run away again. Keep repeating these steps and soon you will win the battle, which will reward you with "Videl" potara.
Area 20 (battle 20)
The last survival battle is, unfortunately, one of the most difficult. block physical combos and keep running away. You get to avoid combos and counter some of your own, pushing him far at the end. If you see it coming in your direction from afar, use ki attacks (such as "Flame Shower Breath") and run away a little longer. Eventually you will get the "Majin Buu (Good)" potara as well as unlocking "Vegeto" as a potara and as a character.
Area 21 (battle 21)
You will have to finish the battle with "Spirit Bomb" but strangely it is not an easy battle. Defend yourself from all physical attacks and counter with your combos, throwing as many Kamehameha as possible. When your enemy has life in the yellow area, go far away and start charging "Spirit Bomb", releasing it only when you are 99.9% sure (well, there is always 0.01% doubt) that you will not miss it. Eventually you will unlock not only the "Kid Buu" potara but also the "The Evil Monster of Janemba" story potara.
Janemba the Evil Monster
battle 1 - SSJ Gogeta vs Janemba
You will have to fight a single battle as Gogeta Super Saiyan against Janemba. Basically you will be asked to finish him with “Stardust Breaker”, so start attacking him with everything you have and, when he reaches his yellow life bar, run away from him and recharge your energy until you can launch the designated attack. After winning, get "People Maliciousness" and some random Z items.
Baby's Revenge
battle 1 - SSJ4 Goku vs Baby Vegeta

Baby's Revenge
Here you will hold the first battle from Dragon Ball GT, Goku Super Saiyan 4 versus Vegeta Baby. He is not very strong, and since you will only have to defeat him (you are not required to use a specific move to defeat him or other tricks) attack him as physically as possible, but be careful, as he seems to be able to block a lot of attacks, plus the its Final Flash is quite powerful. After winning you will get "SS4 Goku's Fusion", "SS4 Vegeta Fusion" and another random potara.
The Ultimate Android
battle 1 - SSJ4 Goku vs Super 17
Now we will have to face the second (and last) battle from Dragon Ball GT, Goku Super Saiyan 4 vs Super 17. He is quite strong, and since you have to defeat him using Goku's 10x Kamehameha you could be in trouble. It seems that '17 always starts the battle using one of his ki attacks instantly (watch out for his "Hell Storm", as although it won't harm you much it will produce up to 50 hits), so be ready. As for the battle, there is something you can try and by doing this you will probably have a better chance of using your final attack: start attacking it as you usually do and, when it is about to die (when it is about halfway through its gauge). yellow), push it as far as you can. Then quickly recharge your ki until you have the energy to throw the 10x Kamehameha, and when it comes close to you, use it. By then he will probably be dead and you will have won the battle! After winning you will get several random capsules along with a "Goku Super Saiyan 4" potara and "The True Ultimate Android" story potara.
Revenge of the Saiyans
battle 1 - Vegeta (Scouter) vs Zarbon
battle 2 - Vegeta (Scouter) vs Dodoria
battle 3 - Vegeta (Scouter) vs Zarbon Post-Transformation
battle 4 - Raditz vs 1st Form Frieza
battle 5 - Saibaman vs 1st Form Frieza
battle 6 - Nappa vs 1st Form Frieza
battle 7 - Bardock vs 1st Form Frieza
battle 8 - Vegeta (Scouter) vs 1st Form Frieza
Area 1 (battle 1)
This is going to be a bit more difficult than the same (well, almost the same) battle you faced in the Frieza saga as you now have to play with a weaker Vegeta. Your physical combos won't do him a decent amount of damage to defeat him, so the best way is definitely to attack him from afar with the "Galik Gun" as many times as possible. However, if you need it, you can use your expensive “Full Power” skill to instantly use the “Super Explosive Wave”, which is a very effective attack at short distances. Keep staying away from him, use the ki attacks specified above and you will soon win.
Area 2 (battle 2)
Same thing as before, but this time your enemy is a little weaker.
Area 3 (battle 3)
Use the same strategy as in the first battle, but now you will also have to watch out for our enemy's physical attacks, which have become stronger.
Area 4 (battle 4, 5, 6, 7 e 8)
Here you will have to defeat Frieza using a lot of different Saiyans (defeat him with Vegeta to get the purple potara from "Tuffles") and also using a Saibaman ... In any case your strategy must be the same for all five battles, stay away from him and try to attack him with your best ki attacks as many times as possible, while trying to dodge his powerful "Death Beam". When the last battle is completed, you will get the story potara “The Plan to Conquer Earth”.
The emperor of the Cosmos
battle 1 - Final Form Frieza vs Vegeta
battle 2 - Final Form Frieza vs Goku
battle 3 - Final Form Frieza vs Krillin
battle 4 - Final Form Frieza vs SSJ Goku
battle 5 - Final Form Frieza vs Cooler Final Form
Area 1 (battle 1)
Really easy battles, the "Death Beam" and physical attacks will be enough. Also, at the end you will get the “Frieza Final Form” potara.
Area 2 (battle 2)
Easy battle, same strategy as before.
Area 3 (battle 3)
Again as before, this is even easier than those already addressed!
Area 4 (battle 4)
Here you will have to kill your enemy using the "Death Ball", so make sure you do it when Goku Super Saiyan is in his yellow life bar. you can use the “Full Power” power up to reach the necessary energy so you can easily launch it, so make sure you do it as soon as possible! You will get another "Super Saiyan" potara at the end.
Area 5 (battle 5)
It may be difficult to damage your enemy in this battle using physical attacks and combos, so try to stay away from them and use the "Death Beam" as many times as possible, trying to activate "Full Power" to use the "Death. Ball ”if you feel the need. Eventually you will get "Frieza Final Form - Full Power" which is also an interesting potara, and you will get the story potara "The Revenge of the Sayans".
The Ultimate True Android
battle 1 - Perfect Cell vs SSJ Super Trunks
battle 2 - Perfect Cell vs SSJ Super Vegeta
battle 3 - Perfect Cell vs SSJ2 Goku
battle 4 - Perfect Cell Perfect Form vs SSJ2 Teen Gohan
battle 5 - Perfect Cell Perfect Form vs Super 17
Area 1 (battle 1)
Your ONLY problem with this battle is that your enemy is very strong against physical attacks, so you should NEVER try to use that kind of strategy against him. As soon as the battle begins, get in the water and recharge your ki. Then try to launch your ki attacks from here, decreasing his health. If he gets close to you, make sure you run far and continue the same strategy until you win. You can also use "Perfect Barrier", but I must remember that that attack is only effective at short distances.
Area 2 (battle 2)
Here you can also go for physical attacks, as well as use ki attacks when you feel like it. The battle will not be very difficult, I believe you will be able to do it without too much trouble.
Area 3 (battle 3)
Same thing as in the last fight, but try to block as many Goku combos as possible, and counter with super Kamehameha or "Perfect Barrier" if you get the chance. Eventually you will get "Super Saiyan Goku", which is always nice!
Area 4 (battle 4) Your new form will be much more powerful, but you can always use the strategy of the last battle, using "Spirit Bomb" to finish it (as required), otherwise you will have to start over. Eventually you will get "Super Transformation".
Area 5 (battle 5) Not very strong players might have problems here, but I will try to help you. Don't do very prolonged combos against him, as most of the time he will be able to stop them easily, so you'll only have to do short ones AND normally walk away from him to use ki attacks. If you want to use "Spirit Bomb" make sure you only do it when he is close to you, otherwise you won't be able to damage him. You should also try to block all of his ki attacks, as "Hell Storm" is really annoying and can also cause us a lot of damage. You will also unlock the story potara "The Destructive Majin".
The Destructive Majin
battle 1 - Majin Buu (Good) vs SSJ2 Vegeta
battle 2 - Majin Buu (Good) vs SSJ3 Goku
battle 3 - Super Buu vs SSJ3 Gotenks
battle 4 - Super Buu vs SSJ Vegito
battle 5 - Majin Buu (Good) vs Janemba
Area 1 (battle 1)
Easy, but long battle. Your enemy is not very powerful, but neither are you. You should try to use physical combos and, when possible, ki attacks, but I am warning you right now that this can become a very long battle!
Area 2 (battle 2)
Another easy battle, you will have to use the same strategy as the previous battle, but be careful because in this form Goku is more efficient in physical attacks, which should suggest "try to avoid them at all costs" and then try to counter with the your combo set. At the end you will receive an important "Super Saiyan" potara and other random potara.
Area 3 (battle 3)
If you have completed the previous battle you will have some relaxation with this one, as your strategy will be the same BUT you will NEVER have to use "Extermination of Mankind Homing Blasts", as that particular attack does not cause much damage to your enemy and can be easily avoided (and stopped).
Area 4 (battle 4)
In addition to having to fight against a legendary character, this battle could have been much easier if you did not have a victory condition, in practice you will have to finish the battle with your Super Buu "Revenge Death Bomber", a move that will make you lose. a lot of life. In any case, proceed as in the last battles (this time using "Extermination of Mankind Homing Blasts" if your enemy is in the water and far from you) and, when he reaches the yellow life bar, try to get as far as possible and load up your super finishing move. When you can finally use it, get close to your enemy and do it. If you've defeated him, fine, if not, you'll be in BIG trouble. Ah, I forgot to mention that his physical attacks are very powerful, so make sure you block them all.
Area 5 (battle 5)
You will have to be especially careful of Janemba's ki attacks, besides that your best strategy is definitely to attack at close range with your physical combos. Eventually "Psyche Ogre" will be there waiting for you along with the potara of the "Revenge of Baby" story.
The Plan to Conquer the Earth
battle 1 - Bojack Post-Transformation vs Ultimate Gohan
battle 2 - Broly vs SSJ2 Vegeta
battle 3 - Mecha Frieza vs SSJ3 Goku
battle 4 - Cooler Final Form vs SSJ Gogeta
battle 5 - Baby Vegeta vs SSJ4 Gogeta
battle 6 - Super 17 vs SSJ4 Gogeta
Area 1 (battle 1)
You will get a purple "Seal Release" potara for completing this really easy battle, where physical attacks and a few ki attacks will be more than enough to defeat Gohan.
Area 2 (battle 2)
Poprio like Bojak, Broly is pretty strong in physical attacks, and this will prove to be another pretty easy fight. Do the same things as in the previous battle and you will win. Eventually you will get the "Super Saiyan 4 Vegeta" potara which will allow you to use him as a character.
Area 3 (battle 3)
In this fight you will have to be particularly careful of Goku's physical combos, which will cause a lot of damage and take a long time to finish. When he's about to do them, be sure to block them and counter with your long combo set. In addition, you will also need to rely on some of your ki attacks, as they can do a good amount of damage. Eventually you will get the purple "Reconstruction Surgery" potara.
Area 4 (battle 4)
Here you should use the strategy already used in previous battles, but be even more careful with all the moves of your enemy: all his attacks, both physical and ki, will do a lot of harm. That said, try to stay away and attack him with your ki attacks, so you can do decent damage to him without getting too exposed. The potara you will get at the end of the battle is "Goku Fusion".
Area 5 (battle 5 e 6)
For both characters the strategy is almost the same, but since Super 17 can't recharge ki, you'll have to be careful with him. For both enemies you will have to try to block as many attacks as possible, and when Gogeta finishes one of his combos you will have to counter him with your set of combos, in order to have more ki to launch a powerful final attack at the end of the fight. When these two battles are over you will get "Artificial Bruits Waves" and "Vegeta Fusion", both purple potara that you can have fun with.
The real World Tournament
battle 1 - Tien vs Chiaotzu
battle 2 - Kid Goku vs Krillin
battle 3 - Chiaotzu vs General Tao
battle 4 - Ten vs General Tao
battle 5 - Krillin vs Master Roshi
battle 6 - Master Roshi vs Kid Goku
battle 7 - General Tao vs Kid Goku
battle 8 - Piccolo vs Kid Goku
Area 1 (battle 1)
Do combos on your enemy until the bottom right bar is in the red section, then throw him away. He will probably end up near the end of the arena (if not outside of it) at this point use a ki attack, he will fall and you win. In any case, remember that in this part of the story you have to win all the battles by ring-out, okay?
Area 2 (battle 2)
Same as before.
Area 3 (battle 3 e 4)
Same as before.
Area 4 (battle 5)
Same as before.
Area 5 (battle 6)
Same as before.
Area 6 (battle 7)
Same as before.
Area 7 (battle 8)
Same as before, yes, I copied - pasted all five times! In any case these battles are easy, you just have to follow the strategy I gave you in the first one and, in case it fails, keep repeating it until you get the desired result.
Solution summary
General Strategies
Saiyan saga
Saga of Frieza
A Lonesome Final Battle
The Greatest Warrior In The Universe
Saga of the Androids
Super Warrior Of The Future
The Legendary Super Saiyan
The Threat of the Galactic Warrior
Saga in Majin Buu
Janemba the Evil Monster
Baby's Revenge
The Ultimate Android
Revenge of the Saiyans
The Emperor of the Cosmos
The Ultimate True Android
The Destructive Majin
The Plan to Conquer the Earth
The Real World Tournament