Please note:
The solution is based on the US PC version of the game. There may be divergences from the Spanish version and / or for other platforms.
Cyprus
Once the enemy mercenaries have been eliminated, exit the Templar building, following the golden arrow. Fight inside the church, then use the orange items to heal your wounds. Talk to the great master, inside the sacred place, and continue to proceed in the direction indicated by the golden arrows. When you reach the building at the top of the hill, begin to descend, making your way along the path indicated by the arrows. Smash the back door, freeing the occupants. Move to the left where the rock is. Examine the second historical tablet, then make your way to the ruins. Once in the amphitheater, use the most powerful attack to destroy the shields. Using the golden arrows as a guide, remember to scan the historical tablet on the right, then pass the semi-destroyed wall near the ruined castle. At the ravine, left. Defeated the chief mercenary, break the door of the nearby building, freeing the French, and ending the mission.
Misty Forest
Follow the path, up to the half-destroyed bridge, stopping as soon as you hear the sound of arrows coming from your sides. After the bridge, pay attention to the dogs. Collect the contents of the chest near the camp, then go through the forest. Locate the torch on the right, towards a path that proceeds to a hut. Examine the corpse, revealing a small special area containing several treasures. Then look at the area beyond the nearest building, follow the golden arrows to return to the hut. Hold the Control key, revealing the footprints, to follow as they make their way through the forest.
Swerve to the left, free the priest from the attack of the dogs to complete the bonus objective. Go back along the footprints, follow the path to the beast's lair. Create an ambush, then start fighting the hideous being. His defeat will allow you to continue, we recommend using the elevated path, which leads to a camp. From there, follow the golden arrows, using the Control key to locate the bear traps - examine them one by one and disarm them, using the E key.
Retrieve the treasure, return to the king's tavern, receiving the commander's sword as a reward. Then start along the path traced by the golden arrow, being ambushed: hold down the Control key to examine the game area, locating the corpse of a Templar, from which you can recover a shield. Go to the port to finish the mission.
The Inquisition
Go up the stairs, up to the corridor, enter the first room on the right. Examine the book, retrieving a chronicle of the Templars. Exit the room, go down the corridor on the opposite side. Proceed towards the entrance flanked by angelic statues, arriving at the chapel: talk to Lorenzo, then start following him. Try to always stay at a "medium" distance - using the mini-map, keep the central arrow on the border of the red circle that covers Lorenzo's surroundings. When he has talked to Isaiah, you can proceed.
Open the bookcase, then head down to the basement using the tunnel. Using the E key, hide behind the desk, letting the guards pass. Go down the stairs to the prison. Kill the guards, then follow the golden arrows, to the torture chamber, to be examined in order to recover various items. Free the prisoners using the huge lever, killing all the opponents who try to stop you. Once out of the torture chamber, go down the stairs. Left, save the prisoner, then - as usual - make your way along the path dictated by the golden arrows. Open Marie's cell, using the lever on her right.
After fighting the guards, use the nearby lever to open the gate that leads to the next tunnel. Go down into the sewers, then drop the bridge, always using the nearby lever. Go over the bridge, then another lever, for another bridge. Go down the stairs, so don't move this last lever: it's a trap. A little later, the level will end.
City of Acre
Eliminate the Saracens near the port, converse with the Templar, then make your own all the crates visible along the marina. Follow the golden arrow, then push back the next two groups of enemies, thus saving two groups of soldiers. Talk to the wounded soldier near the tree. Fight the Saracens who animate the base of the tower, then talk to the commander. Exit to the left, first follow the white arrow, then the golden one, thus managing to retrieve various things from the various crates in the area. Talk to a second wounded ally, who will tell you some details about siege engines.
Following the white arrows, you will come to a scaffolding on the right: take a look at the chest immediately beyond it, near the stairs. Go up the flights of stairs, using the golden arrow as a guide. Use trebuchets to defend Acre from waves of enemies, hitting the siege towers. Then go through the tower to the door that was penetrated by the enemies. A final group of allies are trying to keep their opponents at bay; after helping them, use the wheel to lower the door, completing the level.
Video - Gameplay Trailer
Acre Tunnels
Go down the stairs, retrieve a torch, turn it on. Follow the arrow towards the corridor, light the two braziers, one of which is near the statue. Interact with the lever, causing the grating to rise, then proceeding to the sewers. Use the lever on the wall, bringing down a bridge. Pass it, go down the stairs to the left. One of the two characters will have to hold the next lever, while the other will go through the door.
Read the tablet, then activate the gate thanks to the torch-lever. Repeat on the next two levers. Left, use the lever in the alcove, opening a grate. Immediately after, another lever, on the floor, which will open a gate, suitable for descending. Avoid switches; the two characters will then have to position themselves near the levers, one positioned on the central floor, the other on the upper floor, making the bridge go down.
After passing it, light the three braziers, break the wall near the third. Another brazier, then take a look at the tablet behind the tomb to understand another piece of the message. Go up the stairs, another tablet, then follow the golden arrow. Two braziers to light. Move slowly, due to the different traps placed along the path - especially for the circular saws. Twentieth brazier, then some guillotines, to be overcome in a hurry. Avoid pressing the switches on the floor, then locate the brazier in the corner. Go up to the circular room, take the money from the chest, set the brazier on fire.
One of the two characters will then have to hold the lever steady, while the other proceeds beyond the gate, setting fire to yet another brazier. The character holding the lever will have to release it, opening the second gate. The other will have to pull the lever beyond it, allowing the passage to the partner. He opens the grate, lighting the torch on the wall. Follow in the footsteps, going down the ramp. After the corridor, there will be a brazier to light. The next room contains ground-level switches, which your characters must press in alternating sequence. Then, use the lever near the statue, deactivating the trap. Take the contents of the chest, exit the room, light the brazier in the corridor. Climb the steps, up to four levers. Activate them all by opening the grates. Straight, right, examine the tablet, then exit the memorial.
Open the grate using the lever, then walk along the skeletal corridor, carefully avoiding the switches on the ground, instead igniting the braziers in random order. Enter the room on the left, avoid the switch in the center, lower the two levers. Light the last three braziers in the area that will follow, then reaching the path that will lead to the exit.
Siege of Acre
Silently kill the two closest enemies, go down the stairs, hide behind the wall. Then enter the next room, set the supplies on fire. Right, wait for the bullet to arrive, which will kill a number of enemies. Eliminate the survivors. Make your way along the path marked by the golden arrows, locating an archer inside the tower - stay outside the white circle, marked on the ground, to avoid being hit by him. Go up the stairs to the left, then the ramp to the right, take out the archer at the top. Go back to the ground, walk around the garden dodging the bullets. Go up the ramp to the next tower. Climb it and take the archers out here too, then - when you get to the first catapult - shoot at the enemies to distract them.
When they are no longer watching you, you can catch them from behind and kill them with ease. Then set the catapult on fire. Drop the flashlight, defeat the enemies. Go through the door, light up yet another pile of supplies. Having repelled the enemies, go down the stairs to the right. Avoiding the shots of the archer, go past the fountain, take a left, silently kill the two enemies. Follow the directions given by the golden arrow, you will find another enemy to kill silently - near the gong.
Follow the arrows to the last warehouse, set fire to the supplies, then go down the stairs. Kill the two waves of knights, then kill the archers protecting the catapult as well. Take possession of it, throw boulders towards the Saracens. When they stop their assault, you can set fire to the weapon you just used. Keep following the signs to the enemy camp. Killed all the guards, the cardinal will be released. You will have to escort him: go down the ramp to the wooden platform. Kill the enemies, left, go down the stairs and proceed along the exit tunnel.
City of Ascalon
Take out the enemies near the beach, then save the village members from the Hashishin attack. You will have to act as an escort for the inhabitant, up to the first house. To the left of it, a chest, interesting content. Then destroy the door, freeing the villagers trapped inside. Go through the gate, watch out for the ambush. At the second house, break the door, freeing more enemies. Repeat for the third; the gate to the citadel will be opened for you. Follow the blue arrows, pushing back the enemies. Place a character at each lever, causing the door to close. So go up the stairs, use the two levers in the area to open the new passage.
Escort the new group of inhabitants along the road marked by the golden arrows. Wait for the blue Hashshin to leave, so you can silently kill the others, who have their backs to you. Examine the treasure inside the cave, then return to the city. Go along the wooden platforms, enter the burning courtyard. Repelled the Hashi, you will reach the entrance to the citadel.
Ascalon Citadel
Enter the first room, use the levers to close the gate. After noticing how impossible this is, follow the yellow arrows to the next room. Eliminate the Hashishin, read the tablet on the left. A little further on, past the flames, press Control to notice the presence of various switches in the area. Use the two levers on either side of the room, at the same time, placing your characters in correspondence with them.
Exit this room, right, to the end of the corridor. Repelled the attack of the Hash, enter the door they will have opened, positioning yourself near the yellow dot. Open the double doors, reaching the next area of the citadel. One of the two characters will have to use the first lever, his partner must go beyond the gate to take advantage of the second, then repeat this procedure until you reach the stairs. Follow the golden signs, turning right twice, then going up the stairs.
In this new room, stand on its right section, hold down the Control key, thus revealing the presence of a path. Follow it through the quills to the lever on the wall. Press it, then repeat these actions for the left side of the room. Then locate the semi-destroyed wall, hit it, retrieve the fragment of the diary of the Templars, exit the room.
Right, go through the dining room, making your way through the Hash. Use the various levers on the walls of the following rooms to deactivate the traps. You will be ambushed by some Hash and several archers - knowing this, you can fend them off with even greater ease. Then, you can continue beyond the barriers, recovering another fragment of the diary. Go down the stairs, examine the stone wall, destroy it, then continue left. Use the three levers, read the inscriptions on the tablet to complete the level.
Ibelin Mansion
Turn around, proceed along the downhill path. Wait for the two Saracens to overtake your character, then kill them by hitting them in the back. Keep walking along the path, arriving inside the city. At the wall, take a right, avoiding the archer near the tower. Collect the contents of the crate, then turn around and go up the wooden ramp. Silently take out the other two archers, keep going up. You will hear two Saracens talking about the prisoners - catch them from behind too, then follow the blue arrow.
Examine the door, freeing all prisoners. Follow the white arrow to a chest. Then continue along the path indicated by the golden sign, reaching a garden. Silently eliminate the two enemies patrolling the play area, then the two nearby archers. Follow the blue arrows, arriving at the Saracen warehouses. Kill the guards, set fire to the supplies contained in the warehouse, then make your way to the next fountain to deal with all the Saracens on site. When you reach the orange dot on the map, you can interact with the lever that opens the access to the mansion. Then exit the garden, going beyond the grate. Once through the gate, examine the catapult, then light a torch and set it on fire. Eliminate the palace guards who, having arrived on the scene, will try to obtain information on the incident.
Walk along the road marked by the orange arrow, reaching the camp. Pull the lever on the left, enter the building, then enter the library (opposite side of the corridor). Examine its content in detail. Keep following the golden arrow to escape the mansion. Eliminate Muzafar, using the charge attack, to complete the level.
La Roselle Night
Go up the stairs, after getting rid of the group of enemy soldiers. Right, retrieve the contents of the chest. Then approach the first house of the Templars, examine the door, go down the stairs, get rid of the two guards silently. Approach the market, then examine the door next to the second Templar house. Left, the second patrol intercepted, still in the vicinity of the gong.
Make your way using the golden arrows as directions, killing all of the king's soldiers. Go down the nearest branch, reaching the third house of the Templars, also to be examined. Near the stairs, take a left, retrieve the objects that you can find by following the white arrows. Then trust the gold, killing the reinforcements who will try in vain to stop your advance.

Go up the stairs, knock on the door of the fourth house of the Templars. Then go towards the yellow dot, examine the umpteenth door, watch the movie. Quickly run to the blue dot, saving some peasants from the attack of the guards. Then go up the stairs marked by the golden arrow, thus meeting Gerard.
Burning Forest
Make your way to the tree, grabbing the crate next to it. Then follow the white arrows, run through the forest. Locate the bear traps using the Control key. Cross the small river, thus approaching the enemy camp. Fight the opponents in the lower area, then climb to the top, examine all the corpses.
When you get to the bridge, we recommend that you silently kill all enemies on it before continuing on. Then go down to the ruins. Follow the path on the left, locating two tablets: they contain important fragments of the diary, examine them carefully. Making your way through the burning forest, you will come to a camp. Free him from the enemies, then examine the nearby tent.
Go up the hill, following the white arrows. Enter the first building, retrieve the tablet. Then take the stairs indicated by the golden arrow. Turn right, start fighting. At the fork in the road, hold down the Control key to view the routes, following to the left. Beware of bear traps; free the templar, then kill the three dark knights to end the level.
The swamp
Follow the path towards the village, catching the first two guards by surprise, so as to kill them silently. Get past the barrels, throw the pots at the next group of opponents, then get rid of the rest of the enemies that populate the village. Exit it, take a left, retrieve the diary of the Templars from the chest. Then walk around the fort, using the gold arrows as references. Jump over the tree to the ground, paying attention to the bear traps. Get rid of the Marauder leader, then open the cages, freeing all the prisoners. Make your way along the path marked by the white arrow, trying to distract the guards by throwing pots, so that you can then kill them silently.
Exit the cave, fighting the opponents. Examine the cage, then make your way to the group of swamp pirates. After repelling them, locate the ruined building on the left. Follow it, so make your tablet beyond the rubble. Then follow the yellow arrows, going up the path, silently killing the archer, recovering the contents of the crate at the end of the bridge. Jump back into the swamp, then walk up the wooden ramp to an abandoned fort. Examine the well on the right, getting more information on a strange symbol. When you arrive at the cemetery, take a look at the graves on the left, thus taking the royal shield.
Then jump over the tree, meeting a Templar. Follow him, thus being ambushed - repel all enemies, saving him. Left, jump to another tree and come across a brazier. Go up the wooden ramp, talk to the hermit. Go back to the swamp, hold down the Control key to view all available trails. One of them leads to a torch: take it, go to the brazier, light it, then start along the path that ends on a barrier: set it on fire with the torch, recover the hermit's objects, bring them back to the owner.
Now, take the path marked by the golden arrows, reaching a large village, populated by various enemies. After repelling them, talk to Marie near the harbor. Jump on the ship to finish the level.
Desert Town
Talk to the man on the left, you will be attacked by a group of bandits: after defeating them, escort your allies to the neighborhood on the other side of the city. Follow the golden arrows, saving the merchant. Cross the wooden bridge, silently kill all the archers, then continue the escort work. You will only have to deviate when the white arrow appears, as it signals the presence of a tablet, from which you can obtain a fragment of the Templar's diary.
Back at your allies, go up the wooden ramp, kill the archers, then open the gate using the lever. Repeat on the next two, defeating the opponents placed between one and the other. You will approach some catapults: kill the archers in their vicinity, then use the siege weapons to destroy the two barricades. After this area, use the lever to open the gate. Killing one last group of bandits will allow you to end the level.
Marauder's Camp
Hold down the Control key to examine the play area in detail. Use the path, which will become visible, to proceed beyond the gate. Silently kill the two guards, then approach the first torch. Turn left, then begin to systematically eliminate all the guards in the area. At the second part of the camp, pay attention to the archers positioned on the tower - dodge their arrows, placing yourself in an alcove to then attack the enemies that will arrive on the scene, catching them by surprise. Then use the Control key to locate traces that lead to an islet, there will be a chest there, you can open it to retrieve a tunic.
Avoid the patrol of soldiers, ignoring the watchtower for now. Instead, move to the right, killing the guards near the harbor. Light a torch, set the two treasures on fire to complete the bonus objective. Climb the hill, then continue to the other side of the camp, getting rid of the two guards near the tent. During the next segment of the game, try to stay as close to the white curtain as possible. You can then kill the lone guard without being noticed by him, he is at the end of the ramp. Repeat this elimination mode for the two guards inside the tower, then target the largest patrol in the area.
So, walk along the raised path, fight all the enemies, go down the wooden ramp and take the fragment of the diary of the Templars from the tablet. Go up the wooden ramps, follow the golden arrows, then interact with the lever on the right, disabling the spike traps near the steps. Quickly run along these steps, pull the second lever, so that the traps go to kill the incoming enemies.
Climb the stairs again, up to a pair of towers. Stay adjacent to the wall to avoid being hit by the arrows that will be shot from the tower. Then go up the steps, reaching a small library, where you can retrieve another fragment of a diary. Making your way along the path marked by the usual golden arrows, you can activate other traps, which will help you get rid of the opponents in the area. Then cross the bridge to get to the end of the level.
Temple of the Nine
Examine the inscriptions on the tablet on the right, then light the brazier using the torch. Cross the bridge, open the door thanks to the lever. Dodge the flames by following the path. Run up the stairs, retrieve the contents of the crates, interact with the lever on the wall to continue. In this new room, you will have to place one of the two characters on one of the switches, the other will then have to pull the lever with the corresponding symbol. By repeating for all four levers, you will open the entrance to the next chamber. Contains several useful items.
Go back to the previous room, position yourself in correspondence with the yellow dot. Get Marie up the ramp, she will then have to interact with the wheel. Celian will have to go up the stone ramp to the right, recovering a chest, then go back and cross the wooden bridge. Marie will have to spin the wheel, causing a second bridge to descend. Celian will walk along it, use the following lever. You will switch back to Marie, and you will have to repeat the process along the following bridge and gate. In the new room, be careful to dodge all the switches on the ground: they activate dangerous traps based on arrows. Crossing a bridge, you will come to a room containing a puzzle of levers and bridges. The first two levers will bring down the first bridge, along which you will have to move the two characters. So leave one of them near the second lever, move the other one along the bridge, up to the third. Interact to cause the last bridge to descend, then examine the tablet on the left. Go down to the gate, two more levers to open it.
Right, look beyond the statues. Hold down the Control key to locate the path, then move towards the goal marked in white. Do not pull the lever, turn around instead, and proceed inside the central passage, avoiding all the switches on the ground. Right, go down the ramp, quickly run towards the maze of flames. Go straight up to the wall, left, follow the exit path. Interact with the lever to the right of the gate. Follow the stairs to the left; one of the two characters will have to place himself on the switch, the other will have to pull the corresponding lever. Then, go back to the room where the huge statues are, go through the gate. Use the lever to open the gate on the right, examine the tablet.
Open the following path using the flashlight on the wall. One of the two characters must be placed on the switch on the left, marked with an "I" symbol. The other on the one with the symbol "III", at the bottom right. Change again character, this will have to go on the switch with the symbol "I", on the far left. So, in the center. Then use the levers to finally open access to the last area.
From here, use switches II, I, III, I in sequence to exit definitively. Go up the stairs to the left. Then, have Marie hold the lever steady, while Celian has to run around the room, activating all the others. The door to the final chamber will open, where the level will end.
Video - Trailer E3 2010
Templar Hideout
Follow the golden signs to a field. Dodge the archers, silently killing enemies in the area. You can then make your way along the elevated path, also killing the enemies located there. Turn left, coming to a field. Follow the path, recovering various treasures. You will be intercepted by a group of monks: get rid of it, then examine the tablet to get a fragment of the diary. Get off, always letting yourself be guided by the golden signs. Having saved the farmer, also clear the entrance to the mine from the enemy presence, then use the path that runs along the farm to surprise the soldiers who make up the French checkpoint, so you can kill them without being detected.
Go down the hill to a river. At the end of the path, you can retrieve two tablets. You will then have to be guided by the golden signs, hold down the Control key, revealing a path to follow. Accept the duel with the Templars, near the entrance, thus completing the third bonus objective. Then go to the yellow dot, talk to the Grand Master, fight him. Pull down the two levers, completing the level.
Montsegur Outskirts
Following the path, you will have to save a villager from the attack of the soldiers. Then follow the golden arrows, save a second, take the road to the left of the entrance to the town. Next to the ruins, you can free a third of them, and then access the entrance. Take out the commander, examine the flashing dot near the statue. Go down the river, following the golden arrow.
A second enemy commander will oppose you, to be reset as done for the first. Then enter the alley between the two buildings, which will allow you to proceed. Third commander, then left the village. Cross the bridge, paying attention to the falling tree. Enter the enemy camp, eliminate Isaiah, then cross the tree that blocks the path. Examine the enemy bodies on the ground, take out the pair of beasts, then walk the path that proceeds along the cliff. Go up the stairs, up to the walls. As the main entrance will be blocked, use the directions provided by the golden arrows to find an alternate path. Examine the tablet, completing the level after entering the castle.
Castle Courtyard
After defeating the enemies in the first courtyard, use a torch to burn the first pack of supplies for the inquisition. Go up the stairs, eliminate the opponents blocking the entrance, paying attention to the siege bullets that will be fired at you. Go up the stairs on the left, enter, use the levers on the side to open the main gate. At the courtyard, go up to the right, ending the archers - but stay away from the beast. Interact with the lever on the right, opening the gate. In the following courtyard, silently kill the two guards near the gong. Then retrieve the torch, light it, burn the second crate of supplies for the inquisition. Follow the golden arrows, recovering the treasures along the way, staying on the right side of the building. When the two groups of guards split, you can kill them both by catching them from behind, in sequence.
Go down the ramp, then stop, wait for the patrols to pass, and proceed. Follow the blue arrows to locate the third supply for the inquisition, then go up the stairs, pulling the levers if the path is obstructed. Then use the large wheel to open access to the inside of the castle. Enter, starting the fight against the Grand Master. You will have to pay attention to his unblockable attack, always performed from above: it is advisable to maintain a high level of life points, so as to be sure that these hits do not cause your premature demise.
Montsegur Castle
Go down the first corridor, entering the room on the right. Free the servant, then go through the corridor, taking out the soldiers. Retrieve the Templar's diary. Follow the golden arrow, towards the fountain, then right, to a training room. Kill all the enemies located inside it, then examine the crates in the corner to get to the second floor.
Walk the entire corridor to the next room, examine the bookcase, thus opening a secret door. Enter the study, examine the documents next to the jar of water. Retrieve the key near the nearby set of books, defeat the enemies, exit the study. Go down the corridor, following the directions of the white arrows to reach another part of Celian's documents, examining the library, as usual. Then making your way along the path marked by the golden arrows, take out the inquisitor, taking a left. In the nearby library, always on the left, you can find the third part of Celian's documents, then - in the shelf on the right - the key.
The following bookcase can be overturned to access a secret treasure room, from which you can then reach a trap door. Go down the stairs, eliminate the inquisition, then - using the blue dot as a reference - interact with the lever on the wall to open the cell, freeing your servant. When you reach the fountain, go right, eliminate the great inquisitor. Proceed to the golden arrow and are then stopped by an ambush. Enter to the right, killing another great inquisitor, then - in the library on the left - you can get the last fragment of Celian's documents. Go down the following stairs, towards a cellar. After the fight against Lorenzo, you will reach the end of the level.
The Sanctuary
Get past the traps, then defeat the French soldiers. Follow the white arrow to the left, then press the Control key near the wall, then breaking it, gaining access to various objects. Exit to the left, pass two more fire traps, then use the lever on the pedestal to free access. Interact with the lever on the wall next to the door. Return to the room full of water, defeat the Templars. Go up the stairs, following the path marked by the white arrows. You will come to two levers: one of the characters will have to look for switches between them and the gate, then press them. The character closest to the gate will have to quickly run past it, dodging the traps. Then interact with the lever on the opposite side, keeping it open so that your teammate can follow you.
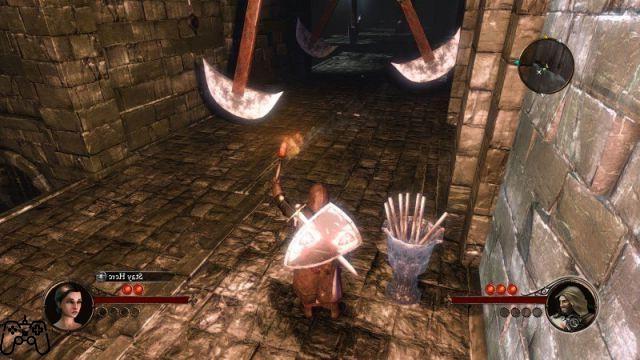
Climb along the sloping wall, examine the tablet, continue along the golden arrows. Interact with the two levers, then run towards the gate, always using the lever to keep it open. Go through the passage and press another lever to open your way to the next room. Eliminate the beasts and the inquisitors, pass the pillar, go down the passage to the right, examine the tablet. Back at the gate, hold the Control key to find the signs on the floor, then use the lever on the right, marked by an arrow. Pass the flames and moving logs, diving into the alcove if necessary. Pull the lever, hold down the Control key near the wall, tearing it apart. You will be able to obtain various items, which can be taken from the chest. Make your way to the central area of the room, examine the tablet. Go down the passage on the left, immediately after the alcove. When you reach the room with the two pots full of food, examine them by holding down the Control key. Then destroy the wall, and go down again. One of the two characters will have to hold the lever, while the other will have to proceed along the corridor covered by the flames.
Go up the stairs to the left, then use the lever on the wall to the right, opening your way to the lower level. Then go to the character holding the lever, release it, go through the gate. Repeat the same procedure for the lever that allows access to the central floor, then to the first. When you reach two other food pots, go down to the right, use the first lever, then change characters. Move to the left, as far forward as possible, then press "up" so that the other character releases the lever. The other subject will therefore be able to overcome the gates and traps, up to the third lever, on the left. Move to the subject on the right, having him release it. Repeat this procedure continuously, until both characters reach a room where there are giant statues.
Grab and light a torch, then use it on the base of the nearest statue. Now, the character with the flashlight will have to stand still while his colleague descends the stairs. Press and hold the lever immediately after traps made up of moving wood. Check back on the character with the torch, turn it back on, then go down the stairs, setting fire to the base of a second statue, then the third one, on the opposite side of the room.
Back at the entrance, check the subject holding the lever, causing him to release. Go back to the entrance. Turn on the torch, position yourself in front of the moving logs, then walk them until you reach the statue. Turn on his base, go back to the entrance. Flashlight again, then left, pull the lever disabling the traps, then go through the passage made now accessible. Another statue to light up.
Flashlight again, then run down the stairs to the right. Go past the two spike traps on the left, light the brazier, use it to keep the torch fire alive. Continue beyond the trap on the right. Turn around, towards the door, pass yet another trap - on the left. Run up the stairs, turn on the statue. Have both characters go up the stairs to the left. In the following three rooms, both characters will have to interact with the two levers characterized by the same symbol, only in this way will the steps that allow you to proceed will open. One of the two will then have to go back to the entrance, light a torch, go up the stairs, light the brazier in the corridor, get to the last statue, also light its base.
Then let both subjects descend towards the lower floor, passing the traps made up of various wooden trunks. Entering the sanctuary, you will have to challenge the Great Master. We recommend blocking as much as possible, accumulating points on the energy bar, so that you can launch a power attack to end the enemy. When the opponent's energy starts running low, you may be challenged by his use of an unblockable attack - run away and use prayer to make up for it. Then, use the charge to damage it beyond repair. After the victory, you can enjoy the final cutscene!


