


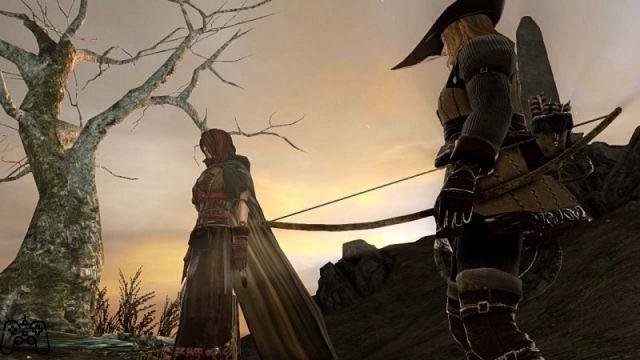
Introduction
Dark Souls 2 does not differ much from its predecessor in terms of difficulty, however the game areas will tend to be shorter, but noticeably more intense in terms of the enemies to be faced. For everything else, the usual rule applies not to focus on a single statistic, but to range in several of these and be effective both in melee and in long distance. Using the ascetic bonfires, not only will revive, in an enhanced version, every single enemy, but will allow you to collect every object and treasure present again, however, the enhancement of the area will also become permanent in the New Game + (and following), therefore before deciding to use one to collect useful items, make sure the area is easy to navigate even while avoiding clashes. As always, using the help of other players to deal with bosses will greatly reduce the difficulty of the latter, even making some battles ridiculously easy; It may also be advisable to have yourself summoned before facing one, as you can learn the strategy before facing your own battle. The choice of the class is binding only in the very first hours of the game and, in a short time, you will be able to cast spells, even if your initial choice was that of a warrior. The receptacles of the souls, are very useful but very rare objects, they will allow you to be able to reassign each level point, in this way you can correct your mistakes, but remember that you will not return to the first level of experience and, in the end, you will still have to spend all points up to the current one. Read every message left by other players, knowing first the presence of a trap or an ambush could prove vital in practically any situation. Always try to stay under 69,9% of the maximum transportable weight as you will perform fast rolls and will not be clumsy in the race. Finally, remember that the materials to upgrade weapons and armor are extremely rare, choose your equipment first, do several tests and, only when you are sure, use your precious sparkling titanites or petrified dragon bones.
This guide will be divided into four parts:
Boss
Merchants and objects
Covenant, spells, pyromancy, miracles, evil eyes.
Boss soul weapons, rings and levels
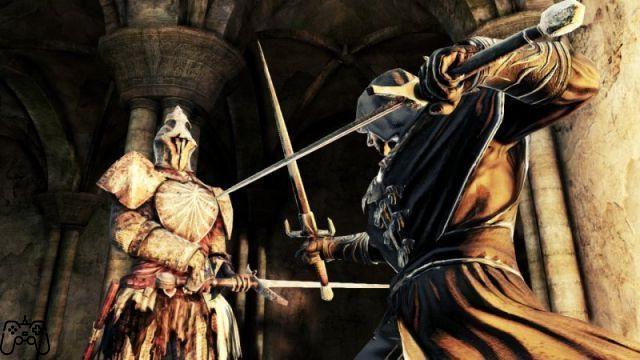
Battles with Bosses
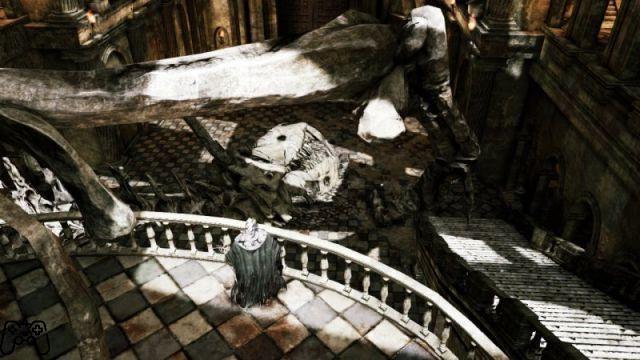
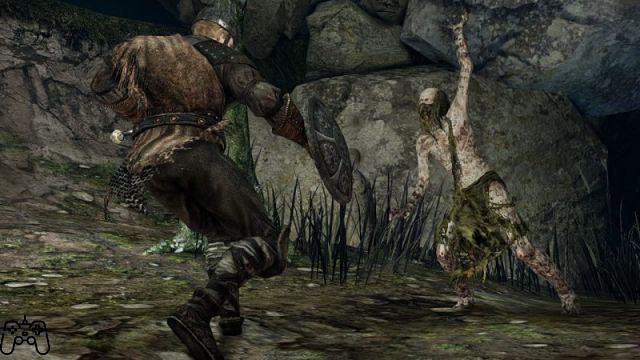
The last Giant
Pay attention to his trampling, sometimes he will perform only one, while other times up to three, alternating the two legs. These hits could kill you in an instant if your life is below 50%. For hand-to-hand characters, it is advisable to target the left leg, wait for it to stomp, dodge to the right leg, then return to your target and strike a couple of times. When you are at a safe distance, you will have to watch out for his arm strike, however, he will be remarkably slow to make this type of attack and you will have plenty of time to notice and immediately dodge inward and be under the body that it represents a safe zone. If you manage to stay behind the boss himself by attacking the left leg, he will simply stomp with the same leg and retreat immediately afterwards, in this way you can inflict a lot of damage while remaining in relative safety. For characters with good ranged offensive ability, you should limit yourself to targeting his torso and retreating for the entire battle area, you will be able to land at least three hits before entering his arms reach.
Persecutor
This boss can be encountered at least four times during the game: in the forest of fallen giants, on the arena, where there is an empty soldier who will throw bombs at you, a second time in the area behind the door that can be opened with the soldier's key and, here, it will represent the main battle, however, if you have defeated him at the first appearance, it will not be necessary to defeat him again. In Fort Ferreo, returning to the area of the encounter with the Demon of the Forge after beating him. Finally in the Drangelic Castle during the New Game +, in the throne room, in this case you will have to face two Persecutors. For a close combat approach, it is advisable to target the enemy and try to move fast and dodge some of his attacks. Let him lunge, then dodge to the side to avoid nearly every one of his attacks, just make sure you have some energy left and deal a hit or two before retreating. His charge attack is by far the easiest to avoid and you just need to discard to either side of him. His horizontal slash, on the other hand, might be more difficult, but rolling towards him might be enough to avoid the damage. For his triple combo, try to stay behind the enemy body for the first two hits, then roll back for the third and final shield attack. Whenever you see his sword light up blue, try to move or roll towards the hand where he holds the shield, or, roll very far as this attack is very dangerous and will inflict a negative Curse status on you. To face the fight from a distance, it is advisable to be powerful mages since the Persecutor is very weak to magic, do not target the enemy before starting to throw the blow, therefore, when the throw is about to end, you can take your target; don't be greedy and just cast a maximum of two spells at a time before retreating to a safe distance.
The Knight of Dragons
For melee characters, this fight won't be very difficult, just move in a circle around the enemy body and hit it when it misses you after bringing its slow attack. For ranged characters, it is advisable to have activated all the levers in the previous level and, in this way, to have expanded the walkable space of the combat arena and otherwise stay at a safe distance to hit it before it is too close, so , dodge his slow attack to get further away.
The Old Dragon Slayer
Equipped with a very high physical resistance and stability given by the shield, you will be able to face this boss closely and move around his right side. You can easily block his normal attacks but, you will have to move away immediately when you notice that he is charging his attack with purple energy. Each normal attack that the boss fails will allow you to hit him at least twice without having to dodge later. Keep your shield raised as you move to the side, therefore, recharge your energy if the opponent's hits have consumed it all.

When he performs his jump attack, you may have time to drink a quick Estus Flask. Finally, whenever the enemy will dodge away from you, run to the left as he is about to launch his ranged attack.
The Flexible Sentinel
This fight will prove to be very easy if you manage to use the combat area to your advantage, in fact, there will be a very comfortable column in its center that will prevent the boss from reaching you easily. So try to stay close and provoke one of his attacks at short range, then roll sideways to attack while the enemy is regaining strength. If you have powerful ranged attacks, just circle around the column and attack the enemy whenever the opportunity arises and you're pretty sure they can't reach you.
The Sentinels of Ruin
The fight will begin on one of the platforms in the area. The first of the three sentries will attack you immediately upon your exit from the fog portal, so roll or move to the side, later, once he has taken his shot, you can respond with a maximum of one or two attacks. Staying on this platform, you will attract the second sentry who will try to hit you with an air attack, try to take cover behind the nearby wall, then counterattack with a few hits. Then jump to the lower level as two enemies are too many for the narrow platform. So try to attract the two Sentinels in the area below the fog gap so as not to attract the third one at the back of the room. Stay in front of your opponents trying to dodge their attacks and hit while they are recovering their energy, it would be advisable to focus first on the most damaged one and, once killed, you will have enough time to dedicate yourself to the one left alone, before its partner reaches it. . Obviously, it is seriously advisable to face this battle with the help of two other players.
The Lost Sinner
This enemy will move very fast, and it is advisable for melee characters to use a good shield and 100% physical protection. Try to block his attacks without consuming all of your energy, then strike once before regaining your strength. For ranged characters, you'll need to learn the timing of his attacks well as you'll have to dodge them all. The basic hit can be dodged with a roll to the right, this way you will be far enough away for the boss to finish his combo while you inflict a single attack. When he performs his aerial attack, roll forward. If you lose the target on the boss, try to get it back as quickly as possible.
Freja
Freja is a huge spider, try to keep the distances short as it will tend to throw a powerful beam that will eliminate you in a few moments. Stand on the side of one of her two heads and wait for her to take a hit before dealing massive damage and then immediately return to her side.
Gargoyle of the Campanile
The fight will start against two enemies, so when one of them has dropped to mid-life, a third will join the fight. Up to five enemies can be alive at the same time, and six is the total to face before ending the battle. Killing one at a time is the best strategy to adopt. Focus on the first boss and bring his life to half, then try to keep the others behind. The full-life enemy will tend to stand between your ranged attacks and his more battered companion, while the latter is spewing fire. Have a lot of healing items with you (not just Estus flasks), then, in need, get away and regain precious life. Stock up on bombs of all kinds as it's easy to hit more than one enemy at a time with these special items. The artificial intelligence of the enemies will change according to how many of these are present in the area of the fight, the fiery breath will be used only when there are three or more, however, when there are two or less, they will tend to be more aggressive in the body to the body. Finally, really pay attention to their area lightning bolt, move away immediately as soon as you notice that they are throwing it.
Lord of the skeletons
This is one of the clashes that makes numbers its difficulty. Immediately hurl yourself on one of the three undead that will take a few moments before attacking you, then use the piles of bones as cover to avoid the attacks. Once you have eliminated one of these large skeletons, a group of minor enemies will join the battle, these will also count in the vital bar of the boss, therefore, you will have to eliminate every single enemy in the area to emerge victorious from the battle. Each of the major skeletons will spawn a different type of minor enemy, and you should just make sure you take out one at a time and then dedicate yourself to their followers. The important thing is that you kill the skeleton capable of casting spells last and only when the area is completely free from new targets as the wheel-skeletons will be born, very difficult to avoid and hit if present with a large group. Move around the entire perimeter of the battle and use the columns to divide the bulk of the enemies into smaller groups. The use of pyromancy, a firestorm, is very advisable if launched with the right times and spaces.
The Executioner's Cart
The first part of the fight will see the boss intent on moving counterclockwise, for the entire length of the corridor. Your task will be to reach, by moving clockwise, a lever to pull to collapse a gate against which the boss himself will crash. When the wagon is near, you will hear the typical noises and a strong light will appear at the end of the corridor. Also, the area will be chock-full of enemy skeletons; these will be killed automatically by the passage of the chariot, however, they will reform as long as you do not kill the necromancers hidden in the crevices inside which you too will have to hide to avoid the stride enemy wheels. Before moving from one hole to another, wait for the wagon to pass and make sure there is no necromancer present where you are moving, if not, run towards the enemy and try to kill him as quickly as possible.

Once you reach the lever and lower the gate, the cart will crash leaving you to face the deadly two-headed horse. At close range, the enemy will attack you from both the rear and the front, so it is advisable to stay on the flank to avoid his blows and wait for him to start channeling the power for the shadow attack, during which he will be totally vulnerable. In the long run, the horse will try to charge you, to avoid being hit, dodge to the side at the last moment.
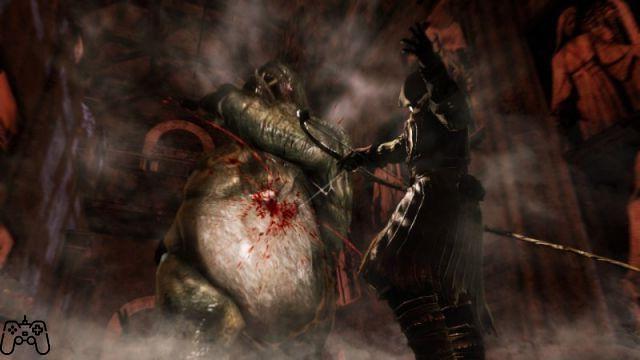
Demon of greed
This boss won't be very hard to take down, however, his immense body will make it difficult to avoid getting hit. Try to force the enemy to attack you from the front while staying at a distance, then, while he is busy making one of these blows, move to the side to inflict damage and avoid being hit by the long tail. You may find it helpful to break the vases scattered around the room using iron arrows, spreading the poison inside them and poison the boss himself at the same time.
Mytha the Destructive Queen
Before crossing the misty threshold and facing this boss, make sure you have burned the blades of the huge windmill you are inside, to do this, go to the nearest bonfire, light a torch and approach the central part of the blades themselves, then select the option to set fire to the entire structure. It is advisable to face the fight wearing light armor or, in any case, keeping the equipped weight below 69,9%. Be in human form and summon Jester Thomas (a NPC) out of the battle area, your partner will deal with lethal pyromancy blows to the boss while you keep him distracted by dodging his simple blows.
The Old Iron King
The most important thing to watch out for during this fight is where the platform ends and where the lava begins. Try to force the enemy to attack you with their arms, swerve back and hit the limbs when they are stuck to the ground. If you ever find yourself really far from the boss, he will try to hit you with fire orbs, in this case, try to move to the left edge of the area before the orbs are spat out, then, slowly move to the right to avoid being affected. The other fire attack it can make is a jet thrown with a 180 degree arc, just back off to get out of the area of effect.
Demon of the Forge
Summon Lucatiel of Mirrah just outside the mist portal for the boss fight. Equip different defensive armaments against fire, the shield of Gyrm obtainable at the Gates of Pharros will surely be for you, moreover, by breaking the vases that surround the area, you will cover yourself with water, earning for a short period of time a minimum of immunity to flames. Target the enemy, so make sure your equipped weight is 69,9% or less; whenever flames erupt from his body, move away immediately, then attack each time he hits the ground with his huge sword shortly after it has exhausted its fiery discharge.
Najka the Discover
Once you enter the battle area, run to the boss half-buried in the sand, beware of ranged magic attacks, then hit once to bring your enemy out into the open. Wait for the boss to hit the ground with his two tails, then hit without directly attacking the tails themselves, in fact, these can be cut, however it is not recommended as Najka will tend to use more magic attacks. So try to always stay in contact with the boss and prevent him from casting his powerful spells, otherwise you could find a quick cover behind the tree trunk on the left side of the area (as long as you are fighting near him) or run to the side of the enemy body, or under if you are very far away.
Almost all hits are parable using a good shield with 100% physical defense. When Najka goes underground, immediately step onto one of the marble slabs to force her out of the closet.
Royal Mouse Authority
This fight will prove to be one of the toughest in the entire game due to the minor enemies that you will have to kill immediately and before the actual boss takes the field, they will be able to poison you with every hit. I do not deny that it could take several deaths since the only way is to throw yourself headlong towards the rats and hit with huge slashes or area attacks, hoping that they will die quickly and without causing too much damage. Once the Royal Authority is in front of you, try to always stay under his belly and turn towards his back legs, hit a few times, then try to raise the shield to avoid being damaged in turn. The enemy charge attack will completely drain your energy, however, you will have time to recover as your opponent will take a few moments to recover after the mighty attack. Should the Greater Rat move away from you, immediately try to regain the position under the belly, always remaining close to the rear left leg.
Royal Vanguard of the Mice
This fight is simply made up of a huge multitude of rats, however you shouldn't have much of a problem as they are sensitive to the lure of the decoy skulls. Try to separate the mice into smaller groups, then hit several with sweeps of large weapons or area attacks. When the rat with the crest on the nape appears, try to focus on him as he represents the main enemy, hit him two or three times, then immediately move away to avoid being poisoned instantly by one of his bites.
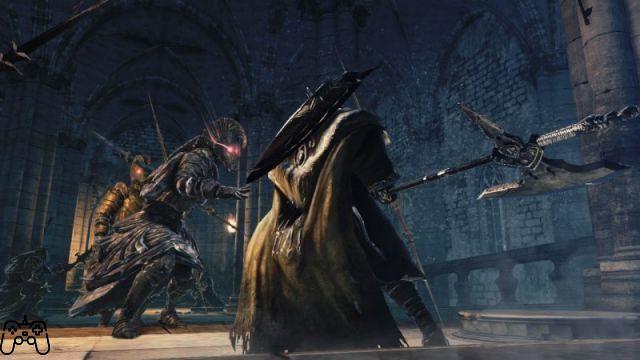
The Lurid
It is important to face this fight with enormous patience as you will not be able to survive two consecutive hits, so it is important to study the enemy moves and the right timing. Dodging left or right will give you the opportunity to deal as much damage as possible, however it will also make you vulnerable to one of his side attacks, so dodge back after each successful attack. Turn in a circle and with the shield raised, force the enemy to use one of his heavy attacks after which he will remain stationary for several moments. By striking his arms, these can be cut off; they will regenerate quite quickly but, in this period of fear, you can really hit without too many thoughts.
Knights of Dragons
In this battle, you will face two Dragon Knights perfectly identical to the same one already faced previously. The first will be shortly after the foggy threshold, the second will be on the opposite side of the room that will shoot lethal arrows at you. Face the closest one, paying attention to the sound of the second's bow, discard to the side or raise the shield to avoid being hit by the lethal arrows. When the first of the bosses has dropped to mid-life, the second will join the fight. Continue to focus on the most battered enemy by looking at the attacks that come from his companion and, once the main enemy is killed, you can dedicate yourself to the survivor who will prove to be really fragile.
Knight of the Mirror
As soon as you pass the fog door, run towards the enemy who will make a long jump towards you. Then draw the enemy towards the center of the area, target him and, when he attacks you, roll to his left side. This will give you enough time to hit him at least once, so roll back to the left to avoid his next attack. Whenever he uses his electric attack, immediately move away and wait for it to finish, you will then be able to attack him twice before he starts attacking again. To avoid the mighty enemy combo, roll away and wait for it to deliver the final blow. When the enemy's life is halfway through, the boss will start summoning a minor enemy from the mirror shield, at this moment you can continue hitting for reduced damage, or, wait for the minor enemy to come out and kill them using a weapon with a high physical attack value (at least 350), and then return to focus on the Knight himself.
Velstadt, the Royal Guard
The main boss attack consists of a sword slash, charged on the head, this can be avoided with a simple side dodge. Occasionally he may perform a foot stomp, it is very important to take a few steps back before being hit.
When his life drops to 50%, he will kneel and start channeling dark power, at this moment he is completely vulnerable and you will have the opportunity to deal numerous blows. Whenever he raises his sword towards the ceiling, he will start casting various spells, dodge to his side or back to strike a couple of times before retreating into a defensive stance.
Vendrick
The old King, now reduced to an empty and stupid being. You won't be attacked by the boss until you deal the first damage. This fight could be very long (up to thirty minutes), however, for each giant soul in your inventory, their defense will be reduced; It is possible to obtain up to five souls of this type in the game, and I strongly recommend that you have all of them (and not use them) to face the old King. Your enemy will make only two attacks, a blow with the front sword (which is difficult will hit you) and a semicircle slash. Try to stay behind the boss and to the left of his sword, this way none of the attacks will be able to reach you and you will have all the time and calm to inflict your blows.
Darklurker
This is the final boss for the "quest line" of the Dark Pilgrim covenant. Try to equip pieces that significantly increase your resistance to darkness and possibly a shield with 100% defense to this element (obtainable by using a dark stone on a shield from the blacksmith). Stay close to the boss and move clockwise with the shield raised, he will not hit you, but he will draw his mighty sword to perform a combo, after which you can inflict several hits. Raise the shield again and repeat the same process. At 10% (in case you are a melee character) he will create a clone of himself, which you will have to watch out for while dealing with the main enemy. Finally, I strongly recommend that you use pyromancy as the Darklurker is very weak to fire.
Singing Demon
Get yourself a weapon that can deal electrical damage, stay close to the boss and circle to the left. The basic attack will not be able to hit you but, you will still have to pay attention to his body, avoidable by discarding back. When he finishes his attacks, he will show his face; you can decide to hit its weak point (the face in fact) a couple of times maximum since its causal water attacks cause great damage, or heal yourself by drinking an Estesu flask. If you notice that the demon is about to charge you, run left or right and roll just before it reaches you.
The Guardian Dragon
Immediately move behind the guardian and close to one of his paws. Move so that you are always on the back of the boss himself and, when he raises his paw to hit you, swerve to the side trying not to be on the side of the body. Keep hitting the paw and avoiding the pestos. When the boss takes off, move quickly under him to avoid the dangerous flames without too much trouble.
The Ancient Dragon
This optional boss represents the biggest challenge in the entire game. As soon as the fight begins, run to the Dragon itself and get to its left side to hit its paw a couple of times, then, move to the lowest point of the tail to hit it once, then immediately move to avoid being hit and approach again to inflict another two or three hits on the end. Whenever the boss rises into the sky, immediately spot where the tail is and immediately run towards it until you reach its end, stay at a distance until the beast touches the ground, then hit the base of the tail for two or three times before walking away again so as not to be affected by this. Wear whatever can regenerate your energy as fast as possible, as you will continue to run throughout the fight, and still need to have enough to inflict your blows.
The King of Giants
Target his left leg and try to stay on the back, then circle to the left. The boss will turn around trying to hit you with his right foot and miss you. Keep hitting his left leg, watching out for his avoidable sword attacks by dodging to the side.
The Defender of the Throne and the Sentinel of the Throne
Summon one of the NPCs out of the misty threshold that leads to the fight with these two bosses. Let your partner distract one of the enemies, then focus on the remaining one. All attacks are avoidable by dodging to the side, and those of the defender are also shieldable while those of the sentry are not. Once you take down one of the two bosses, immediately throw yourself on the next one, as taking too long, the first enemy eliminated will come back to life.
Nashandra
Be sure to wear the bond ring, as it is very easy to be cursed during the fight and see your energy drop dramatically as if you were in hollow form.
As soon as the fight begins, the boss will summon four cursed clouds, these can be destroyed with a single shot, and it is advisable to use a quick weapon. When the clouds are settled, heal yourself and reach the boss himself. The main attacks from which you will have to watch out are two, one powerful from top to bottom and easy to dodge by dodging from the side; then a three hit combo, after which you can inflict a couple of attacks. When he starts firing his powerful dark beam (you will notice as he starts channeling power) immediately run to the back of him to avoid being killed instantly. Whenever he brings his hands to his chest, step away and wait for him to finish firing the dark blast. Every now and then, the boss will revive the cursed clouds, forcing you to deal with them again before you can hit the main target again.
Merchants
Lenigrast locksmith:
Lenigrast is Majula's blacksmith. Before you can use his services, you'll need to purchase the key to his workshop from the merchant in the Forest of Giants. Thanks to him you can upgrade all types of non-elemental weapons.
Items for sale:
Wooden arrow
Iron arrow
Wooden dart
Heavy dart
Chip of titanite
Repairing powder
Targray Sentinel
Merchant encountered after defeating the Old Dragon Slayer. Head of the covenant of the Blue Sentinels
Items for sale:
Holy water
Lucky charm of the monastery
Infrared blue sphere (NG+only)
Carhillion
Merchant present in the Desolate Dock that will move to Manjula once the Flexible Sentinel is defeated. He will speak to you only if you have an intelligence value of 8 or higher.
Items for sale:
Amber grass
Twilight grass
Simple incense
Wellager
Ghost merchant encountered near the entrance to Drangleic Castle on the main staircase.
Items for sale:
Ancient Radiant Life Gem
Grass of dawn
Divine blessing
Repairing powder
Magic arrow
Arrow of lightning
Magic dart
Lightning bolt
Grandahl
Merchant encountered in three different places: Dark Ruins, Black Throat and King's Gate. He is the leader of the Dark Pilgrim Pact.
Items for sale:
Human Effigy
Ascetic bonfire
Felkin
Merchant encountered at the hunter's grove, just before reaching the very first bonfire. He will speak to you only if your degree of intellect and faith is 8 or higher.
Items for sale:
Carbonized resin
Agdayne
The merchant of the Crypt of the Undead. He will become aggressive if you turn on a flashlight inside his room.
Items for sale:
Dark arrow
Dark dart
Human Effigy
Elizabeth mushroom
Head of Vengarl
Merchant encountered inside the fog in the Dark Ruins, take the right exit from the bonfire and enter the misty forest, then, follow the left wall until you find some stones in the center of a small area.
Items for sale:
Great destructive arrow
Urn of lightning
Golden resin
Lycia by Lindeldt
You will meet Licia for the first time, inside the Tower of the Flame; exhausted all dialogue options to have Majula transferred to the circular mechanism room. It sells various spells and miracles.
Gavlan
This merchant will appear for the first time at the Desolate Pier, to move to the Valley of the Harvest, then, to the Gates of Pharros for good. It will also buy your every single item or footprint by paying you in souls.
Items for sale:
Poisonous arrows
Poisonous moss
Poisonous throwing knife
Rotten resin
Lanafir
Merchant of the Forte Ferreo area.
Items for sale:
Human Effigy
Green bud
Black fire bomb
Carbonized resin
Repairing powder
Rusty coin
Salutation stone
Thanksgiving stone
Apology stone
Stone very well
Old fragrant branch
Maughlin
Merchant present in the house on the left in the Majula area, he sells a lot of armor and weapons for the first levels of the game. Also, he will sell new pieces after taking out some bosses.
Melentia
Merchant present in the Tower of Cardinals, after having exhausted all dialogue options, will move to Majula. He will sell some new armor after defeating some NPCs.
Items for sale:
Pharros lock
Lenigrast key
Human Effigy
Vital gem
Amber grass
Fire bomb
Haunted urn
Throwing knife
Rosabeth of Melfia
Rosabeth is the petrified girl who blocks the lever to access the Dark Ruins. She will move to Majula once you have offered her some new clothing, remember to pull the lever she blocked only after she has moved to the bonfire as you will risk killing her in the battle that follows. It is the png you will have to turn to to enhance your Pyromancy Flame.
Items for sale:
Small blue lappola
Small yellow lappola
Small orange lappola
Seed of fire
McDuff
Merchant you can reach by blowing up a part of the wall at the Lost Bastille (you can see a bonfire behind it), or by using the Bastille key to open the door to his workshop. By giving them the Dull Ember, you can create and upgrade elemental weapons.
Chloanne
Merchant encountered upon your arrival at Harvest Valley, exhaust every dialogue option to have it moved to Majula. It sells many upgrade materials, to which rare materials will be added after defeating some bosses.
Olaphis
Initially petrified merchant, he is in the Lost Bastille and blocks access to a bonfire. Through him you can exchange the souls of the bosses with special weapons and spells.
Items for sale:
Red water
Shalaquoir
Shalaquoir, is a cat present in the house to the right of Majula. In addition to being a merchant, he keeps track of your progress within the pacts and allows you to abandon one.
Items for sale:
Return bone
Prismatic stone
Skull lure
Talisman of Llyod
navlaan
Navlaan is a powerful wizard who is in the Fort of Aldia, he will present himself in two different forms depending on whether you meet him alive or empty. In the first form (empty) he will entrust you with a mission where you will have to assassinate several and, importantly, pngs (this can be completed by bringing him all the required objects without killing anyone and without losing the object itself). In normal form he will sell you various items and spells. By pulling the lever to the left of the area, you will summon his deadly dark specter in different areas of the game, I advise against doing this unless you are looking for a big challenge.
Items for sale:
Big lightning bolt
Big fire arrow
Great destructive arrow
Good luck charm of the dragon
Crimson Water
Ascetic bonfire
Ornifex
Ornifex is one of two merchants who will trade weapons and spells with the souls of the bosses. It is very difficult to find, you will have to ransom the satyr to the right of the bonfire in the area, kill him and get the Fang Key, then drop from the fake floor near the two ruined towers in the same area and open the door that you will find behind you. . After the first meeting, he will move to the lower Tseldora Pietraluce Quarry.
Items for sale:
Fire arrow
Fire bolt
Amber grass
Green bud
Fire butterfly
Dyna and Tillo
Dyna and Tillo, are two special merchants, encountered in a nest in the Via di Passage. Trade with them: Prismatic Stone, Small Polished Stone, Polished Stone, and Petrified Object. Leave the items in their nest and wait for the symbol on the ground to disappear and reappear to get your random reward.
Objects
Arrows:
Wooden Arrow - Damage: Physical 50. Purchase from the blacksmith in Majula
Iron Arrow - Damage: Physical 50. Purchase from the Blacksmith in the Lost Bastille
Magic Arrow - Damage: Physical 50, Magic 160. Purchase from the ghost merchant at Drangleic Castle
Arrow of Lightning - Damage: Physical 50, Lightning Bolt 140. Purchase from the ghost merchant at Drangleic Castle
Fire Arrow - Damage: Physical 50, Fire 160. Purchase from Ornifex
Dark Arrow - Damage: Physical 50, Darkness 160. Purchase from the merchant in the Crypt of the Undead
Poison Arrow - Damage: Tax 50, adds 300 poison points. Purchase from the merchant Gavlan
Tearing Arrow - Damage: Physical 50, adds 300 bleeding points.
Great Iron Arrow - Damage: Physical 200. Purchase from the Blacksmith in the Lost Bastille
Great Destructive Arrow - Damage: Physical 100. Purchase from Vengarl's head
Great Bolt of Lightning - Damage: Physical 100, Lightning Bolt 250. Purchase from Navlaan
Great Fire Arrow - Damage: Physical 100, Fire 200. Purchase from Navlaan
Dardi:
Wood Bolt - Damage: Physical 70. Purchase from the blacksmith in Majula
Heavy Bolt - Damage: Physical 100. Purchase from the blacksmith in Majula
Fire Bolt - Damage: Physical 70, Fire 160. Purchase from Ornifex
Lightning Bolt - Damage: Physical 70, Lightning Bolt 160. Purchase from the ghost merchant at Drangleic Castle
Magical Bolt - Damage: Physical 70, Magical 160. Purchase from the ghost merchant at Drangleic Castle
Dark Bolt - Damage: Physical 70, Darkness 160. Purchase from the merchant in the Crypt of the Undead
Healing items:
Fuschetta Estus: Drink it to regain life.
Human Effigy: Use it to become human, burn it at the bonfire to prevent online interactions in your world.
Lifestone: Use it to regain life in a short period of time.
Radiant Lifestone: Use it to recover more life in a short period of time.
Ancient Radiant Lifestone: Use this to recover a huge amount of life in a short amount of time.
Elizabeth's Mushroom: Use to recover a huge amount of life in a short amount of time.
Amber Grass: Restores a small amount of spell uses.
Twilight Herb: Restores a fair amount of spell uses.
Grass of Dawn: Restores an excellent amount of uses for spells.
Poisonous Moss: Reduces the amount of poison taken.
Monastery Lucky Charm: Cures poison and restores life.
Dragon's Lucky Charm: Cures poison and restores a lot of life.
Divine Blessing: Heals all negative states and restores all life.
Green Blossom: Temporarily increases energy regeneration.
Dark Tablets: Increases defense from Darkness.
Common Fruit: Increases resistance to poison.
Snake pads: Increases resistance to petrification.
Red lozenges: Increases resistance to bleeding.
Repairing Powder: Restores the durability of equipment, but does not repair broken objects.
Red Water: Restores the life and uses of spells.
Crimson Water: Restores more life and spell uses.
Small Blue Trap: Increases magic defense.
Small Yellow Trap: Increases the lightning defense.
Small Orange Lapp: Increases fire defense.
Offensive items:
Fire Bomb: Explodes dealing fire damage.
Black Fire Bomb: Explodes dealing a lot of fire damage.
Throwing Knife: A common ranged weapon.
Tearing Throwing Knife: A ranged weapon that causes bleeding.
Poisonous Throwing Knife: A ranged weapon that causes poisoning.
Pile of Dung: Throwable item that causes poisoning to enemies but also to yourself.
Aromatic Amber: Applied to the weapon, adds magical damage.
Gold Resin: Applied to the weapon, adds lightning damage.
Dark Resin: Applied to the weapon, adds dark damage.
Rotten Resin: Applied to the weapon, adds poison damage.
Blood Serum: Applied to the weapon, it adds bleeding damage.
Lloyd's Talisman: Blocks the use of Estus Flasks within the area on which it was thrown.
Haunted Urn: Explodes dealing magic damage.
Urn of Lightning: Explodes dealing lightning damage.
Evil Eye Urn: Explodes dealing Dark damage.
Corrosive Urn: Explodes damaging enemy equipment.
Holy Water: Explodes dealing a lot of damage to any enemy considered undead.
Carbonized Resin: Applied to the weapon, adds fire damage.
Various objects:
Bone of Return: When used, returns to the last bonfire without sacrificing souls.
Dark Sign: If used, return to the last bonfire by sacrificing all the souls obtained.
Fire Butterfly: When used, automatically turns on the torch.
Silver Talisman: Turns you into an object of the area you are in.
Rusted Coin: Temporarily increases luck.
Ascetic Bonfire: If burned at one of the bonfires, it increases the power of the monsters in the area and restores items and treasures.
Junk: Worthless object.
Simple Incense: Decreases the intelligence needed to use a particular spell by one point.
Skeptic's Incense: Decreases the faith needed to use a particular spell by one point.
Small White Sign Stone: Allows you to leave your summoning mark and be summoned into another player's world for a short period of time.
White Signstone: Allows you to leave your summoning sign and be summoned into another player's world without time limits.

Blue Eye Orb: Invades the world of guilty players, item usable only for players of the Blue Sentinel Pact.
Red Eye Orb: Invades a player's world in the same area you are in.
Damaged Eye Orb: If possessed, allows you to invade the world of Lycia of Lindelt.
Crystal of Separation: Allows you to return to your own world during an online session.
Bone of Order: Restore the connection with other worlds.
Symbol of loyalty: Represents proof that you have helped other players, if used it restores the life of the players who host you.
Symbol of Grudge: Represents proof that you have invaded and killed other players.
Rat's Tail: Give to the Rat King to level up in the Rat Covenant.
Stone of Pharros: Can be used to activate the mouths of Pharros and unlock treasures, traps and hidden areas.
Ancient fragrant branch: Can be used to cure some NPCs and monsters present in the game world from the state of petrification.
Small smooth and polished stone: Exchangeable item with Dyna and Tillo.
Smooth and Polished Stone: Exchangeable item with Dyna and Tillo.
Petrified Item: Initial and tradable gift with Dyna and Tillo for a randomly selected powerful item.
Vessel of souls: If brought to the elderly woman at the beginning of the game, it allows you to redistribute the points spent in the various experience levels.
Ancient Feather: When used, returns to the last bonfire visited without sacrificing souls. This item has infinite uses.
Skull Lure: When thrown, it draws surrounding enemies towards it.
Dragon Scale: Offered to the Dragon Covenant to rank up within it.
Fragment of Estus Flask: To be offered to the Emerald Aralado in Majula to increase the use of the Estus Flask permanently.
Salutation Stone: When used, say the word "Hello", which is audible to other players.
Apology Stone: When used, say the word "I'm Sorry", audible to other players.
Thanksgiving Stone: When used, say the word "Thank you", which is audible to other players.
Miniature Scale: Item available for purchase from the merchant Gillian.
Petrified Egg: Indispensable item to join the Dragon Pact.
Sublime Bone Powder: If burned at Majula Bonfire, it increases the amount of life restored by drinking Fuschette Estus.
Sun Medal: Essential item to rank up within the Sun pact.
Eye of the Dragon: Leave the Dragon Mark, allowing you to be summoned into the world of a player to defeat to get a Dragon Scale.
Red Summoning Stone: Leaves the red mark, allowing you to be summoned into a player's world as a dark specter, therefore, the player's own enemy.
Keys:
Undead Prison Key: Obtained in a round structure in the Hunter's Grove, opens the prison in the same area.
Old-fashioned key: Obtained in one of the chests of the Lost Bastille, opens a shortcut within the same area.
Key of the Bastille: Key obtainable at the Bell Tower of the Moon, opens the doors in front of the Lost Sinner boss and lights up the battle area.
Key to Tseldora: Obtained by killing the Undead Lord at the end of the fight against Freja and will allow you to access Tseldora's Lightstone Quarry.
Fang Key: Key obtained by ransacking and killing the Satyr to the right of the bonfire in the Dark Ruins, allows you to open the cell of Ornifex.
Forgotten Key: Key obtained inside a treasure in the Scolo area, allows you to open the door and reach Grandhal in the Black Gorge.
Giant's Affinity: Obtained by killing the King of Giants within Jeigh's memory. It will allow you to begin the fight with the final boss, Nashandra at the Throne of Will.
Villa Key: Key obtainable by exhausting all dialogue options with the mapmaker Cale in the Forest of Fallen Giants. Opens the doors of the villa to Majula.
Key to the King's Passage: Opens the door to the battle area with The Mirror Knight.
Key of the Bound: Obtained by defeating the Song Demon. Opens the cage at the top of the elevator in the King's Passage.
Lenigrast's Key: Purchased from the merchant Melentia, opens the door to Lenigrast's workshop.
Round Keystone: Allows Majula to change the path inside the Mechanism Room, obtainable by defeating Lycia.
Soldier's Key: Obtained by defeating The Last Giant, opens three different doors within the Forest of Giants.
Tseldora's Lair Key: Key given to you by Pate, opens the fight area with Freja.
Iron Key: Obtained in the Iron Fort, opens some doors in the same area and in the Forest of Giants.
Ash Mist: Item obtained by speaking to the Ancient Dragon at the top of the Dragon Shrine. Allows access to memories.
Weapon and Armor Upgrade Material:
Shard of Titanite: Allows upgrading of weapons and armor to a level of +3.
Large Titanite Shard: Allows upgrading of weapons and armor to a level of +6.
Piece of Titanite: Allows upgrading of weapons and armor to a level of +9.
Titanite Slab: Allows upgrading of weapons and armor to a level of +10.
Gleaming Titanite: Item to upgrade special weapons and armor to a level of +5.
Petrified Dragon Bone: Item for upgrading weapons obtained by swapping the souls of bosses to a level of +5.
Seed of Fire: Item to enhance the Flame of Pyromancy to a level of +10.
Patti
Keepers of the Bell:
Keepers of the Bell is a player-versus-player invasion pact, wearing the Seal of the Keeper, you will be summoned in the Bell Tower of the Moon or Bell Tower of the Sun level of another player. Your aim will be to eliminate the owner of the world you are in to get a Titanite fragment and advance in rank. You can join this pact by speaking to the Bell Guard, located at the beginning of each of the two levels.
Rank 0 - 0 Kills: Guardian's Seal
Rank 1 - 10 Kills: Titanite Slab
Rank 2 - 30 Kills: Hidden Weapon
Rank 3: 100 Kills: Warden's Armor Set
Blu Sentinel
Blue Sentinels are a type of player-versus-player invasion pact. You can reach the combat arena to challenge other covenant members, or use the blue eye orb to enter the world of a player with a high sin value (parameter not visually marked), or be summoned into the world of a covenant follower. of the Blue Way (wearing the Guardian's Seal) invaded by a dark specter, your aim will be to defeat the invader to rise in rank. To enter the pact, you will need to talk to Sentinel Targray after defeating the Old Dragon Slayer and, have at least one symbol of loyalty in the inventory (obtainable by helping a player to defeat a boss).
Rank 0 - 0 Kills: Guardian's Seal
Rank 1 - 50 Kills: Tree Shield
Rank 2 - 150 Kills: Divine Wrath
Rank 3 - 500 Kills: Magnificent Sunlight
Brotherhood of blood
The Brotherhood of Blood is the pure player-versus-player deal (and my favorite). By embracing this pact, you can challenge other players in the arena and get a red eye orb by winning. With the sphere you can invade the world of another player with the sole purpose of killing him and obtaining a Token of Grudge.
To enter, talk to little Titchy after killing the Executioner's Wagon boss.
Rank 0 - 0 Invasions Won: Symbol of Blood
Rank 1 - 50 Invasions Won: Double Curved Sword
Rank 2 - 150 Invasions Won: Crescent Scythe
Rank 3 - 500 Invasions Won: Great Chaotic Fireball
Rat King
The Rat King is one of two player-versus-player summoning pacts. By joining the Rat King and wearing the ring that will be delivered to you, you will summon the players who are exploring the Gates of Pharros in your own world, which can be improved and made more lethal by unlocking the mechanisms through the keys obtained by defeating the players to get more. queues and advance in rank, every single monster will give you a hand. To be able to join this pact, you will need to talk to the Rat King after defeating the boss of the level and having the rat tail in the inventory.
Rank 0 - 0 code: Symbol of the Rat
Rank 1 - 10 tails: 10 small smooth and polished stones
Rank 2 - 20 tails: 20 smooth and polished stones
Rank 3 - 35 Tails: Ring of the Sleeping Dragon
Remains of the Dragon
By entering this pact, you will be able to leave the dragon's eye (it works exactly like a summoning symbol) to be summoned into another player's world and face him in a duel to get (in case of victory) a dragon scale, useful item to rise in rank within the pact itself. To enter, you will first need to find the petrified dragon egg at the Dragon Shrine, then deliver it to the merchant of Fort Ferreo.
Rank 0 - 0 Scales: Dragon's Eye
Rank 1 - 10 Scales: Dragon Head Stone (allows you to transform your head into a dragon's head and, by assigning the stone to the item button, spit a powerful energy-consuming fiery jet; the effect will disappear after death but the object has infinite uses)
Rank 2 - 20 Scales: Dragon Cheststone (allows you to wear the full dragon set by removing all your equipment; the effect disappears after death but the item has infinite uses)
Rank 3 - 30 Scales: Great Black Dragon Sword (136 Physical Damage with no stat bonus)
Via del Blu
The Way of the Blue is the first covenant you can join by talking to Saulden up the stairs behind the Emerald Herald in Majula. By entering into this covenant, you could be helped by a Blue Sentinel covenant player if a dark specter were to invade you.
Rank 0 - 0 Invading Ghosts Killed: Blue Seal
Rank 1 - 1 Invading Ghost Slain: Bloody Bite Ring
Rank 2 - 5 Invading Ghosts Killed: Silence
Rank 3 - 10 Invading Ghosts Killed: Blue Tear Ring
Company of Heroes
The Company of Heroes is the pact for those looking for a truly hardcore game challenge, in fact, once inside this, the game monsters will be considerably more powerful and you will not be able to summon or be summoned by other players. To join the Fellowship, just examine the huge monument to the right of the passage to the Tower of Heide a Majula. To rank up you will have to defeat the various dark ghosts in the game world and get the special stones to offer to the monument itself.
Rank 0 - 0 stones: Table of champions (object showing the ranking of all members of the covenant and of the stones delivered)
Rank 1 - 10 stones: Great Magical Weapon
Rank 2 - 25 stones: First Dragon Ring
Rank 3 - 50 stones: Conqueror's Seal
Pilgrims of darkness
The Pilgrims of Darkness Pact is one of two player versus enemy pacts in the game. By joining this, you can visit the abyss, an area consisting of three levels and very difficult, after which you will have to face the Darklurker boss. To enter the pact, you will have to talk to the Grandhal NPC in all three locations where he can be encountered within the game, finally offer a human effigy for each attempt to visit and complete the abyss, finishing each of the three levels and By beating the final boss, you will rank up.
Rank 0 - 0 Levels: Seal of the Abyss
Rank 1 - 1 Level: Evil Eye Resonant Soul
Rank 2 - 3 Levels: Great Resonant Evil Eye Soul
Rank - Draklurker Defeated: Evil Eye Climax and Xanthous Armor Set
Heirs of the Sun
The Heirs of the Sun are the second player pact against enemies in the game. Your aim will be to get summoned by other players and help them defeat the bosses of the various levels, in this way you will get the medal of the sun, useful to rise in rank within the pact itself; in addition, your spectrum will appear bright yellow when summoned. To join, in the Harvest Valley, take the path to the right in the second bonfire area, then, cross the bridge over the poison gas and defeat the hammer-wielding enemy. Before entering the cave, go down the path to the left, then take the passage to the right paying attention to the enemies with scythe and, advance up the side of the hill. At the end of the path, you will find a monument illuminated by sunlight through which you can join the Heirs of the Sun and where you can deliver your earned medals.
Rank 0 - 0 medals: Sun Seal
Rank 1 - 10 medals: Parma del sole
Rank 2 - 20 Medals: Sun Sword
Rank 3 - 30 Medals: Sun Lance
Magic
Spells
Soul Arrow: Small magic damage arrow, shot in a straight line. Purchasable from Melentia.
Great Soul Arrow: Magic damage arrow shot in a straight line, more powerful than the small version. Purchase from the merchants Carhillon and Lanfir.
Heavy Soul Arrow: Slower to fire but definitely more powerful than the previous two soul arrows. Purchase from the merchants Carhillon and Lanafir.
Search Soul Arrow: Magic damage arrow that follows the target. Purchase from the merchant Straid of Olpahis.
Heavy Seek Soul Arrow: High magic damage arrow that follows the target. Obtained by exchanging the Sentry of Doom soul with the trader Straid of Olaphis.
Searching Soul Mass: Spheres of energy that will revolve around your head will be hurled at the nearest enemy once they are within close range. Purchase from Ornifex.
Crystal Seeker Soul Mass: Same as standard Soul Mass, but definitely more lethal. Found in the Amana Shrine.
Soul Spear: Spear of energy that, if thrown at enemies, will pierce them, hitting even the targets behind. Purchase from Agdayne.
Crystal Soul Spear: Same as the Soul Spear but considerably more lethal. Purchase from Olaphis merchant Straid.
Wave of Lightning: Releases strong energy that knocks enemies back but does not damage them. Purchase from Carhillon.
Soul Spear Barricade: Throw several spears of little damage at the enemy. Purchase from the merchant Carhillon.
Soul Shower: Drop a shower of magical arrows on the target. Purchase from Straid of Olpahis.
Great Soul Sword: Performs a slash with a huge magical blade. Found in Drangleic Castle.
Soul Vortex: Shoot several searching arrows one after the other. It can be found in Tseldora's Pietraluce Quarry.
Soul Thunderbolt: Fires a beam of energy that hits the ground and continues in a straight line. Found in Drangleic Castle.
Soul Geyser: Unleashes a large mass of energy which, once hit the first target, splits into smaller masses. Found in the Fort of Alida.
Magic Weapon: Infuses the weapon into the right hand with magical damage. Purchase from the merchant Carhillion.
Great Magical Weapon: Infuses the weapon into the right hand with greater magic damage. Purchase from Navalaan.
Magic Crystal Weapon: Infuses the weapon into your right hand and increases total damage by 30% for the next ninety seconds of being cast. Found in the Dragon Shrine.
Powerful Magic Shield: Increases the overall defense of the shield held in the left hand. Purchase from Navlaan.
Greed: Makes a sound that draws enemies away from you. Purchase from Carhillion.
Silence: When thrown, it reduces any noise or sound you make. Reward for reaching the second rank in the Blue Way covenant.
Controlled Fall: Eliminates fall damage, but won't protect you from falls that would kill you anyway. Purchase from Ornifex.
Hidden Weapon: Makes the weapon held in the right hand invisible. Reward for reaching the second rank in the Covenant of the Keepers of the Bell.
Repair: Repair equipped items but not broken ones. Found in the Shrine of Winter.
Light: Creates a small light that illuminates the surrounding area for fifty seconds. Purchase from Straid of Olaphis.
Chameleon: Turns you into an object of the level you are in, any action other than walking will break the effect. Found in the Harvest Valley.
Unleashed Magic: Increases the power of magic by 20% but decreases life by 30% for a total of sixty seconds. Obtained by defeating Navlaan.
Miracles
Heal: Heals the caster and nearby allies for 500 life. Purchasable from Licia.
Medium Heal: Heals the caster for 850 life. Purchasable from Licia.
Great Heal Extract: Heals the caster for 1300 life. Purchasable from Licia.
Great Healing: Heals the caster and nearby allies for 1300 life. Purchase from Cromwell (merchant who cancels sins located in Tseldora's Stone Light Quarry).
Soothing Sunlight: Heals the caster and nearby allies for 1000 life. Purchasable from Licia.
Refueling: Heals life slowly over time. Purchasable from Licia.
Resplendent Life: Heals 850 life over sixty seconds. Purchasable from Licia.
Magnificent Sunlight: Heals the caster and nearby allies for 840 life over one hundred and twenty seconds. Awarded for reaching the third rank in the Blue Sentinels covenant.
Caressing Prayer: Lower poison buildup to the pitcher and nearby allies. Purchasable from Licia.
Strength: Does no damage but knocks back nearby enemies. Purchasable from Licia.
Divine Wrath: Explodes dealing damage and knocking back all nearby enemies. Reward for reaching the second rank in the Blue Sentinels pact.
Force Issued: Unleashes an arrow of sacred energy that damages enemies over range. Purchase from Targray the Blue Sentinel.
Lightning from the Skies: Fires several lightning bolts at random points around the area on which it was thrown. Purchase from Targray the Blue Sentinel.
Lightning Lance: Shoots an arrow of light at the enemy in the distance. Purchasable from Licia.
Great Lightning Spear: Damage boosted version of the normal Lightning Spear. Purchase from Straid of Olaphis.
Solar Lance: Similar to the lightning lance but slightly more powerful. Reward for reaching the third rank in the Heirs of the Sun covenant.
Soul Pacification: Creates an energy wave that surrounds the launcher and very powerfully damages all enemies belonging to the undead category. Purchase from Chloanne.
Blind Lightning Bolt: Launches a sphere of energy which after a short journey explodes into several lightning spears that will follow a random trajectory. Purchase from Straid of Olaphis at New Game +.
Magic Barrier: Increases each elemental defense by 15% for ninety seconds. Purchase from the Head of Vengarl.
Great Barrier Magic: Increases each elemental defense by 25% for ninety seconds. Purchasable from Wellager.
Miracle of the House: Returns to the last bonfire visited without sacrificing souls. Purchasable from Licia.
Guiding Miracle: Reveals more messages left by players. Purchasable from Licia.
Holy Oath: Increases Physical Attacks by 50 and Physical Defense by 75 for sixty seconds. Purchase from Straid of Olaphis.
Reveal: Creates a small red orb that will move towards the nearest enemy even if hidden. Purchase from Straid of Olaphis.
Perseverance: Boosts poison defense, bleeding by 15%, petrifaction and curse defense by 30% for sixty seconds.
Sunlight Blade: Empowers right-handed weapon with lightning element by 30% for ninety seconds, also increases hit range.
Evil eyes
Dark Sphere: Throws an orb that causes dark damage to the target: Purchasable from Straid of Olaphis.
Dark Salute: Throw some orbs that deal dark damage to the target. Purchasable from Grandahl.
Dark Fog: Releases a cloud of dark fog on the area in front of the launcher, this poisons any enemy within it.
Purchase from Straid of Olpahis.
Affinity: Create some dark orbs that chase the target until they hit it dealing dark damage. Purchase from Straid of Olaphis.
Repeated death: Burn corpses. Purchase from Chloanne.
Dark Weapon: Adds dark damage to the weapon held in the right hand. Purchase from Felkin.
Whisper of Despair: Reduces the target's defenses. Found in the Cemetery of the Saints.
Push Back: Grants complete invulnerability for a second and a half. Exchangeable for the soul of the King of the Giants at Straid of Olaphis.
Double barricade. She reflects every spell. Found in the Gates of Pharros.
Torpor: Reduces all damage taken by 35% for twenty seconds. Purchase from Straid of Olaphis.
Shard of Life: Create dark pillars around the caster, these target surrounding enemies dealing dark damage. Purchase from Cromwell.
Dark Storm: Creates a vortex around the caster that deals dark damage to all enemies within the area of effect. Purchasable from Grandhal.
Resonant Soul: Creates a large mass of darkness, but consumes a hundred souls. Reward for reaching the first rank in the Dark Pilgrim Covenant.
Great resonant soul: Like the resonant soul, but more powerful and consumes five hundred souls. Reward for reaching the second rank in the Dark Pilgrim Covenant.
Climax: Hurls a fast dark mass at the target, the damage depends on the possessed souls and consumes 5000. Reward for reaching the third rank in the Dark Pilgrim covenant.
Resonant Flesh: Consumes souls and recovers life over time. Purchase from Felkin.
Resonant Weapon: Consumes souls and increases the attack power of the weapon held in the right hand. Purchase from Felkin.
Life-Sucking Bandage: Consumes souls but curses a certain spot on the ground dealing damage to any enemy within it. Exchangeable for the Darklurker soul at Olaphis' Straid.
Deep Anchor: Blocks all enemy spells. Purchasable from Grandhal.
Pyromancy
Fireball: Launch a fireball at the target. Purchasable from Rosabeth.
Orb of Fire: Launches a fireball that explodes hitting both the target and surrounding enemies. Purchase from Rosebth.
Large Fireball: Launch a fireball with a large area of effect. It can be found at the Pietraluce quarry in Tseldora.
Large Chaotic Fireball: Fires a fireball that releases a pool of lava onto the ground beneath the target's feet. Purchasable from Wellager.
Firestorm: Creates several columns of fire from the ground that deal significant damage to each enemy hit. Purchase from Titchy.
Chaos Storm: Creates several columns of fire around the launcher and also leaves several flames. Found in the Forte Ferreo.
Combustion: Fires a blaze from the hand holding the pyromancy hitting all enemies at close range. Purchasable from Rosabeth.
Improved Combustion: As with normal combustion but the area of effect is greater. Purchase from Titchy.
Fiery Whip: Creates a fiery whip from the hand holding Priomancy. Purchase from Titchy.
Poison Fog: Creates a cloud of fog in the area in front of the launcher, this poisons any enemy within it. Purchasable from Rosabeth.
Toxic Fog: Creates a cloud of fog in the area in front of the launcher, this applies the negative toxicity status to enemies within it. Exchangeable for the Rat Vanguard soul at Straid of Olaphis.
Acid Wave: Creates a cloud of mist in the area in front of the launcher, this damages the equipment of all enemies within it. Exchangeable for the Royal Rat Authority soul at Straid of Olaphis.
Persistent Flame: Creates a fireball that moves slowly, when an enemy approaches, it explodes. Purchase from Straid of Olaphis.
Band of Fire: Makes the area in front of the launcher hot and explodes shortly thereafter. Purchase from Straid of Olaphis.
Forbidden Sun: Unleash a huge fireball with impressive destructive power. Purchase from Navlaan.
Flame Weapon: Adds fire damage to the weapon held in the right hand. Exchangeable for the soul of the Old Witch at Straid of Olaphis.
Sweating: Reduces the fire damage taken. Purchasable from Rosabeth.
Iron Flesh: Increases the caster's resistances and defense but greatly reduces movement. Purchasable from Rosabeth.
Warmth: Creates a small orb that heals the caster and nearby allies for twenty seconds. Purchase from Agdayne.
Immolation: The caster's body catches fire damaging all enemies in contact. Found at Forte Ferreo.
Boss Soul Weapons
In this guide we will only deal with the weapons that can be obtained by exchanging the souls of the bosses, which have a unique auxiliary effect for this type of weapon. We believe it is useless to describe the weapons without particular effects since upgrading them means a high cost of resources making them less desirable than the normal weapons found during the game.
Barbed club
Obtained by trading Doom Sentinel's soul with Straid. Adds bleed damage to each hit.
Butcher knife
Obtained by exchanging the soul of Il Lurido with Ornifex. Absorbs life with each hit.
Lance of the chariot
Obtained by exchanging The Executioner's soul with Straid. Adds bleed damage to each hit.
Shield crossbow
Obtained by exchanging the soul of The Executioner with Straid. He remains in a parade position while shooting darts.
Lance spits fire
Obtained by exchanging the Guardian Dragon soul with Ornifex. The powerful attack launches a fireball.
Great barbed sword
Obtained by exchanging the Mirror Knight's soul with Ornifex. The powerful attack does more damage.
Sword of the Regent
Obtained by exchanging the King's soul with Ornifex. The power of the sword is increased based on the souls in the player's possession.
Long time in Mytha
Obtained by exchanging Mytha's soul with Straid. Adds poison damage to each attack.
Sword of the forge
Obtained by exchanging the Soul of the Forge Demon with Straid. The powerful attack causes a wave of fire to the front.
Spider's fang
Obtained by exchanging Freja's soul with Ornifex. The powerful attack also slows enemies.
Spider web
Obtained by exchanging Freja's soul with Ornifex. Powerful attack pierces shields.
Rings
Seal of the abyss
Obtained within the Dark Pilgrim Covenant. Increases the power of evil eyes but their casting consumes life points.
Seal of the Ancient Dragon
Obtained within the Dragon Remnants covenant. Estus flasks heal fifty more life points.
Ashen Fist Ring
Found in the Cemetery of the Saints, increases the defense to petrification.
Seal of the bell tower guardian
Obtained within the bell tower Guardian pact. Allows you to invade the world of the Campanile invaders.
Bleeding ring
Purchase from Cromwell. Increases resistance to bleeding.
Brace ring
Found in the Lost Bastille. Increases the breaking strength of the equipment.
Blue Seal
Obtained in the Blue Way covenant. Allows Blue Sentinels to help you when you are invaded.
Blue tear ring
Found in the Lost Bastille. Boost defense when life points are below 35%.
Blue stone ring
Purchase from Carhillion. Increases the speed of casting spells.
Ring of Chlorancy
Found in the Forest of Fallen Giants. Increases the speed of energy regeneration.
Gold snake ring
Found in the Forte Ferreo. Increase the discovery of objects.
Silver snake ring
Found at the Lost Bastille. Increase the souls left by enemies once they are killed.
Blood seal
Obtainable within the Brotherhood of Blood covenant. Adds bleed damage to attacks.
Seal of the Rat
Obtained as part of the Rat King's covenant. Allows you to summon other players within your personal Gates of Pharros area.
Ring of curse
Purchase from Cromwell. Increases resistance to the negative curse state.
Dark Quartz Ring
Purchasable from Rosabeth. Increases the defense against darkness.
Delicate lace
Purchase from Titchy. Increases the chance of being invaded.
Dispersive ring
Purchase from Navlaan. Upgrades your defenses to magic, lightning, fire, and darkness.
First Dragon Ring
Obtainable within the pact of the Company of Champions. Increases life points and equippable weight.
Fire Quartz Ring
Purchasable from Rosabeth. Increases fire defense.
Gower's Guard Ring
Found in the Shady Woods. Eliminates the increased damage taken from attacks from behind.
Seal of the Guardian
Obtainable as part of the Blue Sentinels Covenant. Allows you to be summoned into the world of a Blue Way member to protect them from invasion.
Eagle ring
Found in the Forest of Fallen Giants. Extends the range of ranged weapons.
Illusory Conqueror's Ring
Obtained by finishing the game without dying. Makes the weapon held in the left hand invisible.
Illusory ring of the exalted
Obtained by finishing the game without resting at any bonfire. Makes the weapon held in the right hand invisible.
Ring of the King
Obtained in the Crypt of the Undead. Allows access to the King's portals.
Vital ring
Found in the Forest of Fallen Giants. Increase vital energy.
Persistent Dragon Ring
Purchase from Straid. Increases the range of spells.
Name ring
Purchase from Shalquoir. It makes it easier to play with like-minded players.
Northern Ritual Ring
Found at the Pinnacle of the Sinner. Increases the use of spells but decreases life total.
Old lion ring
Obtained by defeating the Old Dragon Slayer. Increases the damage of rapier weapons.
Ancient sun ring
Found in the Shady Woods. Creates an explosion after taking a certain amount of damage.
Poison Ring
Found in the Harvest Valley. Increases resistance to poison.
Red stone ring
Found in the Shady Woods. Increases the power of your attacks when your life total is below 30%.
Red eye ring
Purchase from Shalquoir. Makes it easier for enemies to spot you.
Constraint ring
Found in the Cathedral of the Blue. Limits the penalty of life points in empty form.
Ring of blades
Obtained by defeating the Persecutor. Increases the damage of physical attacks.
Ring of the Giants
Purchase from Gavlan. Increase balance.
Ring of knowledge
Available from Straid. Increases intelligence by five points.
Ring of vital protection
Found in the Desolate Pier. Souls are not lost upon death, but the ring breaks and must be repaired.
Prayer ring
Purchasable from Licia. Increase faith by five points.
Resistance ring
Obtained by following Cromwell's missions. Increases resistance to poison, bleeding, curse, and petrification.
Ring of restoration
Found in the Forest of Fallen Giants. Regenerates two life points per second.
Soul Protection Ring
Purchase from the Head of Vengarl. No souls are lost upon death and protects from petrification, breaks when used but can be repaired.
Steel cap ring
Obtained from Saulden as a reward. Increase physical defenses.
Ring of the dead
Obtained after using the Key of the Bound. It maintains the human form even as empty beings.
Evil eye ring
Purchase from Shalquoir. It absorbs life points for each enemy killed.
Ring of Thorns
Obtainable as a reward from Pate. Performs a counterattack when taking damage.
Whispering Ring
Purchase from Shalquoir. It emits a sound alerting you to the enemy presence and allows you to talk to the Scorpion Man in the Shadowy Ruins.
Royal Soldier's Ring
Found in the Desolate Pier. Increase equippable weight.
Second Dragon Ring
Obtained as a reward from the Scorpio Man. Increases Health and Energy.
Silver cat ring
Purchase from Shalquoir. Decreases the damage of falls.
Sleeping Dragon Ring
Ring obtainable in the Rat King covenant. No noise is produced with the movements.
Southern Ritual Ring
Found in the Campanile of the Moon. Increase usable slots for spells.
Enchanted Quartz Ring
Purchase from Carhillion. Increase Magic Defense.
Stone ring
It can be found in the Via di Passage. Damages enemy balance for each attack inflicted.
Seal of the Sun
Obtainable in the covenant of the Heirs of the Sun. Increases the strength of miracles.
Lightning Quartz Ring
Purchasable from Rosabeth. Increases the lightning defense.
Third Dragon Ring
Found at the Dragon Shrine. Increases life points, energy and equippable weight.
Conqueror's Seal
Obtainable within the pact of the Company of Champions. Increases the damage with bare hands.
White ring
Obtained by trading items with Dyna and Tillo. Gives the appearance of a white spectrum.
Layers
Way of passage
The Passageway, is the first play area, this is where your adventure will begin. Advance from the starting point until you reach a house with lighted windows. Inside you will find the Old Keepers of the Fire. During this first visit you will be given the opportunity to create your character by choosing class and appearance; by visiting the keepers again by owning the receptacle of souls, you will be able to redistribute the points spent as the levels advance. The rest of the level is a tutorial, for each foggy portal you pass through, you will find yourself in a small path with some stone slabs that will explain the commands for the basic game actions. On a small beach controlled by two Trolls, you will find a coffin upon entering which, you can change the sex of your character, returning a second time, you will return to the original sex. Continue along this linear area to reach Majula.
Majula
Majula is the operational center of your adventure, here you can level up by talking to the Emerald Herald, upgrade the Estus flasks and access numerous merchants, some of which, will be unlocked as you advance in the main adventure.
Forest of fallen giants
Taking the left path from the Majula bonfire and passing under a stone archway, you will reach the Forest of Fallen Giants. Once out of the underground area, you will reach the actual forest, here there will be several undead quite easy to eliminate as long as you don't get surrounded. To the right of the stream you can find a comfortable bonfire. Going up the road that runs along the stream on the right, you will soon reach a brick passage, through which you will find yourself in a large open area populated by several undead, eliminate them by attracting them in groups of up to two elements, then, once you have made a clean sweep , you can also dedicate yourself to the Knight of Heide, it is highly advisable to face this enemy using different bombs and staying at a distance. Go under the stone archway and the misty portal, go down the path and make your way killing the enemies until you reach a staircase, watch out for the archer at the top, take him out quickly and dedicate yourself to his companions in the open area. Climb the ladder on the left, then go through the door on the right and activate the Cardinal Tower bonfire.
Cardinal Tower
Go down the ladder in the hole to the right of the bonfire, then reach the stone terrace. Climbing the ladder on the right after eliminating the undead, you will find yourself on the square where you can face the Persecutor for the first time. In front of you there will be a wall with some barrels, blow them up in the distance to create a convenient shortcut to the bonfire. Exit and go down to the right to reach an area with some houses, make your way over the roofs and reach the cave where you will find Cale il Cartografo who will give you the key to the Villa di Majula. Return to the bonfire and once out of the shortcut, take the ladder to the left. Go down the ladder and take the passage under the arch on the right, blow up the explosive barrels and finish off the iron enemy. Enter the area behind the iron enemy, take out the enemies and pass the misty portal on the left, go down and reach the pressure elevator to reach the fight with the Last Giant. Once you have the Soldier's key, you can open the three doors in the room past the iron enemy; one of these will lead you to the area for the second encounter with the Persecutor and the nest where you can be transported to the Lost Bastille.
Tower of Heide's Flame
From Majula, take the path to the right and go under the archway to enter the circular mechanism room. Take the only open path on the right to reach Heide's Tower of Flame. This simple and linear area is littered with Sentinels, huge but decidedly slow enemies that, if faced individually, will not represent a big problem since their attacks are easily dodged and suffer a lot from hits over distance.
By activating the three levers in the area, you will expand the battle area with the Dragon Rider located in the lowest area of the level. Going up to the highest part, however, you will reach the clash with the Old Dragon Slayer.
Desolate jetty
Once you've defeated the Dragon Rider, cross the bridge and go down the spiral stairs to find yourself in the Desolate Dock area. It is really advisable to have a Key of Pharros with you as in the upper area of the level you will be able to activate a mechanism that will illuminate the area by repelling the reptilian men inside the dark areas. Reach the most winged part and to the left of the area to reach a lever to pull and ring the bell that will allow the huge ship to moor. Go down to the lowest floor starting from the point where you are to reach the dock and go up on the deck of the ship, here you will face several enemies and you can go below deck where you will face the Flexible Sentinel. Once the battle is over, go into the next room and interact with the giant compass to reach the Lost Bastille.
The Lost Bastille
The area will be littered with Jailers, huge looking enemies but not very hard to deal with, wait for them to start charging the shot with their huge weapon and dodge to reach their rear side to deal heavy hits, otherwise, just face them on the distance. Once you reach a large staircase with a Jailer on top, take out the enemy being careful not to hit the barrel in front of him, then drop him from the staircase and take him against the wall below, blow him up to create a gap in the wall through which reach a bonfire and McDuff's shop. Reach the room full of undead equipped with a broadsword, lure them outside and try to eliminate them with spells or bombs with a large area effect. Enter the huge room and immediately take the door on the left, pull the lever to raise the gate, eliminate the remaining enemies and go all the way down the corridor until you reach the misty portal for the fight with the Sentinels of Ruin. Once the boss is defeated, go up to the opposite side of the area and go through the corridor to find yourself in the servants' quarters. Continuing from this room, you will face a portion of the level populated by explosive enemies, be very careful when they will throw themselves against you, since hitting the ground will emit a wave of energy that will throw you off, also inflicting a lot of damage, use a weapon that you eliminate them with a maximum of three hits and therefore be very fast. You will reach a room with two cells, one of which is blocked by the petrified body of Straid of Olaphis, one of the two merchants through which you can exchange the souls of the bosses. From the cell on the right, drop down and cross the long path to reach the Pinnacle of the Sinner.
The Pinnacle of the Sinner
The area will be littered with undead enemies, your aim will be to reach the elevator in the central tower and take you to the submerged area. Here you will have to deal with the enormous abominations, always try to face it one at a time as the clashes will be made difficult by the water that slows down your movements. Once you have made a clean sweep, walk through the entire linear area until you reach the misty portal for the fight with the Lost Sinner.
Bell Tower of the Moon
To reach the Bell Tower of the Moon, from the servants quarter bonfire to the Lost Bastille, go down the ladder into the hole in the floor, then activate the Key of Pharros to create the passage and reach the area. This level is quite short and climbing to the top of the bell tower you will face the Bell Tower Gargoyle. The real challenge of the area is that other players belonging to the Covenant of the Keepers of the Bell, could invade you, it goes without saying that there is no precise strategy to face other players like you.
Hunter's Grove
To access the Hunter's Grove, you will need to talk to Licia in the circular room of the mechanism to Majula, then offer her 2000 souls to turn the room creating the passage for the area. As you enter the level you will find a bonfire on your left. The whole area is littered with lethal butterflies, these are found on trees and it is advisable to eliminate them with a bow before advancing, in fact, they will release poisonous spores as you pass. Once you have passed the first bridge, on the right you will find the path that leads to the Purgatory of the Undead, continuing straight, however, you will reach a drawbridge which lever to lower it is hidden inside a nearby cave. The boss of the area is the Lord of the Undead.
Purgatory of the Undead
To access the Purgatory of the Undead, you will have to pass a rope bridge, be very careful and walk it slowly, as some beams will be missing and the fall will lead you to certain death. Once you reach the misty portal and kill the dark specter, you'll have to deal with the boss Wagon of the Executioner.
Harvest Valley
As soon as you arrive at the valley of the harvest, you will meet the merchant Chloanne, exhausted all the dialogue options to have her moved to Majula. Every lower part of the area is littered with lethal poisonous gas, this will increase the negative state of poisoning for every moment you spend inside it, you may be able, running, to reach some objects inside the miasma. Then go to the building full of pots containing poison, being careful of the miners with hammers who could smash them near you. From here, look for the misty passage to the level boss fight.
Earth's Peak
The Earth's Peak is a huge windmill. Your aim will be to reach the central part of the blades, light a torch and set the entire structure on fire, then reach the misty portal for the boss fight.
Iron Fort
Once you reach the beginning of the area, cross the bridge and enter the fort proper. Once you reach the first open area, watch out for the various archers scattered around the area, cross the bridge on the right and enter the misty portal on the left for the fight with the Demon of the Forge. Then reach a room with four fire-breathing ox heads, climb the ladder and press the button to deactivate the other ox heads in the level, you can go back to the start of the fort and retrieve a key. Exit the exit below and go to the fight area with the Old Iron King.
Campanile del Sole
Once you have defeated the Demon of the Forge inside the Iron Fort, you will reach a room with several suspended walkways and the lava in the lower floor, next to the first stairs, you will find a room with a Pharros mechanism to be activated which will open the path to the Bell tower. As with that of the Moon, even in the Bell Tower of the Sun, the biggest threat is represented by the players belonging to the Pact of the Keepers of the Bell who could invade you at any time, also by beating one of the dark specters, you will have the possibility to obtain the Katana of the Berserker .
Shady Woods
Once you have ransacked Rosabeth and defeated the monsters that will ambush you, you will be able to access the Shady Woods. You will soon reach a bonfire in the center of a ruin and three paths will be at your side and in front of you. On the right you will find the foggy area, it is very easy to get lost in this area, but to continue you just need to go alongside the left side and you should find a small path that goes up to the Shady Ruins. Taking the path to the right of the bonfire instead, you will reach the Winter Sanctuary accessible only after having lit all the ancient bonfires. On the straight path you will find a portal that leads to the Aldia Fortress but which can only be opened with the King's Seal. Once you reach the Dark Ruins, pass the ruined structure and reach the area populated by Satyrs, turn right by the giant Basilisk and Climb the path near the two turrets to reach the misty passage and the boss fight.
Gates of Pharros
The Gates of Pharros are a very short level but, populated by powerful and huge monsters that will be faced individually. Try to attract the rats scattered around the area as facing larger enemies with the annoyance caused by the rats could prove fatal. Another difficulty is given by the fact that the members of the Rat pact could summon you to their personal level where you will have to defeat them together with the enemies who fight alongside them. Only some of Pharros' mechanisms hide items, others activate traps that would only become useful if you enter the Rat covenant.
Pietraluce quarry of Tseldora
At the beginning of the level you will find yourself in the real army camp, this area is populated by numerous undead, not very lethal if taken individually, very dangerous if faced in a group. Go down the escarpment and climb the first ladder on the right to activate all the boulders and eliminate the enemies below, then, reach the large door to face the first boss of the area. After winning the fight, advance and climb the ladder, move along the slope and enter the cave on the right to find a bonfire. Exit where you entered and drop onto the balcony of the structure in front of you, from here go down to the lowest floor of the area to reach the cathedral crossing an embankment with many spikes. Climb the ladder behind the left portal to find yourself in the spider area, here, earn the bottom of the area by passing over the cobwebs and reaching the misty portal for the boss fight.
Tomb of the Saints
To access the Tomb of the Saints and subsequent optional levels, you must have moved the merchant Gillian to Majula. The man will position himself in front of the well in front of the villa, paying the right number of souls will lower a ladder that will allow you to go down inside the well. This level is quite short and, as with the Gates of Pharros, here too you could be summoned into the world of a player belonging to the Rat covenant.
The Drain
The Scolo will very closely resemble the Infamous City from the previous Dark Souls chapter. A set of walkways and wooden structures where it will be very difficult to find your way around. Smash all the statuettes identical to those seen outside Majula's well as they will spit a poisonous jet at you. Orient yourself by lighting all the torches present so that if you are forced to start again, you will know exactly where to pass. Arm yourself with patience and go to the opposite side of the bonfire.
Black Throat
The Black Throat is a fairly straightforward level but, populated by powerful monsters, make sure you take out as many poison-spitting figurines before moving a single step, then, reach the area with the caves on the left and wait for the insect-like enemies to come out. to kill them. Once you get to the area with the puddles, prepare your best pyromancies to hit the enemies that will come out of them. Continue down the path to reach the boss fight.
Winter sanctuary
This area will only serve as a barrier to reach Drangleic Castle, in fact you must have lit all the primeval bonfires to pass.
Drangleic Castle
The most difficult and cryptic part of this fairly linear level is a room where on the sides you will see twelve stone statues, these are enemies that will activate once you are close enough. Killing each enemy pair near the back door will open it. Only the first door on the right allows you to continue in the level while the others hide precious objects but also several Sentinels of Ruin. Once you get to the top of the castle, go through the misty portal to the boss fight.
Amana shrine
This level will also be quite linear but populated by really tough and annoying enemies. Aside from the Disciples of the Dragon, who will represent the least threat, you will need to have a bow with you as enemies capable of casting spells will start attacking you from immense distances. Watch out for the water around you as reptilian enemies will be hiding that can be identified by a small glow on the liquid. Continue by stopping often and checking the area in front of you with the bow's first-person aim.
Crypt of the Undead
The Crypt of the Undead presents a rather peculiar challenge, in fact, in different rooms of the level, you will notice some enemies running towards a precise point and pulling a lever to make a bell ring, from that moment on, from the various tombstones scattered will begin to some truly lethal and magical ghosts. If you feel able to do so and, if you want to explore the area calmly, try to foresee the enemies that will go to ring the bell, or, eliminate any tombstones. Just before reaching the boss fight and in the huge corridor, drop down the stairs on the sides and enter the small passage below, immediately eliminate the enemy inside the small room to prevent the bell ringing by making the passage in the corridor earlier of the clash with the boss, really impossible to go through.
Aldia fortress
Once in the garden in front of the fortress, quickly free yourself from the rats and light the bonfire in the hut at the base of the staircase. Enter the fortress proper and face the dark specter.
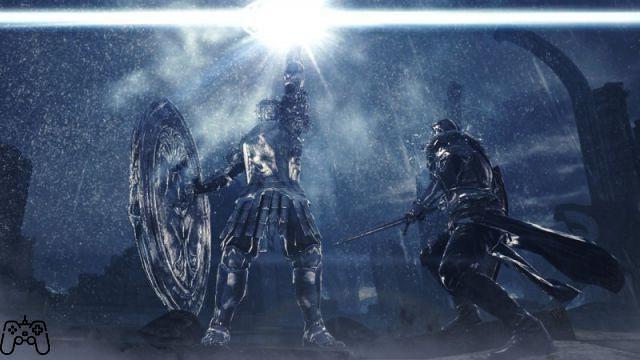
Once in the gigantic hall, slowly approach the huge dragon skeleton as soon as it starts to move backwards to avoid getting hit. Climb the stairs and reach the top level to activate a lever behind the huge basilisk and gain access to the second part of the fortress. You will find yourself in a huge corridor full of caged enemies. Pay attention to the squares on the sides as enemies are hiding behind them. Then reach the troll that will break through the wall, try to eliminate him on the spot and do not let him run down the corridor as it would free the other enemies. Nearby you will find a room with a flight of stairs that will lead to a prison full of acid gas, eliminate the enemies inside with ranged attacks, then, take off all your equipment and collect the key inside. Go back to the corridor and open the door on the right, go through the room and go out the other side, leave the troll alone and turn right to face the dark specter of Navlaan and, after beating him, the boss of the area.
Dragon's Nest
The Dragon's Nest, is an area full of shiny lizards but populated by some immense Dragons, these as impressive as they are, will not be a big challenge if you manage to stay attached to one of their legs and never on their front. Once the dragons are gone, return to the bonfire and revisit each area to eliminate the glowing lizards and earn valuable minerals.
Dragon Shrine
As with Heide's Tower of Flame, in this level, there will be some huge sentinels, these will have to be faced either on the distance or separately. Once you reach the huge staircase leading to the Ancient Dragon, lure the dragon knights and separate them from the sentries. You will reach a huge balcony where you will receive the key to access the ancient memories.
Ancient Memories
There are four ancient memories, and they consist of areas that can be explored in time, after which you will receive precious objects. The first of them is located in the Cardinal Tower, take the archway in front of the place of the first meeting with Pate, immediately turn right to find yourself in front of a giant tree. The second memory is found in the place of the confrontation with the Persecutor. The third and final memory is located behind the King's portal near the area of the fight with the Last Giant and at the end of it you will have to face the Lord of the Giants. The bonus memory is that of the dragon and you can enter it by interacting with the stone inside the area of the encounter with Freja.
Throne of the Will
The Throne of Will is a simple area that serves as a passage to the final battle area. It is accessible by passing the King's portal in Drangleic Castle.
THE VIDEO OF THE SOLUTION - PART ONE
THE VIDEO OF THE SOLUTION - SECOND PART
THE VIDEO OF THE SOLUTION - THIRD PART


