Please note:
The solution is based on the US version of the game for Xbox 360. There may be divergences from the Spanish version and / or for other platforms.
PROLOGUE
Below, the missions relating to the prologue.
Take a bite out of crime
The patrol service acts as an introductory tutorial to the dynamics of the game, so the first four cases will be extremely short, compared to the continuation. Your partner will be Ralph Dunn. Examine the bloodstains, then walk down the left section of the alley, locating a gutter. Climb it, reaching the roof. Before your eyes, on the ground, you will see the murder weapon - a pistol. Talk to Dunn, he will let you know there is a gun shop nearby. Jump in the car, go visit this shop. The owner will give you the register, by associating the serial with the owner's name you will know that the weapon belongs to Schroeder. Go to his apartment, examine the mailbox to find his room. Knock him out during the fight, then scan the drawer, finding a diary with Rose's name, thus concluding the case.
Armed and Dangerous
You will receive a phone call notifying you of a robbery in progress. Head to the crime scene, kill the robbers in the street, who try to use the cars as cover (one hit should be more than enough). Now move to the bank entrance, stay covered around the corner - then when you feel ready, jump out and kill the three criminals on the ground floor; aim upwards, take out those on the first floor as well.
Warrants Outstanding
Chase the Delinquent down the street, then towards the roof. Do not get too close while climbing: it could punch you and make you fall treacherously. At the roof, you will have to overcome a fight - block the enemy attacks, then respond with a stronger punch, thus quickly coming to the end of the fight.
Buyer Beware
Head to the crime scene, where you will find Mr. Gage deceased. Examine the victim's clothes, recovering the coupon. Then scan the area near the garbage can, from there you can retrieve the murder weapon. His serial number is clearly visible; you can also ask for information at the nearby gun shop. Apparently, Kalou took his weapon there for a cleanup operation.
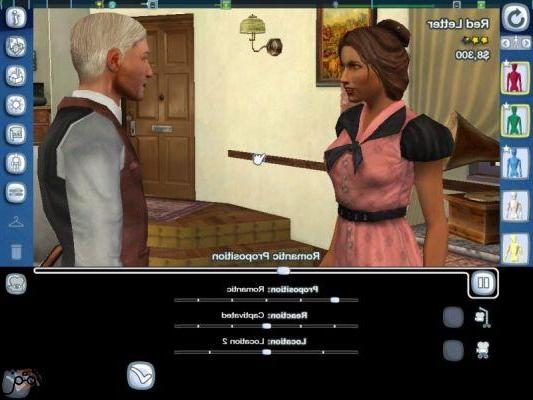
You will now have to question the shop assistant. Since this mission is always included in the tutorial, you can freely indicate the moments in which he will be lying, without fear that the interrogation will end early. Then head to Kalou's jewelry shop, talk to the man at the counter - it's Kalou himself, he will immediately try to escape. Start chasing him, shooting him with your gun, proceeding down the alley. After taking him, you will question him: to get the truth, choose to doubt his intentions, then exploit the information provided by the witness.
Video - Launch Trailer
TRAFFIC CONTROL SECTION
Here are the missions you will carry out when you are assigned to traffic control.
The Driver's Seat
After the promotion, you will have a new companion - Stefan Bekowsky. You will have to investigate a mysterious murder, which took place on the rails. Examine the central part of the victim's body, recovering a receipt, containing Morgan's name. You can also find a possible murder weapon, a tube full of blood - as well as a pair of glasses. Upon closer inspection, you can also pick up the victim's passport, which identifies him as Adrian Black. Travel to his residence, talk to his wife, then explore the house by examining all items related to possible problems in their marriage - especially infidelity. Behind the house, you will also notice a new boiler, which is missing a pipe.
Talk to his wife again, she will point out Morgan - Frank Morgan, a friend of Black's. He will also give you his address. Go to the pub, talk to Frank about the events, asking if he has any explanations about Adrian's whereabouts. He will leave: chase him while, in the car, he proceeds to his apartment. You will discover that Adrian is alive: chase him and arrest him, completing the case.
Marriage Made in Heaven
Outside the bar, you will find Pattison's body. Examine him, especially his cloak, by retrieving the apparently freshly taken out life insurance receipt. So talk to the witnesses, that is, the bartender and the actress. They will tell you about how the deceased was conversing with his wife, before she was speeding away. Both witnesses, apparently, will not completely tell the truth - or rather, they will omit details, which is not enough to accuse them of perjury.
As you continue to examine the area, you can retrieve a bloody knife from the garbage can in the back alley. There are no clues that connect it directly to the murder, but it can still be useful. So go to Pattison's residence. You can meet his wife, along with Sobo - neither of them seems to be worried about Pattison's death. They will ask you to leave; take a look at the messages inside the police phone. You will be told how the murder was caused by a knife wound, not a blow to the head.
Go back to Pattison's house, you will witness a murder - Sabo will kill Lorna. Start chasing him, trying to shoot him. In case he manages to escape, he will take a hostage: aim carefully, so as to kill Sabo without hitting the hostage (otherwise, you will have to repeat the entire mission). Case closed.
The Fallen Idol
There was an attempted murder, but both victims apparently managed to survive without severe damage. Examine the site where the impact occurred; one of the two potential victims is a minor. You will also find a notice from her mother requesting that she come home. Talk to the witness - June Ballard. Since she has a tendency to lie, try to force the interrogation repeatedly, thus letting the truth out, especially when it comes to Jessica's youth.
Now, go visit the police hospital, talking to Jessica directly. Ask her about June and Bishop, as well as anything she knows about Hollywood. There will be a fight between Bishop and McAfee, June's husband. When she takes the car and leaves, start chasing her. She will stop by the restaurant, to make a call. By remaining silent and hidden, you can eavesdrop on the conversation, discovering that McAfee has a problem with the Bishops. Head to Bishop's apartment, which has already been visited by the McAfee family. Examine it, looking at photos of the movie set, shops, and any items that reference a potential career as a movie star.
Then go talk to Ms. Bishop, ask her about June, McAfee, and the checks. Before you leave, call the police station to tell you the address of the Hopgood store. Travel in that direction, then fill Hopgood with questions. Head to the back of the shop, thus locating a secret passage to the back room. You will find evidence of sexual intercourse, filmed by Hopgood. Try asking Hopgood about the events, he will clearly deny everything. Also, a colleague of yours - Roy Earle - will come on the scene, and will declare that Hopgood is free to leave.
Exit the shop, you will be stopped by McAfee's men - escape down the street, then reach the movie set where Bishop is, using the photo as a reference. Jump over the half-destroyed cinematic structures to be able to catch Bishop, arriving to catch him when he is at the top. McAfee's henchmen will arrive on the scene, starting to shoot at you: protect Bishop, while Bekowsky covers you from below. Kill all the enemies with the support of the LAPD. When the gangsters are dead, the case is over.
MURDER SECTION
Here are the missions you will carry out when you are assigned to the homicide.
The Red Lipstick Murderer
Your partner in this series of killing bench adventures will be Rusty Galloway. Immediately begin examining the crime scene, locating the ball-shaped lighter. Line up the four sections of the sphere, obtaining the address of the Bamba club. Head to this club, talk to the bartender, Garret Mason. He will ask you to move towards McColl, in the back - he knows Celine Henry. Try to question her, apparently she is quite honest, he will also give you the address of Celine's husband. So head to Henry's house, talking to Jacob, inside. Scan this play area, looking for clues: locate the diary on the counter, which will reveal that Jacob had feelings towards Celine. Talk to the husband about the matter, then use the phone to call a police team. Now, carefully examine the car at the crime scene - it's Alonzo Mendez's.
Visit his apartment, recover the murder weapon and several bloody items. Suddenly, Mendez will enter his room and, realizing what is happening, will flee immediately: chase him, to his car. You will then move on to a car chase, the goal always remains the same - to reach Mendez. If you get close enough, Rusty will hit the tires of the enemy car, it will crash into a wall, and you can arrest Mendez.
The Golden Butterfly
Upon examining the body, you will notice strangulation marks and boot prints, as well as the victim's address, inside the backpack. So move to his house, where you will find the daughter of the deceased. Examine the house carefully, noting any signs of a failed marriage. Talk to Michelle Moller, discovering further indications regarding the bad emotional atmosphere that permeated the house.
Then ask Hugo Moller, who will enter the scene. You won't be able to extract much information, he will remain rather evasive and vague. Exit the house, talk to the neighbor across the street. In this instant, you will be able to see Hugo trying to burn his bloody shoe: chase him and catch him, accusing him of the murder of his wife.
Visit the morgue now, examining the wounds on Mrs. Moller's body, noting how she was strangled using a rope typically used for ships. Now go to Michelle's school, all the clues point in that direction for now. You'll find Eli Rooney - a lure for children - hit him and take him to jail. Then examine his car in the parking lot where you can find clues connecting Rooney to Moller. Back at the police station, interrogate Rooney and Hugo until they confess. Your boss will be happier if you can get Eli to confess first.
The Silk Stocking Murderer
Examine the victim's body, discovering a library pass cut in half. Follow the trail of blood to get to the roof, thus finding the other half, and discovering the identity of the woman - her name is Antonia Maldonado, you will also get her address. Go towards the house, talk to the owner. Examine Antonia's room, noting how she has recently been visited, not amicably. Locate the wedding photo, also examining the bracelet and the broken window next to it.
Go back to the main floor, ask the owner of the house about Antonia's favorite activities. She will tell you about the El Dorado bar, as well as the complicated relationship between the victim and her husband, Angel. At the bar, you can find the divorce papers, which Antonia was about to give to Angel. As you continue to investigate, you can also retrieve Angel's address himself. Visit his house, examine the mailbox, thus discovering the exact number of the apartment.
You will be ambushed by Angel, along with his brother. Knock out the brother, while Rusty will hit the main suspect. Take them to jail, continue exploring the house - you will find bloody clothes, as well as clear signs of how a fight took place. Go down the corridor, talk to the neighbors, they will tell you the events of the previous night.
Return to the police station to complete the interrogation with Angel - the evidence appears to be inconsistent with each other, but still sufficient to keep him in jail. You will now have to go and examine the fruit shop next to the bar. Talk to Clem, break the gate on the left wall, then scan the drawers. The combination of the case is 2-5-3, you will find Antonia's jewels inside. Clem will escape: chase him, take him, and take him to the central to close the case.
The White Shoe Slaying
As usual, start by examining the body, noting how the dress indicates a recent cleaning. Ask the waitress, she will tell you about the presence in the area of some fairly suspicious subjects. Call the police station, give the name of the shop that did the cleaning, talk to the clerk, he will give you all the events during the night of the assassination.
The dress belonged to Taraldsen, the address is included. Go visit this area, meeting the victim's husband, Lars. Examine the house, some clues indicate that the victim's husband was out of the house the night the killer took place, and has shoes that are exactly the same size as the potential killer. Ask him about the status of the marriage which, as a cliché, was not going well. He will give you information about the bar his wife visited on the night of the murder.
Travel to the bar, asking the bartender for information - it appears that Taraldsen was talking to two people, a sailor and a man named Richard, who is a regular visitor to the bar. The latter will immediately escape from the bar, so you will have to start chasing him, using your car. Once you reach him, you can ask him a few questions, then take him to the police station. He will say that the sailor was the last person to speak to Theresa. Jessop, the sailor, will arrive at the police station on his own. He will answer all your questions. You now have three suspects, each of whom exposes a version of the story that conflicts with that of the other two. One last trail remains - the nomad camp. Head to this area, talk to the boss, Stuart Ackerman.
Also explore the rest of the camp, finding the murder weapon, as well as some clues that seem to indicate that Ackermann was somehow involved in the struggle. Talk to Ackermann again, pointing out his lies, then taking him to prison.
The Studio Secretary Murder
Upon examining the corpse, the identity of the victim will be revealed - it is Evelyn Summers. Some clues give you information about the bar she frequented. Get there right away, talk to the bartender and McCaffrey, one of the owners. She will tell you about her brief criminal past, as well as other places the victim typically visits, namely Rawling's bowling alley. Another clue leads you to the liquor store where Summers worked.
Go there, talk to Robbins, the owner. After the conversation, head to the back of the shop; Summers apparently stole, among other items, a book belonging to McCaffrey. He then proceed to the bowling alley. Talk to the old lady at the counter, asking about Summers' friend Tiernan. The latter will suddenly escape: chase him, take him to the police station, start interrogating him.
You'll get McCaffrey's address. Head to his apartment, noting the presence of the murder weapon. Apparently McCaffrey is the killer: go up to the roof, chase him. After getting him, take him to the station too. Forcefully question both suspects to bring the case to its natural conclusion.
The Quarter Moon Murders
Talk to Phelps, then make your way to Pershing Square. You will find a second clue; we recommend proceeding to the land registry. Go up to the second floor, then use the ladder to get to the top of the candlestick. Get over the chains, finding the third clue. The chains will then break, a short skit will take you to safety. So go to the public library. Climb the pipes, passing the scaffolding. Walk carefully, a single step out of place can cause serious problems. At the top of the roof, you will get the fourth clue. Now move on to Westlake, proceeding to the islet to the north, where you will find the fifth clue.
Now move to the art museum. As you enter the maze, keep moving forward along the corners, up to a series of crossroads. The directions you will have to follow in this kind of labyrinth are the following: left, right, left, right. In the center, you will find yet another clue, which will direct you to the film set, which you already visited when you were in charge of the traffic.
Go up the stairs, the whole set will begin to collapse. Use the pillar to make your way until Rusty clears the way. Use the tube to land without hurting yourself. Recover the last clue by escaping from the ruins of the set. The last clue will lead you to the abandoned church, where you will have to fight against the real killer: Garret Mason. Follow him to the catacombs, then dive to the side to avoid the shots from his shotgun. You will reach a corridor, there you will have to unload all the bullets at your disposal on the back of the enemy, thus managing to kill him and complete the case.
"VICE" SECTION
Below are the missions you will carry out when you are enlisted as a deputy.
The Black Caesar
Roy Earle will be your companion in this adventure in the anti-narcotics group. Examine the bodies of the two subjects. On Tyree's corpse you can find a memo indicating the frequency of a radio station - 275. In Lamont's wallet it will be possible to retrieve the ticket for some event. Other potentially interesting clues concern the drawing on the table, as well as the large container of popcorn near the kitchen table; under this container you will find a vial of morphine.
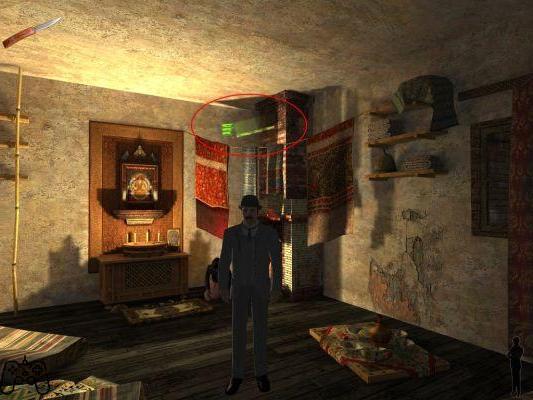
So go to the Black Caesar stand. You will be able to interact with the cook, Fleetwood Morgan. Go after him as fast as you can, then use any standard combo to KO him and take him to jail. Go through the entire booth to find a box with several vials of the drug, as well as a card provided by Jermaine Jones. Try questioning Fleetwood, doubting his claims. He will tell you about Jones, indicating him as the main drug distributor. Approach the phone nearby, thus retrieving Jones's address from your usual informants. Enter his residence, locating a radio: tune it to 275, a secret drawer will open, full of drugs, money and tickets.
You will also notice a potential clue on the radio, a sticker with the name "Ramez Removals". Jones's henchmen will arrive and try to eliminate you: repel them, an absolutely standard fight. Then, talk to Jones, asking about morphine and Ottie. Continue to doubt his claims, obtaining various information regarding Ottie, which you will then have to go and visit. Locate the slot machine, on the back, by examining it carefully - you will notice a drawing with the word "WIN" associated with a cherry and a bell. Use the slot machine continuously, until these three objects appear on its screen. This will open access to Ottie's secret warehouse, also full of drugs and money.
Ottie, realizing the situation, will run away - you will have to chase him, on foot. After getting it, take it to the police station. Use the testimony of Jones and Morgan to nail him. Then head to Ramirez's warehouse, which appears to be the main supplier. Shoot the runaway truck, then enter the warehouse, make your way through the sea of crates. On the other side, a long ladder: climb to the top, then interact with the crane controls. Move the blocks that, on the left, prevent access to the freezer. Go down and examine it, discovering a large drug reserve. Exit the building; Ramez will manage to escape, retrieve a shotgun, and begin killing those present. Go back to the warehouse, use the crates as cover, shoot Ramez until killing him.
Head to the Polar Bear Ice. Eliminate the two gangsters, enter the following room. Hide under the counter, kill the oncoming enemy, grab his shotgun, use it on the next opponent in the right corner. Enter the room on the right, get rid of yet another nuisance. You will reach the freezer, where the final challenge with Lenny will take place. We recommend "direct" combat: the play area offers no protection, just try to kill Lenny before he kills you. Move to the end of the freezer to discover the drug warehouse, closing the case.
Video - Gameplay
The Set Up
Enter the locker room, examine Hammond's locker, finding a small diary containing a phone number. Call the station to find out who it belongs to, then go to the hotel that will be indicated to you. Examine the guest list, enter room 207. Retrieve the telegram from the garbage, the betting slip next to the side, the piece of ticket and box of chocolates from the drawer, as well as the can of beans from the table, and the open newspaper. on the "Southscott Shingle Home" page. It is associated with the Candy Edwards address, an area to which you will have to proceed.
This is a motel; talk to the woman at the counter, she will point you to room 7. Punch Carlo, then search his pockets, retrieving a list and a knife. Then examine the rest of the room, noting a ticket to Ohio and a postcard. Wake up Candy, talk to her, then use the Southcott information to expose her lies about Hammond. Then use the telegram to get information regarding Hammond's final direction. The next morning, chase Candy, trying to remain undercover. Go over the fence, then use the trees and mailboxes to keep out of sight. Turn right, proceed along the alley, then enter the betting office.
Examine the note left by Candy, proceed to the address associated with the name written in it. Follow the path, talk to the manager, he will point you to Roy's shop. There you will see Candy getting into a taxi, follow it to the station. Candy will go into the bathroom, you will hear a shot. You go inside too, finding Candy's body. Retrieve the gun from the crime scene, then a piece of ticket from Candy's bag.
Head to the Egyptian theater. Eliminate the opponent on the right, then the next one who will come out the door on the left. Go up the back stairs to the balcony. Kill Carlo, now equipped with a machine gun (wait for him to stop to reload, it's the perfect time to hit him dead). This will close the case.
Manifest Destiny
Examine Bowe's body, then Bittleson's, noting the presence of various drugs in his pockets. In the back room you will see a huge container of Valor cigarettes, then some Browning rifles associated with a serial number. Now go back to evidence group "B", examine the three pieces of the horn, uncovering a secret compartment, which contains a ticket to the blue room and some boxes of morphine. Talk to the waitress, doubting the information she will give you about the events surrounding the shooting, also pointing out her lies about the owner. Back at the police station, talk to Detective Harry, obtaining the harbor poster. Look for information on who may have taken the guns, morphine and cigarettes.
Walk towards the Blue Room, talk to Elsa. Doubt her claims twice, even though - for now - you don't have the evidence to falsify her claims with certainty. After a cutscene, chase Elsa's car until you reach her apartment. Another cutscene, you will therefore find yourself inside the Blue Room. Talk to Meyer Cohen, again you don't have specific evidence, just doubt what she says. More skits, then move to North Bronson, where a shooting will take place. Stay covered until the enemy has to reload his weapon, then run to the right behind the building. Go up the stairs, hit the opponent while he is distracted by Roy. Examine his corpse, obtaining a memo. Talk to Felix, doubt it, then show him the sniper memo to ascertain his lie.
Call Kelso via the police phone, making him converge on the station. During the interrogation, doubt the claims regarding morphine and theft. Skit, therefore you will have to participate in a chase. Approach the car, skid it, then hit the wall in the dead end. Hit both killers, then examine their corpses - recover the posters, as well as information about the post office and the Chinese theater. Looks like Shelton has to meet the gangsters.
Inside the post office you will be confronted with five gangsters; Fortunately, you will be helped by many fellow cops, so you can kill them all without problems. Then go through the entire play area again to retrieve Lenny's business card from Beckett, a memo from another of the gangsters. Moving on to the Chinese theater, the opponents will try to escape, so eliminating them will be even easier: chase them and bombard them with shots. Return to the station to interrogate Shelton. Show the memo about the meeting, then use Beckett's confession to nail Sheldon when you talk about the theft. This will end the case.
FIRE SECTION
Here are the missions you will carry out when you are assigned to the fire section.
The Gas Man
Your new partner will be Herschel Biggs. You'll have to deal with two fires right away: one near the Steffens 'residence, the other in the Swayers'. Visit the first. Locate the boiler, maintained by Ryan, on the left. You can also find a ticket from a travel agency nearby. Talk to Don Steffens, expressing some doubts when he talks to you about Suburban Redevelopment. Go to the Sawyer house, locate the regulator valve, on the ground to the right of the house. Then go after the suspect, Herbert Champman; unfortunately, he will not provide you with any particularly relevant information. Move now to the travel agency "Gulliver", looking at the register, in order to obtain details on the two families Steffans and Sawyer. So talk to the clerk, John Cunningham. Listen to his views on Suburban, but doubt what he says about the promotion. Now go visit the Suburban office. After a skit, you will be automatically directed to fire station number 32. Talk to Lynch, examine the Swayer boiler, then line up the three pieces he will give you, so that the main light is positioned to the left and the gas balloon is positioned on the right. So go to the headquarters of InstaHeat. Talk to Ivan Rasic, obtaining information on the valve. Question the information he will give you about Model 70, pointing out his lies about his employees, especially Varley.
Using the telephone, call your assistants to obtain further information about Rasic's employees. You will be told to question Clemens, Ryuan, Varley. Talk to Rasic again, obtaining their addresses. Now examine the lockers of the three workers: both Clemens and Ryan seem to have sympathy for anarchists. Exit the headquarters, looking for the suspects. Talk to Clemens, doubting his knowledge of Varley and his type of work, then refer to the anarchist books to point out the lies regarding Ryan. He will then immediately try to escape, using his van. Go after him, then head back to the police station, taking Ryan with you too, so you can compare the versions.
By questioning Ryan, you leverage his anarchist sympathies so he can admit his first lie. Then, use the information provided by his boss to highlight the second lie. Doubt his knowledge of Suburban, use his criminal career to catch the latest lie. By questioning Varley, use the information about the boiler he repaired to locate the first lie, then use the information Ryuan provided for the second. Both appear to be guilty, so accuse Ryan of arson, send Varley to Detroit, accusing him of murder.
A Walk in Elysian Fields
This time the fire killed an entire family. Examine the bodies and the family photo. Then reach the garden, noting the presence of footprints. Move to the right side of the house, where the boiler is located, also to be examined. After Herschel leaves the house, talk to the neighbor, Dudley Forman. Express doubts about his first response, then about demolitions, but accept his references to the race. Finally, question his information regarding the specific subjects outside. Herschel will give you an origami in the shape of a crane, examine the sheet from which it is made, it is an advertisement for Elysian Fields. Head to the area.
Examine the scale models, talk to Monroe. Question the information regarding the fires, then use the advertisement to point out her other lie, and doubt the last answer again, she will tell you everything she knows. Talk to the secretary, getting a list of names. Go up to the first floor, call the station for information on Herbert Chapment. Now move towards Rancho Escondido, eliminate the two enemies. Then examine the bricks of the wall, noting how they are of a rather cheap kind. Talk to Roy in the Blue Room, meeting Herschel in the nearby street. You will be called on the phone soon, they will inform you about Chapman's location. Head there.
Talk to the neighbors, examine Chapman's car. You will find inside several objects, which nail it. Chapman will arrive on the scene, escaping on a makeshift vehicle. Go after him, then kill him to end the case.
House of Sticks
You will play as Jack Kelso. Read Elsa's report, then go through the file linked to the case. Talk to Elsa; doubt the first two statements, then accept the third. After another cutscene, head to Elysian Fields. Retrieve the concrete receipt from the first table, the demolition orders, as well as the note from Monroe. Talk to the man outside, he will lead you to the pile of rubble where Lou died. Examine the pieces of lumber next to the two workers on the left corner of the house. It will be revealed that the wood belongs to a film studio. The man you just spoke to will try to hit you with a bulldozer: dodge it, shoot the driver. Call your fellow cops for information on the Keystone study address.
Corrupt the guard, enter, going up beyond the gate. Enter the cinema, interact with the film, make sure that the vision is perfect, by moving the two switches - one controls the speed, the other the focus. Get it started by watching the movie. Before you leave, examine the table on the right - it contains another film, about the Suburban Redevelopment Fund. Talk to Curtis Benson on the phone, asking him for information, as comprehensive as possible. After another skit, proceed to the second Elysian Fields headquarters. Climb up to the top room, where you will have to fight three enemies. Don't worry about defeat - it's written in the plot that you must lose. After more skits, jump into the nearest car, reaching Elsa's house, where the mission will end.
A Polite Invitation
Upon reaching Benson's apartment, you will need to examine a number of potential clues. Start from the table on the left, from which you can retrieve the insurance for the Rancho Escondido; Then go to the glass table, there you can get a certificate of ownership of some shares. Talk to Benson, use the certificate to uncover his various lies about suburban development, insurance, fraud; Also try to question his information regarding the area Lou built.
Now move to Fire & Life. Go up the elevator to your office. Examine Lou's file, looking at the land value. Then, take a look at the latitude and longitude for more clues to Buchwalter. Talk to Cole, then head to the land registry. Shelf "S" contains various information regarding the company; select the second page, where you will find "Suburban Redevelopment", then locate Courtney Sheldon's name. Go and look at the map of the town, in the center of the room. Enter the following latitude and longitude numbers: 34 ° 4'29 '' N, 118 ° 17'58 '' W. They are associated with lot number 1876988. Now, move to the machine immediately to the right, entering the number you just found. Divide it by 90000, then add one - coming up with number 21, definitive. Now move to shelf U, examine the land registry, looking for lot number 1876988.
You will be suddenly attacked by three subjects, starting a shooting. Kill the first one from your starting position, then move quickly to the left, as a second opponent will come from the right. Eliminate him, take his shotgun, quickly kill the next opponent, equipped with a machine gun. Dive again to get maximum coverage, a last opponent with a pistol will reach you, but using the shotgun you can finish it very quickly.
Back at Kelso's apartment, answer the phone, then continue to the area where Monroe resides. Killed the first enemy along the way, move to the left, where you will find a refuge. Shoot down, where there are two other opponents (near the stairs, on the right). Go up the stairs to the right, kill the subject who stands in vain behind the column, keep running forward. Dive under the bar on the right, which will act as a barrier for the shots of the last two guards, equipped with machine guns. Killed them too, the fight can be said to be over.
Break the door on the right, kill the two subjects inside. Retrieve the shotgun in their possession, go through the door on the left. An enemy remains here: kill him too. Move forward, visualize the skit; when it's finished, take a left. Another door to go through, then another enemy, on the left, to kill. So run forward, watch out for the gangster on the left, go up the stairs, towards the second floor. Move down the corridor to the right, reaching a door on the left. There you can find Monroe: examine the safe, obtaining various information on Fontaine. Now, examine the table, obtaining a list of home sellers. Then look at the photo, read the newspaper, complete the case.
A Different Kind of War
Your first goal should be a visit to the Westlake Disease Control Center. They will give you information on possible suspects. Head towards the Rancho Rincon, on the trail of Kelso. After a short cutscene, make your way to the crime scene, examining the crystal ball on the ground - you will notice a bloodstain. Now, look at the folders on the shelf near the front door. Contains a threatening letter from a deceased individual. Go to the table, on which you will notice a diary - looking at it better, you will find a road trace.
Exit the room, look in the locker on the left for more morphine vials. Skit, you'll go back to Kelso, in Rincon's. Smash the door, examine the flamethrower on the right. Enter the crane room, look at the origami, the plans for the river, and the photo on the wall. Back as Phelps, escort Kelso, destroying all the police cars along the way. At Ira's hideout, you will take control of Kelso. Kill the first three cops, then wait a second, as a fourth will arrive and will have to go the same way. Run forward, recover the machine gun from one of the corpses, so you can easily get rid of the immediately following subjects as well. Turn left twice, diving into the water. Get rid of two other men, continuing straight. Climb the ladder on the right, diving immediately to the nearest cover. From there, systematically terminate the flow of opponents that will come from the door in front of you.
Then enter to the left, recovering some ammunition. Exit, go down the corridor. Right, along the bridge, pay attention to the opponents positioned along the bridges positioned to your right and to your left. Go down the stairs to the right, get rid of other enemies, retrieve the gun, go down into the stream on the right. The water level will begin to rise, cross the bridges in the center, climb the ladder on the right, kill the two enemies on the left. Then go through the tunnel on the left, finding Elsa and Ira. Enjoy the final scene.