


Please note:
The solution is based on the American version of the game, so it is possible to find some differences in the Spanish version.
Chapter 1: Back in a Flash
The story begins with Ellie pinning an injured Joel behind metal shutters to keep her safe while she goes for medical supplies. There will be a lot to see in the mall, so you can look around and check the situation, but right now there will be nothing to collect. Go up the stairs and run to the statue in the snow. Take note of the American Princess shop around the corner on the right. Go into the Weston Pharmacy and check around. The shelves will be totally empty, but there will be a note behind the counter, in front of a closed door. The note will have the combination for a lock on the front of the American Princess store. The pharmacist was locked in there, and he probably has the key to the back room of the Weston Pharmacy. After reading the note, use the combination. Ellie will automatically enter the code. Grab a bottle inside the shop and check the back left corner to find the apothecary's mangled body. Check the body to find the pharmacy key. From the body, a note will fall out of the pocket. Grab it, it will count as an artifact. On the way back from Weston Pharmacy, notice the presence of a dangerous clicker outside. Grab a bottle near the shutter and throw it at the clicker before running to hit with Ellie's knife. Open the closed door on the back, you will find the kit that will be empty. Leave it and jump through the window to the lobby with the crashed helicopter. Time to investigate - there might be a medical kit there. Enter the Pixitek shop on the right. Crawl through the rubble and look to the right of the exit door to find a dead body. Check outside for an energy pack, then check the body for another artifact. Exiting the shop, go down the stairs and jump over the railing to complete the first chapter.
Chapter 2: Mallrats
Follow Riley through the halls, you will reach the entrance under a barred door and enter an apartment. On a table in the center of the house, don't miss the first artifact. Follow Riley to a bedroom with a missing ceiling and go up. Jump through the destroyed wall. Before leaving the apartment, there will be some graffiti that will trigger an optional conversation. Continue following Riley up the stairs and through the window to the rooftops. After they've jumped down a couple of drops, Ellie and Riley will hide out like a military patrol. Cross the makeshift bridge and Riley will take you to a hole. Drop into the mall and take the broken down escalator. Pay attention to the billboards on the left wall. Ellie will be able to initiate some optional conversations on the way to Winston's tent. In the hall, go down and enter the yellow tent. Winston won't be there - look for his nightstand to find a picture of him. Riley will find some booze in the meantime. She will offer to share it. Continuing, look for Winston's saddle to start another optional conversation. At the end of the path, Riley will attempt to lift the metal beam. If that doesn't work, turn right and look at the open window above the double doors. Pick up Riley and she will unlock the front door. When you go there, she will jump out to scare Ellie - how sweet ... she will propose a wolf mask for Ellie, put it on and hit Triangle to roar!

The Halloween shop can now be explored. There will be two more masks to pass over the metal grids. When you are ready to go, go through the double front doors. Outside, Riley will have a challenge for Ellie. As soon as the challenge begins, look on the balcony for bricks. There will be a lot of them, just keep moving up and down to find several. There will be seven total windows to break the red car: front, back, side ones and the sunroof. Turn around to be able to destroy the ones on the back. When throwing the bricks, move the lattice so that the arch hits each window (try to ignore the large green circle). As soon as you break all the windows, you will have three choices of questions to ask Riley. Either way, Riley will lead Ellie through the back rooms to a large power switch. However, before you get to the switch, look for a room on the left to find another artifact. Flip the switch down and follow it to the exit door to complete the chapter.
Chapter 3: So Close
Ellie can now start collecting items. Search makeshift camps to collect items and ammo. Near the courtyard there will be a stretcher with a severed arm and an artifact on the floor. The way to the elevator will be blocked. It is not powered and the door will not be able to open. You will have to find a way to solve this problem. You will find a long cable running from the powered port. Follow him through the maintenance rooms. Don't miss the pistol ammo found near the doors. The halls will lead into a flooded path and end in a generator in a loading bay. Try the generator. It looks like you will need gas to make it work. Grab the note to the left of the generator, then go around to find a siphon tube and a can of gas. Stalkers will appear around the red truck. Climb to the platform out of the water on the left side of the bay. There will be a lot of bricks to collect. Use the bricks to stun the stalkers, then run forward and grab the knife to kill them easily. If you are on the platform, there will be more bricks to take to throw them at the enemies. Eliminate all four of them, so then you are free to search for the gas. There will be gas in the second large truck in the bay. Check the cargo to find two health collectors. When you have filled the jar, go back to the generator and pull the cable three times to make it work again. With the power supply running, there will be no more water. Open the metal door and climb the ladder above the fans. Crawl along the vents, then get on the red truck. From the truck, get off on the raised dry platform. Move to the closed doors and open them both. There will be a little puzzle to solve. Ellie will need to use the raised garage door to leave this room. To keep the second garage door open, move the crates under the shutters until they rest. Climb on the boxes, then go through the raised garage door on the right. Go through the vents, then go down through the double doors. Press the green button to unlock it, so you will allow Ellie to get out. Beware of the infected in front of you. The first infected will be quiet, allowing Ellie to stab him smoothly. Don't make too much noise and take out the clicker as soon as possible. The infected wanderer will drop extra ammo for your pistol. Search the corners to find the bottles and bricks if you need them. Leave the shop by lifting the closed shutter to the right of the cashier. Upon entering the hall you started from, two clickers will appear. The first clicker will wander near the shutter button, while the other will stay around the corner, far into the room. There will be a lot of bricks in the makeshift field on the left. Eliminate the clickers, then open the electronic escalator lock. Go up the stairs, turn left to find an artifact.
Chapter 4: Fun and Games
The time has come to explore the mall more. The first target marked appears in front of you. Go around the carousel to find a horse that Ellie can ride. Riley will present Ellie with a book of puns. There will be tons of word games to read - 22 in total! Ellie will put the book away when she enters another business, so watch out if you want to hear them all. Behind the Merry-Go-Round, it will be possible to find an artifact in the fast food restaurant. Check out the kitchen. Your goal? It will be upstairs, but you will take a detour down the stairs to find a photo booth. When you are ready, go to the active escalator. In front, on the right, you will find a portico. There won't be much to see here, but there will be a Jak X Racing car in the rear left corner. On the right, Ellie can test the Angel Knives machine. Using this, Riley will narrate an imaginary fight. To complete this section you will need to press the buttons as they appear in the lower left corner. Whenever the keys are linked with a "+" sign, this will mean that you will need to keep each key connected to finish the combination.
Riley will escape after the ensuing argument, taking Ellie to a creepy closet. The exit door will be at the rear right. The double doors will lead to a department store where Riley will be waiting. And she will have water pistols! Riley will challenge Ellie in another game. This time, you will both be armed with water pistols. Press R1 to pump and reload the water gun. Use the shelves for cover and try to hit Riley with more water to fill her blue bar. Next, you will have to play hide and seek. Periodically, Riley will scream, revealing her location if you're keeping one ear to the ground. Use the listening skill to detect Riley when he moves. Win two out of three rounds to finish this section. In fact, even if you lose - there will be no penalty! You can only lose one trophy. After completing the water gun fight, the chapter will end and you can go back to using Ellie.
Chapter 5: The Enemy of My Enemy
Jumping from the helicopter with the med kit, move through the path to the left and approach the Octopus Records store. Approach and a group of armed enemies will appear. One of the men will be attacked by an infected, dropping his bow. Get it before you go to the enemies. There will be an extra arrow next to the dead bandit's body, but there won't be much cover or room to hide here. Move left and enter the record shop for a better chance of hiding. One of the three bandits will wander into the shop by himself. Stun them with a brick or a bottle. There will be more items to collect behind the shop counters. Grab another brick / bottle to easily deal with the next thug, then attack the last two. If you get attacked by one of them, take out your gun and shoot them quietly. On the way out, build a couple of Molotov cocktails or hand grenades. They will be really useful in the following fights. Enter the toilet corridor passing the record shop. Past the men's room, you will find an open air vent. Go through - you will find an artifact if you follow the trail of blood. Inside the sporting goods store, you'll find a group of infected just below, while bandits prowl in the distance. Throw a brick or bottle at the bandits to take the infected out. They will fight each other, stay hidden until one group or the other is dead. Try throwing a Molotov cocktail at a bandit while he is being attacked by two or more infected. You can kill three or more birds with one stone. Take out the last few enemies and check behind the counter for extra ammo. Outside the shop, look for a pile of junk to pick up Ellie and let her into another shop. Again, you will find a group of infected on the right, while the bandits will roam on the left. Don't wake the infected on the back! Instead, sneak up to the crumbling roof until the bandits appear. Throw a Molotov cocktail, bombs, or bricks / bottles at the bandits to alert the infected. Once again, wait for the infected to take out the bandits, or vice versa. Stay hidden, then deal with the remaining enemies with your pistol or bow. Now enter the back rooms, where the infected are, then go up through the destroyed roof on the opposite side of the shop. Climb and pull to open the shutter to return to the departure hall. Outside the locked room with Joel, the gang of thugs are trying to break into. Hide behind the railing on the right, then throw a Molotov cocktail to kill two bandits. Enter the two-story shop on the right for good cover and extra ammo. Don't leave thugs alone for too long, someone will try to break the lock. They are an easy target, so take them out ASAP. Once you've cleared both floors of thugs, don't try to get to Joel. Instead, get ready for another wave. Build smoke bombs, bombs, Molotov cocktails, or whatever you prefer. Heal yourself and collect all the extra ammo left by the corpses. A sniper will shoot from above when Ellie attempts to enter the locked door. Drop a smoke bomb or run to the shop on the left to hide. From here, you can easily take out all the bandits who try to break into Joel's room.
Chapter 6: Escape from Liberty Gardens
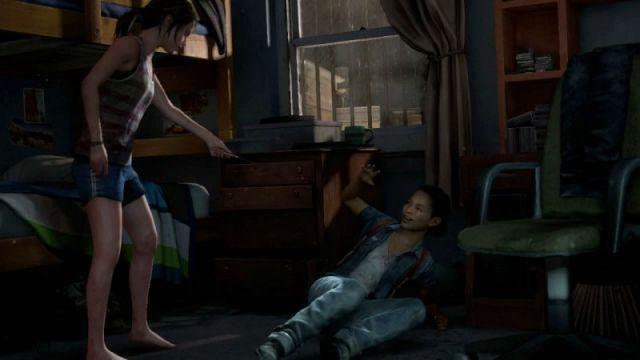
Ellie and Riley will be on the run at the start of the chapter. As Riley locks the door to the right, Ellie can start trying to lift the shutter ahead. Riley will be of help. Hold Triangle to raise it, then run to grab a cart. Move the carriage to support the damper. Riley will shoot the lock on the front door that leads into a cargo area. Avoid the infected on the left and climb through the back of the truck. Down the hall, Riley will sneak under the garbage. Follow her, but an infected will grab Ellie. Press the Square Button, then run to help Riley. Go to the infected who is attacking it and press Triangle to take it down. Go up the stairs to the right to enter an orange corridor. Make a sharp right turn as you pass the stacked crates and jump over the tables. Enter an incomplete section of the mall, jump over the railing to the right and jump over the opening on the scaffolding. Riley will lead you to the left. Jump over the wooden barrier and then follow Riley around the scaffolding. Jumping on the metal platform will cause a tip over. An infected will want to attack her, press the Square button until Riley arrives, but unfortunately she will be attacked too. Run to her aid and press Triangle to kill the creature.
THE VIDEO OF THE SOLUTION - PLAYLIST
Click here to see the entire video solution of the game!
THE VIDEO OF THE SOLUTION - PART ONE
THE VIDEO OF THE SOLUTION - SECOND PART
THE VIDEO OF THE SOLUTION - THIRD PART


