Please note:
The solution is based on the US PC version of the game. There may be divergences from the Spanish version and / or for other platforms.
FIRST PART
Below, the levels present in the first part of the game.
Locate the transponder
After the short tutorial, always go straight to the strange creature, to be eliminated with the right trigger. Having also killed his "companion", continue walking the path in front of you. After the cutscene, get rid of the enemies and recharge your energy. Exit the cave. Approach the transponder, viewing the cutscene. Destroy the nearby creatures, aiming with the left trigger.
Hitting the larger creatures repeatedly, repeatedly pressing the A key to complete the cutscene. Quickly continue towards the following objective, following Laroche. An excavation procedure will therefore begin, during which Akrid will arrive in the area. Get rid of the creatures in the area, also taking the energy. Proceed to the drill, then hold down the X button to begin the repair, using the left and right analog sticks. Completed that objective, you will have to return to the transporter.
Retrieve the Platform
After the cutscene, proceed down the corridor following the various target signs. You will arrive at the elevator. Get carried to the basement, talking to Gale, then continuing towards the arsenal. So talk to the teacher in the area, without interacting with the nearby elevator. We recommend buying a hunting knife as well as a Shotgun (if you have the necessary cash). Then continue to the elevator, selecting the main area as your destination. Before recovering it, follow Gale's advice to "test" how it works.
Save Laroche and empty the Energy Container
Leaving the Coronis in the area, follow the various objectives marked inside the Mech, arriving at a petrol depot. Follow the destroyed fragments, arriving at a flight of stairs. Then exit, pressing the B key, then go down the stairs and kill the Akrid that will attack you. Approach Laroche, talking to him, causing two Akrid to be summoned. Their weak point corresponds to their tail, so we recommend hitting it repeatedly (preferably with the Shotgun) to maximize the damage inflicted. Repeat the same procedure on the next Akrid.
Starting from the Laroche positioning area, follow Akrid inside the cave. Here you will have to pay attention to the explosive "bags" produced by the Akrid; dodging them, you will be able to reach the "source" of T-Energy located near the final area. So shoot all the explosive bags that surround it. So pay attention to Akrid's "producer" on the wall, pulverizing him. Collect the contents of the nearby crate, recovering the ammunition. So go back to the platform, exiting the cave along the way you came, until you are interrupted by a radio message. You will then have to return to the platform. Ignore the Akrid, continuing to proceed towards the inside of the platform. Enter the first room by pressing the left trigger and turning the left analog stick clockwise.
Continue to the second game zone, trying to repeat the previous process. As soon as you are informed about the problems in the area, you will have to exit the Mech, press B and walk to the equipment. Press X to begin repairs.
Once the repair is complete, go back inside the platform and relocate the storm gear. Go back to Coronis, then go talk to Braddock.
Locate the observation ship
Go back to the platform, then exiting again outside, until you reach the ravine. Press B to exit, thus continuing to the side and rolling to then throw yourself towards the hook. So, get off. Talk to the scientists in the area, then approach the life support module and repair it. Therefore, project yourself towards the wall, using the hook to reach it. Now press the A key repeatedly to move towards the cover. Get rid of the various Akrid in the area, then jump over the cover by pressing the left analog stick. Kill the subjects that come into the room, rolling around to avoid their explosives.
Hit the special component visible in the center of the room, using the pistol. Exit the cave, getting rid of the Akrid outside. Use the hook to climb further, killing this other Akrid as well. Move further along the ravine. Retrieve the registration at its end, thus completing the mission. Then go back to the platform, leading it to the "special" area. Keep walking until the storm arrives and freezes. Equip the most powerful shotgun at your disposal, trying to fend off the enemies. Then hit the ice blocks that cover the platform, paying attention to the Akrid that will attack continuously.
So go back to the platform, walking towards the cave, then starting to go down. You will find yourself facing an Akrid of enormous size, with two small tails and a large mouth. As in the previous case, the two tails are its weak point, so we recommend repeatedly aiming in their direction. Also retrieve the ammo crate visible on the ground, also using the bird to quickly retreat. As soon as the way is clear, place everything by holding down the B key.
PART TWO
Below, the levels included in the second part of the game.
Introductory Section
Proceed to the platform, thus proceeding along the snow. Several Akrids will attack, starting from the ravine. Get rid of them initially by hitting them with the "drill", then using the drill to break the ice formed around the station. Then enter the nearby cave. Move forward to avoid the Akrid. As soon as you notice the indication for the right trigger flashing on the screen, press the trigger itself repeatedly to counteract the Akrid's attacks. Unfortunately, the station will not work, as the generator needs to be repaired. Before doing so, we recommend that you take out the Akrid in the area, then repair the generator, climb the stairs and use the console to activate the tram station.
Then go to the cave closest to you, after communicating with the headquarters. Move through the tunnel, arriving at the Akrid on the opposite side. Use the hook to get to the platforms around you. At the top, you can exit the cave, arriving at the second control station. Go inside, flipping the switch. Proceed along the side of the ravine, ignoring the Akrid. Continue to the third control station, then the fourth, then go through the cave repelling the attacks suffered by Jim. Quickly get rid of incoming flying enemies by hitting them with the Shotgun, causing them to explode into small pieces. So use a grenade to pulverize the emitter of monsters, moving again towards the inside of the cave.
You will now find yourself battling various flying Akrids. When / if they manage to put Jim Ko in, you'll need to complete a quick quick-time event by quickly pressing the A button, then aiming the on-screen reticle at the flying Akrid and pressing the triggers. So try to keep the Shotgun always charged to the maximum, hitting everyone present as soon as they get too close. Once near the dead end, use the next console, and then use the bird to move along the ravine, arriving at the fifth control station. Press the switch in the area, then pulling the nearby lever to cause a realignment of the tracks. Continue forward along the cave, reaching the next large play area. Run to the partially destroyed mechanism, repairing it and thus awaiting the arrival of the giant crab.
Collect two of the ammo containers in the area, and dodge the crab's blows. So wait for one of its tongs to get stuck in the snow, then position yourself behind it and shoot the piece of orange meat that will now be visible. So repeat the procedure, until both tongs have been hit and destroyed.
So try to throw a grenade exactly into the opponent's mouth, causing him to explode from the inside, causing a large amount of indirect damage. Continue towards the crab's back, starting to shoot ice at the back. You will therefore cause the appearance of its weak points, right on the back. Keep hitting these areas, until his death. Enter the station, reactivating it. Taking advantage of the console, take the audio file from the table, thus calling the platform. Exit and retrieve the platform, continuing towards the console. Interact with the switch by pressing the left trigger, then rotate the left analog stick and reposition it correctly.
You will then be attacked by another giant enemy crab. Press the right trigger when instructed, then hold the left trigger to take hold of one of the arms. Flip the left analog stick up, then aim the "drill" at the orange sweet spot. Hold down the right trigger, using the auger on the crab arm. So repeat the procedure until one arm falls down. Repeat everything on the second arm. Jump off the platform, then repeat the previous strategy, hitting the enemy's back. Also interact with the lower part of the platform, gaining access to the armory, and thus returning to the platform, near the port.
So move along the platform, past the snowy area, until the canyon becomes too narrow. So jump outward, continuing forward. Talk to Dr. Roman now, then grab your Mech and proceed down the hill. Kill the Akrid along the way by jumping out of the mech at its end. Get rid of the remaining Akrid, so look up and hook onto the cable leading to the cave. Use the hook to get to the platform below, then continue to the next cave. Get rid of the Akrid and equip the pistol, then hold the X button. Aim for the eggs and hold the right trigger to perform a DNA scan. Go back to Roman. Back on the platform, proceed towards your destination, repelling the Akrid who will attack you as you move along the cave. Arrived in the meanders of the cave itself, kill the Akrid able to "spit" the explosive, thus continuing towards the opposite side.
When the platform is blocked by the "shape" of the level, jump out and use the nearby hook to get up. Make your way under the pipe, taking the component there. Break the ice by locating other components. Several Akrid will then begin to descend towards you. Kill them en masse, preferably using the Shotgun. If possible, we recommend "aiming" towards the bottom of the pipe, thereby causing an explosion that will allow you to take them out as a group.
Then go back to the platform, returning to the headquarters. Continue to the elevator, getting carried down and then talking to Gale. We also recommend that you stop near the master's shop to buy new guns and / or cannons. So go back to the main dock, getting back on the platform as soon as possible.
Video - "Frozen to Death"
Locate the thermal pocket
Exit Coronis, thus activating the menu for "fast" travel. So choose to proceed to Bailey's Crossing. Once in the area, proceed upwards using the various objective "markers" as a guide for the correct direction.
So get over the storm. Once beyond it, break the ice walls, and then go to locate the white symbol on the nearby platform; indicates the possibility of using your new "hook" to project yourself over the ravine; press the left trigger to launch.
Then use the hook, approach the platform and repeatedly press the left trigger to continue moving into the cave. Get rid of the Akrid that will attack you, then proceed to the right. Destroy Akrid's emitter, then use the hook to climb up and get rid of the explosive Akrid. Move along the tunnels, starting to chase the saboteur, reaching a room characterized by the strong presence of energy. You will then be attacked by a huge enemy crab. At this juncture, you will have to pay close attention to the crab's ability to "launch" its claw towards you; in those moments you will have to roll backwards to avoid it. The various ammunition containers in the area should facilitate the success of your strategy. So go to the next energy "extraction" area.
Proceed through the front doors, moving along the corridors and following the markers until you reach closed doors; press B to open them. Get rid of the Facehugger by continuously pressing the A key, then hitting it with the right trigger three times in order to terminate it definitively. Move straight across the play area again. You will reach the generator room. Make your way to the switch to disable the generator itself. Return to the "main" generation room by pulling the safety lever and exiting through the next doors.
The Leak
Approach the large door at the end of the room. Take advantage of the nearby control panel by pressing the B key. Proceed along the target areas to another control panel, which will allow you to open a subsequent door, within which you will have to proceed. So take the audio log next to the dead bodies, after going through the door. When you get to the next room, you need to get rid of the Facehuggers using the gun. So follow the various target areas, thus observing the next cutscene.
You will therefore have to deal with it with some kind of enormous centipede; they specialize in long-range attacks, firing syringe-shaped bullets. If you have long range weapons, we recommend positioning yourself in a safe area, hitting enemies from a distance. Instead, in case you don't just have the Shotgun, you will need to take a little risk and get close to hit the opponent. When the enemies are dead, you can move to the control panel. Fix it, then continue straight ahead along the play area. The floor will fall apart, but you can throw yourself at the nearby hook. So move along the nearby pipe, which now serves as a bridge, and use the bird to continue your exploration.
At the top, you will locate a room completely covered in blue light. Try to stay on the back, getting rid of the Facehuggers immediately and then proceeding to the nearest room, placing yourself behind the cover and getting rid of the centipede-shaped Akrid in the area. Then move along the ice caves, arriving at a second control panel. Take advantage of it, therefore waiting for the opening of the door close to you, from which various Akrid will arrive. Try to hold the position while you kill them, then proceed along the door. So locate the explosive pockets, destroying them before the Akrid get too close.
Then pull the lever next to the door, getting rid of the Akrid in the area and pulverizing the egg sacs. Also take the ammunition on the ground, thus approaching the destroyed turret, visible in front of the door. Quickly repair the turret, then pulling the lever, and using the turret itself to repel the Akrid. When the electricity has been turned on again, the door behind you will open. Turn around and go straight ahead, reaching the control panel and using the lever to open the garage. Turn around and approach the consoles behind you.
Locate the Backup
Try to transfer files, failing. As soon as the Akrid begin to appear, throw yourself behind the nearest cover. So go back to the garage. Press the button to deactivate the control system, so that you can access the platform. Enter, and then quickly return to the previous structure. Use the platform to get carried up by the elevator, then reach the control system to get the data backup.
Approach the control panel, then reject the Akrid that will appear from the window. Roll sideways to avoid the enemy's tongue. Also pay attention to the large "eggs" that will be thrown by the enemy, which go to emit large Facehuggers. We recommend rolling backwards to put some distance between you and the bags, destroying them before they go out to emit Akrid. Then approach the window, shooting towards the creature's head. Repeat this procedure several times, retrieving the ammunition from the ground. A hole will therefore appear on the enemy's head; throw a grenade into it.
Once the fight is complete, follow the objectives to the adjacent building. Use the control panel and associated switches to meet the boss again. Combat will prove much easier here, as enemy "pockets" will be launched less frequently. Therefore, limit yourself to rolling frequently to dodge enemy shots, then continuing to hit his forehead until he is permanently KOed. Then exit through the indicated door, pulling the lever on the wall to continue.
The Return Home
Go outside. The boss will attack you again, breaking the walkway. Press the A key repeatedly to bring Jim back. Keep moving along the walkway, then along the next ramp, making your way, pushing back the various Akrid in the vicinity. We recommend using the grenades to pulverize the egg sacs in the area at maximum speed. Climb the nearby stairs, then press the keys on the screen to complete the quick time event.
You will therefore find yourself facing one of the most complex fights in the game. The Akrid in the area is in fact extremely aggressive, but it will also tend to retreat quickly as soon as you try to hit it, so you must be extremely fast. The general strategy will still have to be the same, that is to quickly destroy the "eggs" emitted by the boss, recover the ammunition present in the area, and throw grenades in quantity.
After you've dealt a good amount of damage, the enemy will retreat again. We recommend repairing the nearby control panel, then proceed to the platform and enter it. You will then suffer another attack from the boss; to reject it you will have to aim at the left arm of the robot, then pull the left trigger to launch your anchor, and press the correct keys during the following quick time events.
PART THREE
Below, the levels included in the third part of the game.
The Killing Zones
Jim will quickly break the fan, leaving the room. He proceeds straight ahead, exiting the play area, following the various pipes. When you are near the lift, use it (press button B). Keep going, up to the pipes. After the next cutscene, project yourself along the wire to the next play area. Then jump down, using the control panel. You will therefore have to proceed to the next generator, using the platform in front, to be reached via a hook.
Akrid will then begin to attack; use your new weapon against them. Proceed up to the generator, repairing it. Go back to the control panel, throw yourself along the rope, to the other side of the cave. Begin to proceed towards the interior of the cave.
Get rid of the Akrid then, shooting towards their tails. Then continue towards the platform, freeing it from the presence of the Akrid, and then proceed to repair the platform itself, and proceeding inside it.
Retrieve Medicines
Now go back to the inside of the platform, getting rid of the Akrid as you continue towards the following objective, following the "signs" visible in the area. So listen to Jim's conversation, entering the next area, to locate a "lake" of lava. Your goal will therefore be to prevent your main character from dying from the heat. We recommend staying inside the platform to avoid excessive heat (pay attention to the orange bar that indicates Jim's resistance to heat). Then examine the nearby rocks, reaching an area to which you can "hook". Reposition yourself in a "correct" way, so you can use the hook and throw yourself forward, freeing yourself of the Akrid on the opposite side of the lava lake.
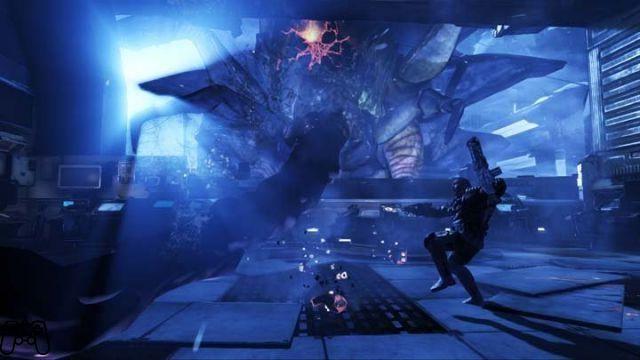
Follow the metal path, freeing yourself of the Akrid. You will therefore have to go down to the nearby cave, where you will find yourself in front of yet another Akrid, a large scorpion. You will essentially have to try to dodge its "stinging" tail to be sure of success during the fight, so that its "spike" goes to the ground. You can then hit its orange weak point.
When the spike is therefore "detached" from the body, the scorpion will fall to the ground. Run after him, continuing to hit his orange area to finish him off. Then open the nearby chest, obtaining some medicines. Now return to the platform, jump into it and then return to the base. Talk to Mira, then give her the medicine.
Follow Mira through the base, talking to her. Proceed to the outer gate, where an Akrid is attempting to proceed inside. So move sideways to dodge the enemy's blows, while trying to hit the orange bulbs along the Akrid's body. When he "opens" his back shield, you will notice a new part of his body that can be hit repeatedly. Shoot her again to deal more damage.
When the opponent has been KO'd, proceed to the right following the objective.
Access to the Armory
Proceed to the platform, where you will find Mira. Talk to her, then enter the platform and proceed towards the following objective. Then move around the lava areas, locating the flying Akrid to eliminate. Get rid of it, then return to the platform, continuing to proceed towards the armory. Follow it, and then exit the platform and then enter the elevator and gain access to the base that contains the central part of the armory.
Now explore the armory, being ambushed by the Akrid visible in the first room. Kill them, then proceed along the next room. Kill the Akrid here too, thus locating the lever on the wall. Pull the lever, thus fighting to reach the elevator. During your exploration, we recommend that you pay attention to the "patches" of ice in the area. After passing the elevator, you will find yourself in front of an ice tunnel. Go down this tunnel, reaching a platform that needs to be repaired. Repair it, and then throw yourself boast. You will reach a room with flying Akrid. Kill them, proceeding to the doors of the armory, which will be closed.
Destroy the Akrid eggs, preferably from a distance. Proceed to the control panel by pressing the buttons that will appear on the screen. Head back to the outside, entering the central room, starting another defense sequence.
In this sequence you will have to deal with a new genre of Akrid, capable of moving very fast and of "charging" Jim directly. The best weapon to finish them off is the Shotgun. In general, the goal in this game zone will simply be to survive.
Finally, you will be asked to repair the entrance to the game area; you will therefore have to reposition the turrets. After relocating everything you can, the nearby wide doors will reopen, and you can proceed forward to return to the camp.
FOURTH PART
Below, the levels included in the fourth part of the game.
Return to Cornis
Talk to Mira, then to her father. Go back to the Mech, talk to Mira again. So listen to her instructions as you progress through the various play areas. When she leaves, go back to base. So free the port from the Akrid, then proceed along the basement and go through the various rooms, killing all the Akrid in the area. Back at the main bridge, make your way to Korvac's laboratory. Get rid of the Akrid there, by reaching the doctor. Help him fend off the Akrid, then continue towards the interior of the laboratory as soon as you are shown. Talk to Korvac again, then - when you get close to the nearby car, shoot repeatedly until it explodes. So go back to the hangar, talking to the characters in the area.
You will therefore have to go talk to Gale, obtaining "upgrades" for your Mech. He proceeds to the basement, continuing towards Gale. Complete the necessary operations in Coronis, then return to your area, exiting outside and projecting yourself towards Bailey Wake.
Then move the platform to the area that will be indicated on the screen, then activating the "drilling" mode. You will now need to defend the platform as it tries to extract the energy. Having completed the drilling work, go back to the usual platform, then enter it to get it back to normal.
You will then be contacted by Dr. Roman, who will request your assistance. Return to the platform and proceed towards Shackleton Peak.
The storm
Talk to Roman, who will ask you to retrieve some storm data. Enter your platform, proceeding to the large door next to you. Open it using your nails. When you reach the following play area, place your vehicle on the tracks. Proceed up, press the switch visible in the main control room. Jump on the ship, making yourself carry forward. Use the elevator to go down, then start moving towards the snowy area, being attacked by another scorpion-type Akrid.
By dealing enough damage, he will return to his cave. Get rid of the flying Akrid that will appear in the area, to make the Scorpion reappear as well. The subsequent fight will turn out to be quite similar to the challenge with the crab that you faced previously; it will be necessary to counter its standard attacks, and then repeatedly hit its tail until it is cut from the body. Once the scorpion is dead, you will have to pay attention to the tower. Shoot the hook towards the tower, then get out of your "suit" and start repelling the flying Akrid that will try to reach the area. When all the data has been collected, return to your platform and proceed to the outside of the play area.
Back from Coronis, you will be able to obtain a Water Purifier, required by subjects residing in the Lost Field. So go back to Mira to get additional information regarding the Campitano's father, as well as the previous missions. Return all these materials to the captain, thus activating an intermission scene.
The Crab Hunt
Enter your platform, thus continuing towards the area indicated on the screen. Go down through the caves, killing the flying Akrid. Then repair the control system, restarting the "pumps". Return to the control room, using the controls in the area, and then return to the platform. You will now have to deal with the Crab King. We recommend initially preferring a defensive approach, simply counterattacking the crab's blows. Then jump to the outside, getting the opportunity to shoot towards the belly of the same crab. So keep shooting towards the belly, until the enemy dies.
FIFTH PART
Below, the levels included in the fifth part of the game.
The Petrol Depot
After the cutscenes, proceed to the basement, talking to Gale about the new upgrade. Then continue towards the petrol depot. Use the platform to activate it. You will now have to "reactivate" all the pumps in the area. Bring the platform and interact with the keyboards to increase the flow. You will be attacked by some Akrid, get rid of them and continue your supply work.
The Mysterious Cavern
Talk to Roman, then take you back to the lava. The matter will now become slightly complicated, since you will have to "drill" with the platform, but you will not be able to stay in the lava for too long. You will therefore have to stay close to the platform while fighting the Akrid.
So jump inside the platform, right after the Akrid has been eliminated. Enter the nearby cave, repeating the procedure. So look at the cutscene. Approach Gale, then observe the cutscene and proceed into the elevator. Then move along the subsequent caves, then using the various covering walls to successfully deal with the NEVECs present in the area. Having killed them all, continue to the next cave.
Back outside, start climbing along the station using the hook, examining the control rooms for some useful items. At the top of the mountain, press the switch near the control panel, opening the door next to it.
Once outside, a NEVEC soldier will arrive. Position yourself behind the closest cover, firing at the other soldiers as well, preferably from a distance. When they are dead, enter the station, get rid of the rest of the NEVECs, and complete the objective by interacting with the control system.
Video - Trailer Gamescom
Defeat Laroche
Enter the platform, then use his "arm" to reposition the plate. You will therefore have to carry out a battle against Laroche, both inside your Mechs. Use the right trigger to counter Laroche's attacks, then press the X button to further exploit the drill arm. Repeat the procedure a few times, so that Laroche's shoulder becomes visible. Grab it with the left trigger, then hit it causing the generator to pop over his shoulders. Hit the generator to cause damage to the enemy. The shield will deactivate, and you can then detach the front of the enemy Mech by pressing A repeatedly; once this is done, you will be able to observe the intermission scene.
View
After the cutscene, you will return to the camp, using the nearby cover to get rid of the NEVEC soldiers in the area, reaching the survivor beyond cover. Talk to him, then enter the village. Kill the NEVEC soldiers, then continue towards the following survivors, obtaining clues to a new objective, reaching the headquarters to be able to observe a new cutscene.
The Escape from the Cell
Take the communicator from the table inside the cell. Approach the fan, hitting it to begin the escape. Continue to the open area, waiting for the "Facehugger" to jump towards Jim. Get rid of it, then dodge the various Akridis in the area.
Locate the ice tunnel by moving through it, then climbing up the slope, causing the door to open automatically. Enter and swerve to the right, picking up the weapons. Start hitting the NEVEC soldiers in the area, then climbing up the ice hill, killing the two enemies at the top, and then jumping behind the nearest cover, passing the next corridor. You will therefore find yourself in the vicinity of other NEVECs, always in the same corridor. Kill them before proceeding, then go through the following gate and jump behind the wall. Other soldiers to be eliminated, therefore an elevator to enter.
You will therefore find Gale again. After the fight, get past the rest of the soldiers, jumping behind cover and getting rid of the NEVEC soldiers. Continue to the room indicated by the objective "beacons".
The Entrance to Nush
Enter your robot, proceeding outward. Then go out and position the C4 at the base of all support columns. After the various cutscenes, go back inside the robot and proceed to Nushi's cave, entering. Locate the yellow objects, which you will have to "charge" using electricity (by pressing the left trigger after approaching): You will finally arrive at a dead end. Create a "thread" using your hook, transporting yourself to the raised area. Get rid of the subsequent Akrid, "opening" Nushi so that you can freely move with the robot.
Isenberg
The strange "structures" that make up the inner part of Nushi will have to be used to dodge enemy attacks, while trying to roll often and willingly. So place yourself behind the enemy, shooting towards the orange areas on the back.
To know when / if the opponent will use his rockets, we advise you to pay attention to the color of his weapon, it will begin to "flash" in orange. So continue to shoot at the weapons, their explosion will in fact cause an electric shock along the opponent's body, and you can then hit the enemy directly. Repeat the same procedure until all four rocket launchers visible on his body are destroyed, thus focusing on his shoulders.
The Akrid will also act as an indirect "aid" during combat. It will in fact be a kind of "distraction" towards the Isenbergs, so that you can attack them without problems from behind. To avoid being subjected to electrical attacks, we recommend using the coverage in the area. Having destroyed his shoulders, you can resume shooting towards the front of the Mech, until it is destroyed. The fight, however, will not be completely over. Isenberg will attack you again and you will have to overcome some quick-time events in order to survive. With that done, enjoy the final scene!


