Please note:
The solution is based on the American version of the game, so there may be differences for the Spanish version.
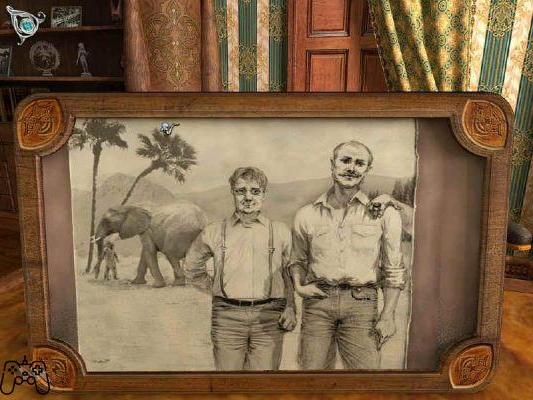
Day 1: October 14, 1897
The inventory bar has a magnifying glass, tape measure, and test tube. Examine the documents in the notebook at the bottom left and read the letter and the birthday program. If a hand cursor appears, click to use one of the tools.
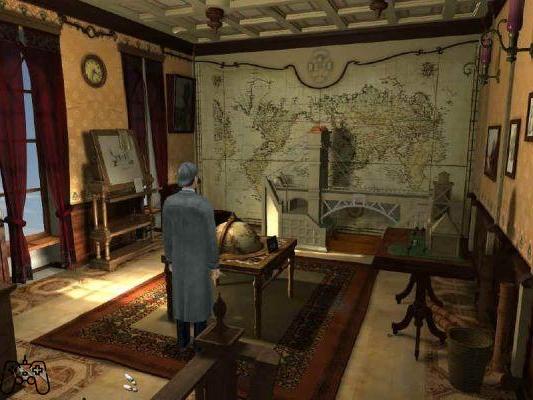
Sherringford Hall
Ballroom: pick up the newspaper on the floor. Read Bromsby's note (the blue one). Open the notebook and read the complete note with the words in blue in mind. Talk to the doctor about everything and then talk to Grant Sweetney about all matters at all times. Examine the path of the bullet. Go to the left of the ballroom and talk to Lockhart. Go down the aisle and before the door by the window, pick up a piece of off-white dress near the chair. Go left from the entrance and talk to Scott Brimms. Then go to the bar to talk to Colonel Patterson. Go back and go out the door in front of the chair you got the piece of dress from. Hear what Sherlock has to say.
Corridor with Armor: Sherlock will notice that he smells gunpowder. Notice the footprints on the floor and see where they lead. Examine the floor under the armor and take the black sheet. Click on the armature. Examine the door jamb and use the tape measure on the dust spot. It is 1m and 65cm from the surface. Turn around and use the magnifying glass on the mirror table. Take the black hair.
Kitchen: Enter the door after the armor, use the magnifying glass on the floor to the left of the stool. Get the copy of the uniform button. The sign of the cannon is done by hand. Examine the dustbin on the left. The lid is heavy. Go to the lower right from the central table and talk about everything with Carl Pannister, the cook. Exit the kitchen.
Corridor with table and paintings: exit through the door to the left of the armor. There is a sauce on the door handle.
Smoking room: enter the room on the right. Notice the footprints on the floor. Use the tape measure on the footprints, cuts 7. Use the lens on the ashtray on the coffee table. Take the flaked ash that doesn't come from the cigar. Follow the footprints to the bathroom on the left. Use the magnifying glass in the lower corner of the sink. Take the greasy red hair under the scissors. Go back to the corridor.
Corridor with table and paintings: go to the middle of the hall and use the magnifying glass under the table. Collect the box with the white powder. Go down the hall and pick up the red bag from the floor in front of the right door. Examine the bag for Lavinia's passport, train and plane tickets from Geneva to London and a (small caliber) pistol. Read the tickets. Use the test tube on the powder on the floor next to the bag.
Women's Room: go through the left door. Collect the picture of the pretty young girl on the mirror. She wears beautiful earrings. Examine the photo in your notebook. Use the test tube on the circular point on the stage. Examine the notebook on the table near the sofa. Take the business card written in French. Read it and open the notebook to see who it belongs to.
Staircase: go back into the corridor and go through the door at the end. The handle is smeared with sauce here too. Talk to Mary about everything. Head left to the next screen, examine the locker to the right of the chairs to see the short blue tablecloth.
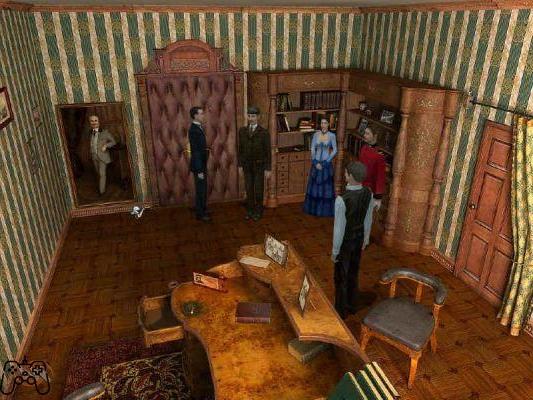
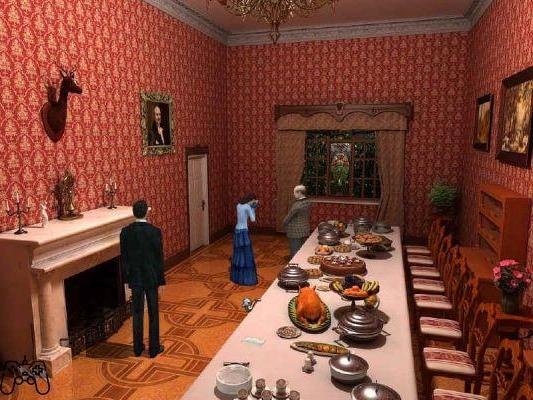
Banquet Room: enter the other door. Take and read the guest list on the table (still in the notebook). Some names are marked with Xs, dots and circles. Go talk to Herman Grimble and then talk to Lavinia. A military man (Herrington) will defend it.
Ballroom: the scene will move to the ballroom. Talk to Colonel Patterson. Talk to Lieutenant Herrington and then talk to Hunter the bartender. Go talk to Brimms who is sweeping the floor.
Banquet Hall: Talk to Lavinia. Click on the gun in the inventory and then click with the gun cursor on Lavinia (do this whenever you want to talk about a particular object). At this point Holmes will wonder what Dr. Watson has been up to. The game will automatically switch to him.
Doctor Watson:
Courtyard: Meet with Lamb the coachman. Go right. Talk to Miss Lambert on the steps. An inspector will be arriving from Scotland Yard. Examine the guest list in the notebook to see how Colonel Patterson is marked as a little short-sighted (the dot) and a little hard of hearing (the X). Go left and talk to Satterthwaithe. Her costume is torn. Go to the lower left and talk to the three men: Hurley, O'gohan and Spencer. Go right and talk to Miss Roundtree. Then talk to Sue. After questioning everyone, Sherlock will arrive to talk to Watson.
Sherlock Holmes:
Go to where Lamb is and use the magnifying glass on the yellow spot in front of the back door. Take the cigarette butt. When you are in detail use the tape measure on the footprint next to where the cigarette was. Size 7. Inspector The Streets will arrive. Return to Baker Street by clicking on the map.
Baker Street:
Holmes is awaiting Wiggins' report and must research some of the collected items. Watsno needs to read some books for more information.
Doctor Watson:
Go to the bookshelf and click on any book on the second shelf starting from the top one. Open the notebook to read the fingerprint book. Click on any brown book on the middle shelf. Open your notebook and read about ballistics science. Click on any book on the second shelf starting from the lowest one. Open the notebook to read the tobacco study.
Sherlock Holmes:
Click on the work table in front of Holmes.
Analysis
White dress:
Take the bowl of water and place it on the metal plate above the tripod under the lamp. Click on the green soap bottle and then click with the soap above bowl. You will see a yellow film above the water. Click on the light. Take the piece of cloth and place it in the bowl. Now you have to wash the fabric in the solvent. Repeat the previous operation but, instead of taking the soap, take the blue bottle with the solvent. Now take the piece of clothing and place it on the glass plate of the microscope. Read the result in the notebook.
Dust taken from the door jamb:
Take the dark powder from the inventory and place it on the metal plate. Turn on the alcohol lamp. Read the test result in the notebook.
Black Hair:
Place the black hair in the microscope to get the result right away.
Box with white powder:
Click on the magnifying glass in your inventory and then on the box with the White powder. Place all three white plows on the glass plate of the microscope. They are identical and will become a single stack. Take the white powder back and put it back in your inventory. Take the combined powder and place it on the metal plate. Turn on the lamp to get no effect. Put the powder in the bowl with the water and place the bowl on the metal plate. Turn on the lamp. The report is available in the usual notebook.
Red hair:
Place the hair in the microscope.
Quiz
Answer all the questions with Yes or No, justifying the answers with the evidence and testimonies obtained during the investigations. The colors of the question types: red - reports, green - documents and blue - testimonials. Click on the colored answer and then click on the similar colored frame to insert it as proof. Here is the question number with the correct answer and justification:
Question 1 (on the murder weapon). Answer: Yes
Reason: Click on the second dialogue with Colonel Patterson and place it in the blue frame.
Question 2 (escape of the murderer by the stairs). Answer: No
Motivation: Put the dialogue with Mary in the blue frame.
Question 3 (about the dust found in the smoking room). Answer: No.
Motivation: Insert the cigarette butt in the red frame and the study on tobacco in the green frame.
Question 4 (on the side door of the kitchen). Answer: No.
Reason: dialogue with Satterthwaite.
Question 5 (about Miss Lambert). Answer: NO.
Motivation: The dialogue with Carl Pannister and the one with Miss Lambert.
Question 6 (about the height of the killer). Answer: Yes
Motivation: Insert in the red frame the ratio of the measurement of 1.65 cm carried out on the corridor leading to the kitchen, insert in the green frame the study on ballistics.
Question 7 (on the view of the guests). Answer: Yes
Motivation: Insert the dialogue with Miss Lambert in the blue frame and the guest list in the green frame.
Click on the notebook when done.
Day 2: October 15, 1897
Baker street
Doctor Watson
Read Lestrade's notes in the notebook.
Sherringford Hall
Click Sherringford Hall on the map. Talk to Miss Lambert outside the residence.
Ballroom: Talk to Grimble. Leave the ballroom through the door that leads down the hall to the kitchen.
Kitchen: Talk to Pennington.
Smoking room: Take the white glove off the table.
Women's room: Examine the table and take Lavinia's purse. Open it in inventory to get the London opera program and Herrington's letter. Go through both documents and open the document page in the notebook to read the letter. Exit the ballroom to find Lavinia with the other guests.
Hall to Ballo: Talk to Lavinia who got powdered.
Bromsby Office: Examine the table closely. Click on the photo of Bromsby and Grimble to see a third person, with Masonic symbols, cut from the photo. Examine the photo of young Lavinia in the notebook. Click on the letter from Fowlett to Bromsby in front of the photo of the men. Read it in the notebook. Click on the brown book, read the marked pages that speak of medieval French art in the notebook (you should have understood that the documents all end here). Open the top drawer. Take and read all the objects: the piece of newspaper, the piece of paper with code (55 must be added to it) and a piece of book. Go back to the table and click on the photo hanging on the wall, that of Sir Bromsby in front of the Kalidassa Abyss. Lestrade will come and tell you about Fowlett. Click on the large portrait of Sir Bromsby to discover a safe.
Flatham
Flatham Station: Palrate with Governor Fletcher.
Outside Fowlett's house: Talk to Graham and get the key to Fowlett's house. Talk to Fletcher. Watson will leave to speak to the station chief.
Fowlett's House: Use the key on the door to enter.
Stay: Click on the dragon claw to the left of the door to get the matches. Light the lamp on the table for us. Look at the shoes on the floor to find out that they are a size 6. Use the measuring tape with the footprint on the floor to find that it is a size 7. Mezzotint prints of Epinal: Go to the bottom of the screen. Click on the four pictures on the wall. Examine the City of Epinal paintings carefully to find hidden photos (one for each painting). The painting on the left has a concealed deer on the main tree line in the valley. The second painting has a bear hidden in the shade of light of the central hill. The third painting has a crab in the foreground on the stones by the river. The picture on the far right has an eagle's head with the waterfall coming out of its beak. Examine the machine in the corner to find that it takes a coin to play. Go and get it on the carpet under the coffee table. Go to the right side of the door facing the door and click on a book on the lower shelf of the library. Read it in the notebook.
Kitchen: Enter the door to the left of the library. Use the magnifying glass on the ashtray to the left of the stove. Take the white powder. Examine the table and take the bottle of gin, the blood on the cork and a broken glass. Exit the kitchen.
Aisle: Face the bookcase, go right and click on the door in the dark corridor. Use the matches on the floor lamp to light up the room. Click on the mat next to the broom. The first door is closed. Enter the second.
Bedroom: Examine the automatic shoe cleaner under the mirror.
Numbers Puzzle: Examine the plan with the numbers. The goal of the puzzle is to place the missing numbers to make 55 as a sum horizontally, vertically and diagonally. When you are done (the enclosed image should help you) take the coin.
Day 2: October 15, 1897
Click on the machine above the table. Examine the screwdriver inserted into the window sill. Examine the certificate on the wall. The safe and the archway next to the bed need something. Go to the end of the bed. Click on the bed to notice that the pillow is missing. Examine the basin in the corner. Take the substance on the left side. Examine the photo of Fowlett on the wall. Go back to the living room.
Stay: Return to the machine and insert the coin.
Card puzzles: You have to find the cards that complete the logical sequence. Click on the right hand of the machine to see the cards shown. First Hand: Ace of Hearts, Ace of Spades and Ace of Spades. The Ace of Spades completes the series. Second hand: three of leathers, jack of swords and seven of clubs. The four of spades completes the series. Third hand. Two of hearts, seven of clubs and queen of leathers. The four of clubs concludes the series. You won. Take the piece of paper and read it. Read the text about Noah in the book. Go back to the bedroom.
Bedroom: click on the arch above the safe.
Noah's Ark Puzzle: The animals must enter the ark in the right order. Click on the animals to send them to the ark. Order: crab, deer, bear. Then click on all the other animals except the eagle which is the last animal of the puzzle.
Safe: The safe door will open. Examine the forcing of the door. Take the various documents and read them all. Hear Watson say Murray found a key in the garden. Exit the house.
Outside the house: You will get the key from Watson. Go back inside the house to use it.
Basement: Use the new key on the first locked door in the corridor. A dead man stands under a pile of potatoes. Use the measuring tape on the dead man's feet to reveal a size 6 foot. Take the business card on the floor and examine it in the notebook. Go outside.
Outside the house: Go to the back of the house. Use the measuring tape with the footprint on the barrel outside the bedroom window (size 10). Go talk to Fletcher. Watson will report the dialogue with the station chief and Fletcher will identify the dead man as Fowlett.
Baker street
Quiz
Question 1 (about Horace Fowlett). Answer: Yes
Motivation: Click on the dial with Murray and place it in the blue frame.
Question 2 (about the presence of guests in the Ballroom at the time of the shot). Answer: Yes
Motivation: Select the development of crime (Lestrade report).
Question 3 (about the relationship between Bromsby and his daughter). Answer: No
Motivation: Select Hermann Grimbel, Sherrington Hall, October 15, 1897
Question 4 (on Fowlett's knowledge of the Grimble and Bromsby problems). Answer: Yes
Motivation: Letter from Brombsby to Fowlett dated 11/12/96
Question 5 (on the lack of something from the Fowlett house). Answer: Yes
Motivation: Select Fowlett's bedroom from which the pillow is missing.
Question 6 (about someone entering through the window of Fowlett's house). Answer: Yes
Motivation: Fowlett's bedroom, the window held open by the screwdriver; garden, size 10 footprints on the barrel under the window.
Click on the notebook when done.
Day 3: October 16, 1897
Analysis
White Gloves:
Use the magnifying glass on white gloves.
Wooden toy:
Use the magnifying glass on the wooden toy.
Fat Balls:
Place the fat balls in the microscope and examine them to find out their composition.
When you have done everything, talk to Watson.
Flatham
Doctor Watson:
Flatham Station: Talk to the station chief to find out more about Mr. Fowlett.
Train: Get on the train. Go to the bottom of the screen and examine the dust on the corner. Go back to the door and take the side corridor. Examine all the benches. Take the white feather that is to the right of the first benches. In the third set of benches starting from the top, take the hat under the left bench. The hair on the hat is red. Go to the end of the carriage already and examine the dust. Collect the cigarette butt.
Baker street
Holmes will examine the red hair of the hat, at which point he will call Wiggins and give him orders. A knife will be added to the inventory.
Sherringford Hall
Ballroom: Talk to Miss Lambert. Wyatt Collins is very tall. Talk to Sue to find out more about the Lieutenant. Go to the staircase.
Staircase: Talk to Mary about Wyatt Collins. Go up the stairs.
Bromsby Office: If you haven't opened the secret safe yet, click on the large portrait of Bromsby to the right of the door.
Safe puzzle: Find the code to open the safe using the one found in Fowlett's safe. If you can't figure out how to do it, we will help you. The code is: 3 1 2 2 1 1. Collect all the contents of the safe: a key, a letter from Richard (which you must read) and the money transfer to Sherman's bank. So go talk to Inspector Lestrade.
Bromsby Cementworks
Use the map to go to Bromsby Cementworks.
Gate: Talk to Mr. Goblet. Marty and the dog are the night watchmen. He will give you a set of keys for Grimble's office. To the right of the entrance is the office, in the middle is the workers' cloakroom and further on is the raw material warehouse. The only key to the Fairfax theater is Mr. Grimble.
Square: Go to the left of the cart. On the next screen, go to the building at the far right. Use the keys to open the door to Grimble's office.
Office: Go up the stairs. Get Grimble's Golden Key under the table near the left painted wall. Click on the photos on the left wall. You will get three photos in your notebook. Click on the copy of the bridge next to the other wall. Notice that one of the models of man is missing. Use the keys to open the door across the room. Examine the old souvenir from India.
Safe: Go to the bottom of the screen and examine the photo on the wall. Use the key found in Bromsby's safe in the lock of the wall safe. Take the bill book and read. Open your notebook and compare the data you just found with the money transfer data found earlier ... it smells like a scam.
Grimble Desk: The drawer is closed. Take the paper under the table and open the notebook to read it.
Ganeesh: Look closely at the statue of the Elephant God Ganeesh. Click on the torso and collect the Bromsby figure from the mouth. Go back to the large copy of the bridge.
Copy of the bridge: Put the Bromsby puppet in the hole. Get the silver key from the floor under the bridge. Go back to Grimble's office.
Writing desk: Use the key taken from under the bridge on the closed drawer. Try to get the key. Take the card and read the Toilet Threat and the information about Captain Lowrie in the notebook. You cannot bring the card and key with you as Grimble may return and notice the disappearances. Holmes will put everything back in place.
Baker street
Lieutenant Herrington will come and question you about the case. Wiggins will tell you about a man who walked into Bromsby Cementworks.
Bromsby Cementworks
Go back to Bromsby Cement work using the map. Click on the ladder to the left of Holmes. Click on the ladder at the top to climb the wall.
Marty and the dog, first round: SAVE! Turn up the brightness of the monitor and only start this puzzle if you have some free time. The goal is to get to Grimble's office without getting caught by Marty and his dog. Double clicking the mouse will make Holmes run. You will have to place him in very precise places, so that he is not caught out.
1. Follow Marty by clicking at the bottom of the screen.
2. The point of view will change.
3. Move Holmes to follow Marty from a fair distance until Holmes is behind the cart to the right of the workers' cloakroom.
4. Place the cursor in front of the entrance door to the office.
5. Wait for the dog to pass the lamp on the right and click to make Holmes run to the office door.
6. Take the golden key out of the inventory and use it on the door.
Office: Go up the stairs. Enter the double door. Go to the bottom of the screen. Pull Ganeesh's torso. Take the puppet. Exit the office. Place the puppet on the bridge reproduction. Get the key on the floor. Go back to the office. Open the desk drawer. Take the new sheet (read it) and take the key to the warehouse. Exit the building and go to the warehouse.
Marty and the dog, round two: ALSO SAVE HERE! This time Holmes must arrive at the Fairfax theater used as a warehouse. This is located on the left side of the screen.
1. Leave the office.
2. Go to the exit at the bottom of the screen to find Holmes next to a lamp.
3. Here you have to be very precise. Click to place Holmes slightly lower to the right of the covered wagon in the dark area. The precise point is under the dark area on the ground.
4. Open the inventory and make sure that the key to the warehouse is quickly accessible.
5. Wait until Marty turns the corner and is almost at the mouth of the covered wagon; the dog will pass the lamppost at the top of the screen. Run down and then go left to the Fairfax theater door. Be quick.
6. Approach the door and quickly use the warehouse key on the bottom of the door.
Fairfax Theater
Theater entrance: Watson will join Holmes inside the warehouse. Use the matches to light the lamp on the right. Go to the room on the right. Use the measuring tape with the footprints on the floor.
Set: Go forward and click on the door. Use the knife on the door. Use the matches to light the hanging lamp to the right of the center of the screen. Examine the mat for traces of blood and a black hair. Go forward and grab the keys to the left of the door.
Small room: Go to the back of the theater, use the keys on the door to enter. Go to the white point at the bottom of the screen. Use the magnifying glass on the white powder. Go through the door on the right.
Quicklime room: Go to the left side of the room and use the knife to cut the third ring from the right. More quicklime, you need a mask to protect Holmes. Go back to the set.
Set: Grab the tea towels on the floor to the left of the double door. To make a mask, use the knife on them. Use the mask and go back to the quicklime room.
Quicklime room: Go left and click on the hand. Holmes needs something to move the body. Go back to the door and grab the shovel to the left of him. Use the shovel on the body to find that you need more. Go back to the sets.
Set: Take the pole to the left of the door that goes to the small room. Return to the body and use the pole on the hand. Holmes will recover Johanssen's passport and the Richmond Abbey liquor. So he'll call Watson. Holme and Watson will leave the area and be confronted by three oriental men.
Quiz
Question 1 (On the keys to the Fairfax theater held only by Hermann Grimble). Answer: Yes
Motivation: The dialogue at the Bromsby factory
Question 2 (On the relationship between Captain Lowrie and the Bromsby enterprise). Answer: Yes
Motivation: The documents on Sir Bromsby before the Kalidassa Abyss and on Captain Lowrie.
Question 3 (On Wyatt Collins' honesty). Answer: No
Motivation: Dialogue with Mary and text of the Hearing.
Question 4 (On Herman Grimble and the Bromsby legacy). Answer: Yes
Motivation: The Lloyd Locker, Lloyd & Masterson papers.
Question 5 (On the provenance of the man in the Fairfax theater). Answer: Yes
Motivation: Passport found on the body.
Day 4: October 17, 1897
Listen to Watson, Lestrade and Holmes.
Doctor Watson: Open the document page in the notebook and read about the fraud, Wung Jei and Lieutenant Herrington.
Hunter's house
Use the map to go to Hunter's House. Read about Hunter's murder in the notebook. Enter the door on the left. Talk to Appleby.
Room: Test the blood. Look at the paintings in the locker. Notice the brand on the new rolls. Go to the window and use the measuring tape on the footprint on the sill which turns out to be wider than 8 and smaller than 12.
Mountain range: Go to the garden. Go down following the path and enter the greenhouse from the bottom of the screen. Look at the vase table on the right. Examine the two small pots with two non-English plants. Go to the other table next to the long wall. Move the plant in front of the one with the flowers. Collect the Little Flowering Plant Take and read the pledge slip for an exotic jewel. Head back to Baker Street while Watson goes to get the busy item.
Baker street
Click on the Liqueur in the inventory. Click on the library. Read the Encyclopedia. Click on the door to the left of the fireplace. Holmes is really well disguised. Click on the map to go to Richmond Abbey.
Richmond Abbey
Abbey door: Approach the gates of the Abbey. Click on the small window. Talk to James Little's Brother to find out about the ruins.
Go to the ruins: Take the path that goes to the left. Advance to the first intersection. Take the path to the right (depending on the point of view of the screen). Pass the pond on the left one screen and turn left. Turn right and come to the next intersection. Turn left in the middle and come to the next intersection. Look at the bucket on the left of the road. Take the narrow path that leads to the next intersection. Go ahead and breathe in the smoke. SAVE. Before moving forward, practice how to get back to the pond from this point.
Back to the pond and timed puzzles: Go ahead, the entrance to the ruins is in flames and the evidence will be destroyed. The timed puzzle will start. Turn around and go forward into the intersection. Turn right. Take the bucket. Take the left path. Take the path on the right. Turn left. Use the bucket on the pond. Go back and take the first left. Turn right. Turn going into the middle left path. Take the narrow path at the top of the screen. Go ahead and use the bucket of water on the fire. Enter the shelter.
Ruined refuge: Use the matches on the candle to the right. Use the magnifying glass on the red area on the floor which turns out to be ink. Examine the Richmond Abbey liquor bottle. Examine the mattress. Examine the burned cards on the left. Go to the bottom of the screen. Use the measuring tape on the footprints, size 10. Advance to the wall with arches and look for the different brick. Use the knife on the darker brick. Take the letter and read it. Examine the various evidence and documents in the notebook. Go back to the Abbey and use the map to go back to Baker Street and from there to Sherringford Hall.
Sherringford Hall
Grimble will tell Watson to inform Lestrade that he has renounced the succession of the Bromsby Quests. Holmes will arrive and inform Lestrade of the letter from Mycroft Holmes. Read the letter about the Kalidassa abyss in the notebook.
Women's room: Enter the women's room. Approach the mirror to see Herrington and Lavinia. Talk to Lavinia. After Herrington leaves the room, he will give you a tip. Show the picture of the cute girl to Lavinia. Holmes will ask her to be discreet about the conversation about Miss Davenport.
Baker street
Listen to Watson show you the Silver Earrings he got from the pawn shop.
Quiz
Question 1 (on the connection between the thugs and the case). Answer: Yes
Motivation: Wung Jei document
Question 2 (about Simon Hunter's Assassin's Weapon Skills). Answer: Yes
Motivation: Dialogue with Appleby at Hunter's House.
Question 3 (on the use of the shelter near the Abbey). Answer: Yes
Motivation: Dialogue with the religious of the Abbey.
Question 4 (on the handwriting of the text of the message of the ruins). Answer: Yes
Motivation: Threat W and Toilet Threat documents.
Question 5 (on the ease for an English officer to find work as a jailer on a ship). Answer: Yes
Motivation: letter from the Kalidassa Abyss.
Day 5: October 18, 1897
Listen to Holmes, Watson and Lestrade. Then go to the Aston Theater.
Aston Theater
Read the poster on the left and enter the building.
Entrance hall: Talk to Kirby, the man who is cleaning the floor. Talk to Bruce Ashton, Raleigh Wilcox, Miss Sullivan and Miss Carolyn Small to learn more. Changing room: Enter the door on the left behind Aston. Talk to Doris. Exit the door to the right of the mirror.
Aisle: Knock on the door at the end of the hall. Talk to Richards. Use the silver earrings on Richards to learn more about the tragedy. There is another set of keys for the Fairfax Theater. Go down the hall and enter the furthest door on the left. Doctor Watson:
Office-Costume Room: Take a page from the Guacayamo book on the coffee table. Read it in the notebook. Take the inventory of the costumes, there are 30 of them marked. Click on the open book on the table. Click on the cupboard and learn that the gunner's uniform is missing.
Office-Costume Room:
Behind the scenes: Go back to Doris' room. Exit the other door. Behind the scenes, talk to Adam Poole. The missing elements of the crew did not take their things. Learn about the closed room. Go back to the entrance hall.
Entrance hall: Talk to young Bruce Aston to get the key to the theater. Go backstage.
Behind the scenes: Go down the hall to the opposite side from where you are. Use the key you just obtained on the door at the top of the stairs.
Closed room: Grab the two items in front of the box on the floor. Take the silver earring from the inventory and use it on the left silver wave. You need two more earrings.
Doris's room: Click on Doris to agree with Holmes that you can't get the earrings.
Entrance hall: Show the silver earrings to Miss Carolyn. She will give you her and Doris's. Return to the locked room.
Closed box of Veronica: Use the magnifying glass on the wooden box on the lock with the gold ship and silver waves. Insert the earring from the pawn shop on the left, the one curved in the middle and the clamshell one on the right of the silver design. Take the photo of old Fairfax with Richards, Davenport and another man. Take the note beside. Outside the Aston Theater, talk to Lestrade so he can catch Richards as soon as possible.
Baker street
Talk to Watson and wait for Wiggins to arrive with the last clue. Read: Raymond's Water in the notebook, then read the desperate message and all the suspicious footprints.
Quiz
Question 1 (On the provenance of the various sets of keys). Answer: Yes
Motivation: Dialogue with Bruce Aston
Question 2 (About one of the red hair and its belonging to an actress). Answer: Yes
Motivation: Miss Sullivan at the Aston Theater
Question 3 (On the discoveries in the dressing room and on the connections with the case). Answer: Yes
Motivation: Rehearsal in the Sherringford Hall sewing room, near the bucket (the fake gunner's button of the costume from the theater).
Question 4 (On the possibility of finding the writing on Veronica Davenport's message elsewhere). Answer: Yes
Motivation: The French business card and the ancient document.
Optional quiz
You can get to the final movie even without answering these questions.
1. Who killed Sir Bromsby? Lieutenant Herrington
2. Who killed Horace Fowlett? Wyatt Collins
3. Who killed Johanssen? Jeffries
4. Who killed Veronica Davenport? Jeffries
5. Who killed Jeffries? Nobody
6. Who killed Hunter? Herrington