


Please note:
The solution is based on the American version of the game, there may be differences with the Spanish one.
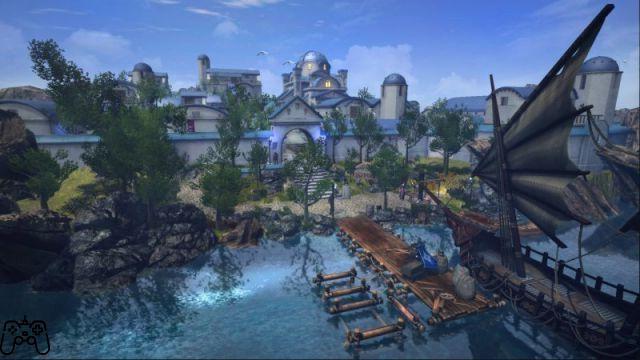
Act 1: Sorpigal
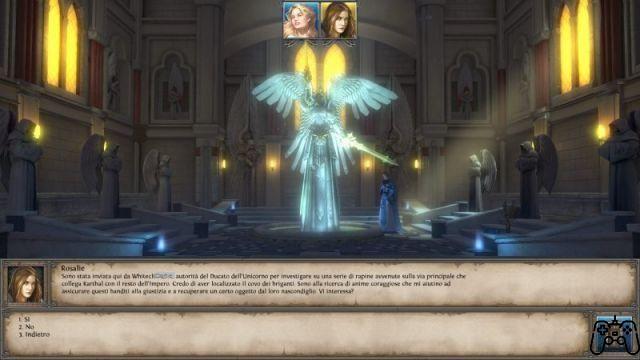
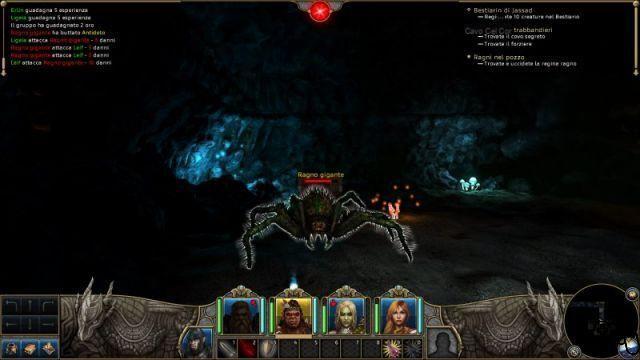
As soon as you arrive on the island, you will be informed that you cannot take your mentor's ashes to their destination, as the whole city is empty, but since you are here, you may be able to help the city guard. Dunstan will offer to show you the most interesting places within the city, so explore and, when satisfied, head to the city guard garrison. Once there, talk to Maximus the leader of the group, the man will ask you for a proof of your fighting skills, directing you to the main fountain of the city where some spiders have created their nest. Leave the garrison and pass the small market until you find the fountain on the opposite side of the square, make sure you have several antidote potions with you because the bite of the ravenous spiders is remarkably toxic. Go inside the cave until you reach the queen of the arachnids, this is equipped with a very lethal bite, it is therefore advisable to always keep the life of your group under control. Once you have won the battle, continue exploring the cave, you will reach a portion with a small harbor, open the chest, eliminate the spiders that will appear immediately after and collect the smuggler's treasure. Return to Maximus, the head of the city guard, your next task will be to reach the lighthouse outside the city, check the situation and, possibly, turn the light beam back on. Arrange your equipment and, after exiting the west gate, follow the beach to the lighthouse, open the many chests and pray at each shrine. Once inside the main tower, take the path on the left to free a Naga who will inform you of his cult that has taken possession of the area, it will be up to you to depose their leader. Go back in the corridor and out the door, at first you will be attacked by a group of naga who will block the access to the upper floors, eliminate the enemies and go up. Take the left path once again to reach the edge of the tower and a teleportation platform that will lead you to the opposite side of the edge. Make your way through the numerous enemies until you reach the stairs to the third floor, where you will encounter some naga elites tough enough to defeat. Once you reach the new upper floor, you will be attacked by a Kenshi and his followers, corner them and try to make them fall down. Go through one of the doors on the edge of the tower, here you will need to activate two panels on the floor so that the teleporter to the north can be used correctly. You will be teleported in front of the cult leader himself, when the battle begins, immediately move away from the edge, as your opponent's blows could plunge you to certain death. Once you have won this battle as well, return to the teleporter that brought you to the top floor, then, activate the plate on your right and the one on the back, finally the last plate to activate the teleporters and return to the lower floor , exit the lighthouse and return to Maximus. The head of the city guard will direct you to Rosalie who is in the chapel of Sorpigal, and you will also be informed that a group of bandits has settled on the trade route. Get potions and spells to cure yourself of poisons and toxins, then take the road to the lighthouse again, reach a fork in the road and take the path north to reach the entrance to the bandit camp. Once you reach your destination, go to the space to the right and open each chest, then, head left to find the old key to the main entrance. Head left, in the first room you will find a history book and on one of the outer walls the room, if your perception value is high enough, a secret passage to a chest. At the end of the corridor, you will find a metal key, then go back and take the path to the right, you can find a new secret passage by the door of the first room.
Then go along the corridor for its entire length and lock the door with the key, finally in the next room, open the chest and look for an opening in the nearby wall to reach the lower floor. Follow the passage to the right to find yourself inside a cave, make your way killing the enemies until you reach a room manned by elite bandits. Take out the enemies and go through the door they were guarding, you will find the bronze key that will lead you directly to Luke, the leader of the bandits. Once the fight is over, collect the book from the pedestal and return to Maximus by exiting the door nearby. You will be directed to Portmeyron Castle to talk to the new governor, head north until you see the castle, take out the two militiamen outside and go through the gate to face other enemies. Pull the lever in the first room on the right and take the path to the left, follow the corridor to reach another lever which will open the door on the opposite side. Go back to the entrance and take the path to the right. Continue along the corridor until you reach a door that cannot be opened, then reach the nearby passage and pull the lever inside, the door will open and you will be able to reach the next level. Once on the second floor, go around the corridor that leads to the left and in the first room, inside which there will be some enemies, pull a new lever. Go back and turn right, in one of the recesses you will find yet another lever to open the nearby door, go through the new passage and head south reaching the passage blocked by debris, then head right and pull the lever. The nearby door will open, enter and turn right at the first intersection to reach a room with a soldier killed on the bed; continue through the various rooms until you reach the warehouse. In this area you will find three levers and the order in which to pull them is: the one on the left twice, the one on the right twice and finally the central one only once. Once the gate is open, go ahead and reach the stairs to the third floor. Immediately walk to the right and enter the first room in which to find a chest with one of the keys, head north and in the first room with three opponents, collect another key. Use the keys you just found to open the door that is further south and the one to the right of the corridor. Then head to the southern room and enter, you will find Iven, the boss of the level, he will not be a really difficult enemy and he behaves like an elite archer, however, he will be accompanied by some bodyguards against whom you must fight first. Attract the lesser enemies and once they have been taken out, go for the boss.
Act 2: Seahaven
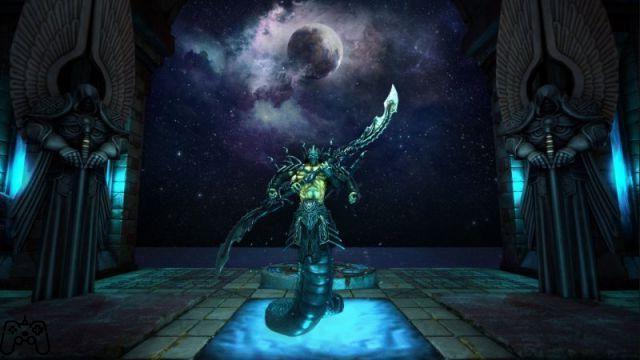
Following the victorious defense of Governor Jon Morgan's castle, you must seek the mastermind behind this plot. The governor will take you to the forge, you will not be able to have the horse with you as it is too heavy. Once you reach your destination, you will find a portal to your right, enter it to find yourself directly at the third level, here you will meet numerous dark elves but, continuing to fight as you advance, you will soon reach the portal to the second level. There won't be many opportunities to explore the area, however, you will have to contend with numerous enemies. Don't worry about not being able to go through the door sealed with various symbols, as you will receive a separate quest for it. At the second level, you will have to keep going down, then turn to reach a new portal facing the usual enemies. I recommend that you use area effect and healing spells, you will often be surrounded by numerous enemies, therefore, spells such as fireball and regeneration will certainly be useful. Unfortunately you will have to worry about eliminating every single elf, since one of them has the fragment of land that will allow you to end the chapter. Once you reach the first level, you will meet a mysterious elf with whom you will have a short chat, after which you can continue and, thanking the fragment found shortly before, access the chapel. Be very careful within this area, as soon as you interact with the altar, a mighty boss, the Lord of the Earth, will appear; obviously, you will be forced to face the fight, but it is better that you make sure you have the spell of regeneration and raging determination that will prevent your opponent from turning your companions to stone. Once the battle is over, you will receive the blessing of the Earth Goddess and can return to Morgan. The next mission will be entrusted to you by Galkor, the Lord of the Earth, you will be required to find all the elemental fragments. Head to find the water shard in the Lost City near Seahaven. Your objective will be found on the fourth level of the dungeon inside a sarcophagus, which can be opened by finding the golden key located inside one of the chests. Once obtained, go to the forge to open the barrier, behind it you will have to solve a small puzzle, aligning two tunnels so that both lead to the fountain, use the button on the right to change the color of the base, then the one on the left to allow to the flow of water to be more powerful, approach the tank and use it. Behind you the Water Lord will appear, it is advisable to cast a few enhancement spells on your party before interacting with him. What will make this battle difficult is that your opponent will continue to cast very damaging area effect spells. Air-based spells will not be very useful and once you win the fight you will get the blessing that will allow you to walk on water. The fragment of the air can be recovered in the second level of Skull Rock, where you will have to face the Siren, a very dangerous enemy as it can paralyze the members of your group; obviously the best way to face this challenge is to use a spell that makes you immune from the state of paralysis. Start by blocking the passage so that you can easily kill the two lesser sirens, so you can dedicate yourself to the actual boss. Again it is best to use the Furious Determination spell to avoid paralysis, weaken his armor with the Acid Jet spell, then attack at close range. Once the battle is over, you will get Yumiko's bow which can be brought back to the owner, it is located on the nearby surface and behind the corpse you will find the fragment of the earth. Go back to the forge and get in front of the air barrier, you will face two air elementals, then you can look for the entrance to the third level where you will also have to get the golden key inside one of the chests in the area . Use the key to open the door in the center and go over the two platforms. Once you have passed the barrier, you will have to face a small puzzle consisting of having to jump on the right floating platforms, the correct order is: the one on the left for once, the one in the center three times, the one on the right twice and go back four times. times. Once the shard is used, the actual boss will appear. The Lord of the Air is very similar to the two elementals faced shortly before, however, his attacks will be more powerful, weaken his armor or poison him then, use fire-based spells; after the battle, you will be able to use all the portals. The Shard of Light can be obtained on the second level of Faralgan's house in Karthal. Here you will find a toothed gold wheel next to a statue, this wheel will be used on a lever that will open the door to the warehouse where you can find the fragment on one of the shelves. The moment you get the precious fragment, you will be attacked by many enemies which, however, will not be a big problem. Return to the forge and take the opposite entrance to the air room. Once inside the new area, you will have to deal with a new puzzle, a chasm with some platforms that will have to be deactivated in this order: forward, forward, backward, backward, backward (on the stairs), forward, right, right, forward , forward, left, right, back, back, forward, forward. Once the little puzzle is finished, everything will settle down forming a ladder to the altar, place the fragment there and wait for the real boss to appear. Your opponent will fight like a normal light elemental, however, his attacks will be considerably more powerful; the best way to have an easy time during the fight is to use dark magic.
Once you reach the top floor, you will have to face numerous enemies that you have already fought previously and reach a room with some statues, collect the toothed wheel from one of these and return to the room where the fireplace is access; finally adjust the lever using the wheel you just found. You will find yourself inside the warehouse, where you can get the fragment on one of the shelves, of course you will be attacked instantly. Go back to the door and go through the first portal, then the one to the west, the one to the south of the map, the first one at the top and the one to the east three times. You will find yourself in front of the altar of darkness, place the fragment on top of it and start the fight against what is simply an enhanced elemental of darkness. Use spells of the Light and you will surely have an easy life. The Fire Shard can be obtained at the third level of the Lost City. Enter the room on the third level, access is at the bottom of the map, defeat some, undead, then, in the next room you will have to deal with the crystal spider. This monstrous being, fights over the distance inflicting various damage and using area attacks, shortened the distances so that he no longer uses area spells. When he teleports, follow the previous path to emerge victorious from the battle. Collect the fragment to the right of the entrance, then return to the forge to activate a new puzzle. Take out some fire elementals and go back to the exit while staying towards the inside of the room, activate the second one, lever to the right, the first to the left and the second to the left. Walk to the wall on the right and activate the last lever, you will activate the passage to the altar, reach it and interact with it. You will face an enhanced fire elemental, the best way to emerge victorious from the fight is to use water-based spells. Once the boss is defeated, you will get the blessing and finish this mission. Heame, a knight of Seahaven, will tell you that Lord Haart has a dark secret. If you enter his house during the day, you will not find anyone, so go there at night to find the butler who will inform you that the Lord is not in the house. Go through the city gates and talk to the guard, you will be informed that Lord Haart has just passed the gates recently. Leave the city and go up to the area with the green trees (near the cave of the Cyclops), follow the direction that holds the entrance to the city below you and you will find out what the dark secret is about. Go to the inquisitor, decide whether to tell the truth and make the inquisitor become Haart's enemy, or that the Lord was looking for bandits. Once you find out who the leader of the Highwaymen is during the quest "The Search for Kilburn", you decide to look for him yourself. The entrance to the meeting place is very close and it is the tower itself. Head north then east when you encounter two ghouls it will mean that the entrance to the Lost City is very close. Before entering, make sure you have a good amount of potions and spells that will protect you from the negative state of paralysis. Enter and quickly find the bridge to the castle, kill the two guards and open the gate with the key that they have dropped. Try to continue in the same direction you came from to find a descent and reach the next level. You will be attacked by numerous enemies at the same time, take them out and at the first intersection open the door with the key found in this same level. Once you have found your objective, there will be no reason to go down further and, you can exit through the door located in the southernmost corridor, turn at the first intersection and reach Seahaven again to return to Morgan in the castle. The next mission will be activated after finding the first of the obelisks scattered throughout the world, you will have to find seven more, then, reach the location of the treasure. Start at the Seaharbor gate, take ten steps to the Sea of Storms, turn left and take twenty steps, turn right and take eleven, then left for nineteen steps (you will need the blessing of the Water God). Turn right and take three steps, then right again to take the last step, under the rock on the left you will find the treasure. Inside the fortress of Crag, you will learn that the captain is very sick and only a Necromancer can help him, Ciele will then ask you to go to Karthal to find Kaspar, the only individual able to help the King of the Pirates. Once you get to the place of interest, go to the slums and enter the hospice, here Kaspar will join your group; return to Crag where you will be instructed to look for some ingredients. Look for Widowseep Berries in the Shadow Forests southeast of Kharta, elven mushrooms in Halloth Grove west of the Elemental Forge, brimstone that the alchemist can buy in Seahaven, mercury from the shopkeeper, and the heart of the crystal spider you have. previously defeated; finally bring all the ingredients to the fort to finish the mission. Pastor Umberto will ask you to find all nine heretical texts that the inquisition wishes to burn permanently, these will be scattered throughout the world and can only be completed in the fourth act. The first book can be found near Sorpigal to the north in a dangerous cave, you will find a Shadow Dragon inside, to defeat it you will need to be at least twentieth experience level. The second book is located in the first level of the Portmeyron castle, you can access the room with the book through the Lost City. The third, is found in the cursed ruins not far from Portmeyron Castle, when you decide to go there make sure you have the Furious Determination spell. The fourth book can be found during the mission "The Master of the Assassins" in the third level of the guard garrison. The fifth is located in the second level of the Karthal sewers after the "Liberation" mission. The sixth book is found in the Tower of the Riddle and the key word is "age". The seventh should be found during "The Highwaymen" mission on the first floor of the bandits' hideout. The eighth can be found in one of the shipwrecks, the one located north of Seahaven.
Atto 3: Karthal
After defeating Montrad and returning to Jon Morgan, you will receive a new mission. You will have to go to the city of Karthal and find out what happened to the spy; you will be met by another agent in the sewers. The problem is that the gates of the same city will be closed, however, there is a secret entrance in the sewer of the next city. Entering the muddy tunnels you will meet a woman who was waiting for you, from her you will learn that these conduits lead to the house of her father, Falgar, and the agent you were sent to look for; to reach the opposite side of the sewer pipe, raise the grate by pulling a lever. Advance by eliminating enemies and making sure you have some spell or item that can cure the negative state of poisoning. After a short walk, you will reach the stairs to the mansion, inside it the situation will not be safe yet, in fact, you will be attacked by the shadow wizards and black guards, clearly these are remarkably resistant to dark magic, as well as that of the air, so try to use spells of a different nature and thus prevent enemies from launching their lethal attacks. Reach the vestibule where Captain Ripley is waiting for you. The attack pattern of the captain is the same as that of the dark guards, however, you will not be forced to face him, in fact, from him you will learn that Falagar has been arrested. Head out to find yourself inside the city itself, here you will learn from Dunstan that the gates have been opened and you should look for a man named Hamza who could help you free the man from prisons. The best way to find out where this Hamza is is to listen to the voices of the citizens, is some place so full of gossip in a fantasy world? Obviously the local tavern in the city. Once you arrive at the warm and comfortable inn, talk to a woman named Haifa, the only dialogue option will be "Gossip: Hamza", so select it and new choices will appear; when you tell her that Jon Morgan is sending you, she will tell you to seek your answers within the Cosmic Circle. The password to enter the circle is "destiny cannot be altered, once events have begun their course"; At this point you will be given two new missions "Companions in Crime" and "The Keys to the Sewers", after which you will have to return to Hamza. To break into the garrison, Hamza expects you to steal the key from one of the black guards named Theron, in fact, without it you can forget to break through the prison itself. Unfortunately, you only know the name of your target but not its location. Lucky for you, this is a guide, so ... The man you're looking for is at the slum tavern and, you don't even have to fight, so casting a protection spell before entering the place will be totally superfluous. Enter the tavern, buy a drink for Theron to make him pass out on the ground completely drunk, then check his pocket to get the coveted key to the sewer. Now you need to get some more detailed information on the garrison for Hamza.
Leave the port district and head to the slums, you will find the entrance to the Blackfang headquarters, in exchange for information, you will be required to retrieve the cargo of a ship that has sunk, if you have followed this guide carefully, you will have already found the cargo in question, however, you will need to go back to the chest in question (the game itself will require this). Take a ship to Crag and head south, pass the Skull Rock and continue forward, you will encounter the wreck of the ship, go inside and defeat all the Nags; the sailor inside will inform you that the monsters have already cleared the ship and headed to the Skull Rock. Go back to the rock and look for the passage to the second level (the password will be: swordfish). The casket is located in the northernmost room, once collected, return everything to its rightful owner. With all the information on the garrison and the key to the sewer, you are ready to raid and free Morgan's agent; your allies will distract the soldiers by giving you enough time to complete this delicate mission. Head to the slums and talk to the black guard captain who is on the spot, no matter what you say, the fire will attract attention. Take the main entrance and reach the end of the hall, open the door on the left and kill the wizards inside, collect the key from the floor and head to the magic anvil. Exit the room to find yourself surrounded by enemies, the best way to get away with it will be to stand against in the corner or between the walls and columns since you will only have to attack your opponents from two sides; remember to eliminate the wizards first and only focus on the normal guards later. Once you have won the battle, enter the room on the opposite side from the one you just left, you will notice a new door on which to use the key collected earlier from the floor; you will find a comfortable descent to the first level a few steps away from you. At the first crossroads, turn left and pull the lever at the end of the corridor, you will open a nearby gate and, in addition, you will have the opportunity to also open the passage for the sewer which will be useful for your future escape. Go back and take a right at the intersection through the open gate, go forward and when you reach the room with two corridors, take the one on the left. After opening a door, you will encounter the Minotaur, the best way to deal with him will be to attack from a distance. After defeating the monster, you will receive a key that can be used in this same room, after which you will have to pull the lever for the next gate; finally on the table you will find the fragment of darkness. After you have gone through all the doors, you will have to force a grate using one of your characters with a remarkably high strength, after that, talk to Falgar who will take his place in the middle of your group. Escape through the sewers, where you will start a short chat about politics and conspiracies, after which all you have to do is report to Morgan. You will be asked to find out more about Dunstan, you will receive the first clue to Karthal inside the local tavern in the harbor district, the host will inform you that Dunstan belongs to Shiva's group, and the last time they were seen, they were on their way to Wyslin Jungle. Travel fast by taking a boat to Crag as the jungle is north of this city. Exit and go to the teleporter to the east, then the one nearby. When you reach the jungle you will find Shiva's camp not far from your location, talk to the woman who will tell you that Dunstan has had a sudden change after visiting the Tomb of a thousand horrors, this place is located in the mountains northeast of Seahaven . You will have to go to the tomb to finish act three, also, along the way you will have to face three deadly cyclops, so it is advisable to be at least level twenty-five.
Act 4: The final battle
The entrance to the Mephistophelic tomb will close behind you, trapping you inside and the only thing you will decide to do is look for a quick way out. Advance and prepare to face several shadow creatures, obviously these will not be very resistant to light-type spells. Head west and take the portal to reach the second floor, however, it would be advisable to search for the statue first to resurrect your dead companions. Once you reach the second level, you will discover more teleporters, but nothing else special except for a chest to the north that needs a word to be opened: Erebos. Go through the first portal, then the second and at the end enter the third as well, done this, continue east killing huge waves of shadow enemies. Once you reach the third level be prepared for a bit of confusion caused by the presence of many teleporters, advance towards the first of these, then into the second and third followed by the fourth which is located in the northernmost part of the maze. The fifth and final teleporter, on the other hand, will be located south of the map and near the fourth, after this too, the grate for the next level will open allowing you to move on. The fourth level of the tomb, will literally be a maze, start by advancing towards the teleporter in front of you, then enter the next one and press the first tile, you will have to press five in all. The tiles will be indicated by a yellow light and you will still have to pay close attention to the Shadow Dragons in the area, so it is advisable to rest and save often. Go back and go over the teleporter south of the entrance and press the second tile. Go back to the beginning of the maze and reach the teleporter to the west, go through the two portals to press the third tile. Take the same path for the first tile and activate the fourth one next to it, go over it a second time and return to the entrance to the same level. Head southeast and, without using the portal, go down until you reach the fifth tile. You will have to face a boss who can paralyze you, so use the spell of Furious Determination at the beginning of the fight. Once you have taken out the hideous monster with many eyes, position yourself on the tile; Check the corpse on the right for a book, then, reach the fifth level. You will have to deal again with other teleporters, advance and use the one to the east, then the one to the north and finally the one to the east again. Turn right at the fork and talk to the dark elf in front of you, he will lead you to the field and tell you to leave this place; within this same field, you will learn some new skills. Go outside and join Jon Morgan, the man wants to start a battle to retrieve his niece in Karthal. Go to Crag and ask the pirate leader to help you. Once you have started this mission, you will no longer be able to go back until you have finished it, so it is advisable to have a resurrection spell or hire a druid to resurrect the dead characters in your group, also you may decide to spend all the money you have. they are left in mana and life potions as you will use them all the time. Head to the port of Grag and talk to the ogre who is there, once you get on the ship the battle will finally begin. You will find yourself in Karthal in the middle of a big fight, you will have to face several dark elves, they will be remarkably vulnerable to light type magic.
After defeating the huge beast, advance until you collide with the next wave of enemies, try to stay in the corner and get attacked only from two sides, also take out these soldiers, talk to the elf you met earlier at the forge elemental, if you answer with the rhyme and the fourth dialogue option, it will attack you. The fight with the elf will not be a big commitment, the spells work well against him, but the blows in the body to body do not and once he is done out go directly into the complex of the guards. Inside, you will meet the regent of the city, Markus Wolf, the man will flee immediately with the help of some black guards and wizards; to advance you will have to change two gears and pull the levers to open the next door. Your objective will continue its escape by throwing other enemies at you, so try to have a wall on one of your sides so as not to be surrounded, then use spells such as Fiery Breath that causes damage to all enemies in a direct line and, of course, vital regeneration. Move south, drink from the fountain along the way and after going down a corridor where you will kill all the surviving enemies, you will be able to face Markus once and for all. The man will fall to the ground after the first hit and you can decide whether to kill him or stun him. You will start a cutscene after which you can decide which path to take for the second level of the city guard complex. Once inside the new floor, advance to the center and take out the wizards first and then the other enemies. You will find the entrance to the third level not far from the area in which you are, here you will have to clash with other elves along with shadow enemies, take out the "Faceless" who will not be a hard nut if you are at least thirtieth level, so , continue on your descent. You will reach Ker-Thal, where the corpse of Captain Carg is located, from here you can go left for a sanctuary of resistance to dark magic, or right for the passage to the second level of the area. Continue along the corridor defeating several enemies using area effect spells, do not waste potions and save them for the third level. You will meet Dunstan who, in fact, is very different from the man you met at the beginning of the game; go right and pick up one of the pages. Advance across the bridge and be careful as Erebos will often appear in front of you, some powerful attacks will be enough to take him out temporarily. Reach the first room and eliminate any elven resistance, then collect the second page and go to the next room to find the first piece of the solar seal. Go back to the bridge and reach the room to the southeast, then head east and then west, inside the last room you will find the third page; remember that in each of the rooms you will have to eliminate at least twenty opponents. With all the pages in your possession, reach the platform in the center and activate the seal, you will then have to face four "Faceless" close to the mechanism, finally, enter the name "Michael".
THE VIDEO OF THE SOLUTION - PART ONE
THE VIDEO OF THE SOLUTION - SECOND PART
THE VIDEO OF THE SOLUTION - THIRD PART


