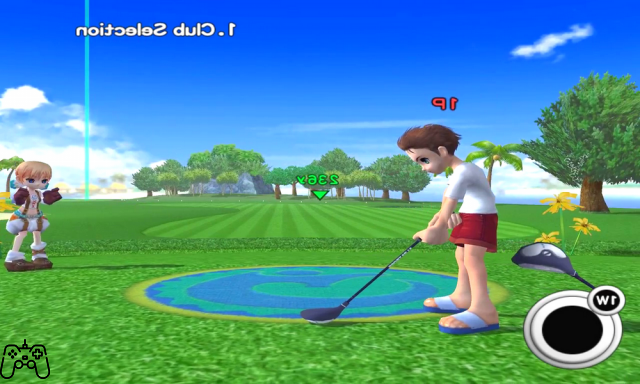
General Councils
- First of all, the difficulty of the game could make your first approach with it rather difficult: it is therefore absolutely advisable to familiarize yourself with the training mode before proceeding with the actual game in its main mode. It will also take some patience to be able to learn to play without making large amounts of mistakes; although artificial intelligence is not initially brilliant at all, it will tend to improve following your own improvement, so you cannot think of resting on your laurels.
Moreover, your opponents (it is not clear if the authors of the game did it on purpose or not, but this particularity is present) will be able to use the spells immediately, while you will have to wait and buy them when you have a sufficient amount of money.
-The practice mode can be used to easily overcome the moments in which you will have problems with specific paths. However, when you think about this, you will also have to take into account that the artificial intelligence tends to adjust itself according to your level, so the more you become strong in a certain path, the stronger your opponents will also become.
There is a limit to artificial intelligence, but it is not so obvious, on the other hand in a game of golf the computer can calculate the trajectory in an infinitely precise way, which we cannot do with our miserable brain. So you will have to try to get to a level of knowledge of the path high enough to allow you to place surprise master shots, but not high enough to allow you to play in an automated way, since it would be harmful to the progress of the game, paradoxically.
-There is the possibility of using lottery tickets to make your own additional items. Although their usefulness becomes less and less essential as the game progresses, in the initial stages they will be decisive in being able to obtain objects of a good level without having to waste too much (otherwise, you would certainly be forced to repeat a given level a considerable number of times. before being able to overcome it with certainty).
- It is also possible to make improvements to your caddy; its main task is to give you advice on how to shoot more effectively and efficiently, as well as to slightly increase your Pangya bar. In any case, it is advisable to consider them only as a last resort: they are not useless, but certainly less priority than almost all the other purchases available.
- In addition to training, it is advisable to proceed almost immediately with the purchase of as many improvements to your equipment as possible, since (especially the different types of clubs) will really help you in improving your overall performance - and, of course , greatly facilitate the game.
- One of the modes that will almost certainly prove to be extremely useful is Pangya Festa: unlike multiplayer (and similarly to single player) it will give you additional experience points - as well as clearly a lot of money. There is a small constraint (however easily circumvented): you must first unlock the characters via the single player: only then can you use them in the Pangya Festa.
- There are unwritten requirements that measure your ability to tackle subsequent sections of the game: in practice, during the first few moments it will be enough to perform a simple par in all the holes to defeat the computer. As the game progresses, it will be more and more essential to do birdies or eagles to have any * hope * of eliminating the opponent - all of this reaches its peak in the fight with Kaz, to whom a separate section is dedicated.
Versus Mode & Linked Objects
This is a mode where your opponents will only be humans, not the computer. Each of you will need to have your own Wii remote, it will not be possible to take turns as in other games of this genre. The goal is to pop as many balloons along the way. When you are not busy making your throw to pierce one of the two balls, you can use Party items to hinder your opponent, which will now be listed:
Fire Bandage: Increases shooting distance, decreases control.
Silent Misanga: Increase your aim, but forcefully set the wind to one meter.
Titan Wrist Band: Makes the Mystical Phoenix Ball larger, thus allowing you to shoot balls more easily.
Lucky Bracelet: Makes Pangya easy, and makes it possible to fill the Combo Gauge faster.
Stamp Hammer. you can make your enemy's balloons smaller by moving the Wii controller down while holding the A button.
Wind God Fan: very funny; you can move your Wii remote up and down by holding the A button to cause the wind to appear on your opponent's court.
Graffity Crayon: you can use the remote tracer, holding down the A key, to create graffiti on your opponent's screen.
Vibrating Teaser: You can decrease your opponent's aim by shaking the Wii controller while holding down the A button.
Hurricane Badge: Causes the arrival of a very strong wind even compared to the wind you are usually used to. However, it will be reduced to one meter when the shot is taken by the medal holder.
Shuffle Badge: random selection of clubs used by players (affects all players).
Feather Badge: decreases the force of gravity along the path of the game, so that the Mystical Phoenix Ball travels higher than usual. The medal holder's curvature and spin will be maximum.
Time Bomb Badge: the shots of all players will be conditioned by a time limit; however this time limit does not affect the medal holder.
How to make an effective shot? - First part
The distance indicator is characterized by the presence of a color that will first scroll downwards, then upwards. That color indicates the range within which the ball will stop; the range will tend to decrease if you are in locations where there is a need for more power, and therefore a different kind of club than the one you are currently using. A typical case of this kind are bunkers.
There are also different clubs for different levels of altitude. In fact, the iron clubs have a more accentuated and high arc than the wooden clubs, and therefore must be used if you are close to an obstacle that requires a shot with an accentuated slope to be overcome, or if you are in a bunker from which you can only exit by giving a high gradient to your shot. Clearly, shots made with shorter-bowed clubs will also cause more bounces, so they are especially recommended in cases where your goal is to get to long playing distances.
All this also applies to interference caused by the presence of the wind, which however has an opposite influence: the higher the ball's arc, the more it will spend time in the air, the more the influence of the wind will be felt on your shot. . This means that when the wind is very strong, the use of iron clubs is not recommended in any case, unless it is aimed at overcoming very specific and insuperable obstacles with another kind of club.
In general the effect of wind and that of elevation and wind are both linear, so it will not be difficult to understand which of the two prevails over the other: if the elevation is higher than the wind (in numerical terms), then its effect will prevail; while if the wind is higher than the elevation, then its effect will be the winning one. This way you should be able to adjust your shots quite easily in most cases.
Clearly if you decide to give effect to the ball everything changes, and in that case it is not easy to calculate which of the two effects will prevail and above all how the wind will move the trajectory of the ball. In general it is not recommended to use the effect when the shot is aimed and there is a large amount of wind, as the risk of out of bounds is greatly increased in these extreme conditions.
Calculation methods:
- the elevation is a determining factor, even when it is not much (in absolute value). It can make the difference between a birdie and an eagle, which in the final stages of the game will be decisive given the strength of your interlocutors. You simply have to subtract or add the distance to the power yards, depending on the slope (positive or negative).
- as regards the spin, in the event that you find yourself in the optimal occasion to use it (therefore in the event that the wind is absent, or in any case low enough), the maximum usable level (beyond which it will be probable the occurrence of an effect -fresbee) is equal to 7 spins. Remember that when you spin the distance tends to decrease due to the curvature, and remember that the distance you add will increase as the wind increases (adding two to three yards to the wind speed seems to be the most popular solution).
- each vertical meter of wind will give a correction of 0.6 tiles in case you are using 1W; of 0.8 tiles if you are using 2W, and of 1 if your choice fell on 3W. The same will apply if the wind is horizontal, only in this case the adjustment must be made to the right or left, in the opposite direction to the wind.
- it is advisable to manually calculate the power bar configuration of your club. Take the maximum power of the club, divide it by 10, and consider each dash on the bar to be worth one tenth of the power, therefore coinciding with the value you just found.
- In case you are on a slope, some kind of steps will be shown along a green horizontal line, they will have to be multiplied by two to understand by how many tenths of a brick you will have to move (if there are 2 steps, move 0.8 tiles).
Spin:
Usually the spin is also carried out to obtain a greater distance than that obtainable with a standard shot (therefore avoid resorting to this technique when you are inside the green - it usually leads to damage rather than improvements in your performance). For this reason, it is always recommended to aim upwards for optimal execution of the technique in question.
Different spins will have slightly different effects: a forward spin will cause the ball to advance, but it will remain lower than the standard imposed by the club you are using. This could be useful in cases where you consider the wind an obstacle capable of putting you to the whip: a lower elevation exposes you to a lesser extent to its deleterious action.
A backward spin will cause a greater elevation of the ball, which for this reason will assume a more arched trajectory, and for this reason it will therefore tend to travel a slightly shorter distance. This spin, unlike what is stated above as a general indication, can be used near the green, especially in cases where you have sunk into a bunker located near the green, or in the unfortunate event that you have placed the ball right in front. to an obstacle, always near the green (this can happen especially if the reference obstacle is a tree or sui generis).
On the Put:
There are particular methodologies that can increase your chances of success in being able to perform a Put. They can be briefly summarized in the following points:
- Zoom in before taking the shot, trying to align the black pixels with the cup behind them. Clearly you will have to pay attention to both their perspective and their direction: in case they are not perfectly available on a straight line, try to approximate; in the event that the Green forms a slight hill, you will have to apply more power to the shot relative to the points that are located towards the bottom of the square, and less power relative to the points that are located in the upper part of the square.
- Try to accurately measure the distance of the put from your position: the best method to perform this measurement is to follow the numbers and instead avoid approximating by squares, as they can often be misleading. The point beyond which you will need to add one yard to your put distance is approximately two inches of elevation between you and the hole.
You will have to do the reverse reasoning if the put is oriented in a descending way: for every 20 centimeters of elevation, eliminate one yard in your count, since gravity will do the rest of the work. In the event that, despite these guidelines, you still have doubts about the amount of force that you will have to try to impart to the ball, always round up: even psychologically speaking it will still be easier to endure a long shot than a gone shot. short (perhaps stopped a few centimeters from the hole, which always turns out to be a joke).
- In the unfortunate event that the computerized opponent manages to put in before you, take an example for your shot, it generally works (on the other hand if it worked for him, why shouldn't it work for him?).
- It is also advisable to modulate the power of your shot in relation to the length of the distance of the power meter. In practice, the longer the power meter is, the more you just need to get close to the recommended power.
So, in case it is short, it is good to add a slight amount of power; if it is long, it will be good to avoid giving excessive power in order not to be long. All this must also be modulated by paying attention to what is suggested above: therefore in the event that there are slopes, additional precautions must be forcibly taken to perform further modifications of the optimal distance.
- A general advice regarding the optimal positioning of the points is to make sure that the fourth point is aligned with the hole, and that therefore all the points from the fourth onwards are, thus leaving the first three the task of making the curve to the ball. This will be slightly different if the shot is really long and wrong: on these occasions maybe even moving to the fifth or sixth will not cause too much damage, in fact it will probably favor you slightly. An additional problem will arise when the points are not aligned in any way. Here the only thing that can safely save you will be your experience in similar situations.
- The use of the B button to take a practice shot is highly recommended, in order to avoid biting your hands by making a shot that with a slight modification could have easily been in the hole. It is also advisable to use a type 6 iron club, certainly the most useful for this purpose.
How to make an effective shot? - Second part
Wind:
Always valid rule: if you find yourself in the middle of a group of trees, the wind will tend to decrease; in case you find yourself in the middle of an island, the wind will tend to increase. The physical rule according to which the wind affects your shot is very simple: supposing you are shooting a shot without particular effects and straight, and the wind is X meters, and the shot is along Y squares of the green, then the displacement immediately by the ball. it will be in the wind direction and equal to XY meters. So you will have to try to aim XY meters in the opposite direction to that of the wind in order to perform a completely straight shot.
Pangya:
There are some things that should be avoided if your goal is to quickly reach Pangya. First of all, you will have to avoid bending your elbows during shooting, as well as look for an object that develops vertically, to be used as a substitute for a front sight, towards which to direct your shot without paying too much attention to the screen, which could contain several objects that they would distract you.
Practical description of the way to be able to get a pangya-hit easily: first of all you will have to block your elbows in such a way as not to suddenly change the direction of the shot in an involuntary way. So you have to try to keep the controller completely straight - as you would a real golf club - and then move your wrist very quickly forward when you get to where the ball is on the screen. In this way (after some practice - you will have to loosen your wrists so that you can execute a very fast blow) you can always get the maximum power available, with clear advantages.
However, there are other tricks to have the maximum available power, which still require some practice to be used. One is to try to split the shot in two: take a slow initial swing without hitting the ball, stop, then step back, and then hit hard and firm (but not necessarily hard). If done properly, this type of shot will give you maximum possible power in no time.
Other ways to do this are: hold the controller in your hand like a TV remote control, then turn it fully, and in the meantime move it first quickly to the right and then quickly to the left. So turn it upwards. It is very simple to perform and once learned it will almost ensure success. Another possible way is to perform a movement similar to launching a fresbee, however in reverse, that is, starting with the controller in front of you (and facing downwards, in such a way as to make the movement to be perceived in reverse. part of the Wii). There are certainly so many other ways that we haven't had the chance to experiment with them, in case you find one that suits you best, use that.
Clubs:
- Wood: The characteristic of the shots made with this type of club is to have a rather low arc with a very high roll when the ball lands. They are particularly useful when the distance to be covered is large, as their accuracy leaves something to be desired precisely because of this tendency to roll as soon as they touch the ground. Fortunately, however, they have the particularity - as explained above - of not being affected by the wind in a particular way.
- Iron: Their shot is characterized by a very high arc and a low tendency to roll, or in any case by a controlled rolling with generally low rebounds. Shooting accurately will be much easier using the irons, but it will be more difficult to cover considerable distances. Also ideal for exiting bunkers, they are however particularly sensitive to the presence of wind which, if present in considerable size, will tend to ruin their trajectory.
- Wedge: They have the highest arc among the clubs, so as to allow you to overtake obstacles that would otherwise prove impossible to overcome, especially if your ball is positioned right at the foot of the obstacle itself. Clearly the high arc causes strong wind effects, but if you limit yourself to very short shots the accuracy will not be decisively affected.
- PW and SW: means Pitching Wedge and Sand Wedge. The second kind of club has an even higher arc than the first, but has an even less rolling ability. Useful if the ball is really sunken in a very deep bunker.
Clash Bonus:
It is counted only if the shot to which the bonus is associated goes directly to the hole. It is however possible to perform bonuses by taking advantage of the buildings scattered along the map, and in this way it is also possible to be able to achieve bonus combos, particularly useful in desperate cases. Don't count on them too much though, since their realization is always difficult, and often directly linked to luck rather than to the skill of the person who performs the blow.
Characters & Their Bonus-Clothing
Cecilia
Specialized in complicated shots. However, due to the complicated nature of the shots, she will often fail causing OBs which will greatly affect her score. In the rare cases that the shot hits, she will likely be an Eagle.
Kooh
One of the worst characters in the game in general, often able to miss even the most elementary and banal shots. You will have no particular problems eliminating it.
High:
Its main problems are two: the inability to overcome hills, and the tendency to waste time when at a clear disadvantage. Neither problem is capable of causing you any particular harm.
Arin:
Peculiar character, and probably among the strongest in the game: specialized in long shots that go straight into the hole, he often manages to place them. However, her emotion plays tricks on her when she is near the ring: in those cases she gets caught up in emotion and misses rather simple shots.
Kaz:
When you find him as an opponent, Kaz will turn out to be almost unbeatable. All this strength will make you believe that even as a playable character he is unbeatable. In reality, this will not be the case at all, as it is very difficult to control: he seems to hit the ball in a completely causal way, which does not allow you to direct your shots in your own way. Moreover, its power is immeasurable compared to that of all the players to whom you will have been accustomed before its use: although you may consider it an advantage by restoring yourself, it does not seem worthwhile to make this change in your way of playing to be able to use only one character. .
Physical characteristics of the characters:
There is a peculiarity concerning the use of power in the game: every time your character's power exceeds the level of 20, the aim will tend to decrease. In reality it is a rather common feature, present in the vast majority of golf games, designed to prevent the creation of "super-powerful" characters capable of both aiming perfectly and making shots that go very far. In reality, therefore, it is not always bad that the power of a character over 20 depends a lot on your style of play and above all on the values of the other attributes of the character himself: in the event that the aim and control are already at levels more than good, there will not be much to worry about since even a slight decrease would not significantly compromise your performance on the playing field. In practice, however, in the event that your power has actually reached a level of 20, you should simply try to balance the points that are attributed to it, always attributing points to control, which will be really essential in order not to waste the power in shots that go consistently OB
In fact, despite the power receiving penalties, it will be practically impossible to complete the game without making it reach levels above 20: in the last holes it is necessary to perform birdies and eagles over quite considerable distances, which cannot be overcome without making extensive use of levels. quite high power. In fact, in these last holes it will simply be important to shoot the ball inside the green on the first or second shot in order to finish as quickly as possible to avoid the pressure of the looming opponents who often will not miss even a shot. However, it is advisable to always create a spare set of clubs with maximum precision and minimum power, especially useful in case you find yourself forced to use clothes that exaggerate the power to the detriment of control.
Let's say that as a general rule, your control should be a maximum of ten points below your power. This rule of thumb can also be violated if you have become very familiar with the game and as a result your natural aiming has really improved a lot.
Clothes:
The power that is shown in relation to the links is a slightly complicated matter. Let's take, for example, that a power equal to A (B) is marked on the shirt, where A and B are two natural numbers. The number A indicates the increase to the statistics that is given by default following the use of the given shirt, while the number B indicates the increase in the statistics that it is potentially possible to perform through your character customization. Their sum is the total improvement potential of the jersey. The personalization of the characters is achievable by buying the additional statistics that are allowed by the number B present on your object, according to the methods that will be described below.
There is also the possibility to increase your stats by buying them directly, not only through clubs and clothes. However, your ability to improve stats independently of suits or clubs is paradoxically limited by the slot capacity of your suits and clubs.
One exception to this rule: in case the upgrade is related to power. Only in these specific cases will it be possible to get an additional slot, regardless of your club or your outfit, for each additional level. There is a reason why power isn't limited by slots: power already suffers an indirect limitation due to its inverse proportionality to aim and control.
Therefore its independent upgrade from clubs and clothes is generally not recommended, as in the long run it would put you at a clear disadvantage with almost total elimination of your aiming and shooting control abilities. You can view the statistics and the bonuses associated with them by clicking at the bottom right of your room, in correspondence with a box that shows five colored lines. By clicking again, you will be able to see the total bonuses obtained during the game for the clothes you are currently wearing.
Unlock items and characters
There are some peculiarities that will allow you to unlock the various characters and the various uniforms and clubs in a fairly simple way:
- In versus mode and in practice mode your unlocking possibility will be increased if you are a novice. So a trick could be to create several novice characters. This would allow you to view a large number of items, however it would not allow you to complete the collection with any of the characters. The advantage that is given to you in these modes, however, is not present in the Story and Party modes, in which Fortune Luck does not count for anything.
Fighting against Kaz
This is one of the most difficult fights you will encounter throughout the game, if not the most difficult of all. Precise strategies are difficult to enumerate, as he is also able to correct himself automatically (his AI is much higher than the average of the other opponents you will encounter along your path). The peculiarity of him is that he has enormous power and precision, and therefore he is able to shoot the ball at 300 yards on the green in one shot without problem.
However, it is still possible to defeat him. His power is greater than his accuracy: this means that from time to time he will miss a few shots, perhaps even sending him into OB. In these cases he will have to seize the moment and try to make a perfect match in such a way as not to allow him to recover the error. In case you have improved your character a lot, it is possible that you will also be able to keep up with his power, but this will not be true for most players (it takes a lot of hours of play to have a truly complete character in every its characteristic, and often the power is not among the privileged for various reasons).
In practice, all this reasoning means that your best ally in trying to destroy Kaz will be luck. So in case you are not particularly lucky, you will have to try several times before being able to have the best on your opponent. Precisely for this reason, it is advisable to give it to him in the event that you find yourself in a situation that you know you have not got out of, such as if the hole is particularly difficult to reach (for example behind a large obstacle - obstacle that , of course, it will be easily circumvented by your opponent). Try to be ahead on the eighth hole, as he is very unlikely to make a big mistake in the ninth hole.
There is a significant psychological component that can affect your match against Kaz. In fact, many of his shots are actually far from impossible, but you won't be used to them at all. This can also be of great help to you in versus mode: if you have fought Kaz and your friends have not yet, you will certainly have the great advantage of knowing your limits - and knowing that they are actually much higher than they are. you imagined earlier.
Anyway, back to the point, try to emulate Kaz's shots. They may seem really crazy, but most of the time you will be able to imitate them, without even having to try too hard. A slightly unusual tip but which can be decisive: repeat the game until you manage to win the first round. In addition to improving your morale, it will virtually put you on par with Kaz (who will practically never lose the last round unless you hit the hole in one fell swoop).
Nonetheless, there are some constraints that you will certainly have to respect in order to have any hope of victory: first of all, that your rank is at least senior, since otherwise your life expectations will be very low. So in the (rare) case that you come to his mercy as a less than senior, proceed to level up through other levels. Good clubs are essential.
Solution summary
General Councils
Versus Mode & Linked Objects
How to make an effective shot? - First part
How to make an effective shot? - Second part
Characters & Their Bonus-Clothing
Fighting against Kaz


