Please note:
The solution is based on the American version of the game, so it is possible to find differences in the Spanish version.
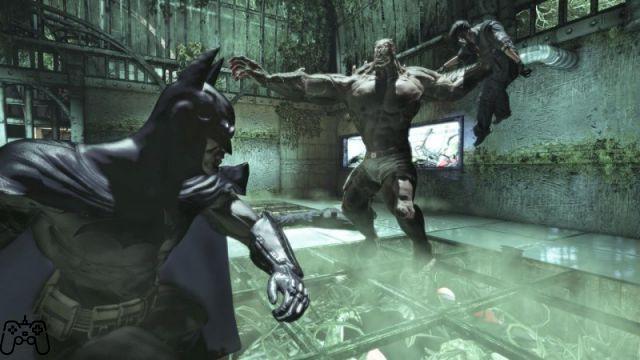
The Batman
Project yourself towards the Bat-Signal. Meet Gordon near the light, so move forward again. Continue to the next target, then press the attack button repeatedly. Try to avoid the red lines to dodge the rockets. Go and question the driver. Proceed to the building marked on the map. Get rid of the guards, then continue to the top. At the street, switch to using the Batmobile. Shoot at the cannons. Locate the lines on the ground, following them to the target above. You will be given the option to use missiles. Back towards the streets, cross the bridge, then get rid of the subjects in the area.
G.C.P.D.
Talk to Gordon, then to the cops nearby. Gordon will provide you with 3 different missions. You will have to start from the mission "The Riddler". Exit through the nearby doors, locating a policeman. Then talk to Jack Ryder. Enter the elevator, listening to Nigma. You will therefore have a switch to use the code that will activate all the red and white blocks in the area. You will have to overcome 3 paths.
During the first round you will have to use the wall near the pipe, then move along the next wall, then use the code near the ramp to get to the landing. The second path will be the same, but you will no longer have restrictions regarding the use of the boost. At the third path you can only move to the left, projecting yourself over the ramp. Jump on the elevator and go out.
City of Fear
Head to the clock tower. Go up, use the Bat vision to activate the statues, using the computer. Exit the tower, returning to the study. Climb to the roof, use the generator, moving along the road. Activate the battle mode. Move to the roof. Go up the ramp, up to the top of the roof, going through its narrowest area. Use the battle mode to proceed. Hit the switch at the end of the platform. Continue to the generator, activating the engines.
Move to the next antenna, launching yourself towards the "docking" area. Activate bat vision. Project yourself between the various points of support. After a short training session, you can proceed to rescue the hostage. Grab the grate near the door, then go down and start hitting. You will therefore have to move the two scanners to find the plant completely east of the map. So use the Grapnel to proceed towards the "chemical" plant. Climb to the wall at the top, then use your vision to survey the surroundings. Ignore the character on the right, moving left instead. Glide down using the parachute, then use the shaft to proceed.
Make use of the nearby terminal, then continue to the top of the central building. Starting at the top of the factory, look down, locating the guards. Glide to the left, then get rid of the ninjas in the area. Glide down again, examine the nearby worker and open the portal. Pull the nearby bridge to create a ramp, then throw yourself forward. Pull the next portal towards you, then proceed across the bridge to reach the worker. Pull down the door, using the gun to KO the worker himself. Enter the room, saving the character in the area. Take advantage of the remote control, therefore the nearby Batmobile.
Park the Batmobile near the cabin. Exit, go up to the platform, then throw yourself over the ramp. Take a takedown on the guards inside the control room. Get rid of it and use the gel to open the wall. Examine the nearby ID, then open the nearby wall. Go back to the outside and enter the Batmobile, then move to the final area, examine the fourth worker, then open the panel near the elevator. Open the portal, then use the cables to get on the elevator and enter it from the front. Go back and proceed forward to cause the Batman to drop. Then enter the next room, going up the shaft. You start the skit by hitting the white colored enemy. Jump on the elevator, go outside, being ambushed.
Get rid of the bird, then go back the way you came by placing the Batmobile on the elevator. Move outwards, crossing the ravine. Use the cannon to destroy the wall, then place the Batmobile near the wall. Exit, go up the platform. Place the ramp on the ground, turning it to proceed towards the hole.
Ace Chemicals
Destroy the two tanks visible along the way. Get rid of the nearby guards by deactivating the turret. Use the panel to open the way, moving towards the portal.
You will now have to proceed with the Batmobile to the combat area, exit, then jump in and out to get rid of the subjects nearby. So take advantage of the opportunity to "shoot" out to reach the following portal. Continue to the right, so get rid of the enemies, one by one. When the path is clear, move up to reach the main chamber. Then slowly remove all the containers, inserting them into the small openings on the opposite side of the room. Then go forward, examining all the cells. Change your vantage point by taking advantage of the Batmobile. Then begin the escape.
City of Fear 21%
Go back to GCPD, talk to Gordy, then go back to the street. Charge Gordon, then continue forward until you are attacked by the tanks. Activate combat mode, making sure you take advantage of the Quad Barrage. Continue to the top, then drop down and proceed to the next cutscene. Approach the wall, then wait for Barbara to be brought out, selecting the nearby cell to locate the knight. Also examine the truck, reset the PC, listen to your mate, then leave.
Use the Bat-vision in combat mode, while following the path. You will then have to exit, trying to examine the bomb. You will have to defend the bomb from the tanks. Make it detonate, then return to use the Bat-Vision to reach the bridge.
Miagani Island
From the top of the bridge, you can begin to proceed towards the goal, landing near the field. Shoot the subject near the balcony from behind. Get rid of the guard, then proceed with the next patrolling guard. Use the grates and ventilation ducts to get rid of others as well. Continue to the balcony, hiding and then going down to kill the rest of the subjects one by one.
Retrieve the trophy from the nearby room, then get rid of the next enemy.
Pikney Orphanage
Make your way to the following objective, ignoring the creature in the area. Continue to the lighthouse, letting the subjects talk to each other.
Climb towards the character, freeing her. Switch to using Catwoman. After the fight, talk to her and then return to the outside.
Line of Duty: Founder's Island
Select the mission by reaching the construction field. Stand at the top of the observation areas, trying to locate the patrols. Fly down, clearing the patrols one by one. Then free the hostages.
Line of Duty: Bleake
You will then locate a hostage on the roof near Ivy's lair, in the center of the urban area of Bleake. Watch out for objects that will be thrown at you. Free Ashley, the fireman.
Continue to Langstrom's laboratory, walking to the right. Locate the body on the floor, taking control of the DNA.
Riddler's Revenge - Second Part
Activate the Quest and head to the Riddler garage, using the Batmobile. Left, along the mud path. Step onto the green light, locating the following platform. Use the code to release it, then use it again to maintain the elevated ramp, avoiding its fall.
You will now have to get out of the wagon, placing yourself on the green light. Cross the bridge in front of you, using the Batmobile to proceed and reach the next area of the trail. Drop the ramp, then go up to the next platform. Use the code to solidify the ramp, then activate the generator.
Then move on to use Catwoman, walking to the left corner. Then return to Batman, exiting the cave.
Riddler's Revenge - Third Part
Take the Batmobile to the bridge, eject it and proceed along the wing. Go back to the orphanage, then position yourself near the door, take out the Batarangs, and use them to hit the points corresponding to the question marks, causing the circles to move on the floor. Place Batman and the camera in such a way that you can use the reflections of the lights, they must be positioned in the opposite direction from the ceiling.
Head to Catwoman, then continue into the room, looking towards the center, locating some purple question marks. Catwoman will see the sequence 3 1 4 5 2, while Batman the sequence 1 3 5 2 4. The codes are reversed. Enter Batman's code using the Batarangs, and Catwoman's code using the whip. When the gates have opened, go out using the TD. Tell Catwoman to open the drawer, exiting to the main room. Talk to her, then go out and talk to her friends outside.
City of Fear 26%
Head to the Batmobile, continuing to Miagani. Go back to the bridge. Shoot the tanks with the machine gun, completing the objective.
Riddler's Revenge - Part Four
Proceed forward, continuing to chase the "keys". Continue to the next garage door, entering the cave. After the short walk, stand on the pressure area to reveal the solution to the following case. Switch to using Catwoman, then return to Batman and exit the cave.
Riddler's Revenge - Part Five
To reach the next garage entrance you will have to go up the previous stretch of road. Then press the various scales using sufficient force. Turn the corner, then aim to the right of the guardrail. Move to the third play area, diving to the last area. Avoid using the "Cop-Out" key that will be suggested to you.
Then go back to the platform, to reveal the following case. To find the following key, position yourself near Selina.
Riddler's Revenge - Sixth Part
Return to the orphanage by entering the physics room. Climb the characters by pressing the corresponding buttons. Then examine the layout of the tubes, noting how a sparkle comes from the left. Suppose therefore that the plates are numbered 1-2-3, Batman is indicated with B and Catwoman is indicated with C.
Place B on number 1, C on number 2. Place both on number 3, then B on number 2. Place C on number 3, then on number 1. Place B on number 2, then both on 1. Place yourself on the block to render quiet the floor. Get rid of the robots, then retrieve the key. Also try to cause the nearby bridge to descend.
City of Fear 26%
Go back to the bridge, then continue using the Batvision in combat mode. Get rid of the drones, following the path to the hospital.
Having recovered the vehicle, jump out and examine the passenger. Examine the nearby body, then examine the nearby door, triggering the next part of the video. Go back and play the video again to find out where your neighbor landed. Once you have regained control of the character, turn around to locate her. Examine the nearby chest where she is hiding, solving the mystery once and for all.
Video - Trailer
The Perfect Crime - Second Part
Head back towards Bleake, examining the map to locate the intersection in the center of the island. Retrieve the body on the right. Examine the arm, go down one level to examine the chest, then examine the knee as well.
Perfect Crime - Part Three
Return to Bristol Station, moving to the area above. Examine the body, the eye, the right arm.
City of Fear 28%
Climb to the top of Wayne Tower. Talk to Lucius before you leave. Jump into the Batmobile, then start the fight using the Quad. Enter the tunnel, then pull the fan and jump inside. Use the gel twice to get to the fan. Activate the bat-vision, following the circuit to return to the button on the other side. Deactivate the bat vision, then use the launcher to reach the path.
At the next area, turn right and retrieve the Riddler Trophy. Return to the tunnel to the end of the play area. Look at the wall, following the path and passing the room at the end. Get rid of the enemies in the area, then take possession of the doctor. After the fight, hide in the kitchen, using the panel to open the gate. Use the Batmobile and break free.
Jump out using the panel. Dodge the rockets, getting rid of the enemies until there is only one truck left. Destroy this too, so go and interrogate the driver. Press the keys indicated on the screen until the soldier screams, then let him go.
Perfect Crime - Part Four
You will need to head to the area just north of Miagani. So retrieve the body in the east area. Examine the chest, then examine the muscle on the right shoulder.
Gotham on Fire - Second Part
Go back to Bleake, locating the building near the intersection. Activate the aquatic system to begin the chase. When the opponent decreases his speed, do an eject and finish it.
City of Fear - 32%
Start again with the main goal. Head to Miagani to recover the upgrade. Try to use it, then use the virus to get closer to the target, then use it on a larger tank.
Armed and Dangerous - Prima Parte
We recommend that you visit Bleake before starting the mission, then proceed and locate the APC. Hit the opponent with large amounts of missiles until they are knocked out.
Armed and Dangerous - Second Part
Return to the island of Miagani, and then start the journey again. Run to the trucks, then use the side "bursts" to pass them effectively.
Line of Duty - Bleake
Park the Batmobile near the road. You start the scene in Quicktime, approaching from the east and then fly and let the fireman locate you. Jump down, staying in the boat. Use batview to examine subjects along the way. Jump into the Batmobile, then run forward and shoot the enemies.
City of Fear 33%
Go back to the Miagani area of the bridge, locating your friend who will give you the Disruptor. Pull it out, then drop down and hit the opponent repeatedly. So fly in the air and move along the rooftops. At the garage, jump to the top of the parking lot.
Penguin's Weapon Cache
Starting from the front area, activate the bat-vision to proceed to the opposite side of the turret, at the corner of the roof. Get rid of the patrolmen, then hit the two characters near the roof. Enter the front area of the roof, then make your way along the hatch. After the fight, use the gel on the nearby crates.

Exit, pull the door towards you, then remaining positioned backwards make the whole thing explode. Climb progressively at maximum speed, then jump along the pipes to avoid the ambush. Enter the parking lot, go up the ramps, get rid of the subjects at the top.
City of Fear 38%
Head to the Founders Island, avoiding the drones. Use the batvision and then get rid of the nearby guards. Starting from the raised area, go down progressively, avoiding the drones. Get rid of the nearby drone, then use the gel on the nearby controls to complete the game.
Stagg Airship Alpha
Climb to the top of the tower to retrieve the gadget. Listen to your friend, then jump forward and try to open the hatch. Retrieve the toy and point it at the panel. Jump forward starting from the platform, opening the vent in front of you. Head down and use the hack to open the door and retrieve the Riddler's trophy. Go down to the grate, downloading the codes. Head left, hacking the panel to open the way.
Enter the room on the left, gaining access to the ship controls. Move the containers outwards. Jump down, get the trophy next to the wires. Hack the panel, then move the nearby ball back and forth. Turn around and look in the hole, locating the crates. Hack the crate in the center, then retrieve the three crates on the side. Place the box on the left, collecting the Riddler's trophy. Enter the nearby opening near the wall. Collect the trophy, then climb to the top, freeing yourself of the enemies. Stun the opponent. Hack the panel near the door, then jump down to start the fight. Approach Stagg, then start doing the combo. Back down, activate the side controls by opening the side door. Look down, locating the puzzle.
To solve the puzzle, you have to block all the boxes except the fifth of the second row from the left. Then retrieve the puzzle by jumping into the trap door. Examine the wall on the right. Make it explode. Place yourself in the completely clear area, then spin the ship, examining the hatch below and recovering the trophy. Go up the stairs, then go up the shaft to the panel, hacking it. Move towards the laboratory, going through the ventilation duct.
So take advantage of the nearby computer, using bat-vision. When you have taken possession of all four zones, go back to use the computer, then exit the room. After the brief conversation with Alfred, go up to the platform in the center, using the triple batarang ability on the three dots. Follow the path proceeding to the first cargo room. Hack the panel, then start the fight. Dodge the enemies, even getting rid of the doctors. Go back to the starting area and fly through the window.
Stagg Airship Beta
Fly under the first ship, then project yourself forward. Look at the opening in the wall, then proceed towards the path. Retrieve the chest, then examine the trophy, then open the wall near the corridor to find the next trophy. Listen to the radio, then use the computer to open the next cell. Continuing to the next room, throw yourself across the ceiling and take out the enemies, one by one. Counter the blows of the last opponent with a large pistol, hitting him with a few repeated punches. Go to Stag, then to Scarecrow. Select the option on the left.
Go back to Ivy's residence area. So go back to GCPD, going to interrogate the policeman indicated in green. Then talk to Jack Ryder, then to Ivy.
Slip under the door, then examine the back of the wagon, then continue to the station, calling the Batmobile. Make your way to Miagani, then hit the enemy in the area, then run in the opposite direction from the bridge. Kill the other three enemies, follow the road north, reaching the fortified area.
City of Fear 50%
Climb up the street, continuing to the tower to the south. Enter the parking lot of the tower, recovering the upgrade. Exit through the nearby tunnel, starting the fight. Load up the sonar, then hit the ground. Climb to the top, starting the fight, preferably using the batarangs. We recommend stun the nearby subject.
City of Fear 53%
Head to the roof, entering the secret lair. Talk to Robin, then use the computer, examining the cell before leaving. Head to the founders.
City of Fear 54%
Make your way to the drone, landing on top. Use the hack on the drone. Approach the crane, diving to begin the fight against the enemy guard posts in the area. Then use the panel to open the doors below. You will now have the ability to hack sentries. Hack the two below, then jump to the left.
Climb up to the roof, then examine the gunslinger behind you, sliding forward to hit him quickly. Climb along the pipes, then descend to the ground floor. Wait for the last group of opponents to approach, hitting them repeatedly. Go up to the upper floor, reaching the control room. Interact with the computer behind the door. Retrieve the remote control. Run to the Founders, then proceed forward killing them one by one.
Locate the ramp, drop it sideways, then stun the electric type enemies and hit the nearby medics as well. Activate the computer, activating the Batmobile mode. Keep moving the ramp up, then throw yourself forward. Dodge the cannons, then go back to the challenges.
Video - Trailer - Family Matter
Riddler's Revenge - Part Seven
Listen to the answer to the riddle, then rotate the various segments of the duct to be able to climb over the various pressure areas. Turn the wheel sideways to cause the wall to move, noticing an opening. Go down to the lower level, turn left. When the second hole is open, throw yourself up to start the fight.
Go back to the Batmobile, head to the first hook, then turn around until the painted tile is below you. So go up to reach the third, then continue to the plate below you. Stand on the plate, using the Batmobile and destroying the two turrets to be able to exit. Scroll down to view the solution. Switch to using Catwoman, then head over to the Batmobile to exit.
Riddler's Revenge - Ottava Parte
Return to the orphanage by entering the third room. Tell Batman to place himself near the scale, so Catwoman will have to stand on the opposite side. You can start the maze. You will have to move Catwoman and Batman in two different ways. For Catwoman, you will have to proceed forward once, once to the right, then down, then twice to the right, then once again down, then left three times, then once down, then down. right four times, then down again.
Switching to Batman, you will have to go straight once, then go right, then straight again, then twice right, then left and straight again, then left again, then left again. So get rid of the subsequent bots, then recover the key. Having taken the key, proceed towards the outside.
Riddler's Revenge - Part Nine
Continue to the entrance to the lair, destroying the tanks. Move on to the second lap, using the brake to get past the totem pole. Continue to the second wall, aiming for the first space. Continue to the center, then drop down to the third empty space. When you get to the third round, go past the totem and throw yourself forward beyond it. Complete the wall run, then jump to the second wall and brake again, continuing straight.
Project yourself towards the opening of the tunnel, reaching the second totem and also moving towards yet another wall. Passed the last of the Crusher series, projecting yourself forward. Park on the scale, continuing north and getting rid of the bats.
Gunrunner
Get to the room at the end. Climb up the wall, back to the ventilation shaft and cause the gel to detonate, clearing the enemies in the area.
Pull the ventilation duct down, projecting yourself up to begin the fight, going through the nearby pipes. Complete the various scenes in Quicktime, then get rid of the group of opponents in the area.
The Perfect Crime - Sixth Part
You will hear some music. Proceed north to find the musician in the lower area of the city. Examine the ship north of the map, retrieving the body immediately below. Examine his left leg, then his left shoulder, then his left finger.
The Perfect Crime - Seventh Part
Head to the Pretty Dolls Parlor, near the lower Founder level. Locate the Riddler trophy by going through the ventilation ducts. Blow up the walls to reach the main enemy. Try using the explosive gel, preferably hitting the subjects on the ground.
After you have finished the first five, position yourself near Pyg and counterattack three times, thus throwing the last knife. Finally, take advantage of the explosive Batarang, combining it with the combo. When all the minions are finished, use the panel near the door to bring Pyg back to GCPD. Head to the clue room to observe the dialogue.
City of Fear 59%
Return to Bleake, heading towards the clock tower. Approach the computer from the center so you can use it. Continue towards the studies, moving towards the roof. Get rid of the nearby patrol, then move to the shaft at the back.
Make a quick melee attack, then use the voice on the elevator to enter. Select a character and send him to the opposite side, making him recover his weapons. Use ventilation ducts to eliminate subjects in the area. We also recommend that you always try to dodge the subject with a gun. Leave the gunslinger for last, counterattacking repeatedly as you KO him.
Panessa Studios
Jump into the elevator and go down, completing the next quick combo. After you get rid of the enemy, hit the door and quickly get rid of the brute. Move towards the statue, then continue beyond the door. Get rid of the enemies around the central area, then destroy the ammo in the corner.
After you've cleared the first wave of opponents, the second wave will appear - target the biggest enemies to quickly maximize your chances of victory. Go up the stairs on the corner, getting rid of Miss Bell. Head to the corridor, locating the ventilation duct, waiting for Robin to be in the area. Head to the control area, entering the code "0539". Press the keys to activate the code, watching the video. Approach the dais, listening to Robin. Locate the five bombs in the area, then move towards Johnny and knock him out. Open the nearby portal, go outside and quickly hit the grate just below the portal. Quickly hit the higher dimension enemy.
Continue forward after the cutscene, continuing to the third level, starting the combo. During combat, we recommend focusing on dodging to maximize your chances of winning.
After the fight, climb to the top and start scoring trophies, then return to the lab, preferably using the grate beyond the corner. After yet another fight, go get Harley, returning her to her cells. You will then have to enter the cell. Turn around and exit to locate the next area. Talk to Robin, giving him information about Barbara. Talk to Harley more in the nearby cell. Exit, jump into the Batmobile behind the studio.
Gunrunner - Part Four
Follow the truck back to Bleake. When he enters the garage, try to open the door, then lead the Batmobile into the sewers. Follow the marked path, hitting the enemies at its end. Jump out and use the panel in the control room. Return to the Batmobile, opening the nearby portal.
Climb up, then begin the series of shots towards the nearby holes, freeing yourself of the enemies, dodging and hitting repeatedly. Collect the explosives, close the door and start the detonation.
Gunrunner - Part Five
Exit and follow the sewers until you reach the founder. Climb to the top of the building, continuing towards the crane. Get rid of the sniper, then use the bat-vision to locate the red triangle: use it as an indication to kill the enemies. Then use the panel to go down, listening to the voice of your ally. Enter the conduit, using the hack to disable and destroy the turret. Move along the shaft, repeatedly using the combos to pulverize the group. Restart the previous routine to go and finish the level.
City of Fear 72%
Head to the sign near the botanical gardens. Hack a tank, so watch out for the patrolling cobra tanks in the area. Approach the chariot furthest away from you, chase it, then hit it quickly. Then go outside and use the road to your advantage, descending along the wagons. Move to the roof to locate Ivy. Head to the ship, then get rid of the doctor then kill the 8 enemies in the room nearby.
Locate the yellow objects inside the bat vision. Tell your characters to head towards these objects, causing them to explode. Use the item on the left, telling the doctor to visualize it. After he is KO'd, wait on the roof and finish off the subjects that appear below. Head to the cell, using the bat vision. Follow the orange footsteps as you move along the path. Proceed outside, then return to Miagani and continue towards the Founders. Follow them to the cemetery, trying to hit the ground. Move south.
Get rid of the drones coming from the left. Hack the minons, look left to locate the giant tank. Go back to the back, moving along the ramp in the center. Get rid of the tank, then use the missiles. Open the container, activate the generator, then proceed down. Move along the tunnel, pass the barrier and then continue to the end of the path. Exit and enter the grate. Hack the tank, then proceed to sabotage. Let the "mobile" tank move forward, past the next area to reach the pipes. Go to the hideout and open the portal.
Also open the following gate, moving up the ramp. Go up to the control room, unlocking it. Continue to the next barrier, then to the next ramp. Let go of the ramp, then move forward and project yourself over the ramp itself.
Move forward again, then moving left to locate the bottom of the radar. Hack the three tanks, always staying near the church. When one of the turrets "comes to life", destroy it quickly. At the same time dodge the attacks and fire the missiles quickly.
Cloudburst Showdown
Head to Bleake, starting the cobra dance. Try to stay away from the tank, moving forward until you see the cobra. Destroy it, then leave quickly. Repeat the procedure 2 more times.
You will now have to approach and carry out some scans, revealing the presence of 4 weak points on each side. You will have to follow the "cloud" aiming completely towards the target. A bar will appear on the screen, proceed towards the radar and follow it until the light passes you.
Move along the fully "open" areas of the road, then throw yourself forward. Repeat this routine four more times. After the fourth repetition, continue to use the machine gun to dodge the missiles. Having KO'd the opponent, go back to Miagani and examine Poison Ivy.
Heir to the Cowl - Parte Quarta
Head to the top of the statue, in the middle of the waterway, between the islands. Repeatedly throw batarangs. When you notice a blue "field" around you, throw the blade. Quickly continue the combo, using the neighboring leapers as support.
City of Fear - 79%
Talk to the penguin, then enter the communications room. Continue to the clue room, recovering the gun.
Go back to the founder and find yourself inside a mannequin shop. Examine the street, locating the manhole. Park the Bat-Mobile in the area. Exit and move to the sewers, activating the generator. Enter the ventilation shaft, knocking back the enemies in the area. Shoot the only soldier in the area, telling him to open the door for you. Use the Batmobile.
Jump out of the vent, using the panel to clear the way. Jump onto the pipe, using the Batmobile to destroy the wall. Enter the hidden room, flipping the switch to cause the barriers to drop. Move the Batmobile towards the shaft, then launch towards the hook, causing it to descend. Retrieve the trophy, then fire five shots at the nearby cell to overload it. Keep going by opening the door with hackering. When the first fan stops, lower the Batmobile in the area. Jump over the nearby wall, entering the elevator. Use the recorder to go down two levels, then use the gel on the wall to cause it to explode.
Stop the first fan, drop the Batmobile just below. Get rid of the next four soldiers. Fly down, then jump over the right wall to enter the elevator. Use the recorder to go down two levels. Reach the wall to make it explode. After the fight, open the door, entering the shaft and locating the cell on the left. Swerve to the right instead, firing a charge at the generator. Use the nearby fan to retrieve the trophy. Then the panel to open the elevator. Blow up the wall, then drop down the path and go up to the alcove. Climb up the ventilation shaft. Walk along the pipes. Turn around and use the destroyer to pulverize the crates of weapons in the corners of the room. Kill the medics, then retrieve the two trophies in the area.
Use the panel in the corner, exiting the room and proceeding along the duct. Turn the corner, disabling the sentry and projecting yourself down the next conduit. Hit the nearby cell five times, opening it. Switch to using the Batmobile, making it go down to the platform. Hook to one of the nearby points, causing it to move counterclockwise to cause the platform to descend. Jump into the batmobile.
The Excavator
Examine the radar, locating the three red marks at the end of the passages. Wait near the entrance to the tunnel, turning towards the tunnel. Use the combat mode to hit the character with the cannon. Examine the radar, locating the next red flash on the map.
After the three tunnels, move to the northwest corner, where a gate will open. Do a super eject. Move up, then proceed to Gordon. Move to one side, then go left.
Arkham Knight
Stay low initially, moving towards the wall on the opposite side. Then jump to Gordon. Moving on to Round XNUMX, get rid of the soldiers and the drone. Approach the room with the knight, then project yourself beyond the glass. Move on to the third round, then enter the opening in the wall. Get rid of the next wave of enemies and the nearby drone. Approach the rider, moving down and retrieving the trophy. So, go towards the railing next to the elevator.
Exit outside and continue along the ground. Move around the fourth game zone, getting the trophy on the back. Go back to the center of the station, following the drone. Move up the stairs, going along the right side of the turret. Project yourself towards the wall, then deactivate the turret on the left. Quickly project up to finish.
Scarecrow
Get rid of the small enemies by dodging the batarang. Jump on the elevator, then look at the cutscene. Switch to using the Batmobile, then charge up to level 3, destroying the missiles. After the fight, proceed to the area closest to you, load up the passengers and return to GCPD. Talk to Stagg.
City of Fear 89%
Head to the clock tower, stopping near the railing, locating the two snipers. Get rid of the closest sniper, then move on to take out the next one. After the body has been located, quickly get rid of the subject assigned to using the cannon.
Enter the tower, using the computer on the third floor.
Video trailer 2
Lamb to the Slaughter
Head to the lady of Gotham in the center of the island. Fly forward, then get rid of the subjects in the area.
Riddler's Revenge - Parte 10
Using the electric charge, go back to the orphanage and proceed to the last room of the exam, until you reach a puzzle, and switch to use Catwoman to proceed to the roof. You will therefore have to "open" a target for the laser. The two charges in the recorder will cause the blocks to move.
More simply, you will have to position Catwoman in the area, and then move the blocks sideways so that Catwoman is positioned in the center of the last row of blocks. Reposition it therefore in the central part of the central row. So tell her to dive twice, to dodge the blades in the area.
Moving on to the second puzzle, you will also have to deal with a second laser. Here are the movements to follow to solve the puzzle:
1. Place Catwoman on the second slot on the second row.
2. Place Catwoman on the third slot of the fourth row.
3. Place Catwoman on the first slot of the third row.
4. Place Catwoman back on the first slot of the third row.
Then keep moving to dodge the blades, while also staying crouched. As for the third puzzle:
1. Leave Catwoman on the first slot of the third row, moving the first row down.
2. Leave Catwoman on the first slot of the third row, moving the first row to the left.
3. Leave Catwoman on the first slot of the third row, moving the first row down.
4. Remove Catwoman, then move the first row to the left.
5. Place Catwoman on the second slot of the first row, then move the first row to the left.
6. Place Catwoman on the second slot of the first row, then move the first row down.
Head into the first room, recovering the key.
Riddler's Revenge - Parte 11
Proceed to the outside, then get rid of the robots around. Also get rid of the nearby cat to finish the mission successfully.
City of Fear 90%
Go back to GCPD and talk to your friends. Climb to the platform above, using the Batmobile to get rid of the nearby subjects.
Move to the portal, look to the right, then pull the fan down. Follow the path outwards. After the cutscene, turn left, looking at the generator from the roof. Tag the drone guard post at the garage entrance. Drop down, run to the door and walk forward.
Use the combos to get rid of the brute in front of you. Then use the REC on the three generators to reactivate the lights. Call the passage, proceeding to the starting line. Go out and use the flying drones, then focus on the small tanks. Dodge repeatedly, then dash out of the way to reach the roof. We recommend an aggressive tactic to maximize your chances of winning.
City of Fear 94%
Head to the study, then drop down to locate the cells. Talk to Harley, then go back up. This will bring you to the end of the game. Head towards the "Miagani" side of the bridge of piety, moving towards the door immediately below. Enter the back of the truck. Shoot at the chairs, then place your character near the cell, next to the exit.