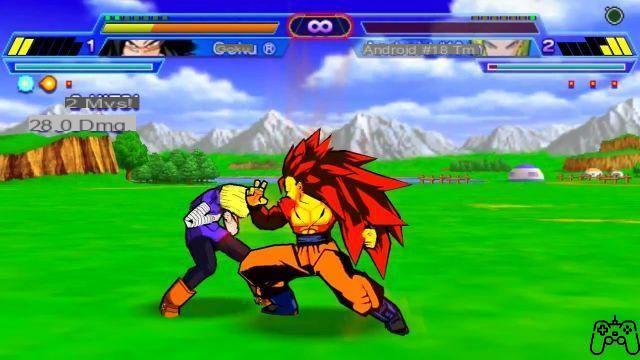
Basic Controls
Button X: Guard.
Circle Button: Ki Attack.
Triangle Button: Throw / Kick.
Square Button: Run / Punch.
Directional Buttons: Movements.
Control Stick: Movements.
R button: Avoid using the directional arrows.
L button: Charge.
Start Button: Game Paused.
Select Button: Fills the Ki but only in training mode.
Advanced Controls
Fast fly to your opponent: Press left or right twice quickly.
Special Attack: Press Circle and Left or Right at the same time. Press and hold to charge the shot and make a stronger attack.
Final Attack: Press Circle and the up arrow at the same time (5 Ki bars). Press and hold to charge the shot and make a stronger attack.
Socket: Square Button and X Button at the same time.
Transform: Press Circle and Down Arrow at the same time (4 Ki bars).
Avoid (with Teleportation): Press X and the Arrow that goes towards your opponent during his attack.
Final Hunt: Press R after flying your opponent. Hold R to do the Combo three times.
The Challenges of the Game 1-10
Challenge 1
Hit it twice with the Aura Burst Smash!
All you have to do here is press R and then the Triangle right after. This will cause you to punch your opponent and have a special short pause in the game.
Challenge 2
Hit five times with the Aura Burst Smash! And beat the enemy.
Easy enough, all you have to do is use five Aura Burst Smash (R and then Triangle) and then take out the enemy.
Challenge 3
Hit three times with the Aura Burst Blast!
Easy Goal, hit R and then use the Ki attack strike the right way three times.
Challenge 4
Hit with the Special Attack!
Press Forward and Circle to use three Special Attacks hitting your opponent.
Challenge 5
Eliminate the Opponent with the Special Attack!
You will only have to keep hitting the enemy and bring him under 50% of his HP in the final bar and then hit him with the Special Attack and win.
Challenge 6
Use your Final Attack!
You just have to press up and circle with 5 Ki bars and hit your opponent with this shot.
Challenge 7
Beat the Opponent with the Final Attack!
Get your opponent to 100% of the last bar and then hit your opponent with this shot.
Challenge 8
Use the Aura Burst Guard five times!
When your opponent tries to attack you just need to hold X and then press R to use the Aura Shield and block the Attack. You will have to do this five times.
Challenge 9
Take no damage for a certain amount of time (Beginner). Time: 15 Seconds!
This challenge will be simple for some while for others it will be nearly impossible. You can get help to pass this test by going in a circle using the stick and holding it down. This will cause your opponent to only attack the air as you circle around him.
Challenge 10
Take no damage for a certain amount of time (Normal). Time: 30 seconds!
This challenge will be simple for some while for others it will be nearly impossible. You can get help to pass this test by going in a circle using the stick and holding it down. This will cause your opponent to only attack the air as you circle around him.
The Challenges of the Game 11-20
Challenge 11
Take no damage for a certain amount of time (Hard). Time: 60 seconds!
This challenge will be simple for some while for others it will be nearly impossible. You can get help to pass this test by going in a circle using the stick and holding it down. This will cause your opponent to only attack the air as you circle around him.
Challenge 12
Take no damage for a certain amount of time (Z). Time: 30 seconds!
This challenge will be simple for some while for others it will be nearly impossible. You can get help to pass this test by going in a circle using the stick and holding it down. This will cause your opponent to only attack the air as you circle around him.
Challenge 13
Use Guard Crush!
Really easy this challenge, you will have to hit and break through until the enemy guard gives up.
Challenge 14
Eliminate the opponent using only the Guard!
Not too difficult but a bit boring. All you have to do is fully charge and then do the Aura Burst Smash and eventually release the Final Attack. You will have to go through this procedure twice which will take you quite a bit of time but it won't be too difficult.
Challenge 15
Use the Final Hunt twice!
You just have to blow the enemy up and then press R behind him to hit him in the back and then press R two more times to finish him off with the Ultimate Fighter Attack.
Challenge 16
Eliminate your opponent with the Final Hunt Attack.
Bring your opponent to 75% of his final HP bar and then use the Ultimate Hunt Attack.
Challenge 17
Use the Teleporter 3 times!
When your opponent attacks you just need to press forward + X to teleport behind him and hit him. Do this three times to finish the level.
Challenge 18:
Eliminate the opponent in 120 seconds!
This will be the simplest challenge, you will just have to fight normally and have all the time you need to win.
Challenge 19
Eliminate the opponent in 90 seconds!
This will be the simplest challenge, you will just have to fight normally and have all the time you need to win.
Challenge 20
Eliminate the opponent in 60 seconds!
This challenge can be difficult if you get confused during the battle. The key to doing this smoothly will be using the Final Attack to defeat the opponent easily. If you use it almost immediately you should have time to do the rest with ease. Be aggressive and don't waste unnecessary time.
The Challenges of the Game 21-30
Challenge 21
Winning with a Perfect!
It will not be easy I tell you right away, you will have to fight being very, very careful and avoid any attack that will come to you from the enemy, especially the Ki shots that are rather difficult to avoid. An easy way to win will be to keep flying around in circles and hit the enemy with special attacks while trying to avoid his attacks.
Challenge 22
Win with at least 50% Energy
This will be simple, you fight normally and you should meet the requirements to pass the challenge, avoid the head shots and you should succeed without major problems.
Challenge 23
Win with at least 70% Energy
This too shouldn't give you too much trouble, you can take some damage and you will still do it, try to use the Final Attack to quickly resolve the encounter.
Challenge 24
Win with at least 90% Energy
This looks pretty much the same as ending up with a Perfect but at least here you can get a couple of hits and hope to make it. Fight very carefully and avoid any attacks, especially Ki hits. Finish it off with a Final Strike when the enemy is at 50% of the second bar.
Challenge 25
Winning without using Energy Attacks!
Easy, you just have to keep hitting him with kicks and punches until you knock out the opponent.
Challenge 26
Winning without using the Special Attack!
Without problems, too, use the usual and always useful kicks and punches.
Challenge 27
Use the Delete Upload five times!
Press and hold Triangle but before the attack is over, press R to cancel it. Do this five times.
Challenge 28
Use the Attack Charge three times!
Press and hold the Triangle to charge an attack and then hit the enemy with this attack three times.
Challenge 29
Use the Attack Charge seven times!
Press and hold the Triangle to charge an attack and then hit the enemy with this attack seven times.
Challenge 30
Avoid four times!
Easy objective, you just have to hold X when the enemy uses physical attacks.
The Challenges of the Game 31-40
Challenge 31
Avoid seven times!
Easy objective, you just have to hold X when the enemy uses physical attacks.
Challenge 32
Avoid the Takes 3 times!
When the enemy tries to grab you, you'll have to try to grab him at almost the same instant. So when you see that the Trick proves, grab it using X + Square.
Challenge 33
Stop the Fall 4 times!
When you are about to hit the ground after a flight, immediately press down + X to break the fall, do it four times to move on to the next challenge.
Challenge 34
Reflect the enemy's Energy Blast 6 times!
Each time the enemy uses his Ki Blast you will have to press forward + X to reflect his hit and make him return to the sender. You will have to use the forward + X counter move just when the energy ball is very close to you.
Challenge 35
Win without using the Guard button!
It will be simple, you will just have to fight normally to avoid big problems.
Challenge 36
Win without using the Speed button!
You can't run here, you just have to use Special Attacks and hits.
Challenge 37
Win without using the clash button!
Use speed and special attacks, you shouldn't have any problems whatsoever.
Challenge 38
Win without using the Energy Button!
Use only kicks and punches and eliminate the enemy physically.
Challenge 39
Win without using the Aura Burst button!
This is going to be so easy it won't even be fun. The Aura Burst is not a big loss to your attacks, you will just have to fight normally and everything will be fine.
Challenge 40
Winning without using the Ki Charge button!
Again this will be simple, you cannot use L so you will have to fight normally. You can still gain Ki using physical attacks so you won't have a big loss.
The Challenges of the Game 41-50
Challenge 41
Make a five combo!
You will have to use the Combo using the Square and hit at least six hits.
Challenge 42
Make a Combo of ten!
You will need to do a Combo that will end up with a Final Hunt attack.
Challenge 43
Make a Combo of fifteen!
Release a Final Attack such as a Super Spirit Bomb. After having given 9 hits you will have to use the second part of the attack and thus arrive at a total sum of 19 useful hits to pass the level. This final attack works with Gohan, Brolly, Trunks, and many more.
Challenge 44
Make a twenty combo!
And here we have gotten to where many have big problems moving forward to the next challenge. Grab Future Trunks in Super Saiyan version and make his Final Attack. After six hits, press circle again to activate the second part of the attack and you should end up with sixteen hits.
After the Great Energy Ball has hit the enemy correctly, start pressing Square to continue in the combo and get at least 22 hits by passing the challenge.
Challenge 45
Hit the opponent three times from behind!
To solve the problem, use the Teleportation. When your opponent attacks you just need to press forward + X to teleport behind him and hit him. Do this three times to finish the level.
Challenge 46
Do 1200 Damage with a single Combo!
You just have to grab Normal Goku and release his fury by charging the Spirit Bomb.
Challenge 47
Do 2000 Damage with a single Combo!
Take SSJ3 Goku and start in the form of Normal Goku. At the start of the battle, fully charge up and launch the Super Spirit Bomb Charge. After 9 hits of the Normal Goku press Down + Circle to activate the second part of the attack and you should get to 2200. The Combo should have 19 hits.
Challenge 48
Survive as long as you can! Time: 5-10 minutes
You just need to hold the Control Stick down or up and keep flying around in circles. When you can use the Final Attack because it will waste a lot of time. Use this method to never die and pass the challenge without difficulty but with a lot of boredom.
Challenge 49
Give as many hits as you can! At least 20 shots
Here is a way to overcome this challenge easily. Grab the Future Trunks and send the enemy as high as you can into the air. When he is at full height hold the control stick forward and when you get close to the enemy press Square (Trunks should do a flying kick). The kick will be slow but it should give you a chance to hit at least twenty shots before the enemy finally reaches the ground.
You will be able to hit up to 33 hits using this method if you are quick to hit Square.
Challenge 50
Cause Huge Damage! Damage: 5.000
Not very difficult even if with certain characters it can be difficult. The best to win the challenge is Vegito, first equip him with all the special powers with the cards you can. Then remove it and hold R while selecting it to start in SSJ mode. Now quickly load the Final Kamehameha very fast.
Charge when the Ki gauge is at 0 or 1 and then hold fire and hit to do damage that should exceed 5000 damage points.
Main Characters: Goku
Advantages :
Dragon Strike has a high special attack priority and can initiate Combos. He will be able to outsmart almost all physical attacks (apart from some high priority deadly moves like the Pikkon Hyper Tornado). In this game, compared to the rest of the series, it is even more powerful and will even be able to cope with some ray attacks.
His Ultimate Power has an excellent explosive charge, it will raise Goku's attack by 184% in SSJ4 while by 181% in SSj3. It will only last ten seconds but if you manage to place a combo you can do some truly incredible damage. His forward + Kick will be the best of the whole game, he has a huge priority and it's easy to hit the enemy.
This move will take your opponent higher where Goku can do more damage and fight better than on the ground. The Kaioken is a good charge that can be used five times in a match, if used in a row it will increase Goku's attack by 311%. It costs a lot of energy to do it but increasing it will be essential to win the most difficult fights.
Disadvantages:
He doesn't have a good opening shot at all, his back + Kick is of no use in this game. You will hardly reach the target and even worse you will not be able to use it for a Combo or a Counterattack. His Ki increases very slowly, Goku will only have two and a half bars of Ki on the ground with his main Combos and even less if the Combo is Aura Burst and Punches or his Super Dragon Strike.
Main Strategy:
In this game, the use of the opening move Back + Kick makes no sense given the difficulty (almost impossible) of tying it to a combo and the difficulty of hitting it. At this point, to win with Goku you will have to risk and aim for an attacking strategy. Starting with Forward + Punch + Kick + Kick will be an absolute risk and there will be several chances that it will quickly lead you to defeat.
If you choose the other, however, it will be a slow agony and almost certainly also in defense you will lose in front of opponents at your level or stronger. If this entry move works for you, you can immediately aim for a hooking combo and maximum damage that will take you to a sure advantage, if you fail you are defenseless from the opposing Combo but I tell you immediately that the risk will be well repaid.
At close range you can use Back + Punch + Punch + Punch + Kick. Remember that Kick attacks are slower than Punch attacks. Back + Punch + Punch will be faster than Forward + Punch + Kick so if you can put two chained hits against someone charging their Kick attack you will force them to Teleport or a Return Combo. Back + Punch is also faster than Forward + Punch and is better as a transition grip against Attack Block.
To be able to compete with Goku against the rest of the game's Super Heroes group you will not only have to risk a lot but you will also have to fight in an unconventional way. Another character used in this way will be Piccolo but he is much better than Goku in this game. Use the forward move + Kick which with its very high priority will give you a good advantage in attack and will be able to disable the opponent's attacks, also try to fly in the air because if you force your opponent to fly you will have an advantage in staying high .
If you manage to cancel the enemy attack, you will bring the opponent very close to you and so you can use the back strike + Punch + Punch + Punch + Kick. Even for Ki it will be impossible to give a precise strategy, you will have to risk something if you want to have some advantage from this ability. Use the Aura Burst + Left + Energy Button to take advantage, remember that your opponent will not be able to block it and take advantage of the Ki, they will have to avoid the attack.
To use your Burst Charges at best you will have to activate it five times and then release it when you are SSj3 or better SSj4, only in this way will it have maximum destructive power.
Combo :
The legend :
P = Punch Attack
C = Kick Attack
> = Advance Towards the Opponent
<= Allontanatevi dall'Avversario
/ = High key of the Pad
/ = Low key of the Pad
E = Energy button
- = Cancel
* = Stun
'= Super Charge before making the move
[AB] = Aura Burst
- [AB] = Cancel Aura Burst
Beginners section (without cancellations)
Base
CCP> E [Kamehameha] 11 Hits, 761 Damage. Opponent gains 0.6 Ki Bar.
Kaioken
PCC <= "" [pugno = "" barra = "" colpi, = "" danno. = "" Del = "" drago] = "" guadagna = "" ki. = "" L'avversario = "" p = "" super = "">
Intermediate Section (without Burst cancellations)
SSJ2
> PCC-,
And [Kamehameha] 14 Blows, 1122 Damage. Opponent gains 0.9 Ki Bar.
SSJ2
> PCC-, <= ""
Advanced Section
SSJ3
>PCC-[AB]C*, [AB]P*,
SSJ4
(Combo must be done while in the air)
>PCC-[AB]C*, [AB]P*, >>P*,
Main Characters: Piccolo
Advantages :
Piccolo has the chance to hit an opponent with combos in an incredible way, the best in the whole game. Even he can hit three times farther than the best of all the rest of the game's characters. This will be the great strength that Piccolo has in the game and that you will have to exploit if you choose this character, it depends on your ability but if used well he will be practically untouchable.
Another feature will be its incredible damage capacity. Usually a Combo can hardly get above 3000 damage while your friend will easily reach above 3200. Another good thing Piccolo will be one of the few characters who have a regenerating move in their arsenal of moves.
Regeneration gives you a 1500 point bonus after activation and will be the best move of its kind in the entire game. And now after all these good things let's move on to the problems of the character.
Disadvantages:
As in the previous chapter, also in this new game Piccolo is practically free of defects. Each of his attributes range from above average to exalted. His only stats that should be penalizing but his super shot Soccer + Soccer + Soccer can be done even from the middle distance without problems. He may not be as effective as Vegeta, Krillin or Trunks but he will certainly be better than most of the characters you will find in the game.
Main Strategy
In this game the Starting Combo will start with a Kick. Like all attacks of this type this attack will be loaded and canceled once used. If you use it against a Punch attack it usually manages to pass (it depends a lot on timing and distance) but there are times when you will be blocked.
The advantage is that Piccolo's Kick attack can go all the way to the other side of the screen and therefore brings enormous unpredictability. If you don't believe it, do a test in training mode and move away from the opponent by four long steps.
Use the Kick from there and you will see how the hit will start the Combo by bonding perfectly to the next Kick + Kick, whether loaded or not. To make it better the first kick tracks the opponent so as to save you from any Aura Bursts or side steps and being sure that whatever the opponent does the next two shots will hit, it will not always be like this but the possibilities hooks are high.
Combo :
The legend :
P = Punch Attack
C = Kick Attack
> = Advance Towards the Opponent
<= Allontanatevi dall'Avversario
/ = High key of the Pad
/ = Low key of the Pad
E = Energy button
- = Cancel
* = Stun
'= Super Charge before making the move
[AB] = Aura Burst
- [AB] = Cancel Aura Burst
Beginners section (without cancellations)
Number 1 : C'C'C*, P*
E [Destructive Wave] 13 Hits, 1111 Damage. Opponent gains 0.9 Ki bars.
Number 2: C'C'C*, P*, PPPP "" maou]="" p="">
Number 3: C'C'C *, PP ^, / EE [Deadly Grenade] Activate the second E on hit number 19. 24 Hits, 2254 Damage. Opponent gains 0.7 Ki bars.
Intermediate Section: without Kara Burst cancellations)
Number 1: C'C'C *, P *,> PPPC-,
Number 2: C'C'C *, P *,> PPPC-, PPPP <= "" [hit = "" bars = "" hits, = "" damage. = "" Earn = "" ki. = "" the opponent = "" maou] = "" p = "">
Number 3: C'C'C, P *,> PPPC-, PPPPC-, / E [Deadly Grenade] Activate the second E on hit number 26. 31 Hits, 2461 Damage.
Advanced Combo: (you will need to know the whole Combo System)
Number 1 : C'C'C, PE-[AB]C*, [AB]P*, >PPPC-,
E [Destructive Wave] 21 Hits, 1459 Damage. Opponent gains 2 Ki bars.
Number 2 : C'C'C, PE-[AB]C*, [AB]P*, >PPPC-,
<= "" [hit = "" bars = "" hits, = "" damage. = "" earns = "" ki. = "" the opponent = "" maou] = "" p = "" pppp
Number 3:
PPPC-, C'C'C *, PE- [AB] C *, / E [Special Beam Cannon] 16 Shots, 1717 Damage. Opponent gains 2 Ki Bars.
Number 4 : C'C'C*, PE-[AB]C*, [AB]P*, >PPPC-,
<= ""
Main Characters: Krillin
Advantages :
His start Kick + Kick + Kick + Kick + Kick is the second best starting Neighbor Combo of the entire game (only Buu Boy Starting Combo beats him). It has a high priority for each shot and a small reload time from shot to shot. You can do small chains with him step by step making Krillin one of the worst opponents in hand-to-hand combat despite not having any throwing combos.
His Ki is great, as Pikkon has a lot of erasable chains (except the Krillin slip instead of the traditional Ax kick) and his best Combos will build around 7 Ki Bars for him. The Sun Fist (or as it is more properly defined Solar Flare) is great and has the best stun time of the whole game allowing you to chain the various combos with absolute simplicity. The Combo is quick and easy to make making it useful even if you don't really want to do a Combo.
His High + Kick- is very strong, he hits from a great distance, competing with Trunks' sword attack as his starting move. Even if you get hit by the initial attack, you can get into a low block and start a backup combo.
Disadvantages:
The only real downside to taking Krillin is its low power, even with its strongest Combo you will barely get 2200 damage.
Main Strategy:
The best form for Krillin will be the Enhanced one that you will have to unlock, play with the normal one only if you want a real difficult challenge.
Krillin is a unique Character in this game and cannot be placed in any of the usual categories for this type of game (attack, defense, etc.). His initial shot will be either the Kick + Kick + Kick + Caclio + Kick- or the Alto + Kick-. With the first you can chain the other combos of the character to the great.
The first starting move has a short range, a high priority with multiple hits and will be lethal even if your opponent hits at the same time as you (works even after taking the first initial hit). As with all chained shots this too can be charged with each shot to break the enemy's guard and will be really hard on your opponent when you charge the shot and therefore when to use the side step.
Even if your enemy manages to avoid the blow with a side step, your character will automatically align with the enemy and the last shot with an automatic side step. This move is therefore the ideal starting point for any match and you will not have any limits or particular counter indications. If you have the advantage of Ki or if both contenders are using Ki crossed with the rest the starting move will still be particularly effective.
Combo :
The legend :
P = Punch Attack
C = Kick Attack
> = Advance Towards the Opponent
<= Allontanatevi dall'Avversario
/ = High key of the Pad
/ = Low key of the Pad
E = Energy button
- = Cancel
* = Stun
'= Super Charge before making the move
[AB] = Aura Burst
- [AB] = Cancel Aura Burst
Beginners section (without cancellations)
Number 1: CCCPP *, PC '= "" [solar = "" flare] = ""> E [Destroying Sphere] 8 Hits, 1101 Damage. Opponent gains 0.6 Ki bars.
Number 2: CCCPP, PC "[ab]c""" 1.1"" 15"" 1651" " caricate " " colpi " " danno " " delta " " distruttrice " " flare " " forza ] " " guadagna " " ki. " " leggermente " " l' avversario = "" p="">
Intermediate Section: without Kara Burst cancellations)
Number 1: CCCCC- / C-.
PPP<="" [sphere="" [solar="" e="" al="" avversario="" barre="" caricate="" colpi,="" danno.="" della="" dietro ="" distruttiva="" e="" flare]="" forza]="" guadagna="" ki.="" laterale="" leggermente="" l'avversario="" p="" passo= "" you="">
Advanced Combo: (you will need to know the whole Combo System)
Number 1: / C ~,
> P *,> PPPE [Destroying Sphere] 21 Hits, 1720 Damage.
Number 2: / C ~,
>P*, >PPP
Main Characters: Future Trunks
Advantages :
With Future Trunks you will have enormous ease in making very effective combos. His classic Kick + Kick + Kick has incredible attacking ability while his back + Kick + Kick offers a quick and easy defensive starting combination. Both initial moves are easily canceled with a side step to then take advantage of your teleportation and easily end up behind the unsuspecting enemy.
Evasive Kick is a great counterattack especially against characters I can hit from medium or long range like Piccolo, Trunks Swordsman or Broly. Since this shot is loadable it can also be easily canceled so you have no reason not to use it always and under any circumstances. Just beware of the small initial charge time that won't allow you to fast counterattacks. This Character can overcome the 3000 damage point barrier in one of the few areas where it surpasses the Swordsman Trunks. His mixed blood gives you an increase in attack and defense of about 20% making this character lethal when he transforms into SSJ and you will be able to use him in this form.
Disadvantages:
You will not have the USSJ, although widely used by him in the final part of the Saga you will not be able to use it here as they did with Goku and his SSJ4. If this is not injustice.
For the rest, Future Trunks has no weakness in his skills, at best he does not excel in all categories and is overtaken by Krillin and Bardock in close combat and his attacks from afar are excellent but not exceptional Piccolo type.
Main Strategy:
The beginnings to do with Trunks SSJ are always Soccer + Soccer + Soccer + Soccer and Back + Soccer + Soccer. These attacks make you advance incredibly and against opponents that you can press immediately (the slow ones to be clear) the first opening will be mandatory.
This attack will be incredible for its fury but it needs fast charges to perform at its best. The best Kick to load is the third so as to do it and finish it with a quick kick. The priority will be good but the series will not be very fast so you can stop it whenever you want and this is where the Back + Kick + Kick series will come to your aid.
This kick is fast and can be used either chained to another set or quickly canceled with a side step. Grapples are also another great option as you can use a perfect attack using Back + Punch + Back Punch + Punch + Forward + Energy Button.
Trunks' perfect shot to stun will be Kick + Kick + Kick and Forward + Punch + Punch + Kick + Kick but sadly the first kick of the second set will be high and therefore fail miserably against Young Gohan, Krillin and Gotenks.
This seems like a minor problem in high football but it could become a nightmare against a good player who will use Krillin well. Forward + Punch + Punch + Kick + Kick will be Trunks' fastest stun streak so it will become extremely important against very fast characters who will likely avoid your initial hits with ease.
The easiest way to solve the height problem in the shot above is to throw your opponent into the air. To do this use the simple Back + Punch + Kick so make sure you finish the first combo with this little streak so you don't worry about the high kick you do next to stun. Another reason to take the battle into the air will be that the Kick + Kick + Kick + Kick hit can't connect from the ground and this move will be essential if you want to fight against Trunks.
If you have an additional Ki bar you can immediately chase your opponent after Back + Kick + Punch by pressing and holding the Burst (the R button) you will automatically go into the air.
Combo :
The legend :
P = Punch Attack
C = Kick Attack
> = Advance Towards the Opponent
<= Allontanatevi dall'Avversario
/ = High key of the Pad
/ = Low key of the Pad
E = Energy button
- = Cancel
* = Stun
'= Super Charge before making the move
[AB] = Aura Burst
- [AB] = Cancel Aura Burst
All combos here are done on the ground in SSJ but are also possible without transformation.
Beginners section (without cancellations)
Number 1: CCC *, »P,
E [Finish Buster] 9 Hits, 1117 Damage.
Number 2: CCC *,> PPCC *, »P,
PPC> E [Finish Buster] 14 Hits, 1324 Damage.
Number 3: CCC *, »P,> PPCC *, ^ E [Cyclone Buster] E (15 Hits),
E [Finish Buster] 29 Hits 2647 Damage.
Intermediate Section: without Kara Burst cancellations)
Number 1:
PPC-,> PPCC> E [Finish Buster] 20 Hits, 1657 Damage.
Number 2:
PPC-,> PPCC * ^ E [Cyclone Buster] E (25 Hits) 35 Hits, 2610 Damage.
Number 3: CCC~, PPPPC, »P
PPC-,> PPCC *, ^ E [Cyclone Buster] E (26 Hits),
E [Finish Buster] 40Hots, 3109 Damage. Opponent gains 2 Ki Bars.
Advanced Combo: (you will need to know the whole Combo System)
Number 1:
PPC-,> PPCC *, »P, PPPPC-, CCCC-, ^ E, E [Cyclone Buster] E (31 Shots),> E [Finish Buster] 42 Shots, 3193 Damage. The opponent gains 2.4 Ki bars.
Solution Summary
Basic Controls
Advanced Controls
The Challenges of the Game 01-10
The Challenges of the Game 11-20
The Challenges of the Game 21-30
The Challenges of the Game 31-40
The Challenges of the Game 41-50
Main Characters: Goku
Main Characters: Piccolo
Main Characters: Krillin
Main Characters: Future Trunks


