Please note:
The solution is based on the US version of the game for Xbox 360. There may be differences with the Spanish version and / or for other platforms.
Introduction - Leaky Cauldron / Diagon Alley
This is the "starting" area, from which all your missions will then begin. The main door acts as a gateway to the next levels, when you select it you will be explicitly asked if you want to "continue the story". The bulletin board can be used to re-play missions that you have already passed once. The cinema allows you to review all the cutscenes encountered up to the time of viewing. The back door allows you to reach Diagon Alley and in the basement you can create new objects thanks to the union of "golden bricks", recoverable along the course of the game. We recommend immediately to proceed to the exploration of Diagon Alley, containing several shops, where you can buy useful items for the continuation of the game.
Introduction - Hogwarts Castle
It is the main center for the continuation of the story; in addition to interacting with the other characters, you can take part in different "lessons" here, so as to learn new spells / learn about new game areas.
Primo Anno - The Sorcerer's Stone
Here are the missions you will face during the first year of Hogwarts school.
The Magic Begins
In the Leaky Cauldron, proceed to the back of the room, positioning yourself on the piece of floor in the form of LEGO. Press Triangle to switch to Hagrid, then view the pink circle. Press and hold the Circle key to cause the floor to rise. Use Harry to get to the switch, then drop down to the arrow. Use Higrid, performing a spell to open the door. Exit towards Diagon Alley. Hagrid will have to use Leviosa on the bricks on the ground. Get a red spider and yellow flowers (left-right), then have Higrid Leviosa use it on the ice cream cart, picking up a blue popsicle. Place it in the cauldron, then go up through the doors of the Gringotts bank. Pull the chain. Continue inward. Talk to Griphook, having him join your team. Move him to the yellow lock, hold Circle to make him open the gate. Create a portrait with Leviosa, then take it with Circle, opening your way to the new area. Proceed to the left, have Hagrid pull the chain, stopping the fire. Use Griphook to open the door, enter. Follow the arrow, towards Ollivander's shop.
Hogwarts
In your room, practice your magic for a while, shooting some energy through your wand. So proceed to the hall. Talk to Hermione. Try to get out, then shoot (with your wand) at the painting on the right twice to distract the jammer. Follow Nick left, down the stairs. Use the pipe to reach the switch, press it, talk to the wizard. You will therefore participate in your first lesson. Use Leviosa on the battery on the right. Then - by pressing Square - move the colored blocks, creating stairs to reach the second floor. Shoot the painting, then use Leviosa on the ghost that will come out of it. Always Leviosa on the batteries, freeing the second student. Right, rebuild the armor with Leviosa, freeing the third student. Then reach the entrance corridor; place the colored blocks on the purple base, as shown in the painting, opening you access to the next room. Go up the stairs, use Leviosa on the statue to the right. Then on the bookcase and on the pieces of the statue, recreating it. Return to the main corridor to gain access to the next main story event.
Out of the Dungeons
Right, send Scabber to repair the pipes destroyed by the Troll (by pressing the switches). Forward, to the globe. Shoot the shelves with the blocks, then reposition them on the purple panel, allowing you to get to the platform above you. Use Leviosa on the flashlight, causing a fire. Always with Leviosa, you can put the pieces together, a situation that will allow you to proceed. Leviosa on the pieces of painting, you will be able to disguise yourself as a woman and proceed beyond the door. Eliminate the troll (use Leviosa as soon as you see some LEGO blocks in front of him, shoot them towards his head). So take his club and slam it on his head to finish it.
Hogwarts
Attend your second lesson. Try using Lumos, pressing Circle to activate it and then reaching the screws to test it directly. Take the first piece of star on the right, the second on the lower floor, on the left. Then create steps, shaping the blocks at the back of the room. At the top, use the light to retrieve three more pieces. Head down and join the potions lesson. You will need to retrieve three ingredients: a broken flower (on the left, use Leviosa on the tube); a piece of arm bone (beyond the left corner, after the golden door); a snake tooth (use Leviosa on the snake in the middle section of the room). Throw everything into the cauldron, then use the Circle key to drink it. Pull the chain to the right. The following lesson will be about using herbs. Use Lumos Solem to hit the gold circles next to the vines (you'll need to quickly destroy the tubes on the right and the cart on the left first). Ron will be released and you can now freely use Lumos Solem. Enter the new room for a lesson on flying. Practice a little, using the analog stick to move and X to increase your altitude level. Shoot the Gargoyles, then the flowers, thus fulfilling all the requirements. Then take a right and Lumos on the vine plant at the end of the play area. Reach the garden. Use Lumos on the Devil Snare, then reunite them using Levosa, towards the center of the play area. Visit the nearby woods to retrieve the three items for the potion of strength, craft it, then drink it and pull the chain making the ball roll towards the wall. Jump on your broom to fly to the opposite side of the bridge, then head down the path to the Quidditch gate.
Jinxed Broom
Go down the stairs, use Leviosa on the boxes blocking the path. Move right, then fly right and drop down. Launch to the front, then right, then use Leviosa on the pieces of the tube, repositioning them in the right place. Send Scrabbers through the pipe, then run to the left. Reach the colored blocks, then position them in such a way that they coincide with the diagram on the back. Create a small room of Rune, then stand in front of it with Hermione, press Circle. Go ahead, break the curtain in front of the painting, go down to the door on the ground. Assemble the colored blocks, go up the ladder. So create platforms, which you can then lift using Levosa, so as to reach the upper section. Smash the gargoyle, then reach the stirrup to complete the mission.
Hogwarts
Return to the school from the Quidditch gate, using Lumos to remove the screws along the way. Locate the fat woman painting, then enter the dormitory and collect your gifts.
Video - Trailer
Restricted Section
Equip the cloak, approach the books and press Triangle to stop them. Then apply Leviosa on the path. It is necessary to create an explosive potion; recover the red spider (position yourself on the book, near the statue, letting your partner launch you - then shoot the bookcase to get it out), the yellow flower (next to the spider), the blue icicle (shoot the table, then launch towards the books that will thus be revealed, so use Leviosa on the torch to make it stick to the ice wall). Place the three ingredients in the cauldron, et voila. When you reach the library, shoot the pile of books; take the tube and move it to the next stack. You will see a locked gate. Place the tube next to it, then reposition the red and blue tubes. Take the key, use it to open the door. Use Lumos on the vines to the left, then shoot the two bats. Approach the mirror.
Hogwarts
Go visit Hagrid; exit into the courtyard, then turn right.
Forbidden Forest
Approach the tree, create a rain cloud with Leviosa, thus making him get back in shape. Climb the two ladders with Fang, then move to the right and hit the areas marked on the map, arriving at a large grassy plain. Use Lumos on the vines, opening your way. Locate the colored blocks on the right. Before assembling them, make a hole in the bottom of the lake, causing it to dry up. Back at the blocks, move to the right. You will find others, inside a net: also position them on site (in the tree), then use Leviosa on it to reach the exit.
Hogwarts
From the main corridor, go up the stairs and talk to the magician painting, entering the secret room.
Face of the Enemy
Shoot the wizard painting, then the rubber duck - making it grow, then use Leviosa on Fluffy's mouth. Also with Leviosa, you reassemble the harp to put Fluffy to sleep. Open the hatch. Drop down again, then use Lumos and Solem to get rid of the vines. Have the statue release the broom, jump on it and shoot the key four times. Place it in the lock. Still ahead, shoot the sentries and enter the castle. Then shoot the bishop and retrieve the queen. Assemble the pieces with Leviosa. In the next chamber, dodge the fireballs and use Leviosa to repel the green ghost at the sender. He will be stunned; hit his heart three times to reset it.
Second Year - Chamber of Secrets
Here are the missions you will face during the second year of Hogwarts school.
Floo Powder!
Proceed to the interior of Ron's house. Shoot all the moving objects, trying to figure out where Ginny is. Now, touch the painting in front of the fireplace, then move the Floo Dust Pot, throwing it on the fire. Continue on, interacting with Borgin and Burkes. Use Leviosa on the broom, cleaning the mirror. You will notice a chain, pull it with Hagrid and join the pieces of sword through Leviosa that will form. Take the green key, opening the door to the shop. Once in Knockturn Alley, shoot the largest box; the object that comes out will create a kind of "handle" that Hagrid can then use to reach the exit.
Hogwarts
Try to open the door, immediately noticing how a potion of strength is needed to succeed. The three objects are immediately next to the play area where you are, after making them yours, pull the chain and go through the door. Then proceed to the Herbology class. Go to the cloakroom, press the Circle key to get the item, go back to the courtyard. Use the item on the Mandrake to open up access to the rest of the school. Continue to the classroom corridor. Go up the stairs to the right, see Professor Lockhart's lesson. Use your new magic to stop the Pixies, making them "enter" a bubble and then shoot in their direction and finish them off. Now reach the Quidditch gate.
Dobby's Plan
As Hagrid, use Leviosa on the hatch. Drop down, shoot the crate, then throw your club hand at the barrier on the left. Right, shoot Dobby, then have Hagrid pull the chain and cross the bridge. Shoot Dobby again. Through Lumos and Immobilus, "discover" the way to Golden Snitch. Go up the stairs, right, use the ladder. Attach the purple rock to the lever, opening the gate. Up the ladder again, shooting Dobby again. With Hagrid, pull the chain to drop some blocks, making up some stairs. Shoot the cups and Dobby. Use Immobilus on the Pixies, cross the bridge, shoot the barrel. Use Leviosa on Debby, recovering the last heart. To get Harry back to health, you'll need to create a new "kind" of potion of strength. The ingredients are the usual and you can find them in the immediate surroundings.
Hogwarts
Reach the grand hall, shoot the mannequins, then Malfoy (hitting him at least five times). Go up to the upper corridor. Left, talk to the snake. Place the pieces on the pedestal, creating a replica of the snake, thus opening the gate for you. Try to open the Slytherin door; a Polyjuice potion is required. To recover the black hair, you will have to destroy the crates on the left, taking the hair that will fall from the head of the student, hit by the octopus. For the red berry, you'll need to locate the cauldron on the right, surrounded by some bottles. Shoot them, the berry plant will grow and you can make the red berry yours. For the green apple, use Leviosa on the door on the left, freeing the Pixie - it will give you the apple you were looking for. Combine the ingredients, then challenge Justin Finch-Fletchey to permanently learn how to make Polyjuice potions. Go to the hallway of the waiting room, use Leviosa on the two pipes to stop the leak.
Crabbe and Goyle
Instantly create some Polyjuice, using the ingredients around you. Go down the stairs, use Lumos on the vines, clearing the passage. Use Leviosa on the box, then on the pieces, joining them. Shoot the four snakes, thus recovering the necessary pieces of armor, which will need to be assembled. In this way, you will get rid of the streams of water that block your progress. Press Circle in front of the door. Then right, use Leviosa on the glass ball with the fish, then again on the fish that will be popped out. The skeleton will come out, return your eyes to the snake, ring the bell.
Hogwarts
Proceed to the right, returning to the bathroom.
Tom Riddle's Diary
You'll have to face Moaning Myrtle right away. Use Leviosa to repel all the objects it throws at you. Shoot her as soon as she comes out of her cover. Repeat the procedure until she is defeated. You will then enter the "Diary of Memory", which paints Hogwarts as it was several years ago. Use Lumos on the vines, revealing a sideboard. Use it to break the doors, retrieving the headphones. Get the Mandrake, use it to smash the glass door on the right. Create a potion of strength (to get the Thorn Blossom you will have to jump along the "keys" that you can see on the left, after shooting the bookcase, revealing a "secret passage"), pull the chain you just discovered. Right, Immobilus on the Pixies to recover some pieces of the bridge. Create it on the left, where you can see the supports. For the right part, it will be sufficient to join the two "arches".
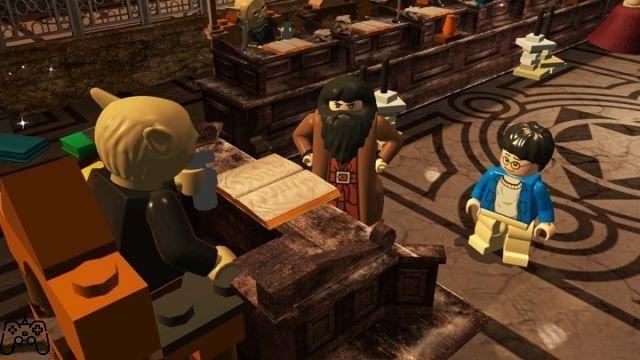
Drink some strength potion, then jump across the following platforms, pull the chain, reaching the last play area of the level. Go along the corridor, press the button near the stairs, walk them. Shoot the painting, it will "emit" a key, press it to activate the next ramp. Use Leviosa on the nearby table, turning it over. Have your partner climb on it, then activate everything. The gate on the right will open. Shoot the flag, then use Leviosa to move it to the trampoline, which you will have to take full advantage of. Up again, use Lumos to remove the screws, then use the revealed platforms to get to the end of the level.
Hogwarts
Follow the group of spiders, up the corridor, then to the courtyard, reaching Hagrid's tent.
Follow the Spiders
Sweep away the grass at the back, making some discs pop out. Use Leviosa to move them to the rain cloud, then move it to the tree on the left. A ladder will come out, use it to climb up (first, however, tell Fang to drop a tree, which will act as a "bridge"). Once at the port, use Lumos to get rid of the screws, then Leviosa on the pieces of the bridge, recreating it. Right, another ladder, then take advantage of the cobwebs. Immobilus on the Pixies on the tree, it will fall and Fang can reach you. In the new area, shoot the spiders, until a black-purple one appears. Hitting him, he will turn around on himself. Use Leviosa, then hold down the Circle key to make it spin. Release to throw it at Aragog, repeat the procedure three times to annihilate him. The last part of the level will be reduced to an escape from Aragog, technically very simple.
Hogwarts
Reach Lockhart's lesson, then the last mission will start automatically.
The Basilisk
Left, shoot the painting, exposing the tube. Throw some Scabbers down the pipe itself. In this way, you can press the switch. Use Lumos on the screws, then place the tube in line with the others. Go back to Scabbers, telling him to move the rest of the pipe towards the switch, so that a frog is "released", which he will try to move towards the cupboard. Then follow the path that will be "created" by the frog, jumping on the bathroom that emits green gas. With Leviosa, reassemble the siphon, use it to free the toilet. Left, use Leviosa to use the siphon as a weapon against the octopus. Then reassemble (the siphon), again with Leviosa. Position yourself on the disc, having your partner lift you up. Follow the ledge, recompose the skull, then the bridge, use it to cross. Drop the snake statue, jump on it as it climbs, so you can reach the pipe. You will find yourself having to fight a large snake. Beware of the laser emitted by his eyes. Stand in front of one of the three piles of rocks, shooting towards the enemy's face. Repeat the process for all three small rock towers. You will therefore have to create a potion of strength (as usual, the necessary items are in the immediate surroundings). Pull the chain, Fawkes will come to the area to help you. Shoot the snake again, in the face. Left, join the two chains with Leviosa, drop the tube with the help of Harry and Ginny. Jump on it, retrieve the sword and with Leviosa hurl it towards the enemy!
Third Year - Prisoner of Azkaban
Here are the missions you will face during the third year of Hogwarts school.
News From Azkaban
Use Leviosa on the painting on the left. Shoot (still at the painting), jump on the book, thus managing to get out of the room. Once at the Hogwarts Express, you will need to be able to stop the flow of steam. Shoot the cage with the owl, then Leviosa on the flower. Right, shoot the plants on the pots, retrieving a megaphone. Use it to make people leave their luggage. Shoot the luggage, then use it as a "ladder" to the platform above. Left, drop down once you get to the other side. Reassemble a cauldron, with Leviosa. Create a potion of strength, shoot the black suitcase, pull the chain. Once in the passenger car, use Leviosa to deliver two candies to two people. Pull the key, unlocking the door to your compartment. The dementors will take control of the train. Eliminate them using Professor Lupin's "Partonus" magic. Take the ice ax from the second carriage from the left, use Leviosa on the luggage and on the packages associated with them. Knock on the door, block the moonbeam. When you get to the second carriage, move to the right, eliminate the dementor. Then use Leviosa on the suitcases, removing them from the front section of the tube. Make the Scabbers go up the pipe, take the key, use it on the lock on the right, freeing yourself from the ice. Luggage Car, have Hermione open the luggage with the Runes, then assemble the pieces and use Leviosa to launch it towards the purple area, blocking the first and second windows. Have Lupine move forward, taking out the Dementors.
Hogwarts
Go up the stairs to the left, reaching the first DADA lesson. Use Riddikulus three times, thus learning magic. So move on to the Divination lesson. You will have to reposition three teacups; the first in front of you, the second in the cabinet behind the wall, the third in the Rune cabinet (use Hermione to open it). Now move to Hagrid's garden. You will need to place three "bits" of food on the posts associated with Buckbeack. Right, locate the tree next to the purple brick. Move it towards the rock, stopping the arrival of the Pixies. Then use Leviosa to clear the passage; therefore, Hermione will have to use Crookshanks to begin digging and recovering the chicken leg. The second is in the trench, a little further on. The third is beyond the big rock, down the ladder (you'll have to dig a bit with Crookshanks to find it). Reach the Great Hall, then move the statue to the left to allow you to enter.
Hogsmeade
Go down the secret passage, use Lumos to remove the screws. Eliminate the Pixie, then take the platform, place it on the first "platform holder", so you can jump without problems. Repeat the procedure with the second one. So take the weight, place it on the edge of the bridge, so that the latter goes to "go down". Cross the bridge, then use Leviosa on the torches near the vines and go forward. "Pull" the shadow with Leviosa, making faces appear on the panels. Place a flower in front of the "nose" panel; place a cake in front of the panel with the "mouth" and a painting on the one with the "eyes". Right, go up the ladder. Now place the purple box on the scale, thus opening your way to the door. Locate Malfoy; take the torch and move it towards the snow, melting it. Reassemble the pieces, set the whole on fire. You will now have to fight Malfoy, with snowballs. The main method is to use Leviosa on Malfoy's balls, so as to quickly send them back to the sender (it will be possible to perform this procedure only in relation to the smaller sized balls). You will now have to place three "brooms" on the huge snowball, thus trying to move it and allow you to pass. One is next to the ball itself, the second on the road to the left, the third in the trees next to it.
Hogwarts
Quick interlude, from the entrance corridor proceed towards the Gryffindor hall.
Mischief Managed
Smash the cupboard, reassemble the pieces. Shoot the armor, place the key on the wall. Left, use Leviosa on the flashlight near the screw, unleashing a second key. Place it in the door, continue inside. Straight, you will now have to create a potion of Strength, using the objects in the surroundings. Pull the chain, use Leviosa on the rock; the following door will open. Once outside, you need to create an invisibility potion. The three objects (as you probably already know) to use are the red spider, the red berry and the chicken legs, all of which can be found in the immediate vicinity. Have both Ron and Harry drink the potion. Right, use both characters to lift (with Leviosa) the gargoyles, opening the gate. Continue to the end of the corridor, smash the two gray crates, assemble the pieces to create a violin and "serenade" the painting, so that it goes to release the gray key, which you will have to use to unlock the door.
Hogwarts
Continue to the classroom, where the DADA lesson will be held. Shoot the crates and use Patronus to keep the boggarts that populate the room at bay. So, go to Hagrid's room.
The Shrieking Shack
To defeat the Whomping Willow, it is best to try to hit directly the "root" which aesthetically resembles a punch. Press Triangle to jump on it, so you are perfectly positioned to hit the small antennas at the top of the tree. Three times should be enough to push the opponent back. Once you reach the basement, use Lumos on the bridge, then cross it and go down. Split the two roots, then climb along the leaves on the right. To proceed, you will need to find the roots of three different colored vines, then use Leviosa to make the exit free. Left, go past the platforms to find the first root. Right, two more platforms, drop down to the second part of roots. Right, pass the two water sources (eventually use Leviosa to divert the jet), arriving at the third set of roots. Use them in conjunction to locate and proceed beyond the exit. In the following area, you will (via Sirius and Lupine) hit the Scabbers, using the "vibration" of the pieces of furniture to locate them. Then join the pieces themselves to create a trap. So you will find yourself checking Harry & Hermione again. Right, reaching the trench. Use Lumos on the screws, then re-assemble the pieces to create a rock. Shoot the rock, so that you "release" some blocks that you can climb along. Still right, you will arrive in front of a cauldron, with which to create a potion of Strength (as always, ingredients nearby). Pull the chain, then have Crookshanks pull up and free some dwarves, who will drop a ladder. Use it to climb, eliminate the spiders, then assemble the mushroom pieces so that you can reach the end of the level.
Hogwarts
Starting from the courtyard of the clock tower, move to the left, go through the door to reach the hospital wing.
Video - Gameplay
Dementor's Kiss
Take the headphones from the cupboard, then shoot the plant on Mandrake's vase. Now, send the Mandrake to the pot, then shoot the plant (on the ground) again, thus the barrel of fish should be torn apart. Use Leviosa on the fish, in this way Buckbeak should pull out some parts, which you can "join" to form a grill. Now, Leviosa on the chicken leg, give it to Buckbeak. Then again Leviosa, on the ax, breaking the chains. At the edge of the forest, you will have to try to recover a gramophone and a recording. Right, go down to the swimming pool. Kill the Pixies, then create a rain cloud using the discs. So use the small purple trampoline to reach the upper level. Lumos on the screws covering the gramophone, then move to the central island. Leviosa, pulling out the hook. Shoot at the hook in question, take out the crate, take the box inside. Bring everything to the gramophone, joining the two objects. When you get to the lake, go up the stairs on the left, shoot towards the bush with the red pieces. Levosa, lifting it towards the bridge. Then pass the latter, again Lemosa (on the vines), releasing a rock, which will destroy the block of ice in the center of the lake. Jump down and use Patronus on the six dementors.
Hogwarts
From the back yard, jump onto Buckbeack and proceed to the next level.
The Dark Tower
Kill the Dementors on the outer wall, then right. Shoot the yellow chest, take the ax. Use Lumos on the vines, then forward. Leviosa on the bucket of water, so that it is "shot" towards the garden, going to give birth to some flowers. Use them to climb up, then hit the gargoyle at the top. In doing so, he will breathe fire at the ice of the door. Hit the nearby chest, assemble another gargoyle, enter the next door. You will now have to split up (you and Hermione). Everyone will have to proceed along one of the two paths available. Whoever takes to the right, will have to use Leviosa on the platform on the left; while whoever goes to the left, he will have to use Leviosa on the torch on the right, thus freeing the screws. Then go back to the right and launch a second platform to the left. Use Leviosa on the debris on the right, then place it on the door on the left to continue. So create a potion of Strength, using the cauldron at the top right. Pull the chain, cross the bridge, continue towards the tower. You will have to fight a Dementor here. Use Leviosa on the barrels, making sure they empty completely. Then shoot the other dementors in the area. As soon as the larger one begins to inhale, it will also pull up all the debris, which will obstruct its airways. Repeat the procedure three times to finish it.
Quarto Anno - Goblet of Fire
Here are the missions you will face during the fourth year of Hogwarts school.
Quidditch World Cup
In the first area, reunite Arthur, Fred, Ron and George. For Arthur, you will have to proceed to the right; you will find him unconscious, use Leviosa to eliminate the Death Eater. For Fred, create a potion of invisibility (recovering a red spider, a red berry and chicken legs); then move to the left, use Leviosa on the cart and on the tent. For Ron, go back, then right - take out the Death Eeaters that threaten him. George is immediately south of Ron, put out the fire to save him. After the cutscene, break the flag and use Leviosa to move him to the diving board. In doing so, you can jump over the fire. Hit the nearby barrel to get others to join you. Move the green wheel towards the cart, using Leviosa to remove it. Create a potion of strength (taking items from the immediate surroundings, no directions are needed), then pull the chain to continue. Eliminate the Death Eaters to finish.
Hogwarts
Head to the Potions class. For the first item (orange snake), use Leviosa on the Gargoyle's horns on the left; inside the wardrobe, choose the color orange, green and purple to create the snake. For the second item (green leaf), move to the right corner and retrieve the chest - shoot the lock, grab the panel and move it to the pump on the left to free the leaf. For the yellow banana, use Leviosa to unlock the pipe, then throw Crookshanks along it. Make him move the red panel, a banana will drop into a tank, freeing a bird. Shoot him, take his legs to take out the banana.
Dragons
Break the lock on the left section of the cage, then Leviosa to the purple egg - have it "travel" to the purple door at the top. Go to the opposite side of the tunnel, smash the Pixies, then create a chain for Hagrid to pull. Make your jumps pass the blue flame. Use Lumos on the vines, creating a mushroom to use to reach the chain, to be assigned to Hagrid. Cross the bridge. You will now need to clear Common Welsh Green. Take the xylophone with Leviosa. Press the same notes that are "sung" by the Dragon. South, get over the flames. Left, pull up the nearby pool, jump into the water. Repeat the process with the other two tanks, making them "pass through" the flames. You will now be able to switch to Swedish Short-Snout. Use Leviosa on the ring, placing it near the intersection of the purple chains. When they are broken, create a bridge with the blocks and go down the ramps to the right. You will now move on to Horntail. Use Leviosa on one of the chains, then have Hagrid take care of the other and any of the other characters the third. You can now reach the other side of the cage. At this location, get Fang to start digging so that Hagrid can then take the path below and Harry can climb up with his cloak. Hagrid will have to pull the chain, Harry use Lumos on the screws. Then again Harry will have to use Leviosa on the gray structure and Hagrid move a mushroom, so that Harry passes through the tree. Hagrid will then have to use Leviosa on the chain so that Harry can go right and complete the level.
Hogwarts
Head to the second DADA lesson. Use Reducto on trapped students, freeing them, learning ... the magic you just used. Continue to the tent, talk to Hagrid.
The First Task
Right, jump along the rocks to get good cover. Tear apart the two garbage piles to create a passage (breaking the barrier). Right, take the piece of rock and place it in the steam jet. Collect the ingredients for the potion of strength from the surrounding area (very easy to find). Drink the potion, then run along the rocks. Throw one towards the purple area, then jump across the platforms being careful not to get hit by the Horntail fire. So use Leviosa to put out the fire. Position the colored blocks in such a way as to create a "row" that allows you to climb to the top (smash the rocks to get the blocks of various colors). Then start running quickly along the wall of the tower, entering the next building, until the end of the level.
Hogwarts
Go down to the bridge, watch the scene. Then go to the corridor of the meeting room. Go up the stairs, break the pipes with Reducto. Enter the door at the end.
Secret of the Egg
Here you will need to place the four green shells at the tank. The first is next to the tub; for the second, take a left and split the three sinks. In this way, the water level will rise, and you can retrieve the shell. For the third, use Leviosa on the barrel, assemble the pieces. Then have both characters use Leviosa on the yellow components, freeing the shell. For the fourth, smash the lockers near the painting, reaching an object that you can smash to reach an umbrella. Give it to the painting to get the shell in exchange. Now place the shells and drop down. Enter the bathroom area, use Leviosa on the broom. Clean the windows, start repelling the crates that will be thrown at you by the little mermaid (using the normal "flash" associated with your wand). The last two crates can be used to "compose" a train (through Leviosa), which will release a cloud that will blind the little mermaid; in this way she will give you the faucet, place it on the bathroom.
Hogwarts
From the entrance corridor, go to the forest path. Right, find a gate with a shiny lock. Destroy it with Reductor. Go down to the lower section of the area, then right, towards the gate.
The Black Lake
Swim to the right, entering the blue tunnel. Right, take out the fish, then smash the rock blocking access to the next tunnel. Use Leviosa on the tentacles, thus unlocking the passage. Right again, join the colored blocks (via Leviosa) to create the shape of a "fish". Continue until the crossroads; the two characters will take different paths. On the "upper" path, shoot the tufts of grass; then go to the "lower" path, and have him use Leviosa to proceed (on the giant crab). Returning to the upper path, right, looking for the eye of the octopus, going to eliminate it. In this way, the passage will be free and the two paths can converge without problems. Using Lumos, retrieve the pearl and place it inside the shell, bottom right.
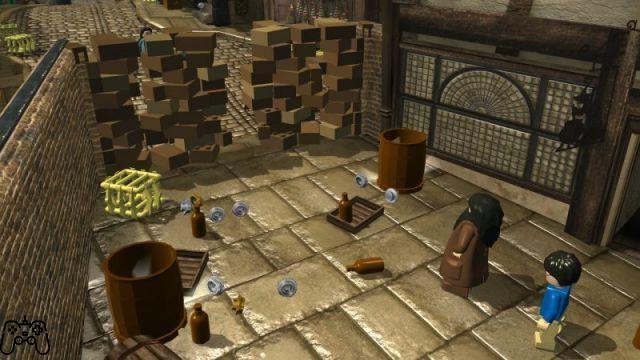
You will arrive at the lair of the little mermaid. You will have to move the three anchors; for the one on the far right, simply use Leviosa. Further to the left, Lumos to remove herbs, then Leviosa. For the one in the center, smash the rocks around the tunnel, and continue straight, then using Leviosa on the purple sphere and finally on the anchor.
Hogwarts
Talk to the painting, making the stairs move. Go up the two flights of stairs. Break the chest with Reducto, then give the wheel to the painting. Shoot the stairs, go up two flights, reposition the painting, shoot it again again to make the stairs go up. You will gain access to Dumbledore's office.
The Dark Lord Returns
At the first room, take the pieces of armor from the bushes around you. Join them, then shoot the armor to get directions (right, then left). Repeat the procedure for the second and third chambers. You will find yourself in a "real" labyrinth. Beware of mobile platforms; try to move with the right timing so as not to go wrong. Eventually, you will find a Pixie with an arrow; place it at the end of the path to reach the exit. Second labyrinth; turn the corner, noting the sphinx. Use Leviosa on the next book, then jump to the platform to the right. Leviosa on the insect, the spider will arrive on the scene. Leviosa on the second and third insect, in this way the sphinx will move and you can continue. In the next area, fend off the Death Eeaters and Voldemort. During the final cutscene, hit the Square key very quickly to repel the spell; three times and you will have won!


