Please note:
The solution is based on the US 3DS version of the game. There may be divergences from the Spanish version and / or for other platforms.
Kokiri Forest
After the opening scene, talk to Saria. Before you can enter the Deku Tree, you'll need to retrieve a sword and shield. So approach the fence at the top of the hill and locate a small hole where you can slip in - at the end of the path you will find the required sword and shield. Then explore the village, trying to recover some rupees, which can be found in every house. So talk to Mido to have access to the Deku Tree.
Deku Tree
Use the first set of vines to reach a platform, then grab the map from the chest to the right. Go through the chest to reach a door, enter - it will close behind you. To defeat the Deku you will have to use the shield to return the peanuts that he throws at you. So talk to him to have access to the following room.
Quickly jump to the central platform to reach the opposite side, which will collapse under your weight. Nearby, a chest: you can get the slingshot. Immediately assign it to one of the keys, then climb the vine on the left, recovering a heart from the treasure chest. Then launch a sling towards the ladder to cause it to descend, and proceed upwards.
The sling will allow you to remove the Skulltula blocking the path, then proceed along the walkway to the right. Go through the door, climb the golden switch, then climb the platforms until you reach a treasure chest. It contains the compass. Therefore, to exit the room, you will have to use the Deku stick to light the only torch in the room, then transferring the flame to the various braziers in the area. When the door unlocks, use the hole in the center of the new room to drop down - the web will cushion the impact. Press another gold switch to turn on the lights around the cobweb, then light another Deku stick to proceed across the pond - you'll need it to burn the cobweb. Then enter the door in front of you, shoot the silver eye above the door to unlock it. Then press the underwater switch by first floating above it, then holding down the A button to dive and press it. Then run to the opposite side of the room, kill the Skulltula, pull the crate down to reach the platform in the next room. Light the two braziers, make your way forward.
Light a Deku stick, then burn the web on the right. Make your way into the hole, press the block so that it falls off the platform. Light another torch, then use the block you just moved to return to the previous platform, then burn the web to create an access to the new room. Now you have to hit the three Deku in the following order: two, three, one - the door leading to the boss will open.
Boss: Queen Gohma
The most effective weapon for damaging the queen is undoubtedly the sling. Aim and wait for her eye to turn red. When she does, shoot a seed inside her, stunning her. You will then be able to approach and hit her repeatedly, moving as she awakens. She will then return to the ceiling, you will have to take care to dodge her blows until she drops again, only at that moment can you return to hit her, until you defeat her. So retrieve the container of hearts nearby before leaving the room.
After being returned to the village, continue to Hyrule Castle.
Hyrule Castle
After the drawbridge you will find yourself in front of the Hyrule market. Talk to Malon, stationed in the central part of the market; you will learn that she has not seen her father in a long time. Since you will not be able to enter the castle for now, go out and re-enter. Malon will show you some vines that run along the wall. Talk to her twice to get an egg, which is needed to wake her father up.
Climb the vines, approach the ravine, jump from the top of the gate to the ground below. Cut through the flower bed to reach a flight of stairs, but don't go up - it's best to use the vines on the wall to the left, then swim to the opposite corner. So make your way to the end of the path, there you will find Malon's father, or Talon. Try to wake him up using the animal that came out of the egg given to you by Malon. Talk to Talon, then stack the crates to create a platform that will allow you to reach the hole along the castle wall. Come in. In this area you will have to focus on avoiding the eyes of the guards, while walking through the courtyard of the castle (the path taken by the guards is highly deterministic, so you will have no problem identifying it).
At the central part of the courtyard, approach Zelda. She will ask you to find the two spiritual stones, then giving you a letter. So talk to Impa, who will teach you a song - Zelda's lullaby. She will then take you to the drawbridge, telling you to reach Death Mountain.
Lost Woods
From the entrance to the forest go right, left, right, then left again, straight, left, right. You will reach the plains of the sacred forest. The following path, while appearing like a labyrinth, is completely linear: pay attention only to the enemies that occupy the corners of the playing area, keep the shield at hand to counter their blows. Climbing the last stairs, you will meet Saria, who will teach you a new song. Then use the nearby ladder to reach the new game area, which will then take you back to the castle. From there, you can return to the village where - if you want - it will be possible to complete some side-quests.
Video - Japanese Trailer
Death Mountain Trail
When you feel ready to enter Death Mountain, go talk to the soldier guard post near the gate, showing him the letter from Zelda. Go through the gate, starting the ascent to Goron City.
Crown City
Once in front of Darunia, play Saria's song to get her attention. Then use the bracelet to remove the flower bombs from the bed. So approach the urn in the central part of the level, surrounded by some braziers: enter Darunia's room and recover the flame, using it to light the braziers. The urn will start spinning, you will have to throw a bomb inside it to stop it; try again until you get a smiling face, which will give you an additional heart. So leave Goron City, venturing towards the cave of the Dodongos.
Dodongo Cavern
Initially you will notice how the entrance to the cave is blocked by a huge boulder. After exiting Goron City, proceed to the right, locating a flower bomb. Take it and throw it over the fence, so that it hits the rock below, pulverizing it. Go down the mountain, enter the cave.
Then use the platforms arranged in a circular manner to reach the central platform, also not forgetting to retrieve the chest located beyond the cracked wall, in the left part of the room. You will now notice a completely blocked door: jump to the opposite side of the room, get rid of the Beamos with a flower bomb, then use a second one to blow up the wall on the right. Approach the switch, moving one of the statues above it, so that it remains activated permanently. Unlock the top door, then go through two more. Use your sword to repel the two Lizalfos, their departure will allow you access to a door.
To get rid of the Dodongos we recommend using a powerful sword strike without delay, rather than approaching them with a defensive attitude - perhaps hitting their tail, the absence of armor makes them more vulnerable in that specific area. Then light the braziers placed along the room to make your way to the door, for now blocked. Hit the switch (on the other side), then jump down and continue across the passage, now accessible. Climb on the switch, then walk towards the room on the right side of the map, where a passage will have opened.
Take one of the bomb-flowers from the ground, place it on the free space in front of you to cause a first chain reaction: the ladder will be destroyed. Before continuing, we advise you to destroy the weak wall that covers the perimeter of the room, going to take the compass at the end of the path that will open up. Locate the statue in front of the ladder, pull it off and climb up to reach the switch. Go through the door, returning to the main room, where you will notice a bridge. Follow it to reach the following area.
You will reach an area where the floor, made up of platforms, "slides". Jump over the first one starting from the ladder, then wait for the next one to move before proceeding to the ladder on the opposite side. Pull the block out of the wall, use it to reach the platform above you. Take the flower bomb, throw it so that it explodes next to the destroyed wall. Go through the opening, shoot the eye with the slingshot to remove the energy field. Go down the corridor to the next room, dodging the Dodongos. You will then have to shoot at two more eyes, one right in front of you, one in the alcove on the left wall. Open the treasure chest on the opposite side and grab the bomb bag.
In the central room, use the switch to extend the moving platform to the top of the room. Once there, turn right and cross the wooden bridge, throwing bombs near the "holes" along the bridge itself. At some point, the Dodongo's eyes will turn red and his mouth will open. Drop to the lower level, enter the Dodongo's mouth, flip the switch in the center of the room, then climb up to the platform on the right.
Go through the corridor and climb the blocks along the east wall of the room. Retrieve the fairy from one of the containers, follow the path to a block placed on a platform, throw it to the room below, then take it to the switch. This will unlock a door. Place a bomb on the faded square, revealing a hole that serves as an entrance to the room where the boss is located.
Boss: King Dodongo
The enemy's combat strategy sees him inhaling a large amount of air, which is then used to fuel a powerful flame, coming out of his mouth. Your fighting style dictates that you throw a bomb in the mouth just as you inhale, so that the explosion will stun it, and you can then hit it with your sword. Repeat this move three times, completing the fight.
After teleporting outside, talk to Darunia to get the fire stone.
Death Mountain
Before being able to proceed towards the following scenario, it will be necessary to recover some objects that will be indispensable in the continuation of the mission. Climb up the side of the mountain, reaching a red flag. Use the bombs to remove the boulders, then dodge the falling rocks along the next path. You will reach a wall that you can climb; listen to the owl, then take a bomb to the discolored wall on the left, detonate it to reveal the presence of a passage. Stand next to the fountain and play Zelda's lullaby. The Great Fairy will arrive on the scene, granting you two new powers - the use of magic and a melee attack consisting of a turnaround.
Go out and talk to the owl again, then get carried down the mountain. Move to the back wall, then locate the platform next to the graveyard entrance. Once at the house, you can take possession of a piece of heart, next to the cow.
Lon Lon Ranch
There are two reasons why you will visit Lon Lon Ranch: to retrieve a bottle and get a new song. For the bottle, enter the ranch during the day, continue towards the barn on the left, then participate in the mini-game: you will have to recognize the super cuccos among a myriad of standard cuccos; to do this in a simple way you have to talk to Talon "taking" him from behind, so you can immediately understand the area where the super cuckoos were pulled. You will get a new bottle full of milk.
Then go talk to Malon, who is stationed in the center of the farm. Talk to Epona, take out your Ocarina, so that she teaches you her song: you can later use it to summon it at will.
Zora's Domain
Follow the river that comes out of the village of Kakariko, talk to Kaepora, then pulverize the rocks using the usual bombs. You can therefore buy magic beans, they allow you to reach previously inaccessible areas. Try them now inside the Kakariko cemetery, they will lead you to two additional hearts.
Make your way up to the waterfall, climb to its top, then look around for a heart on a small platform - jump up and retrieve it. Then approach the ladder and proceed to the Triforce icon, in front of the waterfall. Play Zelda's lullaby to view the entrance to Zora's Domain.
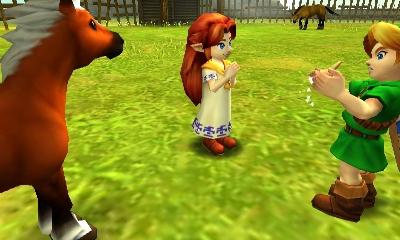
Follow the path, then turn left to reach Zora's room. Go through the entrance, left again, talk to Zora at the edge of the waterfall. Accept his offer by participating in an easy diving-based minigame: dive in and recover some rupees, Zora will give you a new armor in exchange, which allows you to dive much deeper.
The newly acquired armor allows you to explore an underwater tunnel that leads to Lake Hylia. Take the bottle, which contains a letter from Ruto. Go back to Zora and show the letter to the King, positioning yourself on the platform and taking out the bottle. It will allow you access to the fountain of Zora, where Jabu-Jabu resides.
Before entering Jabu-Jabu's belly, we recommend swimming up to his backside. Place a bomb next to the huge stone near the tree, revealing the presence of a fountain. Play Zelda's lullaby, the fairy will give you a new item - Farore Wind, allows you to create checkpoints in dungeons, from which you will start over in case of death.
To enter Jabu-Jabu's mouth you will first need to take a fish and put it in the bottle. The fish can be found in the pond in the lower part of Zora. Then free it in front of Jabu-Jabu and enter.
Jabu Jabu
Equip the Deku shield, you will need it right away to repel the projectiles that will be launched by the Octorok and the Shabom. Then press the white switch to remove the barrier from the door in front of you. Talk to Princess Ruto, then follow her as she falls. Talk until you convince her to allow herself to be carried in your arms.
Go through the nearby door, then leave Ruto on the ground and start popping the bubbles. Jump into the water, throw Ruto to the opposite side of the play area, before hitting the switch. Then press it to cause the water level to rise, so you can get close to Ruto automatically. Go through the following tunnel paying attention to the Shaboms, shoot at the switch on the ceiling using the slingshot, then enter the next room, killing the Octrock.
Wait for a platform to descend towards you, then let yourself be carried to the upper floor. So go back to the room where you found Ruto, enter the door on the opposite side from the entrance. At the fork, take a right, go up the switch. Enter the room, knock the princess down, kill the enemies using the slingshot, then take Ruto with you along the only path not blocked by a tentacle. Place the princess on the switch so that she holds it down. Then go down and go through the door. Use a slingshot to hit the tentacle, after you defeat it you can pick up the dungeon map. Now go back to the crossroads room. Enter the door on the left, pulverize the Shabom using the boomerang; you will get the compass. Take Ruto and lead her along the corridor, now the red tentacle that previously blocked him will have been removed, but you will find a blue one, to always finish using the slingshot. You will find a third - and last - beyond the next door, this time accompanied by a group of Biri, to be killed with a boomerang.
Back in the crossroads room, drop into the hole to the west, previously occupied by a tentacle. Take the princess over the door, throw her towards the platform to go get the spirit stone. He will unfortunately appear a boss.
Mini-Boss: Bigocto The platform in the center of the play area will begin to spin, Bigocto will move independently, led by the centripetal force. His weak point is his back. To be able to hit it effectively you will have to run along the opposite direction from the swirl of the platform, thus finding yourself naturally behind Bigcoto's back; then shoot him with the slingshot, hitting the green jewels on his back. By repeating this procedure, you will be able to eliminate it. Make your way to the center of the room, using the elevator to go up.
Once through the door, launch a slash at the Octorok, then use the boomerang to petrify the gelatinous platforms. Grab a chest from the platform on the opposite side, place it on the switch, enter the next room. Kill all the Biri with the boomerang, climb the vines, then throw the boomerang at the switch (it will break the glass that protects it). A door to the north will open, leading to the boss.
Boss: Barinade Move in a circle around Barinade to avoid the electric field caused by its tentacles, then use the boomerang to cut through the organic matter that connects it to the ceiling. In this way the central body of the jellyfish will be made vulnerable, you can repeatedly hit it with your boomerang. When only Barinade remains, switch to the sword to quickly end the fight.
Ruto will therefore give you the last spiritual stone, the spiritual stone of water.
Temple of Time
Proceed to Hyrule Castle, observing a skit. Retrieve the ocarina from the stream where she was thrown by Zelda, learning a new song - the song of the time. Before proceeding to the Temple of Time, we recommend going to retrieve some objects from the surroundings, which will be indispensable for the continuation.
From the market proceed north, reaching the central part of the castle. Climb the vines, go through the gate, blow up the boulder on the right to gain access to another fountain. Play the Zelda song near the triforce symbol, thus obtaining a new magic - Din's fire, a move that creates a wall of fire around you, capable of damaging enemies and lighting torches.
To reach the temple of time you will have to proceed along the path to the right of the mask shop. Once inside, play the song of the time while standing in front of the altar, opening the door to the Master Sword. Take it, then watch the scene where you will meet Rauru, who will ask you to go and see the other sages. Talk to Sheik, then go back to Kakariko village.
Kakariko Village
Back in the village, go and visit the cemetery, move to its north part and remove the tomb with the flowers. You will find the spirit of Dampe. Chase him along the path by car, obtaining the Hookshot. Once in front of the blocks with the symbol of the temple of time, play the song of time to dissolve them, so that you can reach the mill. Talk to the bald guy, take out the Ocarina to learn a new song - the song of thunderstorms.
Then go up along the ivy behind Mido's house, reaching the Lost Woods. Right, left, right. Use Saria's song to cause Mido to move, then proceed forward, left, right, reaching the plains of the sacred forest. Use Hookshot to eliminate the enemies that populate the area, then - out of the labyrinth - approach Sheik, who will teach you another song, the forest minuet. Then shoot the Hookshot towards the roots of the tree above the platform, so as to reach the actual entrance of the temple.
Forest Temple
Hit the two Wolves in the back, causing their immediate death. Then climb the ivy to the right, use the hookshot on the chest to retrieve the small key. Go through the door - the Poe will steal the lights from the torches in the room, disabling the elevator. You will have to be able to find and defeat them to regain the use of the elevator in question.
Enter the room in front of you, kill the blue bubble using the hookshoot, then keep the shield up to be able to finish the Stalfos. You will get a second key. Go back to the main room, then approach the blue block in the right corner. Play the song of the time, enter the next room, climb the ivy to its top, clearing the path from the Skulltula. You will get the chest with the dungeon map, then go straight.
At the balcony, shoot the hookshot at the target on the balcony to the left. Step on the red switch to cause the water to disappear from the well. Jump from the balcony to the ground below. Go down the ladder to reach the bottom of the shaft, retrieve the key at the end of the tunnel. Climb the ivy, returning to the main hall; Unlock the door at the top of the stairs on the right, then clear the blue bubble. Climb other stairs to the second floor. Follow the directions indicated by the arrows on the ground, then move the block to the alcove.
You can then climb up to a ladder that leads to a corridor, moving the red block until, even in this case, it reaches the wall. Use the blue block to launch to the upper level, then turn right. Climb other ladders, unlock the door, walk along the corridor. Beware of the hands that, coming out of the wall, will try to take you. Jump over the platforms, unlock the door, go down the stairs. Killed the two Stalfos, you will get the crossbow of the fairies. You will now have to go in search of the blue sister.
Exit on the opposite side, locate the three paintings on the steps - on one of them you will find what you are looking for. Shoot until the Poe is released, go down the stairs and fight the sister using the newly recovered crossbow. In this way, one of the flames will be brought back to the central hall. Now go back to the room where you fought the Stalfos, enter the door on the opposite side, find three more paintings - this time one of them contains the Red Poe. Repeat the procedure indicated for the previous sister, obtaining the key.
Go up the stairs, jump over the platforms, go through the corridor, then shoot the eye to realign the path. Enter the next room to locate the colored treasure on the floor below which contains the key to the boss. After grabbing it, jump into the hole and proceed through the door. Go through the wooden door, kill the Floormaster, open the chest for another key.
Exit, right. Climb up to the entrance of the winding corridor, hit the eye again, then straight, returning to the area where you fought the blue Poe. Go through the door, now unlocked. Jump to the right, go along the rotating platforms, use Din's fire on the frozen eye. Run through the corridor, then jump into the hole in the northwest corner of the room. Let the first section of the ceiling drop, then run to the tile with the switch. Then run to the tile on the left, take the arrow. Let another piece of the ceiling drop, then run to the door. Shoot the painting with the green Poe, then some blocks will fall from the ceiling: start joining them, you have a minute to do it; then the green Poe will appear, defeat him as done with the previous ones. Beyond the door pulverize the Skulltula, jump from the balcony, fighting against the last sister Poe.
The combat will be slightly different: it will clone itself and its clones will surround you, trying to block your advance. You will be able to distinguish her "real" Poe by her tendency to twirl every time she appears: hit her with your slingshot five times, so that even the last flame returns to her place. Then use the elevator to go down to the room below.
Before reaching the boss you will have to overcome one last puzzle: press a pillar counterclockwise, revealing a switch. Press it, then rotate the room counterclockwise, revealing a second switch. Press this too, then rotate the room again in the same direction, opening a room towards the Skulltula. After getting it, press the pillar one last time to gain access to the last switch, which will open the access to the boss room.
Boss: Phantom Ganon
Go up the stairs, proceed towards the center of the room to find yourself in front of Phantom Ganon. He will throw himself at one of the paintings: you will have to equip your bow and keep it pointed towards them. At some point, two Ganons will come out of the paintings, running towards you - one of them real, the other not. You can recognize the "real" one by the more intense color, shoot your arrow in the direction of him. Repeat three times to move on to the second part of the fight: Ganon will get off the horse, firing a single bullet that you will have to counter using your sword. By inflicting two such blows on the enemy, he will perish.
So talk to Saria to get the forest medallion. You will be transported back to the Deku tree. Return to the village of Kakariko to begin the path to the Fire Temple.
Fire Temple
Visit the village market to retrieve some items, then proceed to the path that runs alongside Death Mountain, arriving in Goron City. Talk to the only Goron left, who will give you the Goron Robe. Then head inside Darunia's room, removing the statue to reveal a passage leading to the crater. Equip your tunic right away to withstand the intense heat. Approach the semi-destroyed bridge, launch a hookshot to cross the ravine. Talk to Sheik, he will teach you a new song - Bolero of Fire. Go down the ladder on the left to enter the temple.
Go up the stairs, then enter the room on the left. Talk to Darunia, approach the left corner by jumping from platform to platform. Use the switch to free the Goron, then retrieve the key from the chest behind him. Exit the way you entered, you can now proceed beyond a previously blocked door (right in front of you). Bomb the south wall for a second key, then exit this room and enter the huge house on the opposite side.
Enter the door marked by the big blue block, free the Goron for the third key. Follow the bridge to the locked door, slide down the plateau, turn right, climb the wall to the platform above you. With the two Keese killed, jump to the platform below. Press the block on the flames geyser, creating a kind of elevator that allows you to reach the area just above you. Unlock the door to get to a new section of the temple.
Make your way along the platforms to the left, move the block over the edge, then carry it up to the small ravine, which will allow you to reach the wall covered with chains. Drop to the platform below, above the diamond-shaped switch. Hit it with the hookshot to extinguish the flames, climb along the wall and go through the door to reach the next room.
Then dodge the boulders, proceed right following the wall, eventually locating a trapped Goron. Climb on the switch to free it and then take the key. Once out of the cage, continue to follow the wall in the same direction, until you find an alcove that contains yet another pair of goron and key. Turn around, enter the door you passed earlier. Shoot the eye above it, making your way to the dungeon map.
Now continue past the door you passed as you made your way through the previous room, running along the chained platforms. Jump to the platform containing the torch, destroy the wall, then free the Goron and grab the key from the chest. Climb back to the platform with the switch, press it, take the key and free the Goron.
Follow the right side of the wall to the compass. Then move south, use the key to open the seemingly locked door. Indifferently pass the Goron, approach the switch, run over the wall of fire, then use a bomb on the "fake" door in front of you, revealing a real door, which you can unlock with the key. To eliminate the opponent that appears you will have to hit his "core" positioned in the center of the chest. Then go up to the platform that will be activated, continuing to the fourth floor. Press the two consecutive switches, thus removing the flames surrounding the treasure chest, which contains the Megaton Hammer. Use it on the square platform to reveal a new room.
Remove, again with the help of the hammer, the statue that blocks the door. Pulverize the pillar to create stairs, which lead to a switch. Grab a crate and place it over the switch in question, causing another passage to appear. Make your way through the flames, jump to the blue block, play the song of the time to move it to the switch. Another Goron will be released, you can take the key, climb the blue block and go back through the door you came from. Jump to the platform ahead of you, hit it with the hammer to drop it. Jump down to return to the room where you spoke to Darunia. You have created a passage to the boss room, but you are missing the key to enter.
Go back to the entrance area of the fire temple, go down the stairs to the tribal statue on the right. Pulverize the next layers, arriving at a door that was initially locked, but for which you have the key. Unlock it, then hit the rusty gear with the Megaton Hammer to free the last Goron, who will give you the key in question. Now make your way up to the room where you met Darunia, you can finally reach the boss.
Boss: Volvagia
Volvagia's attack strategy consists of jumping underground, and then re-emerging from one of the many holes in the ground. You can anticipate his arrival by observing the lava emitted from the holes (when Volvagia is about to leave, the hole will have more lava). You will therefore have to hit her with the Megaton hammer, stunning her. By repeating this procedure, you will achieve victory with some ease.
Grab the container of hearts, then jump on the transporter to meet a sage and Darunia, also getting the fire medallion. Before leaving the crater, it will be necessary to perform other tasks. Use the hookshot to proceed across the bridge, then left, walk across another short bridge. Destroy the boulders to the right using the Megaton hammer, revealing the entrance to the fairy fountain. Play the Zelda song while staying close to the triforce icon, causing the fairy to double the magic bar.
Now, with the aim of heading to the water temple, you will first have to go through a small dungeon, the ice cave - accessible from the fountain of Zora.
Video - Gameplay Trailer
Ice Cavern
The cave in question is completely full of stalagmites, which you will have to destroy with the sword to be able to make your way. At the first room, get rid of the Freezards using Din's fire. Then go straight, recovering all the rupees, until you unlock a passage. Jump across the platforms to the blue fire, which must be used to melt the red ice: you can retrieve both the dungeon map and some rupees, as well as a treasure chest.
Bottle some more blue fire, go back to the previous room, use it to open the passage that goes east. Now fill at least two bottles with fire, return to the room with the rotating blade, melt the ice to make your way to the next area.
Move the block west, then north, get the silver rupee inside the red ice block. Throw the block of ice into the abyss to return it to its original position. So move it west, south, west, to a blue fire. Refill the bottles again, then move the block south, get the rupees, move west, more rupees, north, east. Move everything south, use the fire to melt the ice blocking the door, enter the next room.
Defeat the wolves, take the iron boots from the chest, then have Shiek teach you the serenade. You can then exit the cave. Go back to Zora, use the fire to thaw the King, who will give you the robe as a reward. Now play the water serenade to be transported to Lake Hylia, dive here and drop with the iron boots, then throw the hookshot towards the entrance of the water temple, and drag yourself to it.
Water Temple
Initial tip: always equip the Zora tunic, it allows you not to drown. Entering time, swim to the platform on the right, diving into the body of water in the area. You will find a stone block, to be pulled up to its forced locking. Equip your iron boots, drop down. Run through the passage until you meet Ruto. It will swim until you get close to the first switch. Remove the iron boots, then let yourself be transported to where Ruto is. On the wall you will see a symbol of the triforce, next to it you will have to start playing the song of Zelda, making the water come down. Then go through the door, use the hookshot to get rid of the enemies, retrieve the dungeon map. Explore the room below you.
Shoot an arrow at the extinguished braziers on either side, unlocking the door. Wait for the shells to open, attack the inside, take the key. Exit and proceed to the passage blocked by a block. Press it sideways, until it falls down. Make your way through the tunnel, arriving at a new room.
Use the stream of water to jump across the ravine. Now, re-equip your boots, position yourself on the tube, hit the switch next to the dragon's mouth using the hookshot to hit the target in the underwater tunnel, then get dragged over the gate. Float to the room, grab the key from the chest, then hit the switch again to reopen the gate. Return to the central room of the temple, passing the only locked door. Use the hookshot to reach the triforce symbol, then play Zelda's lullaby to raise the water level. When the temple is half full, exit the room and locate the platform where two aligned vessels are visible. Throw the hookshot towards it, then continue following the objectives in sequence, up to a small room with a treasure chest: hit the diamond switch to go and get the compass from inside the chest.
Go back into the room where you raised the water level up to half, equip the iron boots, and let yourself sink down to the hole that leads to the underground room. Hit the diamond switch to cause some shells and quills to release, take them all out using the hookshot and unlock the corner gate, which will lead you to the key. Go back to the area where you met Ruto, float to the surface, use a bomb to make your way through the destroyed wall, recovering a key. Go back to the main room, go through the door, stand on the stream of water coming out of the ground and shoot the diamond switch using an arrow. You will then reach another symbol of the triforce, play the lullaby to proceed. Jump to the moving block, then throw the hookshot to hit the target in the next area.
In the center of this room you will notice a switch, which controls the water level only in the room in question. Increase it initially, to reach the first platform. Lower it to get to the next one, lower it again to go forward, raise it to get to the last one, lower it to jump on the dragon's head, then press it one last time to make your way to the last platform. Go through the door to meet Dark Link: this is not a "real" fight, it will be enough to be able to hit it a few times to end the interaction. Then take the Longshot from the crate (a 2.0 version of the hookshot, capable of hitting farther). Swim across the river, jump to the platform on the left, hit the golden eye with an arrow to clear the way to the gate. Shoot a longshot at the treasure chest, take the key inside.
You will now have to raise the water again to be able to reach the boss. Go to the main room of the water temple, visualize the side of the wall blocked by the black metal gate: at the top you will notice an eye switch - shoot an arrow at it. Go inside and retrieve the key from the chest. It unlocks a door located at the far north of the map, on the ground floor. Once in the area, kill the Tektites using the arrows to facilitate your progress along the play area, then open the door on the other side. Now run between the two sides of the map, pulling and pushing the block in the area, until it falls on the underwater switch. The water level of the room will rise, you can reach the door at the top of the steps.
Kill the Tektites, then use the switch to activate the water flows. You can thus easily cross the ravine. Jump into the hole immediately below the area from which the boulders come down, then throw yourself beyond the only door present, which hides the key to access the boss room. Now you have to reach the third symbol of the triforce and play Link's song, thus raising the water level: the boss is on the third floor.
Hook up to the dragon statue with the hookshot, then walk up the incline to find yourself facing the enemy.
Boss: Morpha
The weak point of the boss coincides with the red nucleus in the center of the amoeboid. You will always have to stay well away from its tentacles, the main attacking weapon, using longshots to bombard the boss's core with shots. Since it "moves" along its body, it is good to try to inflict damage when it is near one end of the tentacle, which is closest to you.
Killed Morpha, get the container of hearts, then return to Lake Hylia. Talk to Sheik, then read the engraving near the teleport, which indicates an elusive ability to "shoot" the morning light. Look at the island, play the song of the sun, then shoot an arrow at the rising sun. Swim to retrieve the fire arrows.
Well
Once in the area, go through the invisible door, dodge the green bubbles, then approach the area completely filled with water, reaching the symbol of the triforce. Play Zelda's lullaby to make the water level drop, then proceed to the southeast section, enter the hole to start a fight against Deadhand. Approach one of the giant hands, let yourself be caught, then quickly press all the keys of the pad to free yourself; Deadhand will approach again, lowering his head towards you: hit him repeatedly to damage him. Repeat this technique two more times; his death will provide you with the lens of truth, which allows you to visualize the secret passages.
Shadow Temple
Go back to Kakariko, watch the cutscene with Sheik as the protagonist. You are going to learn a new song - Nocturne of Shadows. Use it to reach the temple, then light all the torches with Din's fire, opening the access door. Use the hookshoot on the painting to go through it, enter left, then use the lens to locate a passage to the right. By killing the enemies in the area, you can get the map. Now exit and proceed to the west wall, then west again. Finish Deadhand, then retrieve the boots from the crate - they allow you to float higher than the ground. Exit and return to the room surrounded by skeletal torches. Use the lens to locate the only torch that is not an illusion, move the bird statue until it is facing the "real" face, thus unlocking the door to the east. Float in his direction with the new boots, then continue to the inside of the temple.
Enter the passage on the left, recover the rupees to gain access to a key. Go right, kill the mummies to get the compass. Go back to the room where you fought the Beamos, use some bombs to clear the path in front of you. Unhinge the door, go down the passage. Jump along the platforms with the help of the boots, take the rupees to cause the opening of the last door. Continue along the corridor, then use the lens to find a detachable block from the wall, use it as a shield to avoid the spikes. Once these obstacles are cleared, climb onto the block and jump to the switch, which will unlock a chest containing the key.
Go back to the area full of guillotines, walk up the rocky platform to the left. Run quickly so as not to be hit by the blow of the guillotine itself, therefore equip both boots and lenses. Jump on the invisible platform, continue to the moving one, run to the locked door, enter. Grab the rupees to unlock the passage, go up the stairs, retrieve a flower-bomb and throw it at the skull, whose explosion will release a key.
Use the lens to locate a switch above the door, which you will need to press using the Longshot. Then pull up, go through another door, equip your boots, run beyond the fans. Wait for the last set of fans to stop, jump down, shoot an arrow at the eye, run in its direction. Equip your boots again, take out the lens, locate a hole in the wall, then run right towards it. Kill the mummies, bomb the garbage near the door, recovering a key. Use the lenses to locate a block on the wall, move it to the ladder, climb the block, then to the roof.
Proceed to the boat, play Zelda's lullaby near the triforce symbol, then use the flying boots to reach the platform on the left. Go through the door, another small labyrinth with invisible walls, but you can equip the magic lenses. Enter the blood stained door, kill the enemy, take the key. Then enter the third door, unleash Din's fire to stop the spike rush, and retrieve the boss key from the chest. Go back to the platform next to the ship, locate the statue surrounded by bomb-flowers, shoot an arrow to make them explode: the statue will create a bridge for you, so you can reach the door.
Boss: Bongo Bongo
Equip the bow and the truth lens, so always staying well out of the hands of Bongo Bongo, shoot at one of them with your bow. After hitting it, switch to the alternate hand. When both are blue, use the lens to visualize the eye in the center, shoot an arrow at it to hit it, then approach it and hit it with your sword. Repeat this strategy until victory. You will then get the shadow medallion.
Retrieve the Spirit Medallion
Starting from the Gerudo valley, cross the first bridge taking Epona with you, so as to quickly reach the Gerudo fortress. Get noticed by a guard, he will throw you in the cell. Look up, shoot the longshot in the alcove in the ceiling. So let yourself fall down, enter the door on the left. Go up to the right, talk to the subject who is stationed in the cell. A Gerudo will drop from the ceiling, wait for it to attack, block, perform a jump attack as a response. Take the key from his "corpse", then exit left, turn right, shoot the guard. Continue straight, go up the ramp to the right, then turn left. Jump on the platform, quickly go through the door.
Finding another cell, hit the warrior, freeing the carpenter. Left, go down one level, keep going straight until you reach a door. Free another carpenter by hitting the Gerudo, go back out, climb the ivy, go through the door and proceed along the path that leads to the last of the carpenters. Another Gerudo to finish, so as to obtain a kind of badge that allows you to walk around the game area in freedom. Make your way to the large gate, climbing the ladder, then talk to the Gerudo who will open the passage for you to enter. So equip your boots, crossing the river of sand. Follow the lined up flags, reaching a stone compound structure. Use the lens to locate a Poe on its top, follow it for a few minutes, it will take you to the desert of the Colossi.
Try to enter the Spirit Temple, but stop when Sheik interrupts you: he will go to teach you a new song. After that, play the prelude of the light to return to the temple of time, place the Master Sword in its case to become a child again. Play the song Sheik just taught you, you will be taken to the Spirit Temple.
Spirit Temple - Link Bambino
Go up the stairs, talk to Nabooru. Then enter the hole, kill the Keese and Armos, unlocking the doors. Enter on the left. Kill the Skull Bubble, throw the Boomerang at the switch, a bridge will drop. Follow it to reach a door, run towards the Anubus, noticing how it moves in a way that mirrors you. Make it reach the barred door, then use the Boomerang on the crystal switch to create a wall of fire, kill the Anubis, open the door.
Retrieve the five rupees, causing a bridge to go down. Light the Deku stick, then all the torches. Take the key from the chest, exit the room, enter the hole in the wall which will now be accessible, given the presence of a door. Use the slingshot to get rid of the Skullwalltulla, climb the wall, kill all the enemies, throw a bomb towards the crack in the ceiling, the explosion will cause it to open.
Throw Armos from the platform so he lands on a switch, go up the stairs, light a Deku stick, drop again. Also light the torches, causing a map to appear. Go up the stairs again, go through the door. Then move the block towards the sun ray, thus opening the exit for you. Collect the rupees by lighting a torch. Also light a deku flame, then all the torches around, obtaining a chest with a key. Exit the room. Go up the stairs, hit the Iron Knuckle repeatedly, getting the silver gloves. Play the prelude of the light to return to the temple of time, where you will have to extract the Master Sword, so as to become an adult, and therefore play the last song taught to you by Shriek to reach the time of the spirit.
Spirit Temple - Link Adult
Go up the stairs, right, move the gray block until it falls into the ravine. Go up the stairs, bomb the Beamos. Look up towards the area where the Beamos was. Fire the crystal switch with the longshot, enter the door on the left. Play Zelda's lullaby near the triforce symbol, use longshot to reach the chest that will fall, take the compass inside, go back to the Beamos room.
Right, dodge the boulders by taking the silver rupees. Go through the door, retrieve the key from the chest, then back to the Beamos room. Open the door, go through Like Like, climb the wall, use the lens to locate the enemy running around the room: kill him, then move the cobra statue so that the light beam hits the sun switch.
Go up the stairs, float to the triforce symbol, then play Zelda's lullaby to cause a chest to fall. Get its contents using longshot, then go up the stairs, go through another door. Kill all the enemies by unlocking the door. Fire a longshot at an Armos to reach the switch. Then hold it down so you can reach the next room. You will get the mirror-shield, which allows you to reflect the rays of light. Go back to the previous room, immediately use the shield to deflect the light towards the solar switch. The door will open, so go inside and get the key.
Proceed to the room where you killed the Anubis, go through the locked door, climb the wall using the longshot to balance. Another door through which to proceed. So place yourself on the closest symbol, play Zelda's lullaby. Go ahead, break the doors with your hammer, shoot the eye, use the longshot again to reach the top of the ice blocks. Climb on the switch, drop down and open the chest to get the boss key.
Exit the room, go through the door in front of you, perform a jump attack on the crystal switch inside the cage. The door will open, kill the Lizalfos and move the cobra statue towards the rock on the wall, letting the light hit it. Bomb the rock, then go back to the room where the second cobra statue is.
Reflect the light at the sun switch so that the floor drops. You will then be able to orient your shield to direct the light towards the face of the statue. After a few minutes, the face will melt, and you can access the area where the boss is stationed.
Boss: Twinrova
Jump to a side platform. When one of the two witches attacks, use the shield to deflect the beam towards the other witch. The two witches will unite, creating a single, larger enemy, who will alternately shoot fire or ice. What you have to do is absorb three of these attacks - of the same type - accumulating energy which must then be returned to the "sender". The witches will be stunned, and you can attack directly, achieving victory. The melody of the prelude of light was played to reach the temple of time. Talk to Sheik, obtaining the arrows of light, which you will need to fight Ganondorf.
dungeon finale
Go down the stairs, go through the door, take a right to reach the barrier. Use Din's fire to light all the torches on the first floor. Look up, shoot an arrow at the flashlight above, opening the door. In the following room use the longshot combined with the boots to recover all the rupees that will allow you to pass to the immediate surroundings of the barrier, which can be destroyed by using an arrow of light. Get rid of the Freezards, pulverize the stalactites surrounding the fire in the center of the room, then pour some into a bottle. Melt the ice blocking the exit, refill the bottle, press the blocks around you until you reach the red ice. Melt this too, reaching the water barrier, also to be knocked down by shooting an arrow of light.
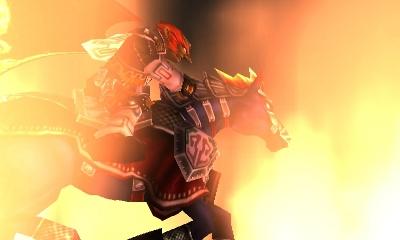
In the new area, look to the right and shoot a fire arrow at the flashlight. A bridge will be created, cross it to get to the platform, then use longshot to reach the next one. Turn around, shoot an arrow at the flashlight, jump to the stairs, go up on the switch. When the chest drops, use longshot to grab it, retrieving the golden gloves. Use the lens to locate a secret path to the shadow barrier. Shoot an arrow in his direction.
Use the gloves to lift the huge block that separates you from the group of silver rupees, then grab them and make your way to the fiery barrier. Destroy this too by shooting the usual arrows. Use the lens to kill all the Keese, then play Zelda's lullaby to cause a crate containing a key to fall. Take it, continue to the next room, use the lens to locate the hidden path that leads to the light barrier, to pulverize. Make all the rupees around you your own, then hit the first switch to drop a chest. Pick up the bomb and throw it towards the hole in the ceiling, reaching the second switch.
Shoot the cobwebs that invade the next room, using a flaming arrow. Then deflect the light, making it hit the sun switch. Destroy the last barrier, the spirit barrier, to reach the tower of Ganon. Go up the stairs, get rid of the Dinalfos, then the Stalfoso. Retrieve the boss key, proceed through the door at the end of the path.
Boss: Ganondorf
Stand on one of the outer blocks, while Ganon will begin firing electrical charges. Knock back these balls of electricity, stunning him, then hit him with arrows of light. Then jump onto his back, keep hitting him with your sword. Then repeat this strategy until he is killed. Follow Zelda, dodging the falling rocks, killing the two Salfos. Upon exiting the castle, you will find yourself in front of Ganon.
Boss: Ganon
Shoot the arrows of the light towards Ganon's forehead; when he is stunned, walk around him and hit his tail, repeatedly. You will be able to get your Master Sword back: hit him with it, then - when he gets back on his feet - run under his legs, hit him in the tail. Zelda will hold him still, give him the coup de grace to enjoy the finale.


