


In this guide by Genshin impact we will do an overview of the skills and builds best for Sangonomiya kokomi and we will explain everything you need to know about the Drifting Luminescence banner.
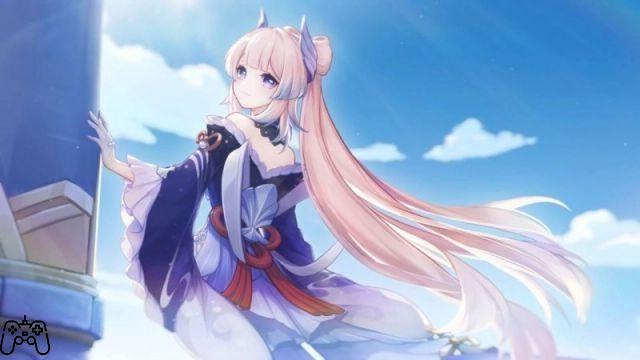
Kokomi is the young divine priestess of Watatsumi Island and a descendant of the Sangonomiya clan. She is also the leader of the resistance opposing Archon Raiden Shogun and his Vision Hunt Decree. Her fighting style is based on the use of magical ranged attacks of the Hydro element using category weapons Catalyst. One of his strengths is his healing for teammates, whose power is based on maximum HP.
Sangonomiya Kokomi is available on Genshin Impact thanks to the new banner Drifting Luminescence. Getting a five-star rarity character requires a large amount of luck or a large amount of Intertwinded Fates (or often both!), So before wasting resources it's a good and right thing to know more about his fighting style, combat talents and passive.
Il banner Drifting Luminescence
The only way to get Sangonomiya Kokomi is to try your luck with the banner Drifting Luminescence, which will be available on Genshin Impact until Tuesday 12 October. As with all event banners you will have to use Intertwinded Fate to express "wishes", which you can get mainly by investing your hard-earned Primogems in the Shop - Paimon's Bargain session or directly from the banner page.
Kokomi isn't the only playable character obtainable from Drifting Luminescence. In fact, the banner includes 6 five-star rarity heroes and 16 four-star rarities. Fortunately the odds of getting Kokomi and the other "cover" characters, that is Rosaria, Beidou e Xingqiu they will be greater for the duration of the event.
If your goal is to add Sangonomiya Kokomi to your team it is good to know the gacha mechanics by Genshin Impact, before throwing away precious resources. The first time you get a 5-star character from the event banner, there is a 50% chance that this is Kokomi. Otherwise, the chances will rise to 100% with the next 5-star reward.
The odds of get an item of the highest rarity they are only 0,6% for each "wish" (attempt), but luckily Genshin Impact has a mechanic designed to make it less tedious to obtain characters, called "pity". Specifically, if you don't receive a five-star item within 89 attempts, the 100th will have a XNUMX% chance of being a reward of the highest rarity. This hidden counter obviously resets after getting a five-star character.
So if you are unlucky and fail to win even a 5-star character with wishes, with the 50th attempt you will have a 100% chance of obtaining Sangonomiya Kokomi. In the worst case, then you will get 180% the character with no more than XNUMX attempts. There are undoubtedly many, especially if you are a "free-to-play" player, but it is also true that the latter is the most catastrophic scenario possible.
Combat Feats, Passive Bonuses, and Constellations
As explained in the previous section, getting the main character of a Genshin Impact banner can take a lot of patience and resources, so it's good to take Sangonomiya Kokomi's characteristics into consideration before spending large amounts of Interwined Fates.
Kokomi is using weapons from the Catalyst category and attacks based on the Hydro element. His abilities are based on the use of water magic that take the form of fish and jellyfish, which also can keep the team standing thanks to their healing effects.
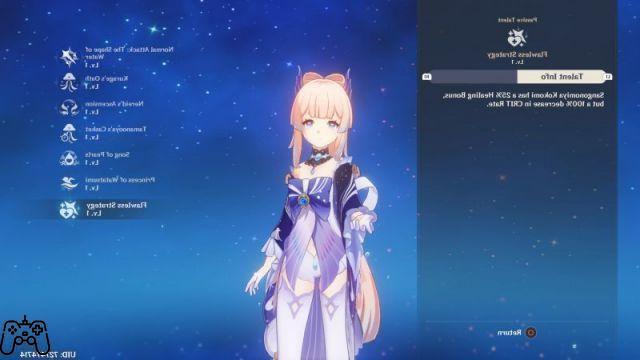
Here is an overview of the fighting talents in Kokomi:
- The Shape of Water: Kokomi's standard attack can be performed three times in a row and takes the form of fish dealing Hydro element damage to enemies. The Charged Attack consumes a portion of your stamina and deals Hydro Area Damage (AoE). The attack from above damages all opponents in the trajectory during the fall and subsequently the impact on the ground causes Hydro damage to the area.
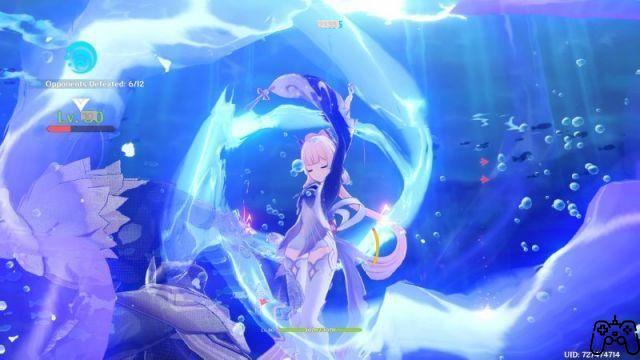
- Elemental Skil - Kurage's Oath: Kokomi summons a "Bake-Kurage", a kind of magical jellyfish, which damages opponents and heals allies. It also applies "wet" status to Kokomi. The Bake-Kurage stays in the field for 12 seconds and deals Hydro damage to the area and heals at regular intervals. The power of the latter is based on Kokomi's maximum HP (base, 4,4% of maximum HP + 424).
- Elemental Burst - Nereid 'Ascension: Kokomi performs a powerful AoE attack of the Hydro element that scales according to the maximum HP and activates the "Ceremonial Garment", a sort of magical ceremonial garment, for 10 seconds that grants various bonuses. The power of normal, charged and top attacks gain a percentage bonus based on Kokomi's maximum HP and also heal allies. Furthermore, for the duration it will be more resistant to the interruptions of the opponent's attacks and will be able to float on the water.
Here are the bonuses given by passive talents di Sangonomiya Kokomi:
- Tamanooya's Casket: If the Bake-Kurage is already on the battlefield when Kokomi activates Nereid's Ascension, its duration timer is reset. This means that you can potentially have him stay on the pitch for about 23 seconds with the right timing and recall him immediately afterwards.
- Song of Pearls: While wearing the "Ceremonial Garment" the bonus for normal and charged attacks based on Kokomi's max HP will get an additional boost.
- Princess of Watatsumi: Stamina consumption while swimming is reduced by 20% for the whole team.
- Flawless Strategy: Kokomi's most important passive to take into consideration, since for better or for worse it clearly defines his role in battle. In fact, it grants a 25% bonus to the healing given but at the same time reduces the chances of hitting critical damage by 100%.
As for the bonuses of the Constellations, like all the other characters in Genshin Impact (with the exception of the Traveler and Aloy), you will unlock them in succession using Kokomi's Luck Star each time. To get them it is necessary to win a "duplicate" of the character in the dedicated banner. Here is the full list:
- Lv. 1 - At Water's Edge: While wearing the "Ceremonial Garment" the final hit of the normal attack combo will deal an additional Hydro element damage equal to 30% of Kokomi's maximum HP.
- Lv. 2 - The Clouds Like Waves Rippling: Kokomi receives healing bonuses when healing affects characters with 50% or less HP. Specifically, the Bake-Kurage gets a 4,5% bonus and 0,6% normal and charged attacks during the effects of Nerei'd Ascension.
- Lv. 3 - The Moon, A Ship O'er the Seas: Increases the level of Nereid's Ascension talent by 3. The level cap increases to 15.
- Lv. 4- The Moon Overlooks the Waters: while wearing the "Ceremonial Garment" the speed of Kokomi's normal attacks increases by 10% and those that hit enemies allow you to recover 0,8 energy points (the latter effect activates once every 0,2 seconds).
- Lv. 5 - All Stream Flow to the Sea: Increases the level of Kurage's Oath by 3, with the maximum level cap increasing to 15.
- Lv. 6 --Sango Isshin: While wearing the "Ceremonial Garment" Kokomi gains a 40% bonus to Hydro damage for 4 seconds if a normal or charged attack heals an ally with 80% or more of her HP.
Better builds
Is it worth investing resources to obtain Sangonomiya Kokomi? It depends. How Support falls into the same niche as Barbara (with the due differences), a very valid 4-star character, always of the Hydro element, but which can be obtained for free simply by progressing in the main story of Genshin Impact. From this point of view, yes, it might be worth skipping the Kokomi banner on foot and saving Primogems for the next characters.
However, keep in mind that Kokomi on paper can give more healing thanks to the passive Flawless Strategy which increases their effectiveness by 25%, but at the same time reduces the critical chance by 100%, which significantly lowers its offensive potential. On the other hand, the damage of Nereid's Ascension and the bonuses of the "Ceremonial Garment" scale to the maximum HP of Kokomi, so creating an effective set is not difficult at all and could even give some small satisfaction in terms of DPS.
With regard to the better build for Sangonomiya Kokomi, in principle anything that increases maximum HP also increases healing and (partially) damage, while anything related to the probability of performing a critical hit is essentially useless.
Among the Artifacts that we recommend, the four-piece set of Tenacity Of The Millelith (obtainable at the Ridge Watch) is a great choice if you are aiming for pure support: the first bonus increases the maximum HP by 20%, while the four-piece bonus increases the attack of the companions by 20% when an enemy is hit by the Elemental Skill. Since the effect is valid even if Kokomi leaves the field, it has a great synergy with Kurage's Oath.
If you are aiming for a slightly more offensive build, you can opt for four pieces Heart of Depth (obtainable at the Peak Of Vindagnyr). The first bonus increases Hydro damage by 15%, while the four-piece bonus increases Normal and Charged Attacks by 30% for 15 seconds after activating the Elemental Skill. Alternatively you can aim for a mix with two pieces Heart of Depth and Tenacity of the Millelith.
As for weapons, the best choice is probably theEverlasting Moonglow five-star rating obtained from the Epitome Invocation banner. Increases healing by 10% and normal attack damage by 1% of the user's maximum HP. Normal attacks recover 0,6 Energy for 12 seconds after using Elemental Burst. Additionally, the weapon's bonus stat increases maximum HP. An excellent solution undoubtedly, but not for everyone.
The alternative, on the other hand, is extremely accessible to anyone: let's talk about the Thrilling Tales of Dragon Slayer. That's right, a really common three-star weapon (you probably have loads of them in your inventory) but one that has a really great effect if you're aiming to create a support build: by changing characters in battle, the one who takes over the user's place. this weapon gains a 24% attack bonus for 10 seconds. Since we are talking about a very common weapon, it takes very little then to bring the Refinement Rank to the maximum, thus doubling the power of the aforementioned bonus (48%). Bring Kokomi onto the battlefield, do some healing, and then move on to the next character to cause massive damage. Simple but effective.
If you found this Genshin Impact article useful, we recommend that you take a look at our recommendations for the best builds for Aloy from Horizon Zero Dawn and Forbidden West, as well as our guide to fishing and how to get and upgrade the free spear "The Catch. ".


