


Differences with Demon's ...
The main difference is that instead of having a game with a central area (the Nexus), where you can access every single area of the game, in Dark Souls we have a whole world, to reach a certain place, therefore, you will necessarily have to , make the way on foot, until you find the Lord Vessel, which will allow you to teleport between the various bonfires. Healing spells and flasks (Estus) now have a limited number of uses, with a visit to one of the bonfires this number will return to its maximum. As for online gaming, to help another player the method has remained that of the stone with which you will leave your mark from which you can be evoked, to invade instead the speech is quite different, or use the stones of the red eye broken (but you must be in human form), or you must enter one of the various Covenants; some of these Covenants will allow you to invade the worlds of others. The weight of the items in the inventory is now gone, so you can turn around with any item found without receiving penalties. The world trend no longer exists, but there is a Covenant that allows players to make an area much more difficult to tackle. There is no longer even the tendency of the character, now the only two conditions are human and dead, as a human you can summon other players and be invaded, also the percentage of finding rare items increases, from dead this time you will keep all your life points, but you cannot summon and you cannot be invaded. For the evolution of weapons and armor, you will first have to find the various embers scattered around the game, and once found you will have to offer them to the specific blacksmith. For everything else, Dark and Demon's Souls are identical, same GUI and same controls.
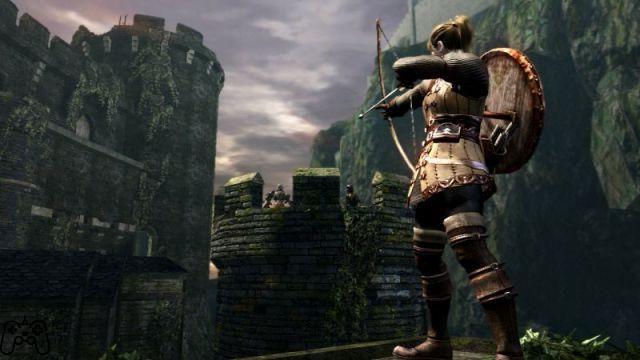
Introduction
Here are the character stats.
Vitality: Increases PV
Affinity: Increase the number of spell slots
Resistance: Increases the character's resistances
Power: Used to be able to use certain types of weapons and shields
Dexterity: Used to be able to use ranged weapons
Stamina: Increases the player's stamina and maximum carry weight
Intelligence: Increase the power of spells
Faith: Increase the power of spells
The classes
The classes are more of a starting point, by choosing the class you will decide more than anything else how to deal with the early stages of the game, maybe even just to decide if we are more suited to a wizard style of play, rather than a brutal warrior. In fact we will have no limits in the growth of our character.
Warrior
Level: 4
Vitality: 11
Affinity: 9
Resistance: 11
Power: 13
Dexterity: 13
Stamina: 11
Intelligence: 9
Faith: 9
Cavaliere
Vitality: 14
Affinity: 10
Resistance: 11
Power: 11
Dexterity: 11
Stamina: 10
Intelligence: 9
Faith: 11
This character will start the game in the Covenant "Via Del Bianco"
Viandante
Vitality: 10
Affinity: 11
Resistance: 10
Power: 10
Dexterity: 14
Stamina: 12
Intelligence: 11
Faith: 9
Thief
Vitality: 9
Affinity: 11
Resistance: 9
Power: 9
Dexterity: 15
Stamina: 10
Intelligence: 12
Faith: 11
He is the only character that starts with the "Universal Key"
Bandito
Vitality: 12
Affinity: 8
Resistance: 14
Power: 14
Dexterity: 9
Stamina: 10
Intelligence: 8
Faith: 10

Cacciatore
Vitality: 11
Affinity: 9
Resistance: 11
Power: 12
Dexterity: 14
Stamina: 11
Intelligence: 9
Faith: 9
sorcerer
Vitality: 8
Affinity: 15
Resistance: 8
Power: 9
Dexterity: 11
Stamina: 8
Intelligence: 15
Faith: 8
Pyromancer
Vitality: 10
Affinity: 12
Resistance: 11
Power: 12
Dexterity: 9
Stamina: 12
Intelligence: 10
Faith: 8
Cleric
Vitality: 11
Affinity: 11
Resistance: 10
Power: 12
Dexterity: 8
Stamina: 10
Intelligence: 8
Faith: 14
Discriminated
Vitality: 11
Affinity: 11
Resistance: 11
Power: 11
Dexterity: 11
Stamina: 11
Intelligence: 11
Faith: 11
Initial gifts
During character creation you can decide to start the game with one of the following gifts.
Divine Blessing: a potion with which you will heal all your HP and remove any negative status. One use only.
Fire bombs: you will start the game with 10 dark fire bombs.
Double Humanity: You will start the game with the Double Humanity item, if used it will immediately give you two Humanity points.
Binoculars: object for long distance observation.
Pending: item with no effect, but which can be traded later in the game.
Universal Key: the only object not found in the game, it is the same key as the thief, it allows you to open some doors inside the world.
Ring: increases PV by 5%.
Witch's Ring: Allows you to talk to the Chaos Witch "Quelaag" when you meet her in the game.
The Covenant
The Covenant are real factions within the game, joining one of them will totally change the experience of the game, both online and offline, each of them has certain rules, and the agreements with them can be severed, but you will receive malus.
The White Way
Pact for those who want to help other players, it will be easier for the members of this Covenant to find each other, also you will increase the power of miracles. If you break the pact you will receive a penalty of -1 to the number of Estus flasks. To enter, talk to Petrus at the initial bonfire.
Guard of the Princess
The members of this covenant will be facilitated to be online, you will have access to two new miracles. If you break the pact by killing Gwynevere, the area of Anor Londo will turn dark. To enter this Covenant, talk to Gwynevere.
Dark Lama
The members of this Covenant will receive The Blue Orb, which will allow you to invade the worlds of those who have broken treaties with the other Covenants. You will have a ring that when equipped will make you invade the Anor Londo area of any player who killed Gwynevere. To enter this Covenant you will need to equip the dark moon ring, and enter the catacomb in Anor Londo, the central statue will disappear and you can access the room where Gwyndolyn is located, talk to him and accept the pact.
Ranks
To rank up with this Covenant, you will have to kill the players marked on the guilty book, by killing them you will receive an item called Souvenir, to be delivered to Gwyndolyn.
1 = 10 Souvenirs, you will receive the Dark Moon Sword and the Dark Moon Talisman.
2 = 30 Souvenirs, you will receive nothing.
3 = 80 Souvenirs, you will receive nothing.
Warriors of the Sun
The players of this Covenant will appear as golden ghosts when summoned. Every time you kill a boss, you and your playmates will be rewarded with a Sun medal. It will be easier for players of this Covenant to find themselves online. You will receive the Spear of Light miracle. To enter you must have faith at 50, this number can be decreased by helping other players to kill the bosses, for each boss killed, the value of the faith statistic will decrease by 5, so killing 5 bosses you will only need 25 in faith to enter . Find the broken altar in the Undead Hamlet, and if your faith is enough, you will be given the option to make the deal.
Ranks
1 = 10 Sun Medals, you will receive the "Great Spear of Light" miracle and you can offer Lord Gwyn's soul to receive the "Sun Spear" miracle.
2 = 30 Sun Medals, you will receive nothing.
3 = 80 Sun Medals, you will receive nothing.
Forest Hunter
Upon entering this Covenant, you will be given a ring, which will summon you to the Dark Root forest whenever a player not belonging to this Covenant enters the area. To enter you will need to talk to Alvina, the huge white cat in the Dark Root forest. Each time you kill an invader, you will be awarded a victory point.
Ranks
0 = 1 - 5 Victories.
1 = Divine blessing.
3 = Ring of the Mist.
5 = Alvina will tell you about the Wolf Sif.
1 = 10 wins, you will receive nothing.
2 = 30 wins, you will receive nothing.
3 = 80 wins, you will receive nothing.
Servants of Chaos
Upon entering this Covenant, you will have access to three new pyromancy spells. To enter this Covenant, you will have to find the secret street located to the right of the well; after beating the boss of the Cursed City, talk to the spider queen to accept the deal. By betraying the pact you will be cursed with an egg infestation on your head, absorbing your souls this egg will hatch causing a worm to come out of your head, granting you access to the Poison Cloud spell, and Poison Mist of pyromancy; To cure this infestation you will need the Worm Egg item.
Ranks
0 = 0 Humanity offered, you will receive the Chaos Fireball spell.
1 = 10 Humanity offers, you will receive nothing.
2 = 20 Humanities offered, you will receive the Chaos Firestorm spell, and open the shortcut to the Izalith area.
3 = 80 Humanity offers, you will receive nothing.
Servants of the Graveyard Lord
By entering this Covenant, you can use the eye of death, which will leave a symbol on the ground, this same symbol will appear in the world of 3 other players, making the game much more difficult. Through this sign the cursed player will be able to invade your world eventually killing you and removing the curse. By killing cursed players, you will receive an eye of death. You can only make this pact before completing the Tomb of the Giants. Make sure you have at least one eye of death, in the catacombs you will collide with a titanite demon in a corridor, in front of it you will find a partially open coffin, climb on the coffin and wait 30 seconds, you will be transported to Nito's room, talk to him to make this pact. You will receive the Sword of the Graveyard Lord, and the Sword Dance miracle of the graveyard.
Ranks
1 = 20 Eyes of Death, you will receive the miracle Dance of the Great Swords of the Cemetery.
2 = 40 Eyes of death, you will receive nothing.
3 = 80 Eyes of death, you will receive nothing.
Way of the Dragon
By entering this Covenant you can transform into a dragon man capable of breathing fire. With the Dragon's Eye (obtainable by accepting the pact) you can leave the remains of the dragon in the world of other players, through the remains you can be summoned, and by killing the player you will receive the Dragon Scale object (which allows you to evolve the weapons of Dragon type). You will also receive the Stone Dragon Head item which will transform your head into that of a dragon (you do not have to wear the helmet), used this item again, you will spit a flame of fire, the damage of this flame depends on the rank with this Covenant. To enter this Covenant, you will need to speak to the Eternal Dragon in the Ash Lake area.
Ranks
1 = 10 Dragon scales, you will receive nothing.
2 = 30 Dragon scales, you will receive Stone Dragon Torso, an item that will transform your entire body into a dragon man (as long as you don't wear any type of armor), you can breathe fire, the damage of the unarmed attack will be increased, and you can use a miracle that emits a sort of earthquake that knocks opposing players, and further increases your attack. The form of the dragon will remain there until death.
3 = 80 Dragon scales, you will receive nothing
Dark Specter
By entering this Covenant, you will receive the dark hand, a fist weapon, capable of sucking humanity points from other players, also with rank 2 you will receive the Red Eye Orb, an infinite object that allows you to invade the world of other players . To enter this Covenant, you will have to defeat the 4 Kings before finding the Lord Vessel, at the end of the battle the eternal snake will appear; talk to him to make the deal.
Ranks
1 = 10 Humanities offered, you will receive Red Eye Orb.
2 = 30 Humanities offered, you will receive Dark Sword and Dark Wraith Armor Set.
3 = 80 Humanities offered, you will receive Dark Hand upgrade and steal more souls.
Bonfire
The Bonfire is a real checkpoint for the various areas, from here onwards every time you die, you will restart from the last bonfire visited, using it you can level up using the accumulated souls, you can repair weapons and armor (provided you have purchased repair kits) or upgrade them, you can change the magic in use, and access the bottomless chest (provided you have purchased it), where you can leave the items you do not use. By sacrificing one humanity point when dead, you will return to human form. You will restore HP, Estus flasks, uses of spells. The bonfires can be upgraded, in human form, by sacrificing a humanity point, reinforcing the bonfires will increase the number of Estus flasks by 5. If other players light the same bonfire, you will receive an extra Estus flask. Once you find the Lord Vessel, you can teleport from area to area. Whenever you rest next to a Bonfire, every enemy in the area will be reborn.
Masters of the bonfire
Bonfire Masters are specific NPCs placed near certain bonfires in the game. By offering the soul of the guardian to a bonfire master, you will permanently increase the effectiveness of your Estus flasks.
Online Gaming
There are two ways to play Dark Souls online: cooperative and PvP.
Cooperative
Use the white stone and leave your mark on the ground, a player can use your mark to summon you, enter his world and by killing the zone boss as well as the souls, you will receive humanity. As summoned, you cannot use Estus flasks, but you will receive Healed VPs when the summoner uses one, this also applies in reverse, in the sense that if you are the host player, take a look at your teammates' life bar , you may want to heal them even if your HP is at max. By dying as evoked, you will not lose neither souls, nor Humanity.
PvP
You can invade the worlds of other players in several ways, the simplest is by using a broken red stone, unfortunately even if you fail the invasion, the item will still be consumed. Or you might decide to join one of the Covenants that allows invasion against other players. The purpose of the invasion is obviously to kill the opposing player, by doing so, in addition to receiving a large amount of souls (and the satisfaction of having defeated someone) you will also receive humanity.
Second episode of the guide
Boss
A premise is a must, few of these bosses can even be beaten alone; depending on your style of play, some of them may seem impossible or really easy, my very personal advice is to always summon someone.
Boss - First part
Demon of the refuge
The only easy way to beat this boss is to select fire bombs as a starting gift, and throw them at him. By killing him as soon as you encounter him, you will get the demon hammer. In the second fight, however, do not keep him in target and try to go around him to avoid his blows.
Bull Demon
As soon as you pass the fog door, turn your back and climb the ladder to your left, when you are on the tower eliminate the two skeletons. Go down and go towards the bottom of the bastion, as soon as the boss appears run towards the ladder, climb the tower and target the demon, and as soon as he finds himself below you, throw yourself off the turret, and hit the head of the boss. Move away and lure him towards the end of the bastion, avoid his shots and return to the turret to hit him in the head again. Do this until he dies.
Bell gargoyle
Stay at a safe distance, and study its attacks a minimum, a good shield will parry most of the hits of the first Gargoyle, even if the fire will still inflict damage on you, try to circle around it so that if it fails with one of the his shots, you can attack him without risk. You may also find some bombs useful in this fight. Remember that if you hit his tail a few times, he will drop the big demon ax. When the second Gargoyle comes down, stay focused on the first one, but keep your distance from the newcomer and his flames. Killed the first, dedicate yourself to the second, try to get around him when he spits the fire to be able to deal several shots.
Goat Demon
Try to eliminate the two dogs in the area as quickly as possible, obviously trying to avoid the boss's shots at the same time. Once you have eliminated the dogs, go up the stairs to the left, and position yourself on the arch of the gate below, if the demon will remain in the lower part, wait for it to be below you, take it as a target and hit its head in flight (as for the Demon Taurus), if instead he should go up the stairs and come towards you, wait for him to approach and then throw yourself off the arch, when the boss also comes down, he will remain stationary for a few seconds, and you can deal a couple of blows.
Moon butterfly
Before entering the fog door, check the base of the tower under the stairs for the summoning sign of the Witch Beatrice. Keep far away from the boss, and try to avoid her magic attacks with somersaults. After a while, the boss will lean on the bastion, as soon as you see it starts to descend, run towards it, and deal as many hits as possible.
Hungry Dragon
Before entering the fog door, check behind the pillar just above the stairs for the NPC summon signal. Most of the time, keep your distance from this boss, and study his movements well. The boss will hold two positions, standing and on all fours. It is advisable to eliminate his tail as soon as possible by hitting it several times (you will also receive the great ax of the Dragon King) When he is standing, try to go around him avoiding or parrying the blows of his arm, deal only one blow when you are behind him, if it takes off, move away and check its shadow to avoid being crushed, pay attention to its tail, it is advisable to always remain in parade position. When he gets on all fours, get away and see what he does; if he starts walking, get out of his trajectory if you are in front of him, and run after him until he stops, inflict as many blows as possible and get away quickly. At about mid-life, he may start spitting out a large wave of acid, I recommend running as far as possible, as this acid will quickly break down your equipment.
Infinite download
Entering the room, the boss will not attack you, look for the little street just to the right of the stairs, this little street is made in an "L" shape, hit the boss with an arrow to start the fight. Always stay in the "L" -shaped alley, lure the boss in front of the entrance to the alley, and as soon as you hear him make a noise, run around the corner, he will try to hit you with his arm, arm that will remain on the ground for some useful seconds to allow you to land a few shots. Once he pulls off his arm, go back in front of him and wait for him to make another sound, turn the corner to avoid being hit, and continue slashing on the outstretched arm.
Queen of Chaos - Quelaag
Before entering the fog, summon the NPC. Try to always stay behind her, or in any case on her side, never front, try to hit her when she spits out the lava or uses her front blade. Always walk away after two or three hits, wait a few moments to see what attack he uses and regain your stamina. Pay close attention to his area attack, so it is advisable to move away every two or three hits. Don't be in a hurry, try to eliminate it by giving it a few hits and walking away immediately.
Gwyndolin - Dark Sun
In order to face this boss, you must have killed Gwynevere, and entered the tomb at the base of the big elevator in Anor Londo with the Dark Moon ring. The boss will use three types of attacks, a volley of arrows, a series of magic bullets, and a giant magic sphere; when he uses the volley of arrows just zigzag, when he uses the magic bullets hide behind a column, when he uses the magic ball wait for him to throw it and at the last dodge the shot, reach the boss and try to hit him as many times possible before he teleports farther.
Seath - The flakeless
The first time you meet this boss (from the Duke's Archive) it will be a fight where you have to die, so spend all your souls. The second time you meet him instead (from the crystal cave), immediately run behind him, and eliminate the crystal you see in the boss cutscene, in this way you will make the dragon vulnerable to your blows. Spin around the boss all the time, and he shouldn't be able to hit you, when you're behind him hit him a couple of hits and regain your stamina. As soon as you regain your stamina, get into parry position, and if he doesn't start beating up his tails, keep circling around him to reach his back.
Centipede Demon
Draw the demon towards you, or look for a larger area out of the lava. Always keep in contact with the boss, always in parry position, try to cut his tail, so that he will go crazy and run against the wall, keep hitting him, and as soon as the tail grows back, repeat this strategy. As soon as his life is low, he will use an area attack, absolutely avoid it by staying behind him.
Pinwheell
Hit it the first time and it will start forming clones of itself; if you pay attention you will be able to see which is the original, only by hitting him will his life go down. Hitting the clones instead will eliminate them with one shot, so if you should find one nearby, don't worry about eliminating it, don't let them surround you. Fireballs are easy enough to avoid. Keep up the good work this boss will go down easily.
Boss - Second part
iron golem
As soon as the fight has begun, do not approach the boss immediately, but let him throw his ax, done this approach in parried position, as soon as you see that he is about to strike a blow, try to move away or dodge, if he raises his arm to grab you, look for to dodge or even better try to go around it. The best strategy is to be able to land a good number of hits to his right leg, so that the boss starts to falter, keep hitting the leg and the golem will fall to the ground and be completely vulnerable.
Big Wolf Sif
The easiest way to beat this boss is to look for a small climb as soon as you enter the mist portal on the right, then go up the mound and kill the boss with magic. If you don't have powerful enough magic at your disposal, keep some distance between you and the boss, maintaining a parry stance, wait until the boss has slashed and hit him, otherwise wait for him to jump when he is on you, hit him before he jumps again. Another fairly easy strategy is to try to stay under his chest so that his shots don't land and hit him in the legs. When he is short of life he will start limping, wait until he has struck a blow and hit him and then walk away immediately.
The four kings
Before entering the fog portal, check behind the column in front of it to summon the witch Beatrice. To face this boss it is necessary to keep equipped the ring obtained by beating Sif. This boss consists of four identical bosses, which will spawn every certain time, so it is advisable to eliminate the first one fairly quickly. If you are a wizard, keep your distance and cast your spells. If, on the other hand, you are a hitter, it is advisable to equip the most powerful armor you have (obviously you have to keep under the maximum weight) and throw at you the Iron Skin miracle; Always keep close to the bosses and their attacks will do very little harm, but beware of the huge area blast.
Cradle of Chaos
Run to the left glowing sphere, avoid the boss hits, and destroy the sphere. Leave immediately, and be careful not to fall into the chasms that will form at your feet. Destroy the right sphere as well, and go back in front of the boss at a safe distance. Check the chasm below him, there is a huge branch, take the measurements well, and avoid the blows, throw yourself on the branch and run towards the boss. Easily remove the branches and kill the insect. The ease of this boss is that if you die, but you have eliminated the orbs, when you return to the boss room you will find the orbs already destroyed, and you can immediately jump on the branch.
Wandering demon
It is advisable not to target this boss. Stay close to the boss, in parry position, try to go around him, when you are behind him hit a blow. If the demon should give a side swipe with the sword, roll behind him and you will not be hit by the explosion, if instead he should raise his sword with both hands and plant it in the ground, quickly move away from him, to avoid the huge explosion. area. If it takes off, move away a few meters, wait for it to fall to the ground, give it a couple of hits, and go back around it.
Wandering fiery demon
Same strategy for the Wandering Demon, only this will be a little faster, and the area damage will be increased.
Priscilla
This boss will be invisible until mid-life. Check her footprints on the snow, when you see her footprints approaching each other, it means that she is about to hit you, run to meet him and go behind the footprints, you will miss her and you can hit her. At mid-life she will be visible again, and will launch a storm attack at you, which will be easy to dodge. Keep your distance to avoid her blows, and hit her when the opportunity presents itself. If you cut off her tail, you will receive Priscilla's knife.
Nito
Make yourself a divine weapon before facing this boss, you will need it to eliminate the little skeletons, without them coming back to life. As soon as you fall into the boss room, wait for the little skeletons to come towards you, kill them and Nito will come to meet you. Whenever you hear a scream, it means that Nito is about to use the sword dance, a huge blade will come out of the ground to impale you as soon as the scream ends, avoid them with a somersault. Always keep your distance from the giant skeletons so they don't attack you. Every shot from Nito is parable, except for the explosion, which you can avoid by moving away from him when he charges her. Try to avoid and parry his blows, and go around him from behind to hit him easily.
Ornstein e Smough
Kill Ornstein first, to do this move away in the parry position, and make sure that the two bosses are far enough away from each other, wait for Ornstein to attack you, avoid or parry the blow, hit him two or three times and walk away again. When Ornstein dies, lure Smough towards you, and only attack him when he uses his jump attack.
Hydra
Approach Hydra, avoiding its jets of water, it is better to approach from an area without obstacles, otherwise the jets in contact with trees and stones will explode hitting you. When you are close enough, the boss will stop spitting water, and will attack you with his heads, before attacking you he will emit a roar, stand on his front in parry position without targeting him, look where the heads go and give a single blow to one of the hills. Recover your stamina as quickly as possible, return to face the boss and stay in parry position until the next attack.
White - Boss finale
There are several strategies for beating the last boss in the game. The first, for melee characters, is to equip Havel's entire armor set and cast the Iron Skin miracle, parry her attacks, and hit him at the right moment. Another strategy is to hide behind one of the large stones inside the area, wait for Gwyn to try to grab you and hit him when he misses. For those who use magic instead it is advisable to stay at a distance and cast spells, as soon as the boss is too close immediately roll away, and return to casting spells when the distance is sufficient.

The magic
ARROW OF THE SOUL
USES: 30
SLOTS: 1
INT: 10
DESCRIPTION: magic bullet
OBTAINED FROM: Griggs, Logan, Rickert 1000 souls
GREAT ARROW OF THE SOUL
USES: 20
SLOTS: 1
INT: 14
DESCRIPTION: magic bullet
OBTAINED FROM: Griggs, Logan 6000 souls
ARROW OF THE HEAVY SOUL
USES: 12
SLOTS: 1
INT: 12
DESCRIPTION: magic bullet
OBTAINED FROM: Griggs, Logan, Rickert 2000 souls
GREAT ARROW OF THE HEAVY SOUL
USES: 8
SLOTS: 1
INT: 16
DESCRIPTION: magic bullet
OBTAINED FROM: Griggs, Logan, 8000 souls
SEARCH ARROW SOULS
USES: 10
SLOTS: 1
INT: 18
DESCRIPTION: magic bullets, which appear above the head, are launched towards the first enemy that approaches
OBTAINABLE FROM: Logan 20000 souls
SILENCE
USES: 6
SLOTS: 1
INT: 15
DESCRIPTION: cancels the noises of your footsteps
OBTAINED FROM: Fortress of Sen
LUCE
USES: 3
SLOTS: 1
INT: 14
DESCRIPTION: creates a halo of light around you, which illuminates what surrounds you
OBTAINED FROM: Dusk
LANCE OF THE SOUL
USES: 4
SLOTS: 1
INT: 36
DESCRIPTION: magic bullet
OBTAINABLE FROM: Logan 40000 souls
CRYSTAL SOUL LANCE
USES: 4
SLOTS: 1
INT: 44
DESCRIPTION: magic bullet
OBTAINED FROM: Logan in the Duke's archives 50000 souls
CRYSTAL MAGIC WEAPON
USES: 3
SLOTS: 1
INT: 25
DESCRIPTION: right weapon upgrade
OBTAINED FROM: Logan in the Duke's archives 20000 souls
ARROW SOULS IN SEARCH OF CRYSTAL
USES: 10
SLOTS: 1
INT: 24
DESCRIPTION: magic bullets, which appear above the head, are launched towards the first enemy that approaches
OBTAINED FROM: Logan in the Duke's archives 30000 souls
RESISTANCE TO CURSE
USES: 4
SLOTS: 1
INT: 16
DESCRIPTION: increases resistance to curse
OBTAINED FROM: Ingward 5000 souls
REPAIR
USES: 1
SLOTS: 1
INT: 14
DESCRIPTION: repairs all equipment
OBTAINED FROM: Dusk 10000 souls
HIDDEN BODY
USES: 3
SLOTS: 1
INT: 14
DESCRIPTION: Makes you slightly invisible
OBTAINED FROM: Dusk
HIDDEN WEAPON
USES: 3
SLOTS: 1
INT: 14
DESCRIPTION: Makes the right weapon slightly invisible
OBTAINED FROM: Dusk
MAGIC SHIELD
USES: 5
SLOTS: 1
INT: 10
DESCRIPTION: enhances the shield, and halves the stamina consumed to parry
OBTAINED FROM: Griggs, Logan 3000 souls
IMPROVED MAGIC SHIELD
USES: 3
SLOTS: 1
INT: 15
DESCRIPTION: Same as for the magic shield, but the effect is better
OBTAINABLE FROM: treasure in the Duke's archives
MAGIC WEAPON
USES: 5
SLOTS: 1
INT: 10
DESCRIPTION: Upgrade the right weapon, only works on normal weapons
OBTAINED FROM: Griggs, Logan 3000 souls
GREAT MAGIC WEAPON
USES: 3
SLOTS: 1
INT: 15
DESCRIPTION: as for magic weapon but the effect is stronger
OBTAINED FROM: Cut the candlestick vein in Anor Londo, go downstairs to collect the magic
AURA OF DISTRACTION
USES: 20
SLOTS: 1
INT: 10
DESCRIPTION: creates a noise from a distance that distracts enemies
OBTAINABLE FROM: Griggs 1000
BREATH OF THE WHITE DRAGON
USES: 20
SLOTS: 1
INT: 50
DESCRIPTION: Similar to Seath's attack, it creates a line of crystals between you and the target
OBTAINED FROM: Logan in the Duke's archives if you kill him
CONTROLLED FALL
USES: 10
SLOTS: 1
INT: 15
DESCRIPTION: reduces damage and noise from falls
OBTAINED FROM: Griggs
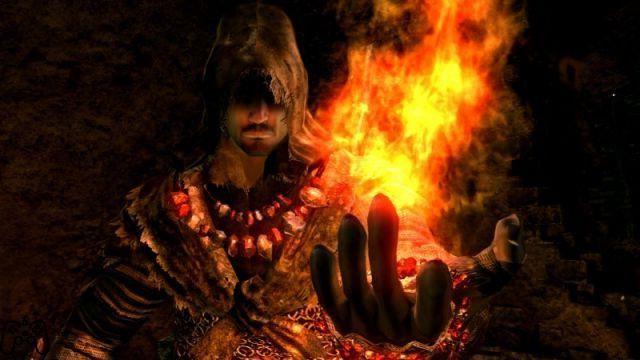
Pyromancy
FIRE BALL
USES: 8
SLOTS: 1
DESCRIPTION: fireball that can be thrown towards the target
OBTAINABLE FROM: Laurentius, Quelana 800 souls, initial pyromancy
FIRE GLOBE
USES: 6
SLOTS: 1
DESCRIPTION: fireball launched towards the target, explodes on contact leaving a pool of lava
OBTAINED FROM: Laurentius, Quelana 8000 souls
BIG BALL OF FIRE
USES: 4
SLOTS: 1
DESCRIPTION: fireball that can be thrown towards the target, also hits the enemies around the target
OBTAINABLE FROM: Quelana 20000 souls
WATER BARRIER
USES: 3
SLOTS: 1
DESCRIPTION: covers the player with water
OBTAINED BY: Laurentius 2000
COMBUSTION
USES: 16
SLOTS: 1
DESCRIPTION: attack based on fire in contact with the target
OBTAINABLE FROM: Quelana 500 souls
IMPROVED COMBUSTION
USES: 8
SLOTS: 1
DESCRIPTION: attack based on fire in contact with the target, increased damage
OBTAINABLE FROM: Quelana 15000 souls
FIRE WHIP
USES: 80
SLOTS: 1
DESCRIPTION: fiery lash that hits the target at close range, each cast consumes 21 uses
OBTAINABLE FROM: Quelana 10000
WHIP OF FIRE OF CHAOS
USES: 80
SLOTS: 2
DESCRIPTION: fiery lash that hits the target at close range, each cast consumes 21 uses
OBTAINED FROM: Treasure in Lost Izalith
FIRE WAVE
USES: 80
SLOTS: 1
DESCRIPTION: blaze that hits targets at a short distance, can be used on the move
OBTAINED FROM: Killing an enemy in the well of the Ariamis Painted World
ACID WAVE
USES: 2
SLOTS: 1
DESCRIPTION: Acid surge that corrodes enemy equipment
OBTAINED FROM: Ariamis Painted World Cemetery
BUFFER OF FIRE
USES: 20
SLOTS: 1
DESCRIPTION: Emits columns of fire around the player, each throw consumes 17 uses
OBTAINABLE FROM: Quelana 30000
BUFFER OF CHAOS
USES: 20
SLOTS: 2
DESCRIPTION: Same as the Firestorm, but the damage also increases with humanity
OBTAINED FROM: Rank 2 Covenant Servants of Chaos
FIRE STORM
USES: 20
SLOTS: 1
DESCRIPTION: Emits huge columns of fire around the player, each throw consumes 17 uses
OBTAINED FROM: Quelana after you finish the requested favor
BIG BALL OF FIRE OF CHAOS
USES: 1
SLOTS: 1
DESCRIPTION: increases attack and defense, but gradually consumes HP, duration 60 seconds
OBTAINED FROM: Infamous city, under the large parasitic insect
IRON MEAT
USES: 3
SLOTS: 1
DESCRIPTION: Increases every defense, but the player becomes heavy and unable to roll as if the equipped weight was equal to 100% duration 30 seconds
OBTAINED BY: Laurentius 20000 anime
POISONOUS FOG
USES: 3
SLOTS: 1
DESCRIPTION: a cone of toxic fog, which causes poison to the target
OBTAINED FROM: Eingyi, but you must have a parasitic egg on your head to be able to purchase 10000 souls
TOXIC FOG
USES: 1
SLOTS: 1
DESCRIPTION: A toxic fog cone, causing target toxicity
OBTAINED FROM: Eingyi, but you must have a parasitic egg on your head to be able to purchase 25000 souls
RELATIONSHIP OF THE UNDEAD
USES: 7
SLOTS: 1
DESCRIPTION: Lock an undead target in place until another enemy approaches
OBTAINABLE FROM: Quelana 10000 souls

Miracles
FORCE
USES: 21
SLOTS: 1
FAITH: 12
DESCRIPTION: area explosion that starts from the player, repels enemies and knocks them down, deflects enemy spells and arrows
OBTAINABLE FROM: Petrus 4000 anime Reah 1000 anime
FORCE ISSUED
USES: 6
SLOTS: 1
FAITH: 18
DESCRIPTION: Throws a huge sphere of force at the target, knocking it out and dealing damage, deflects spells and enemy arrows
OBTAINED FROM: Siegmeier event
WRATH OF THE DIVINITIES
USES: 3
SLOTS: 1
FAITH: 28
DESCRIPTION: area explosion that starts from the player, repels players and knocks them out causing damage, deflects enemy spells and arrows
OBTAINED FROM: Reah 10000 souls
CARE
USES: 5
SLOTS: 1
FAITH: 12
DESCRIPTION: recover a modest number of VPs
OBTAINED FROM: Griggs, Logan, Rickert 1000 souls
GREAT IMPROVED CARE
USES: 1
SLOTS: 1
FAITH: 14
DESCRIPTION: Recover a large amount of HP
OBTAINABLE FROM: Petrus 10000 anime, Patches 10000 anime, Reah 2000 anime
GREAT CURE
USES: 3
SLOTS: 1
FAITH: 24
DESCRIPTION: recover VP, the amount depends on the Faith statistic
OBTAINED FROM: Reah 10000 souls
SOOTHING WARMTH
USES: 3
SLOTS: 2
FAITH: 48
DESCRIPTION: recover a large amount of HP from the player and nearby allies, the amount depends on the faith stat, in order to use this miracle you must be part of the Princess Guard Covenant
OBTAINED FROM: By killing an ancient sister in the Duke's archives
REGENERATION
USES: 2
SLOTS: 1
FAITH: 16
DESCRIPTION: gradually recover HP
OBTAINED FROM: Received from Reah after saving her from the Giant's Tomb
GRACE OF THE SUN
USES: 2
SLOTS: 2
FAITH: 32
DESCRIPTION: gradually recover the HP for the player and for the allies, to use this spell you must be part of the Princess Guard Covenant
OBTAINED FROM: By killing an ancient sister in the Duke's archives
LANCE OF LIGHT
USES: 10
SLOTS: 1
FAITH: 20
DESCRIPTION: Fires a spear of light that deals electrical damage to the target, the damage depends on the faith stat
OBTAINED FROM: Covenant Warriors of the Sun
BIG LANCE OF LIGHT
USES: 10
SLOTS: 1
FAITH: 30
DESCRIPTION: Throws a spear of light that deals damage plus electricity to the target, the damage depends on the faith stat
OBTAINED FROM: Covenant Warriors of the Sun, requires XNUMXst rank
LANCE OF SUNLIGHT
USES: 5
SLOTS: 2
FAITH: 50
DESCRIPTION: Throws a spear of light that deals huge electricity damage to the target, the damage depends on the faith stat, you must be part of the Covenant Warriors of the Sun to be able to use this miracle
OBTAINED FROM: Covenant Warriors of the Sun, requires XNUMXst rank
MAGIC BARRIER
USES: 4
SLOTS: 1
FAITH: 14
DESCRIPTION: Reduces 70% damage from enemy spells for a short period of time
OBTAINED FROM: Reah 6000 souls
GREAT MAGIC BARRIER
USES: 2
SLOTS: 1
FAITH: 24
DESCRIPTION: Reduces 90% damage from enemy spells for a short period of time
OBTAINABLE FROM: large vacuum
GUIDING MIRACLE
USES: 5
SLOTS: 1
FAITH: 12
DESCRIPTION: it makes visible more messages of other players on the ground, in addition it also makes visible some advice on the levels always through written on the ground
OBTAINABLE FROM: Petrus 2000 anime, Reah 500 anime
KARMIC JUSTICE
USES: 4
SLOTS: 1
FAITH: 20
DESCRIPTION: if hit, the miracle explodes causing physical damage to all nearby enemies by knocking them out
OBTAINED FROM: Oswald 40.000 souls
LAMA DARK MOON
USES: 1
SLOTS: 1
FAITH: 30
DESCRIPTION: upgrades the right weapon, increasing its damage based on the faith stat, you must be part of the Covenant Blade of the Dark Moon to be able to use this miracle
OBTAINED FROM: Covenant Blade of the Dark Moon
PEACEFUL WALK
USES: 5
SLOTS: 1
FAITH: 18
DESCRIPTION: create an area of effect around the player, all enemies that enter it will be slowed down as if they had reached the maximum of the equipable weight
OBTAINED FROM: catacombs
VOTE OF SILENCE
USES: 2
SLOTS: 2
FAITH: 30
DESCRIPTION: creates an area of effect around the player, within which neither the player nor enemies can cast spells
OBTAINED FROM: Ariamis Painted World
DANCE OF THE SWORDS OF THE LORD OF THE CEMETERY
USES: 40
SLOTS: 1
FAITH: 0
DESCRIPTION: Huge blades sprout from the ground, impaling enemies, each throw consumes 20 uses
OBTAINED FROM: Covenant Servants of the Graveyard Lord
GREAT DANCE OF THE SWORDS OF THE LORD OF THE CEMETERY
USES: 40
SLOTS: 1
FAITH: 0
DESCRIPTION: As with the Graveyard Lord's Sword Dance Miracle, but increases damage and area of effect
OBTAINED FROM: Covenant Servants of the Graveyard Lord rank 1
SOLAR BLADE
USES: 1
SLOTS: 1
FAITH: 30
DESCRIPTION: Adds electrical damage to the right weapon
OBTAINED FROM: Killing the Dark Sun boss Gwyndolin
Tools: name and details
Repair box: allows you to repair equipment at the bonfire
Weapon Forge Box: allows you to upgrade weapons at the bonfire
Armor forge box: allows you to upgrade armor at the bonfire
Bottomless box: allows you to deposit any type of object at the bonfire
Skull Lantern: usable in the left hand, it is used to illuminate the Tomb of the Giants, obtainable in the lower part of the level
Binoculars: it is used to observe at long distances
Consumables
Fiaschetta Estus: heals a part of the HP, can be upgraded with the fire guardian soul by talking to a campfire keeper, his depends on how much the bonfire has been upgraded in the area
Divine Blessing: heals all HP, and removes negative effects
Prismatic Stone: if used it creates a bright and colorful mark on the ground
Anima guardian of the falò: if used it gives 5 humanity points. if given to a campfire keeper permanently upgrades Estus flasks
Humanity: if used it gives a humanity point
Double Humanity: if used it gives two humanity points
Transitional Curse: allows you to hit the ghost enemies of Petit Londo
Refuge bone: if used, it returns the player to the last bonfire visited without losses
Was Green: increases stamina recovery for a limited period
Blood Ross Musk: nullifies the effect of bleeding
Purple musk: nullifies the effect of the poison
Flowering purple moss: it cancels the effect of the poison, and of the toxins
Purifying Stone: undo the curse
Carbon resin: applies fire damage to the right weapon
Gear resin: apply poison to right weapon
Golden resin: applies lightning damage to the right weapon
Deworming egg: removes the curse of the egg

Online
Orange sign stone: allows you to write and vote messages on the ground
White mark stone: allows you to leave your mark in order to be summoned by another player as a ghost
Red mark stone: allows you to leave your mark and be able to be summoned as a dark spectrum and therefore to fight against the player who summoned you, this stone can be obtained on the highest tower in the painted world of Ariamis
Black stone of separation: allows you to return to your own world if summoned, and allows you to return a summoned player to their world
Broken red eye sphere: consumable item, allows you to invade another player's world
Red eye sphere: allows you to invade another player's world
Black eye sphere: allows you to invade the world of those who have killed a campfire keeper
Book of Guilt: list of players accused by other players, or who have broken a pact with one of the Covenants
Accusation: allows you to accuse a player, so that players belonging to the Dark Blade Covenants invade his world
Eye of Death: when used after making a deal with the Graveyard Lord, it makes other players' worlds much more difficult
Dito Curved limit invasion by other players
Throwable
Fire bomb: deals Fire damage to the target
Dark Fire Bomb: deals increased Fire damage to targets
Droppings: inflicts toxins on target and player
Throwing Knife: deals light damage to the target
Poisoned Throwing Knife: deals poison damage to the target
Skull lure: attracts certain types of enemies
Lloyd's Talisman: prevents enemies in the area from healing themselves through the Estus flasks
Not equipable
Pending: selectable as an initial gift, it can be exchanged with the Snuggly crow, for a Souvenir
Bronze coin: can be sold to the Frampt worm for 1000 souls
Silver coin: can be sold to the Frampt worm for 3000 souls
Moneta d'oro: can be sold to the Frampt worm for 5000 souls
Sun Medal: serves to increase the pact with the Sun Warriors covenant, can be exchanged with the raven Snuggly for a piece of white titanite
Souvenir: serves to augment the pact with the Dark Blade covenant
Ember
Wide embers: used to increase normal weapons to +10, to be given to Andrei in the church of the undead, obtainable in a chest behind the butcher in the depths
Very large ember: used to increase normal weapons to +10, to be given to Andrei in the undead church, obtainable in Petit Londo when you lower the water level
Enchanted embers: used to increase or transform magical weapons to + 5 or enchanted weapons, to be delivered to Rickert in Petit Londo obtainable in the dark root forest in a small pond in the midst of giant mushrooms
Big magic ember: used to increase magical weapons to + 10, to be given to Rickert in Petit Londo obtainable in the Duke's archives after beating Seath
Divine embers: used to create divine weapons, to be given to Andrei, obtainable on the tower after beating the Moon Butterfly
Great divine ember: used to further increase the power of divine weapons, to be delivered to Andrei, obtainable in the Tomb of the Giants
Dark embers: used to make Occult weapons, and to upgrade them, obtainable on a tower in the painted world of Ariamis
Crystal embers: used to transform and improve crystal weapons, to be delivered to the giant blacksmith in Anor Londo obtainable in a chest in the Duke's archives
Chaos Ember: used to transform and upgrade chaos-type weapons, to be delivered to Vamos in the catacombs obtainable in a lava pit in the Demon Ruins
Fire embers: used to transform and upgrade firearms, to be delivered to Vamos in the catacombs, obtainable in the area between Infinite Rush and the Wandering Fire Demon
Forging materials
Titanite chipping: strengthens normal weapons to +5, normal armor + 3
Large shard of titanite: strengthens normal weapons to + 10, and raw weapons to + 5
Piece of titanite: strengthens normal weapons to +14, crystal and lightning weapons to + 4
Titanite plate: strengthens normal weapons to + 15, crystal and lightning weapons to + 5
Shard of green titanite: strengthens divine, magical and fire weapons to +5
Piece of blue titanite: strengthens magical weapons to +9 and enchanted weapons to + 4
Blue Titanite Slab: strengthens magical weapons to + 10, enchanted weapons to +5
Shard of red titanite: strengthens firearms to + 9, and chaos-type weapons to + 4
Red Titanite Slab: strengthens firearms to + 10 and chaos-type weapons to + 5
Piece of white titanite: strengthens the divine weapons to + 9, and the occult ones to + 4
White Titanite Slab: strengthens divine weapons to + 10 and occult weapons to + 5
Sparkling titanite: reinforce weapons and armor that cannot normally be reinforced (example: the weapons of the Dark Knights)
Demon Titanite: strengthens souls created with boss souls up to +5
Dragon Scale: strengthens dragon-type weapons
Boss souls
Soul of the Moon Butterfly: horn of the lunar butterfly from a spear + 10 - Crystal ring shield from a shield + 10
Soul of Quelaag: sword of fury of Queelag from a curved sword + 10 - Blade of Chaos from a katana + 10
Iron Golem Core: golem's fist from a weapon + 10 fist - Golem's ax from an ax + 10
Soul of Gwyndolin: dark moon bow from an arc + 10 - Dark Moon Catalyst from Witchcraft Catalyst
Soul of Ornstein: dragon hunter spear from a spear + 10
Soul of Smough: Smough's hammer from a hammer + 10
Soul of Sif: great sword of Artotias cursed by a great sword +10 - Great sword of Artotias cursed by a great sword +10 - Great shield of Artorias by a shield + 10
Soul of Priscilla: scythe steals life from a halberd + 10
Anima di Gwyn: sword of the king from an ultra heavy sword + 10
The weapons
Negative statuses inflicted by some secondary effect weapons
Bleeding (sang): continuous damage type, decreases HP as long as the effect lasts
Poison (speed): continuous damage type, decreases HP as long as the effect lasts
Toxicity (tos): very powerful type of continuous damage, decreases the HP as long as the effect lasts
Weapon Type Transformation: Weapons can be transformed by changing their type using the appropriate embers and the right materials
Raw weapon: increased physical damage (blacksmith Andrei)
Crystal Weapon: Increased physical damage, but the weapon cannot be repaired (Giant Blacksmith and Rickert)
Lightning Weapon: Applies lightning damage to the weapon but removes stat modifiers (Giant Blacksmith)
Magic Weapon: Applies magical damage to the weapon but reduces the strength and dexterity modifier (Rickert blacksmith)
Enchanted Weapon: Apply magic damage, and int stat modifier to A (Blacksmith Rickert)
Divine weapon: apply divine damage to the weapon (blacksmith Andrei)
Hidden Weapon: applies occult damage to the weapon but decreases the strength and dexterity modifiers (blacksmith Andrei)
Firearm: applies fire damage to weapon but removes stat modifiers (Blacksmith Vamos)
Weapon of Chaos: damage increases with possessed humanity (Vamos blacksmith)
Legend:
Attack: Fis - normal damage; Mag - magical damage; Fuo - fire damage; Ful - lightning damage; Crit - critical hit damage; Adj - modifier to spells, miracles and pyromancies: the higher this value, the more effective your spells will be; por - value that indicates the range of the bow and crossbow: the higher this value, the more distant the hit targets can be
Defense: when you hold the weapon with two hands and use it as a shield; Fis - normal damage; Mag - magical damage; Fuo - fire damage; Ful - lightning damage; Stab - this is the value of your physical stability when you receive the blow: the higher this value the more difficult it is for the blow to jump back
Side Effects: Sang - the weapon also adds bleeding status; Vel - the weapon also adds poison status; Div - the weapon also deals divine damage; Occ - the weapon also deals occult damage
Modifiers: modifiers range from a minimum of D to a maximum of S: the higher the modifier, the more the given statistic will increase the damage of the weapon; statistics are strength (fo) dexterity (de) intelligence (int) and faith (fed)
Dur: the durability of the weapon before it breaks, with a weapon at risk we will inflict less damage, with a broken weapon it will be unusable
Weight: the weight of the weapon affects the maximum weight that can be equipped
Knives
Knife:
Attack: fis 56 crit 131
Defense: fis 45 may 10 fuo 10 ful 10 stab 26
Side effects: /
State modifiers: fo E of B
Requests: For 5-De8
Hard: 200
Weight: 0.5
Mage starting weapon - purchasable from the male merchant in the undead hamlet
Long Fantasy:
Attack: fis 100 crit 127
Defense: fis 45 may 10 fuo 30 ful 30 stab 26
Side effects: /
Stat modifiers: fo E
Requests: for 5
Hard: 100
Weight: 0.5
Banshee
Bandit's Knife:
Attack: fis 56 crit 147
Defense: fis 45 may 10 fuo 30 ful 30 stab 26
Side Effects: Sang 300
State modifiers: fo E of B
Requests: for 6 of 12
Hard: 200
Weight: 1.0
Thief Starting Weapon
Parade knife:
Attack: fis 56 crit 147
Defense: fis 45 may 10 fuo 30 ful 30 stab 26
Side effects: /
State modifiers: fo E of B
Requests: for 5 of 14
Hard: 200
Weight: 0.5
Valley of the Dragons, Petit Londo
Priscilla's Knife:
Attack: fis 80 crit 100
Defense: fis 45 May 10 out of 30 stab 26
Side effects: blood 500 occ 110
State modifiers: by A
Requests: for 6 of 20
Hard: 100
Weight: 1.0
Cutting off the boss Priscilla's tail
Spade
Straight sword:
Attack: fis 20 crit 100
Defense: fis 20 may 5 fuo 15 ful 15 stab 16
Side effects: /
State modifiers: fo E of E
Requests: for 6 of 60
Hard: 200
Weight: 1.0
In a corpse in the Undead Refuge
Straight sword broken:
Attack: fis 40 crit 100
Defense: fis 20 may 5 fuo 15 ful 15 stab 16
Side effects: /
Status modifiers: fo D by D
Requests: for 8 of 8
Hard: 200
Weight: 2.0
Left by zombie infantry
Great sword:
Attack: fis 82 crit 100
Defense: fis 50 may 10 fuo 35 ful 35 stab 32
Side effects: /
State modifiers: fo C by C
Requests: for 10 of 10
Hard: 200
Weight: 3.0
Initial weapon Knight
Short sword:
Attack: fis 78 crit 100
Defense: fis 50 may 10 fuo 35 ful 35 stab 32
Side effects: /
State modifiers: fo C by C
Requests: for 8 of 10
Hard: 200
Weight: 2.0
Starter weapon Hunter
Long sword:
Attack: fis 80 crit 100
Defense: fis 50 may 10 fuo 35 ful 35 stab 32
Side effects: /
State modifiers: fo C by C
Requests: for 10 of 10
Hard: 200
Weight: 3.0
Warrior starting weapon
Straight barbed sword:
Attack: fis 80 crit 100
Defense: fo 50 mag 10 fuo 35 ful 35 stab 32
Side effects: sang 300
Status modifiers: fo D by D
Requests: for 10 of 10
Hard: 160
Weight: 3.0
Left by the Knight of Thorns Kirk
Straight sword of sunlight:
Attack: fis 82 crit 100
Defense: fis 50 may 10 fuo 35 ful 35 stab 32
Side effects: /
State modifiers: fo C by C
Requests: for 12 of 12
Hard: 240
Weight: 4.0
Left by Solarie di Astora if killed
Spada in Balder:
Attack: fis 80 crit 100
Defense: fis 50 may 10 fuo 35 ful 35 stab 32
Side effects: /
State modifiers: fo E of B
Requests: for 10 of 14
Hard: 120
Weight: 3.0
Left by the red cloak knights
Straight sword of Astora:
Attack: fis 80 may 80 crit 100
Defense: fis 50 may 10 fuo 35 ful 35 stab 32
Secondary Effects: Divine 120
Status modifiers: fo C de C fe C
Requests: fo 10 de 10 fe 14
Hard: 160
Weight: 3.0
Valley of the Dragons
Straight sword of the silver knight:
Attack: fis 165 crit 100
Defense: fis 50 may 10 fuo 35 ful 35 stab 32
Side effects: /
Stat modifiers: fo E de C
Requests: for 16 of 22
Hard: 300
Weight: 6.0
Left by the silver knight
Dragon sword:
Attack: fis 200 crit 100
Defense: fis 50 may 10 fuo 35 ful 35 stab 32
Side effects: /
Status modifiers: /
Requests: for 16 of 10
Hard: 360
Weight: 6.0
Left by the bridge Wyvern by hitting its tail several times with arrows
Dark Sword:
Attack: fis 82 crit 100
Defense: fis 50 may 10 fuo 35 ful 35 stab 32
Side effects: /
State modifiers: fo C by C
Requests: for 16 of 16
Hard: 200
Weight: 6.0
Dark Wraith Covenant rank 2
Straight crystal sword:
Attack: fis 145 crit 100
Defense: fis 50 may 10 fuo 35 ful 35 stab 32
Side effects: /
Status modifiers: /
Requests: for 16 of 10
Hard: 60
Weight: 6.0
Left by undead crystal soldiers, or purchased from merchant Zena
Large swords
Bastard sword:
Attack: fis 105 crit 100
Defense: fis 60 may 10 fuo 40 ful 40 stab 38
Side effects: /
State modifiers: fo C by C
Requests: for 16 of 10
Hard: 200
Weight: 6.0
Purchasable from Andrei
Sword of the Black Knight:
Attack: fis 205 crit 100
Defense: fis 60 may 10 fuo 40 ful 40 stab 38
Side effects: /
State modifiers: fo C of E
Requests: for 20 of 18
Hard: 300
Weight: 8.0
Likely to be dropped by the Black Knight wielding this weapon
Claymore:
Attack: fis 103 crit 100
Defense: fis 60 may 10 fuo 40 ful 40 stab 38
Side effects: /
State modifiers: fo C by C
Requests: for 16 of 10
Hard: 200
Weight: 6.0
In a corpse on the Wyvern bridge in the village of the undead
Flamberga:
Attack: fis 100 crit 100
Defense: fis 60 may 10 fuo 40 ful 40 stab 38
Side effects: sang 300
State modifiers: fo D of C
Requests: for 16 of 14
Hard: 160
Weight: 6.0
Purchasable from Shiva, dropped by magician snake man
Great Crystal Sword:
Attack: fis 180 crit 100
Defense: fis 60 may 10 fuo 40 ful 40 stab 38
Side effects: /
State modifiers: fo C by C
Requests: for 20 of 10
Hard: 60
Weight: 8.0
Purchase from merchant Zena
Great Sword of the Serpent Man:
Attack: fis 110 crit 100
Defense: fis 60 may 10 fuo 40 ful 40 stab 38
Side effects: /
Status modifiers: fo B
Requests: for 24
Hard: 300
Weight: 10
Left by snake man
Great Spada of the Lord:
Attack: fis 231 crit 100
Defense: fis 60 may 10 fuo 40 ful 40 stab 26
Side effects: /
Status modifiers: fo D by D
Requests: for 20 of 20
Hard: 400
Weight: 8.0
Evolved from Gwyn's soul
Great Moonlight Sword:
Attack: Mag 132 crit 100
Defense: fis 60 mag10 fuo 40 ful 40 stab 38
Side effects: /
State modifiers: int A
Requests: fo 16 of 10 int 28
Hard: 300
Weight: 6.0
Obtained by cutting off Seath's tail
Great Sword of Artorias:
Attack: fis 120 may 85 crit 100
Defense: fis 60 may 10 fuo 40 ful 40 stab 38
Side effects: /
Stat modifiers: fo C de C int B fed B
Requests: fo 24 of 18 int 20 fed 20
Hard: 400
Weight: 10
Evolved from the soul of Sif
Cursed Great Sword of Artorias:
Attack: fis 158 crit 100
Defense: fis 60 may 10 fuo 40 ful 40 stab 38
Side Effects: It's cursed you can hit ghosts
Status modifiers: fo C de C int C fed C
Requests: fo 24 of 18 int 18 fed 18
Hard: 400
Weight: 10
Evolved from the soul of Sif
Great Stone Sword:
Attack: fis 148 may 100 crit 100
Defense: fis 60 may 10 fuo 40 ful 40 stab 38
Secondary Effects: If used, the powerful strike casts the Peace Walk miracle
State modifiers: fo C de C int E
Requests: for 40 of 10
Hard: 800
Weight: 18
Left by the stone knight
Ultra large swords
Great dragon sword
Attack: fis 360 crit 100
Defense: fis 70 may 10 fuo 50 ful 50 stab 44
Secondary Effects: The powerful attack creates a wave of force towards the target
Status modifiers: /
Requests: for 50 of 10
Hard: 400
Weight: 24
Obtainable by cutting off the tail of the great eternal dragon in the ash lake, this will not make him hostile towards you
Great sword:
Attack: fis 130 crit 100
Defense: fis 70 may 10 fuo 50 ful 50 stab 44
Side effects: /
State modifiers: fo C of D
Requests: for 28 of 10
Hard: 200
Weight: 12
Purchase from the merchant in Sen's Fortress
Dragon Slayer:
Attack: fis 205 crit 100
Defense: fis 70 may 10 fuo 50 ful 50 stab 44
Side effects: /
State modifiers: fo B of E
Requests: for 32 of 18
Hard: 300
Weight: 14
Chance to be dropped by Black Knight wielding this weapon
Two handed:
Attack: fis 130 crit 100
Defense: fis 70 may 10 fuo 50 ful 50 stab 44
Side effects: /
State modifiers: fo C of D
Requests: for 24 of 10
Hard: 200
Weight: 10
Obtained in the cemetery area near the Bonfire Shrine
Large demon machete:
Attack: fis 133 crit 100
Defense: fis 70 may 10 fuo 50 ful 50 stab 44
Side effects: /
Status modifiers: fo B
Requests: Fo 40
Hard: 600
Weight: 18
Chance to be dropped by the Goat Demon, available for purchase from Shiva
Curved swords
Scimitarra:
Attack: fis 80 crit 100
Defense: fis 45 may 10 fuo 30 ful 30 stab 30
Side effects: /
State modifiers: fo E of B
Requests: 160
Weight: Dur: 1.5
Purchase from male Undead Merchant in Undead Hamlet
Shotel:
Attack: fis 82 crit 100
Defense: fis 45 may 10 fuo 30 ful 30 stab 30
Side effects: /
Stat modifiers: fo E de C
Requests: for 9 of 14
Hard: 120
Weight: 2.5
In a corpse in the fortress of sen, available for purchase from Shiva
Falcione:
Attack: fis 82 crit 100
Defense: fis 45 may 10 fuo 30 ful 30 stab 30
Side effects: /
State modifiers: fo E of B
Requests: for 9 of 12
Hard: 160
Weight: 2.5
Obtained in the infamous city
Quelaag's Sword of Fury:
Attack: fis 60 out of 180 crit 100
Defense: fis 45 may 10 fuo 30 ful 30 stab 30
Secondary Effects: Damage increased by the player's humanity points
State modifiers: fo E of B
Requests: for 11 of 13
Hard: 600
Weight: 3.5
Obtained using Quelaag's soul and a +10 Curved Sword
Sword of the guardian of the painting:
Attack: fis 76 crit 100
Defense: fis 45 may 10 fuo 30 ful 30 stab 30
Side effects: /
State modifiers: fo E of A
Requests: fo7 de 20
Hard: 100
Weight: 1.5
Left by White Assassin in Anor Londo
Long phantasma:
Attack: fis 140 crit 100
Defense: fis 45 may 10 fuo 30 ful 30 stab 30
Side effects: Sang 300, cursed sword you can hit ghosts in Petit Londo
Stat modifiers: fo E
Requests: for 7
Hard: 100
Weight: 1.5
Left by ghost with double weapon in Petit Londo
Eastern swords
Collaborating:
Attack: fis 90 crit 100
Defense: fis 45 may 10 fuo 30 ful 30 stab 30
Side effects: sang 300
State modifiers: by B
Requests: for 14 of 14
Hard: 80
Weight: 5.0
Killing the undead merchant in undead hamlet, available for purchase from Shiva
Clean Blade:
Attack: fis 90 crit 100
Defense: fis 45 may 10 fuo 30 ful 30 stab 30
Side effects: sang 300
Status modifiers: fo D by D
Requests: for 20 of 16
Hard: 60
Weight: 8.0
Purchase from shiva
Laito:
Attack: fis 88 crit 200
Defense: fis 45 may 10 fuo 30 ful 30 stab 30
Side effects: sang 300
State modifiers: by B
Requests: for 14 of 20
Hard: 80
Weight: 5.0
Obtainable in Infamous City
Chaos Blade:
Attack: fis 133 crit 200
Defense: fis 45 may 10 fuo 30 ful 30 stab 30
Side Effects: Sang 300 damage increased based on humanity
State modifiers: by B
Requests: for 16 of 14
Hard: 120
Weight: 6
Using Quelaag's soul and a +10 katana
Large curved swords
Server:
Attack: fis 107 crit 100
Defense: fis 60 may 10 fuo 40 ful 40 stab 36
Side Effects: Regenerates HP for each hit
Stat modifiers: fo E de C
Requests: for 24 of 13
Hard: 150
Weight: 10
Obtainable in the infamous city
Murakumo:
Attack: fis 113 crit 100
Defense: fid 60 mag 10 fire 40 ful 40 stab 36
Side effects: /
State modifiers: fo E of B
Requests: fo 28 de B
Hard: 180
Weight: 12
Left by giant skeleton with sword or by Shiva
Sword of the Graveyard Lord:
Attack: fis 255 crit 100
Defense: fis 60 may 10 fuo 40 ful 40 stab 36
Side effects: tos 300
State modifiers: fo E of E
Requests: for 24 of 13
Hard: 600
Weight: 10
Obtained in the Cemetery Lord's Servants covenant
Lunge swords
Stocco:
Attack: fis 73 crit 100
Defense: fis 45 may 10 fuo 30 ful 30 stab 22
Side effects: /
State modifiers: fo D of C
Requests: for 7 of 12
Hard: 150
Weight: 1.5
Purchase from undead merchant in undead hamlet
Stock:
Attack: fis 75 crit 100
Defense: fis 45 may 10 fuo 30 ful 30 stab 22
Side effects: /
State modifiers: fo D of C
Requests: for 10 of 12
Hard: 150
Weight: 3.0
Obtained in a corpse in Petit Londo
Frangimaglia:
Attack: fis 57 crit 120
Defense: fis 45 may 10 fuo 30 ful 30 stab 22
Side effects: /
State modifiers: fo D of C
Requests: for 5 of 12
Hard: 200
Weight: 0.5
Obtained in a corpse in the slums
Ricard's rapier:
Attack: fis 70 crit 100
Defense: fis 45 may 10 fuo 30 ful 30 stab 22
Side effects: /
State modifiers: fo E of B
Requests: for 8 of 20
Hard: 100
Weight: 2.0
Left by Ricard undead
Rapier of Velka:
Attack: fis 60 may 97 crit 100
Defense: fis 45 may 10 fuo 30 ful 30 stab 22
Side effects: /
State modifiers: fo E of C int B
Requests: fo 8 of 16 int 16
Hard: 130
Weight: 2.0
Obtained in the Painted World of Ariamis
Axes
One-handed ax:
Attack: fis 80 crit 100
Defense: fis 55 may 10 fuo 50 ful 40 stab 36
Side effects: /
State modifiers: fo C of D
Requests: for 8 of 8
Hard: 250
Weight: 2.0
Pyromancer class starter weapon, available for purchase from undead merchant in undead hamlet
Gargoyle's Tail Ax:
Attack: fis 93 crit 100
Defense: fis 55 may 10 fuo 40 ful 40 stab 36
Side Effects: Increases poison defense and bleeding
State modifiers: fo D of C
Requests: for 14 of 14
Hard: 150
Weight: 5.0
Obtained by cutting off the tail of a gargoyle (that of the bell or that of Anor Londo)
Battle Ax:
Attack: fis 95 crit 100
Defense: fis 55 may 10 fuo 40 ful 40 stab 36
Side effects: /
State modifiers: fo C of D
Requests: for 12 of 8
Hard: 250
Weight: 4
Bandit class starting weapon
Butcher knife:
Attack: fis 90 crit 100
Defense: fis 55 may 10 fuo 40 ful 40 stab 36
Side effects: /
Status modifiers: fo D of D fed B
Requests: fo 18 de 12 fed 16
Hard: 180
Weight: 7.0
Left by the dark ghost Mildred who will invade you in the swamp of the infamous city if you are in human form
Growing Ax:
Attack: fis 115 may 115 crit 100
Defense: fis 55 may 10 fuo 40 ful 40 stab 36
Side effects: /
Status modifiers: fo D of D fed B
Requests: fo 18 de 12 fed 16
Hard: 180
Weight: 7.0
Buyable or by killing Patches
Golem's Ax:
Attack: fis 155 crit 100
Defense: fis 55 may 10 fuo 40 ful 40 stab 36
Side Effects: The powerful attack causes an area hit
State modifiers: fo C of E
Requests: for 36 of 8
Hard: 600
Weight: 16
Using the soul of the iron golem + ax +10
Big axes
Great Demon Ax:
Attack: fis 144 crit 100
Defense: fis 55 may 10 fuo 40 ful 40 stab 38
Side effects: /
Status modifiers: fo A
Requests: for 46
Hard: 600
Weight: 22.0
Chance to be dropped by Bull Demon, available for purchase from Shiva
Great Ax:
Attack: fis 140 crit 100
Defense: fis 55 may 10 fuo 40 ful 40 stab 38
Side effects: /
State modifiers: fo C of E
Requests: for 32 of 8
Hard: 230
Weight: 14.0
Obtainable in the depths
Ax of the Dragon King:
Attack: fis 360 crit 100
Defense: fis 55 may 10 fuo 40 ful 40 stab 38
Secondary Effects: Unleashes an area hit with the powerful attack
Status modifiers: /
Requests: for 50 of 8
Hard: 400
Weight: 24
Obtained by cutting off the hungry dragon's tail
Great ax of the Black Knight:
Attack: fis 213 crit 100
Defense: fis 55 may 10 fuo 40 ful 40 stab 38
Side effects: /
State modifiers: fo B of E
Requests: for 36 of 18
Hard: 300
Weight: 16
Chance to be dropped by black knight who wields this weapon
Hammers
Club:
Attack: fis 87 crit 100
Defense: fis 45 may 10 fuo 30 ful 30 stab 30
Side effects: /
Status modifiers: fo A
Requests: for 10
Hard: 250
Weight: 3.0
Purchase from undead merchant in undead hamlet
Reinforced club:
Attack: fis 97 crit 100
Defense: fis 45 may 10 fuo 30 ful 30 stab 30
Side effects: sang 300
Status modifiers: fo C
Requests: for 12
Hard: 100
Weight: 4.0
Purchase from undead merchant in undead hamlet
Mazz:
Attack: fis 91 crit 100
Defense: fis 45 may 10 fuo 30 ful 30 stab 30
Side effects: /
Status modifiers: fo B
Requests: for 12
Hard: 250
Weight: 4
Cleric class starting weapon
Morning Star:
Attack: fis 83 crit 100
Defense: fis 45 may 10 fuo 30 ful 30 stab 30
Side effects: sang 300
Status modifiers: fo C
Requests: for 11
Hard: 160
Weight: 4.0
In a chest near the bonfire sanctuary
War Pick:
Attack: fis 91 crit 100
Defense: fis 45 mah 10 fuo 30 ful 30 stab 30
Side effects:
Status modifiers: /
Requests: fo C de D
Hard: 220
Weight: 3.5
Purchase from Andre
Pickaxe:
Attack: fis 89 crit 100
Defense: fis 45 may 10 fuo 30 ful 30 stab 30
Side effects: /
Status modifiers: fo B
Requests: for 14
Hard: 250
Weight: 5
Left as a haunted barbarian in the infamous city
Blacksmith's Hammer:
Attack: fis 87 crit 100
Defense: fis 45 may 10 fuo 30 ful 30 stab 30
Side effects: /
Status modifiers: fo C
Requests: for 14
Hard: 250
Weight: 5.0
Left by Andrei if killed
Giant Blacksmith Hammer:
Attack: fis 120 ful 200 crit 100
Defense: fis 45 may 10 fuo 30 ful 30 stab 30
Side effects: /
Stat modifiers: fo D
Requests: for 16
Hard: 250
Weight: 6.0
Left by the giant blacksmith if killed
Vamos Hammer:
Attack: fis 105 out of 64 crit 100
Defense: fis 45 may 10 ful 30 fuo 30 stab 30
Side effects: /
Status modifiers: fo C
Requests: for 14
Hard: 250
Weight: 12.0
Left by the blacksmith Vamos if killed

Big hammers
Great Demon Hammer:
Attack: fis 138 crit 100
Defense: fis 50 may 10 fuo 35 ful 35 stab 32
Side effects: /
Status modifiers: fo B
Requests: for 46
Hard: 600
Weight: 22.0
Killing the wandering demon in the undead shelter on first encounter, tradable with Snuggly for the Sack helmet
Big club:
Attack: fis 135 crit 100
Defense: fis 50 may 10 fuo 35 ful 25 stab 32
Side effects: /
Status modifiers: fo B
Requests: for 28
Hard: 250
Weight: 12
Obtainable in the infamous city
Dragon tooth:
Attack: fis 290 crit 100
Defense: fis 50 may 10 fuo 35 ful 35 stab 32
Side Effects: Indestructible
Stat modifiers: fo D
Requests: for 40
Dur: indestructible
Weight: 18
Obtained in Anor Londo, in the secret passage in the fireplace
Smough's Hammer:
Attack: fis 275 crit 100
Defense: fis 50 may 10 fuo 35 ful 35 stab 32
Side effects: /
Stat modifiers: fo D
Requests: for 58
Hard: 600
Weight: 28.0
Made with hammer +10 and soul of Smough
Concession:
Attack: fis 125 may 130 crit 100
Defense: fis 50 may 10 fuo 35 ful 35 stab 32
Secondary Effects: Divine 130
State modifiers: fo b of A
Requests: fo 50 fed 30
Hard: 600
Weight: 24
Left by the dark ghost of Leeroy in the tomb of the giants
Broad club:
Attack: fis 120 crit 100
Defense: fis 50 may 10 fuo 35 ful 35 stab 32
Side Effects: Poison 180
Status modifiers: fo A
Requests: for 26
Hard: 250
Weight: 11
Left by a haunted barbarian in the cursed city
Fist weapons
Gloves:
Attack: fis 60 crit 100
Defence: /
Side effects: /
State modifiers: fo C by C
Requests: for 5 of 8
Hard: 300
Weight: 0.5
Purchasable from Andrei
Claws:
Attack: fis 65 crit 100
Defence: /
Side effects: /
State modifiers: fo E of B
Requests: for 6 of 14
Hard: 150
Weight: 1.0
Purchase from Shiva
Dragon Bone Fist:
Attack: fis 90 crit 100
Defence: /
Side effects: /
Status modifiers: fo A
Requests: for 20
Hard: 999
Weight: 8
Crafted from a +10 fist weapon and iron golem's soul
Dark Hand:
Attack: fis 200 crit 100
Defense: (when used as a shield) fis 80 mag 80 fuo 80 ful 80 stab 30
Secondary effects: with the powerful attack you will acquire the humanity points of the target (NPCs and players)
Status modifiers: /
Requests: /
Hard: 999
Weight: 0.5
It can be used both as a fist weapon and as a shield, obtainable in the Dark Wraith Covenants
Throw
Launch:
Attack: fis 80 crit 100
Defense: fis 40 may 10 fuo 30 ful 30 stab 26
Side effects: /
State modifiers: fo D of C
Requests: for 11 of 10
Hard: 180
Weight: 3.5
Purchase from undead merchant in undead hamlet
Lancia tools:
Attack: fis 86 crit 100
Defense: fis 40 may 10 fuo 30 ful 30 stab 26
Side effects: /
Stat modifiers: fo E de C
Requests: for 13 of 15
Hard: 140
Weight: 4.5
Obtained in the cemetery near the Bonfire Shrine
Demon Spear:
Attack: fis 100 ful 120 crit 100
Defense: fis 40 may 10 fuo 30 ful 30 stab 26
Side effects: /
State modifiers: fo C by C
Requests: for 12 of 10
Hard: 400
Weight: 4
Purchasable from Shiva, left by the Bat Demon
Picca:
Attack: fis 86 crit 100
Defense: fis 40 may 10 fuo 30 ful 30 stab 26
Side effects: /
State modifiers: fo D of C
Requests: for 24 of 10
Hard: 180
Weight: 10
Purchase from Andre
Dragon Slayer Lance:
Attack: fis 90 ful 60 crit 100
Defense: fis 40 may 10 fuo 30 ful 30 stab 26
Secondary Effects: The powerful attack hurls a bolt of lightning towards the target
State modifiers: fo C of B
Requests: for 24 of 24
Hard: 300
Weight: 10
Created by a +10 spear and the soul of Ornstein
Partisan:
Attack: fis 80 crit 100
Defense: fis 40 may 10 fuo 30 ful 30 stab 26
Side effects: /
State modifiers: fo D of C
Requests: for 13 of 12
Hard: 160
Obtained in the cemetery near the Bonfire Shrine
Trident:
Attack: fis 80 mag 80 fuo 80 ful 80 crit 80
Defense: fis 40 may 10 fuo 30 ful 30 stab 26
Side effects: /
State modifiers: fo E de c int B
Requests: fo 16 of 16 int 24
Hard: 240
Weight: 6
Left as a channeler in the Duke's archives
Lance of the Silver Knight:
Attack: fis 155 crit 100
Defense: fis 40 may 10 fuo 30 ful 30 stab 26
Secondary Effects: Divine 110
Stat modifiers: fo E de C
Requests: for 16 of 22
Hard: 300
Weight: 6
Left by silver knight in Anor Londo
Horn of the moon butterfly:
Attack: Mag 110 crit 100
Defense: fis 40 may 10 fuo 30 ful 30 stab 26
Side effects: /
State modifiers: int B
Requests: for 12 int 14
Hard: 160
Weight: 5
Crafted using a + 10 spear and the soul of the moon butterfly
Alabarde
Halberd:
Attack: fis 110 crit 100
Defense: fis 40 may 10 fuo 30 ful 30 stab 26
Side effects: /
Status modifiers: fo D by D
Requests: for 16 of 12
Hard: 200
Weight: 6
Obtained in Undead Hamlet
Gargoyle Halberd:
Attack: fis 115 crit 100
Defense: fis 40 may 10 fuo 30 ful 30 stab 26
Side Effects: Increases some resistances
Status modifiers: fo D by D
Requests: for 16 of 12
Hard: 200
Weight: 6
Left by the second Gorgoyle of the bell, or by Anor Londo's Gargoyles
Titanite auction:
Attack: fis 120 may 145 crit 100
Defense: fis 40 may 10 fuo 30 ful 30 stab 26
Side effects: /
Status modifiers: fo D de D int D
Requests: for 16 of 14
Hard: 600
Weight: 6
Left by a titanite demon
Halberd of the Black Knight:
Attack: fis 230 crit 100
Defense: fis 40 may 10 fuo 30 ful 30 stab 26
Side effects: /
State modifiers: fo D of E
Requests: for 32 of 18
Hard: 300
Weight: 14
Left by black knight who wields this weapon
Great Scythe:
Attack: fis 100 crit 100
Defense: fis 40 may 10 fuo 30 ful 30 stab 22
Side effects: sang 300
State modifiers: fo E of B
Requests: for 14 of 14
Hard: 130
Weight: 5
Obtained in the catacombs
Life-hunter scythe:
Attack: fis 165 crit 100
Defense: fis 40 may 10 fuo 30 ful 30 stab 22
Side Effects: Sang 500, when the bleed effect is applied to the target immediately consumes 50% of his HP
State modifiers: fo E of B
Requests: for 16 of 14
Hard: 100
Weight: 6
Crafted from +10 scythe and priscilla's soul
Sickle:
Attack: fis 110 crit 100
Defense: fis 40 may 10 fuo 30 ful 30 stab 26
Side effects: /
Stat modifiers: fo E de C
Requests: for 14 of 12
Hard: 200
Weight: 5
Obtained in the fortress of Sen
Lucerne:
Attack: fis 110 crit 100
Defense: fis 40 may 10 fuo 30 ful 30 stab 26
Side effects: /
Status modifiers: fo D by D
Requests: for 15 of 12
Hard: 200
Weight: 5.5
Obtained in the catacombs
Giant's Halberd:
Attack: fis 110 ful 135 crit 100
Defense: fis 40 may 10 fuo 30 ful 30 stab 26
Side effects: /
Status modifiers: fo D by D
Requests: for 36 of 12
Hard: 300
Weight: 16
Available from giant blacksmith
Whips
Whip:
Attack: fis 80 crit 100
Defense: fis 30 may 10 fuo 20 ful 20 stab 16
Side effects: /
State modifiers: by B
Requests: for 7 of 14
Hard: 200
Weight: 1.5
Obtainable in the infamous city
Toothed whisk:
Attack: fis 76 crit 100
Defense: fis 30 may 10 fuo 20 ful 20 stab 16
Side effects: sang 300
State modifiers: by B
Requests: for 8 of 16
Hard: 200
Weight: 2
Leave from black ghost Jeremiah Re
Bows
Bows can do different types of damage depending on the arrows used, the type of damage you will find in the description of the arrows themselves
short bow:
Attack: fis 31 crit 100 por 50
Defence: /
Side effects: /
State modifiers: fo D of A
Requests: for 7 of 12
Hard: 100
Weight: 0.5
Starter-class hunter weapon, available for purchase from undead merchant in undead hamlet
Long bow:
Attack: fis 36 crit 100 por 50
Defence: /
Side effects: /
State modifiers: fo D of A
Requests: for 9 of 14
Hard: 100
Weight: 1
Obtained in the dark root wood
Composite arch:
Attack: fis 55 crit 100 por 38
Defence: /
Side effects: /
State modifiers: fo C by C
Requests: for 11 of 12
Hard: 100
Weight: 1
Obtainable in Petit Londo
Great Dragon Slayer Bow:
Attack: fis 85 crit 100 por 50
Defence: /
Side effects: /
State modifiers: fo C by C
Requests: for 20 of 20
Hard: 100
Weight: 10
Obtained in Anor Londo
Black Bow of Pharis:
Attack: fis 34 crit 100 por 65
Defence: /
Side effects: /
State modifiers: fo E of S
Requests: for 9 of 18
Hard: 100
Weight: 1
Left by Pharis in the dark root garden
Dark Moon Bow:
Attack: fis 80 mag 80 crit 100 por 50
Defence: /
Side effects: /
State modifiers: fo E of D fed D
Requests: fo 7 de 16 fed 16
Hard: 400
Weight: 1
Crafted from bow + 10 and gwyndolin soul
Crossbows
Crossbows can do different types of damage depending on the bolts used, the type of damage you will find in the description of the bolts themselves.
Light crossbow:
Attack: fis 50 crit 100 por 50
Defence: /
Side effects: /
Status modifiers: /
Requests: for 10 of 8
Hard: 150
Weight: 3
Obtained in undead hamlet
Heavy crossbow:
Attack: fis 55 crit 100 por 50
Defence: /
Side effects: /
Status modifiers: /
Requests: for 14 of 8
Hard: 150
Weight: 5
Obtainable in the depths
Sniper Crossbow:
Attack: fis 52 crit 100 por 70
Defence: /
Side effects: /
Status modifiers: /
Requests: for 20 of 16
Hard: 150
Weight: 8
Obtained in the fortress of Sens
Avelyn:
Attack: fis 37 crit 100 por 50
Defence: /
Side Effects: Shoot more burst squares
Status modifiers: /
Requests: for 16 of 14
Hard: 150
Weight: 6
Obtainable in the Duke's archives
Pyromancy flames
Necessary weapon for the reed pyromancies
Flame of pyromancy:
Attack: adj 100 out of 40
Defence: /
Side Effects: Improving it increases the effectiveness of pyromancy
Status modifiers: /
Requests: for 4
Hard: 30
Weight: 0
Pyromancer starting weapon, available for purchase from Laurentius
Improved Pyromancy Flame (same name and image as the regular pyromancy flame)
Attack: adj 254 out of 60
Defence: /
Side Effects: Improving it increases the effectiveness of pyromancy
Modifier stat: int S
Requests: for 4
Hard: 30
Weight: 0
Obtained by upgrading a +15 pyromancy flame from Quelana
Catalysts
Weapon needed to cast miracles
Sorcerer's Catalyst:
Attack: adj 110 fis 40 crit 100
Defense: fis 26 may 8 fuo 20 ful 20 stab 26
Side effects: /
Stat modifiers: fo E int A
Requests: for 6 int 10
Hard: 90
Weight: 2
Wizard class starting weapon
Izalith's Catalyst:
Attack: adj 113 fis 40 crit 100
Defense: fis 26 may 8 fuo 20 ful 20 stab 16
Side effects: /
Stat modifiers: fo E int A
Requests: for 6 int 14
Hard: 300
Weight: to
Left by the pyromancer in Lost Izalith
Logan's Catalyst:
Attack: adj 180 fis 46 crit 100
Defense: fis 26 may 8 fuo 20 ful 20 stab 16
Side effects: /
State modifiers: fo E int S
Requests: for 6 int 24
Hard: 90
Weight: 2
Obtained after purchasing all spells from Logan and beating Seath, you will find a chest where Logan was
Beatrice's catalyst:
Attack: adj 114 fis 40 crit 100
Defense: fis 26 may 8 fuo 20 ful 20 stab 16
Side effects: /
Stat modifiers: fo E int A
Requests: for 6 int 10
Hard: 90
Weight: 2
Obtained in Valley of the Dragons
Oolacil ivory catalyst:
Attack: adj 180 fis 24 crit 100
Defense: fis 26 may 8 fuo 20 ful 20 stab 16
Side effects: /
State modifiers: fo E int C
Requests: for 3 int 12
Hard: 30
Weight: 0.5
Purchasable from Oolacile
Demon Catalyst:
Attack: adj 109 fis 110 out of 170 crit 100
Defense: fis 26 may 8 fuo 20 ful 20 stab 16
Side effects: /
State modifiers: fo D of D int B
Requests: fo 12 of 10 int 10
Hard: 300
Weight: 4
Left by the Wandering Fire Demon
Catalyst of exile:
Attack: adj 145 fis 145 crit 100
Defense: fis 26 may 8 fuo 20 ful 20 stab 16
Side effects: /
State modifiers: fo E de D int A
Requests: fo 10 of 10 int 12
Hard: 160
Weight: 3
Obtainable in the infamous city
Crystal catalyst:
Attack: adj 315 fis 240 crit 100
Defense: fis 26 may 8 fuo 20 ful 20 stab 16
Side effects: /
State modifiers: fo E int S
Requests: for 7 int 32
Hard: 90
Weight: 2.5
Left by Logan if killed
Dark Moon Catalyst:
Attack: adj 240 fis 44 crit 100
Defense: fis 26 may 8 fuo 20 ful 20 stab 16
Side effects: /
Stat modifiers: fo E fed A
Requests: fo 4 fed 16
Hard: 60
Weight: 1
Crafted using the soul of Gwyndolin
Talismans
Weapons used to cast miracles
Talisman:
Attack: fis 14 crit 0
Defense: fis 26 may 8 fuo 20 ful 20 stab 16
Side effects: /
Stat modifiers: fed B.
Requests: fo 4 fed 10
Hard: 50
Weight: 0.3
Chest near the bonfire sanctuary
Canvas Talisman:
Attack: fis 14 crit 100
Defense: fis 26 may 8 fuo 20 ful 20 stab 16
Side effects: /
Stat modifiers: fed A
Requests: fo 4 fed 14
Hard: 50
Weight: 0.3
Cleric class starting weapon
Thorolund's Talisman:
Attack: fis 14 crit 100
Defense: fis 26 may 8 fuo 20 ful 20 stab 16
Side Effects: Enhances the effect of miracles regardless of faith
Stat modifiers: fed D.
Requests: fo 4 fed 10
Hard: 50
Weight: 0.3
Purchasable from Petrus
Ivory talisman:
Attack: fis 14 crit 100
Defense: fis 26 may 8 fuo 20 ful 20 stab 16
Side effects: /
Stat modifiers: fed A
Requests: fo 4 fed 16
Hard: 50
Weight: 0.3
Left by Reah if killed, and by Petrus when Reah died at the undead church
Sun Talisman:
Attack: fis 14 crit 100
Defense: fis 26 may 8 fuo 20 ful 20 stab 16
Side effects: /
Stat modifiers: fed A
Requests: fo 4 fed 14
Hard: 50
Weight: 0.3
Left by Solaire if killed
Velka's Talisman:
Attack: fis 14 crit 100
Defense: fis 26 may 8 fuo 20 ful 20 stab 16
Secondary Effects: The power of miracles is determined by the value of intelligence rather than faith
State modifiers: int A
Requests: for 4 int 16
Hard: 50
Weight: 0.3
Purchase from Oswald
Dark Moon Talisman:
Attack: fis 14 crit 100
Defense: fis 26 may 8 fuo 20 ful 20 stab 16
Side effects: /
Stat modifiers: fed A
Requests: fo 4 fed 24
Hard: 50
Weight: 0.3
Obtained in the Blade of the Dark Moon covenant
The frame
The characteristics of each single piece are: Duration, Weight, Physical Defenses (normal-hit-slash-penetration), Elemental Defenses (magic-fire-lightning), Resistances (balance-bleed-poison-curse)
Wayfarer Set: Wayfarer class core set
Elmo : 400, 1.4 ,9-10-10-9, 8-10-9, 0-8-8-0
Corpo: 400, 3.5, 25-25-25-23, 12-15-13, 0-13-13-0
Guanti: 400, 2.1, 14-15-15-14, 12-15-13, 0-13-13-0
Gambe: 400, 2.1, 14-15-15-14, 12-15-13, 0-13-13-0
Thief's Set: Thief class core set
Elmo: 250, 1.2, 9-10-9-9, 8-5-6, 0-8-12-0
Corpo: 250, 3.1, 25-25-23-23, 20-14-16, 0-23-31-0
Guanti: 250, 1.8, 22-24-22-22, 19-13-15, 0-23-31-0
Gambe: 250, 1.8, 22-24-22-22, 19-13-15, 0-23-31-0
Brigante Set: Brigand class basic set
Elmo: 200, 1.2, 9-10-9-8, 8-5-6, 0-8-8-0
Corpo: 200, 3.1, 25-25-23-21, 20-13-17, 0-20-20-0
Guanti: 200, 1.8, 14-15-14-13, 12-8-0, 0-12-12-0
Gambe: 200, 1.8, 14-15-14-13, 12-8-10, 0-12-12-0
Hunter's Set: Hunter class core set
Elmo: 250 , 1.2, 7-7-7-7, 5-7-6, 0-6-85-0
Corpo: 250, 4.7 , 27-29-27-27, 20-27-23, 0-21-20-0
Guanti: 250, 2.8, 16-17-16-16, 12-16-13, 0-13-12-0
Gambe: 250, 2.8, 16-17-16-16, 12-16-13, 0-13-12-0
Wizard Set: Wizard class core set
Elmo: 200, 0.9, 8-9-8-8, 10-5-6, 0-6-5-0
Corpo: 200, 2.3, 20-22-21-20, 27-13-17, 0-16-12-0
Guanti: 200, 1.4, 12-13-13-12, 16-8-10, 0-9-7-0
Gambe: 200, 1.4 , 12-13-13-12, 16-8-10, 0-9-7-0
Pyromancer Set: Pyromancer class core set
Elmo: 400 , 1.1, 8-9-8-8, 9-12-6, 0-9-23-1
Corpo: 400, 2.7, 21-23-21-21, 23-20-17, 0-23-59-2
Guanti: 400, 1.6, 12-13-12-12, 14-18-10, 0-14-35-1
Gambe: 400, 1.6, 12-13-12-12, 14-18-10, 0-14-35-1
Cleric's Set: Cleric class core set
Elmo: 350 , 1.2, 8-9-8-8, 9-5-7, 0-9-8-0
Corpo: 350, 4.0 , 22-26-22-22, 23-14-19, 0-24-20-2
Guanti: 350, 0.7, 5-6-5-15, 5-3-4, 0-5-4-0
Gambe: 350, 2.0, 14-17-14-14, 23-13-19, 0-15-13-0
Warrior Set: Warrior class core set
Elmo: 250 , 3.5, 14-8-16-14, 8-8-3, 5-9-8-0
Corpo: 250, 5.9, 28-30-28-28, 20-27-23, 0-23-20-0
Guanti: 250, 3.5, 17-18-17-17, 12-16-13, 0-14-12-0
Gambe: 250, 3.5, 17-18-17-17, 12-16-13, 0-14-12-0
Knight's Set: Knight class core set
Elmo: 400 , 4.2, 14-13-16-14, 8-9-5, 8-9-6-0
Corpo: 400, 10.9, 37-35-43-36, 22-25-13, 20-23-16-0
Guanti: 400, 3.5, 12-11-14-12, 7-8-4, 6-8-5-0
Gambe: 400, 6.4, 22-21-26-22, 13-14-8, 12-14-9-0
Dark Sorcerer Set: recoverable in Sen's fortress
Elmo: 200, 0.7, 5-5-6-5, 11-8-8, 0-12-12-2
Corpo: 200, 1.8 , 13-13-14-13, 28-21-21, 0-31-31-4
Guanti: 200,1, 8-8-9-8, 17-12-12, 0-18-18-2
Gambe: 200, 1, 8-8-9-8, 17-12-12, 0-18-18-2
Set Of The Canalizer (or techno magician for friends): recoverable in a chest in the Duke's archives
Elmo: 300 , 3.9, 20-19.2-22.8-20, 18-17-13, 5-15-13-0
Corpo: 300, 10.1, 53-50.9-60.4-53, 45-45-35, 12-38-33-0
Guanti: 300, 3, 17-16.3-19.4-17, 13-13-10, 3-12-10-0
Gambe: 300, 6, 32-30.7-36.5-32, 27-27-20, 7-23-20-0
Set Della Fanciulla: recoverable in a corpse in the Duke's archives
Elmo: 150 , 0.8, 7-8-7-7, 8-5-6, 0-9-7-3
Corpo: 150, 2.0 , 19-22-19-19, 23-13-17, 0-23-18-8
Guanti: 150, 1.2, 11-13-11-11, 13-8-10, 0-14-10-5
Gambe: 150, 2.5, 23-27-23-23, 27-16-21, 0-29-22-10
Ancient Set: recoverable in the Dark Root Basin, after saving Dusk, summon her on the corpse in front of the hydra, now go to where the furthest Gold Crystal Golem was located
Elmo: 150 , 0.4, 5-5-5-5, 11-2-6, 0-5-5-20
Corpo: 150, 1, 14-14-14-14, 33-6-19, 0-14-14-26
Guanti: 150, 0.6, 8-8-8-8, 19-3-11, 0-8-8-16
Gambe: 150, 3, 40-40-40-40, 57-17-55, 0-40-40-78
Void Thief's Set: Obtained from Undead Assassin
Elmo: 250 , 1.1, 8-8.7-8-8.3, 8-5-7, 0-6-11-0
Corpo: 250, 2.8, 21-22.9-21-21.8, 20-13-18, 0-15-29-0
Gambe: 250, 1.7, 12-13.1-12-12.5, 11-8-10, 0-9-17-0
Void Warrior Set: Obtained from Undead Warrior
Elmo: 250 , 2.6, 10.9-9.7-10.3-9.5, 6-5-6, 3-5-5-0
Corpo: 250, 6.6 , 24.3-23.3-24.7-22.8, 16-12-17, 8-13-13-0
Gambe: 250, 1.4, 13-12.6-13.4-12.3, 8-6-8, 5-6-6-0
Void Soldier Set: Obtained from Undead Soldier
Elmo: 200, 3, 10-19-11.1-8.8, 6-6-4, 5-7-5-0
Corpo: 200, 7.8 , 26-26-28.9-22.9, 16-17-10, 12-18-13-0
Gambe: 200, 1.5, 13-13-14.4-11.4, 8-8-8, 7-10-6-0
Filthy Set: recoverable through the Anastacia of Astora event
Elmo: 150 , 0.8, 6-8-6-6, 8-5-6, 0-9-7-9
Corpo: 150, 3, 23-29-23-23, 33-19-25, 0-35-26-35
Guanti: 150, 1.2, 9-11-9-9, 13-8-10, 0-14-10-14
Gambe: 150, 2.5, 19-24-19-19, 27-16-21, 0-29-22-29
Gwyndolin Set: After killing Dark Sun Gwyndolin, the merchant Zena will sell every single piece to 10.000 souls each
Elmo: 300, 3.0, 12-12-12-12, 12-6-6, 0-9-9-12
Corpo: 80, 3.1, 20-20-20-20, 31-17-17, 0-23-23-31
Guanti: 80 , 0.5, 3-3-3-3, 5-3-3, 0-4-4-5
Gambe: 80, 1.8, 12-12-12-12, 18-10-10, 0-14-14-8
Great Hat Set: Obtained in the Duke's archives, Crystal Cave, or by killing Logan Great Hat
Elmo: 250, 3, 14-15-15-13, 43-7-17, 0-13-13-0
Corpo: 250, 4, 41-44-43-41, 28-29-35, 0-49-49-0
Gambe: 250, 1.6, 12-13-13-12, 16-8-10, 0-14-14-0
Gold-Fringed Black Set: Obtainable in the Boss area Infinite Discharge, when you take the set the boss will attack you, be careful
Elmo: 400 , 1.4, 16-17.1-16-16, 22-26-14, 0-16-36-0
Corpo: 400, 3.5 , 44-47.1-44-44, 54-68-36, 0-40-94-0
Guanti: 400, 1.2, 14-15-14-14, 18-24-12, 0-14-32-0
Gambe: 400, 3.0, 36-38.5-36-36, 46-58-30, 0-32-78-0
Crimson Set: Obtained in a corpse in the Cursed City, or by killing Ingward in Petit Londo
Elmo: 400 , 1.5, 12-13-12-12, 12-7-9, 0-8-8-8
Corpo: 400, 3.9, 35-35-32-32,32-19-24, 0-21-21-21
Guanti: 400, 0.8, 7-8-7-7, 7-4-5, 0-4-4-4
Gambe: 400, 3.5, 29-32-29-29, 29-17-21, 0-19-19-19
Black Set: Obtained in the painted world of Ariamis
Elmo: 400, 2.5, 12-13-12-12, 12-10-7, 0-9-9-20
Corpo: 400, 3.9, 23-25-23-32, 29-25-19, 0-22-22-13
Guanti: 400, 1.8, 11-12-11-11, 14-11-19, 0-10-10-5
Gambe: 400, 2.8, 16-17-16-16, 22-17-13, 0-15-15-9
Paint Guardian Set: Obtained in the Painted World of Ariamis
Elmo: 150 , 0.6, 3-3.6-3-3, 31-11-8, 0-12-30-0
Corpo: 150, 1.6 , 9-10.8-9-9, 34-29-21, 0-32-78-16
Guanti: 150, 0.9, 6-7.2-6-6, 22-17-12, 0-18-46-10
Gambe: 150, 2.8, 22-26.4-22-22, 30-44-42, 0-21-51-10
Witch's Set: Valley Of Dragons obtainable
Elmo: 250 , 1.1, 9-10-9-9, 12-6-7, 0-10-10-11
Corpo: 250, 4, 33-37-33-33, 43-20-26, 0-36-36-12
Guanti: 250, 1.7, 14-16-14-14, 18-9-11, 0-16-16-6
Gambe: 250, 2.8, 20-22-20-20, 27-12-17, 0-23-23-8
Xanthous Set: Obtainable in the painted world of Ariamis, you must have killed the dark ghost of Jeremiah Re by being invaded in human form
Elmo : 400, 5, 18-28-18-15, 15-3-8, 0-8-11-35
Corpo: 400, 3.9, 32-36-32-29, 37-7-23, 0-22-29-0
Guanti: 400, 2.3, 18-20-18-16, 22-4-14, 0-12-18-0
Gambe: 400, 4, 32-36-32-29, 39-7-23, 0-22-30-0
Vest Set: Purchase from male undead merchant (undead hamlet)
Elmo: 300, 3, 12-12-14-12, 8-8-3, 5-10-6-0
Corpo: 300, 6, 24-24-29-23, 16-16-7, 9-20-12-0
Guanti: 300, 3.6, 14-14-17-14, 10-10-4, 5-12-7-0
Gambe: 300, 4.6, 18-18-21-17, 12-12-5, 7-15-9-0
East Set: Obtained in Dark Root Forest
Elmo: 450 , 4.7, 17-16-21-17, 6-12-7, 8-15-11-0
Corpo: 450, 12.3, 45-43-56-44, 23-25-15, 20-38-28-0
Guanti: 450, 1.5, 6-6-7-6, 1-4-2, 2-5-4-0
Gambe: 450, 4, 15-14-19-15, 5-11-6, 6-12-10-0
Adventurer's Set: Purchase from merchant Zena
Elmo: 500 , 5.1, 18-17-21-18, 12-13-10, 8-11-2-18
Corpo: 500, 13.3, 47-45-54-47, 31-34-25, 20-28-19-24
Guanti: 500, 3,11-11-13-11,7-7-6, 4-6-5-4
Gambe: 500, 4, 14-13-16-14, 10-11-7, 6-8-6-5
Balder's Set: Purchase from the merchant in Sen's Fortress
Elmo: 450, 4.2, 14-14-17-13, 8-9-6, 6-8-8-0
Corpo: 450, 10.9, 37-36-45-36, 21-25-15, 16-20-16-0
Guanti: 450, 3.5, 12-12-15-12, 7-8-5, 5-6-5-0
Gambe: 450, 6.4, 22-22-27-21, 12-14-9, 9-12-9-0
Thorn Set: Obtained in Kirk's corpse in Quelaag's domain after defeating his black specter, in the depths, Demon Ruins and Lost Izalith
Elmo: 250, 4.1, 17-16-19-17, 10-12-8, 6-10-7-0
Corpo: 250, 10.5, 45-43-49-45, 28-33-20, 16-0-0-0
Guanti: 250, 6.5, 26-25-28-26, 16-18-12, 9-16-17-10
Gambe: 250, 6.2, 26-25-28-26, 16-18-12, 9-16-17-10
Dark Set: Obtained by reaching Rank 2 with the Dark Specter covenant
Elmo: 300, 3.8, 18-18-19-16.9, 12-12-10, 6-12-8-0
Corpo: 300, 9.8, 45-45-49.5-42.3, 30-31-27, 13-30-21-0
Guanti: 300, 5.8, 27-27-29.7-25.4, 18-18-15, 9.8-18-12-0
Gambe: 300, 5.8, 27-27-29.7-25.4, 18-18-15, 9.8-18-12-0
Elite Knight Set: Obtained in the Dark Root Forest
Elmo: 450, 4.5, 17-16-21-17, 9-9-6, 8-9-6-0
Corpo: 450, 11.7, 39-35-45-39, 23-25-15, 20-23-16-0
Guanti: 450, 3.7, 12-12-14-12, 7-8-5, 9-7-5-0
Gambe: 450, 6.9, 23-22-27-23, 14-14-9, 12-14-9-0
Crystal Set: Obtainable in the Duke's archives
Elmo: 150, 4.2, 11-9-13-11, 8-6-2, 6-6-0-0
Corpo: 150, 10.9, 28-24-32-28, 21-15-7, 16-15-0-10
Guanti: 150, 6.4, 17-15-20-17, 12-9-4, 9-9-0-0
Gambe: 150, 6.4, 17-15-20-17, 12-9-4, 9-9-0-0
Brass Set: Obtained in Anor Londo, in the tomb of Lord Gwyn
Elmo: 600, 5.1, 18-17.3-20.3-18, 12-11-11, 8-11-9-6
Corpo: 600, 10.9, 37-35.5-41.8-37, 27-25-25, 16-24-20-11
Guanti: 600, 5.4, 19-18.2-21.5-19, 14-12-12, 8-12-10-6
Gambe: 600, 6.4, 23-22-26-23, 16-15-15, 9-14-12-7
Favor Set: Obtained at the end of Lautrec's subquest, in a body in front of the bonfire in the princess's chamber
Elmo: 500, 4.5, 18-17.1-20.9-18, 10-11-7, 8-11-8-5
Corpo: 500, 11.7, 48-45.6-55.7-48, 23-30-19, 20-28-22-20
Guanti: 500, 6.0, 21-19.9-24.4-21, 10-12-8, 8-11-10-10
Gambe: 500, 6.9, 28-26.6-32.5-28, 14-18-11, 11-15-14-14
Catarina's Set: Sold by the merchant in Sen's fortress
Elmo: 400, 4.5, 22-22-25-22, 12-13-7, 8-13-9-0
Corpo: 400, 11.7, 57-56-66-57, 16-16-7, 21-34-24-0
Guanti: 400, 6.9, 34-34-39-34, 18-21-12, 13-21-13-10
Gambe: 400, 6.9, 34-34-39-34, 18-21-12, 13-21-13-0
Silver Knight's Set: Obtained from a chest in Anor Londo
Elmo: 600, 4.8, 17-16-20-17, 10-11-10, 8-9-5-1
Corpo: 600, 12, 42-40-48-4, 29-29-25, 19-24-12-2
Guanti: 600, 5.5, 19-18-22-19, 12-14-11, 9-11-6-1
Gambe: 600, 6.5, 23-22-27-23, 15-16-14, 11-14-7-1
Black Knight's Set: Obtained in the Furnace of the First Bonfire
Elmo: 550, 5, 21-20-24-21, 11-18-6, 8-12-6-0
Corpo: 550, 13, 57-54-64-56, 29-48-17, 21-32-15-0
Guanti: 550, 6, 26-25-29-26, 14-23-8, 10-15-8-0
Gambe: 550, 7, 30-29-34-29, 15-26-9, 11-17-9-0
Paladin's Set: Defeat the black specter of Leeroy, find the armor in a corpse in the room of the boss Nito
Elmo: 500, 5, 22-20.9-25.3-22, 12-13-7, 8-13-9-22
Corpo: 500, 12.9, 59-56-67.9-59, 31-37-19, 20-34-24-57
Guanti: 500, 7.6, 35-33.3-40.3-35, 19-21-12, 12-21-13-34
Gambe: 500, 7.6, 35-33.3-40.3-35, 19-21-12, 12-21-13-34
Steel Set: Purchase from the merchant at Sen's Fortress
Elmo: 500, 5.4, 16-15-18-16, 8-8-5, 9-9-6-0
Corpo: 500, 14, 42-39.5-48.3-42, 22-21-13, 23-23-16-0
Guanti: 500, 8.3, 25-23.5-28.8-25, 13-12-8, 14-14-9-9
Gambe: 500, 8.3, 25-23.5-28.8-25, 13-12-8, 14-14-9-9
Black Iron Set: Obtained from Anor Londo
Elmo: 600, 6, 27-26-31-27, 11-19-8, 12-17-10-5
Corpo: 600, 15.6, 68-65-78-68, 30-51-21, 31-43-25-13
Guanti: 600, 9.2, 40-38-46-40, 17-30-16, 18-25-14-8
Gambe: 600, 9.2, 40-38-46-40, 17-30-16, 18-25-14-8
Havel's Set: Obtainable in Anor Londo, in a secret passage under a fireplace, you will have to hit the wall with one shot
Elmo: 900, 7.5, 36-30.6-41.4-36, 22-22-18, 18-18-4-9
Corpo: 900, 19.5, 92-78.2-105.8-92, 56-54-49, 47-45-11-22
Guanti: 900, 11.5, 54-45.9-62.1-54.0, 32-32-29, 28-27-5-13
Gambe: 900, 11.5, 54-45.9-62.1-54.0, 32-32-29, 28-27-5-13
Ornstein's Set: Purchase from merchant Zena if you kill Ornstein second
Elmo: 700, 5.5, 32-30.4-36.2-32, 16-22-18, 9-18-8-8
Corpo: 700, 12, 70-66.5-79.1-70, 36-46-40, 19-38-18-18
Guanti: 700, 4, 24-22.8-27.1-24, 12-16-14, 6-12-6-6
Gambe: 700, 7, 40-38-45.2-40, 20-28-24, 11-22-12-12
Smough's Set: Purchase from merchant Zena if you kill Smough second
Elmo: 700, 6.8, 40-34.8-46-40, 19-26-21, 14-21-12-5
Corpo: 700, 17.5, 106-99.2-121.9-106, 52-66-59, 35-54-28-9
Guanti: 700, 10.4, 61-53.1-70.2-61, 31-40-33, 21-33-16-5
Gambe: 700, 10.4, 61-53.1-70.2-61, 31-40-33, 21-33-16-5
Stone Knight Set: Obtainable in Dark Root Forest
Elmo: 800, 6.8, 35-32.9-40.3-35, 17-21-21, 15-17-6-0
Corpo: 800, 17.6, 91-85.5-104.7-91, 45-54-54, 39-45-16-0
Guanti: 800, 10.4, 54-50.8-62.1-54, 27-33-33, 23-27-10-0
Gambe: 800, 10.4, 54-50.8-62.1-54, 27-33-33 , 23-27-10-0
Great Lord's Set: Purchase from merchant Zena in the new game +
Elmo: 800, 3.0, 16-17.3-18.4-14.7, 16-21-21, 0-15-8-20
Corpo: 400, 6.0, 32-34.6-36.8-29.4, 32-41-41, 0-30-15-40
Guanti: 400, 2.8, 15-16.2-17.3-13.8, 15-19-19, 0-14-7-18
Gambe: 400, 2.8, 15-16.2-17.3-13.8, 15-19-19, 0-14-7-18
Unique Pieces: Single pieces of armor, very rare, obtainable with a low percentage by killing some enemies
Boar Fang Helm: Obtained from metal boar, allows you to attack with fangs
Elmo: 600 , 8.0, 26-23.4-31.2-26, 5-4-4, 12-13-8-0
Gargoyle Helm: Obtained from Gargoyle
Elmo: 500, 3.5, 15-12.3-19.1-13.7, 15-15-15, 8-22-19-0
Sun Bug: Obtained from Sun Bug, after killing all 9 in the shortcut to Lost Izalith, gives off light
Elmo: 80, 1.4, 6-6-6-6, 5-24-13, 0-0-0-0
Symbol of Avarice: Obtainable from trap chest, increases the% of finding items, but consumes HP very quickly when worn
Sack: Obtained from the Butcher in the depths
Elmo: 150 , 0.6, 6-10-6-5, 6-8-4, 0-12-10-0
Royal Helm: Obtained by killing the blacksmith in the catacombs
Elmo: 500 , 4.5, 16-13.9-16-16, 10-10-6, 8-16-12-0
Mask Of The Father: Obtained by killing Pinwheel, increases equipable weight
Elmo: 200 , 1.2, 6-6-6-6, 10-6-8, 0-6-0-0
Mask Of The Mother: Obtained by killing Pinwheel, increases HP
Elmo: 200 , 1.2, 6-6-6-6, 12-6-8, 0-10-0-0
Mask Of The Son: Obtained by killing Pinwheel, increases stamina regeneration
Elmo: 200 , 1.2, 6-6-6-6, 10-8-10, 0-6-0-0
The shields
Small leather shield:
Attack: fis 40 crit 100
Defense: fis 80 may 35 fuo 60 ful 60 stab 40
Side effects: /
Stat modifiers: fo D
Requests: for 5
Hard: 200
Weight: 0.5
Initial sorcerer class shield
Leather shield:
Attack: fis 42 stab 100
Defense: fis 85 may 35 fuo 60 ful 60 stab 45
Side effects: /
Stat modifiers: fo D
Requests: for 6
Hard: 200
Weight: 1.0
Traveler class initial shield
Target shield:
Attack: fis 56 crit 100
Defense: fis 78 may 30 fuo 35 ful 50
Side effects: /
Stat modifiers: fo D
Requests: for 8 of 11
Hard: 150
Weight: 2.0
Thief class starting shield
Ringlets:
Attack: fis 55 crit 100
Defense: fis 76 may 32 fuo 65 ful 53 stab 40
Side effects: /
Stat modifiers: fo D
Requests: for 7 of 13
Hard: 150
Weight: 2.0
Purchase from undead merchant in undead hamlet
Broken round shield:
Attack: fis 46 crit 100
Defense: fis 65 may 55 fuo 10 ful 45 stab 30
Side effects: /
Stat modifiers: fo D
Requests: for 6
Hard: 60
Weight: 1.0
Pyromancer class initial shield
Round shield of the warrior:
Attack: fis 50 crit 100
Defense: fis 85 may 65 fuo 35 ful 65 stab 40
Side effects: /
Stat modifiers: fo D
Requests: for 6
Hard: 180
Weight: 1.0
Purchase from undead merchant in undead hamlet
Round red and white shield:
Attack: fis 50 crit 100
Defense: fis 85 may 65 fuo 30 ful 65 stab 40
Side effects: /
Stat modifiers: fo D
Requests: for 6
Hard: 180
Weight: 1.0
Left by swordsman skeleton
Caduceus round shield:
Attack: fis 50 crit 100
Defense: fis 85 may 65 fuo 30 ful 65 stab 40
Side effects: /
Stat modifiers: fo D
Requests: for 6
Hard: 180
Weight: 1.0
Obtained in the cemetery next to the bonfire sanctuary
Shield with effigy:
Attack: fis 60 crit 100
Defense: fis 90 may 40 fuo 70 ful 90 stab 45
Side effects: /
Stat modifiers: fo D
Requests: fo 10 fed 16
Hard: 180
Weight: 3.0
Obtained in the Tomb of the Giants
Shield of axes:
Attack: fis 52 crit 100
Defense: fis 75 may 40 fuo 20 ful 55 stab 45
Side effects: /
Stat modifiers: fo D
Requests: for 7
Hard: 120
Weight: 1.5
Discriminated class starting shield
Crystal Ring Shield:
Attack: mag 100 fis 100
Defense: fis 70 may 90 fuo 70 ful 40 stab 40
Secondary Effects: With the powerful hit it emits a ring of light towards the target, the damage dealt depends on the damage of the weapon in the right hand
Status modifiers: /
Requests: for 10
Hard: 120
Weight: 2.0
Crafted from a +10 shield and the soul of the moon butterfly
Gargoyle Shield:
Attack: fis 62 crit 100
Defense: fis 85 may 40 fuo 75 ful 70 stab 56
Side effects: /
Stat modifiers: fo D
Requests: for 12
Hard: 300
Weight: 4.0
Left by the Bell Gargoyle
East West Shield:
Attack: fis 52 crit 100
Defense: fis 88 may 40 fuo 30 ful 65 stab 44
Side effects: /
Stat modifiers: fo D
Requests: for 6
Hard: 160
Weight: 1.0
Cleric class initial shield
Wooden shield:
Attack: fis 54 crit 100
Defense: fis 93 may 40 fuo 30 ful 65 stab 52
Side effects: /
Stat modifiers: fo D
Requests: for 7
Hard: 160
Weight: 1.5
In a corpse in the village of the undead
Wide leather shield:
Attack: fis 46 crit 100
Defense: fis 91 may 35 fuo 60 ful 60 stab 50
Side effects: /
Stat modifiers: fo D
Requests: for 7
Hard: 200
Weight: 2.0
Hunter class starting shield
Metal shield:
Attack: fis 60 crit 100
Defense: fis 100 may 30 fuo 70 ful 50 stab 55
Side effects: /
Stat modifiers: fo D
Requests: for 8
Hard: 250
Weight: 2.0
Warrior class initial shield
Knight's Shield:
Attack: fis 68 crit 100
Defense: fis 100 may 30 fuo 60 ful 40 stab 56
Side effects: /
Stat modifiers: fo D
Requests: for 10
Hard: 200
Weight: 5.5
Obtained in a corpse in the church of the undead
Teardrop Tower Shield:
Attack: fis 64 crit 100
Defense: fis 100 may 30 fuo 70 ful 50 stab 58
Side effects: /
Stat modifiers: fo D
Requests: for 10
Hard: 250
Weight: 3.0
Knight class initial shield
Caduceus drop shield:
Attack: fis 64 crit 100
Defense: fis 100 may 30 fuo 70 ful 50 stab 58
Side effects: /
Stat modifiers: fo D
Requests: for 10
Hard: 250
Weight: 3.0
Purchasable from Andre di Astora
Hollow Soldier's Shield:
Attack: fis 66 crit 100
Defense: fis 100 may 30 fuo 75 ful 50 stab 60
Side effects: /
Stat modifiers: fo D
Requests: fo !!
Hard: 250
Weight: 3.5
Chance to be left by the undead soldier
Balder's Shield:
Attack: fis 66 crit 100
Defense: fis 100 may 20 fuo 60 ful 50 stab 66
Side effects: /
Stat modifiers: fo D
Requests: for 12
Hard: 220
Weight: 4.0
Chance of being dropped by the Elite Undead Guard
Sun shield:
Attack: fis 64 crit 100
Defense: fis 100 may 30 fuo 75 ful 50 stab 60
Side effects: /
Stat modifiers: fo D
Requests: for 12
Hard: 280
Weight: 4.0
Left by Solaire if killed
Round iron shield:
Attack: fis 68 crit 100
Defense: fis 100 may 30 fuo 72 ful 46 stab 52
Side effects: /
Stat modifiers: fo D
Requests: for 14
Hard: 280
Weight: 5.0
Left by Shiva if killed
Silver Knight's Shield:
Attack: fis 66 crit 100
Defense: fis 100 may 40 fuo 75 ful 65 stab 64
Side effects: /
Stat modifiers: fo D
Requests: for 14
Hard: 250
Weight: 5.0
Possibility of being left by a silver knight
Black Knight's Shield:
Attack: fis 68 crit 100
Defense: fis 100 may 25 fuo 95 ful 65 stab 62
Side effects: /
Stat modifiers: fo D
Requests: for 16
Hard: 250
Weight: 6.0
Chance to be dropped by the black knight
Pointed Shield:
Attack: fis 82 crit 100
Defense: fis 95 may 30 fuo 70 ful 34 stab 49
Side Effects: Block is replaced by a debilitating blow
State modifiers: fo D of C
Requests: for 11 of 14
Hard: 180
Weight: 3.5
Gifted by Siegmeyer in the infamous city if you give him 3 purple mosses
Barbed shield:
Attack: fis 78 crit 100
Defense: fis 90 may 28 fuo 69 ful 40 stab 48
Side Effects: Block is replaced by a blow that inflicts 300 bleed
State modifiers: fo D of C
Requests: fo D de C
Hard: 160
Weight: 3.0
Left by dark spectrum Kirk
Crest shield:
Attack: fis 62 crit 100
Defense: fis 100 may 80 fuo 55 ful 45 stab 55
Side effects: /
Stat modifiers: fo D
Requests: for 10
Hard: 300
Weight: 3.0
Left by videogamingallday.com undead
Dragon Crest Shield:
Attack: fis 62 crit 100
Defense: fis 100 may 20 fuo 85 ful 45 stab 55
Side effects: /
Stat modifiers: fo D
Requests: for 10
Hard: 200
Weight: 3.0
Obtained in Valley of the Dragons
Wavy crest shield:
Attack: fis 62 crit 100
Defense: fis 95 may 42 fuo 70 ful 50 stab 51
Side effects: increases stamina recovery
Stat modifiers: fo D
Requests: for 10
Hard: 200
Weight: 3.0
Obtained in the dark root basin
Spider Shield:
Attack: fis 62 crit 100
Defense: fis 100 may 30 fuo 72 ful 48 stab 56
Side Effects: On parade you will be immune to poison and toxins
Stat modifiers: fo D
Requests: for 10
Hard: 230
Weight: 3.0
Bandit class starting shield, obtainable in the valley of dragons and in the depths, in the room of the giant rat
Blood Shield:
Attack: fis 62 crit 100
Defense: fis 100 may 30 fuo 70 ful 50 stab 53
Side Effects: Increases resistance to bleeding, poison and curse by 50%
Stat modifiers: fo D
Requests: for 10
Hard: 240
Weight: 3.0
Obtained in Ariamis' Painted World
Sanctus:
Attack: fis 62 crit 100
Defense: fis 95 may 40 fuo 70 ful 50 stab 51
Secondary Effects: Recover 2 HP every 2 seconds
Stat modifiers: fo D
Requests: for 14
Hard: 250
Weight: 5.0
Left by Leeroy, dark specter. Curiosity: the design on this shield was decided through a competition in Japan, this was chosen as the best theme and inserted into the game.
Crystal shield:
Attack: fis 70 crit 100
Defense: fis 100 may 60 fuo 80 ful 80 stab 60
Side Effects: Block is replaced by a debilitating blow
Stat modifiers: fo D
Requests: for 14
Hard: 250
Weight: 5.0
Purchase from merchant Zena
Bone Wheel Shield:
Attack: fis 80 crit 100
Defense: fis 90 may 30 fuo 30 ful 51 stab 66
Secondary Effects: The parry is replaced by 3 consecutive hits
Stat modifiers: fo D
Requests: for 30
Hard: 200
Weight: 12.0
Left by skeleton on wheel
Tower shield:
Attack: fis 80 crit 100
Defense: fis 100 may 40 fuo 75 ful 50 stab 72
Side effects: /
Stat modifiers: fo D
Requests: for 30
Hard: 300
Weight: 13.0
Left as a knight in the church of the undead
Large stone shield:
Attack: fis 82 crit 100
Defense: fis 100 may 80 fuo 75 ful 65 stab 80
Side effects: /
Stat modifiers: fo D
Requests: for 38
Hard: 400
Weight: 20
Left by stone knight in dark root forest
Eagle shield:
Attack: fis 62 crit 100
Defense: fis 100 may 55 fuo 45 ful 75 stab 70
Side effects: /
Stat modifiers: fo D
Requests: for 16
Hard: 300
Weight: 6
Obtainable in the infamous city
Large black metal shield:
Attack: fis 80 crit 100
Defense: fis 100 may 40 fuo 90 ful 50 stab 71
Side effects: /
Stat modifiers: fo D
Requests: for 34
Hard: 230
Weight: 16.0
Left by knight in Sen's fortress
Havel's Shield:
Attack: fis 84 crit 100
Defense: fis 100 may 90 fuo 80 ful 80 stab 84
Side Effects: The powerful attack coats your skin in stone, increasing your resistances
Stat modifiers: fo D
Requests: for 50
Hard: 500
Weight: 26
Obtained in the secret passage in the fireplace in Anor Londo
Great Shield of Artorias:
Attack: fis 88 crit 100
Defense: fis 100 may 50 fuo 80 ful 40 stab 88
Side Effects: Increases resistance to negative statuses
Stat modifiers: fo D
Requests: for 34
Hard: 600
Weight: 16
Obtained using Sif's soul and a +10 shield
Giant shield:
Attack: fis 80 crit 100
Defense: fis 100 may 60 fuo 75 ful 75 stab 68
Side effects: /
Stat modifiers: fo D
Requests: for 36
Hard: 300
Weight: 18
Obtained from Giant Guard in Anor Londo, purchased from Giant Blacksmith
PNG
Griggs of Vinheim:
He is imprisoned in the slums of Borgo dei Undorti, you can free him by buying the key from the undead merchant.
Once released it will appear at the bonfire sanctuary.
Rickert at Vinheim:
You will find him in a cell, as soon as you come out of the lift to Petit Londo, go down the small street on the left.
Logan Grancappello:
You will meet him for the first time in the Sen fortress, in an area that can only be reached by moving the boulder trap towards the wall where the sleeping snake man is, to free him you will have to find the key at the top of the castle. Released the first time, you will find it at the bonfire sanctuary.
The second time you will meet him in a cell, after dying at the first meeting with Seath, the key to free him is found in a chest behind the secret passage near the third bonfire in the Duke's archives, where you will later find him again. Returning to the room of the first encounter with Seath, you will meet him mad, he will attack you, kill him and returning to the room from the secret passage, you will find his catalyst in a chest.
Dusk of Oolacile:
Behind the hydra in the dark root basin, you will find a small cave, as you advance you will encounter a gold crystal golem, kill it to free Dusk's soul, talk to him.
You can then summon it from its sign, next to a corpse right in front of the lake where you fought against the hydra.
Ingward:
Ingward is located on the roof of the palace in Petit Londo, the palace where you will face a Banshee. Ingward has the keys to drain the water from the entire area, the keys will be given to you by him after you get the Vessel of Lords, otherwise kill him to get the key immediately.
Lawrence
You will meet him imprisoned inside a pot in a room near the butcher in the slums, break the pots with somersaults to avoid hitting him. Once released, you will find him at the bonfire sanctuary.
Chelan:
You will find it in the swamp of the infamous city, behind a column in front of the entrance to the cave to go to the boss of the area.
Eingyi:
After beating Quelaag, continue and go down the stairs, look for the illusory wall in the circular room.
Peter:
You will meet Petrus at the sanctuary bonfire right from the start of the game.
Reah:
It will appear in the same area as Petrus, after you have rung the first bell. After you talk to her and her guards, she will leave the area. You will meet her in the tomb of the giants, after Patches makes you fall from the peak, kill her now "empty" bodyguards to save her. Now you will find it in the church of the undead intent on praying, after you have visited two different areas and killed the respective bosses, you will find it in the same dead spot.
Lost Warrior:
You will meet him sitting next to the bonfire sanctuary, later in the game you will face him in Petit Londo.
Anastacia of Astora:
Anastacia is the guardian of the bonfire sanctuary locked in a cell below it. After saving Lautrec, you will find her dead later in the game, by collecting her items from her corpse, you will find a black eye orb.
In the area in front of the clash with Ornstein and Smaugh, the globe will vibrate, use it to invade the world of Lautrec, kill him and collect the guardian soul of the bonfire, bringing this soul to Anastacia's cell, you will make it come back to life.
Frampt:
Frampt is an eternal worm who will appear at the bonfire sanctuary after you ring the second bell. You can sell him any item in exchange for souls. He will also transform the various titanites, from larger pieces into smaller pieces. Once he finds the receptacle for the lords, he will transport you to the portal area for the Furnace of the First Flame.
Astora Solar:
You will meet Solaire after beating the bull demon, where he will give you the white stone to be summoned by other players. You will meet him other times at some bonfires. You will also meet him in the area just after the Wandering Fire Demon, entering a hole and descending through the huge roots; reached the back of this room, you will find him mad with a sun bug on his head, he will attack you.
Male Undead Merchant:
Merchant, you will meet him in the Borgo Dei Undorti.
Andrei at Astora:
Blacksmith, you will meet him in the church of the undead, opposite the entrance to the Dark Root Forest.
Lautrec:
You can save Lautrec in the Undead Church, then you will find him at the Bonfire Sanctuary in front of Anastacia; if you talk to him, he will give you useful advice on how to continue in the game. Once he kills Anastacia, you will find him in Anor Londo using the black eye orb. Killing him will find his armor on the left side of the balcony in front of Gwynevere's chamber.
Oswald:
You will meet him in the tower of the first bell after ringing it, he sells the books of the guilty, and he can absolve you of your sins in exchange for souls.
Avina:
You will meet Avina, in the small turret in the Dark Root Garden, talking to her you can enter the Forest Hunters covenant.
Shiva:
Shiva is a merchant accessible only to those who have entered the Hunters of the Forest covenant, you can find him next to the Alvina turret, or at the base of the huge wooden elevator in the swamp of the infamous city.
Woman:
You will meet the merchant Zena in the depths before the entrance to the infamous city. After you can find it under the giant bridge at the Bonfire Sanctuary.
Quelaan:
You will meet Quelaan in the secret room after beating Quelaag, by talking to her you can enter the Servants of Chaos covenant. She is also a campfire keeper.
Siegmeier of Catarina:
Siegmeier is looking for his lost daughter, to continue his subplot, you will have to meet him and talk to him in the following places:
Next to the entrance to the Sen fortress, before ringing the second bell.
In Sen's fortress, throw yourself to the right (check where you fall first) from the first external staircase where the metal balls roll.
Anor Londo, in the open area where you face the two silver knights, the one with the sword and the one with the bow, enter the turret in front of the point you came from, go down the stairs, talk to us, open the front door to him and eliminate all the silver knights in the room, talk to him again.
Infamous city, near the entrance to The Great Void.
In Lost Izalith, after the lava area, in the room where the floor to the right of the poisonous swamp collapses.
In the Ash Lake, at the first bonfire.
Sieglinde of Catarina:
She is trapped in one of the gold golems in the garden between the Duke's Archives, and the crystal cave, free her to continue in Siegmeier's subplot, before meeting him in Ash Lake.
Kaathe:
Kaathe is the second Eternal Serpent you will encounter, it will appear in the abyss after you have beaten the four Kings, only if you have not yet found the Vessel of Lords. By talking to him you can enter the Dark Ghost covenant.
Dark Blade Knight:
You will meet this character at Anor Londo's first bonfire, she is the keeper of the bonfire.
Gwynevere:
Gwynevere is the princess of Anor Londo, talk to her to receive the Vessel of Lords, you can then kill her, but Anor Londo will be covered by the twilight, and you can access Gwyn's crypt even without the ring.
Giant Blacksmith:
You will find it at Anor Londo, passing through a staircase on the upper floors to the left of the cathedral with the two elite giant Guards.
Let's go:
You will meet Vamos in the catacombs, dropping after a spiral descent that ends in a chasm, will open a shortcut for you, to the cave where the undead are wheel.
Patches the Iena:
You will meet Patches for the first time in the catacombs, in front of the lever that allows you to turn the second barbed bridge. Be careful when you cross this bridge later, as Patches will reactivate the lever making the bridge turn, so walk it quickly. If you talk to him again, he will ask you if you are a cleric, if you answer "yes" Patches will attack you. The second time you meet him will be in the Tomb of the Giants, when he will kick you off the peak, go back to him and forgive him, and he will appear at the Bonfire Sanctuary as a merchant, after killing Nito.
Merchant in Sen's Fortress:
In the bridge after the area where the explosive balls are thrown at you, turn right and jump to the point where the bridge is broken to reach the tower where it is located.
Crystal Lizards:
Crystal lizards are very rare, and will disappear in seconds as soon as you get close, so they must be killed very quickly, each lizard leaves behind the glittering titanites, the rarest material in the game, below is the list of where to find them:
Village of the Undead: In a barrel in front of the Demon Taurus.
Dark Root Basin: Near a small slope opposite the Hydra waterfall.
Catacombs: you will find two after the bridge with the two skeletons and the necromancer on it, enter the room on the right, and look at the ground where the color is different, go over it and you will fall downstairs, you will see them in the cave in front of you.
Tomb of the Giants: Immediately after entering the Nito area that you will unlock with the Vessel of the Gods.
Great vacuum: You will find 8 by looking well through the branches, I recommend going out and re-entering the game, until you have found them all.
Lost Izalith: in the area after the Wandering Fire Demon.
Archives of the Duke: In the stairway to reach the first encounter with Seath.
Crystal Cave: You will find 3 after defeating the second Golem, go down the invisible bridge that takes you to Seath, but instead of going straight, turn around behind you and enter the small cave.
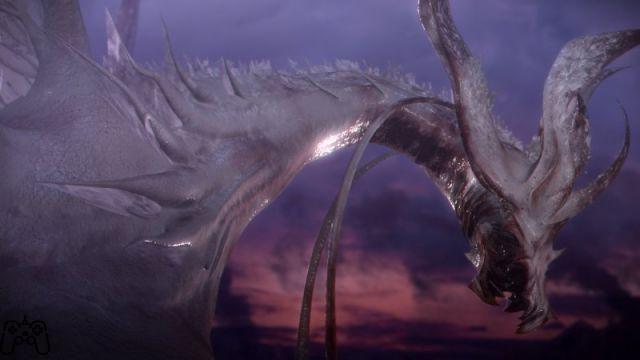
Levels of play - First part
In this analysis of the levels, I have transcribed the fastest and most painless way to reach the various area bosses, obviously nothing prevents you from exploring every ravine, but by following this guide you will know how to retrace your steps.
Refuge of the Undead:
Linked areas: Sanctuary of the bonfire
Collect the key from the corpse that was thrown into the cell, open the door, go down the corridor, until you reach a ladder, use it to find yourself in an area with a bonfire, light it. Open the door in front of you to access the guardian demon area, escape to the door on your left, go down the stairs and light the second bonfire. Exit the door on your left, and collect the shield in the corpse hidden in one of the cells, continue to the end of the road, enter the arch on the left, go up the stairs and go through the portal of fog.
Continue to the left until you find a flight of stairs, go up and as soon as you see that a metal sphere is thrown at you, dodge it, return to the point of impact of the sphere, enter the hole formed, and talk to the dying knight who will give you a key and Estus flasks. Go up the stairs from which the sphere was thrown at you, continue and enter the portal of fog, take the guardian demon in target and hurl yourself on him hitting him in the head, kill him and you will receive the pilgrim's key. Open the door and continue to the peak, to be grabbed by the crow and transported to the bonfire sanctuary.
Refuge of the Undead, Return:
To return to the undead shelter, you must have unlocked the elevator that connects the bonfire sanctuary to the undead church, just taken from the bonfire sanctuary, throw yourself on the canopy in front of you, turn right and reach the highest point from which you see a column of the central tower, do a somersault and climb on it, now walk the stairs of the tower to a bird's nest, you will be given the option to assume an egg-shaped position, wait thirty seconds, and the crow will transport you to the undead refuge.
Go down from the peak and kill the undead with the torch, open the door and as soon as you have reached the center of the room, the floor will collapse causing you to fall into the area where you will face the wandering demon. After defeating him, go up the ladder on the left. Go back to the cell where you met the dying knight, and kill his "blank for a shield" version, plus there are now two black knights in the level. Returning to the cell where the game started, you will find the unusual doll.
Bonfire Sanctuary:
Connected Areas: Village of the undead, Petit Londo, Catacombs.
In the center of the area there is the bonfire of Anastacia, the first bonfire from which you can increase your level, going down the stairs and continuing the road that takes you down, you will reach the elevator to Petit Londo, instead entering the area with the open chest and turning left you will find yourself in the cemetery, continuing the road that takes you down you will access the catacombs. When you unlock the elevator to the Church of the Undead, go up the roof and throw yourself into the area below, you will find yourself behind the central tower, and you will have access to 6 chests. Initially take the road that goes up in front of you, defeat the undead soldiers, until you reach a wall, enter and continue straight to reach the Borgo dei Undorti.
Village of the Undead:
Linked areas: Church of the Undead, Dark Root Basin
Go up the stairs, and defeat the first empty soldiers, continue and enter the building on your right, go through the portal of fog. In front of you the wyvern will glide, go ahead and make your way through the enemies and up the stairs, on your right there are two empty soldiers with spears and several wooden boxes, kill the soldiers, break the boxes and go down to the room below, exit from the gap in front of you to find the undead male merchant, go back, go under the gap on your left to find yourself in an area where you will be ambushed, at the end of this area you will find the object "junk", and climbing the ladder you will return to the beginning of the level.
Go back to where you faced the soldiers with the spear, go up the stairs and kill the other enemies left, enter the tower on the left to find the bonfire, rest. Run across the stone bridge in front of you, avoiding the bombs, enter the room, kill the soldiers, and take the arch on your left, enter the door on your right to find a chest. Exit the building, and go up the stairs, kill the 3 soldiers, go up the tower and eliminate the soldier with the bow. If you have the universal key, you can open the door in the area under the tower to find a chest with black bombs.
Go back to the base of the tower, and go down the stairs, kill the 3 soldiers, on your right if you go down the stairs you can find a black knight behind which there is a corpse with a ring. Climb the stairs to the largest tower, be careful of the fireball that will be thrown at you, kill the soldier and enter the tower (if you have the universal key you can open the door that you will find in front of you, and going down the stairs you will find yourself facing Havel, from this area you can open the door that leads you to the Dark Root Basin) go up the stairs and go through the mist portal to face the Demon Taurus. Go through the portal of fog, go down the stairs, go out on the bridge and immediately turn left, talk to Solaire to receive the white stone.
Now run on the bridge avoiding the arrows, the wyvern will glide over you, immediately throw yourself on the stairs on the right just after the enemies, go down and enter the rectangular opening on the left wall, knock down the ladder, go down and rest at the bonfire, go back up through the ladder and enter the archway. You will find yourself under the bridge, advance and defeat the two empty soldiers, check to your right to see the dragon's tail, use a bow and enter sniper mode, try to hit the tail when it passes in the viewfinder, after about thirty shots , you will receive the Dragon Sword, a great weapon for the first few levels. Continue to the left of the bridge, and enter the gap in the wall, defeat the rats and climb the ladder located on the left side of the room.
Undead Church:
Related Areas: Sen's Fortress, Dark Root Forest
Exit the gap, kill the empty soldier, go through the gate, take out the soldier who will run towards you, and watch out for the soldier with the spear on your right. Try to lure the iron boar towards you, the best way to kill it is with fire, then try to lure it against the various fires lit in the area. Kill the other empty soldiers too, and go back to the tower you came from, go up the stairs, as soon as the black knight notices you, be followed in the area where you fought the iron boar, get behind one of the fires and try to always keep the fire in the middle between you and the black knight. Let him hit the fire if he misses you, so he will die quickly. Go down the stairs on the right, watch out for the undead ambush, go up the stairs and collect the mysterious key from the corpse at the back of the room, now go up the ladder, kill the other zombies, also go up the second ladder, and go through the portal. of fog.
Advance to the opening, turn right, face the guard and collect the shield, go back and go up the stairs, continue until you are at the nth passage, kill the soldier with the spear, before the guard can reach you, then deal with her , continue on the catwalk, go down to the square and kill the three soldiers. Do not enter the church immediately, but go down the stairs to the left, continue and enter the building, go down the stairs and rest at the bonfire. Go back, enter the church and kill the giant knight, go to the opening at the back of the room, eliminate the guards, exit the church, go to the bottom of the stairs and collect the key to the slums.
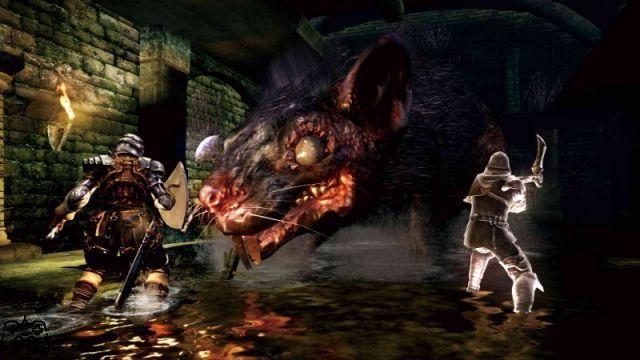
Go back to the church, go up the stairs at the end of the room on the left, kill the guard, go and stop before the passage, try to face the undead in small groups, being careful of the channeler. Once you've cleared the area, continue down the corridor to the left of the hall where you fought the undead and the channeler, go up the stairs and kill the guard, smash the wooden door, go up the stairs and free Lautrec. Go back, go up the ladders on the left side of the hall, pass the portal of fog to face the Gargoyles of the bell. Once the bosses are killed, go up the tower and ring the first bell.
Dark Root Forest:
Linked Zones: Undead Church, Dark Root Garden, Dark Root Basin
Pass the titanite demon in the room in front of Andrei, go straight, face two killer trees, on your right you will see a small slope, from here you can access the Dark Root Basin. Go straight ahead, face two more killer trees (one will pop out from under the ground), continue again, and you will find yourself in front of a door with a magical seal, hit the brick wall next to it to find a bonfire, rest.
Continue along the road to the left of the sealed door, on your left you will notice a sparkling object, be careful because as soon as you collect it you will be attacked by 4 killer trees. Go ahead and enter the vast clearing, immediately turn left, and walk through the area staying attached to the rock wall, face the golem in front of the entrance to the tower, go up and pass the mist portal to face the moon butterfly. Once killed, continue to go up to the other turret where you will find an ember.
Dark Root Garden:
Linked Zones: Dark Root Forest, Dark Root Basin.
To enter the Dark Root Garden, you need the Seal of Artorias. In this area, it is very easy for you to be invaded by other players. Go down the stairs to face the first ghost knight, kill the wizard and face the second ghost knight, kill the ghost thief as well, and continue towards a stone turret. Kill the brigand and the cleric, go down the stairs in the turret, go straight to the bridge and enter the door to face the wolf Sif.
Go back crossing the bridge again, turn left, you will find a pond protected by two giant mushrooms, with a chest inside where you will find an ember, go straight along keeping the abyss on your left, turn the hill, and face the three cats giants. Go down the ladder, cross the bridge, turn left and go down the other ladder, to find yourself in the Dark Root Basin right in front of the Hydra.
Dark Root Basin:
Linked Zones: Dark Root Forest, Dark Root Garden, Undead Hamlet.
Coming from the Dark Root Forest, go down the road, at a certain point you will find yourself at a crossroads, going to the right you will meet a black knight, and you will be able to access a cave with a bonfire, past which you will find the elevator to the valley of the dragons. If you continue to the left, you will arrive in a valley with several crystal golems, at the bottom of the valley there will be a lake with the hydra, I do not recommend to face it coming from this side. At the top of the valley you will find a tower, which leads to the Borgo Dei Undorti, entering the tower will face Havel if you haven't killed him first.
Valley of Dragons:
Linked areas: Dark Root Basin, Petit Londo, Infamous City.
If you arrive from the Dark Root Basin, eliminate the first dragon, and continue straight up the slope on the left, kill the second dragon as well, continuing you will find yourself in front of the undead dragon, approach, and avoid its blow as soon as it wakes up, to kill it I recommend ranged shots, or a very long weapon taking the time to avoid the poisonous flow. Continue the climb, on the left you will find the access to the infamous city, crossing the bridge you will find the lift to Petit Londo.
Depth:
Connected areas: Borgo Dei Undorti, Infamous City, Bonfire Sanctuary.
Go back to where you met Solaire, enter the door on the right using the key found on the stairs of the Church of the Undead. Go down the stairs, face the three dogs, pay attention to the ambushes of the assassins who will come out from the doors of the buildings, continue and enter the portal of fog to face the Demon Goat who will leave you the key to the depths. Go down the stairs kill the other killers, enter the tower using the door above the stairs, go all the way up the spiral staircase, and open the grated door that will lead you to the sanctuary of the bonfire, here you will also find the undead merchant woman. Go back down the spiral staircase, open the door in front of you, continue and go down the stairs, you will find yourself in an area full of undead, kill them and go down the stairs on the left, face the butcher, once killed go down to the lower part of the room, simply throwing yourself in the corridor below the butcher's room, continue until you find the room where Laurentius is imprisoned.
Go back, look for the opening in the wall, and jump into the water, defeat the enemies and climb the ladder to the right, go behind the butcher table to fall into a hole, continue and you will find yourself in a room with a giant mouse, kill it and look for the key to the sewers in one of the numerous corpses in the room, now approach the slope from which the water flows. Stick to the left wall and throw yourself down the slope, this way you won't fall into the hole, go up the stairs to the left, use the ladder, and enter the gap in front of you, go ahead and kill the rats and the channeler, go back , go up the stairs near the ladder, open the door, kill the undead with the torch and enter the door on the left to find a bonfire. Go back from the ladder, go down, turn right and enter the passage on the right, you will find yourself in a huge room, go down the stairs and pass the fog portal to face the Hungry Dragon.
Infamous City:
Linked Zones: Depth, Valley of Dragons, Demon Ruins, Great Void.
Take the gate in the depths, just to the left of the entrance to the Hungry Dragon boss area, go down the ladder to the left of the huge chasm. Go down the ramp, go down the ladder and a haunted barbarian will meet you, try to face him not on the catwalks or you will risk falling. Go ahead and try to eliminate the other two barbarians by attracting one at a time, go ahead and eliminate the two ghouls as well. Ahead of you will find a very narrow bridge, cross it slowly, and stop when it starts to wobble.
Go down the walkway to your left, you will see a corpse below with an object, try to jump on the walkway where you see the corpse, turn right and jump to the walkway below, continue on the stone bridge and activate the bonfire. From the bonfire go straight ahead, watch out for the ghoul that will attack you from your left as you pass the stone pots, back off and kill him before the fire dogs reach you, and then take care of them too. Now go on, eliminate the other ghouls, go down the stairs, until you find the entrance to a cave on your left, attract the barbarian, kill him, continue a little further and kill the ghoul too. Enter the portal of fog.
You will find yourself in the upper part of the swamp, the best way to deal with this initial area, is to be fast, check down and jump from catwalk to catwalk, as from a distance you will be fired with darts that cause toxicity. As soon as you get to the lower part of the swamp, kill the fire bugs, and any remaining poisonous flies. Try to stay on the right side of the area against the rock wall, and continue to reach a gallery with the bonfire.
Exit the tunnel and turn right, do not mind the wooden elevator, but continue towards the huge beach in front of you, once you reach the beach try to always stay on the right to avoid the barbarians, reach the top and enter the cave, don't touch the haunted undead, enter the fog portal to face Queelag. Once you have killed the boss, go up the stairs, to find yourself in front of the lever that will ring the second bell.
Great Vacuum:
Linked Zones: Infamous City, Ash Lake.
To reach the great void, from the base of the swamp coming from the infamous city, look for a large branch on the left side of the area, enter the fog portal, hit the first wall you will encounter to open the passage towards a chest, also hit the wall behind the casket to open the way to the great emptiness. This is an area that develops downwards, try to jump from branch to branch always checking down the possible ways.
When you reach the first flat area, you will have to face some basilisks, pay close attention to their miasma, which if it infects you, will kill you instantly and leave you with the curse status, so eliminate them as soon as possible. Look for the hole in the canvas and go down the ladder, face the other basilisks, and go down to the mushroom area, use the mushroom chapels as if they were stairs, and continue down, you will find yourself in an area with giant mushrooms, identified the entrance of the cave and run inside without facing the giant mushrooms in such a narrow place. Now you will arrive at the Ash lake.
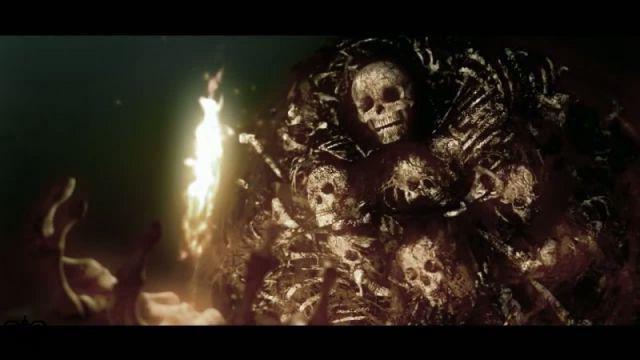
Levels of play - Second part
Ash lake:
Connected areas: Great vacuum.
This is a very linear area, it is a long beach populated by giant oysters, very tough enemies to beat, I recommend the use of a very powerful weapon, or ranged magic. As soon as you enter the area, go up the dune, and on your left you will see a hydra, face it, and on the left you will find a corpse with a dragon scale. Continue to the large tree, enter by climbing the root, eliminate the two basilisks, and avoid the large mushroom, exit the opposite side and check down a ramp from which you can collect the Great Barrier magic spell. Continue on the beach that will get narrower and narrower, stay on the sand, at the bottom of this area you will find a bonfire and the Eternal Dragon, turn behind him, and cut off his tail, you will not be attacked and you will receive the Great Dragon Sword.
London demands:
Linked areas: Bonfire Sanctuary, Valley of Dragons.
This area is haunted by ghosts, make sure you have a cursed weapon, or a healthy dose of transient curses. As soon as you get off the elevator, turn left, continue and you will find yourself in an area with undead that will not attack you, if you go right and go down the small street, you will meet Rickert. Turn left, break the vase and collect the two transitional curses, cross the bridge, kill the two ghosts, and go up the stairs in front of you. In the upper part, two ghosts will come out of the ground, one in front of you, and one on your right, eliminate them and pass the stone bridge, as soon as you enter the building turn left and eliminate the ghost, go back to the room, and do not immediately attack the ghost in front of you, but wait for the others to come out to avoid being surrounded, once eliminated, go straight, turn left and go down the spiral stairs.
Turn left and then right, and enter the arched passage and go up the stairs, you will find yourself in front of a rock walkway, run along it to avoid being hit by ghosts, reached the opposite end, go down the stairs to the left , and wait for three ghosts to come out of the water, try to eliminate them and enter the palace. You will enter a room full of vases, wait for the ghosts to come out and kill them all, enter the door in front of the entrance and walk around the palace trying to eliminate as many ghosts as possible. Now go back to the vase room and take out the banshee, go under the fireplace and go up the ladder. On the roof you will meet Ingward, if you have the Vessel of Lords down, he will give you the key to drain the water from the area, otherwise you can kill him to get the key.
Go back downstairs to the vase room, take the door on your left, turn right, go down the stairs, exit the palace, turn right, go up the stairs, and in the distance you will see a tower on your left, reach it, open the gate with the key and use the lever to drain the water from the area. Now go back to the beginning of the Petit Londo level, pass the initial bridge, where you will meet the first two ghosts, go to the right, where a corpse is, check down and jump into the area below.
Go immediately right, towards the end of the wall, face the first dark specter, on your right you will notice a small stone bridge, cross it and hit the wall to find a dark specter and behind it a chest. Cross the bridge again, slowly enter the huge palace, and let the first dark spectrum reach you, face it on the stairs, also eliminate the ghosts that have reached you in the meantime. Now enter the palace, on your right you will be attacked by another dark ghost, at the back of the room there will be a black abomination, attract the other dark ghost and face it far away, now deal with the abomination, and take the exit on the left, enter the portal of fog, wear the ring obtained by beating the wolf Sif, throw yourself below to reach the abyss and the clash with the four kings.
Sen Fortress:
Linked areas: Church of the Undead, Anor Londo.
As soon as you enter, pay attention to your feet, you will notice a rectangular tile different from the others, go around it, and attract the two snake men, when they have come down the stairs, activate the tile and let the darts hit them. Now go up the stairs to find an area with a very narrow stone bridge and several swords of Damocles to avoid. Cross the bridge, and eliminate the snake man, being careful of the lightning that will be thrown at you from your right, pass the arch, turn left, go up the stairs, to find yourself in front of another narrow bridge with several swords, take the time and run across, arrived in the next room, eliminate the magician snake man, pay attention to the trap placed in the wall in front of you, and enter the passage on the right, cross the walkway and eliminate and leave the snake man alone. sleeps below you, approach the gate, and remain in parade position, a snake man will come forward and be crushed by the boulders. Exit the passage, check the stones and take your time, run and slip into the first passage on the left, exit again and run towards the passage with the magician snake man, kill him and in the room you will find a chest with the protection ring. steel.
Exit the room and go down, always paying attention to the boulders, take the first passage on the right. Enter the room and go through the door in front of you with the shield in parry position, go into the next room and kill the snake man. Climb the ladder, but do not cross the threshold of the passage, wait for a boulder to pass in front of you and follow it down, go down the stairs and immediately take the first step on the left, the chest in this room is a trap beware of the clash. On the left you will see a small elevator, take it and as soon as it stops throw yourself into the room. Go up the stairs on the left, continue and take the walkway on the right, go down the stairs and go up the stairs.
Move the lever so that the boulders are no longer in the way, look for the small archway and continue, pay attention to the trap, activate the tile and wait for the darts to finish coming out of the holes, now go ahead, take the exit and pass the small stone bridge with the swords of Damocles, go up the stairs on your left, eliminate the magician snake man, and pay attention to the snake man who will come to you from behind, pass the umpteenth bridge with the swords paying attention to the magician snake man who will throw lightning at you. Go up the stairs to your right and go through the mist portal to find yourself outside. Go up the various flights of stairs on the left, being careful of the bombs that will be thrown at you by the iron giant, to the right of the largest balcony you will see a break in the wall, if you throw yourself from there you will land on a balcony with a bonfire, continue climbing, at a certain point you will see a giant knight in the distance, do not go that way, but instead continue taking the staircase on your left. Cross the bridge turning right, arrived at the tower turn right again, go up the stairs, exit the arched portal, go up again, and cross the walkway being careful of the guard with crossbow, kill him, enter the room, do not immediately go through the portal of fog, but go up the stairs on your right, take out the iron giant, now go back and through the portal of fog to face the iron golem. Once the boss is killed, tap the orb of light to be transported to Anor Londo.
Anor Londo:
Linked areas: Fortress of Sen.
Go down the staircase, eliminate the first giant, enter the room on your left, also eliminate the other two giants to access the chests behind them, exit the room, and enter the door on the left, light the bonfire. Go outside again, go straight for the elevator, go down, a gargoyle will attack you, take it out. Now turn left, and you will notice a broken window in the tower block in front of you, look for the vertical column you can climb up, and reach the balcony, enter through the broken window, kill the two guardians of the painting, climb the ladder, and make your way. on the rafters of the roof, until you reach the opposite side of the room, go down the ladder on the right, pass the portal of fog, and activate the lever of the elevator, you will be immediately attacked by a second gargoyle. Go towards the cathedral, go up the staircase and eliminate the two giants, turn right, go down the stairs, eliminate the three bat demons, and go down the walkway that gives down, as soon as you reach the tower you will be attacked from both sides by two bat demons, take them out while paying attention to the huge spears thrown from above by the two silver knights.
Now this point in my opinion is the most difficult of the whole game, go up the ramp in front of you, hide behind the wall and listen to the sound of the darts, take your time, and as soon as you turn the right corner, run to more I can not on the catwalk, as soon as you reach the top run immediately to the rider on the left, kill him as soon as possible, turn the corner and throw yourself on the balcony. Enter the palace through the mist portal, and open the first door on the left to access the bonfire. Now go behind the spiral staircase, eliminate the silver knight and enter the first door on the left, hit the wall inside the fireplace, to access an area full of chests, from which you can collect all the pieces of Havel's armor. , the first chest at the back of the room on the left is a trap, be careful. Go back upstairs and go up the spiral staircase, hit every chest you find, there are different traps, enter the first door on the left behind the spiral staircase, open the door at the end of the room and eliminate the knight. silver, go up the stairs and you will find yourself in an open area, eliminate the knight in front of you, and then eliminate the one on the right who will throw the darts at you, go down the spiral stairs, and continue straight towards the staircase.
You will enter the cathedral, eliminate the two elite giants, and go to the door, activate the lever to open it and create a very useful shortcut. In the cathedral you will also find the passage that will take you to the giant blacksmith. Now go through the mist portal to face the bosses Ornstein and Smough. Once killed, go up one of the elevators on the sides of the room, open the door, talk to Gwynevere who will give you the receptacle of the lords, now you can teleport between the various bonfires. At this point go and talk to one of the eternal snakes, Frampt at the Bonfire Sanctuary, or Kaathe in the abyss, they will transport you to the area where you can deposit the receptacle and unlock the golden mist portals to access the other areas of the game .

Catacombs:
Linked areas: Sanctuary of the bonfire, Tomb of the giants.
The skeletons in this area, once killed, will come back to life after about ten seconds, the only way to prevent them from coming back to life is to kill them with a divine weapon, or kill the area necromancer. Go down the spiral stairs, and reach a closed room with a single passage to the left, enter light the bonfire and press the lever to unlock the passage in the previous room. Exit, continue straight and eliminate the various skeletons, cross the bridge on the right, try to kill the necromancer before he escapes, take the passage to the left, continue straight, and as soon as you see the skeleton with the arch in the distance take the first Exit left, cross the bridge and try to kill the second necromancer before he escapes you.
Take the spiral descent, and exit on the left, cross the bridge, and go down again the other descent, exit on the left, turn left again and walk through the area while watching for the explosive skulls, on the other side enter the door of stone, cross the corridor and in the widest part take the opening in the wall on the right, go down the ladder, stand on the sides of the room, and enter the opening in the wall on the left, go down the ladder, continue the corridor and kill the skeletons archers and the necromancer. Take the opening in the wall on the left, you will find yourself in a huge area with wheel skeletons, try to face them one at a time, then take the exit from the cave on the left, continue through the portal of fog, and throw yourself in the huge tomb to tackle Pinwheel. Once killed, climb the ladder on the right at the back of the hall to access the Tomb of the Giants.
Tomb of the Giants:
Linked areas: Catacombs.
Follow the lights on the ground, and slide on the various tombs, try to avoid the giant skeletons and slide on the other tombs, you will reach an area where you will find Patches, talk to him and go to the peak he indicated, you will be thrown down. Collect the skull lantern, turn behind you, pass the rooms with the undead columns, and climb the ladder to reach the area where you met Patches again.
Continue to the right, kill the quadruped skeleton, go through the portal of fog, and wait for the black knight to meet you, kill the quadrupedal skeleton in front of you and the one on the coffin to the left, go down, look for the ladder to access the area of the bonfire. Go back up, continue following the lights that show the way when you use the skull lantern, you will find yourself in an area with a quadrupedal skeleton and a giant skeleton, kill them and continue left to find a second bonfire, go back, always follow the lights of the walls, make your way through the various enemies, until you find a hole with a ladder, go down, go through the gallery, and go through the passage to the right, watch out for the columns of undead, and kill the two giant skeletons. Continue to access an area full of Pinwheel, avoid them and climb to the highest point in the area, break the beams and enter the portal of fog to face Nito. Kill him and use the bonfire to teleport.
Archives of the Duke:
Linked areas: Anor Londo, Crystal Cave.
Enter the corridor and face the two iron boars, light the bonfire and take the elevator in front of you, you will find yourself in a room where you will be attacked by crystal undead, to your left and in front of you, approach the staircase , eliminate the undead archer and immediately jump to the left, wait for two other skeletons to reach you, kill them and enter the library, run towards the channeler, give it two hits before it teleports, stay behind the column and eliminate the other skeletons, go up on the staircase, kill channelers and archers, then also eliminate the other two skeletons on opposite sides of the two stairs, take the other elevator, enter the passage on the left, go up the stairs and eliminate the crystal swordsman, go through the portal of fog and get killed by Seath. Kill the sleeping serpent man, collect the key, a trap will be activated, go downstairs, letting the escaping serpentmen pass, kill the blue maidens, reach the ground floor, eliminate the remaining maidens, and climb the ladder , face the snake men, and turn off the alarm. Collect the key from the chest, go back to the top floor of the room, go up the stairs and open the door.
Continue on the balcony and eliminate the undead, enter the archives again, turn right and go through the new passage, go downstairs and through the library to the bonfire. Go back to the room, go up the stairs on the left to the top floor, take the exit to the right, go up the ramp and activate the lever, go up to the new floor, turn left, enter the other library, and jump on the second ramp. , activate the lever and eliminate the channel, now go down and enter the illuminated passage, go down with the ladder, use the lever to create a shortcut, enter the library behind the passage, activate the lever to unlock the secret staircase, go down, and exit in the garden. In the garden, go down to enter the crystal cave, take out the golems one by one if you can.
Crystal cave:
Linked areas: Archives of the Duke.
Go down, turn right and kill the golem trying to lure it to the widest part of the slab, keep going down and turn right, turn right again and you will find yourself at the end of the slab, if you check in front of you, you will notice some dust that settles in nowhere, in this point there is an invisible bridge, cross it, reach the other slab and face the other golem, reach the end of the slab and check the dust on your right, throw yourself into the void to drop on the invisible bridge, go straight, and at the end of the bridge turn right, you will find yourself in an area with several giant oysters, kill them and go through the fog portal to face Seath.
Ruins of the demon:
Related Areas: Infamous City, Lost Izalith.
Go down the stone slope, turn right and go under the arch, cross the stone bridge and turn left to enter the portal of fog and face Infinite Discharge. Once the boss is killed, the lava on the lowest level in the area will disappear. Go down, face the first of the Taurus Demons, and turn right towards the stone balcony, go down and try to face the numerous Goat Demons one at a time, after the balcony go down the ladder to the left, immediately turn back and go left, kill the giant millipede to access the bonfire. Kill the goat demon, go down the staircase being careful of the gorgons, at the end of the staircase, wait for the bull demon to come towards you and kill him, run straight towards the mist portal to face the wandering fire demon. Once you have killed this boss too, go to the next room, take the stairs to your right and go down to light the bonfire. Use the roots to go down, go through the portal of fog to face the Demon Centipede.
Lost Izalith:
Related Areas: Demon Ruins.
Equip the blackened ring, obtained from the Demon Centipede. The first part of this area consists of a huge lava cave, with two temples, the area is full of giant bipedal demons that will kill themselves, the best way to cross this area is to attract as many as possible enemies in an area where they are close, move away and let them kill each other, practically this area is a race to suicide, also because once dead the enemies will not be reborn even if you die. When you reach the second temple, hit the left wall to open the passage to a bonfire. In front of the bonfire you will notice a small gallery, enter it and climb up using the root of the tree. At this point you can also take off the blackened ring. Carry on and go down from the root, start running straight to avoid the gorgons, go up the staircase to your right, eliminate the abomination, pass under the small turret and turn right, eliminate the pyromancer, and go down the stairs to the left to pass the portal of fog to enter the Cradle of Chaos area.
Painted world of Ariamis:
Linked areas: Anor Londo
To access this area you must have the unusual doll and use the huge painting in Anor Londo. As soon as you enter the area, go up the street, light the bonfire, go up the stairs, eliminate the undead, and go up the staircase to the right of the building, reached the first balcony make your way through the undead, and be careful when you kill the non-dead. infested dead, as once killed they release toxins, go up the stairs and go straight on the bridge to your right, enter the room and eliminate the other enemies, go through the opening on the left of the room, go up the stairs, turn right, exit the gap in the wall on the left, enter the circular tower, go down to the base of the tower and eliminate the harpies, pass the portal of fog to find yourself in the area with the undead phalanx, kill them and open the wooden door to create a shortcut from the bonfire, to the left of the building in front of the undead phalanx, you will find a small well with a ladder, go down and you will find yourself in a labyrinthine area with several non-mortals i rotate, explore and hit each wall, until you reach a larger room with several undead rotates, look for the lever and use it, a small cut-scene will start, the door at the base of the central tower will open. Go back up and go through the newly opened door, go all over the stone bridge being careful of the undead ambushes, kill the giant knight, and at the end of the bridge, go through the portal of fog, to face the boss Priscilla. Once killed, go straight and let yourself fall into the void to return to Anor Londo.
First Flame Furnace:
Linked areas: Sanctuary of the bonfire.
Once you have accumulated all the souls of the lords, talk to one of the two eternal worms and be transported to the area where you have placed the Vessel of Lords. Offer all collected souls to the receptacle, the door to this area will open. Go down the staircase, to find yourself in a large area full of ash. This area is a kind of corridor, where you will meet several black knights, the only thing to do is to advance to the end of this area by eliminating the enemies, up to the portal of fog where you will collide with the last boss. Once the boss is killed, you can light the bonfire for the good ending, or leave the area for the bad ending.
Only PlayStation 3: Demon's Souls
For those interested, at the following link you will find our mega guide of Demon's Souls, exclusive to PlayStation 3!
DEMON'S SOULS GUIDE


