


Please note:
The solution is based on the American version of the game, so it is possible to find differences in the Spanish version.
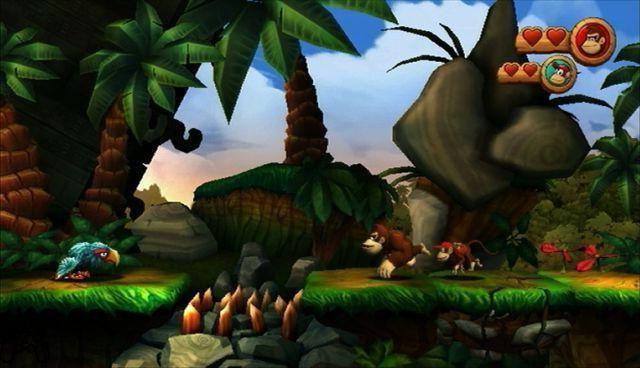
Jungle: Jungle Hijinxs
Go left to find the first Puzzle Piece in the cave, then right on the platform that leads to the trees. Collect the letter K on the first one, then jump to the last one where you find a second Puzzle Piece by hitting the plant. Now go right, wait for the columns to collapse and then break down the obstacle that separates you from another Puzzle Piece yourself. Advance to the right again stopping in front of the three flowers, then hit the ground in front of the central one for another Puzzle Piece. Continue in that direction to find some frog statues - make sure you pick up all the bananas that come out of their mouth by hopping on the flowers. Beyond awaits a Puzzle Piece and the letter O. Roll off the platform and salt as soon as you reach the letter to arrive safely on the opposite side, where the checkpoint and a barrel await you. Once you reach the DK platform, hit it, thus revealing a new part of the level, reachable thanks to the barrel. Fly left, move the plant aside for a Puzzle Piece, then go back to the other side and pick up the letter N at the bottom. Return to the previous level section using the barrel in the middle and continue to the right, then hit the center of the stone monkey-like platform to be transferred to the bonus level, where you get a Puzzle Piece by collecting all the bananas, coins and balloons. . Go over the bridge, still to the right, and use the bump to jump to the platform on the left, then jump to jump to a Puzzle Piece. Jumping to the right instead you get to the letter G. Proceed to the barrel at the end of the level, pass it to collect a Puzzle Piece, then jump on the barrel.
Jungle: King of Cling
Moving right, grab the grass hanging from the ceiling to reach the stone platform, jump on it then jump right again to collect the letter K. Pursue and collect the Puzzle Piece, then move to another area by clinging to the tufts of grass. Now hang on the wheel and jump to the platform on the left, from there go to the second and finally up the trees to collect a Puzzle Piece. On the right is another Puzzle Piece in the middle of the trees. Go over the bridge and hit the ground near the flower to make a barrel appear and you can move to the area in the background. Climb on the wheel to reach the ceiling where the letter O is located. Continue climbing and you will come to another barrel that leads to the bonus area of the level, where by collecting all the bananas and coins you get a Puzzle Piece. Advance to the right, grab the ceiling when you can and stop in the center of the large plant, then hit the ceiling to get a Puzzle Piece. Go right past the checkpoint, after which while you are clinging to the grass you begin to move vertically. Jump to the platform on which lies a flower on the right revealing a Puzzle Piece, then continue to arrive in the area characterized by wheels and spikes. Jump on the wheel below you, go to the one on the right, then go to the wall and drop down to the lower area where the letter N is. Go up using the wall to get near a wheel and a flower. Go past the flower on the right and collect the last Puzzle Piece. Resume the climb that leads you to a particularly flowery area: with the right timing jump on the letter G without being hit by the enemy. Then use the flowers to reach the barrel at the end of the level.
Jungle: Tree Top Bop
Head right and reach the DK barrel, use Diddy to glide to the right where the first Puzzle Piece lies on a platform. Go back to the group of trees and jump to the first right, from there jump into the barrel to get to the letter K. Use the other barrels to get to the elevated area of the level, jump to the top of the trees and get to yet another automatic barrel that throws you into a new area: on the right is the letter O. Beyond the checkpoint hit the ground to make Rambi appear, then retrace your steps accompanied by Rambi to the area of the spikes and hit the stone that makes up the floor in the center to access the bonus stage, where by collecting all the bananas and coins you get a Puzzle Piece. You are now in the area of the two pillars: advance to the right beyond the spikes and approach the stone that Rambi will destroy allowing you to grab a Puzzle Piece. Beyond the trees between the two frogs is the letter N. Go past the spikes and let Rambi take care of the stone platform and enter another bonus area, where this time you have to hit bananas, coins and balloons using the barrels. After getting the Puzzle Piece linked to the bonus, go back to the upper platform and jump to the letter G. Then go past the barrel at the end of the libellum and break down the wall to collect the Puzzle Piece behind it, then enter the barrel.
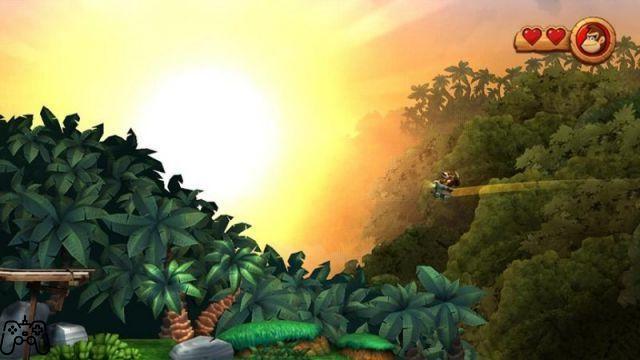
Jungle: Sunset Shore
Start by immediately picking up the Puzzle Piece on the left, then retrace your steps and advance to the right, clearing the way from the platform to reveal the letter K behind it. After the checkpoint, collect the letter O, then continue and hit the ground under the sun making a Puzzle Piece emerge. Resurface using the barrels, then go back to the left and retrieve the letter N. Face the two parrots further away using the roll jump, thanks to which you will also reveal a hidden Puzzle Piece. Go over the bridge and hit the ground to reposition the two platforms, then use them to get to the Puzzle Piece. Proceed and hit the platform to collect the letter G. On the right, the road is blocked by a dragon's head: go up on it with the help of the two platforms, beyond the last Puzzle Piece awaits you. Go back to the platforms and destroy them, then enter the cave that opens below you and reach the barrel at the end of the level.
Jungle: Canopy Cannons
Reach the barrel on the right, jump into it reaching other barrels and collect the letter K. Once out of the barrels hit the flower near which you land and a Puzzle Piece emerges. Advance to the right and climb inside another barrel you encounter along the way, then shoot the sky where the letter O is. In the next barrel, shoot the ground instead, collecting the Puzzle Piece at the end of the unleashed series of events. Further on on the right is a platform which, if hit, plunges you into the bonus section: once again collect all the bananas and coins to get a Puzzle Piece. Then go back to the left, up to the platform dominated by a parrot where hitting the flower on the ground reveals a Puzzle Piece. Proceed to the right and enter the barrel: in this juncture you get an item every time you shoot in the next barrel. You will have to do it three times to deserve the letter N. Beyond another series of barrels awaits you: when you can choose whether to launch towards a nearby barrel or towards a barely visible row of bananas, opt for the latter solution, thus ending inside a barrel above them, from which you are launched towards a Puzzle Piece. Move again through a couple of barrels for a chance to get to the letter G. Then splash again from barrel to barrel dodging the pillars: be careful before the last launch and wait the two or three seconds it takes for the barrel to settle correctly. After passing other barrels and flowers, jump into the dragon statue and head down to get to the barrel at the end of the level.
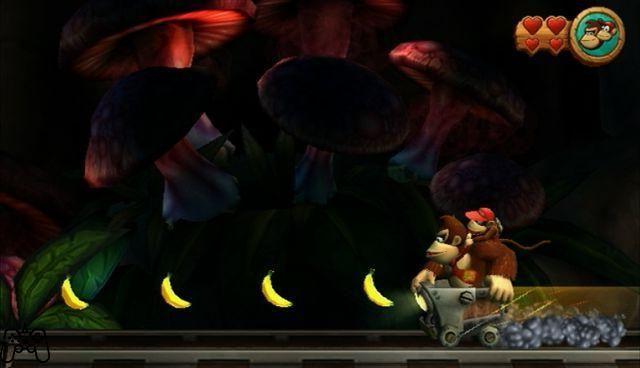
Jungle: Crazy Cart
First, collect the Puzzle Piece behind you, then head right where you meet a DK platform. Hit it by making a series of platforms appear, then start the climb to the left which ends in a bonus stage where collecting all the items rewards you with a Puzzle Piece. Back at the platform, dive into the mine by going right up to the wooden platform, which if hit drags you even deeper near a barrel: enter it to be launched towards the cart. Follow the path by skipping the first two enemies, then jump to the third to be thrown at the letter K. Ignore the part of the track above you for the moment and take down the enemy, then collect the Puzzle Piece and only then jump on the elevated path. As the tracks descend in a dizzying swoop jump from the summit to glide over the letter O. Ignore the flying banana to avoid being pierced by the spikes on the ceiling and advance: when you can jump again, collect the Puzzle Piece and jump onto the new path. When the action approaches the screen, jump carefully to get to the Puzzle Piece, right after the Banana Coin. Beyond the checkpoints, jump over the fire tiki, which would otherwise destroy your vehicle. The next area is made dangerous by another section of the spiked ceiling. At the end, stay on this path until the last useful second, then jump to reach the letter N. This maneuver should also allow you to land on the elevated path. Jump over fire tii and some enemies, then go under the next two fire tikis and jump over the last one. Jump from track to track when the track splits into several small sections: further on, stay focused and jump only to the last one to collect the letter G, landing on a steep descent. At the end of the track jump at the exact moment in which the trolley finishes its run on the tracks to land on the final part of the track which ends one step away from the barrel at the end of the level.
Jungle: Mugly's Mound
After collecting the DK barrels, a cut-scene introduces you to the first boss fight. Your opponent is Mugly and you will have to land ten hits to take him down, however this is complicated by the horn which makes him invulnerable to jumping attacks. This protection vanishes as he charges, so at that moment you can land hits: don't hesitate and launch an attack as soon as the enemy starts running, otherwise you can wait for Mudly to start jumping around the playing area, as even in this situation is exposed to your attacks. The speed of the enemy varies according to the hits suffered and the changes of state are signaled by the change of color: after the first three hits it changes to orange. By inflicting two more hits, you will notice Mudly entering a sort of confusion state: have him crash into the wall and he will fall to the ground. From the moment he switches to red it will take four more hits to kill him. After the cut-dinner, position yourself in the center of the screen and shake the Wii Mote as much as possible.
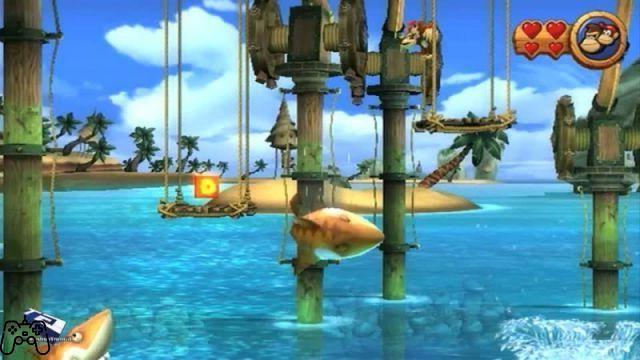
Beach: Poppin' Planks
Head right dodging the crabs to the wooden pillar, shoot it down to reveal another one behind it and jump on it to reach the highest platform on the left. From there go to another platform to the left then jump and grab the Puzzle Piece. Now go right and pick up the DK barrel, then go over the spikes to the stone platform from which you can go to a higher one. Finally reach the wooden platform and collect the letter K. Collect the two Banana Coins on the platform near to the right, then go down and hit the chest of the tesero to make a balloon come out. Beyond, on the right, take down another pillar, then jump into the barrel that appears to access the bonus level, where you get a Puzzle Piece by defeating the two crabs. Exit using the barrel above, then move right into the normal play area approaching a second wooden pillar: hit it and you'll reveal a chest, hit this too and you'll get a Puzzle Piece. Continue to the right, hit the pillar to make another one appear to use on the platform. Hit this one too to reveal a whale that spits objects that you must, of course, collect. Jump on the wooden plank that moves to reach the elevated one, from there continue to the right and then drop to the ground. Climb on the plank on the right and get rid of the crab, then jump to the right and wait for the plank on the left to get up enough, then jump on it again and from there throw yourself towards the letter O. Continue to the right, hit the supported plank from the barrels to make it sink, then go through the checkpoint and collect the Puzzle Piece that emerges by hitting the chest. Hit the cannon that appears in front of you shortly after, then pass the ship that appears and enter it by going left to access another bonus area. Collect all the bananas and coins to get a Puzzle Piece. Then continue to the right where you find the letter N among the ship pieces. Continue paying attention to the spikes that protrude from the ground, after which jump on the boards with the right timing, then also paying attention to the sharks. Collecting the letter G on one of the boards you can hit the barrel at the end of the level.
Beach: Sloppy Sands
Hit the pillar on the right revealing another one, from there jump to the upper platform where you grab a DK barrel with which you can smash the target at the start of the level and get a Puzzle Piece. Jump on the squid cannon, then hit the ground near the triple pillar to make another one appear: jump on it and reach the wooden platform where there is a Puzzle Piece. Go down from there hit the cannon revealing a chest inside which there are four Banana Coins. Get past the next squid cannon and get to the flower, hit it, and pick up the Puzzle Piece. Now retrace your steps and use the squid cannon to launch yourself towards another similar cannon positioned higher up on the right, with which to reach another pair of cannons. When you get to the treasure chest, hit it revealing a balloon. Go past the electrified squid cannon and drop right to the triple pillar. Hit him and use the new pillar on the right to get to the double squid cannon. Continue the descent and pass the first chest, then hit the second one revealing a chest: hit this too and a barrel will appear giving you access to the background. Roll into the large pillar to get the letter K, then return to the section in the foreground by hitting the barrel that appeared earlier having hit the chest on the left. Head right, past the squid cannon, then drop off the wooden area when you can. Hit the cannon by lowering this area and spawning some platforms. Use these to get to the Puzzle Piece on the left, then proceed right to the double squid cannon. Collect the letter O, go left, use the squid cannon to jump onto the wooden board, jump over the electrified squid and use the next one to fly to the letter N. Back on the ground, roll into the wall on the left to finish in the bonus level. Collect all the bananas and coins that earn you the Puzzle Piece go back to the checkpoint. Hit the DK platform: this gesture will raise the tower in the background, and at the same time will make a barrel appear (always in the background) with which you can be thrown into the tower. Climb it and grab the grass growing on the ceiling, jump and grab more grass to get to the letter G. Keep climbing up to the wheel, then head right where the barrels hide a Puizzle Piece. Hit the barrel on top which shoots you away from the tower to finish the level.
Beach: Peacefull Pier
Move right towards the trees and blow to reveal a Puzzle Piece. Then approach the ramshackle jetty and follow the explanation given to you by the game. So jump on the enemy and eliminate him, then enter the barrel on the right, launch into the next one, then again towards another: this is explosive and on the video it is indicated which button you will have to press. With the same button you control the trajectory: try to keep in a straight line to collect all the bananas and thus obtain the Puzzle Piece. Then advance following the distribution of bananas to arrive at the first letter, the K. The banana path continues, this time however interspersed with some dangerous sharks. After picking up the letter O, positioned along the path it was accented a little while ago, you are targeted by attacks from a pirate ship. Try to stay at the top of the screen where it is not possible to take damage, then resume following the banana path as soon as it reappears, leading you to the letter N. Then stay on the lower part of the screen to avoid the cannon fire, but be ready to go back up quickly to reach the Puzzle Piece. Stay in that position to avoid more shots from the ship, then drop down to collect a Puzzle Piece. Dodge more cannon shots by staying at the top of the screen (or if you feel like navigating between shots), then watch a large cannon and large target appear to indicate the direction of its shots. A good strategy for avoiding hits is to wait for the target to blink, then decelerate to empty the anchor. Then follow the banana path on the bottom part of the screen. Beyond the letter G the missile will break, forcing you to land near a barrel. Pass it and hit the ground to enter a bonus level where, as always, you get a Puzzle Piece by collecting bananas, coins and balloons. Finally, enter the barrel at the end of the level.
Beach: Cannon Cluster
Hit the wooden pillar on the right revealing a second one. Hit this too and the first pillar will reappear, this time with a Puzzle Piece on top. A little further on, a pirate ship starts to target you from the background: roll with Diddy, or dance among the sloping balls. After passing the chest with a Banana Coin, jump over the fish, then sweep the flower away to reveal a Puzzle Piece. In short, reach the letter K: wait for the moment when the tiki flies over it to be able to reach it. After that make a higher jump to get to the platform and continue to the dock, where more cannon shots arrive from the background. At the end of this sequence you will drop to the ground. Hit the pillar you land in front of to reveal another one on the pier. Use this to get to the Puzzle Piece on the right, then after passing the chest hit the pillar making another one appear next to the windmill: from this blow on the mill and raise a part of the ground to the left. Now you can enter the barrel and collect bananas, coins and balloons by revealing a Puzzle Piece. Get past the jellyfish and hit the chest to reveal another Puzzle Piece. After that, quickly dodge the cannon fire by taking refuge on the wooden platform to the left. When you can, run and hide under the other wooden platform. Then climb on the stone pillar and use it to reach the wooden platform on the left from which you arrive at the letter O. Return to cover under the wooden platform, then wait for the right moment to sprint to the right where under another platform you will find both shelter than the checkpoint. Then grab the barrel a few steps to the right and use it to hit the target behind you, pick up the Puzzle Piece, after which you start climbing the ship pieces to the right. At the cash desk you can reach the letter N. Proceed beyond where you find yourself again having to avoid the cannon shots. The goal is to get to the wooden crate and use it to jump to the letter G on the left. Then wait for the cannon fire to finish on the crates on the right, then hit the crates as quickly as possible and roll to the right, obviously trying not to get hit. Rolling under the ship you arrive in a new area: grab the barrel and carry it to the right, passing the crabs, and protecting it from the cannon fire that rains on you. Your job is to get the barrel safely to the target and throw it at them. Collect everything in the bonus level and then enter the barrel at the end of the level.
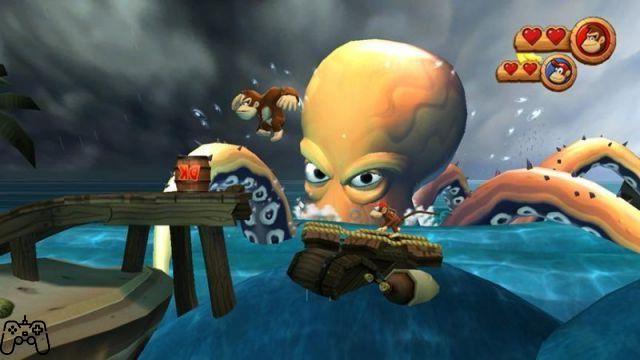
Beach: Stormy Shore
Jump the jellyfish into the cave on the right, then climb the turf, then move to the left side to grab the letter K. Continue your climb reaching the Puzzle Piece as well, then drop down to the other side where the Banana Coins are. Go back to the right and stick to that part of the pattern, passing the lantern. Hit the ground made of stones by entering another area through the hole that you can see below you. Collect all the bananas, coins and balloons to get a Puzzle Piece. At the end, you are teleported outside, near the checkpoint. Go past it and climb onto the stone platform, then jump to grab the letter O, then watch the large jellyfish destroy the galleon in the background. In the next section you will have to collect the balloons by turning by level using the squid. Then jump into the barrel and turn it on when it points up, crashing into the Puzzle Piece. Go back into the barrel and get shot to the right, then hit the pillar and another Puzzle Piece appears. Quickly jump to the small platform on the right, then use the ship pieces to get to the letter N. Over the ship pieces dodge the octopus and its tentacles by jumping onto the small platform, from there go to the grassy wall and climb it to the top where you can hit. the chest revealing a Puzzle Piece. Go down from there using the platforms while avoiding the tentacles. So grab the grassy wall on the right and use it to slowly go down, changing sides when a tentacle blocks your way. Grab the barrel and throw it at the bag between the two chests, causing another chest to appear, this time filled with bananas and coins. Continue grabbing the grass on the ceiling and dodging the tentacles as you proceed to the right. When you get to the ship, use the grassy parts to get around the octopus and its tentacles. Then let the squid launch yourself towards the letter G and finally jump on the ship pieces reaching the barrel that will throw you towards the end of the level.
Beach: Blowhole Bound
Reach the stone platform on the right, jump onto the wooden one and immediately pick up the letter K. Advance to the right and jump to the raised ledge using the second pillar that appears hitting the one you encounter along the way as a springboard. Arrived on a small platform (you recognize it by the hole under it) hit the ground to find yourself in a hut where you have to collect bananas and coins avoiding being hit by the crab. Obtained the Puzzle Piece continue. Jump the squid and go down the hill jumping on the tikis. Ride the whale and hit the anchor to remove it so that the animal can move. So jump on the squid, avoiding the electrified one, until two specimens detach themselves from the background and arrive in the foreground. Use them to get to the wooden platform on the right: after a series of jumps you find yourself back on the whale. After repelling the attacks of the crabs trying to board the big animal, reach the letter O using the wooden platforms. Fend off more crabs and jump over the electrified squid before the whale dives. Jump onto the wooden platform and roll past the birds, then hit the checkpoint area to drop the leaves covering a Puzzle Piece. Where you got rid of other birds, get back on the back of the whale and jump on the abseils, avoiding the electrified ones, to get to a Puzzle Piece. Arrive at the dock launched from two barrels, continue on the pieces of the ship until you get back on the back of the whale. Over the arch, pick up the letter N, then jump into the barrel to be sent back to the ship pieces. Move among these to the barrel, collect the Puzzle Piece by moving quickly before the whale destroys other platforms. Back on the back of the animal, collect the row of bananas, coins and hearts, then hit the blowhole of the poor beast to take a jump that allows you to get to the Puzzle Piece. A short distance away you will also find the letter G. As the whale returns to the water you land on the platform and proceed to the barrel at the end of the level.
Beach: Tidal Terror
Hit the chest immediately to make a Puzzle Piece appear. After that, get ready to face the level with maximum concentration. Not far from you there is a pillar: you must use it as a shelter by positioning yourself in front of it, so that the wave coming from both sides does not hit you. In fact, if you are touched, you will immediately lose a life. So move through these pillars that provide you with cover by getting rid of the crabs along the way. However, use one of these crabs to reach the letter K. Then proceed to the right jumping and rolling when necessary, then hit the red button to make some rocks appear if you need protection. Enter the cave and pass the shark by hanging from the grass hanging from the ceiling. Drop down onto the small platform that houses the letter O, then roll over to the ship. Hit the pillar and a Puzzle Piece appears on the nearby pillar. Before proceeding, retrace your steps and hit the rock between the two pillars just mentioned to end up in a bonus level. Collect everything to get the Puzzle Piece, then go back to the outside and continue to proceed to the right. Take advantage of the covers near the checkpoint, then enter the cave by moving once more hanging from the grass on the ceiling. Then fall on the chest revealing a Puzzle Piece, then cling again and go back to go back down near the letter N: roll off the edge, collect the letter, then immediately jump and land on a rocky plane. Protect yourself from the waves by using stones, while getting rid of some crabs. When you get to the gas pump, hit it to make another Puzzle Piece appear. The next part of the level is mostly made of wood. Get past the squid cannon and take cover from the waves coming in through the windows. Jump to the next double squid cannon to get to the letter G. Then hit the big chest to bring up the end-of-level barrel.
Beach: Pinchin' Pirates
Collect the DK barrels on the right up to the cutscene. At its conclusion you face a boss fight against crabs divided into several parts. Start by seeing it with a yellow crab: jump on it, then hit the ground near it when it has extracted its claws and finally take advantage of its stun to jump on its head again, making it go back underground. The next opponent is a blue crab. This time you just have to wait for the enemy to independently extract the claws to stun him with ground pound (the blow to the ground) and send him back underground with a jump on the head. The third crab, the red one, behaves like the first, but it is good that you jump on his head immediately, without wasting time, stunning him with the ground pound immediately afterwards. After having pushed this one under the ground too, the three crabs will reappear at the same time, merged into a single three-layered crab. Jump on top of them from the platform, then roll on them as they pull out their claws and finally hit them one by one while still stunned from your previous maneuver. Repeat this final sequence a second time and you are done with the fight. After the cutscene, reach the three tikis and shake the controller when prompted on the screen.
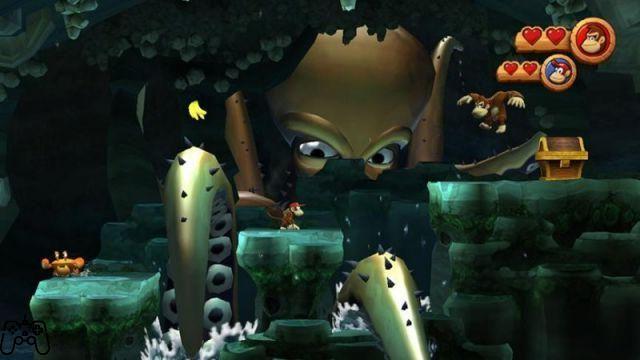
Ruins: Wonky Waterway
First, collect all of the barrels on the right, then roll to the other barrel with both characters, using Diddy's rocket boost to land on a small island with a Puzzle Piece on it. Once this is done you can retrace your steps until you meet the two tikis that you can use to reach the upper edge. Use two more to get to the letter K, then hit the DK platform to make the cave appear. Continue to the right, taking care of the tiki you meet along the way, then go down and stand between the two pillars waiting for their collapse. After that, sweep the candle away making a vine appear: pull the latter and you will be able to collect bananas, coins and a Puzzle Piece. A little further on, grab another vine and reach the platform that appears, then climb the grassy surface on its top and head left and then drop into a barrel that throws you into a bonus level. Collect all the bananas, coins and balloons to get a Puzzle Piece, then go back to the other part of the level using the same vine. Now climb the grass that grows on the ceiling on the right to get to the letter O, then continue in that direction crossing the bridge that houses the checkpoint. Go past the spikes and walk towards the pot, but before reaching it hit the central pillar to collect a Puzzle Piece. Go right and take a good look at the lower part of the screen where you see another Puzzle Piece: go down to collect it, then go back upstairs and climb the vine by dropping a stone wall. Jump into the barrel and you will be thrown into an area made up of crumbling platforms. Move nimbly up there before they collapse. Arrived at the barrel you end up on other unsafe platforms, on which, however, collect the letter N. Then enter the barrel to be thrown into the background of the level. Travel left to the barrel, avoiding the circular saws and falling platforms along the way: you are now thrown into another area of the background, but this time you will have to walk it to the right avoiding the same obstacles as before until a barrel takes you back to first floor. Proceed to the right and open the monkey's mouth using the vine: be quick to enter because you won't have too much time and you risk getting crushed. Get rid of the turkeys and sweep the candle away to be able to pull the vine that gets you bananas and coins. Go down and get rid of the tikis, after which hit the vase revealing a puzzle piece. Go over the two platforms and retrace your steps by destroying the obstacles that separate you from the letter G. Roll down, then jump with timing to get to the floating tiki and from there reach the barrel at the end of the level.
Ruins: Button Bash
Hit the bottom of the mouth of the statue on the left, then walk away. When the situation is safe again, collect the Puzzle Piece on top. Go to the right and use the barrel to get thrown into the statue's mouth, then hit the yellow flower on the left to get a Puzzle Piece. So head right and hit the platform three times until the Donkey Kong logo appears, as well as a row of barrels. Enter the first and slide towards the second, with it slide to the left instead and grab the grassy ceiling to reach a Puzzle Piece. Drop down and go back to the barrel used to reach the stony surface. Jump on the tiki to get to the letter K, then enter the barrel and be thrown to the red button on the right. Run to the right to make the wall stop, then face and defeat the enemies by spawning a barrel. Enter this and shoot at the other barrel when the red target is aligned. Repeat this maneuver two more times and you will come across a row of barrels. Use the red button when needed. When you get to the last barrel, aim down to get thrown into the wall and finish in a bonus level. After collecting everything and getting the Puzzle Piece you come to a wooden bridge. Use the turkey to get to the letter O, then move to the right and hit the DK platform, then enter the barrel and be thrown towards the checkpoint. Head left to grab the grassy surface on the ceiling, then hit the barrel and shoot towards the wall to reveal a bonus level. Collect bananas, coins and balloons again to get a puzzle piece. Now, still clinging to the grassy ceiling, go to the right and drop into the barrel, from this launch towards the other barrel to reach the four red buttons. Press the fire button only when you are directed towards the button you need to press. After that dash towards the grassy ceiling and proceed right up to the spikes, then drop down and get rid of the tikis. Proceed to the hanging right again to wipe out another flame tiki. Then grab the wheel and follow it down to a Puzzle Piece. Go back upstairs and use the grass this time to go up to the left. Eliminate the spikes on the left wall using the barrel and the red button, then continue the climb to the wooden bridge. Enter the barrel and use the others to move around the maze. From the top one, launch to the bottom right, press the red button, then dash to the right again. From there, launch towards the letter N, then return to the barrel above and head left, pass the barrel to the right and from here, finally, to the checkpoint. Defeat the turkeys on the right by uncovering a red button. Press the key three times to activate the platforms. Use them to reach the letter G in the center of the room, then head left where another Puzzle Piece appears on the platform. Finally, reach the upper right of the room and enter the barrel that throws you into the background.
Ruins: Mast Blast
Enter the barrel on the right and let yourself be thrown into the background, then continuing to the right again where you meet another barrel that throws you back into the background. Go left and blow on the plant to reveal a Puzzle Piece. Head back to the right and drop down the slope, then jump before plummeting to grab the letter K. From the platform you land on, slide jumping over the chasms to the barrel. Dive into the background, then slide again to another barrel. You end up on the beach where a crab follows you. Go left and use this same crab to climb to the top of the cone of crates from which you can get to some bananas. Back on the crates, hit them revealing a Puzzle Piece. Break other crates on the right under which a Puzzle Piece is hidden. The path to the right is now complicated: not only do you have to dodge the cannon shots, but also make sure you don't get injured by inadvertently breaking the TNT crates. Quickly grab the letter O then head right past two large crates of TNT. Have the cannon fire at these, then dash to the barrel and use it to board the ship and fire at you. Roll left destroying obstacles, then follow the metal platform above, then left, until you can jump first onto the wooden plank, then right, defeating the crabs along the platforms. Break through the red gate and head right, hitting the red metal platform to go down. Head left initially to retrieve the letter N, then right where the checkpoint is. So jump into the barrel and land on the ship in the background. Knock down the mainmast to continue, then attract cannon shots to the TNT crates and then enter the hole by accessing the bonus level. Collect everything to get a Puzzle Piece, then go back thanks to the tree and grass that grows on it and allows you to cling. Jump into the barrel and hurl yourself to another tree, step on the crab and press on the side of the tree to collect the letter G. Jump to the right and continue in that direction with the help of the TNT crates to get to the Puzzle Piece, then return to the tree. Now press so that the left side rises allowing you to get to another taller tree. Run to the barrel and jump into it, being thrown into an even taller tree. Jump from this to the left side to collect a puzzle piece, then go back to the tree and head right to the other tree below. Have the cannon shots land on TTN's crates to collect the Puzzle Piece emerging from the lotus debris, then jump onto the plank above you and reach the rope on the right. Climb up and leap to the left into a barrel that throws you at the ship, destroying it. Among the remains appears the barrel at the end of the level.

Ruins: Damp Dungeon
Continue past the pillars to enter the cave, once inside jump on the mill and from it quickly move to the stone platform to collect the DK barrel. Go to the next mill, then go to the upper right corner, throw the barrel on the bag and collect the first Puzzle Piece. Get to the platform on the right and continue to the grassy roof area. Proceed clinging to the blades of grass passing the shark, then let go when the letter K is below you. Quickly take refuge on the pillar on the right and from there go to the nearby platform. Then hit the pot revealing a Puzzle Piece. Then jump on the platform that houses the turkey, ignore it and quickly jump on the mill and from this pass to the central platform. Avoid the collapse of the pillars by passing in the lower part: observe how there is also a vase that if hit reveals a Puzzle Piece. Go back up to the platform passing by the mill, then jump to the mill on the right and reach the platform in that direction. Avoid the collapse of another pillar by standing on the side of the platform, collect the Puzzle Piece that emerges, then move to the mill on the right and jump again in that direction reaching the letter O. Then go to the nearby platform and continue towards the mill, go down and then blow on the plant and a Puzzle Piece comes to light. Go down to the right again and collect the Banana Coins. Beyond the checkpoint, climb up to the ceiling using the grass surface and enter a bonus area: collect all the bananas and coins and you will get a Puzzle Piece. Continue to the right by jumping to the upper platform, pass the turkey then drop to a small platform below. Blow on the mill and then jump to the platform you made appear in the background using the barrel. After collecting the Puzzle Piece jump into the barrel on the left which throws you into another area of the background. Continue with the help of the windmill and throw a barrel on the central bag to get a Puzzle Piece. After that you get to the third mill and use the platform on the far right to get to the letter N. So jump into the barrel and jump to the platform on the right where the grass allows you to pass the area covered by spikes as well as the turkeys. After collecting the letter G, drop down to the smaller platform below you, then hit it and plummet into a bonus level. After collecting bananas, coins and balloons, and getting the Puzzle Piece, use the grassy ceiling to get to the mill. Keep left to avoid being bitten by the shark, then jump into the barrel at the end of the level.
Ruins: Itty Bitty Biters
Reach the grassy wall on the left, climb it and climb left again where a barrel throws you into the mouth of the statue. You then find yourself in the bonus level where by collecting everything you get the first Puzzle Piece. Then go right and open the statue's mouth by holding on to the vine. Enter the cave and be ready for attacks from the new blue enemies. Keep running away and find yourself near one of these beings locked in a cage. Hit the ground nearby, then jump on him and hit him. Then use it as a springboard to get to the vine and with it you reach the letter K. Go right and go up on the raised platforms where there are a couple of the blue enemies you just met. After climbing on them, go to the left wall to reveal a Puzzle Piece. Proceed to the right, getting rid of the big enemy along the way, until you come to another caged enemy. Hit the ground to overturn the prison, then use the barrel to launch into a bonus level. After obtaining the Puzzle Piece you are sent back to the center of the wooden platform. Make your way right up to a stone platform, then roll and jump to the other wooden platform nearby and also collect the letter O along the way. Climb to the right with the help of the cage, then go down and jump into the cavity to get a Puzzle Piece. Continue to the right passing the blue enemies: a little further on you will encounter enemies of the same type as the previous ones, but colored yellow. Grab their attention and let them charge, then dodge and jump to the platform on the left at the last moment, sending the enemies plunging into the void. Jump on the remaining enemies on the platform and continue to the right, defeating others just beyond. The third group of yellow enemies must instead be used to reach the letter N. Pass other wooden platforms to arrive at another cage: use it as a support base to blow out the candles, obtaining a Puzzle Piece, then overturn it with a Ground Pound and use it to jump left to get to another Puzzle Piece. Use the enemies again to get to the letter G, then defeat the three enemies in the cage and the other five that appear right after. Once this is done, a barrel will become available that throws you into a lower area of the level, populated by four large enemies, a giant version of the bites encountered so far. Defeating them will reveal a barrel that will throw you outside the cave. Then hit the red and white platform on the left to make a mushroom appear which you must use as a springboard to get to the platform on the left. Then blow on the plant to get the last Puzzle Piece. Proceed to the right and blow the leaves off the DK platform, then hit it to get the barrel at the end of the level.
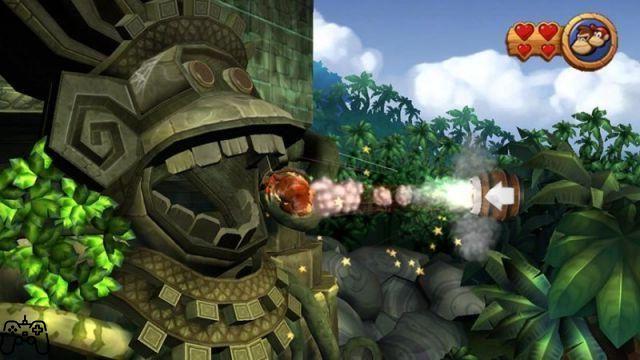
Ruins: Temple Topple
Reach the raised platform on the right, from it jump to the left and enter the barrel to be launched at the Puzzle Piece on the right. Continue in that direction and pass a first group of spikes, then help yourself with the tikis to pass unscathed beyond the next. Then reach the wooden platform and hit the chest to get Rambi out. Now go back to the beginning of the level and, thanks to Rambi, go through the stone wall to get a Puzzle Piece. Then go back to where you met Rambi and destroy the stone platform below the wooden one by collecting the letter K. As you advance destroying everything you should see a platform with rocks. Jump on it and quickly move on to the next one before the one you are standing on falls. Be quick and you will arrive at the letter O, then falling into a new section. After destroying everything with Rambi hit the platform and crash into a bonus level. When you have everything collected, and you have also obtained the Puzzle Piece, destroy the stone block to return to the outside in the checkpoint area. Destroy the platform above you while taking out the tiki, then continue to the yellow flower on the right. Hit this too to make a Puzzle Piece appear. Always proceeding in the same direction you can break every obstacle blocking your path. Stop in front of the red flower and jump on it to get to the letter N. Then follow the entire stony path jumping in the circles of fire until you collect the letter G, then enter the barrel at the end of the level.
Ruins: Giant Turkey
Crouch to dodge its attacks or use the providential crates that provide a convenient refuge. Then wait for the moment when the big turkey will target you with a trio of bombs: collect them and send them back to the sender. After taking two hits, the turkey will throw a fire bomb that will set the perimeter of the area where the fight takes place on fire. Hitting it again with a bomb, the turkey will react by launching a missile that will have the dual effect of creating an earthquake and destroying the crates that had offered you shelter until now. You basically have to keep throwing bombs at the turkey. Be careful though because after the tiki bomb, which explodes as soon as you get close, it will use a set of bombs that detonate quickly, making any attempt to grab and throw them very dangerous. Then fix the tiki that emerges from the turkey after the cutscene thus ending the third world.
Cave: Rickety Rails
Slide to the right and use the barrel across the platforms to be thrown into the background. Hit the yellow flower and enter the barrel that appears. Whenever possible, hit the TNT switch to activate the link in the background, opening a passage in the cave. Use the barrel again ending up in the background, then jump to the tree on the left to get the first Puzzle Piece. Go back to the right, and once back in the cave hit the cacti. Then go up using the platform trees: on the third jump to the right wall, breaking through the rocks and thus bringing to light a Puzzle Piece. Climb up using the platforms and drop into the barrel to be thrown into another barrel, which throws a mine cart into you. Following the path of the bananas that ended up straight on the letter K, then a short distance away jump inside some barrels that hurl you around the level until you deposit near the checkpoint. Follow the crumbling tracks, then turn left to enter a bonus level (collect everything and you will get the Puzzle Piece). After that, proceed to the right, jumping when necessary so as not to collapse along with the tracks. Now enter the barrel and you will be thrown into another mine cart: keep your eyes open and jump when the boulder destroys the path to collect the letter O. After a series of jumps that take you from one path to another, from one trolley to another and from one barrel to the next, finish this sequence by returning to the background. Aboard a cart, you travel along two pressurized paths, and then you are hurled towards a dangerous path by collecting the letter N. Quickly jump into the barrel to be thrown back into the cart. Pass the two series of trolleys and arrive at the unsafe platforms: enter the barrel that you discover under one of these while remaining exactly in the center of the platform. The barrel throws you into a bonus section. Then jump into the barrel on the right and get thrown into the cart, jump out and enter another barrel ending up in a new cart that leads you to the Puzzle Piece. Get out of there and jump right into a barrel to start a series of throws that ends in a cart. At the right moment, go down to enter the barrel that throws you at the letter G. Back on the cart, jump on the wooden platform that houses the barrel at the end of the level.
Cave: Grip & Tip
From the raised platform on the right, move to the grassy area on the ceiling, moving to the right as you clear the cacti. After taking the DK barrel jump into the explosive barrel and launch into the cart starting the path. Keep to the top of the track to collect bananas and coins, then jump to collect a Puzzle Piece and end up inside another cart. Jump on the first tiki, then on the next two to get a balloon. Further along the path you have the opportunity to jump into a barrel that throws the letter K at you.Continue along the path and when possible jump, without pushing yourself to the right, so as to fall into a barrel: collecting bananas, coins and balloons you get a Puzzle Piece. Return to the cart path and first encounter a row of bananas, then a tiki to jump on to bounce off a Puzzle Piece. Pass other tikis and at the end of the track, grab the grass on the ceiling and advance to a new cart. Soon you will be able to jump onto a cart that runs over you ending up on the letter O. Go back to the previous cart, but you will soon leave it to hang on to the grass. Jump on a new cart and from it again to some grass. Beyond the checkpoint, hit the cactus and a Puzzle Piece appears. Move to the red mushrooms to the right and grab another grass-strewn train, like the one that brought you to the checkpoint earlier. When the train explodes jump into a cart, then grab the next train and get carried away until you see two tikis: there you get off and collect the letter N, falling into a cart. Move inside collecting the Puzzle Piece, then jump over the chasm and enter another cart. Overcome the next precipice in the same way and then enter the barrel, being thrown into the background. After many bananas you can collect the letter G. Return to the foreground and drive a cart to the barrel at the end of the level.
Cave: Bombs Away
After collecting all the bananas in the cave, jump to the wooden platform on the right and from this go to the cart. Collect bananas along the way, overcome the chasm and continue guided by the bananas that lead you straight to the letter K. In the path that unravels under the crystal, luminous arrows suggest when it's time to crouch. Climb on the new track and use the enemy to jump onto the elevated path, and from this pass to the next one by collecting the Puzzle Piece. Jump from platform to platform being careful not to hit the crystals and, when the path goes down, jump to the last one ending up on a new part of the path. Reach the middle of the track using the low jump, remembering to crouch when the ceiling drops. At the end of this section with a low jump get to the letter O. Use the low jump again to get to the bottom of the track, pick up the Puzzle Piece, then go back upstairs. Now you have to jump to avoid the holes created by the bombs thrown by the mole. In short, the bombs will break the crystals: drop on the banana that falls from the top to arrive on a new path that leads to a Puzzle Piece. Return to the upper path and be adept at jumping over the parts of the path while at the same time crouching to avoid the crystals. Beyond the checkpoint continue using the low jump to avoid chasms and enemies. Crouching to avoid crystals you come to a row of bananas: stand up and collect suits along with the final Puzzle Piece, but be quick to get back down in time to dodge the falling crystal. When the mole returns, overcome the first two chasms, then use the low jump for the next three. After the two moles have crashed enter a repeated circle: wait for the entry of the letter G and only then jump. Back on the track you are brought under the barrel at the end of the level. Before entering it, go to the right and collect everything in the bonus stage, thus obtaining the last Puzzle Piece.

Cave: Mole Patrol
Get the Puzzle Piece right away in the bonus stage on the left, then jump into the rocket barrel on the right following the banana path and dodging the moles to get to the letter K. If you've collected all the bananas along the way, you'll also get a Puzzle Piece. Advance into the cave by collecting the balloons, obviously without running into moles. Then follow the train along the way touching the balloons holding the moles. When these break the crystals along the way, try to float in the center of the cavity so as not to touch either the ceiling or the bottom. At the letter O, follow the bananas to the checkpoint and beyond to collect a Puzzle Piece. By getting rid of the moles and their balloons, you get another Puzzle Piece. Then go down to the bottom, abandoning the train, to collect the letter N, then quickly return to the center as before and continue in this way up to the outside of the cave. Keep moving among the crystals in this section as well, arriving at the letter G, to collect which you will have to momentarily leave the central position. Before entering the barrel at the end of the level, hit the cactus for one last Puzzle Piece.
Cave: Croded Cavern
Move to the right platform and it will start shaking. Quickly take refuge on the one on the left and a Puzzle Piece will come from above. After collecting it, go back to the right, at the bottom, and enter the wall on the left that leads to a bonus level that earns you a Puzzle Piece if you collect all the objects. Proceed to the right past the sleeping bats and the giant one, then jump into the missile and dodge the bats that come at you. In the waterfall area, follow the bananas to get to the letter K. Beyond a large pile of bananas, keep to the top to grab a Puzzle Piece, then drop down to where the letter O is. Beyond the checkpoint, avoid the bigger bats, then even the smaller ones keeping you low. Avoid other bats and get to the bridge where a bigger bat breaks in: go down to its right and collect the Puzzle Piece. Basically repeat the same action on the ceiling to get to the letter N. The bat will follow you again, just run and jump over the chasm to get to a second checkpoint. Dodge the crane and you will still find yourself with the bat at your heels. Avoid the waves it tries to hit you with and keep low to collect the Puzzle Piece, and the letter G just beyond. Then reach the top of the screen to dodge the fireball. A little further on, the end-of-level barrel awaits you.
Cave: The Mole Train
Collect the Dk barrel, then after the cutscene start the boss fight. Start by carefully avoiding the objects that the mole throws at you without being thrown out of the cart. Jump on the train when you can by exposing the mole and hit it. Then locate the cart that is not flashing blue and run towards it. Now a section identical to the previous one is repeated, with the addition of bombs: the mole throws them at you, but you can throw them back to the sender. After repeating this part of the fight a third time you will find yourself in a darker section, but beyond a lower visibility little should change. In short, your target will become the driver of the train, but the dynamics of the confrontation will remain the same. Repeat the sequence that leads you to hit him four times and the fight will be over. After the cut-scene, hit the tikis and finish the fourth world.
Jungle: Vine Valley
Start by going left, where you find a first Puzzle Piece hidden behind the wall, then bounce on the mushrooms to get to the barrel that throws you on the top of the trees. Then pass the group of enemies and advance clinging to the vines: near the platform do not go up, but let yourself fall and knock down the wall on the right to enter a bonus area where by collecting everything you get a Puzzle Piece. Once you exit, keep on clinging to the vines until you get to the letter K, then go down and reveal the barrel hidden behind the pile of leaves that will launch you towards another Puzzle Piece. Then move using the vines, keeping yourself on the bottom so that the trajectory leads you to collect all the bananas as you overcome the chasm. Then hit the flower on the right revealing a Puzzle Piece, then move on to the next platform using the vine. With Diddy on your shoulders now jump on the grassy platform and make your way to the top, from there fly to the left and grab the vine: at the top enter a bonus area where you get a Puzzle Piece by collecting all the items. Then continue on the platforms reaching the letter O. Then grab the bottom of the vine to collect all the bananas, thus making a Puzzle Piece appear. Continue swinging on the vines, to the right, picking up the N clearly visible on the way: the G is a little further on, between two lianas. Before entering the barrel at the end of the level blow on the flower to its left and collect all the bananas and for one last Puzzle Piece.
Jungle: Clingy Swingy
After throwing the DK barrel, move to the swinging platform, paying attention to the tikis below you. Cling to the grass, move from platform to platform up to the largest one held together by a rope: clinging to it you start the oscillating motion that leads you to collect the letter K. Continue to the platform that has a grassy base and climb to the top using a bat incoming, then hit the ground near the flower to reveal a Puzzle Piece. A little further on, repeat this exact same dynamic to get to the top of a platform, where a barrel gives you access to a bonus area and the reward Puzzle Piece. So grab that sort of dangling shed and climb it on the right side to hit the flower that reveals a Puzzle Piece. Continue to the platform on which there are three Biter, get rid of them and continue swinging forward hanging from these structures: drop from the second to land on the platform that houses the letter O. Advance hurry hanging until the last large structure allows you to go down to the ground, and go from the small platform to the letter N. Then hang up on the object when it comes back on you, then climb it and collect the Puzzle Piece, made visible by the zoom out of the room. Continue to the right, picking up the letter G along the way. The circular platform with two snakes houses the last Puzzle Piece of the level at the top.
Jungle: Flutter Flyaway
Quickly pick up the letter K by moving on the swinging platforms. Then climb the platform that wraps around the beanstalk and wait for the moment to climb to the top and collect the Puzzle Piece, then return to the ground on the platform and jump until you get to the barrel. Bounce on the Chomp for momentum and get to the letter O, then continue to the second set of platforms, where you will have to crouch to avoid the spikes. Bounce on the mushroom and grab the ball to collect the Puzzle Piece on top, then jump to the next ball and drop to the ground from there. Hit the ground near the door to enter the bonus level and earn a Puzzle Piece. Once out of there jump on the mushroom and go up the platform, go to the edge on the right and approach the rotating platforms, then wait for the right moment to be able to collect the Puzzle Piece in the middle of them. After collecting the N on the right, continue in that direction past the Chomp and bounce on the mushroom to collect the bananas above him, thus obtaining a Puzzle Piece. Then roll past the barrel a short distance away to collect the Puzzle Piece, then let yourself be thrown from the barrel and pick up the DK barrel. Jump onto the moving platforms, jump onto the mushroom and bounce off a platform, waiting for its path to culminate. Then bounce on the spider to get to the Puzzle Piece, then return to the platform. Wait for the passage of the platform carrying the letter G and jump on it using the mushroom, then reach the end of the level.
Jungle: Tippin' Totems
Move with all the necessary caution from totem to totem until you collect the letter K over the abyss. Within that same precipice is the first Puzzle Piece. Once out of there, wait for a totem to go up to the right to get on it and collect all the bananas, thus obtaining another Puzzle Piece. Bounce on the tikis and get to the hatch, hit it and enter the bonus level for another Puzzle Piece. At the exit enter the mouth when it opens and jump from totem to tome to get to the letter O: perform a Ground Pound under the letter to make a mushroom appear that will allow you to jump and collect it. Beyond the checkpoint blow into the statue's ear to open its mouth, then continue jumping on the totem poles and finally help yourself with the bat to get to the letter N. Puzzle Piece. Drop down and pick up the DK barrel, then jump left to the lonely banana to discover a barrel that throws you into a bonus level, where you get a Puzzle Piece. At the exit jump on the pole, then roll left to get both the letter G and a Puzzle Piece. Then jump on the hippos to continue, collecting all the bananas along the way to also get a Puzzle Piece. However, remember that bouncing on a hippo more than four times will cause it to disappear. Then press the switch to get the barrel to the end of the level.
Jungle: Longshot Launch
Jump to the left, where the coin is, to end up in a barrel that throws the first Puzzle Piece at you. After rolling back, head left to jump on an enemy that allows you to get to another barrel, which contains a Puzzle Piece. Then go right and continue shooting yourself from barrel to barrel: beyond the second tiki in flames you will find the letter K. Two barrels farther on, throw yourself among the leaves to find another Puzzle Piece. Landed go left and hit the flower to end up in a bonus level where you can get a Puzzle Piece. Then hit the hatch to end up in an area where the flower on the right hides a Puzzle Piece. Go back to the eternal using the mushroom and retrace the path taken to the barrel and this time launch yourself towards the letter O, making sure to hit one of the flying totems. A little farther on, also collect the letter N. After collecting the DK barrel, advance to find a trap door which, if hit, gives you access to another bonus level that earns you a Puzzle Piece. Launch from barrel to barrel to continue: sighting the letter G, orient the barrel to the northeast to be able to grab it. Then go through the next throwing session using the utmost caution. Before the barrel at the end of the level, go down to the hidden platform and hit the flower for the last Puzzle Piece.
Jungle: Spingy Spores
Advance by bouncing on mushrooms, enemies and any other object that acts as a springboard. When you spot the letter K, wait for the burning tiki to rise, then bounce under it to pick it up. Then climb to the top edge and grab the DK barrel, then swing with the vines and hit the log on the ground to access a bonus area that houses a Puzzle Piece. Get out of there thanks to the mushroom that you reveal by hitting the ground in the center, then continue to the moving platforms by moving on the mushrooms. To get to another Puzzle Piece you have to use the mushroom that projects you diagonally to the right, then fly to the left, calibrating the flight so as not to crash on the spikes. On the moving platforms that follow it is best to kill the enemy first on the second, so that rolling on the first you can get to the letter O and then land without being surprised by attacks. Advance being careful not to end up on the spikes hanging from the ceiling to the second burning tiki. Jump on this one and grab the bottom of the platform above it, then grab the grass to get to a bonus level where you get a Puzzle Piece by collecting everything. Then use the hippo to get to the letter N. Then pick up the barrel DK, then jump four times on each hippo. When they all disappear you will get a Puzzle Piece. Hang on the swinging structure and climb to get to the other side, from there jump on the mushroom to get to another structure: from the bottom of this, drop in the banana trail, landing on a barrel that takes you to a bonus level, where get a Puzzle Piece. Continue bouncing and paying attention to the ceiling, then at the end of the hippos perform a roll jump to get to the letter G. In the last area where you bounce on the mushrooms you will find the last two Puzzle Pieces: one on the bottom in the middle, the other on the left above a platform.
Jungle: Wigglevine Wonders
Bouncing on the drum tiki try to land on the upper platform so you can collect the Puzzle Piece on the left. Go down by breaking the piece of wood, then grab the vine and follow the banana trail to the letter K. On the ground hit the flower for another Puzzle Piece. Then grab the next vine and drop into the opening on the right. Jump to the right and from there to the wall, climb the platforms and use the vine to get to the barrel that takes you to a bonus area and related Puzzle Piece. Advance clinging to the vines, moving up and down to avoid the tikis. Between the big and the small one is a Puzzle Piece. Then go down to the bottom of the vine to avoid other tikis. Go through the checkpoint hanging from the vines and collect the letter N along the way. Jump on the drum tiki to land on the secret platform on the left where you find a DK barrel with which you can break the bag on the right and collect the Puzzle Piece. Then hit the piece of wood beyond to be launched towards another Puzzle Piece, then hit the ground at the bottom to return to the surface. Grab the next vine and stand towards the center to collect the banana trail and the letter G at the end. Land on the platform and hit the flower for a Puzzle Piece, then continue among vines and mushrooms to the high platform that houses a flower: hit it and it will spit out the last Puzzle Piece. Swing on the vines to the end of the level.
Jungle: Muncher Marathon
Advance and bounce on the second pile of oranges to the left to collect the Puzzle Piece, then jump over the first piece of wood and prepare to be chased by carnivorous spiders. The level is all about escape from these beings, so it is probably advisable to repeat it several times to collect all the Puzzle Pieces, also because their hunt often leads you astray. After collecting the letter K, prominently displayed on the platform, roll over the gate and pick up the Puzzle Piece above the flower, then quickly head back downstairs. A little further on, cross a chasm with the roll jump and grab another Puzzle Piece. Then hit the mark on the ground to bring out a mushroom that you can use to get to the letter O. Overcome other obstacles, then approach the series of three pieces of stone that come down to crush you: the third of these contains the letter N. Then jump on the oranges and collect the Puzzle Piece among the leaves after which, instead of rolling through the gate, drop down and continue through the darker area to find another Puzzle Piece. Finally, in the final part that sees you proceeding launched from the barrels, move the fourth to the left to collect the letter G.
Jungle: Mongoruby Run
Hit the arrow to start the fight. The mechanic of the fight is simple: hit all the glowing arrows to be able to jump on the boss and injure him. Follow the spinning motion and keep Diddy alive to find hearts inside the flowers. Take it easy and use the wooden platforms as safe areas to stand on. It takes three hits to take down the boss.
Game Video - Gameplay
Cliff: Sticky Situation
Make your way through the skeletons to the letter K in midair, then reach the floating platforms and take out the enemies on the middle one. Now that this is free, go to the far right and wait for the left vertex to reach the highest point to shoot and jump to get to the Puzzle Piece. Move right on the platforms being careful of their collapse, then take down the skeleton using the DK barrel. Continue on the platforms, observing well the behavior of the skeletons to decide the time of the jumps. When you get to the barrel that throws you diagonally, do not enter it, but go down and break the stone that hides a Puzzle Piece. Shake off the tar and continue to the dock, then keep afloat while continuing to jump on the tar surface to get to the letter O. Beyond the checkpoint, jump onto one of the falling platforms and enter the smoky area with it. On the hardly visible right there is a Puzzle Piece. Then blow on the flower near the checkpoint for another Puzzle Point. Then launch with the barrel on the platform where the zebra is: enter the head of the skeleton with a roll jump to access a bonus level where you get a Puzzle Piece. Back on the platform, roll left into the barrel which throws you towards another Puzzle Piece. Then move quickly between the falling platforms, so as to be able to grab the G. In the next column of falling platforms, quickly arrive on the one that houses a plant and hit it to make the Puzzle Piece come out. After you have launched towards the barrel at the end of the level, wait before entering and kill all the skeletons, then tilt the platform to be able to jump to the last Puzzle Piece on the left.
Cliff: Prehistoric Path
Beyond the beginning of the level instead of jumping into the barrel, throw yourself into the tar and advance to end up inside a bonus level where you get a Puzzle Piece. Then go back to the barrel and launch to start a race inside the cart. Collect the K clearly visible along the way, then crouch to avoid the spikes. Then stay on the lower part of the path to collect the letter O. Then jump to the next platform full of spikes to find the access to a bonus level where you can collect a Puzzle Piece. Leaving there, bounce on the tikis to go up to the elevated area, where a session awaits you in which the path will collapse under your wheels: jump whenever you feel like you are exiting the path. Beyond the checkpoint crouch under the spikes, then bounce on the enemy arriving at the letter N. Then perform a small bounce on the next enemy and a higher one on the next landing on the upper track that takes you to the Puzzle Piece. Then drop on the letter G and jump only after grabbing it. After collecting another Puzzle Piece along the way, you get to the final barrel: before entering it, hit the ground near the plant for one last Puzzle Piece.
Cliff: Weight Way
Hit the ground on the left near the plant revealing the first Puzzle Piece, after which get used to the physical principle that governs this level: the platforms move according to the weight they bear, and often the descent of one causes the rise of another. . For example, the skeleton on the second platform is a ballast, so kill it and go back to the platform on the left to see it go up. So jump on the platform as soon as you get up and use it to get to the ceiling, clinging to the letter K. Drop to the platform below, but be quick to escape when it collapses. Then kill the skeleton and continue left, going up. Before entering the barrel, go to the right, where a barrel and a puzzle piece are out of the frame. Then go through the checkpoint and jump to grab the letter O. Near a platform that moves horizontally, jump onto the grassy surface to the right to enter a bonus level. Exit, stay on the platform that controls the movement of the one that moves horizontally, climb to the right and enter the barrel. Drop down using the platform after another checkpoint, then hit the plant making it spit out a barrel that throws you into the background, then hit the nearby plant for a Puzzle Piece as well. Then jump across the platforms to the letter N on the left, then hit the plant on the other side and use the barrel that appears to launch into the next area. Continue to the right and smash the rocks to lower the platform on the left. Beyond this area a spring allows you to get to the grassy floor of a platform: use the barrel to reach the top and pick up the DK barrel. Use this same technique to collect the letter G on top of a nearby platform. When the platform reaches the lowest point then roll into the barrel to be launched towards the last Puzzle Piece.
Cliff: Boulder Roller
From the smaller platform on the right, blow on the mill to bring the platform down. From this jump onto the vine making a switch appear which, when pressed, removes the boulder that blocks your passage. Then bounce on the skeleton to get to the letter K, then roll jump left to land in the barrel which throws you into a bonus area where you get a Puzzle Piece. Continue with caution, between skeletons and platforms that yield. When you alert the platform on which a DK barrel is located, approach the skull and hit the cactus for a Puzzle Piece. Then, during the descent, hit the flower to make a Puzzle Piece come out. After the checkpoint bounce on the skeleton to get to the letter O. In the next session you will have to keep an eye on the shadow to understand where the boulder is about to crash: when you reach the platform with the skeleton, where you can among other things take a little out of breath, start keeping an eye on the flower on the nearby platform from which you will have to release a Puzzle Piece. Beyond the springboards you will find the letter N, while a short distance away you'll have to hit a boulder on the ground to reveal a trap door. Go right, past the rolling boulder, and jump to the platform on the left to collect a Puzzle Piece. Continuing to the right you come across another row of rolling boulders: don't be rushed and wait for an interruption long enough to allow you to safely jump. From the next ramp, crouch in the first hole and wait for the boulders to pass over it, then do the same in the hole just beyond. Hit the cactus on the edge of this platform and collect the Puzzle Piece that comes out. Then be very quick (and help yourself by rolling to gain speed) on the next ramp to get out of the first hole and get to the second in time before the boulder crushes you. Then bounce on the skeleton's head to get to the letter G. Now you have to keep between the two boulders without the help of long intervals until the barrel throws at you a Puzzle Piece.
Cliff: Precarious Plateau
Start by collecting the first Puzzle Piece from the flower on the right, then bounce off the tiki to reach the invisible platform at the top. Open the Rambi box and use Rambi to proceed to the right, without lingering too long on the platforms as they collapse under your weight. Take advantage of Rambi's ability to pass unscathed in the middle of the spiked balls and collect the letter K. Then break down the wall in front of which Rambi is blocked to access a bonus level by obtaining a Puzzle Piece. At the exit, use the spring to get to the switch on the right. Then jump to the platform before the barrel and, off Rambi, pick up another Puzzle Piece from the flower. Then reach the part of the level in the background and collect the letter O there before returning to the foreground. Further on you will have to collect the letter N by moving quickly among the rocks which once again yield under your weight. Continue without major obstacles between the platforms, finally arriving at the letter G. Before closing the level, however, there are two other Puzzle Pieces to collect: one at the end of the level, using Rambi to sweep away the boulders that block the passage, the second in the background collecting all the bananas.
Cliff: Crumble Canyon
Immediately collect the first Puzzle Piece from the flower located at the mouth of the mine on the left, then reach the barrel on the right, ready to react to the collapsing scenario. In the next area, pick up another Puzzle Piece from the cactus on the left, then move forward, slide down the slope and pick up the letter K, then jump to the opposite edge. Once on the kind of swing, stay on the right side to send the platform into tilt and collect the Puzzle Piece on the left. Continuing between the collapsing platforms, drop down to collect the letter O, then use another sort of swing to go up. Enter the barrel that throws you up a slope and use another barrel to enter a bonus level, where you get a Puzzle Piece. Once out of this section, go right and run quickly so as not to be crushed by the rolling boulder, to the point where you can only slide. Keep your eyes peeled for the wooden platform and jump on it to find a Puzzle Piece. Then jump over the small obstacle and pick up another Puzzle Piece from the flower a short distance away. A few steps further you arrive at the letter N with a roll jump. Then go down and wait on the wooden part of the platform for the boulder to pass, then continue to the right avoiding the tar. Then climb the wooden barricade and jump to reach a Puzzle Piece at the top: probably, after collecting this Puzzle Piece you will not be able to complete the level and you will have to reload it to reach the two missing ones. One is in mid-air at the end of the cave, clearly visible as you jump over obstacles. The second is instead immersed in the tar under the barrel at the end of the libellus. The letter G is halfway between these two, also suspended in midair, and can be collected naturally as you flee chased by the stone.
Cliff: Tippy Shippy
Proceed to the right holding on to the vines, then quickly climb up the grassy side of the ship to collect a balloon. Once on the second grassy-walled ship you can enter a secret room where you get a Puzzle Piece. At the exit continue on the platforms collecting the letter K: send the platform to the left on tilt, then with a roll jump land next to the letter. Go down and collect the barrel, then continue between the platforms: after passing the two cannons hit the stone block on the ground and collect the Puzzle Piece. Then launch with the barrel and continue in the direction of the ship with the grassy top. Climb up that part on the right side by dropping the Puzzle Piece, drop down on the platform to the right and from there arrive at the object with a roll jump. Then grab the lone banana between the two cannons to access a bonus area where you can earn another Puzzle Piece. Then wait for the cannons to fire to advance along the platforms that lead you to the checkpoint. Arrived near a ship wreck, go up to the platform at the top and from there perform a roll jump reaching the letter N, then go down into the barrel and launch yourself in the air: on the second platform reach a vine with the roll jump. Continue, leaving out for a few moments the Puzzle Piece that you notice in the background, and launch yourself with the barrel automatically collecting the letter G, then run to the left and collect the Puzzle Piece, then reach the barrel that takes you to the end of the level before the scenario collapses.
Cliff: Clifftop Climb
Press the switch on the right three times to bring out three skulls: climb them and collect the Puzzle Piece on top. Head down to the right to collect bananas where you find a hidden barrel which takes you to a bonus level where another Puzzle Piece is located. Once out of there use the barrel to get to a bouncing floor, which will collapse after the second bounce, so don't waste time and remember that it will also be the same for the next part of the level. Beyond the spring, pick up the letter K while ignoring the barrel momentarily, after which jump into the next area and keep to the left reaching the platform at the top on the left, where hitting a cactus will bring out a Puzzle Piece. Reach the barrel on the right with a roll jump and launch into the next area, pick up the barrel DK, then the letter O between the two swinging platforms. Jump up from the barrels to get to the swinging platform, then from there fly to the left when the platform is on the far left in its swing: entering a bonus level you can get a Puzzle Piece. Continue on the platforms and arrive at the barrel, reach another spring, then move quickly to the left and the barrel where the letter N is. Arriving at the next DK barrel continue to avoid the collapsing stones and collect the letter G as you are thrown from the barrels around in the level. One step from the end of the level a barrel throws you up, where there is another barrel positioned between two platforms: try to deflect the launch to the left so as to land near the cactus which, if hit, releases a Puzzle Piece.
Cliff: Thugly's Highrise
The main mechanics of this fight consists in avoiding the blows of the boss and jumping on his back to injure him: however the metal plate that protects him makes this operation more complex. Initially take advantage of the short amount of time you can jump on his back after you miss a shot of him. After the first shot, when he launches at high speed to the other side of the level, jump on him and take advantage of it to reach the opposite side and hit him on the exposed belly, then settle among the rocks that fall from the sky to avoid being hit by the his return. Watch his legs to see when he is about to jump. Once you have plunged into the lower area be ready to crouch to avoid the fiery attack. This part becomes more complicated because his attack procedure no longer follows a pattern as before: try to interpret his signals to understand which attack he is going to use. After having landed three hits the fight will move to the last phase, in which fireballs are added to his other attacks. Land three more hits and the fight is over.
Factory: Foggy Fumes
Jump to the platform on the right and spin the fan by continuously jumping to the highest part on the left. Collect all the bananas and the falling coin to get a Puzzle Piece. Then use the hook to reach the next platform and go up to collect the letter K, then at the third fan jump first on the moving platform, then on the bent beam to get to a second Puzzle Piece. Once down, go under the electrified snake when it jumps, pick up the DK barrel and continue, up to the barrel that throws you into the background. There you will move through little visible platforms, and it will be necessary to calibrate the jumps to the millimeter: the letter O is on the second platform from the starting point, you just have to drop from the first to reach it. Beyond the checkpoint, roll over the left edge with a roll jump and jump from platform to platform to finally get to the Puzzle Piece. Then go back to the checkpoint and advance to the right, avoiding the electrified snakes to reach another fan platform, which when turned opens the gate allowing you to get to the barrel. Back in the background, approach the barrel, then blow the smog on the left and grab the Puzzle Piece. Back in the foreground, escape the tikis, then wait for some hanging platforms to arrive and jump to the second one, then break through the wall to get the Puzzle Piece. From that point, get to the letter G with a roll jump, then blow into the megaphone for another Puzzle Piece. After that, go to the platform on the right and rotate it once to bring down the platform that houses the last Puzzle Piece.
Factory: Slammin Steel
Pass the first trap and get on the second treadmill, then with a roll jump try to reach the platform above the second trap where the Puzzle Piece is located. Collect the letter K between two crusher beyond. Make your way using the treadmills and keep your eyes peeled for the letter O, which can be reached by bouncing on a chicken robot between two platforms. On that same platform a light bulb hides a Puzzle Piece. Then get on the crusher that has no cover to end up in a bonus level where you get a Puzzle Piece. Then proceed using the increasingly reduced spaces between one crusher and the other, looking for the cracked section of the floor which, if hit, drops you into another bonus area where you get a Puzzle Piece. The letter N is then suspended in the air, in the area full of treadmills, and can be reached by jumping on the roller on the far right when the electrified enemy allows it. The final Puzzle Piece is in sight, but must be reached by rolling to gain speed as you escape the horizontal crusher. Finally, the letter G is found above a crusher towards the end of the level.
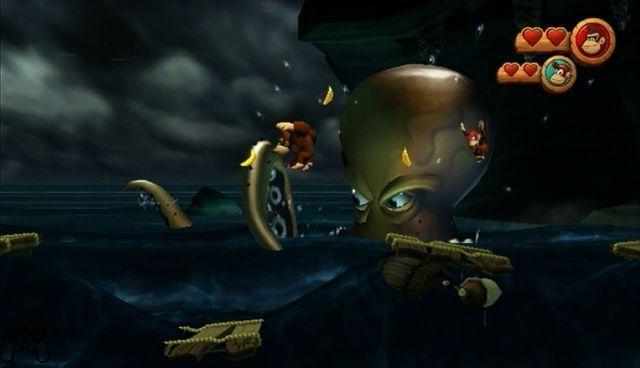
Factory: Handy Hazard
Although the first Puzzle Piece is clearly visible, it will not be easy to reach it: jump the first punch, then wait for the second punch to descend to climb on it and get to the blue platform on the left using Diddy. From there jump to the puzzle piece. Now go back to the first platform and wait for the right fist to descend, climb it and wait to get to the barrel that takes you to the bonus section where you get another Puzzle Piece. Then go to the blue platform on the right, the one with the broken fist, and wait for the fists below to move allowing you to get to the letter K. Arrived later in the barrel supported by one hand, wait for it to reach as high as possible and shoot yourself to the left , then move across the platforms to get to the Puzzle Piece. Ahead before the descent, jump onto the moving platform and follow the banana trail for another Puzzle Piece. Collect the letter O with a jump on the way down, then over the barrel DK also pick up the letter N between the two colliding fists. Then go back and climb on the left fist, from there on another fist thus reaching the platform that houses a Puzzle Piece. Another Puzzle Piece is clearly visible up there, reach for the nearby hand then roll jump to get to the right platform. In the section where the hands are covered by boxes, finally collect all the coins to get the last Puzzle Piece.
Factory: Gear Getaway
Grab and hurl the DK barrel at the white target on the left to collect a first Puzzle Piece. Then jump to the first piston on the right and from there jump to the left, touching the lamp post, to reveal a second Puzzle Piece. After that use the barrel between the third and fourth piston to access a bonus level where you get another Puzzle Piece. Then enter the rocket barrel past the pistons and collect all the bananas in a row to get another Puzzle Piece. Continue avoiding monsters and obstacles and follow the other banana path that takes you to the letter K. Then search towards the top of the level for another Puzzle Piece. Collect the row of bananas at the bottom, then climb up for a balloon and the letter O. The next string of bananas takes you through three crusher, but upon completion it rewards you with a Puzzle Piece. In general, the bananas placed one behind the other show you the trajectory in this difficult final part of the level. Collect all those that are immediately after the checkpoint for a Puzzle Piece, then go up for the letter N. In the final open space, where you pass between the teeth of the Cog, there is finally the letter G, precisely between the second and third in the center of the screen.
Factory: Cog Jog
Jump into the light on the left collecting the first Puzzle Piece, then continue on the rotating platforms to the barrel: calibrate the next jump well so as to land unscathed and collect the letter K during the fall. Then jump to the left and enter a barrel that hurls you to the next Puzzle Piece. Then proceed on the moving platforms to the right up to the couple that goes haywire as soon as you move: from the second blow on the pinwheel to turn on the light bulb, illuminating the Puzzle Piece. Then follow the next platform to the right and wait for it to go haywire to get to the letter O. Beyond the DK barrel, go up the platform and enter the pipeline on the left that takes you to a bonus level where you get a Puzzle Piece. At the exit go back to the rotating platforms and with these go up to the top where you can hit the light for another Puzzle Piece. Go ahead and leave the barrel for now. Instead, jump on the platforms and get to the top one, perhaps with the help of Diddy's jetpack, where there is a floating Puzzle Piece. Back on the ground, grab the barrel mentioned above and take it over the chasm on the right to throw it on the bag and collect a Puzzle Piece. Beyond the arrow made up of bananas hit the circular platform to make it rotate, then jump into the hole when you can and press the Red Button (necessary to access the boss fight, as we will see shortly). Back to the surface jump into the barrel on the right to clear the chasm, then enter the next and move using the barrels to the platform, then roll left to grab a Puzzle Piece. Then bounce on the tiki reaching the letter N, after which grab the grass of the rotating platform to continue: hang on until you can jump on its side not covered with grass, collect the letter G and quickly return to grab the turf.
Factory: Switcheroo
In this level, pressing the blue or red switches makes the platforms of the color of the used switch disappear and instead makes those of the other color appear. Start by going right into the large area where there are two red and one blue platforms. From the highest red platform go left with a roll jump so as not to hit the switch, continue rolling through the chickens to get to a barrel that throws you into the bonus area, where you get a Puzzle Piece. Going right, tap the switch to make a platform appear below you. After picking up the DK barrel, get over the electrified obstacle and then hit the switch and drop a tire. From the platform with several switches, go down to the blue one below, reach the vine by going through the switches and make the blue platform appear as you swing to reach the letter K. Further on, when you come in front of a wall, press the switch above it, then jump into the chasm on the left to press the second Red Button. Back on the surface start the vertical climb by collecting the O. Then jump on the blue platform and roll under the switches, then jump and get to the Puzzle Piece. Further on, use the roll jump to move between the platforms and get to the barrel that throws you into the bonus zone. To pick up the letter N you first need to do a small bounce to get to the switch on the right, then a higher one when you are lined up under the letter. Near the checkpoint there is another Puzzle Piece: go left with the roll jump to overcome the three red switches and arrive on the platform of the same color, then with another roll jump on the left go down on the blue platform from which you can get to the object. Further down the level crouch avoiding the electrified ball, then jump on the rubber to the letter G. Near the barrel at the end of the level is the last Puzzle Piece, also reachable with a roll jump.
Factory: Music Madness
Immediately pull the vine to the left opening the door that hides a Puzzle Piece. Then enter the barrel under the rightmost group of bananas to be thrown on top of the battery plates by collecting the letter K. Later wait for the plate on the left to drop, then climb it with a roll jump and continue left to enter the barrel that gives you access to the bonus area where you collect a Puzzle Piece. Get rid of the enemy flamethrower with the DK barrel, then help yourself with the music in the next platform session: about in the middle, on the bottom, there is a Puzzle Piece reachable with a roll jump. At the end instead you see the letter O, which moves to the left: jump when you are sure to land on the platform. Get past the hammers and jump on the robot, stunning it, then take advantage of that moment to hit the ground near the container to bring out another Puzzle Piece. Beyond other hammers, reach the top of the platform on the right and jump from there to the letter N. Under the letter open a trap door, which leads to another trap door, under which you find a Puzzle Piece. Further on, another hatch, marked by the proximity of a couple of chicken robots, gives you access to the Red Button room. Finally, the letter G can be collected by staying on the silo and being launched towards it.
To use the rocket that takes you to the boss fight at the end of the level you must have pressed the three Red Buttons in the levels Cog Jog, Switcheroo and Music Madness.
Factory: Feather Fiend
Run immediately under his foot, staying between his legs, then step under the other foot and finally take refuge in the right corner. Repeat this action when the boss comes back in your direction. He will then try to crush you, so be quick to sneak away. When the bottom of the chicken becomes grassy try to reach it by passing under the feet that beat the ground in alternating rhythms and cling, then shake the controller to land a series of punches. Repeat this entire sequence a second time until you can cling again and land more hits. Then the enemy will take flight, dropping eggs from which enemies emerge. Wait for the moment when the boss tries to crush you again, then jump on his head and hit him: after performing this attack three times the fight will end.
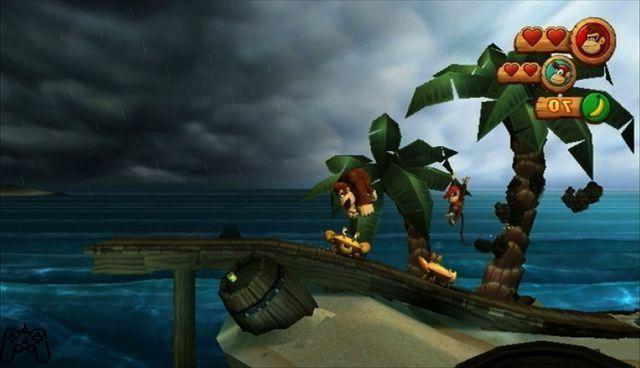
Volcano: Furious Fire
Go right and after first descending enter the passage on the right, then go through the wall that leads to a Puzzle Piece. Study the path of the lava rocks to get to the barrel DK, and to the letter K suspended in midair just beyond. Then pick up the Puzzle Piece, also on a platform in mid-air, and continue towards the letter O, under another platform. Follow the series of platforms that goes up to the left, crouch under the lava rocks, then reach the letter with a roll jump. Beyond the checkpoint, spot the letter N, reachable with a roll jump from the platform on the left. Then hit the rocks on the right wall and go through the passage to the left which gives you access to a barrel which throws you into a secret area where you get a Puzzle Piece. On the right then bring up the platforms by pulling the vine and climb them to get to the Puzzle Piece. Finally, near the curved platforms, go down on the first group of these and look for a hidden Puzzle Piece on the left. Then follow the same strategy to get to the letter G.
Volcano: Hot Rocket
Jump to the left edge of the first platform, then with a roll jump to the right you get to the barrel above which leads you to a secret area where you get a Puzzle Piece. Then mount aboard the rocket barrel, and you will soon find the letter K, so head towards the bottom where it is while paying attention to the falling boulder. Further on, one of the fireballs you need to dodge will hit a boulder, revealing a Puzzle Piece, which you can pick up by walking under it as it falls. While avoiding other incoming fireballs from the left, keep your eyes peeled for another Puzzle Piece in front of you. After the series of rocks that fall off the screen, veer up to collect the letter O. Then go down past the checkpoint to also collect the letter N, on top of a rock, then collect all the bananas arranged in a row to make it appear at the end. a Puzzle Piece. Then past the lava dragon swerve down to collect the letter G. Finally, collect all the bananas in a row once again for one final Puzzle Piece.
Volcano: Roasting Rails
Launch the barrel on the right to open the path on the right, walk and instead of entering the barrel, go down to find another one that leads you to a bonus area where you get a Puzzle Piece. Launching out with the barrel, you arrive at the start of a mine cart session. Immediately climb to the top, elevated by the lava geysers, to reach the letter K. Continue climbing to the ceiling, then enter another cart and do not exit this one as it falls to land a few steps from the Puzzle Piece. Immediately after entering the next cart, jump off to end up on an elevated part of the track at the end of which a Puzzle Piece awaits you. Crouch past the tiki fire, then drop with the next cart to grab the O in midair, then cross the chasm using another cart and follow the banana trail to the N and checkpoint. On the platform that houses a vase, hit it to make a Puzzle Piece appear. After climbing to the ceiling and reaching the second platform sinking into the lava, turn around to see a Puzzle Piece appear as the part you can climb comes off. Finally, follow the banana paths to also collect the letter G.
Volcano: Smokey Peak
Proceed to the right, go past the moving platforms and hit the DK platform to make another one appear that allows you to get to Rambi. Now using Rambi go back to the beginning of the level and break the object with the Rambi symbol on it to reveal a secret area that hides a Puzzle Piece. Go back to the right and drop down to Rambi to collect the letter K, then climb the tiki to the right and use it to reach the wall where a Puzzle Piece is. Go back on board Rambi and continue to the right: get off Rambi on the moving platform, so that the animal does not risk being killed by the lava, while you proceed to collect the letter O. Go back to Rambi and pass the checkpoint, then collect both groups of bananas arranged in concentric circles to obtain a Puzzle Piece. After breaking the gears make sure you don't break the platforms and use them to reach the Puzzle Piece that fell from the sky. After the checkpoint jump, therefore, the lava pools, without forgetting the letter N near the second waterfall. From the crumbling platform then move on to the next one which, beyond a small chasm, houses the letter G. Then pass the barrel at the end of the level without touching it to reach the last Puzzle Piece of the level.
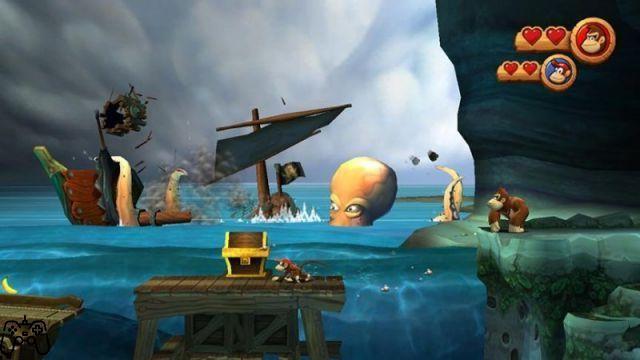
Volcano: Bobbing Basalt
Immediately hit the vase for a Puzzle Piece, then continue on the moving platforms paying attention to the ones that sink into the lava. Jump on the big tiki to collect the Puzzle Piece above its head, then watch the random movement of the rocks and move with the right timing to get to the letter K which is about halfway there. Then go up on the DK platform and hit it to drop a slab, which however sinks rapidly under your weight, so be quick to climb up and collect everything to get the Puzzle Piece. Then pick up the O when it is at the highest point of its trajectory, after which you pass the checkpoint and ignore the DK barrel for now. Jump onto the sinking platform in the lava instead, when it is at the highest point of its path, and use it to reach the barrel which throws you into a bonus area where you get a Puzzle Piece. Now go back to the DK barrel and carry it further into the level, where fireballs emerge from the lava. Go between two of these, continue to the right, go down on the platform that emerges from the lava and throw the barrel into the wall revealing a bonus area where you get a Puzzle Piece. Then go back to the windmill and keep blowing until all the bananas and the Puzzle Piece have fallen. Go back even further, to the platform with the two tikis, and take the lower path to the right passing the sinking platform to the letter N. Then go back to the bonus area and continue past the sinking platforms. Blow on the right helicopter plant and a Puzzle Piece appears. Finally perform a roll jump from the large platform that drops under your weight to get to the letter G.
Volcano: Moving Melters
Carry the barrel to the right and throw it at the bag that flips in midair, dropping a Puzzle Piece onto the piece of platform that remains fixed to the right. As you move between the sinking platforms you come to the wheel on the right that has the letter K. Beyond the barrel of DK perform a roll jump from one of the wheels to get to the Puzzle Piece. Then climb other reels to get to the letter O at the top, after which stay as long as possible on the next giant wheel to bring up a Puzzle Piece. From the checkpoint platform approach the windmill and blow to bring up access to a bonus area where you get a Puzzle Piece. Then jump from the barrel through the fireballs and collect the letter N. Then collect the last Puzzle Piece from the third platform of the next group before it sinks into the lava. Then use the platforms to avoid the fireballs by collecting the letter G at the same time.
Volcano: Red Red Rising
Go to the fourth platform sticking out of the lava and pick up the letter K on the left. When you arrive at the large platform, wait for the emergence of another one on the left that leads you to a bonus area where you get a Puzzle Piece. Beyond the checkpoints the lava starts to rise, so climb the platforms to a group that takes you to the right where you see rocks in the background that break, revealing a Puzzle Piece. Crouch to avoid the rocks as you go to collect the letter O on the left. Further up, after the first group of platforms moving into the wall, a Puzzle Piece appears on the right. Further up, near the fire bubble that moves between two platforms, is a Puzzle Piece on the left. Then use the head of the indestructible tiki to get to the letter N. Then wait for the last of the platforms that come out of the wall to collect the last Puzzle Piece. Finally, the last part of the level, consisting of barrels, awaits you. Wait for the last moment to launch, when the lava has almost reached you: it's the only way to get the letter G.
Volcano: Tiki Tong Terror
After grabbing the DK barrel jump inside the rocket barrel and avoid the traps, trying to collect as many items at the top of the screen. After landing and a cutscene you see the boss of the level. Her weak points are the red gems, but first learn to dodge her attacks. Watch your hands to see which attack is coming, and how much time you have to set up your defenses. After the boss slaps the floor (which you promptly avoided) jump twice on the hand to detonate it in a banana riot. Now the boss attacks become faster: after the slap on the ground sometimes he immediately removes his hand and repeats the attack, so be careful. When you have destroyed the second hand as well, the target becomes the head. It will use its head like its hands, slamming it to the ground, and this, in addition to generating shock waves that hurt you, also gives you the possibility to hit its weak point inside. Each hit immediately accelerates the robot's execution speed. After the third shot, a cut-scene closes the fight.
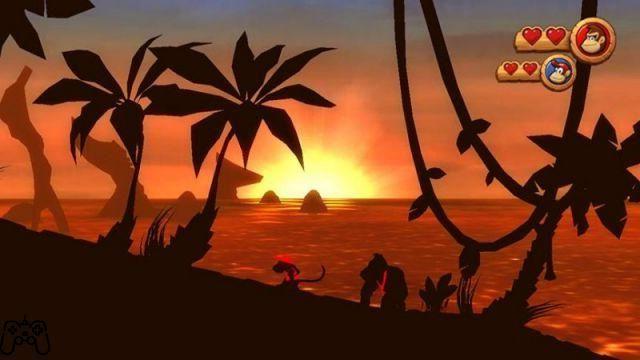
Golden temple
This world is only accessible if you have obtained an orb in each of the previous eight worlds. At first perform a Ground Pound on the platform, breaking the vase containing a Puzzle Piece. Continue on the banana-shaped platforms and collect the row of bananas arranged in front of you, obtaining a Banana Coin at the end. Defend yourself from the enemies by throwing the bombs towards them and you will arrive near two strawberry platforms: first follow the lower path collecting all the bananas, then continue completing the upper one by making a Puzzle Piece appear. By later collecting all the bananas that form two concentric circles you are rewarded with another Puzzle Piece. Watch out for the cherry platforms further down, as they explode shortly after you step on them. So go up on the group of three strawberry platforms, collecting all the bananas that fall from the sky, so that a Puzzle Piece is added to these. Proceed past the orange rain to the swinging banana platforms - the last of which houses the game's latest Puzzle Piece on it. Move to the final part of the level by throwing yourself with the barrels until the one at the end of the level appears. Tap it to exit and unlock mirror mode.
Congratulations, you have finished Donkey Kong Country Returns.
Video of the solution - Level 1-1


