


Please note:
The solution is based on the US version of the game for Xbox 360. There may be divergences from the Spanish version and / or for other platforms.
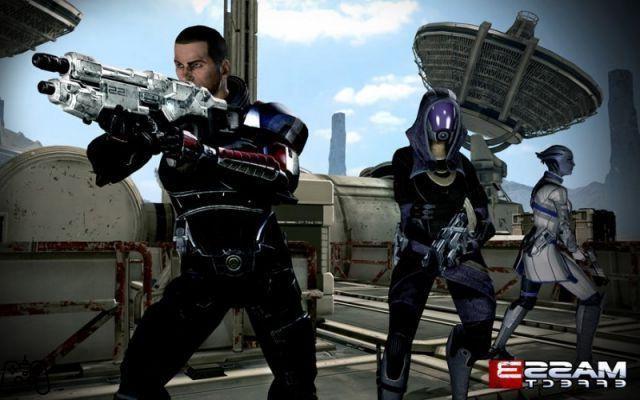
Land: Canada
The very first section of the game can be considered as a tutorial for combat and movement. Right after the cutscene, Anderson will be your teammate and you will initially only have a base-level Predator pistol. Follow Anderson by killing the Husk climbing the wall; since your ammo will likely run out, you will then have to go melee to take out the Husk in the area immediately below.
Then enter the room that is on fire, retrieve the remaining medical gel. So try to open the next door, you will be immediately interrupted by another Husk - kill him and proceed forward. In the next area you will have to face another type of Reape - the Cannibal. It is a subject equipped with a rifle and a grenade launcher, as well as capable of eating his fellow creatures to recover HP. Despite the frightening description, we recommend a strongly offensive approach: they do not have any shields and / or armor, so they can be killed very easily, using your "standard" gun.
So head towards the impact area, equipping the Avenger rifle. So check the radio. You will be attacked by a huge number of Cannibals - they will come almost exclusively from the semi-destroyed shuttle, so immediately direct all your firepower to the area to quickly clean them up. You will then (fortunately) be helped by Joker to overcome the last, complex moments of the game.
The Citadel
Back at the Citadel, your goal will be to speak to the council. From bay D24, talk to Diana Allers. You will therefore have to proceed to the embassies and hospitals in the area.
The Embassies
Once at the embassy, we recommend that you first visit Bailey's office and have a conversation with the commander. You will get a certain amount of experience points and trust points. Your goal will now be to go talk to Udina, along with the current board members. They don't give you a lot of information, but they will re-introduce you to the Specter. This gives you access to the Specter office, along the southern section of the embassy cluster - later you can buy a large amount of items there.
Anyway, back at the elevator entrance, talk to James Vega to increase your reputation level; try to stay a little longer in the vicinity of the elevator, thus finding yourself in front of Khalisah Al-Jilani. You can choose whether to use the Renegade or the Paragon (also depending on your skills in the two distinct specialties): preferring the Renegade, you will fight - so be careful because the opponent will be able to dodge the first blow, so you will have to inflict two of them to put it completely KO. Instead, if you prefer the diplomatic route, you will go to gain a possible ally.
Huerta Memorial Hospital
Go talk to Dr. Michel to get a higher reputation level. Also, go visit Ashley (or Kaiden), who will be recovering from her injury. Even this visit, although apparently disinterested, will positively affect your reputation. It is also possible to visit the "Sirta Supplies" shop: here you can buy improvements for your ability to absorb medical gel, which will be very useful in the future. Having completed this series of objectives as well, return to the Normandy.
Mass Effect 3 - Launch Trailer
Mars
Given the small number of members of your team, you will not have enormous room for maneuver here to implement differentiated strategies. However, we recommend that you improve your offensive or defensive skills, let's say the real "base" of your skills. Then go down the ramp and take out the first group of Cerberus soldiers. We recommend that you first eliminate the weaker "Troopers", and then secondly move on to the opponents with shields. Once you enter the Martian base, you will then move on to using Liara. Use his "Singularity" move to uncover the next Cerberus, so that you can eliminate them permanently using your standard offensive skills (ie, pistols and machine guns).
After the fight, interact with the controls of the vehicle lifting object, moving the machine upwards. This will create a bridge to the next area. Use the following room as cover, thus killing the next group of enemies without getting noticed. However, it is very likely that, at some point, the rest of the Cerberus will notice you. Enter the security room, retrieve the M4-Shuriken and tech gloves. Examine the security terminal, then proceed outside and over the two ladders, not forgetting to retrieve the chest protector made by Kassa. Then go through the closed watertight hatch, examine the pad containing the data, obtaining experience points. Hide behind the sink, wait for the next group of Cerberus - they will arrive already grouped, so a single hit of Singularity should be enough to get them out in the open so you can finish them off with your guns.
Enter the room on the right. Retrieve the medical gel, examine the environmental conditions control panel, thus opening the next step. At the next transition area, proceed beyond the iridescent barrier, recovering the ultra-light materials. To fight the opponents along the next corridor, we recommend using mind control combined with weapons capable of hitting at long range: in this way you will first intentionally group the enemies, then you will kill them using the long range weapons. There will certainly remain some small group of opponents, to be eliminated with short range weapons. Guardians, the main enemies to be eliminated, are similar to Troopers but equipped with a giant shield - the "trick" to prevent this shield from causing you problems is to raise them with your mental abilities, so that you can hit the parts of the body the most. exposed.
Once sterilization is reached, wait for the rays to unlock access to the doors, then interact with the controls on the side. Enter the room, recover the Shotgun, the data logger that allows you to get good experience points, as well as the medical gel. Go through the door on the left, following Ashley as you dive behind the pillars and crates, dodging the turret fire. In case you are hit, avoid risky moves: you will always have to wait for the complete recharge of your shields and only then can you proceed. Entering the control room, kill the following Troopers and the Centurion using shots capable of hitting an extensive game area (the troops will be very concentrated, so this kind of shots will maximize your efficiency). Collect the Medkits and Sniper Rifle Module. Hit the switch in the room, watch the cutscene. Following Ashley's advice, place both of your teammates in a waiting state. Head to the opposite side of the room, getting ready to destroy the enemies that will soon arrive in the area. Your companions will be able to stun the enemies, so they will not be able to inflict damage on you in any way.
Hop into the tram, enjoying the ride. You will therefore undergo a second ambush, but fortunately there will be only five enemies, so it will not even be necessary to prepare yourself properly. Then proceed to the area used for the final fight. Despite the name of "final fight", it is quite similar to all the previous ones, except for the number of opponents, in this case considerably higher. You will therefore have to pay attention to the high number of grenades that will be thrown at you - it is therefore good to try to stay hidden behind one of the many columns in the area, while trying to stun your opponents using the usual "Biotics" ability. After the fight, remember to remove all the contents of the small room in the center of the play area, especially from the shelves that are not normally visible. Then go through the door in front of you, finding yourself in front of Dr. Eva and Illusive Man. There is a simple method that allows you not to waste time in this fight: chase Eva without paying attention to the attempts of attack by the Cerberus. You will reach the roof. Eva will try to attack you and will start a moment in slow-motion: hit her to end the mission definitively.
Normandy & Palaven
We recommend taking a tour inside the Normandy to learn more about the members of the troop, so as to improve your reputation / paragon / renegade levels. Within the medical section you can take care of the re-distribution of skill points, as well as the assignment of special powers unlocked following the interaction with your teammates. Inside Liara's cabin, you will be able to obtain additional information provided by your "secret services", as well as peculiar upgrades.
So head to the troop information center, there you can talk to Traynor and get information on the troop's morale level. Proceeding to the war room, you may be interested in the items accumulated during your campaign - however, this is more relevant information for the multiplayer mode. So head to Palaven, inside the Apien Crest galaxy.
Menus
Unfortunately you will find that Palaven has been besieged, so you will have to land on Menae, the closest moon. Before choosing your teammates, pay attention to the different bonuses they correspond to and try to choose who is more "in line" with your innate fighting style. As soon as you land you will have to deal with the Husk: as usual, it is advisable to hit them using long-range weapons, before they can get dangerously close. In case they actually manage to get close, we recommend using Liara's Singularity. The combat, in its totality, is quite simple and you will be able to reach the camp in a short time. Explore the area in detail to find data discs capable of providing you with both experience and coins, as well as some medkits and an M-97 Viper.
When you feel ready, you can speak to the general, located along the right side of the camp. He will give you a fair amount of reputation, allowing you to proceed to the next game zone. So approach the tower, eliminate the Husk around you. When you have approached significantly, you will notice how the tower is completely damaged: you will have to send your teammates to repair it - we recommend that you send James, so that Liara stays next to you, her skills allow you to effectively defend the area game - a second wave of Husk will soon arrive, so you will have to use all your mind "control" skills to prevent enemies, getting too close, inflicting serious damage in the melee with your characters and teammates.
As soon as your teammate returns, a third wave of Husk will arrive. You won't have any problems this time, as long as you are helped by two Turians. Go back to the main camp, talk to Corinthus again. Garrus will then join your party, while Liara will return to the ship. Proceed to the landing area, your goal is to defend it against the Reaper attack. During the process, you will encounter the Marauder, a new kind of enemy - a slightly modified version of the Husk, belonging to the Turion. You will therefore have to hit them with weapons and / or technology. We recommend focusing on anyone with a gun, only then switch to unarmed Husk. Having eliminated everything possible, you are about to leave the play area. Before you do this permanently, make sure you've got the Assault Rifle upgrade. Back at the camp, head towards the barricade and use the static machine gun turret: your goal will now be the total elimination of the Husk that populate the game area around you. You will have the support of James and Garrus - even if their firepower is severely limited compared to yours, so they will take care of the distraction of the enemies, and you will take advantage of it to eliminate them.
The following opponent will be a kind of giant, equipped with armor: immediately equip heavy and powerful weapons, as well as advanced Tech - only then will you be able to inflict serious damage. In addition, a defensive approach is strongly recommended, since the opponent's melee attacks can take away an enormous amount of life points and destroy your shield irreparably; Fortunately, the enemy isn't very fast, so rolling sideways is often more effective than throwing yourself forward.
So head towards Victus, making sure you have both the Medi-Gel and the sniper rifle. You will now have to eliminate some Cannibals and Marauders: an offensive approach is strongly encouraged, given the large presence in the area of medical kits capable of restoring the level of your life points. Then some Brutes will follow: you can easily eliminate them using a trick, that is by luring them towards the entrance of the cave - they will not be able to pass and they will get stuck, you can eliminate them without running the slightest risk. Finally, remember to retrieve the upgrade for the sniper rifle, and then return quietly to the general and communicate the full success of the mission.
Sur'Kesh
Returning to the Normandy, the ship will immediately suffer a blackout, so you will not be able to move to any place. Go down to the infirmary area to find out what's going on. After a short cutscene, EDI will join you as a member of your party. You can also talk to the rest of the crew to improve your level of trust (or rather, the level of trust they place in you).
So head to the Annos Basin, where you can talk to the diplomats operating in the area - representative of the Turians, Salarians and Krogan. Having talked to all three, you will then need to head to Sur'Kesh. Talk to Wiks, proceed to the lab. There you can converse with Mordin as well as the female Korgan - thus increasing your Renegade or Paragon level. Also retrieve the assault rifle from the barrel, near the nearby shelves.
So go ahead. You will soon be attacked by some Cerberus troops, who will mainly use smoke grenades. Given this rather annoying feature, we recommend turning to the right, so as to go through a completely "protected" part of the laboratory and thus be able to hit them from behind. At the next area, jump over the left wall to reach the fire, then retrieve the Shotgun ammo upgrade. As you continue forward, you will encounter other Troopers - your objective in this area will be the protection of the platform which is used by the female Krogan; your protection must be complete and total, since in the event that the pad is destroyed, the mission will be considered as failed. Therefore, eliminate the enemies at maximum speed, using all available forms of mind control: you will need them to keep enemies away, especially Biotics and Tech.
So retrieve the data container on the opposite side of the game area, so help Mordin to proceed to the next area. Watch out for enemies coming from the left. So go up the ladder, finding yourself in front of an engineer capable of building turrets. We recommend eliminating him first, due to his ability to both build and restore turrets (try to proceed along the colonnade to the right of the central play area, so that you can attack the enemy in the back. Along the following corridor it will also be possible to use the med kit. Proceed to the next room, we recommend that you go up the stairs and kill the enemies on the lower level, starting from the top. You can also recover an M-13 Raptor next to the dead Turian, as well as a pistol with sight near one of the nearby tables, then head to the terminal and there you will find a Scorpion pistol, as well as some medical gel.
So get rid of the two short waves of Cerberus, and then continue straight. The next fight will see you star in a large courtyard - stand along one of its sides so enemies can't surround you. After that, you will find yourself facing a sizable Atlas. First, use a fast fire mode, the fastest possible, to destroy the enemy's shields and armor. Only when the protection has been reset will you be able to switch to a more active approach, attacking him in such a way as to completely reset his defenses.
Tuchanka
The goal in Tuchanka is to find a cure for the Genophage. Make sure you have completed all the missions of your interest within the citadel, as most of them will no longer be available. Go down to the planet, destroy the husks that will be waiting for you. Like the other Husks encountered in the area, these too will be easy to eliminate if / when you stay at the right distance.
After the next transport phase you will be stopped near a semi-destroyed road. Collect all objects around you; then talk to the Krogan to advance. Walk through the ruins and examine the three paintings for additional credits. So examine the dead Ravager, proceed outward. You will find yourself facing two Ravagers and three cannibals in the courtyard. Try to draw them outwards, moving in a circle to the left, then go back twice to the right and hit them sideways without having any escape.
Having gotten rid of the other six cannibals, a Brutus will arrive on the scene. He leaps over the ravine to clear him from a distance, so that he can't hit you in any way. In the next area, stay undercover to get rid of the cannibals. Having killed them, a group of Husk will also arrive on the scene, however completely standard and easily terminable enemies. Enter the next area, retrieve the scope for the sniper rifle visible to the left, as well as the extension for the assault rifle. Move to the trucks. After the cutscene, try to stay still, quickly freeing all the cannibals that will come from above.
Proceed along the stairs to the left, recover the M-5 Phalanx. As you continue forward, your goal will be to activate the two hammer controls on either side of the map. We recommend completely ignoring the enemies, going directly to press the two switches to complete the process with maximum speed.
Turian Survivors
This is a mission divided into two parts: the first sees you helping to rescue a team of Tuians, then you will have to assist them in fulfilling their mission in that of Tuchanka. Upon entering the battlefield, the Reaper will initially be busy and will not notice your arrival. We therefore recommend starting immediately to hit the Husk and Cannibals, near the entrance. A Havester will arrive on the scene, at which point we recommend going up the ladder on the left and taking the sniper rifle ammo among the debris, then using the aforementioned rifle to eliminate the opponents around the Harvester. Having done this, go back down and defend the onslaught of the Turian platform using all the heavy weapons at your disposal.
Go down the following platform slightly downhill, recovering all the objects around you. A little further on some Husk will try to stop you, we recommend the use of powerful and precise weapons (such as the power assault rifle) to quickly penetrate their armor and eliminate them without problems. So approach the Harvester, before it manages to retreat: if it succeeded, it would release a huge amount of Cannibals and use its cannon capable of firing / hitting at a long distance. The use of weapons capable of penetrating armor is essential to successfully finish the Harvester.
Continue forward, then right, retrieve the sniper rifle upgrade. In the following area, you will have to pay extreme attention to the Brute: we recommend killing him using the sniper rifle, so that he does not have the possibility to get close and-consequently-inflict considerable damage on you. At the same time, unfortunately, the Cannibals will throw large quantities of grenades and you will have to look for cover to avoid problems. Combining the two needs, it is good to position yourself near the closest cover, and hit the Brute from there, then come out and finish the Cannibals quickly. Finally, a Harvester will arrive on the scene: immediately take the Reaper Blackstar next to the area from which it will proceed and use it to finish the Harvester with a single powerful blow. So talk to Victus to improve your reputation. So go back to the Normandy.
Video - Gameplay Trailer
Locate Bomb
Immediately after being dropped, you will have to fight against the Cerberus and Centurions. These subjects will be further protected by some barriers: we therefore recommend hitting the generators of these barriers in advance; in this way you can inflict serious damage using weapons capable of hitting an entire game area, rather than having to forcibly target individuals. But try to dodge the grenades that are often thrown at you.
So go up along the various ramps that allow you to reach the inside of the actual building; Pick up the Shotgun upgrade, then proceed to the next area. Pay attention to the engineers, here able to "create" turrets: therefore to be eliminated with considerable priority. Again, hitting the generators - creating an explosion that also damages the enemies - turns out to be the most functional strategy.
So before moving forward, retrieve the Gauntlets on the right and proceed up the ramp to the next area. Kill the troops on the second floor, retrieve the medical gel and the gun upgrade from among the crates. In the next area, the Cerberus will cause several enemies to descend via a transporter; Fortunately, their descent will be slow, so you can eliminate most of them before they land - for the third time, pulverizing the generators gives you a major advantage. Then get rid of another small group coming from the left, recover the money in the area, advance along the next ramp. Retrieve the sniper rifle, climb the following ladder and also grab the stun gun behind the crate to the right.
Destroy the turrets below, get the medical gel, as well as the construction blueprint for the automated turrets. Go through the next corridor, meeting Lieutenant Victus. You will have to protect it from the arrival of several Cerberus. While the enemies are quite weak compared to your abilities, they can be very damaging to Victus, so you'll have to put a lot of energy into protecting him - the best method is to get close to the transport ships and pulverize the enemies before they get there. come down.
At some point the Cerberus will also drop an Atlas: its defensive capabilities are too much compared to your offensive abilities, so we strongly recommend that you send your teammates to take care of Atlas, while you continue to protect Victus from "lesser" enemies. . When only the Atlas is left on stage, dump all remaining ammo on him to complete the mission.
Rachny
Your help will be requested within the Ninmah galaxy, in that of Utukku. The difficulty of the mission can change depending on whether Rachni and / or Grunt survive (or not). Anyway, talk to Commander Korgan and enter the tent on the left, recovering a machine gun and money. Then continue forward, reaching the barrel which contains several great items. Drop down into the following play area, retrieve the Firestorm M-451 from the dead Krogan.
You can use it to destroy the cobwebs blocking the passage placed in front of you. Once in the next area, destroy the platforms containing the spores before approaching them: in fact they will explode as soon as you get close, in this case the damage would be guaranteed. So you will have to deal with several Ravagers - these enemies have quite effective cannons and are able to "generate" underlings on-the-fly. The best way to deal with them is to destroy the "sack" attached to their body, which they use to generate their underlings. The battlefield will therefore be freer and you can eliminate the enemies without too much difficulty.
Examine the play area and retrieve another Firestorm, as well as an upgrade for the Shotgun. Go through the following platforms, getting rid of two cobwebs. Pulverize the control panel associated with the barrier, in this way you will be able to reveal the following game area. Move along the path and remember to pulverize the cobwebs on the left. You will also find a dead Krogan behind the cobwebs in the next room. Examine him to find a note with his last wishes. Collect another Firestorm, so get ready for a new encounter with the Ravagers. This time they will be helped by the Cannibals - but the general game strategy will still remain the same; due to the considerable distance from which they will appear, however, we recommend using a rifle, rather than the Firestorm, which is less effective in this specific case.
Continuing forward, retrieve Shotgun ammo from the dead Krogan. Be careful as you move forward, subsequent platforms can both explode and (simultaneously) create Swarmers. Having finished them, proceed beyond the next web and retrieve the medical gel as well as the gun. Destroy the barrier, locating Grunt. Take the next narrow passage, finding yourself inside the Rachni's lair.
Hit the "node" connected to the Reaper visible above, causing the destruction of the wall on the left, from which several Husk, Cannibal and Ravager will come. Knowing of their arrival, you can previously spam a large number of grenades in the area, so that they are killed even before they can be definitively operational. Destroy the second "node", so as to pulverize the right side of the wall in the entrance area. So go back there and repeat the same procedure, getting rid of the Ravagers. Another node, then use the Firestorm to pulverize the Rachni that will arrive in the area. Go back to the center of the play area, there you will have to choose whether to help the Korgan or the Rachni - in both cases the total power of your army will increase by 25 points, so the dichotomy is not problematic.
The Citadel - Attack
Cortez will drop you off in the landing zone, in the middle of the battle between Cerberus and C-SEC. Immediately jump behind the closest cover, taking out the engineer controlling the turret. He then proceeds upwards, using one of the two ramps available (left or right). You can then hit the Troopers from the side, without them being able to react in any way. Talk to Bailey, go through the next door.
Two more Troopers will arrive on stage, take them out quickly. Guardians and an engineer will exit the stairs on the left - immediately use Tech and Biotic to pulverize their defenses. Eliminate the next soldiers as well, descending from the second floor. Before hacking the door, we recommend proceeding to the right area of the room to retrieve the med kit and the assault rifle upgrade. Make your way to the next room, which is completely flooded. Plunge to the left, inside the bathrooms. Collect the M-76 next to the sink, then open the locker to get some extra cash. Go back to the flooded room, hit the engineer in the area with the highest priority, then move on to the other subjects around him. Retrieve the medkit inside the infirmary, go down the corridor, jump to the left passing the broken window. In this way you will get an upgrade of the sniper rifle and you will be able to interact with the nearby controls that allow the opening of the previously sealed elevator. On the next floor, enter the door on the left and eliminate (hitting him from the back) the Trooper who goes down the corridor. Go straight ahead, then enter the kitchen on the right. Collect the money and the gel, then start fending off the next Cerberus that will mostly come from the bar - so shoot in that direction before they even appear.
The Cerberus transporters will therefore bring a new type of enemy into the area: the Phantom. They are equipped with both excellent movement speed and a barrier and a "cloak" capable of making them semi-invisible. However, they have one key weakness: they have to forcibly get close to you, otherwise they won't be able to hit you in any way. Your combat strategy must therefore be based on always staying far enough away and hitting them with medium-long range weapons. We therefore advise you to jump over the ravine, so that opponents are also forced to jump to reach you and you can hit them just as they try to overcome the ravine in question.
Once this is done, proceed forward past the destroyed areas of the Citadel. Two more Cerberus: an Engineer and an Atlas. Eliminate the Engineer immediately, his poor defensive capabilities greatly facilitate your progress. So go to the Atlas - use the first room on the left as cover, hitting the Atlas as it approaches. As soon as his shields have been eliminated, an enemy transporter will arrive in the area releasing a fair amount of Trooper - it would be good to ignore them and take out the Atlas with the highest priority.
Jump on the elevator and be taken to the council member's residence area. To prevent the Cerberus troops from reaching you, you can simply destroy the elevator generators, located just below the elevator itself. As soon as you get out of the elevator, use a medium level of Renegade or Paragon to discuss with the council members: in this way Ashley (or Kaiden) can be saved. Then step inside the Normandy to enjoy the final scenes!


