


Please note:
The guide is based on the American version of the game and many place names differ from the Spanish version, so it is highly advisable to buy maps from the merchants to get precise directions on where to visit.
Introduction
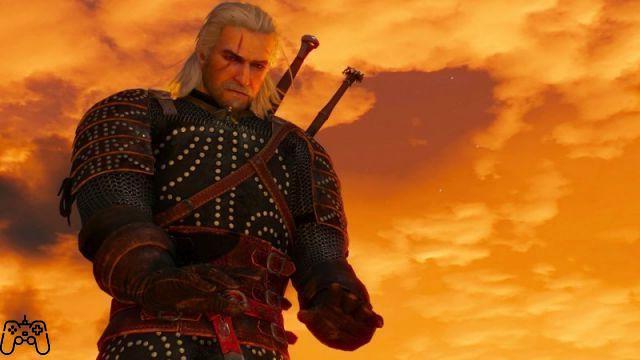
In the world of The Witcher 3: Wild Hunt, there are hundreds of armor and weapons, but none of them are as powerful as Witcher-specific gear.
These particular pieces of equipment are not found during our explorations and must be built by the two most powerful blacksmiths to whom we are supposed to supply the raw materials, as well as the construction diagrams.
Each of these five powerful sets can be upgraded to high levels and adapts to every style of play, it will be up to us to understand what type of combat we prefer and create the most suitable equipment.
The construction materials are not always easy to find and for some necessary for the construction of the Bear set it will be necessary to have first completed a secondary mission that I will describe in the paragraph of the set itself. Always remember that for non-specific monster pieces (e.g. monster eye rather than Nekker Warrior's eye) these can be obtained by disassembling specific monster pieces or other body parts, collected during our explorations.
As for the diagrams, you must first buy a particular sheet or diary from some merchants, thanks to the reading of these special objects you will be aware of the places where to find the construction diagrams of the various sets. Once the mission is activated, just put it as a "followed" mission and the indicators will take you directly to the place concerned. Once there, activate your senses as a Witcher and look for the school symbol usually represented on a wall or rock, interact with it to activate the second part of the mission and see the specific area on the mini-map.
The recommended levels for the search missions of the pieces of the sets, always have a recommended level, however often you will not have to face even a single enemy, so it may be worth trying anyway and starting in search of the diagram, in case you encounter a monster too difficult, you can always come back later, or try to distract the opponent and approach the chest while you are out of the fight.
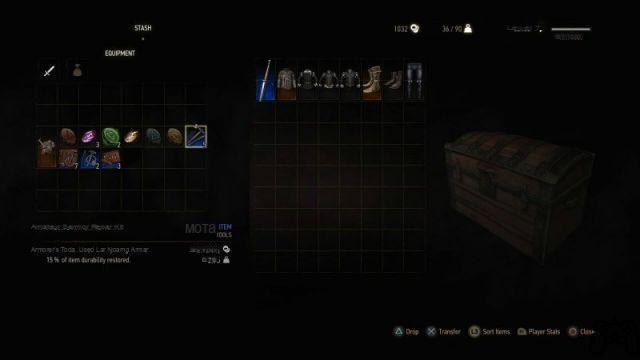
With the recent patch, a repository has been added which represents a fundamental addition to collecting and upgrading our Witcher sets, in fact each piece will need its obsolete version to be upgraded. Throwing away the pieces that we no longer use, would prove to be very expensive, but it may not represent a big problem in the late stages of the game where the money will flow like never before.
The legendary blacksmiths
During your wonderful adventure, you will meet many blacksmiths, but only two of them will be able to build the best Witcher sets for you. Each of these two blacksmiths has their own secondary mission that must be completed before accessing the high-level services, the missions will be obtained relatively soon during the game, but you will still have to be patient as they will be of a prohibitive level for your current situation. However, remember that these blacksmiths will be able to build the first levels for each set and the missions will only serve to unlock the last level.
Yonna and Fergus
You will meet Fergus and his aide Yonna during the main mission involving the Bloody Baron. In fact, the two blacksmiths (a dwarf and a young woman) are located inside the fort of the Baron in Nido del Corvo in the Velen region. Talk to them and ask how you can get the best armor, Yonna will tell you about a special forge on the island of Undvik which is part of the Skeligge. You will therefore not be able to access the forge before having unlocked the journey to the cold lands of the Skeligge, also the recommended level to face the mission is 24 and at this point of the game you will still be at the very first levels.
Once you have reached the recommended level, activate the research mission at the forge and go to the Skeligge Islands. Once in place, look for the mission marker located in the island of Undvik (the one to the southwest and where you faced the giant for the mission of the son of the Jarl). Follow the marker to the forge hideout to find yourself in front of a level 26 Troll.
It is therefore advisable to sprinkle your silver blade with ointment before entering the forge located inside a small cave. The Troll will be remarkably slow and the traps of the Yrden sign could give you a considerable advantage; in fact, it will be much easier to circumvent the slow blows of the enemy and keep close distances so that he does not throw very painful boulders at you. Even the Quen sign will be somehow indispensable, in fact every blow inflicted by the Troll will cause you great damage.
Once you have eliminated this mighty opponent, collect the tools and return to the Crow's Nest. Give the tools to Fergus and ask him if he will now be able to forge a powerful armor for you. You will be immediately interrupted by a group of Nilfgardian officers who will ask the dwarf to build armor that can stop a crossbow bolt. At this point you will discover that the real blacksmith is actually the young Yonna.
The girl, now tired of appearing as a helper and not as the real craftswoman, will decide to build an armor for the Nilfgardian officer too and will ask you for a precious ingredient to succeed in the task of creating the best piece.
The ingredient required by Yonna is none other than an acid gland of an Arcigyphon. Luckily for you it seems that such a beast is prowling not far from the Crow's Nest. Reach the mission marker and face the beast. The enemy has the same moves as the Royal Griffin encountered during the game's prologue, but has the ability to spit acid once in flight.
Once the Griffin is eliminated, cut off its head to get the trophy and collect the gland. Then return to Yonna and give him the ingredient to continue the mission. The Nilfgardian officers will soon arrive and ask for volunteers to test the two armors (the one made by Fergus and the one made by Yonna), then you will be forced to be the guinea pig wearing, fortunately, the bodice created by the girl. The armor you are wearing will successfully repel the dart and Yonna will have the reputation that it deserves.
The girl will promise you an armor in exchange for your service, meditate for a day or two, then talk to her to get the armor, finish the mission and have access to the best blacksmith services.
Hattori the elf who sold ravioli
You will find the elf Hattori as soon as you arrive in Novigrad. The poor guy claims to be one of the best blacksmiths in the world, but is now forced to sell ravioli (quote from Kill Bill) due to the delicate situation with local crime. He will ask you to give him a hand in resolving the grave situation and in return will provide you with the service as the best weapons craftsman.
The recommended level for this mission is twenty-five, but already at fifteen you will be able to complete it if you have spent several points in the Axii sign and unlocked the alternative version with which you can take control of the opponent's mind.
Join Hattori at the harbor as night falls. The elf will take you to meet his suppliers, you will settle for 25% of the profits on poor Hattori's work and you will have to stop the men when they decide to leave the meeting. You will be attacked by other criminals and you will only have to fight. Once you have eliminated your enemies, go to the elf's shop, he will be terrified and will ask you to get him a bodyguard.
Follow the mission marker to reach the man who seems ideal for this task, Sukrus. The beefy man of the Skeligge will challenge you to a fight before he even agrees to talk to you, play it hard, then sit at the table with him. This man will also have a favor to ask of you before accepting the bodyguard assignment for the elf. Go to his brother-in-law and persuade him to return the money to Sukrus using the persuasion of the Axii sign (in case you have not reached the level with the sign, you will have to burn the merchandise). Return to the Sukrus who will accept the new job.
Hattori will then ask you to go and retrieve some material from a warehouse in the port area. Go to the point indicated on the map and enter using the Axii sign on the guard outside. Once inside, mark the right chest with chalk. You will soon be joined by the warehouse owner and his men, fight them or try to resolve the situation peacefully.
Once you have given the material to Hattori, meditate for an internal day to complete the mission, get a very nice sword and access the services of the blacksmith.
Wolf school equipment
Wolf armor is a medium piece of gear that mixes good attack power with good sign intensification. It is therefore perfect for those who love to fight using some signs and take care of the rest with the sword. Unfortunately, the very first diagrams for this set will be in Kear Morhen and you will not be able to start creating it until you reach the part of the plot set in the Witcher fortress of the Wolf school. You will also need to have downloaded the free DLC.
Where to buy maps
You can buy the maps for the Wolf set from the merchant in Lindenvale, the blacksmith in Ker Trolde, the blacksmith in Kaer Muire and Hattori the elf.
Silver sword of the wolf
Reach the ruined tower north of Kaer Morhen. You will need to defeat a level 23 ghost to reach the diagram which is on a corpse against a wall in the center of the tower itself.
Wolf's steel sword
Reach the rampart west of Kaer Morhen. After defeating some ghosts, look for a corpse in the rubble near the northernmost wall of the structure, the diagram is on it.
Bodice, pants, boots and gloves of the Wolf
You will find all the Wolf armor diagrams in one place. Reach the watchtower located southwest of Kaer Morhen, enter and climb the wooden scaffolding, open the chest on the left to find a note about the Wolf armor and two teleportation crystals. Go downstairs and examine the two portals, hit the right crystal with the Aard sign to activate it. Turn behind you and exit the room, immediately turn right as soon as you are in the open air. Climb the scaffolding on the outside and pick up the crystal attached to the wall. Go back inside the tower and insert the crystal inside the portal on the left, activate it with the Aard sign to make a portal appear suspended in the void and in front of you. Calculate the distances well and jump inside the green vortex. You will find yourself in an area where you will have to face a level 23 ghost. Once you have defeated the opponent, look for the diagrams in the corpse on the floor.
Wolf silver sword improved
Go to the Bloody Baron's private garden at the Crow's Nest. Reach the well and use the stairs to go down inside. You will find the diagram inside a chest.
Improved Wolf's steel sword
You can find this diagram inside the Watchtower north of Kaer Morhen. Enter the fort and defeat some level 23 ghosts, then climb the scaffolding inside the south wall to find a chest with the diagram inside.
Enhanced Wolf Boots
Reach the Lindenvale East Cave marker. You'll find a monster lair south of the fast travel sign. Go inside and look for a chest in the larger room.
Improved Wolf Pants
You will find a small triangle-shaped island east of the cabin by the lake in Kaer Morhen. You will find a chest with the underwater diagram inside in the southern part of the island.
Improved Wolf Gloves
You will find this diagram inside a chest located in a monster lair south of the Kaer Morhen fortress. Go inside and keep left, climb the wall to reach a large room with the chest inside.
Wolf Vest improved
You will find this diagram on the miniature islet south of Fyke Island in Velen. Once there, use your Witcher senses to find the Wolf symbol on a wall. Turn around and dive into the water to find the chest.
Upper Wolf Bodice
In the southernmost part of the main island of Skeligge, west of the Fyresdal fast travel sign, you will find a monster's nest inside a small wooden fortress. You will find a small point to climb the wooden walls on the right as soon as you enter the huge door, go up and reach the opposite side to find a treasure chest.
Silver sword of the superior Wolf
You will always find this diagram on the main island of the Skeligge, but this is in the southwestern part. Use the Arinbjorn fast travel sign and look to the southeast for the area with the three large circular tombs. Inside one of these you will find a chest with the diagram.
Steel sword of the superior Wolf
Reach the Lofoten fast travel sign, the easternmost island of the Skeligge. To the west of where you are, on a plateau, you will find stone ruins and a level 26 Troll to eliminate. Then look for a crack in the floor to reach the underground area. You will soon find yourself in front of a room full of explosive gas, use the Igni sign to temporarily eliminate the gas and look for the chest in the left corner opposite the entrance. Collect the diagram and immediately exit the room before the gas fills it again.
Superior Wolf Gloves
Reach Kaer Morhen and follow the path southwest from the main fortress. You will soon reach an iron mine and a sign for fast travel. Inside the mine you will encounter a level 30 earth elemental, against whom the Yrden sign will be greatly useful. Look for the chest on the right side of the cave just after the entrance. You will not be forced to fight the elemental and if you enter combat, just walk away.
Upper Wolf Boots
Reach the river south of Kaer Morhen, follow its path east to reach the entrance to a cave just east of the main fortress. Go inside and turn right through its galleries. Once in the larger room you will have to face a group of level 9 Endiraga, once you have defeated the enemies look for the chest behind the stalls inside the same room.
Upper Wolf Bodice
Follow the road from Kaer Morhen fortress and continue northwest. This long road will take you to an ancient cave, the chest is located at the end of this and behind a large rock column.
Perfect Wolf silver sword
Go to the southeast part of Velen. You will find a hidden treasure just northwest of the large Nilfgardian camp and southwest of the Kimbolt Fast Travel sign. The area will be controlled by a level 22 enemy, take him out and collect the key from one of the two bandit corpses on the ground. Unlock the door for their lair and collect the diagram inside a chest.
Perfect Wolf Bodice
You will always find this vest in Velen, but in the southwestern part of the map. Go east from the Byways fast travel sign.
You will notice stone stairs with two large statues that lead to an animal-shaped sanctuary. Near the stairs you will notice a small round well, inside you will find a chest.
Perfect Wolf steel sword
You will find war remnants in the southwestern part of Velen, precisely south of Condyle and west of the fast travel sign in Byways. Under the water and not far from the coast, you will find a submerged wreck, the chest with the diagram is located just under the wooden stairs that lead below deck.
Superior Wolf Gloves
Return to the main island of the Skeligge. You'll find a circular stone ruin northwest of Boxhol and east of the Fayrlund fast travel sign. The area is controlled by the powerful monster Morvudd. The chest with the diagram can be found against the stone wall near the large structure. You can avoid the encounter with the monster by approaching from the nearby road and jumping on the wall itself.
Perfect Wolf Boots
There is a large island in the southwestern part of the Skeligge Islands. In the eastern part of this island and east of the Dorve Ruins fast travel sign, you will find an area infested with some level 12 devourers. There will be a tall stone tower in the southeast area of the ruins. . Look for the side with many windows and a dead plant rising up the wall. The diagram is at the bottom of this tower against a stone wall.
Perfect Wolf Pants
Go to the northwesternmost island of the Skeligge. To the southwest of this island you will find the sign for the fast travel of the old Watchtower. Climb to the top of the wall just above the tower entrance to reach the diagram.
Griffin school equipment
Griffin armor is a medium piece of equipment that maximizes the intensity of the signs along with the protection of such armor. It is therefore recommended for those who sign the secret of victory in combat.
Where to buy maps
You can purchase maps to find Gryphon school diagrams at the Midcopse Gunsmith, Hierarch Square in Novigrad, and from Hattori once his mission is complete.
Steel sword of the Griffin
Reach the Hindhold fast travel sign. You will find the nest of some level 7 harpies. Right near their nest on the first floor, you will find a small room with a corpse and a chest, look for the objects to find the book which will give you the diagram and the location of the next five.
Silver sword of the Griffin
This diagram can be found in the west of Velen at the small castle called Lornruk. To enter the castle you will need to look for an underwater cave near the Seat of Power on the right. Once inside the structure, climb the wooden ladders to reach the top of the tower and find the relevant chest.
Perfect Griffin bodice, pants, boots and gloves
The last four diagrams can be found in the Dragon Slayer Cave west of the Reardon Mansion. The area is controlled by some level 7 ghosts and the chest by a level 11 vampire.
Superior Griffin silver sword
Reach the sign for the fast travel of the crossroads south-east of Velen. From where you are, head east to find the entrance to a cave, at the end of this you will find the chest containing the diagram.
Superior Griffin steel sword
Look for the bandit camp located southwest of the refugee camp fast travel sign. Once there, search for the ruined stone tower to climb the stone stairs and find the chest.
Superior Griffin Boots
Go to the island southwest of Novigrad. In the northern part you will find an area manned by a Forked Tail that is flying exactly over the chest with the diagram inside.
Enhanced Griffin Pants
Reach the sign for the Burnt Ruins fast travel east of Crow's Nest. The chest with the diagram is located under the burnt wooden beams.
Enhanced Griffin Gloves
South of Velen and near the Frischlow fast travel sign, you will find a small entrance to a locked cave, use the Aard sign to destroy the blocking stones and enter to claim the diagram inside a chest.
Improved Griffin Vest
To the west of the second largest city, Oxenfurt and at the White Water fort (more than a fort it is a set of scaffolding) you will meet a curious and friendly Rock Troll (there is also a secondary mission inherent to this character). Next to him you will find the chest containing the diagram.
Superior Griffin silver sword
You will be able to find the plot inside a cave west of the Elverum lighthouse. Once inside the cave, continue to the left until you find two chests.
Superior Griffin steel sword
This diagram is located on An Skellig and northwest of Urialla port. Look for a ruined village and go north until you reach a shrine where you will face some level 24 bandits. Once you get rid of the enemies, search behind the shrine to find the chest.
Upper Griffin bodice, boots, gloves and pants
Make your way to the northeastern part of Ard Skellig. Look for the bandit camp at the Giant's Fingers in a ship wreck. Go under the stone arch and go left to find the chest.
Perfect Griffin silver sword
The first diagram of the last level of the Griffin set is found in Ard Skellig in the easternmost part of the Boxhol ruins.
Always go east and look left to find the chest in the middle of the rubble.
Perfect Griffin silver sword
Also in Ard Skeligge, you will find the diagram in a collapsed tower in the middle of the Fornhala lake. You will encounter a level 20 Cockatrice nearby, so be careful and be ready.
Perfect Griffin bodice, pants, gloves and boots
You will find the latest diagrams in the abandoned fort on the east coast of Ard Skeligge and northeast of Redgill. You will meet a level 30 Cyclops but you will not have to fight him, in fact you just need to enter the small door of the fort to prevent him from reaching you. Go left and up the stairs to the second floor, you will find the diagrams inside a chest.
Cat school equipment
The Cat school armor is the one that will provide you with the maximum power of the slashing of your swords and the best energy regeneration. It's light armor, so it suits players who make quick dodges their strong point.
Where to buy maps
You can buy diagram maps from the Backbough Merchant, the Crow's Nest Merchant, and Lindenvale.
Silver sword of the Cat
You will find this plot in the ruins of east Tayiar in the easternmost region of Novigrad and northeast of Oxenfurt. You will find a hole in the ground that you can jump into. Use the Aard sign on the wall to reveal a hidden room. Collect the items on the corpse and read Sigismund Sloger's notes to find out the location of the next diagram.
Cat's steel sword
Head south from Novigrad to the Drahim Castle fast travel sign. Enter the stone tower and go to the basement, the diagram and a new clue are right downstairs.
Crossbow of the Cat
Reach the lonely island southwest of Novigrad. You will find a semi-sunken boat, go up to the deck and look for the chest near the wooden stairs.
Bodice, pants, boots and gloves of the Puss
To enter the cave in which to find the latest diagrams, you must first have completed the main mission "Wander in the Dark" at the end of which you will receive the object to unlock the entrance. The cave in question, is located in the northwestern part of Novigrad, there is a hidden path that you have to jump on and that leads to the entrance. Once inside, continue to the left. You will reach a room full of statues with levers on the side, use each of the levers to position the statues so that they are facing the center of the room. Once the passage is revealed, dive into the water to find a corpse above which to collect the laboratory key. Leave the room and keep to the left side to reach a door to use the key on. Kill the enemy called Crazy Kiyan and collect the diagrams from what's left of him.
Improved Cat's silver sword
You will find this diagram inside a house south of the Oxenfurt Gate in the city of Novigrad. Use the wooden ladders outside to enter the first floor where you will find the chest.
Improved Cat's silver sword
You will find this diagram inside the cave located between the Toderas fast travel sign and the Reardon Mansion. Keep left and before the stairs you will find the chest.
Improved Feline Boots
You will find another cave still east of Velen and close to the location of the previous diagram, just east of the Toderas fast travel sign. As soon as you enter the cave, look to the right to find the chest.
Improved Feline Gloves
Look for the small cave inside the Codger Quarry west of Oxenfurt.
Improved Cat Pants
Reach Oxenfurt and look for a large house in the southernmost part of the island that hosts the city. Once inside the house go to the basement and look for a small brick to push to reveal a secret passage behind which to find the diagram.
Improved Cat's Vest
Go east of Oxenfurt and look for the Aeramas Abandoned Mansion fast travel sign. Climb to the top of the brick house and look for the chest near the bookcase.
Superior Feline steel sword
To the north-east of Novigrad inside a small cave near the sign for the fast travel which is called "Cavern".
You will have to clash with a level 19 golem, once you have defeated the monster you will find, among other things, the chest with the diagram inside.
Superior Feline silver sword
Another diagram, another cave. This is located south of Novigrad and east of the Ursten fast travel sign. You will have to face level 18 Nekkers outside. Once inside take out the Troll and go up the platform to the right to destroy the stones using the Aard sign and find the chest behind them.
Upper Puss corsage, pants, gloves and boots
Reach the sign for the fast travel of the Orphans of the swamp of the Hunchback, go west and reach the lake with some stone walls. You will have to deal with a powerful level 27 elemental who has been placed to guard the chest. It is possible to recover the diagram even without a fight, but you will have to move away and approach it in a painstaking way and calculating the times perfectly.
Perfect Feline steel sword
Meet Kaer Gelen in Ard Skellig. Once in front of the gate, go around the basket on the left. You will find a secondary entrance that you will have to go through. Welcoming you will be a pair of level 29 ghosts. Go down the stairs to find the chest in a small room on the side.
Perfect Cat's silver sword
The diagram in question is hidden in a cave east of Harviken on the Faroes. The entrance is easy to miss and is located high enough on the cliff. Follow the tunnel to the end to find the chest.
Perfect Puss corsage, pants, boots and gloves
There is a coastal cave in the gulf south of Trottheim on the Faroes. You will need to defeat some level 13 Sirens before you can access the cave. Inside, continue straight until you reach a crossroads, you will notice a column and the chest is behind it.
Equipment of the school of the Bear
The Bear School set is heavy equipment but very resistant, it is very suitable for those players who like to hit heavy blows without worrying too much about dodging and blows received. Being heavy, the regeneration of energy will be very slow, this factor will make the signs very slow to cast. To find the first diagrams of this set, you'll need to reach the Skelligge Islands first.
Where to buy maps
You can buy the maps to find the diagrams at the Oxenfurt gunsmith and the blacksmith near the Kaer Trolde bridge.
Important Note
To create the last two levels of the Bear set, you will need to have unlocked an Alchemy Recipe Vendor. To do this, you will have to reach the Herbal Druid Gremist near the sacred oak of Gedyneith, accept and complete his mission called "Specialization in advanced alchemy", then buy from him the formulas to create the Rebis, Vitriol and Albedo.
Bodice, pants, boots and gloves of the Bear
Make your way to An Skellig, the northernmost island. Look for the fortress north of the Urialla harbor. The road to the fort will have collapsed, so you'll have to juggle climbing and small jumps. Once inside the fort, go left and go down the stairs, take out the enemies and go to the opposite side of the room to pull a lever on the right. Jump into the hole and turn right at the fork, ignore the enemies and go up the stairs to get past the rocks. You will find yourself in the throne room, the diagrams are inside a chest right next to it.
Crossbow of the Bear
Travel to Spikeroog, the northwesternmost island of the Skellige. There will be a road on the south side of the island that meets the coast just south of the Old Watchtower marker. Look for the cave on the coast and go inside to defeat some level 15 Drowners.
At the first fork, go right and climb the rocks to cross the chasm and reach a platform with a skeleton on which to find the diagram.
Steel sword of the Bear
You will find the diagram in the southernmost area of Ard Skellig. Reach the Ruined Tavern and enter it. Use the Aard Sign to break through the basement and find the chest once the two ghosts are killed.
Silver Sword of the Bear
Reach Fort Etnir north of Rogne, eliminate the two Gargoyles and the powerful Ice Elemental to access the chest with the digraph inside.
Enhanced Bear Bodice
Look for a Smuggler's Cave in the southeast part of Ard Skeligge and above sea level. Once inside you will be attacked by the Grossbart brothers, once you have eliminated the enemies reach the left corner of the room to find the chest.
Enhanced Bear Boots
Head to the Wild Beach marker, go southeast to find an unmarked cave at the foot of the mountain with three level 16 Trolls inside. Defeat the enemies and look for the diagram inside one of the chests near the bonfire.
Improved Bear Pants
Make your way to Undvik Island and take yourself to a small island north-east of the Marlin Coast. You will find the entrance to an ice blocked cave, use the Aard sign and enter to find the chest.
Improved Bear Gloves
You will find the diagram inside a ruined tower northeast of Rogne. There will be a ghost controlling the area during the night, but not during the day. Go up the stairs to find the chest.
Bear steel sword improved
Go to the prison island in Kear Almhult. You will have to deal with some level 12 and 14 pirates. You will not be able to meditate on the island, as the enemies will reappear soon after. Follow the road from the marker to the fort. Once you go through the gate, go up the stairs to your right and in the collapsed corridor, the chest will be next to some rubble.
Improved Silver Bear Sword
Reach the castle northeast of Kaer Gelen, enter and go to the basement. You will have to face some level 21 Alghouls. Once you defeat the enemies, enter the lair and follow the tunnel until you find the chest.
Silver sword of the Superior Bear
Go to the cave southwest of the orphanage at the Hunchback Swamp in Velen. The entrance will be hidden by an illusion and you must have Nehaleni's eye with you. Once inside, go right to find the chest.
Steel sword of the Superior Bear
Reach the ruined tower northeast of the Hunchback Swamp, you'll have to deal with a level 25 earth elemental guarding the chest in a corner of the ruin.
Top bear bodice, pants, gloves and boots
Go to the Hangman Tree and head northwest to find a cave. Once inside, look for the wooden scaffolding on the left of the entrance, continue to the left until you come across some chests inside one of which to collect the diagrams.
Perfect Bear Steel Sword
Go to an unmarked cave northwest of Blackbough. The entrance is on the side of a cliff. Once inside, keep right and reach the end of the tunnel to find the chest behind a stone pillar.
Perfect Bear Silver Sword
You will find this diagram on a small island northwest of the road to Monte Calvo. Reach the peninsula between Bald Mountain and Olena's Grove, head north and defeat the small group of low-level Drowners. You will find the chest behind a large rock.
Perfect bear bodice, pants, gloves and boots
Go to the Shattered Bastion sign and look for the ruined tower with the level 19 Cyclops guarding it. Eliminate the enemy and enter the tower to find several chests and inside one of them all the missing diagrams.
THE VIDEO OF THE GUIDE - PART ONE
THE VIDEO OF THE GUIDE - SECOND PART
THE VIDEO OF THE GUIDE - THIRD PART


