


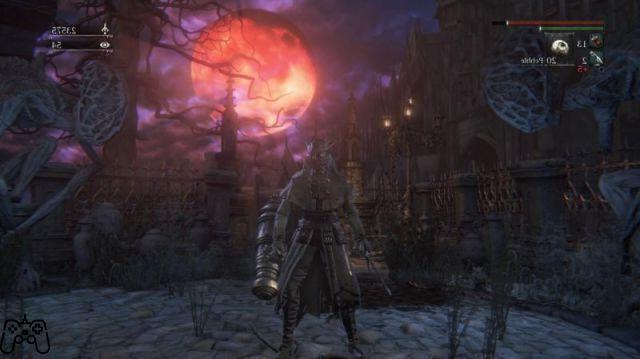
The right character at the right time
This introductory part of our super installment guide examines a very versatile type of character with which facing the game could prove considerably easier. Once you reach the target level cap, you will find that this character is also very powerful against other players.
The aim is to reach a good amount of damage in a fairly short time and to obtain the Sacred Blade of Ludwig the moment it becomes available. It is important to know that there are no better types of characters than others and the one proposed in this section of the guide, in my opinion, is the one with the simplest learning growth and which allows you to obtain maximum results.
Growth
Since our aim is to achieve good damage as soon as possible, we're going to choose Veteran Military as our starting class. This is the only character who will start with high values in both strength and skill. The Hunter's Ax is highly recommended as a starter weapon, due to the skill bonuses and great range it possesses in two-handed mode. Once we have unlocked the Automa in the Hunter's Dream, we will go to spend our blood echo points, each time raising strength and skill up to bring both to 25, in this way we have just reached the "soft cap" (after this value the advantage of the points spent will still be good, but not as noticeable as before) of the two skills in question and for quite some time we should no longer worry about the damage we cause. At this point it will be necessary to start working on our vitality, bring it to 20 and raise the resistance to 15. At this point you may feel the need to further increase your damage, add another 5 points to strength and skills, then bring vitality to 25 and resistance to 20 (from now on these attributes will not be raised anymore). You can now concentrate only on strength and ability bringing them both to 40 points, finally add another 5 points to vitality, bringing it to 30 and 2 points to the color of blood reaching the value of 10. At this point your character will be complete and how you will be be aware, following this process the game turned out to be just a little easier; immediately learn to master the Ax of the Hunter at the beginning and the Sacred Blade of Ludwig then.
The build
As build we mean exactly the methodology with which we decided to distribute our attribute points, clearly some weapons and all the spells will be precluded, but you will not miss them absolutely. Ludwig quality build:
Vitality: 30
Resistance: 20
Strength: 40
Skills: 40
Tint of Blood: 10
Arcane: 6
Level: 96
You will notice that the choice to assign 40 points to both strength and skill is dictated by the fact that the Sacred Blade of Ludwig has a skill bonus of "B" value in both of these attributes, by doing so you will have obtained the maximum result in terms of damage and your defense will be remarkably high.
From this moment on, the choice is yours, you can decide to bring strength and ability to the value of 50 and, in this way, reach the hard cap by further maximizing the damage, or bring the vitality to 50 to become living walls. Once the hard cap is reached in an attribute, it will be useless to spend other points on it, since the advantage received will be very minimal and negligible. However, nothing will stop you from reaching very high peaks and bringing each attribute to 99, it will take time, but satisfaction will certainly be guaranteed. Good luck!
The weapon of my Hunter dreams
As written above, it is in our interest to try to obtain Ludwig's Sacred Blade as soon as possible. Once you have killed the Bloodthirsty Beast, you will unlock the door on the right in Cathedral Ward that leads to the Church of Cure Workshop. Reach the top level of the tower by defeating all the enemies, until you find the Radiant Sword emblem. Now go down to the first floor and exit on the bridge that will take you back to Cathedral Ward, do not go along it, but turn to the right side of the tower itself until you reach a crack in the balcony. Go downstairs and advance until you find an opening on the left. Once on the first wooden walkway, look down to the left to notice a platform with a door and a smaller one just above it, try to drop very carefully onto the smaller platform (it is likely that it will take some tests before to be successful), then drop down to the door to go through to reach the Abandoned Workshop.
In this area you will find the Automa armor set, a relatively useless and funny set, but very profitable when sold to the messengers. Return to the Hunter's Dream and sell the Automaton set to get the echoes needed to buy Ludwig's Sacred Blade, then upgrade it immediately (you should have the necessary materials to take it to at least the third level) and look for some previously visited area to get started. to master the available moves, once this is done, you will find that no enemy will be really too difficult. Needless to say, once you have found the Blood Rock, you must absolutely use it to bring your beloved Ludwig's Sacred Blade to level 10.
As far as firearms are concerned, the best solution is the Hunter's Pistol, fast and suitable for any situation; unfortunately the low value in Tinta del Sangue will not allow you to use weapons capable of inflicting greater damage, but, thanks to your 40 points in strength, you can use the Cannon, a real portent in the situation of numerous or too big enemies and above all against other players, who if caught off guard could be killed in an instant. Also in the case of the Cannon it is useful to train a little, in PvP situations (player against player) the combo of the "R1", "R1", "L1" and "L2" keys is really comfortable, in fact you will perform three slashes during the last of which you will change the setting of your weapon and extract the cannon, the vast majority of the times your opponent will have discarded backwards and you just need to press the last button of the combo ("L2" in fact) to place a nice one bomb straight between the eyes. It is advisable, if you decide to tackle the New Game +, to spend the second Blood Rock to bring the Cannon to level 10.
Play online
As with all the games of the "Souls" genre, even Bloodborne has a fairly cryptic online system that must be understood perfectly to be exploited to the fullest. There are several bells that allow you to have interactions with other players and none of these will be available in the immediate start of the game. In addition, a password system has been added that allows (netcode permitting) to play with a desired player, just need to set the same password in the game's network menu.
Bell of the Call
This bell allows us to summon players in our game so that they help us to face the level in which we are. Using this bell consumes Intuition points (obtained by defeating bosses, other players, or using the Knowledge of the Insane and Wisdom of the Great Being items). Unfortunately, the point will be spent regardless of whether the evocation is successful. In order for the summoning to take place, the guest player must ring the Small Echoing Bell in his game world. The Bell of Call can be obtained in the Hunter's Dream once the clash with the Cleric Beast has begun, regardless of whether she is defeated or not (in fact it can be useful to enter the clash area and use a Mark of the Bold Hunter).
Small echoing bell
Thanks to this bell, we can run to the aid of players in need and who have used the Calling Bell. Very useful for dealing with bosses not yet met without the risk of losing all our echoes. If the area boss is defeated, you will return to your world with all the echoes you have earned. Obtained from the Messengers in the upper tank inside the Hunter's Dream, to activate these merchants you must have at least 10 intuition points.
Left echoing bell
Thanks to this splendid sonic gem, you will be able to invade another player to try to get his skin. The enemies will not attack you and you can use this factor to your advantage. Also, if another player has rung this same bell in the same area where you rung it, it could be summoned into your world as an opponent. Unfortunately, invading is not as simple as it seems, in fact, it will only be possible if a special enemy in the form of a Woman has appeared in the area of an opposing player who rings a sinister bell. These women can appear if the player (and yourself in your world as well) have used any bell; to prevent the danger of invasion, these enemies must be hunted down and killed; Fortunately, an on-screen message will inform you of the appearance of these special enemies.
Hand-to-hand weapons
Claw of the Beast
A pair of gloves equipped with spikes, in one-handed mode we would have only the right, while in two-handed mode we would have both equipped. Obtained inside the labyrinth created using the Chalice of Loran.
Level 0: Damage 75 Bonuses: FO-D, AB-E, TINT- /, ARC-D
Level 1: Damage 82 Bonuses: FO-D, AB-E, TINT- /, ARC-D
Level 2: Damage 89 Bonuses: FO-D, AB-E, TINT- /, ARC-D
Level 3: Damage 96 Bonuses: FO-D, AB-E, TINT- /, ARC-D
Level 4: Damage 103 Bonuses: FO-D, AB-E, TINT- /, ARC-D
Level 5: Damage 110 Bonus: FO-D, AB-D, TINT- /, ARC-D
Level 6: Damage 117 Bonus: FO-D, AB-D, TINT- /, ARC-D
Level 7: Damage 124 Bonus: FO-D, AB-D, TINT- /, ARC-D
Level 8: Damage 131 Bonus: FO-C, AB-E, TINT- /, ARC-D
Level 9: Damage 138 Bonus: FO-C, AB-E, TINT- /, ARC-D
Level 10: Damage 150 Bonus: FO-C, AB-E, TINT- /, ARC-D
Gems: Radial, Triangular, Radial.
Requirements: Strength 14, Ability 12.
Blades of Mercy
A short and very fast blade, which splits into two blades once the setting is changed, very fast and great for characters who have spent multiple points on the skill attribute. Obtained by completing Eileen the Crow's side quest and purchasing it from the messengers, or by killing Eileen herself on first encounter.
Level 0: Damage 60 - ARC 30 Bonus: FO- /, AB-C, TINT- /, ARC-D
Level 1: Damage 66 - ARC 33 Bonus: FO- /, AB-B, TINT- /, ARC-D
Level 2: Damage 72 - ARC 36 Bonus: FO- /, AB-B, TINT- /, ARC-D
Level 3: Damage 78 - ARC 39 Bonus: FO- /, AB-B, TINT- /, ARC-D
Level 4: Damage 84 - ARC 42 Bonus: FO- /, AB-B, TINT- /, ARC-D
Level 5: Damage 90 - ARC 45 Bonus: FO- /, AB-A, TINT- /, ARC-C
Level 6: Damage 96 - ARC 48 Bonus: FO- /, AB-A, TINT- /, ARC-C
Level 7: Damage 102 - ARC 51 Bonus: FO- /, AB-A, TINT- /, ARC-C
Level 8: Damage 108 - ARC 54 Bonus: FO- /, AB-A, TINT- /, ARC-C
Level 9: Damage 114 - ARC 57 Bonus: FO- /, AB-A, TINT- /, ARC-B
Level 10: Damage 120 - ARC 60 Bonus: FO- /, AB-S, TINT- /, ARC-B
Gems: Radial, Triangular, Radial.
Requirements: Strength 7, Ability 11.
Burial Blade
A sword of medium length and fast enough in one-handed mode, which turns into a huge scythe with excellent reach in two-handed mode. Purchase from the Messengers once Gherman the First Hunter is defeated.
Level 0: Damage 80 - ARC 30 Bonus: FO-E, AB-C, TINT- /, ARC-D
Level 1: Damage 88 - ARC 33 Bonus: FO-E, AB-C, TINT- /, ARC-D
Level 2: Damage 96 - ARC 36 Bonus: FO-E, AB-C, TINT- /, ARC-D
Level 3: Damage 104 - ARC 39 Bonus: FO-E, AB-C, TINT- /, ARC-D
Level 4: Damage 112 - ARC 42 Bonus: FO-E, AB-C, TINT- /, ARC-D
Level 5: Damage 120 - ARC 45 Bonus: FO-E, AB-B, TINT- /, ARC-C
Level 6: Damage 128 - ARC 48 Bonus: FO-E, AB-B, TINT- /, ARC-C
Level 7: Damage 136 - ARC 51 Bonus: FO-E, AB-B, TINT- /, ARC-C
Level 8: Damage 144 - ARC 54 Bonus: FO-E, AB-B, TINT- /, ARC-C
Level 9: Damage 152 - ARC 57 Bonus: FO-E, AB-B, TINT- /, ARC-B
Level 10: Damage 160 - ARC 60 Bonus: FO-D, AB-B, TINT- /, ARC-B
Gems: Radial, Waning, Radial.
Requirements: Strength 10, Ability 12.
Chikage
A very fast katana held in one hand that stretches in two hands, gaining range and damage, in this second mode consumes the life of the bearer and the charged shot will consume a large portion of it.

The best weapon for those who want to use a character with a high value in Tint of Blood since in two-handed mode all physical damage will be transformed into blood damage. Purchasable from the Messengers once the Felsblood pact is accepted.
Level 0: Damage 92 Bonus: FO-E, AB-C, TINT-C, ARC-D
Level 1: Damage 101 Bonuses: FO-E, AB-D, TINT-B, ARC-D
Level 2: Damage 110 Bonuses: FO-E, AB-D, TINT-B, ARC-D
Level 3: Damage 119 Bonuses: FO-E, AB-D, TINT-A, ARC-D
Level 4: Damage 128 Bonus: FO-E, AB-C, TINT-A, ARC-D
Level 5: Damage 137 Bonus: FO-E, AB-C, TINT-A, ARC-D
Level 6: Damage 146 Bonus: FO-E, AB-C, TINT-A, ARC-D
Level 7: Damage 155 Bonus: FO-E, AB-C, TINT-A, ARC-D
Level 8: Damage 164 Bonus: FO-E, AB-C, TINT-A, ARC-D
Level 9: Damage 173 Bonus: FO-E, AB-C, TINT-A, ARC-D
Level 10: Damage 184 Bonus: FO-E, AB-B, TINT-S, ARC-D
Gems: Radial, Radial, Triangular.
Requirements: Strength 10, Skill 14, Tint of Blood 12.
Hunter's Ax
A short ax in one-handed mode, gains considerable reach in two-handed mode. The charged shot makes a rotation capable of hitting enemies multiple times. Obtained as the first weapon in the Hunter's Dream
Level 0: Damage 98 Bonuses: FO-D, AB-E, TINT- /, ARC-D
Level 1: Damage 107 Bonuses: FO-D, AB-E, TINT- /, ARC-D
Level 2: Damage 116 Bonuses: FO-D, AB-E, TINT- /, ARC-D
Level 3: Damage 125 Bonuses: FO-D, AB-E, TINT- /, ARC-D
Level 4: Damage 134 Bonuses: FO-D, AB-E, TINT- /, ARC-D
Level 5: Damage 143 Bonus: FO-C, AB-E, TINT- /, ARC-D
Level 6: Damage 152 Bonus: FO-C, AB-E, TINT- /, ARC-D
Level 7: Damage 161 Bonus: FO-C, AB-E, TINT- /, ARC-D
Level 8: Damage 170 Bonus: FO-C, AB-D, TINT- /, ARC-D
Level 9: Damage 179 Bonus: FO-C, AB-D, TINT- /, ARC-D
Level 10: Damage 196 Bonus: FO-B, AB-D, TINT- /, ARC-C
Gems: Radial, Radial, Triangular.
Requirements: Strength 9, Ability 8.
Kirkhammer
A sword with decent range and fast enough in one-handed mode, capable of transforming into a slow but decidedly heavy hammer capable of inflicting damage within the area surrounding the impact. Purchase from the Messengers once the Cleric Beast is defeated
Level 0: Damage 105 Bonus: FO-C, AB-E, TINT- /, ARC-D
Level 1: Damage 115 Bonus: FO-C, AB-E, TINT- /, ARC-D
Level 2: Damage 125 Bonus: FO-B, AB-E, TINT- /, ARC-D
Level 3: Damage 135 Bonus: FO-B, AB-E, TINT- /, ARC-D
Level 4: Damage 145 Bonus: FO-B, AB-E, TINT- /, ARC-D
Level 5: Damage 155 Bonus: FO-B, AB-E, TINT- /, ARC-C
Level 6: Damage 165 Bonus: FO-B, AB-E, TINT- /, ARC-C
Level 7: Damage 175 Bonus: FO-A, AB-E, TINT- /, ARC-B
Level 8: Damage 185 Bonus: FO-A, AB-E, TINT- /, ARC-B
Level 9: Damage 195 Bonus: FO-A, AB-E, TINT- /, ARC-B
Level 10: Damage 210 Bonus: FO-A, AB-E, TINT- /, ARC-B
Gems: Radial, Triangular, Radial.
Requirements: Strength 16, Ability 10.
Wheel of Logarius
A bizarre weapon (it is a wagon wheel), very difficult to master, but with superior power if you have a high strength value. In two-handed mode it consumes your life, pressing the "L2" key a second time, once you have consumed at least 30 life points, the next hit will cause considerably more damage. Purchase from the Messengers after completing Alfred's side mission or killing him during your second encounter.
Level 0: Damage 100 - ARC 25 Bonus: FO-C, AB- /, TINT- /, ARC-D
Level 1: Damage 110 - ARC 27 Bonus: FO-B, AB- /, TINT- /, ARC-D
Level 2: Damage 120 - ARC 29 Bonus: FO-B, AB- / TINT- /, ARC-D
Level 3: Damage 130 - ARC 31 Bonus: FO-B, AB- /, TINT- /, ARC-D
Level 4: Damage 140 - ARC 33 Bonus: FO-B, AB- /, TINT- /, ARC-D
Level 5: Damage 150 - ARC 35 Bonus: FO-A, AB- /, TINT- /, ARC-D
Level 6: Damage 160 - ARC 37 Bonus: FO-A, AB- /, TINT- /, ARC-D
Level 7: Damage 170 - ARC 39 Bonus: FO-A, AB- /, TINT- /, ARC-D
Level 8: Damage 180 - ARC 41 Bonus: FO-A, AB- /, TINT- /, ARC-C
Level 9: Damage 190 - ARC 43 Bonus: FO-A, AB- /, TINT- /, ARC-C
Level 10: Damage 200 - ARC 50 Bonus: FO-S, AB- /, TINT- /, ARC-C
Gems: Radial, Radial, Waning.
Requirements: Strength 20, Skill 12, Arcane 10.
Sacra Lama in Ludwig
A long and fast sword, in two-handed mode it becomes a broadsword with enormous range and capable of inflicting monstrous damage, not very fast. Purchase from the Messengers after finding The Radiant Sword emblem at the Church of Cure Workshop.
Level 0: Damage 100 Bonus: FO-D, AB-D, TINT- /, ARC-D
Level 1: Damage 110 Bonus: FO-D, AB-D, TINT- /, ARC-D
Level 2: Damage 120 Bonus: FO-C, AB-D, TINT- /, ARC-C
Level 3: Damage 130 Bonus: FO-C, AB-D, TINT- /, ARC-C
Level 4: Damage 140 Bonus: FO-C, AB-D, TINT- /, ARC-C
Level 5: Damage 150 Bonus: FO-B, AB-C, TINT- /, ARC-B
Level 6: Damage 160 Bonus: FO-B, AB-C, TINT- /, ARC-B
Level 7: Damage 170 Bonus: FO-B, AB-B, TINT- /, ARC-B
Level 8: Damage 180 Bonus: FO-B, AB-B, TINT- /, ARC-B
Level 9: Damage 190 Bonus: FO-B, AB-B, TINT- /, ARC-B
Level 10: Damage 200 Bonus: FO-B, AB-B, TINT- /, ARC-A
Gems: Radial, Radial, Waning.
Requirements: Strength 16, Ability 12.
horseman pallasch
A very fast stylet capable of performing fast and painful lunges, in two-handed mode it acts as a firearm carrying out the heavy attack, great for stuning opponents. Obtained inside a chest at Cainhurst Forgotten Castle.
Level 0: Damage 75 - SANG: 75 Bonus: FO-E, AB-C, TINT-E, ARC-D
Level 1: Damage 82 - SANG: 82 Bonus: FO-E, AB-C, TINT-E, ARC-D
Level 2: Damage 89 - SANG: 89 Bonus: FO-E, AB-B, TINT-E, ARC-D
Level 3: Damage 96 - SANG: 96 Bonus: FO-E, AB-B, TINT-E, ARC-D
Level 4: Damage 103 - SANG: 103 Bonus: FO-E, AB-B, TINT-E, ARC-D
Level 5: Damage 110 - SANG: 110 Bonus: FO-E, AB-B, TINT-D, ARC-C
Level 6: Damage 117 - SANG: 117 Bonus: FO-E, AB-B, TINT-D, ARC-C
Level 7: Damage 124 - SANG: 124 Bonus: FO-E, AB-A, TINT-D, ARC-C
Level 8: Damage 131 - SANG: 131 Bonus: FO-E, AB-A, TINT-D, ARC-C
Level 9: Damage 138 - SANG: 138 Bonus: FO-E, AB-A, TINT-D, ARC-C
Level 10: Damage 150 - SANG: 150 Bonus: FO-E, AB-A, TINT-D, ARC-B
Gems: Radial, Triangular, Radial.
Requirements: Strength 8, Skill 12, Tint of Blood 10.
Launch Rifle
A short spear capable of carrying numerous and fast lunges, in two-handed mode it performs side swings and a very long lunge with the powerful blow (the one with the most range within the game) and will be able to shoot. Purchase from the Messengers after defeating Djura or talking to him by entering Old Yharnam via the prisons. It is found inside a chest in Old Yharnam
Level 0: Damage 85 - SANG: 85 Bonus: FO-E, AB-D, TINT-E, ARC-D
Level 1: Damage 93 - SANG: 93 Bonus: FO-E, AB-D, TINT-E, ARC-D
Level 2: Damage 101 - SANG: 101 Bonus: FO-E, AB-D, TINT-E, ARC-D
Level 3: Damage 109 - SANG: 109 Bonus: FO-E, AB-D, TINT-E, ARC-D
Level 4: Damage 117 - SANG: 117 Bonus: FO-E, AB-D, TINT-E, ARC-D
Level 5: Damage 125 - SANG: 125 Bonus: FO-E, AB-C, TINT-D, ARC-D
Level 6: Damage 133 - SANG: 133 Bonus: FO-E, AB-C, TINT-D, ARC-D
Level 7: Damage 141 - SANG: 141 Bonus: FO-E, AB-C, TINT-C ARC-D
Level 8: Damage 149 - SANG: 149 Bonus: FO-E, AB-B, TINT-C, ARC-D
Level 9: Damage 157 - SANG: 157 Bonus: FO-E, AB-B, TINT-C, ARC-D
Level 10: Damage 170 - SANG: 170 Bonus: FO-D AB-B, TINT-B, ARC-C
Gems: Radial, Triangular, Radial.
Requirements: Strength 10, Skill 11, Tint of Blood 9.
Sega cleaver
A decidedly fast cleaver that gains reach and damage when held with two hands. Obtained as a starter weapon in the Hunter's Dream.
If you are wondering what weapon the hunter protagonist of the game cover is holding, this is it!
Level 0: Damage 90 Bonuses: FO-D, AB-E, TINT- /, ARC-D
Level 1: Damage 99 Bonuses: FO-D, AB-E, TINT- /, ARC-D
Level 2: Damage 108 Bonuses: FO-D, AB-E, TINT- /, ARC-D
Level 3: Damage 117 Bonuses: FO-D, AB-E, TINT- /, ARC-D
Level 4: Damage 126 Bonuses: FO-D, AB-E, TINT- /, ARC-D
Level 5: Damage 135 Bonus: FO-D, AB-D, TINT- /, ARC-D
Level 6: Damage 144 Bonus: FO-D, AB-D, TINT- /, ARC-D
Level 7: Damage 153 Bonus: FO-D, AB-D, TINT- /, ARC-D
Level 8: Damage 162 Bonus: FO-C, AB-D, TINT- /, ARC-C
Level 9: Damage 171 Bonus: FO-C, AB-D, TINT- /, ARC-C
Level 10: Damage 180 Bonus: FO-C, AB-D, TINT- /, ARC-C
Gems: Radial, Radial, Waning.
Requirements: Strength 8, Ability 7.
Spear saw
Completely similar to the Sega Cleaver if held in one hand, it becomes a real spear capable of carrying out lethal and long thrusts if held in two hands. Purchasable from the Messengers once Father Gascoigne is defeated.
Level 0: Damage 85 Bonus: FO-D, AB-D, TINT- /, ARC-D
Level 1: Damage 93 Bonus: FO-D, AB-D, TINT- /, ARC-D
Level 2: Damage 101 Bonus: FO-D, AB-D, TINT- /, ARC-D
Level 3: Damage 109 Bonus: FO-D, AB-D, TINT- /, ARC-D
Level 4: Damage 117 Bonus: FO-D, AB-D, TINT- /, ARC-D
Level 5: Damage 126 Bonus: FO-D, AB-D, TINT- /, ARC-D
Level 6: Damage 133 Bonus: FO-D, AB-C, TINT- /, ARC-D
Level 7: Damage 141 Bonus: FO-D, AB-C, TINT- /, ARC-C
Level 8: Damage 149 Bonus: FO-D, AB-C, TINT- /, ARC-C
Level 9: Damage 157 Bonus: FO-D, AB-C, TINT- /, ARC-C
Level 10: Damage 170 Bonus: FO-D, AB-C, TINT- /, ARC-C
Gems: Radial, Radial, Waning.
Requirements: Strength 7, Ability 8.
Perforatore
This sort of short spear attached to a mechanism that wraps around your hand, is able to hit quickly but at a very short distance, with the transformation you will extract the blade gaining some range and causing a short range explosion with the attack. powerful. Purchase from the Messengers after defeating Djura or talking to him by entering Old Yharnam via the prisons.
Level 0: Damage 85 Bonus: FO-D, AB-D, TINT- /, ARC-D
Level 1: Damage 93 Bonus: FO-D, AB-D, TINT- /, ARC-D
Level 2: Damage 101 Bonus: FO-D, AB-D, TINT- /, ARC-D
Level 3: Damage 109 Bonus: FO-D, AB-D, TINT- /, ARC-D
Level 4: Damage 117 Bonus: FO-D, AB-D, TINT- /, ARC-D
Level 5: Damage 126 Bonus: FO-D, AB-D, TINT- /, ARC-D
Level 6: Damage 133 Bonus: FO-D, AB-D, TINT- /, ARC-D
Level 7: Damage 141 Bonus: FO-D, AB-D, TINT- /, ARC-C
Level 8: Damage 149 Bonus: FO-C, AB-D, TINT- /, ARC-C
Level 9: Damage 157 Bonus: FO-C, AB-C, TINT- /, ARC-C
Level 10: Damage 170 Bonus: FO-C, AB-C, TINT- /, ARC-C
Gems: Radial, Triangular, Radial.
Requirements: Strength 18, Ability 9.
Threaded stick
This very fast blade is able to transform into a metal whip, capable of striking in a very large area and quite quickly. Obtainable as a starting weapon in the Hunter's Dream, ideal for those who want to grow a character whose skill attribute will be remarkably high.
Level 0: Damage 78 Bonus: FO-E, AB-C, TINT- /, ARC-D
Level 1: Damage 85 Bonus: FO-E, AB-C, TINT- /, ARC-D
Level 2: Damage 92 Bonus: FO-E, AB-B, TINT- /, ARC-D
Level 3: Damage 99 Bonus: FO-E, AB-B, TINT- /, ARC-D
Level 4: Damage 106 Bonus: FO-E, AB-B, TINT- /, ARC-D
Level 5: Damage 113 Bonus: FO-E, AB-B, TINT- /, ARC-D
Level 6: Damage 120 Bonus: FO-E, AB-B, TINT- /, ARC-C
Level 7: Damage 127 Bonus: FO-E, AB-B, TINT- /, ARC-C
Level 8: Damage 134 Bonus: FO-E, AB-B, TINT- /, ARC-C
Level 9: Damage 141 Bonus: FO-E, AB-A, TINT- /, ARC-C
Level 10: Damage 156 Bonus: FO-E, AB-A, TINT- /, ARC-B
Gems: Radial, Radial, Triangular.
Requirements: Strength 7, Ability 9.
Thunder
This fast and powerful club will not physically transform, but pressing the Transform button will emit electric shocks for a short period of time adding this type of damage to your attacks. Found outside the Prison, available for purchase from the Messengers once the Beast Paarl is defeated.
Level 0: Damage 80 LIGHTNING 40 Bonus: FO-D, AB-E, TINT- /, ARC-D
Arm Level 1: Damage 88 LIGHTNING 44 Bonus: FO-D, AB-E, TINT- /, ARC-D
Level 2: Damage 96 LIGHTNING 48 Bonus: FO-D, AB-E, TINT- /, ARC-D
Level 3: Damage 104 LIGHTNING 52 Bonus: FO-D, AB-E, TINT- /, ARC-D
Level 4: Damage 112 LIGHTNING 56 Bonus: FO-D, AB-E, TINT- /, ARC-D
Level 5: Damage 120 LIGHTNING 60 Bonus: FO-D, AB-E, TINT- /, ARC-D
Level 6: Damage 128 LIGHTNING 64 Bonus: FO-C, AB-E, TINT- /, ARC-D
Level 7: Damage 136 LIGHTNING 68 Bonus: FO-C, AB-E, TINT- /, ARC-D
Level 8: Damage 144 LIGHTNING 72 Bonus: FO-C, AB-E, TINT- /, ARC-D
Level 9: Damage 152 LIGHTNING 76 Bonus: FO-C, AB-E, TINT- /, ARC-D
Level 10: Damage 160 LIGHTNING 80 Bonus: FO-B, AB-E, TINT- /, ARC-B
Gems: Radial, Radial, Waning.
Requirements: Strength 12, Ability 8.
Weapons
Cannon
This massive firearm is capable of eliminating many of the enemies with a single shot and causing a lot of area damage, thanks to the resulting explosion. All this firepower, however, has its cost, in fact each shot will consume 10 mercury bullets. Blood Gems cannot be inserted into this weapon. Obtained on the top floor of the windmill inside the Forbidden Woods.
Level 0: Damage 200 TINT-E Bonus
Level 1: Damage 240 TINT-E Bonus
Level 2: Damage 280 TINT-E Bonus
Level 3: Damage 320 TINT-E Bonus
Level 4: Damage 360 TINT-E Bonus
Level 5: Damage 400 TINT-E Bonus
Level 6: Damage 440 TINT-E Bonus
Level 7: Damage 480 TINT-E Bonus
Level 8: Damage 520 TINT-E Bonus
Level 9: Damage 560 TINT-E Bonus
Level 10: Damage 600 TINT-E Bonus
Requirements: Strength 30, Ability 12.
Evelyn
The Evelyn represents the most powerful gun in the entire game, however it is only for characters who intend to spend most of their Blood Echoes on the Blood Tint attribute. As fast as the Hunter's Pistol, but with an infinitely higher bonus, but as noted above, if you're not going to get the Tint of Blood attribute to at least 40, the regular pistol is more than enough. Obtained inside a chest in Cainhurst's Forgotten Castle, available for purchase from the Messengers after accepting the Covenant of the Felbloods.
Level 0: Damage 60 TINT-B Bonus
Level 1: Damage 68 TINT-B Bonus
Level 2: Damage 76 TINT-B Bonus
Level 3: Damage 84 TINT-A Bonus
Level 4: Damage 92 TINT-A Bonus
Level 5: Damage 100 TINT-A Bonus
Level 6: Damage 108 TINT-A Bonus
Level 7: Damage 116 Bonus TINT-S
Level 8: Damage 124 Bonus TINT-S
Level 9: Damage 132 Bonus TINT-S
Level 10: Damage 140 Bonus TINT-S
Requirements: Strength 9, Skill 11, Tint of Blood 18.
Flamethrower
This very special firearm is able to expel a huge jet of flames at medium range capable of burning a large area, very useful when you are in front of many enemies or when the boss on duty is weak to fire. It consumes one bullet per second when used and the jet is continuous as long as the button is held down.
Blood Gems cannot be inserted into this weapon. Obtained by speaking to Gilbert at the window in front of the very first lantern in the game after defeating Father Gascoigne. Purchase from the Messengers after defeating Vicar Amelia. It will be possible to move while using this weapon.
Level 0: FIRE Damage 45 ARC-D Bonus
Level 1: FIRE Damage 50 ARC-D Bonus
Level 2: FIRE Damage 55 ARC-D Bonus
Level 3: FIRE Damage 60 ARC-D Bonus
Level 4: FIRE Damage 65 ARC-D Bonus
Level 5: FIRE Damage 70 ARC-D Bonus
Level 6: FIRE Damage 75 ARC-D Bonus
Level 7: FIRE damage 80 ARC-C Bonus
Level 8: FIRE damage 85 ARC-C Bonus
Level 9: FIRE damage 90 ARC-B Bonus
Level 10: FIRE damage 95 ARC-B Bonus
Requirements: Strength 9, Skill 11, Tint of Blood 18.
Hunter's Arquebus
The bullets fired by this weapon will split into a fairly wide range of shots, capable of hitting a larger area and therefore more difficult for enemies to dodge. It has the same rate of fire as the regular pistol, but the reload time is slightly longer. Selectable as a starting weapon in the Hunter's Dream.
Level 0: Damage 20 Bonus TINT-D
Level 1: Damage 22 TINT-C Bonus
Level 2: Damage 25 TINT-C Bonus
Level 3: Damage 27 TINT-B Bonus
Level 4: Damage 30 TINT-B Bonus
Level 5: Damage 32 TINT-B Bonus
Level 6: Damage 35 TINT-B Bonus
Level 7: Damage 37 TINT-A Bonus
Level 8: Damage 40 TINT-A Bonus
Level 9: Damage 42 TINT-A Bonus
Level 10: Damage 45 TINT-A Bonus
Requirements: Strength 7, Skill 9, Tint of Blood 5.
Hunter's Pistol
The best firearm for anyone with no plans to raise the Blood Tint attribute beyond 20. Selectable as a starter weapon in Hunter's Dream.
Level 0: Damage 70 Bonus TINT-D
Level 1: Damage 79 Bonus TINT-D
Level 2: Damage 88 Bonus TINT-D
Level 3: Damage 97 TINT-C Bonus
Level 4: Damage 107 TINT-C Bonus
Level 5: Damage 115 TINT-B Bonus
Level 6: Damage 124 TINT-B Bonus
Level 7: Damage 133 TINT-B Bonus
Level 8: Damage 142 TINT-B Bonus
Level 9: Damage 151 TINT-B Bonus
Level 10: Damage 160 TINT-A Bonus
Requirements: Strength 7, Skill 9, Tint of Blood 5.
Ludwig's rifle
The bullets fired from this weapon will split into a very large squad capable of hitting numerous enemies at the same time, much like the hunter's harquebus, but at a longer range. Purchase from messengers after obtaining the Emblem of the Radiant Sword in Cathedral Ward.
Level 0: Damage 20 TINT-E Bonus
Level 1: Damage 23 TINT-E Bonus
Level 2: Damage 27 TINT-E Bonus
Level 3: Damage 30 TINT-E Bonus
Level 4: Damage 34 Bonus TINT-D
Level 5: Damage 37 Bonus TINT-D
Level 6: Damage 41 Bonus TINT-D
Level 7: Damage 44 Bonus TINT-D
Level 8: Damage 48 Bonus TINT-D
Level 9: Damage 51 Bonus TINT-D
Level 10: Damage 55 Bonus TINT-D
Requirements: Strength 9, Skill 10, Tint of Blood 9.
Repeater pistol
This gun is capable of firing two bullets simultaneously (not in succession), thus consuming two per use. Purchase from the Messengers after defeating the Cleric Beast.
Level 0: Damage 82 TINT-E Bonus
Level 1: Damage 112 TINT-E Bonus
Level 2: Damage 112 TINT-E Bonus
Level 3: Damage 123 TINT-E Bonus
Level 4: Damage 134 Bonus TINT-D
Level 5: Damage 134 Bonus TINT-D
Level 6: Damage 134 Bonus TINT-D
Level 7: Damage 134 Bonus TINT-D
Level 8: Damage 178 Bonus TINT-D
Level 9: Damage 178 Bonus TINT-D
Level 10: Damage 200 Bonus TINT-D
Requirements: Strength 10, Skill 11, Tint of Blood 8.
Rosmarinus
This weapon works exactly like the Flamethrower, but its jet will be a mist that deals arcane damage.

Purchase from Messengers after obtaining the Cosmic Eye Crest at Cathedral Ward Superior.
Level 0: ARC Damage 30 ARC-B Bonus
Level 1: ARC Damage 35 ARC-B Bonus
Level 2: ARC Damage 40 ARC-B Bonus
Level 3: ARC Damage 45 ARC-B Bonus
Level 4: ARC Damage 50 ARC-A Bonus
Level 5: ARC Damage 55 ARC-A Bonus
Level 6: ARC Damage 60 ARC-A Bonus
Level 7: ARC Damage 65 ARC-A Bonus
Level 8: ARC Damage 70 ARC-S Bonus
Level 9: ARC Damage 75 ARC-S Bonus
Level 10: ARC Damage 80 ARC-S Bonus
Requirements: Ability 8, Arcane 8.
Magic
The spells in Bloodborne work in a very different way from the other games in the "Souls" series, in fact they now function as normal objects and activated with the square button of the pad. The use of magic consumes a predetermined number of mercury projectiles and in order to be thrown they need a specific value in the arcane attribute.
A call to the afterlife
This spell will cause a small burst of stars that will chase surrounding enemies for massive damage. Obtained from a corpse hanging on the balcony before the fight with Ebrietas Daughter of the Cosmos.
Cost: 8 Arcane Required: 40 Arcane Bonus: S
Augure di Drunkenness
Thanks to this spell, some large tentacles will come out of your hand hitting enemies at medium range. Obtained inside a room in the Great Hall area.
Cost: 1 Arcane Required: 18 Arcane Bonus: S
Roar of the Beast
This spell will emit a powerful wave of energy from your body that can hurl your opponents away without harming them. Obtained in a structure inside the Forbidden Woods opposite the boss fight area
Cost: 2 Arcane Required: 15 Arcane Bonus: /
choir bell
Thanks to this very useful magic, you can heal yourself and the allies around you. Obtainable in Mensis' Nightmare inside a chest in the room below the lever that you will use to bring down the huge monster that causes madness.
Cost: 10 Arcane Required: 20 Arcane Bonus: S
Gift of the Messenger
With this little trinket, you will be able to transform yourself into a message from those lying around on the ground. This magic is very useful in case of invasion, in fact the camouflage is guaranteed. Once you use one of the attack buttons, you'll get back to your original shape. Obtainable in the Frontier of the Nightmare, drop from the first bridge in the passage with the poison at the bottom, advance until you find a small cave, eliminate the enemy and behind it you will find the magic.
Cost: 1 Arcane Required: 10 Arcane Bonus: /
Empty shell
This spell will add an arcane damage bonus to your weapon. Obtained inside a chest at Byrgenwerth.
Cost: 3 Arcane Required: 15 Arcane Bonus: /
Bone of the old hunter
Thanks to this object, instead of performing a classic rolling, you will become invisible; the effect will end at the end of the roll. Obtained inside the Old Abandoned Workshop.
Cost: 6 Arcane Required: 15 Arcane Bonus: /
Executioner's Gloves
With this spell you will summon some red skulls that will fly in a large area towards your target. Obtained inside Cainhurst's Forgotten Castle.
Cost: 3 Arcane Required: 20 Arcane Bonus S
Little Tonitrus
With this powerful trinket you will be able to hurl powerful bolts in the direction of your target. The energy will depart from you and go a long straight path hitting everything in its path. Obtained inside an enemy-controlled chest in Yahar'gul.
Cost: 6 Arcane Required: 25 Arcane Bonus S
Caryll runes
The Runes of Caryll are special objects, designed to enhance our character. To use them, you need the Rune Workshop Tool, which can be obtained once the Witches of Hemwick have been defeated. With the tool in our possession, we can go to the Altar of Memory in the Hunter's Dream and insert these runes in one of the four spaces available to us. The last of the four spaces is dedicated to the runes of the pacts. Each of these gives different bonuses and is present in the game in three power levels.
Counterclockwise Metamorphosis
Level 1: Increases Energy by 10% - Obtainable in the Forbidden Woods on a corpse near the area where the Moon Rider (enemies that look like blue aliens) are located.
Level 2: Increases Energy by 15% - Obtainable by talking to Patches the Spider inside the Aula Magna by going down the ladder on the second floor.
Level 3: Increase Energy by 20% - Randomly obtained within a Labyrinth of the Lower Chalice of Loran of Origins.
Arcane Lake
Level 1: Decreases arcane damage taken by 5% - Obtainable in Yahar'gul the invisible village, near a corpse in the area populated by enemies made up of gigantic human skeletons.
Level 2: Decreases arcane damage taken by 7% - Obtainable in Byrgenwerth, near a corpse to the left of the lamp.
Level 3: Decreases arcane damage taken by 10% - Randomly obtained within a Chalice of Isz Labyrinth of Origins.
Beast
Level 1: Increases the benefits of transforming into a beast by 20 points - Obtainable inside the Church of Healing Workshop, taking the secret passage to the right and jumping from platform to platform, thus defeating the beast at the bottom.
Level 2: Increases the benefits of transformation into a beast by 50 points - Obtained by defeating the cannibal who is on the roof of the windmill in the Forbidden Woods. You can attack the cannibal directly to deal with his bestial version, or send him to the Iosefka Clinic to find him transformed into a Giraluna inside.
Level 3: Increases the benefits of transformation into a beast by 100 points - Randomly obtained inside a Chalice Labyrinth.
Blood Charm
Level 1: Gore attacks return 200 HP - Obtained by defeating the Forbidden Woods boss, Shadow of Yharnam.
Level 2: Gore attacks return 250 HP - Obtainable randomly inside a Chalice Labyrinth.
Level 3: Gore attacks return 300 HP - Obtainable by defeating the Hunter at the end of Eileen's secondary mission.
Claw
Level 1: Increases the damage of gory attacks by 10% - Obtainable by defeating one of the three Hunters present in Yahar'gul invisible village.
Level 2: Increases the damage of gory attacks by 20% - Obtained by defeating the bestial version of Gilbert (the NPC who is behind the window in front of the first lamp of Yharnam Central), after defeating the boss Rom.
Level 3: Increases the damage of gory attacks by 30% - Randomly obtained inside the Labyrinth of the Lower Loran Chalice of Origins.
Deep clear sea
Level 1: Increases resistance to slow poison by 100 points - Obtainable in the Forbidden Woods at a large tombstone.
Level 2: Increases Slow Poison Resistance by 200 Points - Obtainable at Nightmare Frontier behind the enemy Rock Launcher at the top of the hill.
Level 3: Increases resistance to slow poison by 300 points - Randomly obtained inside the Labyrinth of the Lower Loran Chalice of Origins.
Hourly Metamorphosis
Level 1: Increases HP by 5% - Obtainable in the Forbidden Woods behind a closed gate by climbing the stairs from the boss area.
Level 2: Increases HP by 10% - Obtainable at Nightmare Frontier inside a cave beyond the stone bridge.
Level 3: Increases HP by 15% - Randomly obtained within a Chalice Labyrinth of Pthumeru Ihyll of Origins.
Communion
Level 1: Increase the number of transportable vials by 1 - Obtainable inside the first chest by taking the left elevator at Cathedral Ward, once the Bloodthirsty Beast is defeated.
Level 2: Increases the number of transportable vials by 2 - Obtainable inside the Great Hall.
Level 3: Increases the number of transportable vials by 3 - Obtainable inside the Iosefka Clinic.
Level 3: Increases the number of transportable vials by 4 - Obtained by defeating the Celestial Emissary boss.
Level 4: Increase the number of transportable vials by 5 - Randomly obtained inside the Chalice Labyrinth of Pthumeru Ihyll of Origins.
Corruption
Single Level: Allows for slow recovery of HP at the point of death. For every Hunter killed (both a player and a normal enemy), you will get the Blood Remnant stackable item, which you can give to the Queen of Cainhurst to climb the rank within the Fleshy Covenant.
Deep sea
Level 1: Increases Insanity Resistance by 100 Points - Obtainable inside the Chalice of the Catacombs Labyrinth.
Level 2: Increases resistance to madness by 200 points - Found in the Forbidden Woods behind two giant vipers.
Level 3: Increases the resistance to madness by 300 points - Randomly obtained inside the Labyrinth of the Chalice of Isz of Origins.
dissolving lake
Level 1: Decreases lightning damage taken by 5% - Obtainable in the Forbidden Woods under a huge root near a pig enemy.
Level 2: Decreases lightning damage taken by 10% - Randomly obtained inside the Isz Chalice Labyrinth of Origins.
Eye
Level 1: Increases the chance of getting an item from a killed enemy by 50 points - Obtainable inside the Mensis Nightmare on a corpse near the Mergo Attic lamp.
Level 2: Increases the chance of getting an item from a killed enemy by 70 points - Obtained by killing the NPC Master Willem before the Rom Spider encounter.
Level 3: Increases the chance of getting an item from a slain enemy by 100 points - Randomly obtained inside the Isz Chalice Labyrinth of Origins.
Evanescent Lake
Level 1: Decreases Fire damage taken by 5% - Obtainable in Nightmare Frontier.
Level 2: Decreases Fire damage taken by 10% - Obtainable inside the Lower Chalice of Loran Labyrinth of Origins.
Oedon Report
Level 1: Increases the number of transportable bullets by 3 - Obtainable by killing the inhabitant of the Oedon Chapel (the character who asks you to send him the survivors).
Level 2: Increases the number of transportable bullets by 4 - Obtainable in a secret area, reachable by taking the elevator that leads to the Church of Care Workshop and jumping over the opening in the middle of the ascent path.
Level 3: Increases the number of transportable projectiles by 5 - Randomly obtained inside the Chalice Labyrinth of Pthumeru Ihyll of Origins.
Great deep sea
Level 1: Increases all resistances by 100 points - Obtainable in the Frontier of the Nightmare, dive into the poisonous swamp and look for a narrow passage controlled by the enemies Brains.
Level 2: Increases all resistances by 150 points - Randomly obtained inside the Chalice of Isz Labyrinth of Origins.
Lago
Level 1: Decreases physical damage taken by 3% - Obtainable on a corpse in Hemwick Charnel Lane near a destroyed brick bridge.
Level 2: Decreases physical damage taken by 7% - Randomly obtained inside the Chalice Labyrinth of Pthumeru Ihlyy of Origins.
Heredity
Level 1: Increases Blood Echoes gained from Gore attacks by 20% - Obtainable by defeating the Hunter at the Tomb of Odeon during Eileen the Raven side quest.
Level 2: Increases Blood Echoes gained from gory attacks by 40% - Obtainable inside a room in Yahar'gul the invisible village.
Level 3: Increases Blood Echoes obtained from Gore attacks by 60% - Randomly acquired within the Pthumeru Ihyll Maze of Origins.
Cacciatore
Single Level: Increases Energy Regeneration - Obtained by completing Eileen the Raven side mission.
big lake
Level 1: Decreases all damage taken by 4% - Obtainable at Upper Cathedral Ward.
Level 2: Decreases all damage taken by 5% - Randomly obtained inside the Isz Labyrinth of Origins.
Luna
Level 1: Increase Blood Echoes received by 10% - Obtainable inside the Hypogeum Prison.
Level 2: Increase Blood Echoes received by 20% - Obtainable at the bottom of the spiral staircase during the fight with Micolash in Mensis' Nightmare.
Level 3: Increase Blood Echoes received by 30% - Obtainable by using the "Touch" gesture, in front of the Brain Mother in Mensis' Nightmare once the lever is pulled and dropped into the abyss.
Contortion of Oedon
Level 1: Gory attacks will make you recover a bullet - Obtainable by killing Adella the Nun at the Hypogeum Prison, or by sending her to the Iosefka Clinic and eliminating her when transformed into a Moon Girder.
Level 2: Gory attacks will make you recover two bullets - Obtained by killing Iosefka at her Clinic before taking out the Spider-Romans boss.
Level 3: Gory attacks will make you recover three bullets - Obtainable randomly inside the Chalice Labyrinth of Pthumeru Ihyll of Origins.
Radiance
Single level: Increases the HP recovered with each use of the vials - Obtained by completing the secondary mission of Alfred.
Stunning deep sea
Level 1: Increases resistance to quick poison by 200 points - Obtainable at Nightmare Frontier.
Level 2: Increases resistance to quick poison by 300 points - Randomly obtained inside the Chalice Labyrinth of Pthumeru Ihyll of Origins.
Armature
Bloodborne's armor is indicatively suitable for every situation, so look for the one that suits you best as an aesthetic and don't get too much trouble. Unlike the other chapters of the "Souls" series, in Bloodborne no piece of armor can be upgraded and the version you will find cannot be altered or modified in any way.
However, there are some pieces of armor that are highly recommended for certain situations, without which staying alive could prove impossible.
To resist the madness
To best resist the negative status of madness (it is really one of the worst status in the history of this game saga), especially while exploring the Mensis Nightmare, I recommend the boots, gloves and torso of the Ashen Hunter set , obtainable by defeating Djura the Hunter in Old Yharnam. As for the helmet, the piece with the highest value in resistance to madness is certainly the Mask of the Tomb Guardian, obtainable inside the Forbidden Woods, follow the path and stay to the left, until you find a point from which jump to reach a ledge on which you will find the entire Tomb Guardian set and a little further down the helmet you need.
To resist the arcane
Some bosses and enemies of the game, make the arcane their strong point, surprising you with attacks of this type in a fast and deadly way. Even a simple boss like Micolash can kill you instantly with the One Call from the Beyond spell. For these cases I recommend the entire Choir set, completely obtainable inside Cathedral Ward Superior.
To withstand any type of element
Several bosses make use of powerful elemental attacks based on fire and lightning, luckily there is a whole set with the highest resistances to both of these elements. The set in question is that of Bone Dust and can be purchased by the merchants of intuition points once the Keeper of the Old Lords, second boss of the Pthumermian Labyrinth, has been defeated.
To resist the poison
For the boss like the bloodthirsty Beast or to explore the marshy areas with poison, I highly recommend the Black Church set, obtainable in the area behind the unlockable gate with the Chief Hunter's Crest, pass the enemy with the Flamethrower and search the corpse nearby.
To resist bleeding
There is a specific fight in this game, during which resistance to bleeding is practically mandatory, I speak of the last fight of the secondary mission of Eileen the Crow. You can get the Cainhurst set (the best to resist bleeding) by accepting the deal with the Queen of Cainhurst and buying the set from the Merchants at the Hunter's Dream.
The Blood Gems
The Blood Gems are, in essence, the only object with a truly random finding in the game, not only in terms of their position (they are very often left by killed enemies), but also in terms of statistics. They are divided into levels from 1 to 20 which identify their power. They must be inserted in special slots inside the weapon, initially each weapon will unlock the first of these slots upon reaching the third level in the upgrade, up to three slots at the sixth. These Gems enhance the damage performance of our favorite weapons, the bonuses have many variables and can enhance the direct attack of a weapon or change the type of damage from physical to elemental, they can increase the bonuses inherent to the statistics, add negative statuses such as poisoning our attacks or making us consume less energy. There are five types: Circular (only for firearms), Radial, Waning, Triangular and Drop (can be inserted in any slot).
It is impossible to draw up a precise list of these Gems, as the statistics are generated randomly and it will be up to you to find the best one for your needs from time to time. Know that there are four types of gems and correspond to as many types of slots on the weapon. Each weapon exists in three versions, the normal one is found during the game, while the Mysterious and Lost type can only be obtained inside the Chalice Labyrinths and also in this case they are found randomly inside them and not in specific mazes. The only difference between the types of weapons is, in fact, in the presence of different gem slots, for example the Sacred Blade of Ludwig normally has two radial slots and one flat, the Mysterious version has two radial slots and one triangular, while the lost one one radial, one triangular and one flat. As mentioned above, it is not possible to draw up a list, but it is possible to search for them effectively, the only prerequisite is a huge amount of patience since we are talking about what in videogame jargon is called "farming".
Find the Gems in Drop
The first really powerful gems you will have a chance to search for can be obtained once you beat Mensis' nightmare boss, Micolash. Exit to the balcony and take the cage elevator with the broken door on the right. Halfway you will notice an open window on the wall of the building, take your time and jump inside.
You will find yourself on a stone bridge covered with gruesome rock shapes and populated by the Brain monsters. It is these enemies that can give you the best drop gems, however it is advisable to wear the pieces of armor with the best resistance to madness as only with the look these powerful enemies are able to inflict this negative status on you. Once you have eliminated the two monsters on the bridge, use a Mark of the Bold Hunter and repeat the procedure until you find all the gems that satisfy you.
Find the best gems in the game
The best Blood Gems in the game can only be found by facing the bosses of the Labyrinths of the Chalice of Origins, created using also all three available offerings. Inside the Isz Labyrinths you will find the triangular ones, inside the Great Pthumerian Ihyll you will find the radials, while the flat ones are found exclusively inside the Loran Labyrinths.
Once you have decided which type of gem you want, search the web for the glyph of one of the Labyrinths of the type you are interested in, in this way you can create it without spending a single material. Go down into the maze and face only the boss of the first level (so better if this is a boss of the simplest). Once this is done, exit using the lamp and return to the Hunter's Dream to close the Labyrinth and open a similar one. Kill the first boss again, then follow this process until you find all the gems you need. The Abyssal gems (the best in the game), can be obtained by defeating the final bosses of the Labyrinths, however it is not recommended to try to obtain them, since the costs in terms of time and effort are too high to justify the search, always taking into account that the statistics even these powerful gems are randomly generated.
The World Part One
For this tutorial section, I'm not going to be writing every step you have to take within all the levels, I find it a useless waste of time and, frankly, I don't imagine a Bloodborne player going through the game while checking out a line guide. per row. I will therefore limit myself to giving you a general overview of the area, describing the enemies present and warning you about the most dangerous situations, then I will provide you with an effective method to face the boss (if he is present).
The Iosefka Clinic
The Clinic is the first area you will face in the game. Like all games in the "Souls" series, the ultimate goal here is to die, but with a little luck and patience you can leave the palace on your own. After the introductory movie and created your character, go down the stairs to find yourself in front of a wounded werewolf and intent on devouring a corpse. Dying in this fight will transport you for the first time to the Hunter's Dream which will serve as the central hub for the entire duration of the game. To try to beat the werewolf, you will need to have enormous patience, start immediately with a loaded shot while he is distracted to tear the corpse, then get behind one of the numerous tables and face his moves while remaining not too attached to the chosen cabinet as defence. Study the enemy's moves and wait for him to take a heavy blow to move to his side and hit him a couple of times before retreating back behind one of the tables. Your attacks will inflict truly laughable damage. If you succeed in the titanic undertaking of defeating this first enemy, you will be rewarded with numerous Echoes of the Blood and you will be able to exit the Clinic until you reach the first lamp of Yharnam. You will enter the Hunter's Dream, where you can choose your first weapons by interacting with the Messengers placed on the ground. Have a chat with Gehrman inside the workshop and take the first tombstone to return to Central Yharnam.
Yharnam Central
You will arrive in Central Yharnam by exiting the Iosefka Clinic. Your main purpose will be to immediately reach the fight with the boss of the area to use the Mark of the daring hunter and return to the Hunter's Dream, in fact, in this way, the Automa will be activated and you can spend your earned Echoes of Blood and level up your character as you see fit. To get the first Marks of the daring hunter, go to the area with the caged dogs, then go straight up to the palace, enter and look for an opening on the right and hidden by some barrels. Drop onto the wooden walkway below, then locate another opening hidden by the barrels on the right, once you pass the passage talk to Eileen until she gives you three Marks of the daring hunter. You will notice that there are numerous lit lanterns, these indicate windows and doors that you can knock on to talk to the inhabitants inside the various buildings.
Enemies
Commoners: Commoners tend to attack in groups and even when you encounter an isolated one, rest assured that another one will soon emerge hidden behind some barrel or corner. The weapons they have are numerous and all vary in range and damage. Let's start with a normal ax, capable of inflicting numerous damage, but only at close range, a pitchfork with a decidedly large reach up to the rifle. Never throw your head down at them, you will soon be surrounded, try to attract one or at most two at a time and, if they are present, identify those with rifles and take out those first.
Crawling Crows: Crawling crows are always on the ground, they are unable to fly, but they can take long leaps towards you. Being practically always in groups of three or more, try to hit them with wide slashes as soon as possible.
Big men: The big men are huge slow peasants equipped with unconventional weapons of considerable size. Start the fight by keeping a safe distance and convince them to attack you to study their moves. Draw your gun and hit them while they are making an attack to bring them to their knees for a bloody attack.
Big man in armor: Fortunately, there is only one example of this enemy, and it is located near the first shortcut to the lamp. Always keep your distance as his ax has an enormous range, try to dodge his blows and get on your side to inflict two swings before retreating to a safe distance. The best way to deal with the first of these enemies, however, is to use Molotov cocktails.
Werewolves
You'll find two werewolves on the bridge leading to the area boss fight. Get their attention and immediately backtrack inside the house you just exited from. The two enemies will get stuck in the middle of the door, giving you the opportunity to land your best attacks without getting hit.
Boss: Cleric Beast
If you haven't already, once you enter the battle area and see the boss for the first time, immediately use the Mark of the Bold Hunter and return to the Hunter's Dream to spend your precious Blood Echoes .
Initially target its head and wait for it to start an attack to fire one of your bullets and bring the enemy to their knees to deliver a gory attack. As you will notice, the boss's arms are noticeably different in size and obviously the bigger arm should be avoided at all costs, so try to always stay on the right side, avoid his attacks and try to hit while he is recovering, on certain occasions. you will also be able to inflict a charged attack.
Should you get hit by one of his attacks, immediately roll back and heal yourself with a vial or two. The best system is to try, as far as possible, to remain attached to the enemy and inflict blows at every useful opportunity.
Yharnam Aqueduct
From the area where you just defeated the Cleric Beast, pass the two werewolves that control the bridge and drop to the left breaking the coffins and crates to slide on a destroyed staircase, continue and go down the ladder to find yourself in the aqueduct. Continuing in the lower part of the area, you will reach a gallery inhabited by a huge pig, attract the enemy and eliminate him, passing through this street you will reach the shortcut for the clash with Father Gascoigne and you will avoid the bridge on which a huge one would have been thrown. fiery sphere.
Enemies
Bestial Peasants: Bestial Peasants differ from their peers in size and scope of attacks. They tend to be more resilient and it is likely that it will take you at least twice as many hits to take them out. Pay close attention to their attacks as they can trigger powerful combos that can take you out in a second. As usual, try to hit them while they are carrying out an attack to bring them to their knees and have a chance to launch a bloody attack.
Giant Rats: Giant rats will never be a real problem until you are attacked by a large group. Considerably not very resistant, try to eliminate them as soon as possible without being surrounded, after each jump they will take a few moments to recover and this means that you will have a wonderful opportunity to inflict some powerful blows.
Creeping populace: The creeping populace is always found in marshy areas, half hidden by the water it is difficult to notice at first glance. Fortunately for you they are remarkably slow in both moving and attacking, approach and wait for them to raise one of their arms to strike back.
Giant Pig: The giant pig is capable of unleashing a powerful charge capable of killing you instantly. Lure him out of the tunnel by forcing him to run towards you, then discarding to the side. Immediately try to move to the back and hit with a heavy attack, when he gets up, stand on his side and in case he gets up on two legs, immediately back away, wait for him to drop to the ground and hit him with your most powerful blow.
Father Gascoigne
The fight with the good father Gascoigne may seem one of the most difficult in the whole game. Endowed with excellent speed and capable of wielding his two-handed weapon, Father Gascoigne will inflict massive damage on you in a fast and painstaking manner. Fortunately for you, you are dealing with an artificial intelligence and thanks to the following tricks, the fight will prove to be really simple. During the first phase, that is, when Gascoigne is still a man, get behind a group of tombstones and have the boss go to the opposite side, wait for him to make one of his large slashes then hit him with the attack with the most reach. great; if you feel reckless, study his movements and hit him with a bullet as he makes one of his attacks to bring him to his knees and deliver a gory attack. During the second phase, he will transform into a beast and it is at this very moment that things will get remarkably easy. Immediately go up the ladder on the right of the area, wait for the boss to reach you at the top, then go all the way up the balcony and throw yourself on the roof of the hut, go down to the left and pass in the space between the tombstone and the tree that you will find in front of you. . Wait for Gascoigne to also come down from the roof and lure him in the middle of the tombstone and the tree, he will get stuck there in the middle and you can land your best blows. In case it should, at some point, break free from your death trap, just escape on the stairs and follow the previous procedure. Another strategy a little less simple than the one just described, is to get the Carillon from the little girl hidden behind the window near the shortcut by climbing the stairs; talk to the child and tell her that you will look for her mother (it is the corpse of a woman who is on the roof of the hut during the fight with Gascoigne). By playing the Carillon during the fight with the boss, you will stun him for a few seconds, creating the opportunity to inflict some heavy blows; this strategy in itself would not be bad if during the second phase (when the boss is in the form of a beast) the attacks received were not so fast as to prevent you from even thinking about taking the Carillon out of your pocket. Once the boss is defeated, collect the jewel from the woman's corpse, at this point you can decide to use the object to get a blood gem, or return it to the girl by returning to the window behind which she hides. By handing the item to the girl you will not get any reward, but at least you can say that you were good people!
The second part of the world
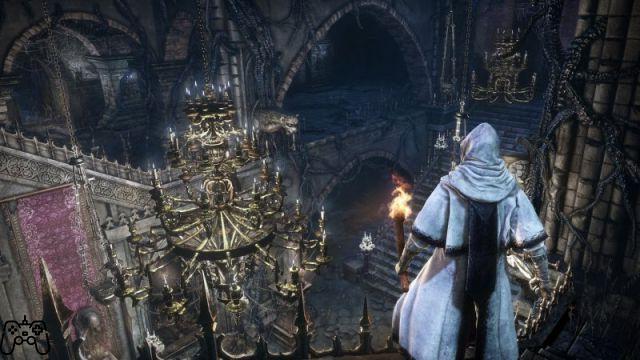
Cathedral Ward
As soon as you enter the Cathedral Ward (the name is in English also by selecting the Spanish guide), you will find a strange individual dressed in red on your right, this is the Guardian of the Cathedral, a completely harmless individual and who will ask you to send him every survivor you meet. in this place here, safe from beasts. A little further on, on the right you will find a closed door, going straight you can go outside, but you will find a closed gate on the opposite side, here you can collect the wooden shield. Then take the exit on the left inside Cathedral Ward. In this area you will encounter several enemies and going up the long staircase to the right you will come across a gate that can only be opened by purchasing the Symbol of the Head Hunter from the Messengers in the Hunter's Dream for 10.000 blood echoes. Instead, taking the road to the left, you will reach a new chapel with a huge sarcophagus in the middle, exit to the left and follow the path until you are at the top of this new chapel, from here you can activate the mechanism that will move the sarcophagus, allowing you to reach the entrance to Old Yharnam. If you have purchased the Chief Hunter Symbol and unlocked the gate, you will find yourself in a large square, your aim will be to reach the entrance to the Great Cathedral and challenge the boss of the area, Vicar Amelia.
Enemies
Church servants - Church servants are men of considerable height and expressionless faces. They will tend to point you out before attacking giving you the opportunity to inflict a few hits. They are remarkably slow and you shouldn't have a hard time getting around them to deliver blows to the sides or back. As with commoners, servants can also be encountered with different weapons, so focus initially on those with firearms.
Church giants: These huge enemies are remarkably slow to carry their attacks, but the range of their weapons is enormous. On the first approach try to position yourself on the back and make a charged attack before they execute one of their slashes. Avoid the attacks by trying to stay close to their hit, then use the pause to attack heavily. Never face two giants together and keep an eye on the surrounding area to prevent another giant from joining the fight.
Boss: Vicar Amelia
The fight with this boss can be almost impossible at first, in fact it is advisable to face him after completing Old Yharnam. Unfortunately, after receiving heavy damage, the Vicar will be able to heal himself and recover most of the lost energy, if your character is not able to counter this moment by inflicting heavy damage (the boss is totally defenseless at the moment of healing) your every effort will be in vain. Amelia is mainly a boss who will use melee attacks, the weak point lies in her legs and you will have to try to hit them at every useful opportunity, in this way the boss will fall to his knees, remaining exposed to your most powerful attacks for a short period of time. Follow this strategy until it reaches the middle of the life bar, so be careful when it starts to retreat, as it means that it is about to launch its powerful cure, immediately run towards it and start hitting it non-stop (in case you are in possession of the Stunning Mist, throwing an ampoule at him will immediately interrupt this cure). Keep hitting her legs whenever possible and watch out for opportunities to make a gory attack on her head. Once this boss is defeated, interact with the skull to learn the "secret" word that will grant you access to the Forbidden Woods.
Old Yharnam
Once in front of the door to enter Old Yharnam, you will find a message that advises you not to enter, however open the door to be greeted by a voice who will advise you not to advance for the second time. Pass the bridge on the left and eliminate the enemies until the mysterious voice tells you that "you forced him to stop", at this very moment you start running (ignoring any enemy) until you find yourself under the tower from which many are shooting at you and lethal bullets. Once safe, you can face the hunter who is in the small square you just passed. At this point you can decide to face Djura (the hunter who has just shot you with a turret of fire) or continue descending into the lower part of Old Yharnam, at the end of which you will find yourself in front of a dilapidated church, inside which you will face the boss. of the level.
Enemies
Mutated Commoners - These new enemies will not be a huge problem, they are very quick to attack and could only cause you significant problems if they surround you. So try to eliminate them as quickly as possible.
Ashy Blood Beast - These mysterious green-cloaked figures are not as swift as mutated commoners, but their attacks will inflict the negative status of poisoning. They are usually always in a group or in any case numerous and often hidden by a mist, try to identify their presence from the verses, so keep your distance and look for the best opportunity to strike, perhaps while they are approaching you. There is also a larger version of this enemy, with greater attack range.
Djura the hunter - Djura is the hunter who will shoot you from the top of the tower, he can be confronted and killed, or approached in a friendly way by entering Old Yharnam through the fight with the Beast Paarl. If faced, the fight will prove extremely easy by immediately running towards him and hitting him so that he falls down; to retrieve the object that he will leave when he is dead, exit the game and return to find it next to the fire turret. If approached in a friendly way, you will activate an interesting dialogue and if you accept his proposal (leave the beasts of Old Yharnam alone) you will still get the item that will allow you to buy the Rifle Lance, the Piercer and the Hunter's armor set. Ashen with the Messengers in the Hunter's Dream.
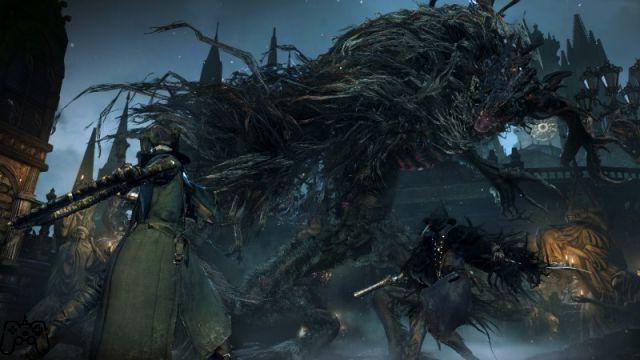
Boss: Bloodthirsty beast
The Bloodthirsty Beast is a remarkably fast foe, both in attacking and moving away from your attacks. Once enough damage is dealt, a huge poisonous aura will explode from his body; from this moment on, even proximity alone will cause you the slow poison negative status, carry many antidotes with you. Fortunately, there are several tricks to make this battle very easy. As soon as he raises her right arm, hit her with a firearm to make her kneel and have the opportunity to deliver a bloody blow to her head; however, the quickest way to have as few problems as possible is to carry several ampoules of Acre Blood with you, in fact as soon as one of these ampoules has broken on the ground, the boss will immediately run towards that precise point and will remain distracted for several seconds, during the which you will be able to unleash your most powerful attacks. Once the boss is defeated, you will get the Pthumerian Chalice.
Workshop of the Church of the Care
Once the Bloodthirsty Beast is defeated, the door to the right of Cathedral Ward will be open, allowing you to explore the Church of Healing Workshop area. The entire level is built on a tower and develops vertically. The enemies will be the old people in wheelchairs equipped with lethal firearms, commoners and big men. From this area it is possible to reach two optional levels: The Old Abandoned Shop, passing through the door at the top of the tower and the upper Cathedral Ward. For the second area you will have to wait to visit Yhara'Gul the Invisible Village to find the key, while the first area will be accessible immediately. To reach the abandoned workshop, once you have passed the first stone bridge and reached the base of the tower, go right and drop down where the walkway ends, advance and enter the door on the left. Once on the wooden platforms, move slightly to the left and check below to notice a smaller platform, carefully calculate your movements and let yourself fall on this precise platform. Look down again to notice a larger platform with a door, this jump will be considerably easier to make, but I still recommend a distance calculation.
The Old Abandoned Shop
Once you pass the door on the wooden platform, you will find yourself in an area completely identical to the Hunter's Dream, but totally empty. In this threat-free level, you can find: The Little Comb, the Old Hunter's Bone, one of the three Umbilical Cords and the Automaton armor set (wear this for some big laughs, especially if your character is male).
Return to the Hunter's Dream to deliver the comb to the Automaton to activate an interesting dialogue and obtain the Tearstone. At this point you just have to decide whether to visit the Hemiwick Charnel Lane area or the Forbidden Woods.
Hemwick Charnel Lane
Facing this area before killing the Vicar Amelia will mean having a considerably easier life, in fact, there will be no dark beasts. Coming from the Vicar battle area, go right to go down a long staircase and pass a cave. The very first part of this level is represented by a small forest with numerous commoners armed with firearms and several beastly dogs. The biggest difficulty will be to eliminate the commoners with firearms, their bullets are capable of inflicting considerable damage and, if in a group, you could find yourself riddled with shots in a few moments; therefore try to take the right timing between one bullet and the next and always eliminate the closest commoners to immediately retreat behind a safe cover. Once you pass the gate at the edge of the small forest, you will enter Hemwick Charnel Lane proper. The area is populated by many old hags, dogs and big men. The secret to dealing with the whole area is to never get surrounded and eliminate the hags that will hurl lethal Molotov cocktails at you as soon as possible. As for the bigger enemies, always try to deal with them one at a time. Once you reach the big house after the wooden bridge, you can face the boss of the area.
Enemies
The Crones - The Crones will always be very numerous within the area and equipped with an impressive arsenal. Fortunately they will not be very resistant and a couple of hits should be enough to send them to the other world, however the fact that they can be encountered with completely different weapons from each other, will force you to have an always different approach. Pay particular attention to the hags that hurl the Molotov cocktails, in fact, these will always be in elevated positions and it is advisable to eliminate them immediately even at the cost of ignoring the enemies that are closest to you.
Afflicted Dogs - Afflicted Dogs differ from their "normal" counterparts in greater aggression and the ability to inflict massive damage. Once you have heard their bark, try to identify them so as not to find yourself surrounded, then attract them and face them in groups of maximum two elements.
Dark Beasts - These tall, black, glittering-eyed enemies will emerge from the ground surrounded by a dreary red light. It is precisely at the moment of their appearance that you will find the best opportunity to inflict a heavy blow. Move away and wait for the moment when they approach you to charge a shot to release when they are in range. Otherwise they are remarkably fast once they get close to you, so try to dodge backwards and land a hit when they finish their attack combo.
Boss: Hemwick's Witch (s)
The approach to this fight will be completely different from any other boss, in fact, once you enter the area, you will only notice a dark beast that walks slowly, but no bosses currently visible. Leave the enemy alone and turn to the sides of the area until the witch appears, the boss, in fact, will only be visible when you are really close to him and are usually found in the corners of the huge room. Once you have located the witch, quickly move to her back and carry out a charged attack resulting in the possibility of a bloody attack, the witch will then disappear and you will have to look for her again. If the witch's energy does not drop after one of your shots, let it go immediately, in fact, there are two witches, but the second can only be eliminated after the first. Keep going around the edge of the room and once you have located the boss, follow the same previous iter. When the first witch has been eliminated, the second will be vulnerable, but once her energy is halfway through, other dark beasts will begin to be summoned into the room. Try to lure the beasts away from the area where you think the witch might be, then run to the opposite side and keep hitting the boss. Pay particular attention to never find yourself in a point where there are also dark beasts, in fact, the witch will be able to cast an immobilizing spell that will leave you at the mercy of enemy attacks. If you fail to eliminate the second witch, the first will come back to life, but with the life bar halved, so try to hit the witches in turn in order to leave them both dying, then eliminate them a short distance from each other. 'other. After the battle, you can visit the small room inside which you will find the tool for the workshop of the runes.
Hypogeum prison
Once the Bloodthirsty Beast is defeated, kidnapping enemies will appear in different areas of the game world that you have already visited. These tall individuals with sacked shoulders will be remarkably resilient and inflict considerable damage. Getting killed by a kidnapper will allow you to reach the Hypogeum Prison area. The easiest Kidnapper to reach is the one behind the Oedon Chapel along with the ravens. The prison area is quite small, but quite labyrinthine, on the second floor you will find a hole in the wall that will lead you to the confrontation with the boss.
Enemies
Kidnappers - Kidnappers, as noted above, are remarkably resilient and their attacks will cause massive damage. Fortunately, they are also very slow and a careful study of their moves will allow you to find the best opportunities to strike. They should never be faced in a group, so try to isolate them and take them out one at a time.
Hunchbacked People - The hunchbacked people are only dangerous when they ambush them. You will notice one going down a flight of stairs, be very careful as from the right will come out its companion who will grab you to inflict a lot of damage. For the rest they are very slow and not very resistant enemies.
Hunters - Hunters are completely similar enemies to you and the weapons they wield are the same ones you can use and buy. Initially stay at a distance and study the attacks, then try to hit them with your firearm to have the opportunity to deliver a bloody blow.
Boss: Best Oscura Paarl
To face this fight it is advisable to wear the armor with the highest coefficient of resistance to lightning. It is not advisable to face this enemy by taking it as a target, the game camera will tend to make a little confusion, and in any case it will be considerably easier for you to pass under its paws to hit them before it retreats far. Wait over the distance for him to make his two or three attacks, then approach and hit; if possible try to hit the center of his body with a charged attack, in this way the boss will collapse to the ground giving you the opportunity to inflict numerous heavy blows. After about a minute into the fight, Paarl will charge with more energy becoming more aggressive and gaining the ability to create a powerful electric blast, immediately move away when he starts howling towards the sky. If hit effectively, the boss will lose his electricity and start to retreat from the opposite side, this is the best time to attack with his head down, try to lock him in a corner and deal as many hits as possible until the moment he regains his power. Once you have defeated the boss, you can open the door that will lead you to the lower part of Old Yharnam, from here you can reach the Djura tower and talk to him in a friendly way.
Forbidden woods
From the area of the clash with Vicar Amelia, go down the stairs until you find yourself in the round square with the two giants, look for the one kneeling in front of an opening and take that street, turn left and advance until you find a door behind which a voice will ask you for the secret word "Fear the ancient blood". This area is divided into two parts, the first will see you face several commoners completely similar to those already met, while in the second part you will have to deal with the vipers. The path along this level is quite direct and you just need to follow the main path to reach the boss fight, however it is advisable to explore the side areas and then return along the path and resume the straight path.
Enemies
Lesser viper - Lesser vipers will almost never be a big problem, identifiable by the hiss, even in large groups they will tend to be quite slow in approaching you, giving you time to charge several shots before they can attack you.
Greater vipers - Greater vipers are identical to lesser vipers, but at least five times larger. Approaching in close combat means being exposed to a series of bites that could eliminate you in a few moments, while staying away you risk being hit by their poisonous spit. Approach avoiding distance shots and wait for them to start approaching you, then charge your shot and wound them when they are close enough, retreat immediately and wait for them to be within range of the next shot.
Snake Commoners - The first enemies of this type you will encounter will not yet be transformed and will appear as normal banded-headed commoners. Approach without too many problems and hit them while holding their heads in their hands. If you fail to take them out during this time, their head will turn into a bundle of snakes capable of tremendous combos of bite attacks. During the transformation follow the same strategy adopted for the vipers, stay at a distance and strike only when they get close to you.
Moon Rider - Moon Rovers are quite clumsy and slow beings, normal versions shouldn't be too much of a problem, while you should be careful of those with tentacles on their heads, as they are capable of casting powerful arcane spells. They will suffer greatly from lunge blows.
Boss: The shadow of Yharnam
This battle will see you face three humanoids capable of performing three complete fighting styles. One will try to get close to hit you with the katana, one will get close to spit a wave of fire on you, while the third will stay mostly still, trying to hit you with fireballs. Try to attract the only two enemies that move behind the huge column in the center of the area, once out of range of the fireballs, try to hit the enemy equipped only with katana. When the two enemies are too close, go around the column and hit the stationary one. Go back behind the column and follow the same path. Take advantage of every good opportunity to hit the enemies and use the bloody attacks to eliminate the one with the Katana. When the energy of one of the bosses is low enough, snakes will emerge from their head, from now on their attacks will enjoy greater range. You will also have to pay attention to the moment in which they will shake their heads and emit a sinister red light, in fact giant snake heads will be summoned that will attack you two or three times before disappearing, at this precise moment you start looking around to identify the where the snake heads appeared, then immediately run to the opposite side. Once you have eliminated the boss with only katana, focus on the one with the candle in hand, wait for it to start blowing the fire to go around it behind and hit it. The last enemy to devote to will be the one who shoots the fireballs, avoid his attacks and take advantage of all useful opportunities. Try to bring some Lightning Card with you, in fact the enemies could be stunned by the electric attacks.
Brygenwerth
This area is considerably reduced and is mostly occupied by a huge palace. Your goal will be to enter the building itself using the entrance on the left side, then find the key to the Lunarium, on the top floor, go out on the balcony to throw yourself into the lake and face the boss.
Enemies
Flymen - These enemies pose no major threat if and only if you are able to get away as soon as they fly in midair. Try to hit them and as soon as they take off, back off to wait for them to land and land some heavy blows.
Ancient Horror - This annoying enemy must be eliminated as soon as possible. Should he survive your blows, he will try to grab you to insert his tentacle inside your brain, inflicting massive damage on you and also sucking up several intuition points. If you fail to kill him during your first assault, immediately back off and wait for him to fail with his arms raised charge. Beware of the magic of him that can immobilize you. Using a Blue Elixir can keep you hidden until you have unleashed the most powerful of your attacks.
Mutant Insectoid - This huge enemy is remarkably deadly over long distances, capable of throwing powerful fireballs at you. The distances must therefore be bridged very quickly and, once reached, you can bring your most powerful shots before it can react.
The student - The student is a Hunter capable of casting very powerful arcane spells, so it is advisable to wear your set with the highest arcane defense coefficient you have. Take him down to the ground floor of the house and take one of the desks with you, try to lure him to the side and hit him with your best attacks at every good opportunity, the important thing is that you always keep the desk in the middle to avoid being hit too many times. . As with all other Hunters, the student can also be shot with the pistol while he makes a shot for the opportunity to rage with a gory attack.
Boss: Rom the Dull Spider
It is advisable to face Rom the Dull Spider, wearing the armor with the highest arcane defense coefficient. Once you have dived into the lake, you will find yourself in a huge area and in front of you the body of a huge arachnid will appear. Deal a blow to the boss to start the fight. Numerous smaller spiders will fall from the sky, in this first phase the boss himself will not attack you and you can focus on the smaller enemies to take them out from first to last by hitting from the side or back. Once the minor enemies have been eliminated, approach the huge body of the boss and deliver your best lunge blows; soon the boss will start teleporting, but you can also hit him right now. Run to the location where Rom appeared and look for a gap between the smaller spiders to sink your weapon into the boss's body numerous times before he disappears again. Pay close attention to his movements, if he should arch his back keep running to avoid the powerful arcane spheres that will rain from the sky, if he starts to move in a confused way, back away a little to avoid being crushed and if he should start to charge yourself with energy, move away immediately to avoid being caught by the explosion. For the rest of the fight, look for an opening among the lesser spiders (which will always be ignored) and take advantage of every opportunity to sink your weapon into Rom's body. Once the boss is defeated, approach the mysterious woman to be transported to the entrance. for the new level.
Aula Magna first floor
By interacting with the various windows and doors present in Yharnam or the Forbidden Woods, you will be given a very special object called the Stone Tonsil. Reach the abandoned church to the right of the Cathedral and stand in front of the closed door (or open if you have defeated Rom the Dull Spider) to be kidnapped by the gigantic monster known as Amygdala. You will find yourself inside the Aula Magna, a fairly small level that serves as a conjunction to reach the Frontier of the Nightmare.
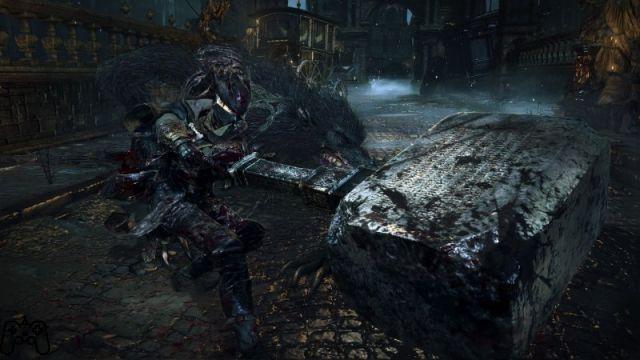
Behind the first door you come across is a shady figure with whom you will have to deal with later in the game. Your goal will be to reach the door which is on the opposite side from where you started.
Enemies
Students - Students are gelatinous beings dressed as graduates. They are not very fast nor responsive and before they can even hit you you will be able to land two or three hits. They are not very resistant and suffer from lunge attacks. The problem arises when you are inside one of the classes, in fact, there will be many students who are advisable to deal with in small groups.
Frontier of nightmare
Nightmare Frontier is a large optional area. Mainly divided into two parts, one external and one underground flooded with poisonous fluid. Pay close attention to the areas populated by Rock Launchers and, once you cross the bridge and follow the gold coins scattered on the ground, get ready to suffer a trap that will catapult you into the underground part. Try to face the two hunters in the starting area by luring them one at a time, then eliminate the Left Woman to avoid being invaded. Once you have passed the main hill, you will find yourself in front of the mausoleum of Amygdala, the boss of the level.
Enemies
Silver Beast - The Silver Beast is a very powerful and fast foe, however it is always on its knees and will take a long time to get up. As soon as you spot one, quickly position yourself behind it and unleash a charged attack resulting in a gory blow. At the point of death, the beast will position itself on all fours, gaining speed and range.
Rock Launcher - Rock Launchers are remarkably lethal over long distances, as they are capable of throwing powerful boulders that could take you out in one fell swoop. When you enter an area populated by these beings, position yourself in cover and identify their position, then run to the closest one and face it in close combat from a position safe from the throwing of the boulders of its companions. They are not very fast and the best strategy is to strike to retreat immediately.
Slimy Beast - Slimy beasts are capable of spitting poison over medium range and will inflict negative bleeding status with melee attacks. Try to use the blows with the greatest range and remember that they suffer terribly from lunge attacks. There are two versions of this beast, a smaller one that tends to always remain in a group and a larger one that is usually isolated.
Brain Monsters - These are among the most powerful enemies in the entire game. You will be warned of their presence by the sound of their disturbing litany. It is advisable to approach in a silent way as, when seen, these enemies are able to cause you the status insanity. Once you reach the melee, try to eliminate these monsters in great speed and always keep an eye on your level of madness. Upon sight, they will try to grab you, so be very careful.
Boss: Amygdala
This is the largest boss in the entire game. Weak to the arcane, fire and lightning. The clash will be divided into three phases. During the first phase, aim for the boss's head and stay just out of reach of his arms, wait for him to take a hit and for him to stay with his head on the ground to run towards her and hit her. When he fires his laser beams (both single and repeat), always discard to the side. During the second phase, Amygdala will become more aggressive and her punches will be charged with arcane energy, so you need to take the right timing to run and hit her head. During the third stage she will detach her arms and gain more reach. It will be really difficult to avoid the shots at this stage by staying close enough to hit the head, the best advice is to move under his chest as soon as he raises his arms to hit the head, or move away and always hit the same arm once he is. to the ground.
Iosefka clinic internal area
Inside the forbidden woods, reach the area with the caged dogs and look for the entrance to a cave. Inside the underground area you will find in an area submerged by poisonous liquid and populated by giants. On the opposite side to where you entered, you will find a small passage that leads to a very long ladder. Climbing to the top, you will reach an inaccessible part of Central Yharnam, from here you can enter (via the rooftops) inside the Iosefka Clinic. This area is remarkably small and within it you will find the invitation to Cainhurst. Be careful to go up to the second floor as the fake Iosefka is waiting for you and, if you haven't defeated Rom, she will attack you on sight.
Forgotten Castle of Cainhurst
Once you have the invitation to Cainhurst, make your way to the central square of Hemwick Charnel Lane, then approach the central monument for a small cutscene. Get on the wagon and enjoy the ride to Cainhurst. Once you reach your destination, open the huge door that you will find in front of you and get ready to face the external area populated by the terrible Spider Women. Once inside the actual castle try to eliminate the ghost women without ever being surrounded. When you reach the highest area of the interior, look for an open window to exit onto the balcony and continue until the boss fight.
Enemies
Spider Women - Present only in the outer area, these enemies are deadly at medium range as they are capable of performing a powerful leap. Try to lure them and discard them back when they hit the ground to inflict a few hits before retreating again.
Servitude - The castle's servants are represented by tiny men. If encountered while cleaning, they will not represent a big problem due to their very slow reaction times, but in the version equipped with a rapier you will have to be very careful and painstakingly study the opponent's movements.
Ghost Women - You will meet these women with their faces in their hands crying, they will almost never attack you first and you can use this opportunity to inflict a powerful blow. In close combat they can be very fast and you never have to be surrounded. This enemy also appears in a version with his head on his lap, they do not attack but are able to emit a scream that will immobilize you leaving you exposed to the attacks of the surrounding enemies.
Gargolle - The gargoyles will tend to descend from the sky or blend in with the statues by ambushing you. Pay close attention to the moment when they raise their arms, move away immediately to avoid being grabbed and suffering extensive damage. Some Gargoyles are able to scream, so pay close attention before approaching them in close combat.
Boss: Logarius the Martyr
Once you reach the top of the Castle, you will have to deal with the ancient king of these lands. Try to get close to the enemy using the brick structures as cover and avoid his arcane attacks. Once in physical contact, hit the enemy and force him to attack you in close combat in turn. From now on, you can use your bullets to bring Logarius to his knees and deliver a bloody attack. During the second phase he will plant his sword in the ground creating a magic able to throw blades in your direction, always use the brick structures to attract the boss towards you and use every opportunity to strike.
Yahar'gul Invisible village
Once you have defeated Roma, you will find yourself directly in front of the entrance to the invisible village. The whole area is populated by enemies already encountered but summoned by the Sinister Women. It is important to locate the position of such women to prevent enemies from continuing to be reborn after death. Once you reach the round square dominated by the presence of a huge monster similar to Amygdala, wait for sure that its lightning bolt explodes, then go full speed up the staircase that descends. Face the three hunters by luring them one at a time and walk the huge road that leads to the Advent Square and the fight with the boss.
Enemies
Wagon of corpses - This fearsome enemy will run on you as soon as he has identified you, if the distance allows you, you can load a shot to be released at the right moment. Try to dodge to the side when his body reaches up and inflict numerous blows before he turns back to you. Some corpse carts will be able to spit corpse pieces at you, try to spot these enemies immediately and take cover as you approach.
Corpse Werewolf - Corpse Wolfman has the same behavior as normal wolfweres, however he will be considerably more resilient and his attacks will deal much more damage.
Boss: The Reborn
Here we are finally at a much more relaxing and easier fight despite the size of the enemy. Once you enter the advent square and the fight has started, immediately look for the ladder that goes up to the walls that surround the area, eliminate any left women and return to the lower floor. Position yourself exactly next to the boss and hit him with charged shots. From the position you are in, you will be safe from the most powerful enemy attacks and you will only have to worry about a few pieces of corpse that will fall on your head. Heal yourself at the right moment and never lose your position to get over this enemy soon.
Aula Magna second floor
You will find yourself on the second floor of the Aula Magna and your aim will be (as for the first floor) to reach the door on the opposite side from where you are.
Enemies
Arcane Students - Arcane students are entirely identical to their normal counterpart, however they will be able to spit arcane fluid at you from a distance. Pay attention and engage them in close combat.
Giant with fiery fists - This giant identical to those encountered in Central Yharnam, is equipped with fiery fists and very fast attacks, try to hit him on the back but move away if you risk being exposed to his attacks. His combos are very long so don't be reckless and wait to hit only on the favorable side.
Incubus of the Month
As soon as you arrive at this new level, immediately walk the path that goes up until you reach the lamp. From now on you will always be exposed to the negative status of insanity, so be quick to move and seek hiding behind one of the eerie rock shapes when a sinister light appears from the spiers of the castle overlooking the valley. Immediately take the path that climbs to the right and where the Rock Launchers are located, at the end of this path you will find the second lamp, remarkably convenient when you have unlocked the numerous shortcuts. Go down and cross the bridge, go up the path to the left and reach the castle door to enter inside. Once you reach the elevator you will be within walking distance of the boss fight.
Enemies
Spiders - You will notice several spiders hanging from the ceiling of the first room inside the castle. Approach slowly and wait for them to drop to the floor. Back off immediately behind the gap you just passed to prevent the larger spider from reaching you, then focus on the smaller ones and when the square is clear you can also hit the giant one safely.
Iron Dwarves - Iron Dwarves will tend to ignore you until you attack one of them. Tend to be slow in both movements and reactions, they will hardly cause you many problems.
Iron Women - A completely opposite speech to the dwarves is what must be done for the Iron Women. Resistant, painful and with an impressive attack range with both the chain whip and the cleaver. Try to study her attacks and shoot at the right moment to bring them to their knees and carry out a bloody attack.
Puppets - You will encounter the puppets in front of the area where you will collide with the area boss. Initially lying on the ground, you will have the best opportunity to land your most powerful blows just as they rise. For the rest, avoid their painful attacks with some dodging on the side.
Boss: Micolash
For this fight it is highly advisable to wear the armor with the best arcane defense coefficient. At the beginning of this fight you will have to limit yourself to chasing Micolash until he goes to slip into a room. Then eliminate the two puppets and approach to force him to summon the tentacles from his hand, stay at a safe distance and hit as soon as the attack is over. After bringing the boss to half energy, it will disappear and you will have to advance inside the maze. Beware of the Iron Dwarves present on the stairs as they will be considerably more aggressive than those encountered previously and, in addition, some of them will be equipped with crossbows capable of throwing powerful darts over the distance. Once you reach the boss again, keep chasing him until he closes inside a room barring the entrance. Go upstairs and once you reach the area with the chasm, go to the right and position yourself in front of the hole in the ground. Do not jump immediately but, look down to find Micolash and target him, then drop below and execute a powerful blow in the air. Try not to give too much respite to the boss as he will be able to carry out a powerful arcane storm by raising his hands to the sky, at which point either back off at a great career or run towards him to hit him and interrupt the casting of the spell.
Attic of Mergo: Center
Mergo's Penthouse is a fairly small area, however it hides the game's most valuable power-up material: Bloodstone. Once out on the balcony, go up the stairs and reach the cage elevator with the broken door, go inside and turn to the castle wall to notice a window, take your time and throw yourself inside it. From here, cross the rock bridge eliminating the Brain Monsters, then go down until you reach the lever to bring down the Lord of Madness (a huge brain). Go back a few meters and throw yourself into the hole on the right. Once on the lower floor take the exit on the opposite side of the room and once outside throw yourself into the huge tower on the right being careful not to fall into the abyss. In this area you will find the precious Blood Rock. Once back at the main lamp, exit onto the balcony again and go left to take the path that will lead you to the boss.
Enemies
Shadows - Shadows are completely identical to the enemies faced during the fight with the Shadow boss of Yharnam, obviously they will be less resistant and powerful.
Madness Pigs - Madness Pigs will follow the same behavior as normal pigs, but will be able to inflict the negative madness status on you if long observed in the hideous eyes.
Boss: Balia at Mergo
Keep your distance from the boss and wait for him to make one of his attacks to hit him in the moment of pause. When he starts swirling his blades, quickly get to the back and attack him without too much trouble.
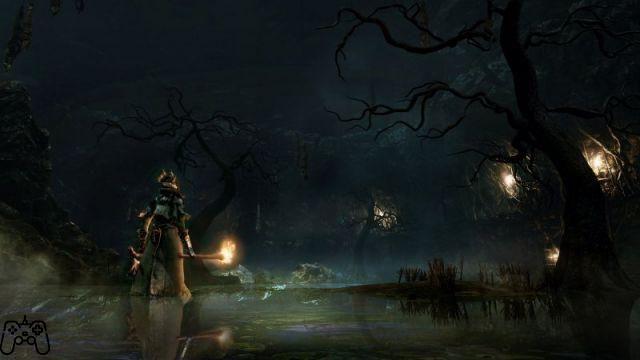
When he summons the darkness, try to locate his location and follow him to the back. When darkness falls on the area, you will have to pay close attention to the copy of the boss that will appear to perform a single slash and disappear again, wait for it to be gone before approaching the actual boss to hit him at shoulders. The darkness will dissipate and you can continue to attack the Nurse as you did before until it is eliminated.
Cathedral Ward Superiore
To reach the Upper Cathedral Ward area, you will need to obtain the key to open the door at the top of the tower which can be reached by taking the elevator to the right of Cathedral Ward. Arriving in the square in Yahar'Gul Invisible Village where the huge monster that shoots the beam from the eyes is found, look for a small opening in the railing on the right, throw yourself down to reach the closed cage with a corpse on a chair, above it you will find the coveted key. Once you get to the Upper Cathedral Ward, take the left path and enter the huge palace. Pay close attention to the Ancient Horrors and try to attack them using the Blue Elixir to avoid being noticed. Once in the central hall, wait for the werewolves hanging from the chandelier to descend to the floor, then retreat behind the door you passed through and eliminate the enemies without risking being hit. Go upstairs and take out the two Ancient Horrors to get the key to the downstairs door.
Boss: Heavenly Emissary
You will reach an area full of plants from which numerous moon rollers will sprout, immediately identify the stationary one and hit it two or three times with your most powerful shots. When the moonshine in question starts to stagger, wait for it to transform into a giant being, then flip it over to its side to keep hitting it and quickly get over it.
Boss: Ebrietas Daughter of the Cosmos
Once you've defeated the Celestial Emissary, break through the window behind the lamp to find yourself on the top floor of the Great Cathedral. Reach the elevator on the opposite side of the one you entered and go down to face Ebrietas. The boss will be motionless, hit him to start the fight. Keep just out of reach of the enemy's tentacles, and wait for it to reach up and land its head on the ground to immediately hit it with one of your strongest hits and then immediately retreat. Pay attention to the moment when he will shake his head and throw himself towards you, to avoid being hit by the opponent's enormous size, take a sideways swerve and a second back. Once the boss has suffered enough damage, he will begin to vomit jets of blood towards you, try to absolutely avoid contact with the liquid as it can cause you the negative status of madness. The moment the boss makes an arcane aura appear around his body, you will have to be even more careful, from now on Ebrietas will be able to throw several arcane projectiles at you in addition to making all the previous attacks. Be very careful when he raises his head to the sky and start dodging to the side to avoid the arcane rays. Try to force the boss to lay his head on the ground staying just out of his reach and soon you will have the opportunity to carry out some bloody attacks. This will be one of the toughest encounters in the game, and it may take several tries before you master the boss's movements by heart.
The Hunter's Dream on fire
Once you have defeated the Nurse of Mergo and silenced the infant's lament, you will find yourself inside the Hunter's Dream and the shop will be completely on fire. The Automa will inform you that Gherman is waiting for you under the big tree. Go to the first hunter and listen to his proposal.
Game endings
First ending
Accept Gherman's proposal, you will wake up in Yharnam, the night of the hunt has passed and the dawn of a new day will peek out from behind the roofs of the buildings.
Second ending, Boss: Gherman
Refuse Gherman's offer and start the fight with the first hunter. For the duration of the fight, Gherman will be vulnerable to your bullets and if he is hit at the right moment he can collapse to the ground giving you the opportunity to carry out a bloody attack. Always try to dodge and study the opponent's movements to bring your best attacks. Once in mid-life, Gherman will gain the ability to teleport to you and will be able to charge a huge burst of dark energy, capable of killing you instantly if you don't immediately retreat to a safe distance. Keep trying to hit the enemy with your bullets and make as many bloody attacks as possible.
Once Gherman is defeated, the Presence of the Moon will appear, a hideous Ancient One who will engulf you. From this moment on, you will take over from Gherman's former place as the first Hunter and Guardian of the Dream.
Final third, Boss: Presence of the Moon
If you have consumed at least three umbilical cords (their position will be indicated in the section dedicated to secondary missions) during the game, the Presence of the Moon will not be able to engulf you and you will be able to fight it.
Always try to attack the boss when you are on his back or during the pause between attacks. Avoid the jets of blood from his head like the plague, if hit you will not be able to use the vials for at least a minute. In case you are hit by the explosion that will charge once you reach the middle of life, you will remain at only one life point, immediately move away and heal as soon as possible before returning to the attack. The latter boss will be considerably easier than Gherman and, even if defeated, you can return to face him without having to go through the previous fight.
Once the Moon Presence is defeated, you will be reborn as the Ancient One, ready to lead humanity into a new era.
Secondary missions
Eileen the Crow - The Hunter's Pact
First Encounter - You will meet Eileen for the first time in Central Yharnam. From the first lamp, exit the gate on the left, pass the two big men and turn right to go up the staircase until you reach the area with the caged dogs. Cross the bridge and jump onto the wooden walkway below, look for the opening behind the wooden barrels and enter. Once on the new wooden walkway, look for the passage on the right which is also hidden by the barrels. You will find yourself in a small balcony with Eileen near the railing; talk to her twice.
Second encounter - Buy the coat of arms of the Chief Hunter and, once in the round square with the two giants, look for the opening for the gate in front of which you found the wooden shield. Return to the Hunter's Dream then back to Cathedral Ward. Exit through the passage in front of you and you will meet it on the left.
Third encounter - The lamp for the Tomb of Oedon will be blocked. You will need to reach the battle site with Father Gascoigne to help Eileen take out a hunter named Henryk. Try not to hit Eileen during the fight and make sure she doesn't die.
Fourth Encounter - Once Rom the Dull Spider is defeated, the Great Cathedral lamp will be blocked. Walk to the entrance to the Cathedral, you will find Eileen dying, talk to her and enter the structure to face a very tough hunter. There is a very simple method to eliminate this enemy, wait for him to hold the weapon with two hands (it is a Chikage so it consumes life over time), go down the stairs and exit the door. The enemy will stand still and die in a few minutes.
Alfred - The Pact of Executors
First Encounter - You will meet Alfred nearby on the way to Old Yharnam, agree to work with him to receive 3 fire cards and a gesture. From now on, you can summon Alfred to some bosses.
Second Encounter - After taking out the Martyr Logarius, don his crown and approach the wall behind his throne. You will bring up the tower of the Queen of the Felshurst, inside the room you will find the sealed invitation for Cainhurst. Reach Alfred who is near the road to the Forbidden Woods, give him the sealed envelope with the invitation.
Third Encounter - Teleport to the Lantern of the Vileblood Queen to find Alfred who has just killed the queen herself. Talk to him and collect the Queen's flesh from the throne. Bring the Queen's flesh to the Altar of Despair (where you faced Ebrietas Daughter of the Cosmos) and bring her back to life by interacting with the spider statue.
Fourth Encounter - Return to the first place where you met Alfred to find him dead and complete his mission.
Regina Annelise - The pact of the Felbloods
Once you have defeated the Martyr Logarius, collect his Crown near the lantern that will appear once the battle is over, put it on and approach the wall behind the throne. The Queen's tower will appear, enter and kneel on the yellow symbol embossed on the red carpet in front of the Queen's throne. Accept his offer to obtain the Corruption rune.
Patches the Spider
You will meet Patches the Spider at the first floor of the Great Hall, then he will set a trap for you at the Nightmare Frontier once you cross the bridge and follow the trail of glittering coins.
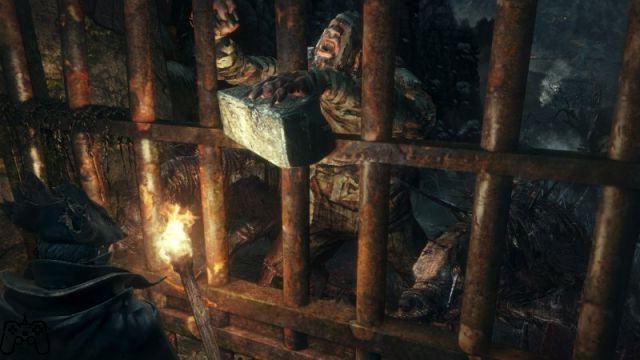
Once you reach the second floor of the Great Hall, look for the trap door to go inside the room where Patches is hiding. Talk to him to learn a gesture.
The survivors
There are some non-hostile characters in the game world who can be sent to Cathedral Ward or the Iosefka Clinic. To activate the dialogue options that will allow you to direct these people to their respective locations, you will need to speak to the Keeper of Cathedral Ward, and to the fake Iosefka at the door in the room where the game begins. By sending the survivors to Cathedral Ward you can advance in their side missions, while sending them to the clinic will mean finding them transformed into Giraluna.
The Old Lady - In the central Yharnam area with caged dogs, after the bridge you will find a door with a small lighted lantern. Knock and direct the old lady wherever you like. If sent to Cathedral Ward, she will give you sedatives once the seventh boss is defeated.
Adella the nun - Once you have been taken to the Hypogeum Prison, exit the prison and go down the stairs to your right. You'll find Adella on her knees, wearing the Church of Cure set (found in the Forbidden Woods) to talk to her. By sending her to Cathedral Ward, he will teach you a gesture and she will deliver her blood to you, be very careful as if you choose Ariadne's blood instead of hers, the nun will kill the woman in red out of jealousy. If sent to the clinic of Iosefka, you will find her transformed into a moonshine, by killing her you will receive the rune of Oedon.
The Cannibal - You will meet the Cannibal above the windmill canopy at the Forbidden Woods. Behind this character hides a hideous beast which, if sent to Cathedral Ward, will start killing all survivors. Send her to Iosefka's Clinic to kill him in Moon Rune form and get the Beast Rune, or face him directly on the canopy where you met him.
Ariadne - You can knock on Ariadne's door by going down the passage to the left of the large round square after Cathedral Ward and where the two giants are. Talk to her a first time, then take out the third boss and talk to her again a second time to absolutely send her to Cathedral Ward. Once you have eliminated Micolash, you will find her under Cathedral Ward (take the passage you entered the very first time and go down the stairs), she will have just given birth to a nightmare infant, eliminate her to receive her shoes and one of the three umbilical cords .
The three umbilical cords
To face the Presence of the Moon and get the true ending, you will need to find and consume at least 3 umbilical cords out of a total of four found in the game, before facing Gherman the First Hunter.
First Cord - The first cord can be found inside the Abandoned Shop.
Second Cordon - Once you have defeated Rom, visit the interior of the Iosefka clinic and go upstairs to find the fake Iosefka lying on a table, take it out to get the cord.
Third Cord - To get the third cord, send Ariadne to Cathedral Ward and kill her after she gives birth to the nightmare infant.
Fourth Cordon - You will get the fourth cordon by defeating the boss Nurse of Mergo.
The Labyrinths of the Chalice
The Chalice Labyrinths are a novelty introduced for the first time in the "Souls" series. Using the appropriate chalice on one of the tombstones inside the Hunter, you can enter a maze complete with enemies and bosses. For each goblet there is a version "of the origins", thanks to these goblets you can create real dynamic labyrinths, with completely random bosses, enemies and treasures. The same thing can also be said for the versions of the "sinister" chalices, which can be purchased from the merchants inside the labyrinth itself and usually at the last level; with these you can create mazes, where at each level there will be a Sinister Woman who will ring the bell exposing you to possible invasions by other players. The information you need to keep in mind of the glasses are the depth which varies from 1 to 5, this value indicates the actual difficulty; for the fourth degree of depth it is advisable to be at least at the eightieth level, while for the fifth it is more than one hundred.
It is clear that the only way to continue inside the labyrinths and be able to create the rituals for the following chalices is to complete them all. In fact, you will find all the materials necessary to create the following glass.
A particular speech should be made for the Contaminated Chalice, in these labyrinths your energy will be halved making this the real stumbling block of the game, it is advisable to face it at least at the XNUMXth level and possibly in the company of a friend.
List of goblets that can be found during the game:
Chalice of Pthumeru - Obtained by defeating the Bloodthirsty Beast.
Chalice of Loran - Obtained by defeating Amygdala at Nightmare Frontier.
Chalice of Isz - Obtained by defeating Ebrietas Daughter of the Cosmos.
Boss: Regina Yharnam
Once you reach the last level of the Great Pthumerian Chalice Ihyll, you will find yourself facing the final boss of all the Labyrinths of the Chalices. Queen Yharnam is not too demanding a boss when faced at the right level. Start by hitting her and back off when she hears a baby cry. Avoid the blood jets and keep hitting her boss until she is at 75% of her life energy. During the second phase, the Queen will release her hands and will be able to respond to your melee attacks using a knife just like the Ghost Women do at Cainhurst Castle, her heels will cause the negative poisoning status, brought with you many antidotes. When she disappears to reappear along with two copies of herself, start spinning quickly around the arena hitting the copies with a single shot until all of them are eliminated and you are left with the original one alone. Once he reaches the precise half of the life bar, he will get some new distance attacks (copies will also be able to make these new attacks), blades that pop out of the ground avoidable by discarding to the side very quickly and knives that will be thrown directly against you, to know in advance when he will carry out these attacks you will have to pay attention to the moment in which he will injure his wrists with the knife. Continue to always delete the copies before returning to dedicate yourself to the original Queen and soon you will be right in this fight too.
THE VIDEO OF THE SOLUTION - THE PVP
THE VIDEO OF THE SOLUTION - THE UMBILICAL CORDS
THE VIDEO OF THE SOLUTION - HOW TO FIND THE BEST BLOOD GEMS


