


Please note:
The solution is based on the US version of the game. There may be divergences from the Spanish version.
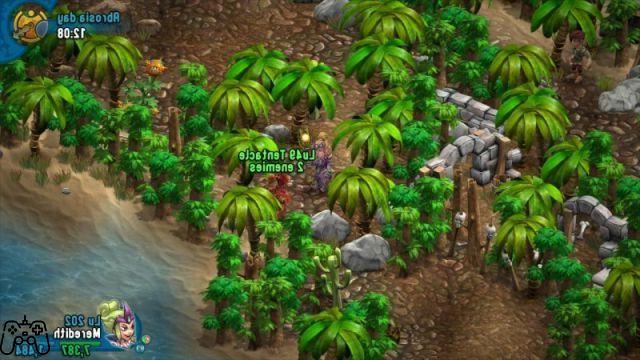
Towards the South Gate Mines
Before proceeding, we recommend that you wait a while to become more familiar with the town, as well as with its inhabitants and associated merchants. We also recommend that you try to use the camp, you will need it to heal wounds and speed up the change between night and day. It would also be a good thing to be able to reach a level of at least 4 or 5, destroying all the small bees that are along the map of the island. So talk to Meridion near the western part of the village, then converse with the non-player character near the forest to the north.
So retrieve the ladder from Merridon. Proceed then past the enemies, then going to talk to Ed Orable. With the saw taken, you can proceed further across the island, cutting the trees that obstruct your passage. Make your way to the next group of enemies. Talk to Adeephi, outside the green portal. Take the torches, then - using the healer to reset any injuries - proceed towards the interior of the mines.
South Gate Mines
Pay attention to the Wannabe Heroes immediately; these are potentially very powerful enemies, which could cause you serious problems if you do not use the defense command. Their attack turn will be divided into two phases, we recommend that you initially use your shield to "parry" you during the first phase, thus repelling the attack quickly. So continue to proceed south-west destroying everyone present, then south again, taking the potions with you. We recommend avoiding casual encounters, they would take you away excessive time without providing any particular advantages.
Proceeding therefore towards the end of the dungeon, it is possible that you will find yourself having to battle against 8-10 heroes at the same time. In this case, we recommend using a group of "standard" tactics to get rid of them quickly, or - as listed above - wait for their attack, parry it with the shield, then proceed to counterattack. This will give you enough space to talk to a non-player named Saarthon. He will give you a key, which you will then have to bring with you to proceed through the game; you can then meet him near the Cassar village.
Exit the mine using the shortcut by pulling the lever. Once back in Merridon, talk to yet another female non-player character near the well. Having taken the ladder, you can proceed through the next section of the main quest, reaching Ed Orable.
Footage - American Launch Trailer
Thief Citadel
First of all, try to always keep all the torches on, until you have recovered a magic that allows you to activate the lights. Then proceed through the dungeon, trying to immediately aim at killing the Earth Golems: these are subjects with enormous amounts of life points, consequently their killing will take quite a long time. They are also weak to attacks by crossbows, which you can carry out without any problems whatsoever. You will then proceed to the fight against the Thief; he is a kind of "fake" hero, considerably more powerful than the others. He will immediately begin to flee as soon as his health points drop below a certain level. You will therefore have to make sure that you can hit him repeatedly before he escapes.
Boss: Crystal Lord
The battle will see you fight against 9 enemies at the same time, at least by selecting the "Hard" mode. Ignore the bees initially, focusing almost solely on the Earth Golems. Having killed them - as you have already learned to do - proceed to focus the subsequent attacks on the Crystal Lord, starting from a level at least equal to 6. Particular attention must be paid to his attacks from afar! Always try to dodge them, even blocking them would cause you a significant amount of damage.
So take the flask back to Stella. Wait for the time to exceed 00:31. Proceed towards the well, activate it to start the battle with the Sniper Imp. We recommend, also in this case, to use your shield to parry the first shots and therefore respond without mercy.
Isle of Euran
Proceed west, reaching the viaticum that leads to the port. Use the key, thus conversing with the person in charge of using the boat. Give him 13 coins to get a chance to use the vehicle. Continue to the west coast, following the exclamation marks on the map. Once you reach Gorodo, you will have to deal with the skeletons. Pay attention to their ability to inflict considerable body-to-body damage: you will necessarily have to protect yourself to avoid big problems. We recommend using your "Painful aim" skill on them while trying to keep Trisha at some distance.
House of Meneres
Now, we recommend that you go and retrieve some Mojo di Gorodo, near the northwest section of the wind coast, inside a chest. Repelled the thieves, recover the Mojo and then quickly return to Gorodo. You will now be prompted to reach Meneres' house; Gorodo will also give you the key to reach Orad. Proceeding forward with the help of the guard, also talk to nearby non-player characters. Continue west to reach Meneres. He will give you the key to enter his dungeon. You will therefore have to proceed through the various Warp, trying to reach the boss - it will be necessary to eliminate all the "mad dogs" placed to guard the levers - in practice, you will have to hit quickly and in sequence all the levers in the area. Also remember that, when the HP of the Mad Dogs are particularly low, he will be able to go and use two different attack turns. They will use the first to hit you, and the second to escape quickly. So make sure you too can hit them before their sudden escape!
Boss: Zhaytray
For this battle, you'll need to focus on mad dogs. Also don't forget to use the strength "boost" on Baldren. Try to keep Trisha alive all the time; this is a potentially difficult task, but you should be able to do it, as you should have a sufficient amount of "spare" potions. At this point in the game, you will find yourself facing some rather weak skeletons, so you can eliminate them without worrying too much. The main boss, Zhaytray, is almost exclusively specialized in melee - so we recommend that you mainly use your shield, and then quickly respond with melee-type attacks. By KO Zhaytray, you can increase the speed of the battle by bringing Trisha back to life. In this way, the whole process should speed up considerably; then focus on the skeletons as soon as Zhaytray is knocked out. So take all the loot, trying to "finish" the thief, thus obtaining a reward. Then continue forward to face the next boss.
Boss: Death Bone
A good general method to complete this level is to progressively weaken the enemies, but at the same time try to leave them alive, so that Death Bone is in no way able to reach your characters directly. However, it is not so easy to be able to implement a strategy of this kind: a particular positioning will be necessary. So start hitting the Walking Bones initially - a total number of 3.
So move on to the actual Death Bone. It is a subject specialized in short range combat; as a result, an ever-useful tactic sees you trying to stay far enough away, especially using Trisha. When, on the other hand, you will use Baldren - we recommend proceeding to more direct attacks, given its greater resistance it is also possible to risk more.
Hopper Forest
Having defeated Death Bone, you can recover Dozeru's helmet. Dozeru will join the party; proceed towards the city, recovering the new armor and equipment. It will now be necessary to level-up to overcome Temwall's castle, which makes up the next dungeon. Beware of a new type of enemy, the Monodrone: they are able to move very quickly, but - at the same time - they can be eliminated with relative ease. However, it is necessary to pay attention to their laser attack, able to "hook you" to a specific game area and consequently cause really considerable damage. Their melee attacks are also particularly ferocious.
Gelatins are capable of inflicting truly remarkable body-to-body damage; they are also capable of "dividing" into other Gelatins, thus significantly increasing the difficulty of the fight (a dead gelatin can be transformed into 3 successive gelatins). Fortunately, each gelatin will only have half the HP of a "native"; this still means an increase of 150%. Take the Ocher key anyway, then proceed through the Monodrone. Take the remnants of the key to the guard outside. He'll fix the key so you can get to the next section of the castle. Make your way further north, destroying everything in your path. When you reach the throne room, try to talk to "Red Death", the jelly-like red subject visible in its center.
Boss: Red Death
We recommend using Baldren as a leader; accumulate the potions, as well as the various seeds to come back to life. We also recommend that you take care of the jellies first, and then move directly to the skeletons. When only the "main" boss is left, we therefore recommend that you take advantage of all the potions you have accumulated so far to recover a sufficient amount of HP and mercilessly hit the boss himself.
Battle of Gorodo
Although you find yourself fighting a single opponent, that battle is not "counted" as a boss fight. Gorodo is able to inflict a considerable amount of damage, and he will be assigned 3 attack turns, as well as a truly remarkable amount of life points. Use your most powerful attacks initially, directing them directly towards Gorodo. We especially recommend using Dozeru and Baldren as "melee" attackers, also trying to position Trisha far enough out of the enemy's range. By combining these two simple strategies, you should be able to finish the battle successfully without excessive worries. So proceed forward to fight against the Glow Golem.
Boss: Glow Golem
This is a battle typically considered to be complex; what is generally better to do is to try to "catch" the Golem, so that he cannot move in any way from his current position. Also combine Baldrens, Star Fury, and Earth Crusher-type attacks. Continue to perform these attacks until the Golem's demise.
Boss: Namoris
As usual, you will have to proceed by following the exclamation points along your game map, completing the various "missions" that will be assigned to you by each non-player character. You will reach a kind of small dungeon. Inside you will find yourself having to use "warps" - we recommend using them as frequently as possible. In any case, to completely complete the dungeon, it will be necessary to kill every enemy in the area and proceed through all the warps. In doing so, you will automatically reach the boss - aka Namoris.
Fortunately for you, the battle will not prove to be particularly complex: you will need to have a sufficient quantity of potions, therefore using the "Piercing Charge" frequently to hit Dozeru mercilessly. Also pay attention to the other enemies scattered around the map, when / if the Dozeru charge is not active you will have to hit these enemies without mercy. A move that works very effectively undoubtedly turns out to be Baldren Star Fury; since it can "hook", we recommend using it to be able to hit two enemies at a time. So focus on Namoris using almost exclusively Baldren, looking for a bodily type contact that will greatly favor your character.
Boss: Assassin
Follow the reports by completing the various objectives. So enter the dungeon, get rid of the enemies and pull the various levers in the area. You will reach the Assassin very quickly. For this battle, we recommend that you avoid direct contact with the Assassin with all your might; first kill all the other enemies in the area, then going to attack the main boss. So try to focus all your "best" attacks on the Assassin, while buying a large amount of potions and seeds, as well as herbs to increase your magic points.
Windy Snowland
Having defeated the boss, follow the exclamation points further to continue forward. Having passed the desert, you will reach a large snowy area.
Boss: Hell Hound
Talk to the merchant to start this battle. The opponent will have a significant amount of life points; you will have to try to "keep" your best moves to be able to use them during this challenge, otherwise you could encounter considerable difficulties! We therefore recommend that you first maximize your life points by using a large amount of potions, and then hit your opponent mercilessly. After the battle, you will get the Hellhound again, and you can give it to the merchant Rafadel. He will therefore open the way forward for you. So approach the Fjordawik village, talk to Iocas, then to Maatha - the subject in the shape of an animal. You will therefore have to deal with Slodian, another new opponent.
Boss: Slodian
First get rid of the Steel Golems; then go to Slodian. We recommend that you use "Haste" on your characters immediately, as well as cast spells that will protect them permanently. So make use of large quantities of your characters' potions, as well as herbs and seeds. After achieving victory, converse with Iocas. He will give you the key to the Forgotten Mountain. Proceed along the passage to the east, arriving at a dungeon.
Other enemies to eliminate, so use Baldren. Once you have reached the final stage of the infinite passage, you will arrive at Forgotten Peak.
Forgotten Peak
Before starting the dungeon, we recommend that you reach at least a level of 45-50, which is essential to be able to overcome the dungeon without having to exert yourself too much. Use your healers repeatedly to avoid incurring excessive damage from nearby subjects. You will then reach Namoris.
Boss: Namoris
Given the extreme speed of ghosts, we strongly recommend that you give top priority to their elimination. It will also be necessary to pay attention to the possibility of being "stunned". Also preferably use lightning to destroy ghosts, to which they are particularly sensitive. As for Namoris, he will turn out to be quite mangy in this specific battle, so make sure you have a good magical defense before proceeding, as well as casting Haste on your characters.
Fortunately, the rest of the enemies will not turn out to be a real threat; you can eliminate them later, with due calm. As for the "recommended level", it will be good to have reached around 45; in case this is not the case, we recommend that you go back and practice a little. However, you will get the "Magic Frog" as a reward. Then jump into the white warp to return to the level entrance. Head back further to Iosac in Fjordawik, giving the magic frog to Slodian.
Accept his apology, then talk to Iosac again. Return to Iosac again, recovering the magic frog "Denala". Proceed to the wild dog, and give him the frog to bring him back to his senses. Move to Iocas after healing, thus recovering the key to his house, located north-east of your current location. Inside the house, you can use the key and thus reach the exclamation point, which corresponds to the position of his daughter. You will also get the "Ethereal Spike" artifact. Then return to Tondarest, collect some Rainbow Coins, and go down the ladder to reach the steppes. Here you will have to deal with a new type of "evil" bee - get rid of all the rest of the enemies on the screen, to get to a level equal to 50. You can then proceed to the red elf named Rilrom. He will tell you about the ax of the tribes, as well as about Zrah. You will therefore have to converse with Drajight, inside the camp. Then continue to the next dungeon, where the battle against the boss awaits you.
Boss: Drajight
Trisha is probably the most suitable character to successfully complete this fight; in case you decide not to use it, however, we recommend using whatever your "second most powerful character" is, since Drajight has 9000 life-points and can consequently create considerable difficulties from this point of view. The surroundings will also feature an enormous amount of steel golems; However, Drajight is extremely powerful, so you can focus all your attacks on him, as disperse your firepower excessively would cause you serious problems.
By implementing these strategies, you should defeat the boss in speed. So take the medals around the play area (examine every corner to find them, without too much difficulty). Having taken 8, give them to Drajight. So go back to Rimrom, who will give you the ax of the tribes. He will also show you Lowritz's location on the map - go to him and talk to him. You will then get the key to the Dungeon.
Zrah's Camp
Pull all the levers to proceed through the dungeon, obviously killing the nearby enemies as well. At this point you should have reached a level equal to - minimum - 40. Try to upgrade your armor, thus proceeding to Zrah.
Boss: Zrah
Golem-type opponent, with 130000 life points, as well as defense and strength above 200 points. Therefore, focus on him all the strongest attacks, as well as the attacks of your strongest subjects. Given the large amount of HP available to the enemy, it will necessarily take some time to be able to finish it. In the event that a large number of opponents get too close, take advantage of attacks capable of hitting several enemies at the same time, always keeping an eye on Zrah. Once the battle is complete, return to Rilrom, obtaining the artifact key. Proceed east to where the Tiny Abyss is located.
Tiny Abiss & Thousand Eyes Dungeon
East towards the signal to reach the abyss. Jump on the ship to reach the "Thousand Eyes" cave. To reach it, you will first need to deal with the scorpions, proceeding north along the abyss. Then jump on the raft, continue east.
Similarly to the previous dungeons, you will have to eliminate all the enemies placed near the "signals", pulling the levers and proceeding along the time-warps. Also destroy the level 38 crystal that you will find along the way, thus reaching the healer. You will then return to Namoris, thus proceeding towards the battle against the boss of the same name.
Boss: Namoris
The main difficulty that you may encounter in the battle is given by the considerable range of action that characterizes the enemy shots. Start by eliminating ghosts thanks to Trisha, mainly using "Painful aim". You will therefore have to deal with Namoris himself. This subject is capable of inflicting a truly remarkable amount of damage per hit; unfortunately he is also gifted with a good amount of life points. On the contrary - and luckily for you - her defense capabilities are relatively low. So focus all the attacks of your characters on Namoris, in this way you will eliminate him with a certain speed, certainly faster than what was seen for Zahr. As for the damage done by him thanks to his magical abilities, it will be good to bring with you a sufficient amount of healing items, so you can "respond" to the damage without too much difficulty.
After the battle, talk to Namoris to get the "Magic Socket". The quest will proceed, and you will be able to exit the dungeon. Go back to Orad, talk to Tondarest, he will show you the next area to go to, that is Green Heart Isle. So jump on the raft and proceed southeast along the Euran coast. When you reach the island, talk to Eranti (characterized by an exclamation point above his head). He will tell you where to find the six keys.
The first will be given to you by Eranti himself immediately after the conversation. To reach the second, you will have to proceed west, thus waiting for a question mark to appear "above" your head. As for the blue key, proceed outwards from the coast of Green Heart Isle, arriving at a tomb-like structure. Slightly to the north, you will find the orange key - watch out for the scorpion guarding him, to be eliminated without mercy!
Boss: Sting Spider
Proceeding east of Eranti you will find this boss, who has the yellow key. You will need to delete it to get this key. We recommend taking advantage of Serena, thanks to her remarkable ability to unleash magical attacks from afar, as well as her "preference" in fighting scorpions. Generally the most effective move will be "Bombing Raid", which can hit a large amount of enemies at a time.
Having taken the yellow key, you will have to proceed towards the violet key. It is located in the vicinity of a rock, directly south-east of Eranti. However, a little patience will be enough to be able to pick it up. So give all six keys to Eranti, proceeding at this point to the next dungeon.
Video - Presentation Trailer
Cave of the Ancestors
Use the green key to unlock the first door, then proceed to the next one using the yellow key, then the violet key, then the red key, then the blue key, finally the orange key. So talk to the crystal-shaped enemy, named Qalan. Get rid of all the enemies in the area, aiming to obtain an experience level of at least 50. Then proceed towards the healer, pull the lever to the west, opening another gate. Proceed beyond the gate opening area, pass the barrels blocking the way, retrieve the fragment from the chest. Continue south starting from Savanti, arriving near a blacksmith. Continue south, past the barrels, grabbing the red shard from the golden chest.
Boss: Xilib
Fortunately, Xilib has only a few hit points compared to other bosses. Get rid of Xilib herself first, then deal with the other opponents around her. You will get the "Orb of Delusion" as a reward.
So move on to using your best characters, and then quickly return to the surface. Return from Tondarest to Orad. Talk to Tondarest, then proceed to Cassar Island. Talk to the woman beyond the brown fence, then quickly pass the groups of bees nearby. Continue to the South Port Mines dungeon. Use the warehouse key on the area next to you, then take the wizard inside.
Retrieve the contents of the golden chest, return to Stella near the Savanti. It will open you to the chest, from which you can retrieve a Crystal Clasp. Head back to Tondarest, in Orad - you will now have recovered all seven artifacts! Give these artifacts to Tondarest, who tells you to proceed to the Dead Lake desert. Take advantage of the nearby portal. So talk to Tylwan, and jump on the raft to travel further forward. Talk to Zerlorus, who will join your party. Now go back to Tondarest again, getting some more ingredients. Tondarest will therefore tell you to begin to watch; you will need to proceed to the "South Pass" island.
Once you are near Arilla, continue south-east. As suggested by Tondarest, visit Tscha Island first.
Warehouse & Great Labyrinth
We recommend using the warehouse as a "base" to try to progressively increase the level of your characters. It is in fact advisable to have reached a level of at least 75 before proceeding. Then follow the signs along the map, returning to Limwar's house. Despite being a boss, it is very likely that you will be able to finish him without any difficulty, given his small amount of life points - when compared to yours.
Having completed this battle, the level reached will allow you in all probability to win the final battle that awaits you. So, let's start by proceeding to Broad Kennel. You will first need to locate five other objects within this dungeon. Kill everything around you first, so that you can more easily proceed along the dungeon itself. Then pull the various levers and jump into the space-time passage. You will now have to face Hyperdron, a kind of mini-boss. When compared with Limwar, it will prove to be a very easily eliminated enemy - we therefore recommend a strongly offensive approach, you will not have to have any mercy on your opponent, therefore you will finish him in 2 or 3 total turns.
Having also recovered the last emerald fragment, put all five fragments together to cause the emerald to "melt".
Mordan
As usual, we recommend that you follow the exclamation marks until you reach the immediate vicinity of Namoris. You will come to a dungeon that will look like a mine - and it will actually be a mine. Collect the last ingredients for Tondarest, then return to give them to him, obtaining the magic staff in exchange. Then go through the portal to return to Cassar, talking to the man (not recommended) visible next to the portal itself. Then watch the next movie. Namoris will appear next to the portal.
During the next dialogue, Namoris will begin to "launch" waves of enemies towards you. We recommend repelling the first wave by simply resorting to Serena's Bomb Raid. When the second wave arrives, therefore, you will have to try to use slightly more complex strategies, given the considerable amount of enemies in the area; we recommend that you mainly take advantage of hand-to-hand combat, combined with the weapons available to your characters, which should now be of considerable power - capable of destroying an enemy in 2-3 well-placed hits. You can therefore see it directly with Namoris!
Boss: Namoris
It is almost essential that your party contains Serena, Dozeru and Baldren. For all characters, the level should be at least around 80 - it is a level that allows you to have a certain "confidence". Baldren is the character who can inflict the greatest amount of damage to Namoris by far; having it inside your party is therefore essential. As far as your attacks are concerned, the most suitable attack at your disposal should be Shield Bash.
Moving on to Dozeru instead, we recommend using "Knightly Lance" over and over again, which is also a remarkably effective move against the type of enemy you are about to face. Unfortunately, after the first "calm" phases, Namoris will begin to summon assistants. However, we recommend not varying your approach, at least until the amount of enemies in the area begins to cause you real problems.
You should therefore be able to defeat Namoris in about ten minutes, repeating these strategies continuously. After his death, you will be able to complete all summons, and recover various rewards, as well as enjoy the final scene!


