Rainbow Six Siege is a very complex game for those approaching it for the first time, starting from its basic mechanics. Of course, the high destructibility of the environments, friendly fire and much more are the cornerstone of this game (which you can find a general smattering of here), but knowing the gadgets of the various operators and the various interactions between them is in turn very important. As for the other mechanics we are talking about a not exactly simple job given the almost fifty operators present at the moment.
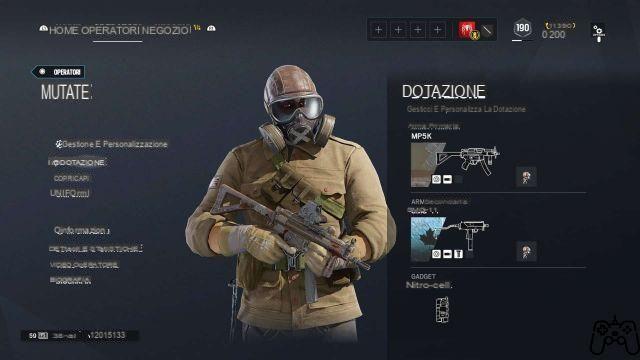
With this idea in mind, I thought of writing this guide to the various operators who joined the Rainbow team during the three years of the project, precisely to help new players to get to know them better and to make more aware of the various gadgets and theirs. peculiarities. The guide also includes photos (for which we thank the extremely available Sheennyra for the time and help in making them), in the hope that they can provide, where possible, also a visual aid to understand what you are talking about.
Without further ado, a good starting point for this task is that of the SAS unit, a unit as useful and well structured for novice players as it is for veterans of the game.
Sledge (Forward)
Sledge is a great operator to start getting familiar with the various mechanics of Rainbow Six Siege, both thanks to his arsenal of weapons, and to his gadget, which is conceptually simple, but very useful in various situations.
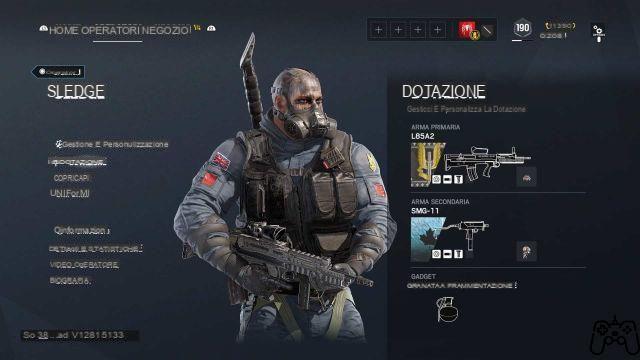
Since the shotgun in attack is almost always not recommended (except in very rare cases), as a primary weapon Sledge has a single choice, valid for all groups of players. The L85A2 assault rifle is an excellent combination of high damage per shot and the easy recoil management it has, the only marginal flaw is its rate of fire, a little below average. As a secondary it is always better to have the SMG-11 submachine gun, excellent in close combat, rather than the pistol.
As one of the few attackers equipped with grenades it is advisable to have those supplied, rather than stun grenades, as, once mastered the throw, they can be a lethal tool against any defender (who is not protected by Jaeger).
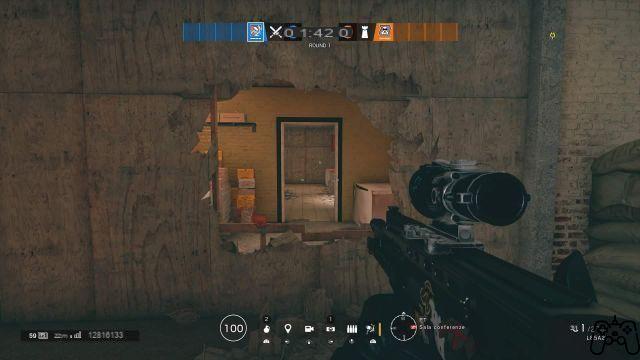
Moving on to the Sledge gadget it consists of a demolition hammer, which can be used to break any destructible and unreinforced surface. This involves not only the ability to open gates to create shortcuts or new lines of fire against enemies, but also the ability to break the floors above the targets and from there shoot through the beams at the hapless defenders.
Especially this vertical play possibility is extremely important to keep in mind, as many maps have this type of floor that can be destroyed by Sledge. Once you have learned in each map which floors are useful for this purpose, it is easy to use that knowledge to put a lot of pressure on the defenders, who are forced to choose whether to abandon safe positions, or risk death from above.
In addition to the above, Sledge's hammer is also useful for quickly destroying Castle's barricades, barbed wire and bulletproof cameras, including Maestro's Evil Eyes.
Thatcher (Forward)
Thatcher is one of those operators who, in the vast majority of cases, it is not wrong to have in the group, because it is always useful for him. In terms of weapons supplied, he is very similar to Sledge, sharing with him the L85A2 rifle, the shotgun and the pistol of the SAS, with the difference of one more choice between the primary weapons (the AR33, also a rifle of assault) and one less of the secondary ones (does not own the SMG-11).
The AR33 has a fairly good rate of fire in the face of a reduced magazine and a slightly more pronounced recoil than the other assault rifle, yet it is a viable alternative to aim for. As a secondary gadget it is perhaps more useful to have the Claymore mine to cover your back, even if the breach charges can still be a valid choice.
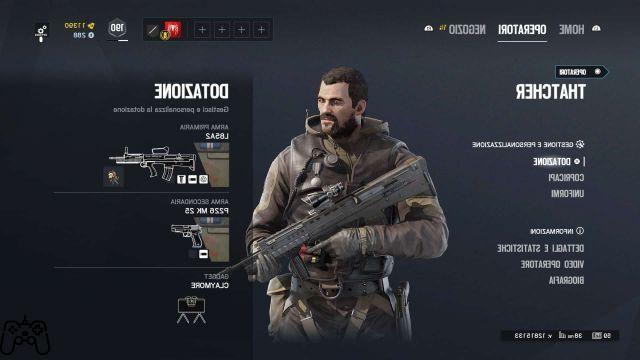
Thatcher's ability is to throw EMP grenades with which she can destroy / disable any defense-controlled electronic device within their blast radius, even through a wall. Since electronic gadgets are very popular among defenders' skills (Mute's jammers, Ela's concussive mines, Kapkan's traps, Lesion's Gu mines and many others), Thatcher's EMP grenades can be used for various purposes and in many strategies.
The most common use is to use the EMPs on hatches and reinforced walls to remove all those defensive gadgets that prevent the functioning of Thermite's exothermic charges or the X-Kairos of Hibana. In addition to this, another common use is to throw EMPs near doors and windows to clear the entrances of some traps and possibly Jaeger's ADS.
There are a few details to pay attention to when using Thatcher. The first is that EMPs are effectively grenades, so if they come within range of a Jaeger's ADS they are destroyed before they detonate. The second is a limitation of this gadget, for which the EMPs do not destroy, but only temporarily disable certain gadgets, including the cameras of all types, the holograms of Alibi, the Yokai of Echo (which also fall to the ground if disabled), the electric discharge of the Clash shield and the gadgets of Vigil and Pulse.
Mute (Defender)
Mute is a kind of Yin versus Thatcher's Yang. While Thatcher destroys the defense's electronic gadgets, Mute blocks the activation of any of the attacker's electronic gadgets, including drones, greatly slowing the attack team's operations.
As an arsenal, Mute has among his primary weapons the MP5K (a very handy, but not particularly strong submachine gun) and the SAS shotgun, which, in defense, is a respectable weapon for those who know how to use it properly. As secondary Mute has the unit's service pistol and the SMG-11 available. Some valid arsenal combinations consist of carrying the SMG-11 as a secondary, combined with the MP5K, in case you want something more reliable over medium distances, or the shotgun, in case you already have excellent control of the SMG-11 and you need an excellent alternative for short-range clashes (as well as the possibility of restructuring the objective).
As for gadgets, the C4 is a great choice against shielded operators and to block attackers who place the defuser, but in case you don't know how to throw it well the bulletproof camera is always a great choice to provide your teammates. useful information.
Mute jammers are incredibly versatile gadgets as the ability to block any electronic tool can slow down attackers enormously. A prime example of this is that jammers can prevent the destruction of reinforced walls, at the hands of Thermite or Hibana, unless they are sufficiently supported. The range of these devices allows you to protect up to two reinforced walls at a time if placed correctly, so it is possible to place them efficiently and thus save some jammers for other purposes.
Another important use of jammers is to block drones. If a drone lands in range of a jammer, it remains blocked as long as the tool remains active and cannot provide information for attackers. For this purpose, it is possible to place these gadgets near the access areas of the drones, although in this case the jammers are more vulnerable to shots from Twitch's firearms or drone.
A great synergy of Mute is with Castle and its bulletproof barricades, as an explosive, such as the Breach Charge, is required to destroy them within a reasonable time, but they can also be used by Fuze to place his cluster grenades undisturbed. With the presence of the jammers the story is very different, as the breach charges and the cluster grenades do not activate and the defenders have to resort to either the destruction of the jammers, or necessarily use operators with non-electronic gadgets such as Ash, Zofia or Sledge , resulting in a greater waste of resources.

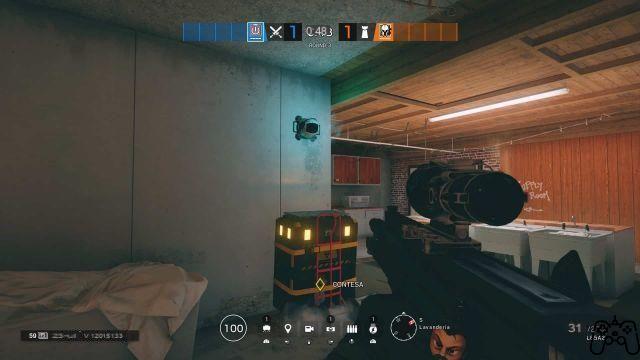
A final trick for Mute is to place the jammers on some raised structures, such as some laundry cabinets in the Oregon map, to completely block the access ladder to the target to the drones or prevent the destruction of the hatch above the target with Hibana. o Thermite (although more preparation is required in this case). Learning these places is always convenient because they are few among the various maps, but for these objectives knowing this possibility can make the difference.
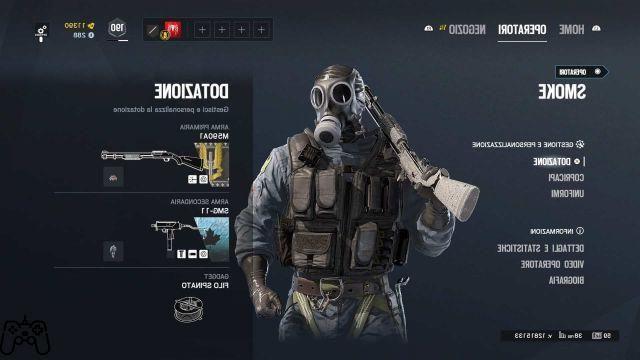
Smoke (Defender)
So far we have talked about three excellent operators for both novice players and more experienced players. Smoke, unlike his peers, is a more suitable operator for veterans, who can master both the weapons and the flow of the game within him.
As for Smoke's weapons, there are some forced choices, as although it has two options both for the primary (the SAS shotgun and the FMG-9 submachine gun), and for the secondary ones (the service pistol) and the SMG-11), one combination of all stands out more than the others. The FMG-9 is quite deficient in almost all aspects and this has led players to create the rifle and SMG-11 combination to take advantage of the peculiarities of these two weapons and overcome the problem. As already mentioned above, it is a quite powerful combination but difficult to master, therefore before putting it into practice it is advisable to do a lot of experience with both weapons. Switching to his primary gadget, Smoke is equipped with three canisters of toxic gas, which he can remotely launch and activate (if not detonated they stick to the surface they were thrown towards) to damage anyone in the poison cloud (except himself) . The gas does not cause particularly high damage, so more than a tool for killing, it is a tool suitable for the negation of an area.
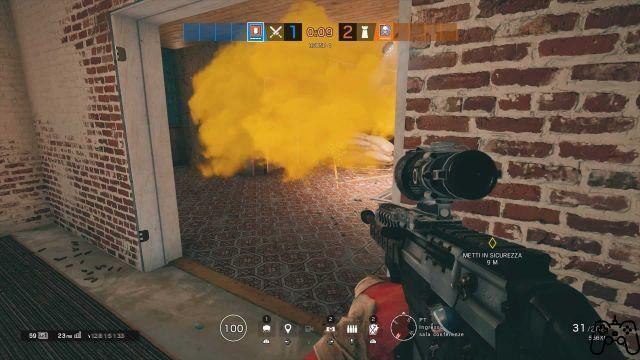
Going to deepen this concept, we can say that denying access to a certain area slows down the progress of the attack team. Smoke achieves this effect thanks to the poor visibility and exposure damage offered by the toxic cloud of its grenades. An attacker who decides to pass through this gas seriously risks finding himself in a disadvantageous condition in the event of a firefight, as, having suffered damage and not being able to see correctly, he can become easy prey for a defender, perhaps Smoke himself. , which instead is in a better condition.
Another type of area denial occurs when attackers attempt to place the bomb defuser. In this case, a properly positioned Smoke can throw a toxic grenade directly at the vulnerable attacker who is placing the device and drop the toxic cloud on him. At this point the opponent can decide either to give up the operation and secure himself (thus losing precious time) or to continue and risk his life.
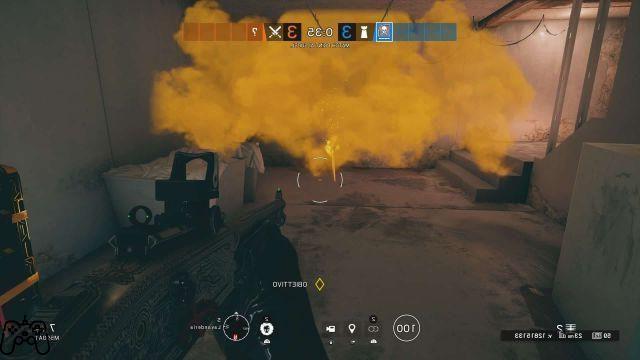
In the event that the opponent is already damaged and Smoke has thrown the grenade with the right timing, the option of completing the defuser placement can be particularly dangerous. Not only does the attacker risk losing his life, but also failing to do so and losing the defuser in an area that is difficult for his teammates to access, thus resulting in a big advantage for the defenders.
A final example of Smoke's incredible versatility is that you can even use the toxic cloud as a cover to pop out a few inches from your opponents, and then devastate them with your shotgun. It's not an elegant move, but when done properly it's still noteworthy.