


After the German operators of the GSG9 (whose guide you can find here), here comes the GIGN, one of the most appreciated units by the community of Rainbow Six Siege, although it is not one of the simplest to make the most of. One thing these operators have in common is the fact that although almost all of them have multiple choices as primary weapons (except Montagne which only has a shield), for each of them there is an option that, given the performance, far outweighs the others, making the choice very simple.
Twitch (Forward)
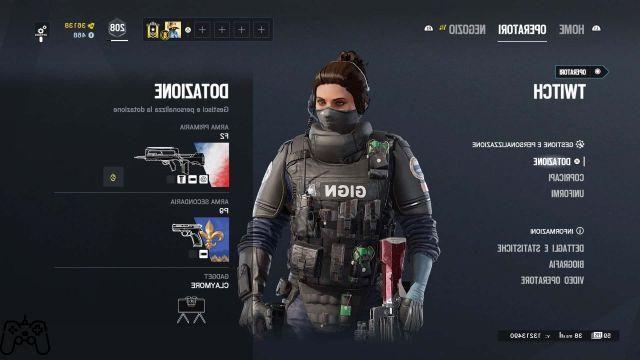
Over time Twitch has suffered numerous debuffs due to the usefulness of its primary gadget and the power of its assault rifle. In particular, the F2 has long been regarded as one of the best assault rifles in the game, thanks to its high damage per shot and its exceptional rate of fire. The only flaw of this rifle is represented by a fairly marked recoil. Despite the defect just mentioned, this is the weapon that most of all characterizes Twitch, as there is no comparison with the other two choices available, decidedly less valid. For secondary weapons, Twitch (like all his colleagues) has the P9 pistol and the LFP586 revolver at its disposal. Although the revolver is far more lethal at close range, it has a longer reload time and recoil than the P9, as well as a smaller magazine, so it is only recommended for more experienced players.
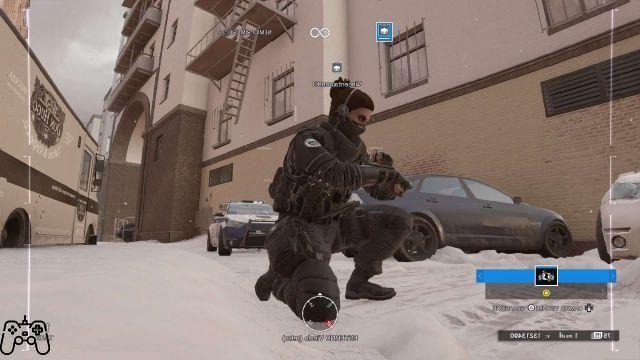
Moving on to the Twitch gadget, these are two stun drones, similar in many respects to those supplied to the other operators of the Rainbow team, but with two substantial differences. The first of these differences lies in the possibility, for each drone, of firing up to five taser shots, capable of inflicting ten points of damage to the operators affected, or of destroying the electronic gadgets and opening the black mirrors of Mira. The second difference is a weakness of these drones, namely the inability to jump over obstacles.
This gadget may not seem very useful on the surface, but when guided carefully and precisely, these stun drones can be quite powerful. Thatcher with its EMP grenades can free up to three small areas from various electronic gadgets, while IQ can detect and destroy them with a weapon, but Twitch can be a good bridge between the two, finding the various targets with your drone, to then remove them from the game (plus providing information to their allies).
One of the most important uses of stun drones is to open Mira's black mirrors and destroy Maestro's Evil Eyes.. In the first case, a single shot on the can is enough to open the mirror, while in the second case, with one shot it deactivates and opens the camera and with a second shot it can be destroyed. In both cases, these are very important operations to carry out and that without Twitch would require greater coordination and waste of resources on the part of the team.
All this versatility offered by stun drones comes at a cost. The noise Twitch's drones make makes it easier for defenders to spot in quiet moments, while the inability to jump over obstacles forces Twitch to maneuver their drones through roads that aren't blocked. If you take into account these two problems and the typical vulnerability of drones, here it becomes evident why Twitch is not particularly easy to use. Maneuvering the drones carefully and expertly through the map so as not to lose them and make the most of the few ammunition available is not easy and must be done with care.
Mountains (Forward)
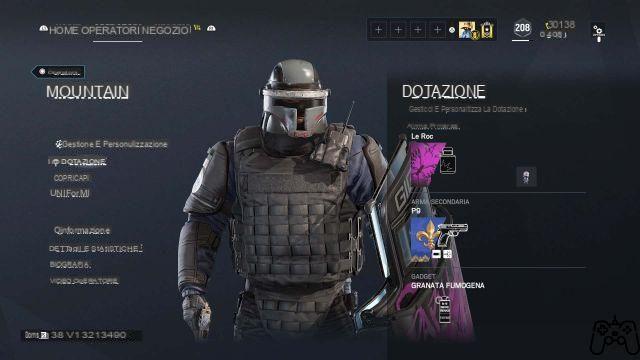
Montagne is the French equivalent of Blitz and, like his German colleague, has only one shield as his primary weapon, in addition to the two French service pistols as secondary. What differentiates Montagne from Blitz, besides the higher weight class, is the role of him with the shield. While Blitz tries to isolate opponents and then finish them off once dazzled, Montagne plays a more passive and reasoned role.
Montagne's extendable shield is its primary gadget and when active it allows the big attacker to be completely covered by any front and side attack, at the expense of being unable to fire the gun. Montagne's only way to fire is to retract the extendable shield, suffering the same weaknesses as other shield operators.
These characteristics, combined with its low speed, put Montagne in a position of protection for companions and as a living drone. In case the team is unable to use the drones to track down the enemies, Montagne can provide real-time indications to their allies and coordinate with them to eliminate the various opponents. In addition to using it as a source of information, you can always resort to the simple protection of its shield when placing the defuser, which is always a welcome thing.
When it comes to weaknesses, Montagne is particularly susceptible to any kind of trap, including the mines of Ela and Lesion that force him to withdraw the shield, either by the effect of the mine itself (Ela) or to remove the poison (Lesion). As for impact grenades and C4, Montagne's extended shield protects him more from these explosives if they are thrown in front of him, while it offers no protection if they manage to be thrown beyond the shield.
Ultimately, Montagne requires coordination with the team and an excellent sense of play to understand when to attack, when to withdraw and above all to put pressure on the opponents without ever finding himself in a dangerous situation. This is not a simple operator, but a good Montagne can be one of the worst thorns in the side in the game, without being frustrating to have against. The best advice possible, both to counter Montagne and to make the most of it, is always to stay calm and play with your head, otherwise in both cases, defeat is assured.
Doc and Rook (Defenders)
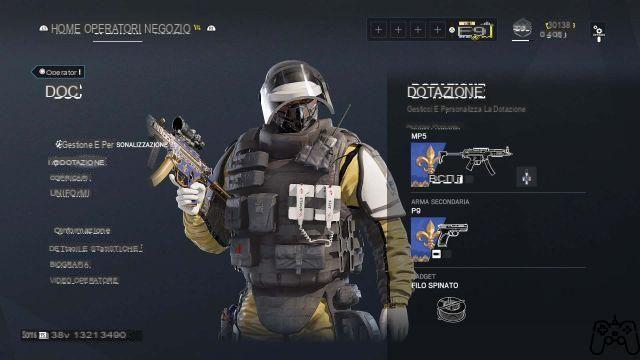
Doc and Rook are two operators who share almost everything, starting from the same arsenal of war, as primary and secondary weapons, up to the statistics (both have three points of armor and one of speed). The substantial difference between the two operators lies in the primary and secondary gadgets.
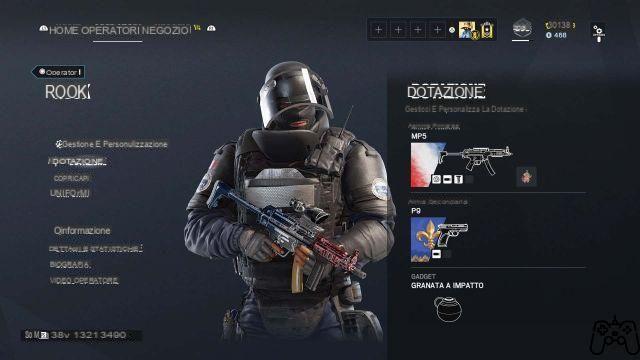
The most important element these two defenders bring is the MP5 with Acog viewfinder. This highly accurate SMG, coupled with the telescopic sight, can be a very dangerous weapon in the hands of skilled players, especially for keeping long corridors or very narrow angles at gunpoint. The damage per shot is quite low, but an easily manageable recoil and good rate of fire make it an excellent option among the few weapons equipped with ACOG in defense (as well as the best choice as primary, for both Doc and Rook).
As for the primary gadgets, Rook is equipped with a bag of bulletproof armor plates that can be placed at the start of the round. Rook's plates give the wearer some interesting perks, such as a 20% increase in their bullet defense (about one more bullet than a headshot) and the ability to be knocked down by explosives, but not killed. on the spot.
Doc's primary gadget consists of a pistol that fires a syringe of adrenaline, capable of recharging part of the target's life. Generally, each of the three syringes available to Doc can recharge forty life points to himself or to an ally, up to a maximum of one hundred and forty (all points above one hundred are lost over time, up to one hundred) , or revive himself or a fallen companion with seventy-five life points, instead of the classic twenty-five (this creates excellent synergy with Rook's plates).
The choice between one or the other French defender, as well as for the secondary gadgets that can be used by the group, basically depends on your style of play. If you are convinced of your ability to aim and you prefer an aggressive style, perhaps even solitary, then Doc's syringes can be very useful for healing any damage suffered in the clashes (or heal some ally who may need them). In case you tend to die often and still want to support your team, Rook is a great choice, as once the bag with the plates has been placed, his role ends there and the French defender can safely devote himself to trying to bring some enemy with him in the grave.
Videogamingallday.com Help Did you like the article? Share it!


