


Please note:
The solution is based on the American version of the game, so there may be differences for the Spanish version.
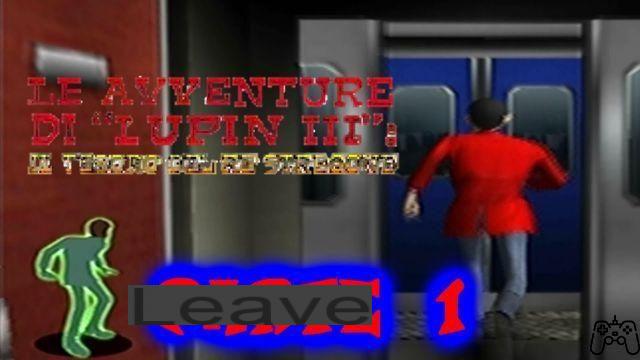
CHAPTER 1 - Disorient Express
From the car, walk straight, passing the statue; a policeman will lock you in the room. Grab the safety manual behind the boxes after the statue itself. keep going straight hiding behind the statues, until you think you have reached an optimal position to shoot the policeman. Then press the red button, exiting the car. Inside the door will be a sleeping cylinder; after taking it enter the double door first, then inside the blue door. Switch to first person mode and while waiting for the policeman to be near the door, take the opportunity to hide behind one of the seats. Keep going from seat to seat until you exit through the sliding doors. Inside the red door will be a policeman disguise. When you wear it you will notice that there is a piece of paper in the pocket with 2517 written, a number that you will have to enter in the numeric keypad. Enter the blue door and give a friendly nod to the policeman, then steal his wallet to get the BGM card; again, look in his pocket to get Lupin's arrest warrant. On the counter there is a document that you will need to take, once done, go up the stairs next to it. When you enter, say hello to the policeman and repeat the procedure from the previous time to receive the playing card. Press the red button before going down the stairs. Enter the north door. Take the infrared glasses on the right then enter the silver door; then again in the blue door. Take off your policeman's disguise and put on infrared goggles. You will see lasers. Once through, you will see a switch. Don't press it, there are other lasers in front of it; wait for them to disappear to approach and press it. The stairs will unlock; Put on your disguise and proceed. Crawl to where the cop is looking and you will see a sleeping cylinder on the floor. Pickpocket the cop to get Gighen's arrest warrant, then again for Goemon's. Then continue, then to the right through the window. Take the photo of Lupine and his gang by moving the chair; then move it to the other side to take the pitcher's photo. Then go up the stairs, still moving the chair that is in the middle of the room, to get the photos of Teresa. Near the door, still using the chair, you will find a nursing kit. Put on your cop disguise and head down. Look in the policeman's pockets to get a doll; then again, receive another doll. The fourth time you will get a card; then look at the notice board where you will see the number 7391. Go back up the stairs. Enter the code on the numeric keypad; then go through the silver doors to get to the kitchen machine. Take off the disguise, enter the second silver door, then pickpocket the cops to find Fujiko's Trading Card 01 and 4 nursing kits respectively. Go out and wait a bit, after the cutsecene look to the right where you will find a fryer. Then use the food cart. Take the card on the table to the right; then enter the door at the end of the hall. Enter the waiting room and take the documents on the first table; then go to the numeric keypad inside the smaller room and enter 6954. In the middle, to the right, is a table with a sleeping cylinder. Head to the door at the end of the room. Open the red door to get another sleeping cylinder, then enter the double door. In there, look in the policeman's pockets for a whistle; in those of the other you will find medicines. After that enter the blue door. Take the cop's laptop, then enter the door, inside which there will be another cop to pickpocket twice. So go out; as soon as you enter the new room make sure not to open the red door. Type 1335 on the keypad, then enter. Go up the stairs and enter the only open room. Before Zenigata sees you, hide among the crates; he will leave a key for you to take; then approach him and shoot him with the Liquid Gun. Use the key to open the access to the room from which you will return to the first floor. Enter the door on the right to get the tourist disguise. Use the key on the door to get out. In the next location go through the red doors and enter the first cabin to get the piece of paper with the symbols, then exit. Go to the numeric keypad and enter 0113. Enter the third cabin and press left, then right * 3. Take the security card and then enter the last cabin; look in the suitcase to get the Zenigata disguise. Go out and look in the policeman's pockets for security ID no. 01, then take the exit. In the first cabin there will be Teresa. If dressed as Zenigata Teresa will give you a keycard. So pickpocket the cop for an ID card; use them on the player. Take off your Zenigata disguise to use the Liquid Gun; then use the card left on the colored device. The sequence is green-blue-red; will appear between holograms. Move the statue of a person with an arch onto the yellow square; then that of the person with the weight on the white, finally the guy with the water on the blue.
CAPITOLO 2 - Theive's and Theive's Alike
Return to your hiding place; take the nursing kit there; check the living room for a sleep cylinder. Talk to goemon and gighen to get various items, then head back outside. Use the traveler disguise and go up the stairs, then to the right. Up the stairs again, then walk to the opening at their end. Again, keep going straight to get to the castle courtyard. You are now in the reception hall; take off your traveler's disguise and use the policeman's one. Enter the door on the right and as soon as you enter get ready to greet the policeman, then pickpocket him twice. Go through the double doors and continue down the corridor until you reach two policemen; the one on the right you will have to scan it carefully as usual to find security document number 3. Once done, head to the door on the right; go to the metal shelf and grab the first aid kit and then go back. In the corridor, walk until you enter the room without any doors. A policeman will enter the corridor, pickpocket him to find Fujiko's trading card 02. Then go back to the previous room. Put on the infrared goggles and look to the left, there is an opening protected by lasers. Once you get through, put on your cop disguise and grab the paper on the table, then head to the new hall. There should be a policeman on the corner you can talk to; then take off your disguise and go to the policeman at the end of the hall; shoot it with the Liquidi gun then quickly go to the panel and type 14,15,04, 13. Enter the door that opens and put on the cop disguise. Then in the first door on the right, which after the senescente will begin to fill with gas. Take the duct tape and go to the door marked "GAS"; use the duct tape on it then enter the door. Look at the shelf next to the PC to find a sleep cylinder. Enter the opening and turn right; there is a save area. Go out. You are now in a room which is blocked by some boxes; go up the stairs and stop on the second floor. Continue and you will find an accessible door at the far right of the hall. There is a policeman behind the boxes; do not use the disguise as he can still recognize you. Press the button near the opening on the right, then enter. Enter the door in front of you; there is a policeman that you will have to pickpocket to get the latch. Go back to the room with two doors and enter the remaining one. On the left you should notice two boxes on two metal things that obstruct walking. On the one hand, you may be able to pass. So run down the hall and around the corner, you will find a policeman. Enter the white door on the left; be careful in here as most cops can recognize your disguise. Go to the back wall of the room and hide behind the statues, then put on your cop disguise. Pickpocket the colleague who is guarding the door. Enter, there is a small passage to the next door, open it. In there pickpocket the cop to get a Comic Book. Look in the locker for a key. Go out the door on the right, go ahead and turn right, then back to the corner, and down the hall. On the right, enter the white and gold door. Enter the opening, then through the door. At your feet is a sleep cylinder; In the passage there is a policeman to pickpocket to receive the glasses. Then turn right, then go up the stairs. Use the Grappling Wire, the screen will become first person mode. Press triangle when the viewfinder begins to circle around the object on the ceiling. You are now on the third floor. Again put on the cop disguise and get the whiskey bottle from the cop at the top of the stairs. Use the key on the door next to the cop. Enter the door on the right and then the opening there. Go through the hall and pickpocket the policeman to receive security document 02. Keep going forward; after turning the corner there is a photo with indicated 1935. Enter the opening on the right; equip infrared goggles. Use the control panel in front of you and enter 1935. Re-equip the disguise and enter the door. Get the golden key from the table in the corner. Exit the door to find yourself in the corridor. Use the Golden Key on the first door on the right. Enter the opening. Then back into the opening on the left and run to the door, but don't open it. Quickly take off your disguise and hide in the trunk. A policeman will unintentionally show you the procedure to open the door. Turn left, ignore the first door you will find and enter the second. You should see the pots, which you will take.
GOEMON
Go up the stairs at the end of the road, turn right and follow the main road, then right again. Keep going straight, then right when you see some stone stairs. Walk up to the large wooden door and press X. Up the stairs and turn left to enter the black door. Then go back to Uptown. Continue straight, then turn right. If you pass a blonde woman dressed in blue, you are on the right track. Continue ahead and turn right at the end of the street. Enter the Kafka bar, watch the cutscene. Then back to Uptown; once you've arrived and done your homework, head back to Downtow. Return to the stone stairs previously seen, then back to the wooden door, which they will now let you in. Press R1 to deflect bullets and square to hit. Two enemies will attack you immediately; destroy them and proceed forward, then turn right. When you find some barrels, break them in two; turn the corner and fight with the three enemies that show up. Continue ahead and then turn left to enter the courtyard of the ruins. Here you will be attacked by many enemies which you will have to dispose of as usual. A wall will fall opening a passage. Follow the tunnels until you get to the rescue area where you can find nursing kits. Enter the door on the right, a gate will close behind you. Enter the door on the right, go through the boxes, then back into a door, also on the right. So go ahead and try to go down the stairs.
Boss - There are three bosses: an old man, a long-haired and a fat guy. They are initially scattered. The fat guy has two sticks, deal with them until you hear two bullets, deflect them. So it's the long hair's turn. He shoots arrows, but his HP is low, so he can easily be countered. The old man can shoot you, but as long as you deflect the bullets there should be no particular problems whatsoever. After killing them, an opening will materialize in the courtyard; enter and follow the stairs, then turn left. Continue forward, then to the right, where you will find other stairs, at the top of which you will have to enter the door on the left.
JIGEN
The procedure is exactly the same as that followed for Goemon. The only different problem concerns the absence of the sword, replaced by the gun. Obviously you will not be able to deflect the bullets, but eventually you will be able to be much faster than your opponents in firing.
CAPITOLO 3 - A Pitcher is Worth 1000 Woes
Go down the stairs and enter the opening. At the door, turn up, down and then down again. Enter and go down the stairs. Inside the opening, then go through the hall and go down the stairs. Open the window in the middle of the room; take the object illuminated by the moonlight. Under the stone will be a key to the tower gate for use on the door. Then straight and left at the brown door, which you will have to enter. Center the shot well and go right. Take the second left, coming to a room with a candle on the wall. Use a match to light it. From that room, turn right, head forward, then right first, forward again and right first, then left. There are now two candles to light. From here go right, then the second left. Three candles in this case. Turn them on. From here, follow this path carefully: left, right, right, right. In this room there is a large box. Move it and light the four candles. Left, then forward through the secret passage to the Cathedral. Open the door on the right, take the iron bell near the statue. Exit and go down the stairs, then go right to where the save area is. Use the iron bell on the switch on the column. A door will unlock, enter it, cross the room and go up the stairs to the terrace. Turn left and enter the door. Then run forward, then right and enter the pot room on the right. Two enemies will attack you. Now follow Gighen's advice, going to the South wing. Re-equip the Liquid gun, then leave the room, then enter the door at the end of the hall. Rescue area. Put on your policeman's disguise. Run to the passage and pickpocket the officer, you will get a Laser Pointer. Enter the door. Then in the door on the right, take the nursing kit. In the opening, then pickpocket the cop. There is a single door on the right to enter; cross the room and look in the pockets of the next cop. Exit the room and go through the hall, then right. Straight through the two openings, then take the one on the right. A policeman will appear. Enter anyway, then taking the first right, taking the note with the symbols. Straight again, then into the opening on the left. After the cutscene Teresa should leave, leaving a key. Take the key with the number. Exit the door at the end of the room, then turn right passing the save point and re-enter the hall. Go down the stairs to the first floor. After the cutscene, look in the pockets of the cop next to you to get some sunglasses. Wake up the sleeping cop, watch to get a doll. Enter the door opposite him. There is a giant metal door in front of you. Enter and run through the hall to the right. There is an opening, go inside and take the sheet with the trio from above the counter. After passing the opening, pickpocket the policeman near you to receive a wallet. Look at the lockers to find a Duct Tape, First Aid Kit and a Sleep Cylinder. The metal door has unlocked. Exit the opening which is guarded by policemen and turn right, then forward, then right through the hall. Continue forward until you come to a door with a numeric keypad. Press the button in the upper left, the one in the middle right, then the one in the lower left, and finally in the upper center; the door will open. Go inside and there will be a save area. Use the key on locker 103 and get the celerino disguise. Exit the door above and head to the metal door seen earlier. Remember to avoid all the doors, just enter the opening with the two policemen on guard. Enter the two openings again and head towards the hall; on the keypad enter 17390548; the code will unlock the metal door. Crawl near the sleeping guard, and before entering the metal door put on your cop uniform. When you enter, the gas will come. Use the Duct Tape on the door as in the previous analogous situation. Go through the gas gate, now malfunctioning. In the new room, take all the items. Exit the opening, then turn right. Run to the wooden door and open it. Go around the boxes in front of you and get a pack of cigarettes from the cop. Go inside the passage and take the door on the right. Turn left and cross the hall. From the guard take the Fujiko trading card Number 03 with the usual method. At one point you will see a policeman walking in the hall; he is one of those who recognize disguises. Neutralize it, then run left and enter the door. Activate the infrared viewer and look at the entrance to the new room. Once you get past the lasers, put on your celerino disguise. Go through the two ports and grab the first aid kit from the locker. Leave through the door that is not guarded. Then left and down the hall. Talk to the cop who will unlock a door, which you will enter. Keep running forward, go around the corner then take a left first. From the cop taking a Stunt Gun, then look again for Security Document 06. Look on the table for a key with a yellow tag. Exit the room and turn left, then cross the hall to the door on the left. Look at the table on the corner to get the key with the red tag. Exit and make yourself across the hall, then left; pickpocket the celerino to get the Folding Knife. Continue in this direction, then left, in the next area take the door on the right. The policeman inside has nothing but on the table you can find the key with the blue tag. Once out of this room, turn right, then enter the door. Run forward and turn right; open the yellow door with the corresponding key. Take the First Aid Kit from the closet. Exit, then right and inside the wooden door. Go ahead a bit, then inside the first door on the right. Here is Rang. On the table, take the memo, then exit again. Turn right, pass the hall. Left again and in the hall take the matches from the celerino. Always left, arrive at the blue door and open it with the corresponding key. From the cabinet taking the guest disguise. When the celerino is not looking towards you, wear it. Exit and you will see Fujiko, follow her and you will go into a previously blocked room; Lupine will steal Rang's ID card from Fujiko. Put on your guest disguise and down the hall; then turn left, go through the small corridor, turn again - this time to the right - and exit through the wooden door. Run down the passage and enter the red door on the right. Then go down the stairs. From the guard take a photo of the fiancée; turn right and run around the room, then go up the stairs. Again, go up the next ramp; pass the hall and enter the door at its end; go back to the first floor. Turn right and continue forward, along the hall, into waiting room 1. Here straight, then take the first door on the right. Take off the disguise and move the bookcase to get the Green Book. Put on your celerino disguise and go out. Turn right into the hall, then go through it and take the next door on the right. Take off your disguise and equip the infrared viewer. You are in a room surrounded by lasers. Overcome them carefully, this time it is more complicated; once done, put on your cop uniform and go out. When you reach the hall, enter the door on the opposite side; you will find yourself in a room full of boxes. There's a Blue Book back there, get it. A cop will enter the room. Take Fujiko's Trading Card 04 from him. Exit, turn right, pass the hall and take the door on your right. Pay attention to the library, take the White Book. Exit, go right and go back to the main hall. Then go to waiting room 2. Keep going for a while, then enter the room on the left; go through it, turn left again, walk all the way down the hall until you take the next door on the left. Here, off the shelf, grab the first aid kit and sleep cylinder. In the living room, take the family photo from the pockets of the police officer who is guarding the door. Enter the door he is guarding and arrange the books in this order: White; Green; Red; Blue. A secret passage is activated; go up the stairs to the security room. Go down the corridor then to the right; turn right corner and use Rang's ID card on the reader. Watch the cutscene. The goal of the game is to score 1500 points in three minutes. You get 10 points every time you hit an enemy with a circle, 50 when you hit them with X. Leave the security room as soon as the door unlocks. Run along the hall, you will notice that the bookcase has now been moved, so that you cannot go down the stairs. Keep moving forward, then turn the corner and enter the previously closed opening. Keep zigzagging until you get to two cops, one of which has Fujiko's arrest warrant. Turn right and run down the hall until you come to a wooden door which you will enter. Going down the first floor two policemen will come towards you. Pickpocket one to get the Goemon figurine. Go down to the first floor. Enter the grand opening; you should be able to see a door to enter. Look in Zenigata's pockets to get a black key. Turn right, you should be in a place with 3 wooden gates. Use the black key on the middle one and enter it. Go ahead, then right, until you reach a small wooden passage to cross; continue forward then left; from here, in the first opening on your left. From the guard take the Security Document 04 the first time; the second you will receive the Letter Opener. Turn around and go to the end of the room; turn right and enter the first opening on the left. Hide behind the crates and open the lockers. Take the guard disguise and put it on. Turn left then enter the door on the right of the hall. Look at the locker in the right corner to find a Sleep Cylinder. Leave the room and head left down the hall; then left again down the stairs. Go ahead, turn right, then into the room. There are medicines in the two cabinets. Once you have them, go back up the stairs. Turn right, then forward, and enter the first door on the left. Go ahead, there should be an opening on the right and a door on the left. Exit the door on the left, then in the middle of the room take the one on the right. From the guard, get a Handy Light and a Flashlight. Enter the door on the left, then go ahead and talk to the guard; then go back, inside the door at the end of the hall. Enter the middle door, then the left one. You should see a bookshop if you have come to the right place. From here turn left, talk to the policeman and tell him to move the crates. Go back to the area where you previously talked to the guard; so come back here and the crates will have been magically fixed. Enter the opening. Go inside and go to the guard, then get him the Security Document 04. Walk along the small passage where you see two guards and from one of them take the wristwatch. Do not enter the door, but turn left, straight and up the stairs. Left again, go down the room and take the first left. From the shelf, take the medicines. Leave the room and head left; then the first on the right and again on the right. From the guard take the love letter. Right, then inside the opening you can see. Two guards will arrive; from the first you can get the Fujiko Trading Card 05. Leave the room, then through the hall, then turn right. Put on your guest disguise and enter the opening. Talk to the guard. Enter the door in front of you. Again, in the front door; from Zenigata take the letter of appointment. Turn right, then straight and into the opening on the right. Put on the guard disguise and enter. Correct to the last chest and type 1468 on the keyboard. Look in the middle of the wall to find a secret door, enter it and go up the stairs. Open the metal door, take the Raven Kreuz disguise. Save and remember to grab the Rave Kreuz Crest from the table. Come back up. Make sure you have the guard disguise. Go to the armor, enter the door nearby and Zenigata will follow you. Exit the room and look at the wall between the armor and the door where Zenigata is. A cavity will open where you can place the Raven Kreuz Crest. Then look at the armor, a secret door will open. Put on the Raven Kreuz disguise and go up the stairs. Keep going straight, pass the enemies and enter the room with the chairs. So go through the door in there and go through the hall. Enter the door at its end. There is an opening in this room, enter it, ignoring the first door on the right. There is a hole, if you get close an enemy will pop out. Then enter the last door on the right, look at the cutscene. Then cross the room and go up the stairs. Go out the door. Put on the police disguise and go talk to Zenigata. Then enter the previously guarded door. Take off your disguise and equip the .38. Enter the door in front of you. In the courtyard, go right, then left into the first door on the right. Go ahead, then right and run until you get to the opening at the end of the wall. Go up the stairs, at the opening turn right. Enter the only door available. Go through the corridor and turn right, then enter. Right again to the terrace; then to the left, pass the hall, enter the door. Continue forward through the passage, then enter the opening, then back into the opening on the left. Take a box of ammunition from each locker. Exit the room and turn left, passing the whole hall. Go down the stairs, turn right, then into the first room on the right. Grab the sheet with the Diagrams and head back down the stairs. Follow the corridor to the door, then the path. Continue forward, then left, then enter the opening on the right. Take the emergency contact sheet and the four ammo boxes from the locker. Exit and head right along the corridor down the stairs. Turn left at the end of the corridor and enter the opening always on the left. Get the two medicine kits and ammo from the lockers. Go back up and go to the terrace. Enter the door in front of you, kill the enemies. Turn left and enter the door on the right. Follow the corridor, shooting at anyone who stands in your way, then enter the door. Always ahead and turn right, then down the stairs. Right again, for a short distance, then left, inside the door. In the middle of the room take the door on the right, you should be in the courtyard. Go through it and kill whoever tries to stop you, then continue inside the door on the opposite side to the one you entered from. Always ahead and inside the white door. Then in the big stone door. Go down the stairs, take one of the ramps, at random - they all lead to the same area. You should be in a save area. Examine the panel surrounded by a yellow square; it's a puzzle. Instructions: assign, starting from left to right, the numbers from 1 to 9 to the keys on the panel, the resulting figure is similar to a telephone keypad. Then enter these sequences: 74269877; 1478963511; 51321178999; 86324777; 52111745598556355. Equip the infrared goggles and proceed to the next room. You will be surrounded by lasers. There are specific points on the floor where you can walk without being hit, simultaneously changing the direction of the lasers. You must be able to get to the gray tile in the middle.
A 3 A
4 5 2
A 1 A
The A's represent the corners, while the numbers represent the faded tiles that regulate the lasers. You start from number 1. First, go ahead and turn right at the corner, then straight, left at the corner. Continue forward, and to the left. You get to tile 4. Now you need to get to 3. At the corner turn left, then straight, then left again, straight, left, and you will get to 3. Now go to 2. Turn left at the corner, then straight. A laser blocks the next corner, but it is intermittent, so you can pass it without any particular whims. Turn right at the corner, pass the laser as before. Go ahead, left on the corner, you are at 2. Now towards 5. Forward, right, pass the laser. Still ahead, pass the usual damn lasers again. Still ahead, two more lasers in the corner. Walk to the middle and you are on 5. Place the vase on the altar. Turn around and walk forward, then right and enter the door you needed the Iron Bell for. Go up the stairs and once you get to the terrace turn right paying attention to the piece of wall fallen next to the door. Pull the lever; turn around and run across the terrace. Once on the opposite side, pull the lever on the wall. Then go back to the altar.
CHAPTER FOUR - Villian's Revealed!
Go down the stairs, follow the corridor and enter the room with the demonic sculpture. It would appear that Lupine is dead (??). Choose one of the two remaining characters, it doesn't matter which one first, as you'll still have to complete the level with both.
GIGHEN
Go down the stairs and stop before entering the opening. Get ready to fight with people armed with Kalashnikovs. Then enter the opening on the left. You can take cover behind the wall; after killing three, go and retrieve the medical kit from the chest. Go back to where you were previously, and make your way to the broken column, shooting the one that isn't in pieces. Once broken, climb to the top of the first of the two, then reach the one you just smashed. Enter the opening, follow the path until you reach the empty room. Go through the room until you get to the opening and you will be attacked by enemies. Shoot them and continue inside the opening. Follow the corridor to a particularly insidious enemy - you will recognize him by the yellow color of his eyes. Continue down the corridor until Gighen is attacked by two enemies, finish them and keep going straight. You will come to a save area. Save the game and enter the room. Arriving at an opening covered by axes you will see a cutscene, then the boss will enter ...
Boss - The boss throws knives in quick succession, using the pistol at the same time. Use the rocks as cover to get close, shoot and hide behind the rocks when needed. At some point, shooting will create a hole in one of the openings previously covered by boards. Once the boss has been eliminated, enter the opening in question. Continue down the corridor, taking the sword from the statue. It is now Goemon's turn.
GOEMON
Go down the stairs and continue to the empty room. Enemies will pop up from the ceiling as you walk around the room, take them out and look in the box on the corner for a first aid kit. Continue down the corridor entering the door in front of you, continuing forward until you find an enemy armed with Kalashnikov. Kill him and enter the door on the right. Continue forward through the doors until you reach another one of the usual ones. Take care of it. Straight on until Goemon notices how the door opens from that side. Enter the door on the right, then straight ahead. In the next one, the door on the right again. You should see another enemy armed with Kalashnikov, which you will finish. So always right. Cross the room to the corridor and flip the switch. Go back to the hall, enter the door on the left. Kill the guard and keep following the corridor, you will find another opponent. After killing him, going straight, you will find yourself - at a certain point - surrounded by the usual enemies, which you will take care of. Going forward you will find a save point; enter the next door and go through one of the openings covered with boards.
Boss - It is equipped with Kalashnikov; the best strategy is to try to deflect the bullets, while avoiding his stick, with which he will come at you. After you hit him a number of times, he will shoot at one of the previously covered openings. Go inside and get the shield from the Demon statue. You are now in control of Lupine. Place the three discs in the opening, and you will find yourself in a save area. Continue forward until you get to the stone room, enter it.
Boss - Shoot fireballs; at the same time you will have to avoid the usual annoying enemies. Take care of them first, then target the boss - in first person mode. You can hide behind a nearby rock. Keep shooting in FPS mode until you kill him.
CAPITOLO 5 - House of the Dead
Two Lurchers are attacking you. Hide behind the broken columns and shoot them using first person mode. Then enter the wooden door on the left. There are bats in this room, always deal with them in first person mode. Enter the door on your right. Walk down the hall and enter the only door. Six enemies will attack you; Quickly enter the other room, then have them enter in turns so that you can kill them more easily. Then go back to the main hall. Run to the left corner of the hall. Enter the green iron door. Continue straight, then left. Kill the enemy and look in the chest for a first aid kit, then enter the other door. Forward again, and inside the brown door. Open the chest near the door for another first aid kit, then leave the room. Lupine will hear shots; keep going and enter the first opening on the left. In the enemy nearby you will find ammunition; then leave the room and enter the blue door. Again, you are in the main room. Go up the stairs, but watch out for the enemies. From the stairs, turn left through the green door without entering it. Left again, run down the hall until you see the door to see on the right, where you will enter. Go ahead, then enter the brown door. There are four bats that you need to shoot. There is more ammunition next to the dead enemy's body. Leave the room, turn left and enter the green door, you will find other enemies to deal with. Once done, cross the hall and enter the opening on the right. Leave the room and, past this hall, look in the trunk to get a dummy doll. Go back through the door you entered, then go back to the main hall on the second floor. Turn right and head towards the green door, where you will enter. Follow the corridor, around the corner. Shoot the enemies, so always straight ahead. Ignore the doors until you reach three opponents that you have to defeat. Keep going straight around the corner and you will be attacked by three enemies equipped with weapons and knives. This part could be quite risky for your HP, so don't hesitate to use first aid kits. Then continue straight until you reach an opening on the right; enter and save. In the trunk on the corner is a first aid kit. Exit the room and turn right, then continue down the corridor. Enter the green door. Turn right and go down the stairs. Follow the corridor through the wooden door on the right. Near the enemy's corpse are some ammo in case you need them. Continue down the hall, then enter the wooden door on the left.
Boss - This boss uses his tail to damage you if you are behind him; if you attack him from the front, he will claw you. Another resource is the scorpion tail. Keep attacking him until he returns to his normal statue status.
Done? Enter the room it came from and get the White Medal Key. Leave the room and turn right at the end of the hall, grab the Dummy Doll from the chest. Then go back up the stairs. Turn right, cross the corridor and use the White Medal Key on the door. Run down the passage and four enemies will come; once you have taken care of it go down the stairs. Turn left, then at the door at the end of the hall. He will get some golden bullets. Here will be some enemies to fight; finish them and go up the stairs. Next to the dead enemy is the Yellow Medal Key. Then turn around and enter the door in the middle of the room. Use the Yellow Medal Key on the door, then go inside. Enter the door and kill the enemies. Turn right to get to the chest, take the contents. Then enter the last door on the right of the hall. Inside are two enemies to shoot at. Open the trunk at the back and grab another first aid kit. Leave the room and go back to the corridor entering the first opening on the left, then go down the stairs. Shoot the three enemies; turn left and you will see three more to shoot. Enter the opening, then along the hall, turn the corner and enter the last door on the right. Near the dead enemy are ammo and one of the usual kits. Go back to the hall and take the first door on the right. Kill the enemies, grab the contents of the chest, then exit and continue through the hall until you reach the opening guarded by a gang of enemies. Take care of it, then enter the door next to the opening. Save, grab ammo and aid, then continue down the hall / hall. Lupine will see an enemy coming up the stairs ... run after him. He will go up then right. You will come to a flight of spiral stairs. Climb up and you will find other enemies, kill them and continue forward. Get ammo and medicine then walk forward. Fire should fill the room.
Boss - Dragon. It breathes fire, which is really bad when it hits. Run to the other side of the room and shoot when the crosshair turns red. Try to aim for the chest. Once killed, run inside the door on the other side of the room.
Grab the Red Metal Key from the table and head back down the stairs. Keep going down the spiral staircase. Take care of the enemies and open the chest to get a Dummy Doll. Go back to the second floor. Enter and continue forward in the hall, slightly to the left you will see the door where you have to enter. Save and use the Red Metal Key on the door ahead of you. Shoot the enemy in front of you and follow the path formed by the libraries. An enemy will throw the bookcase at you; shoot him and enter the opening left by the library. Move the bookcase close to you and enter the secret door. Go through the stairs and around the corner. There are two enemies as soon as you turn left, shoot them. Turn around and continue down the hall, then to the corner. An enemy will knock down some bookcases blocking the opening. Shoot him, go through the opening and enter the first door on the right. Kill the bats and get the first aid kit as well as the ammo. Leave the room; then to the right and along the hall until you reach the door at its end. There should be three enemies and some ammo. Leave, then enter the opening with the bookshelves. Enter the first door on the right and grab the first aid kit. Continue down the hall and up the stairs. Save area, saved and again through the opening. Arrows will start darting around the room, go and press the switch trying not to get hit. The switch will also open a door; take the usual ammo + medicine pack, then enter the door until you reach the treasure room. Now you can choose whether to fight with Gighen or Goemon.
GIGHEN
The boss has a Kalashnikov and a good dive attack. Go up to the second row of columns and wait for Goemon to distract him, shoot him then hide as he turns towards you.
GOEMON
You can deflect bullets, but the main technique is to hide behind columns like Gighen did. He continues until he finds the right opportunity to attack him. It takes a lot of time and patience.
CAPITOLO 6 - I Must Be Dreaming...
Go ahead and go through the door at the end. Run along the hall, continuing to look to the left, to notice the door with the medal above the keyhole. Use the RedMedal key on the door, then run to the hole in the corner. Take the grappling wire and aim for the hole in the wall, then press triangle. Enter through the opening in front of you, then turn right and follow the corridor; corner, left. You will find another opening in front of you, go inside and go up the stairs.
Boss - The little dragon spits fireballs that follow the target, as well as diving into you. Keep shooting and avoiding the shots, at some point it will turn to stone.
Exit the other side and go up the stairs, then enter the door. Climb up using the passage, an enemy will attack you just around the corner. In the room you will enter then there will be another; in the same room you will find a first aid kit on the corner. Enter the only door available and continue forward. In the room, kill the two enemies. Again, here too you can find a first aid kit in the trunk on the corner. So go out; in the next room you will find three baskets to loot. Also exit from here, continue straight and you will come to a save area. After saving, enter the door.
Boss - This boss causes lava to flare up from the ground; pay attention to the red circles to be able to understand the moment when he will strike. Aim for his throat. As soon as the cutscene arrives, you're done. Save, and keep going straight. When you get to the rock-shaped room, you will find another boss.
Boss - Aim for the blue light on his chest; This boss shoots fireballs in quick succession, as well as having the same volcanic powers as the previous one. Use first person view to hit him, don't worry about ammo - as you will have endless ammo. Congratulations, you have completed the game!
Solution video - Final part


