


Port Royal
Use the character you start with along with Mr. Brown - to switch to the latter press the Triangle key - to repair the crank and reassemble the gears. Then move them with the help of the mule, which you can awaken from sleep using the carrot. Then start a duel with Jack. After hitting it, use the pieces of a broken barrel to create a passage to the new location.
Later the action moves to the prisons. Get the dog's help using the bone you find on the right, then have him enter the shaft to drop the bench which needs to be moved in front of Jack's cell. Now just stand still on the left side of the green panel to free Jack. Then let the dog dig near the area where you found the bone to unearth a key: use it on the crank where a key is not inserted, then have the two characters turn both at the same time.
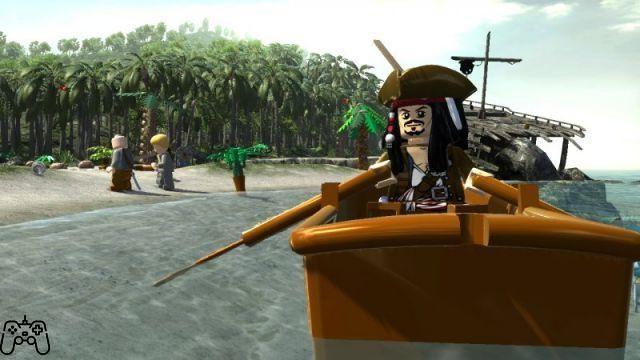
Now roll on the barrel until it fits into the gear, then keep rolling it to open the door. Continue to the beach. After saving the two pirates, go to Jack and extract the compass menu: following the footprints you will discover where the planks are, which must be unearthed by the dog. After assembling them, approach the barrel, roll it along the walkway and discover the switch. Then go to the dock and raise a barrel over your head so you can move under the water. Walk over the switch to raise the dock where you find a key. Use it and go to the platform where you can insert the sword into another switch. Then use the handhold to get to the wheel that you have to turn.
SeamTurtle
Pick up the torch and use it to light the cannon, firing a shot that opens the door. Inside, pick up the two wheels and attach them to the cart, then use the apple to convince the horse to pull it while you ride it.
Break the box and assemble the pieces by obtaining a key. Use it on the crank to raise the pot, then go up using the ladder. Fill the pot by activating the switch with the sword, then reposition it to the right to wake up Mr. Gibbs. After creating an oven on the right, take out a torch and use it to detonate the barrel of explosives. Assemble the scattered pieces of the barrel and enter the tunnel. Then free Marty from the barrel and let yourself be guided by the compass to find his weapon. After you give it to him, you can ask him to slip into the pipeline and destroy the gray structure. Finally, go up the ladder. Then forge the tool that allows you to get to the chandelier. Go from chandelier to chandelier until you get to the only open door.
Get rid of the pirates and deliver the Ruby to Anamaria. Use the latter's ability to close the windows through which other pirates enter and exit through the open door on the left. Use Anamaria's jump again to get to the green bars. Push the box to the left of the balcony to take the item inside and place it on the green panel to open another door. Then push the box to the left so you can use it to reach the balcony. Hit the pirate, then move to the right to be able to hit him a second time, but help yourself with the bench. Then hold on to the chandelier to let it drop so that Cotton can catch the parrot. Now you can go back to the boat.
The Black Pearl Attacks
Use the first cannon in front of you, then order Gibbs to repair the second. The third is behind you, while the fourth is shifted to the left. Then use the nets to climb up the ceiling in different places on the boat and hit the boxes so that some pieces fall to the ground. Among these, a key opens the hatch of the fifth cannon. At this point you can move the guns, so place them where required.
Then dedicate yourself to the medallion. Break the crate nearby, put the pieces back together and push the result down. Throw yourself to the lower level, assemble the pieces, but then move to the right where - using a barrel as a float - you enter the water. Step on a first switch to open the bars, then a second to raise the lock. Go back to the pieces assembled earlier and push them until they fit together opening the door. Swim to the newly opened area and collect the medallion.
Now approach the mainmast and hit the monkeys. Then jump to the right to drop a crate. Assemble the pieces on the green platform while Gibbs takes care of forging a barrel. Roll it into the lifeboat along with a box. Put the box on the other green panel and assemble the pieces, then use the switch to move the platforms. Then using Anamaria jump to the top of the tree for the third shot at the monkey: once it has fallen, chase it for the fourth and final shot.
Smuggler's Den
Select the topmost object in the compass menu and follow the indicated path. To open the hatch, drop the banana from the tree and, holding it, chase the monkey: this will accept it only if chased, and in return will give you a shovel. Drop down and roll the barrel up to the switch to raise part of the bridge. To raise the other side, jump with Elizabeth and grab the top rope. Also with Elizabeth, jump to the right and destroy the three sculptures to get the key. Then open the passage for Jack.
When night falls, follow the monkeys and use your binoculars: point them at Norrington and a short sequence will lead you to the events of the next day. First break the nearby objects to assemble a catapult to use with the wheel. Get some wood from the trap door and hurl it using the catapult. After the explosion, make a spotlight and aim the light beam at it to detonate more dynamite. With the remaining pieces compose a rotating mechanism to direct the beam to the left where other pieces are. With these, make a plank that you use to move left. Then collect some wood and take it to the elevator on the right. Place the wood on the green platform and direct the beam of light towards the reflector. Finally, place the other piles of wood on the green panel and assemble them.
Death Island
Use the switch with the sword to allow Elizabeth to cross the plank, then pick up the key on the bridge to the left and use it with the crank. Bring Elizabeth near the chains, descending on the rocks, then have Jack reach her and pull both chains with the two characters. Then lure the pirates into the moonlight and put their bones back into a wheel. Raise the two parts of the bridge with it, then shoot at the X's using the cannon. Then let yourself be guided by the compass, unearth the object and place it in the indicated place. Now that the lantern is in place, take the two reflective surfaces - one is clearly visible, the other is inside a box - and rotate them until the light hits the wall, opening the passage. Face and hit Barbarossa: when he loses his first heart, he will go into hiding, letting his henchmen take care of you. Face them in the moonlight to get rid of them quickly, then with their bones compose a barrel to fit into the switch to raise the first part of the path to the chest. After facing Barbarossa and his henchmen to the right again, use the pile of bones you can dispose of to compose a target that, if hit by one of Will's axes, clears another part of the passage leading to the chest. Upstairs, push all the ledges into the wall, then get ready for another battle session with Barbarossa and her sailors. Finally push the last pieces into the wall and finish Barbarossa to get your hands on the treasure chest.
In short, you find yourself fleeing while a revived Barbarossa hurls apples at you. Respond with a coconut, stunning him, then use another character to free the one who threw the coconut from the monkey's assault. A couple more coconut tosses should end this section.
Pelegosto
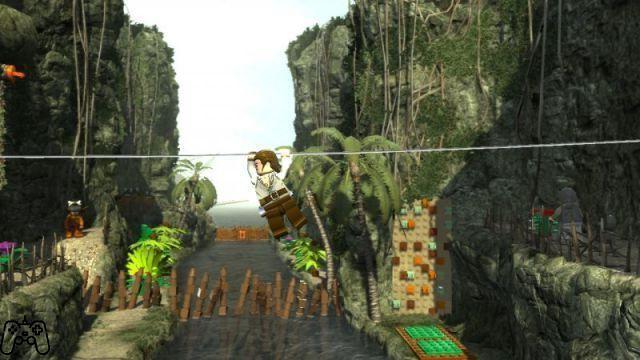
Swing on the rope to move the sphere you are in. Cross the bridge on the right and continue in that direction to jump into the switch that opens the door. Go further and destroy the boxes, then go up using the net and look for the switch on the left that opens another door. Climb left again and use the wheel, then cross the chasm to approach another large spinning wheel. Throw yourself in the hole until you find yourself at the foot of a set of wheels: get on the first while your partner follows you. At the top, destroy the rocks so that your partner can grab you. Roll to the right to open the entrance and exit to the right. Go through the mountain area avoiding the traps and reach the bridge below. As Jack, now use the compass to find the second object, the bone, and give it to the dog, then look for the first object, the box, and unearth it with the help of the animal. Bring it to the area of the green panels on the back, then have the dog unearth the plank to the right of the stream. Use it to cross the stream and collect the box that you need to take to the green panel. There you assemble the pieces and climb to the top of the wall, where you can forge the object that allows you to reach the highest peak. Unwind the rope and grab the vine to open the passage: to close the section destroy the barrier.
A Touch of Destiny
Find the two compass menu items and give them to Pintel and Ragetti to enlist. Then place the monkey cage on the boat and drive it along the waypoints. When the raft runs aground, free it by blowing up one of the barrels. At the broken waypoint, collect the dynamite from the barrels and let Pintel blow up the 3 targets on the lotus flowers. Then pick up the torch and move on the lotus flowers avoiding the tentacles, then have Gibbs adjust the waypoint and continue. At the end of the path go down and forge the wheel that you have to spin three times. Then take the cage and place it on the point indicated on the catapult, then reveal the target with the sword switch, holding it down until Pintel hits the target. Then grab the rope to lower the bridge, then drop down to place the monkey on the green panel. Go through the area with the boxes on the left and use the rope with Jack to get thrown into the next area. Throw the boxes underneath so that the companions can reach you, then use Pintel to hit the target that lowers the bridge.
To overcome the encounter with the marsh crocodile, you must avoid its bites, first of all, waiting for it to get tired and remain still with its mouth open: at that moment throw the bombs in its mouth that the villagers throw below. Then cross the swamp jumping on the green pieces and retrieve the cage. Then place it on the green panel on the right, reachable thanks to the walkway, then continue to the right up to the two sword switches. Using both of them you can collect a key from a fishing net. Take the key to the left and use it with the crank, then roll the cage across the bridge to the switch that gives you access to Tia Dalma's Hut. There pull the two ropes on the back, climb up and use the nets to drop the pieces off the roof. Assemble them, then get rid of the table on the right and put the box in place. Then use the sword switch to make it fall and then drop to assemble the pieces. Finally, use the magnifying glass to follow the ship's path.
The Dutchman's Secret
Flip the switch at the top right to drop a cannon, then give Koleniko a broom. Then use the lantern to push away the tentacles and reveal a sword-switch. Use it and assemble the algae: to go through it use Bootstrab Bill and press the Circle key. Arrived on the left side destroy the container to find inside the pieces that make up Claker. Now bring Bill up to Davy Jones, using the algae, and push the tentacles away again with the lantern light, then throw the ladder pieces underneath so Will can assemble and climb them. Then take Will to the top of the tree and use his ax to drop the pieces needed to assemble Maccus.
In the next section you have to find an escape route. Drop to the lower level and enter the barrel, moving the tentacles away again with the lantern. Roll in the barrel to the switch that pops a first lock. Then, using Bill, cross the algae on the right, lower the ladder by turning the crank, go up and move the tentacles away again so you can move the panel near the gate. Now while one character pushes the door, the other has to flip the sword switch.
Follow Davy Jones to his rooms. With Bill, go through the algae to end up on the other side of the ramp. Use both switches to raise a couple of cranks. Move them so that you can rotate them both, thus raising several panels. So find the right combination to bring the boxes upstairs. Once this is done, place both characters on the illuminated panels that make up a path. If you make a mistake you will be attacked by pirates and to stop the wave you will have to pull the chains.
Cross Island
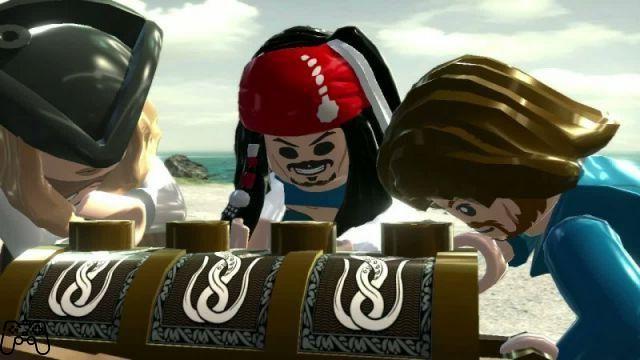
The first thing to do is find the five buried chests. In reality, you really only need the fourth and fifth. The fourth in fact contains a piece that you need to assemble the catapult. Use a coconut that you find from the tree on the bottom right as a bullet. Hit the sword switch like this. When you find the fifth chest, you will have to deal with a giant crab. Rotate the catapult from the crew left on the beach towards the crab and hit it twice so that Jack finally poses to unearth the chest. As Will or Norrington now chase Jack: drop him off the pig and hit him. Since you cannot follow him on the rope, assemble the pieces he left on the street by making a crank and bring it to the right, installing it in the green panel. Get a hammer with the sword switch, then use it to forge the glowing object and enter the opening. Have Will hit the target to continue. Use the Sword Switch and send one character up the plank that is lowered, then grab the green bar to drop a ladder that allows the other to climb as well. Beyond the gate, grab the flashlight, then climb the net, fix the fuse and enter the hole you created.
In the tower, hit the target with the ax and climb the net. Go outside and go down the planks to face Jack again. When you are done you will have to deal with five members of the Dutch crew. Focus first on the ones who put together the shattered companions.
The kraken
Use the cannons left and right to keep the tentacles at bay. Then find three crates of dynamite to be placed on the green panel: find the first on the right, the second in a metal box - which you must detonate by Marty - and the third in the left corner. The latter will be hit by the Kraken, so you'll have to assemble it yourself. Once the three boxes are in place, assemble the switch and forge the sides with Gibbs. Press the switch and follow the platform to the upper level. Here you need two more speakers. To start, turn the knob twice in front of you, while Marty slips into the tunnel: at the exit he can push the fourth crate. To get the fifth, which is on the left, have Pintel hit the target on the wall. Now that you have the five crates, go up the stairs and assemble the new switch, push it, and go up one more level. Being on the bridge you can count on the contribution of the entire crew. Hit the switch on the left, then switch to Jack and take him to the top of the mast using the ladder. Then slide on the rope that goes to the left and sever the tied rope. Now on the bridge forge the winch to the shaft using Gibbs, then hit the switch again. Now that the crates have been raised high enough you can hit them with the cannon.
In the first part of the fight with the Kraken, return to the sender all the pieces that the beast spits at you and that you can collect. After removing three hearts, the monster will try to grab you with its tentacles. Avoid them and take advantage of the tentacle resting on the bridge, using it as a ramp to climb where the dynamite is and light it with the torch. When you have detonated the explosives on both sides, resist the last assault, releasing the bombs that come out of the crates and are thrown at you towards the jaws of the animal.
Singapore
Approach the man asking for the fish on the left and give him what he asks by picking some from the bucket a few steps behind him. Now with Elizabeth climb and slide on the rope, thus opening a passage that Barbarossa will use to reach you. Continue to the sword switch and activate it with Hector while Elizabeth crosses the bars: on the other side have her cut the rope to lower the bridge. Hit the red disc on the door, then use both switches to clear the area and continue.
In the city, advance to the boat to get around the gate and face the puzzle: lower the golden sphere and use the lever to manage the opening of the gates. Inside, pull the chains on both sides to let the steam escape. Sao Feng is now part of your group. Pick up a gun and give it to Tai Huang, then ask him to use it to hit the target. By doing so, you get some carrots that you need to enlist the Tattoo Pirate. You will need her strength right away to pull the orange handle. Now that you have also freed Tia Dalma, you can open the door on the right. Take out the pirates and pull the bridge, again using the Pirate Tattoo. Shoot the target with Huang and pick up the falling box along with Tattoo Pirate, assemble it on the green panel, then push the cart all the way down. Go through the door and the bridge to collect some fireworks that you place on the green panel and light with the torch. Now head to the ship: to lower the last bridge hit the target with Huang.
Video - The power of pirates
Davy Jones' Locker
Use the real Jack to find the canoe and the rubber duck. Then unearth the bow of the ship and prepare to be attacked by the crab. When you get rid of the enemy, hit the target on the ship with Pistol Jack to lower the rope with which you reach the fake Jack. Then look for the peanut with the compass. After giving it to Bomb Jack, use it to blow up the locks on the ship, then reassemble the pieces. At this point you can look for the purple flower to bring the goat to your side, which you need to extract the stern of the ship from the ground. Climb aboard, raise anchor and hang from the chain to pull the ship.
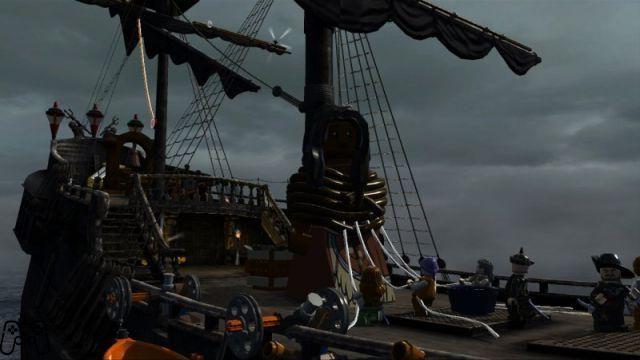
In the next section, as Barbarossa and Marty, you have to look for the rest of the crew. Find Gibbs two levels below deck: get rid of the barrels, let Marty enter the pipeline and finally wake up the pirate with the sword. On the lower level, wake Tai Huang with the shotgun first, then build an axis to move the chest to the green panel, where you get the key that also frees Tattoo. Return to the bridge to free Elizabeth and Tia Dalma by simply destroying the cannons. Then break the chains that hold Pintel and Ragetti, then set fire to the barrel of dynamite so as to make the tentacles that hold Anamaria escape. Then hit the rudder three times to free Will and finally take care of Cotton. Climb to the top of the mast, slide the rope and flip the switch that drops the cage, hit it with Marty's gun, then swing until the ship rotates.
Norrington's Choice
From the back stairs go left to get to a switch which, when activated, causes a target to appear. Hit him and then grab the two chains to gain access to the lower deck. Under there frighten the tentacles with fire and go down. Move the crate all the way, clearing the passage blocked by the tentacles once again with the torch, then use the knobs to move the other obstacles. To proceed, however, you need two swords to use in the switches, and you only have one. Illuminating the left side you can see another character armed with a sword: get rid of the tentacles using the torch again and one of the soldiers will pick up the sword. Go down further and blast the dynamite in front of the gate. Now with the rest of the crew go up and go left. Use the force of Tattoo to always pull the handle on the left side thus releasing the cannons. Turn them on and the recoil will move them, creating space for you to exit the window. Go down and go right, jump with Elizabeth to grab the rope and pass the cannons. In the lifeboat, shoot the target with Tai Huang. Proceed among the tentacles with the help of the torch until you get on board Sao Feng's ship. There use Tattoo to move the weights and you are done with this chapter.
The Brethren Court
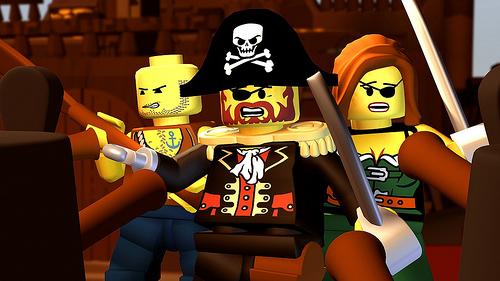
The objective of this chapter is to find the 6 pirates who must present themselves in front of the court. Ammand is in front of you at the beginning: use two swords to activate the switch that knocks down the box containing it.
Then reach the labyrinth on the bottom: you can rotate it using the crank until the barrel falls. Then bring the latter close to Chavalle and use the sword. From where you are, go to the elevator to the left, then go right and use the compass indicator. Unearth a key that you must use on the crank to find Villanueva as well.
Go back downstairs and go left. Reach the checkered lifeboat in the wall: there grab the ropes and replicate the moves of the dancer to catch Sumbhajee too.
Return to the starting point and from there head to the door on the far left. Arrived near Jocard, pick up the gear and put it in its place so that pressing the switch the cannon moves. Then look for the torch with the compass and use it to light the cannon.
Going down to the left you find yourself close to Ching. Place three wig holders around it: you can find the first one thanks to the compass, the other two are on the left.
Now use both sword switches in the elevator to climb to the top of the lair. After the Lords have opened the door, look for the three statues in the left area of the meeting room: breaking them you will get a bone that you need to befriend the dog. In fact, only he can slip into the pipeline on the lower level and get to the chain that opens the cage where the Pirate Code Book is located.
The Maelstrom
In the initial part of this chapter you have to collect the Piece of Eight. To get the first one, destroy the crates to the right of Tia Dalma and give Ragetti the parasol inside. Then look for the trumpet in the wooden box at the bottom left. Then look in the telescope and Mistress Ching will give you the Life Preserver. Then go up the mainmast and go to the nearby tree using the rope: now light the cannon with the torch to get the sausage. Then reach the bottom of the ship where you have to hit the target with Will's ax, then climb the rope to get to the black diamond. Finally, still holding the torch, get on the lifeboat and you will be transported to an area invaded by tentacles: remove them thanks to the heat and you can collect the croissant undisturbed.
In the next section, go left first, where the storm destroys a cannon that you can assemble again. So use it to shoot the wooden barrier on the left. Then move to the area invaded by crabs and build a crank to use on the pin, so as to invade the area with water, rinsing the animals away. Then fire with the second cannon and go in search of the third and last one. On the far right of the ship, turn the crank several times until all the pieces needed to build a cannon fall. Finally, shoot the last piece of wood and move on to the next section. Take down Bootstrap Will immediately and put him back together: he will immediately go over to your side. Then send him to retrieve the torch beyond the algae, then drop him into the area invaded by the tentacles to push the crate to the left. Now Jack can climb the rope and reach the tree on the left from which to attack Davy Jones. After being hit, Jones will fall onto the bridge, moving the action there. Wait for the pirate to get stuck and then sink the second shot. Later he will move to the left, in the middle of the seaweed, where you can only reach him with Bill. For the fourth and fifth blows you will have to go back to using Jack's skill with the ropes.
London Town
Take out the guy with the mustache on the left, then hit the two targets on the window. Climb the rope and move from that to another, shorter one on the balcony, swinging the chandelier. Finally drop the armor and return to the table. Then move the armor stand so you can use it to get to the chandelier, from this exit onto the balcony and jump to the adjacent balcony. Exit and go down the stairs to the hall. Climb on the raised platform and destroy the objects on it, then reassemble the pieces to get two cannons to shoot the statue.
After regaining your weapons, climb the pipe on the left, go to the right using the net, then slide down below. Cross the plank that takes you back to the left, then let Gibbs forge the sword switch and use it to overpass Gibbs himself. After Jack catches up with his partner, have them both cling to the ropes to position the plank in the background. Then cross the aforementioned axis and climb the tubes, then slide down the rope.
Now your task is to reach the first carriage of the caravan. Go from one carriage to the other until you get to the third where you find a musket that you need to hit the target. Continue and stop on the carriage carrying coffins: destroy them and make a board that you will use to reach the distant carriage. Finally, in the last carriage, forge a sword-switch and take control of the horses. Then get rid of the pursuers and throw the coal at the targets.
Find the impostor at the tavern. After you hit him and chased him through the back door, continue to the rafts, then jump on the barrel to use the switch that activates the elevator. Get rid of the enemies and grab the green bars, then move on to the rafts where you again clash with the impostor. Then jump both of your characters on the bellows for a chance to sink the last shot.
Queen Anne's Revenge
After finding the box of bombs, using the compass, throw them at Cook. Then look for the egg that Cook expects to join you. Then use the sword switch to pick up some pieces, then cannon the bars on the right. Then push the dynamite to the right, where it will come in handy shortly. Then look for Garheng on the right and throw a bomb in his direction: to convince him to join you, play Scrum by pressing the Circle key. Using Garheng now, pull the orange handle of Salaman's cell: to enlist him you will need the fried egg prepared by Cook.
To exit, have Salaman create a crane near the crate. Then light the case of dynamite with the torch, which you find on the wall, then use the pieces scattered around to create a ladder. Go up and go to the left, open the barrel and collect the dynamite that you light to create a passage that allows you to continue. Open the cell with Garheng, then head back to the right and jump into the barrel, roll over to the switch inside the cell which releases more dynamite. Turn it on and go up the stairs to the deck.
There the first problem is getting through the red storm created by Blackbeard. First, destroy the lanterns on the left to get some pieces that you can attach to the sword switch. Once this is done, press and hold it while Scrum uses the water jet to climb the mast. There with the musket, shoot the target, then jump across the platforms to get to the other tree. Hit the barrels which pour out pieces that make up a winch with which you can also raise Jack. Use it to activate the switch with which you lower a rope that allows you to get to the far right where the key is, between the fingers of the skeleton. With the key, turn the crank which in turn makes Philip rotate: jump to free him from the chains and close the chapter.
White Cap Bay
First, look for the box, the first item in the compass menu. Use the shovel holding the skeleton a short distance away to extract it from the ground, and in the meantime also destroy the sand castle and the overturned boat, then collect the pieces below. Push them into the water and then take them to the dock. Then using Angelica approach Blackbeard, climb the bars and from there go to the upper platform where there is the crank that lowers the ladder. Now that Jack and his companions can join you, head to the lighthouse. After Garheng opens the door, go up and hold the torch. Light the oil lamp with it and it will throw a beam of light through the magnifying glass. So go down to fix the broken pump, then use the switch to rotate the pump so that the oil ends up on the lamp. After repeating this action for the other tubes and turning on all the lamps, you can point the magnifying glass at the siren.
Go down to the beach, go up with the winch and turn the crank to place the dynamite crate in the right place. Go back downstairs, grab the other crate from Philip's raft and bring this up too to destroy the lighthouse.
A Spanish Legacy
Push the two boxes, unlocking one through the switch: in a short time you will be able to build a ladder to climb. Over there, climb the ropes and get to the ceiling, where you need to drop the panels on the left. Retrieve the other panels from the crates on the right, then roll the barrel into the switch. Then push the piano, then destroy the golden crates on the left and build a harp with the pieces, then push it where the piano is. Armed with a magnifying glass then follow the guy on horseback to the right.
To cross the river you will have to jump on the floating crates. Then stun the soldier controlling the gate using Barbarossa's poisonous frog and gain access to the camp. Destroy the objects near the tents to find a turkey, assemble the pieces to make a plate, place the turkey on the rotisserie and turn it, then serve it on the plate. After destroying the locker to make chairs pulled with both characters the ropes so as to recall the soldiers.
Now undisturbed you can get to the three green panels on which you have to place three boxes. Locate the first with the compass, the second and third instead are hidden under a pile of objects. At this point you can face The Spaniard. After knocking out his henchmen, avoid the bombs, while trying to make them fall on the silver objects: when this happens, in fact, the rain of bombs stops and The Spaniard returns to face you face to face. When The Spaniard has destroyed all the green pieces he will permanently retreat to the mound. At which point assemble the scattered pieces and place the crank on the gray panel, then use it to lower the palm. Place the two seats on the palm and you will be thrown away.
The Fountain of Youth
Enter the undergrowth and find the first object by following the compass indicator. Use Angelica to climb up the ledge and get the shovel you need to unearth it. Then bring the telescope to the point indicated and follow the trickle of water. Inside the cave you have to find three lanterns. Go forward and destroy the first spider web, put the pieces back together and go right where you can insert the barrel into the switch and get the first lantern. The second is easily reachable from Angelica on the right. Then proceed following the compass towards the third object, extract it and assemble it to make a crank to attach to the lever. Turn it around, continue into the area covered by anti-gravity water and float to collect the last lantern.
At the end of this first part of the chapter you will be involved in a great fight, during which you will have to find the fifth object of the compass menu, the statue of the siren, unearth it and place it in its place. Then look for the sixth object, the box of grenades, with which you knock down the rocks a short distance away. Reassemble the pieces and climb up, taking the mermaid statue with you as you cross the area. Then push the box on the right back and the one on the left to the left to be able to cross the watercourse thanks to the planks. Place the statue and you will have access to the central island where the fight with the last boss takes place.
Initially try to dodge Blackbeard's shots and sink at least one. When Syrena arrives, grab a cup and pass it to her. When Blackbeard is stunned, send the cup from Syrena to Angelica to steal a heart from the boss. Repeat this sequence for the entire duration of the fight. The only variant you have to take into account is the throwing of some boxes by Blackbeard: to stop him you will have to find the box that contains grenades, collect them and throw some back at him. Once you've stolen four hearts from Blackbeard, the fight will end.
Congratulations, you are done with LEGO Pirates of the Caribbean!


