


Please note:
The solution is based on the American version of the game, so it is possible to find differences in the Spanish version.
ROOM 00
Enter the portal opened by GlaDOS after he has studied your notes and listened to the radio in the Recreation Chamber. Leave the cell, enter the portal, then maybe put the radio in the middle of the door to see that its waves will interfere with the electronics that move everything. Once in the next room, take the cube in the center and place it on the big button to open another passage and thus begin to familiarize yourself with the operation of the portals.
ROOM 01
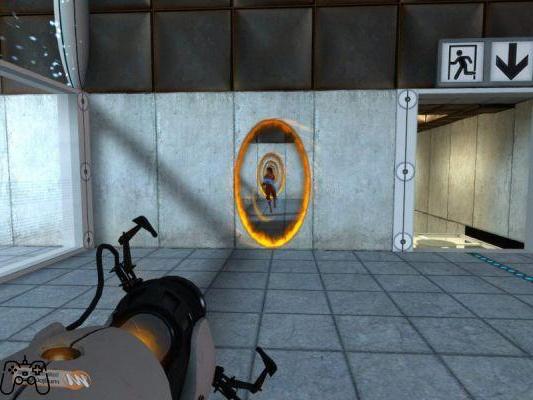
This level may initially confuse your ideas, but as you play it you will find that it is actually quite simple (compared to the others). At the beginning you will have an orange portal that, like all of those of this color at the beginning of the game, will be immobile, but its destination will vary continuously. Also in this room, as in the previous one, your goal must be to retrieve the box and put it back on the button. Too bad that, this time, the box and the button are in different rooms, which communicate with each other. If you can be quick enough, you can enter the chamber with the box as soon as you see it, grab the item and exit the portal before its destination changes. If you can't be quick enough, however, you may lose the box or get trapped until the portal returns to its place. Wait until you can enter the room with the button, put the box back in its place and exit before the portal disappears again. If you can't, wait for the portal to reappear and enter the door to finish the level.
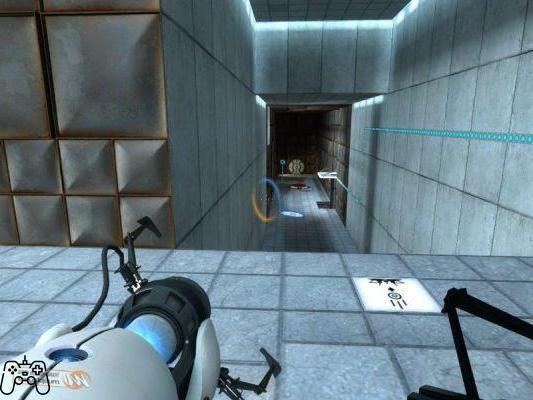
ROOM 02
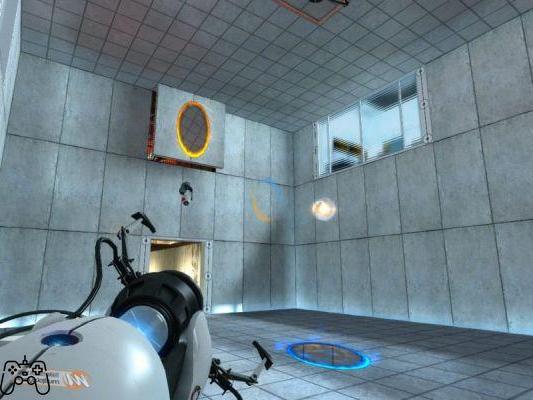
In room 02 there are 3 cameras. The information may seem useless to you now, but wait a few lines and you will understand why we gave it to you. Wait for the voiceover to finish, then enter the door, wait for the blue portal to appear, then go to the window and advance into the passage to emerge on a ledge, from which you can jump to retrieve your own. Portal Gun. At this point, just click the left mouse button to place portals where you see fit. Then get close to the orange portal and start shooting to create blue portals wherever you want. Concentrate mainly in the area to the left, then enter the orange portal, in order to bring you back to the beginning of the level. Then go in search of a camera and shoot a blue portal at the first one you see, in order to make it fall from the wall, since the portal will make it practically "suspended" in midair, severing the wires and the fasteners that held it attached. to the wall. One of the objectives of the mission is precisely to destroy the cameras, so do the same with the other two, even if GlaDOS will not be very happy with your behavior. Once the cameras are in place, proceed to the exit and leave the room, moving on to the next.
ROOM 03
This level, fortunately, is pretty straightforward and demonstrates once again how the blue portals can be exited to both enter and exit. Then shoot them at the three cameras hanging on the walls, looking up to see them, and place them around there as well to access the platform with the orange portal. At this point, all you have to do is shoot one near the door to enter and complete the level.
ROOM 04
Also in this room you will be dealing with boxes and buttons. The orange portal is on the upper level, while the boxes drop on the lower one. There is the possibility of inserting a portal right on this floor, under the box, in order to make it pop out of one of those on the upper floor. You can then shoot a portal on the lower floor wall and go through the orange one to retrieve the box. Nobody forbids then to jump down to the lower floor, to place a portal in the place you prefer, to take the box and then enter inside. The box must still be placed on its button if you want to open the door that will allow you to complete the level. Do not forget, then, before moving on to the next room, to eliminate the cameras hanging on the wall. There are only two on this mission.
ROOM 05
Before entering the room, fire a portal at the first camera, so that it immediately falls off the wall. Once inside, however, look to the left to find the second camera and also note the presence of two buttons. There will then be a block placed on a platform at a rather high height and another on a well. Fire a portal under this last block, so that it pops out of the orange portal, causing it to end up on the other platform. Then shoot a portal near the floor to cross it, take the block and place it on a button, then go back, again from the portal, and shoot another one from the platform with the orange portal behind the block left free. Then enter the orange passage, take the block and place it on the other button, then go through the door, shoot another portal on the wall, at the point you prefer, then go through it to end up in the upper room. At this point, destroy the third and last remaining camera, then complete the level.
ROOM 06
There are no cameras in this room with metal walls. It will not be difficult at all to overcome it because it will be enough to use only a portal. The orange one is already in the right place, while you will have to shoot the blue one exactly where you see an orange light, right above the Receptor. At this point, you just have to go inside if you want to complete the level.
ROOM 07
Also in this room, as in the last one, your goal must be to deflect an energy ball into a receiver. Then wait for the sphere to bounce off the wall, leaving a mark that you will have to cover with a new portal. As soon as the energy ball has passed it, place a portal on the ceiling above the conveyor belt, quickly jump into the orange one and proceed on the belt until you have reached the door that will allow you to complete the level.

ROOM 08
In this room your goal will be to place two portals in such a way as to send the energy ball to the place where it needs to be directed. Immediately shoot one where the black mark is, then as soon as the sphere has passed through it, aim for the orange light and shoot. The ball will bounce off the wall, going back into the orange portal and then ending up directly in the receiver, immediately starting the conveyor belt. Then place a blue portal in an easy to reach place, go through it to approach the platform near the orange portal, then place another blue one near the plane where the ribbon will stop. You shouldn't have any major problems getting on the conveyor belt, which will take you straight to the end of the level.
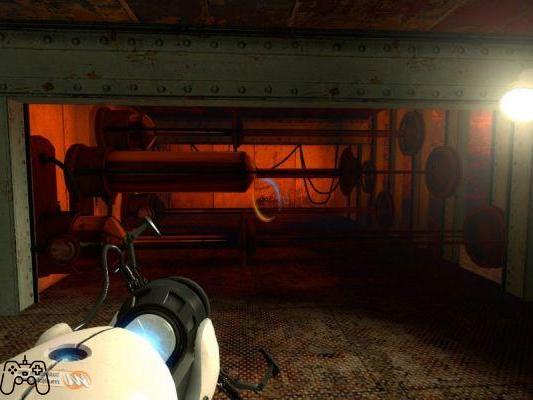
ROOM 09
In this chamber, your goal will be to transport a cube to the other side of an incandescent magnetic field, which is impossible directly because the particles that make up this artificial barrier act as a "reset" button, returning the cube to its initial position in the in case you try to simply cross the field. Then shoot a blue portal on the nearby wall and then collect the cube, then go through the portal with the object in your hand to come out on the highest platform, the one on which the orange portal is located. Then shoot another blue portal inside the hole that the glowing magnetic field is, thus creating a passage on the other side. Then pick up the cube again and quickly go through the orange portal to find yourself in the room beyond the particle field, then put the cube box back on the button on the ground and exit the level.
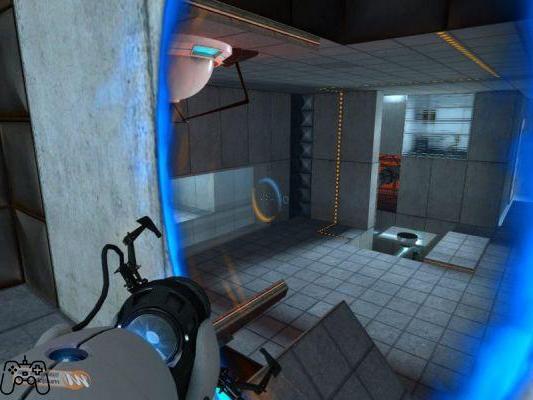
ROOM 10
In this room you will find three rooms, which will make you understand how Momentum Jump works. In the first, look up to see an orange portal on the slightly protruding part of the wall, then create a blue portal on the ground and jump into it. Your momentum, currently quite low, will still throw you into the orange portal and jump onto the ledge that you would not be able to jump to. In the next room, the situation is quite similar, at least in the structure, as only the distance between the orange portal and the ledge you have to end up on changes. You will then have to enter the blue portal with a much higher momentum. Shoot a portal at the bottom of the shaft while on the upper ledge, then jump down to end up inside the passage you created. The momentum you will acquire in the fall will allow you to exit even stronger from the orange portal and jump to the other side of the opening in the floor, thus reaching the exit of this second room. The third chamber is very similar to the previous one, from which it differs only in the position of the orange portal, which is located right at the bottom of the well. Then look up to notice the presence of two protruding panels just above the shaft, then fire a blue portal at one of them, then jump down to end up in the orange portal below and be catapulted upstairs. At this point, raise your head again and look for a panel similar to the ones found before, shoot another blue portal at the top, then throw yourself in order to gain speed and enter the orange portal, also located at the bottom of the well. Once past this passage, you will immediately find yourself in front of the exit of the room and, consequently, of the level.
ROOM 11
Approach the glass ahead for a bird's eye view of the room below. You will notice one Portal Orange gun on a rotating pedestal in the center of the chamber, firing orange portals at one of the four walls. The other three, which are practically suspended in nothingness, must not be crossed in order not to end up in the deadly waters that flow beneath them. Then fire a blue portal at the nearest wall and pause for a few moments in the passage before moving on. In fact, you will have to wait for the Portal Gun creates a portal with a platform underneath it, if you don't want to go to a bad end. Once you jump into the alcove, look for the nearest switch and press it to open a door across the room, beyond the Portal Gun orange. Immediately fire a blue portal in the room accessed from the passage, wait for the weapon to place an orange portal near you, then enter to access the blue portal. Once in the new chamber, watch out for the energy ball moving from one part of the place to the other, shoot a blue portal at the black mark created by the sphere on the wall and wait for it to Portal Gun has created its orange portal on the left wall, the one opposite the energy ball, so that it pops out in the right place, ending its run into the receiver. A mobile platform will thus be activated in the outer chamber. Approach the blue portal and wait for it Portal Gun you create another orange on the left wall, then cross it to come out directly on the platform, which will take you to the center of the room, allowing you to make your own Portal Gun orange. Then press the switch on the platform as soon as you have taken the item to open a door on the other side, shoot a blue portal inside it before it closes, then turn around and fire an orange portal on the opposite wall, at the end of the track. on which the platform moves. Then proceed on board it to the orange portal and jump inside it to enter the room with the blue passage, from which you can access the exit of the level.
ROOM 12
Also in this room you will be dealing with Momentum Jump. Shoot a blue portal on the top protruding panel, then take a look below to get a good look at the bottom of the pit where you need to throw an orange portal. Throw yourself inside to gain momentum and launch yourself upstairs in the room. At this point, wait for the panel behind you to push forward, then fire another blue portal. The orange one will have to be placed at the bottom of the well again and you, of course, will still have to drop inside it at full speed to jump to the third floor of the room. Here you will find instead a red switch on the floor, while the usual cube to be moved is instead on the upper floor. Wait for the panel to pop out behind you, place the blue portal on the angled section of the wall at forty-five degrees, then throw yourself into the orange one, also at the bottom of the well, at least from the second floor of the room, so that you have the momentum. necessary to emerge from the portal and reach the fourth floor of the room. Here you can finally retrieve the usual gigantic box, and then go downstairs to put it back on the red switch. At this point, perform the last Momentum Jump to return to the fourth floor and reach the exit of the level.
ROOM 13
Shoot a blue portal at the top of the wall, near the usual large cube, which is on a walkway higher up. Then put an orange portal on a wall that you can reach, then advance to head to the platform and retrieve the box. Then go downstairs and put the cube back on the red switch located on the floor to open the door from which you can access the next room. Go back from the orange portal to bring yourself back to the walkway, from which you will have to see the passage you just opened. Shoot a blue portal in the next room, then go down a floor to retrieve the box, which you have to take to the nearby orange portal, so you can reach the next room with the cube in your hands. Inside this you will find an energy ball that is bouncing from wall to wall, which you will need to take care of right away to avoid future problems. Shoot a blue portal on the ceiling, just above the receiver on the ground, helping you with the weak light coming from this part of the room. Then place the orange portal over the black mark that is created by the energy sphere, then wait for the ball to cross the portals and enter its receiver. In the room, on the raised platforms to the left, there are two more red floor switches. You should already be in possession of a box, the one you brought with you from the first part of the room. To put it back in its place, shoot a blue portal at the part of the ceiling above the platform, using the square white panel that is right there, then throw an orange portal on a nearby wall and drop the cube inside to make it land. on the first switch. The second cube is instead located on a mobile platform, previously activated by the energetic sphere upon entering the relative receiver. Fire a blue portal at the lighted ceiling above the platform track, look past the orange portal and wait for the moving walkway to pass under the portal exit before descending inside. By doing so, you shouldn't have any major problems landing on the platform and retrieving the second cube, which will then be placed on the second switch. To do this, use the same method already adopted previously. Then put a blue portal on the ceiling just above the second switch, then drop the box inside the portal, so that it pops out of the blue portal, press the switch and open the passage that leads to the exit of the room. To reach it, fire a portal into the room ahead, enter the nearest orange portal and then complete the level.
ROOM 14
Look ahead to immediately notice a red floor switch where the room forks left and right. For now, go left, go up the stairs and enter the small room at the top, inside which there is a box and the receiver of the energy balls. Reaching the cube isn't easy at all, as a Momentum Jump is required. Fire a blue portal at the top of the closest wall in front of the box, then throw an orange portal at the bottom of the shaft formed by the stairs as they descend. Drop into the orange portal from the top of the shaft to fly inside the blue portal and then onto the platform with the cube. Retrieve the box and go down the stairs from where you went up, in order to place it above the red floor switch, thus opening a door on the opposite side of the corridor, thanks to which you can access a room containing the energy ball necessary to activate the receiver at the top of the stairs. Before entering the newly opened passage, place a portal on the ceiling above the receiver, using the red light behind the wall as a guide to position the structure. Go down the stairs and enter the open door thanks to the switch, jump from one moving platform to another until you reach the immobile one in the center. You can stop, wait for the other platforms to have moved into the correct position, and then leave again and reach the room with the energy sphere. Here you will have to put an orange portal on the wall, above the black mark left by the ball, then wait for it to cross the passage just entered and end up in the receiver located in the previous part of the room. At this point, you too enter the portal to return to the first part of the room, reach the platform at the bottom of the stairs and exit the level.
ROOM 15
Your objective in this room is to get past the glowing particle field blocking the other half of the chamber, but unfortunately it is not possible to fire a portal beyond the field. You must necessarily use a Momentum Jump to get to the other side, which is why you will have to look up to find a protruding wall panel, on which you will have to shoot a blue portal. Also throw an orange portal on the ground, but position it so that it is centered on the blue one, using the white icons on the ground as a guide. Then drop into the orange portal to be thrown out of the blue one above and while you fall at full speed try to move so as to end up in the orange portal again, acquiring the momentum necessary to make the second jump, thanks to which you will be launched beyond the incandescent particle field, thus ending up in the second part of the room. Then proceed inside the chamber to find two more incandescent particle fields, which separate the energy ball and its receiver. Then shoot an orange portal on the wall on which the sphere is bouncing, placing it above the usual black mark in the wall, then launch a blue portal on the same wall, moved about five tiles to the left, in order to accelerate the energy ball and send it beyond. the incandescent particle field in which the receiver is located. At this point, wait for the energy sphere to reach where it is needed, then quickly cross the particle field to get closer to the receiver and fire an orange portal at the black mark created by the ball after it hits the wall. Then launch a blue portal on the ceiling above the receiver, using the red light as a guide for positioning, and wait for the energy sphere to enter the machinery that is waiting for it. The receiver activates the platform that will take you to the third part of the room, where you will have to perform another Momentum Jump to cross the incandescent particle field at the bottom. Then put a blue portal on the protruding part of the wall, then wander around the area looking for the staircase that runs along the wall to the left. You will then find a side room containing a well in which you can shoot an orange portal, inside which you will have to throw yourself to be thrown out of the blue portal placed previously. Unfortunately, however, the momentum acquired in this way will not allow you to cross the particle field. Then fire another orange portal on the ground below you, then jump in to be thrown out with the energy needed to crash through the barrier. At this point you will have to perform another Momentum Jump, fortunately simpler than the previous one.
Then look at the angled panels that protrude from the walls, noting above all the black mark on the left wall. Put a blue portal on the opposite side, on the right wall, then fire an orange portal on the sign just mentioned, causing the energy sphere, after bouncing off the left angled panel, to end up in the blue portal, exit the orange one and then bounce. again, but on the right angled panel. Shortly thereafter, the energy sphere will finally end up in its receiver, located at the other end of the room. Then perform a Momentum Jump, similar to the previous one, to take you over the barrier in the center of the chamber. To the right should be a long corridor with a series of moving platforms activated by the receiver you just used. Look ahead to throw a blue portal at the wall, under the arrow pointing around the corner, place the orange portal on the nearby wall and take a look beyond the wall to locate an approaching moving platform, on which you will have to go out. Look immediately to the left, shoot the blue portal at the wall at the end of the hall, just below the arrow pointing around the corner, allow the moving platform to return to the main room, then take a look inside the orange portal, enter when the platform is in front of it, and then immediately shoot a blue portal in the room at the end of the corridor, to be reached via the orange portal. Once inside this room, you will notice a couple of elevators that will take you to the side rooms overlooking the main room, in each of which there is a button that will be pressed to open the doors that contain the energy ball receivers. The buttons will need to be pressed in quick succession, as these steps tend to close very quickly. Before starting to press, place a blue portal in the small side room on the right and an orange one in the one on the left, go up on the platform that leads to the latter, wait for the creation of an energy sphere, then quickly press the switch in the first room , then immediately enter the portal to reach the room from the opposite side and press the button that will open the access door to the receiver. Then take a quick look around the main room and fire a blue portal at the left wall at the bottom of the protruding panel. Then throw an orange on the sign created on the ground by the energy sphere, and wait for it to enter the receiver to get on the elevator that will take you to the exit of the level.
ROOM 16
Advance a little to find the first turret which, fortunately, is facing away from you, which will allow you to grab it without major problems. Throw it to the ground to disable it, then proceed into the next corridor to find another turret, this time pointed at you. Immediately fire a blue portal behind the turret, then dash inside an orange portal to deactivate the turret by approaching from behind. Proceed down the corridor to reach a niche with another turret on the left. Poke your head out to fire a blue portal behind it, then advance into the orange one to use the same method as before to deactivate it. At this point, advance to reach a hall on which the walls, unfortunately, the portals have no effect. Fortunately, it will be possible to shoot portals on the part of the ceiling that is right above the turret, which will allow you to throw something at it after creating an orange portal to be created in an easy to reach area. In fact, you will have to drop a cube inside the portal so that it falls on the turret and destroys it. You will find another one on the right side of the corridor and, to deactivate it, you can use the same trick, that is to make a cube fall on her after creating a blue portal above it. If you run out of cubes by chance, use the large boxes found in an adjacent warehouse. After clearing the hallway, follow him to reach a large room with two turrets, one of which is pointed right at you. Then fire a blue portal behind the turrets, then create an orange one to enter to pop out right behind the enemy weapons and deactivate them. The next room instead contains several turrets pointing in all directions, making it difficult to approach from behind. Fortunately, you can use the group of cubes in an adjacent room. The tactic will be to shoot blue portals over each turret and then throw enough cubes into the orange one to take them all out. After making a clean sweep, enter the next hallway, create a blue portal under the turret ahead, the one pointing towards you, then place an orange portal so that you can enter it quickly. Once behind the turret, deactivate it as usual and proceed towards the end of the level.
ROOM 17
In this room you will have to carry the cube with you from start to finish, but also using it as an element to reach certain areas or complete certain objectives. Use it now to go up from floor to floor, then once at the top, take it again and proceed into the next corridor. Beware, once here, for the energy balls that are fired from the machine at the end of the hall. Fortunately, the cube will deflect them, allowing you to advance without taking damage. Things will get complicated when the corridor turns right, due to the presence of another machinery right behind you. At this point, wait for the sphere to pass and then throw yourself into the corridor, or walk it in the opposite direction to find yourself in the situation of the previous entrance hall. When you reach the end of the second corridor, shoot an orange portal on the wall marked with the black mark. Then take a look in the next room to find a semi-destroyed part on the opposite side on the left, then place a portal on the tile in the center, thus making the energy ball come out of there, which will end up straight inside the relative receiver. In the area there are then two other receivers, each of which will raise one of the platforms necessary to escape from the room. Go down to the ground floor with the cube in hand and proceed into the narrow corridor to the left, then advance to the small room at the end, which contains both a receiver and a machine capable of creating the energy spheres. Position yourself with the cube in your hand on the trajectory of the ball, in order to deflect it into the second receiver and activate the relative platform. Then continue out of the corridor and turn left to find yourself in a much larger entrance hall, in the middle of which there is yet another red floor switch. You will find another one even further on, on a platform that is currently practically impossible to jump on. Put the cube on the first one and open one of the two doors that will allow you to access the third receiver. After that, go out into the corridor and back into the room with the raised platforms, then take a look around for a small protruding panel at floor level and fire a portal right there. Then go up to the upper level of the room somehow and return to the long corridors of the first part of the level to place an orange portal above the black mark left by the energy sphere that moves freely in the area. Then go back to the hall with the switches and go to the second one, the one that has not yet been pressed, kneeling to make it go down. The sphere will cross the portals and advance in the corridor, passing the two open doors and completing its journey in the receiver at the end, thus making the last platform go up. Take the cube, use the portals to go up to the upper floor of the room with the platforms and jump from one to the other to reach the last part of the level.
ROOM 18
To get to the other side of the first opening, shoot a blue portal at the ceiling at the back of the room, then create an orange portal to enter and come out where you placed the blue one. Ignore the room on the left, and look to the right to see yet another opening to go through. Immediately fire a blue portal into the part of the ceiling that overlooks the ledge on the other side, making sure that the passage is as far to the left as possible. Then look around to find the low wall on which to place the orange portal, which is slightly below where you are at the moment. Enter the portal, overcome two more jumps with the technique used so far, then throw an orange portal on the ground, in order to go up to the upper floor and continue like this up to the penultimate floor of the climb. To reach the last one you'll have to place a blue portal on the panel that pokes out of the wall in front of you. Look down from the edge of the platform you are on to see one below to place the orange portal. Shoot him there, then jump inside to gain momentum and blast out of the blue portal at full speed, reaching the upper floor of the room. Ignore the switch, then proceed into the next corridor and press the one that is there, go through the wall, put an orange portal on the wall to the right, using the usual black mark as a guide, then shoot the blue one in order to position the two ends exactly in the path traveled by the lasers of the turrets. You will have to move it to make the energy orbs deactivate all the turrets present. After doing this, throw a blue portal on the small panel at 90 degrees to the wall, then place the orange one on the nearest wall and look inside to locate the switch suspended above the well below. Before pressing it, however, set the energy ball in motion, placing first the orange portal in the same place as before, then the blue one on the protruding panel at the back of the room, thus creating a perfect path for the energy sphere. As soon as you see it pop out of the blue portal, quickly move it to the panel in front of the small red switch, quickly fire an orange portal on a nearby wall and look out of it far enough to open the door of the receiver, which once received the sphere will activate a very useful mobile platform. Jump on it when it is close and proceed to the other side, then jump to the lower landing, press the red switch and run to the angled panel across the room, quickly firing a blue portal above it and one. orange on one of the neighboring walls. Enter the latter to go back, then turn right and look into the shaft below, shoot an orange portal inside it, then throw yourself inside so you can bounce off the blue portal. Grab the cube on the landing, wait for the platform to approach, then jump on it, then once you get to the other side, put the box on the ground, create a blue portal on the nearby wall, go back there via the platform, press the red button, then go through the portals to come out on the other side, grab the cube again and quickly pass the panel before it backs into the wall. Put the cube back on the push switch, place a blue portal next to the newly opened door, drop down to one of the platforms below and place the orange portal on the lightly colored wall. Enter the latter by simply walking into it, then once in the new room shoot a blue portal on the surface of the first platform, put the orange portal at the bottom of the deep well, then throw yourself into the latter to acquire enough momentum to be able to jump out of the previously placed portal. While in the air, move the orange portal to the platform upstairs, then move a bit to reach the blue one and get spit out at full speed. Continue with this tactic also with the following platforms, except the last one, which you can only reach by shooting the blue portal on the angled panel that protrudes from the wall.
ROOM 19
Place a blue portal in the center of the angled panel under the receiver, then an orange one on the one below the machine that produces energy balls, then as soon as the sphere exits the blue portal, move it away from the panel it is in to bounce the energy ball. ball inside the receiver. Then go to the other side of the room to find a corridor with a track for a moving platform, wait for it, then once at the bottom look left to see a niche in which you can launch an orange portal, which you can access by entering for the neighbor. blue portal. Press the switch, quickly shoot a blue portal in the passage just opened and on one of the walls of the next corridor, look out at an orange portal, go up on the platform as it passes, then as soon as you see the energy ball, shoot a blue portal on one black marks to free the entrance hall from the sphere. When the latter is gone, throw an orange portal on one of the nearby walls to make sure the ball doesn't come back. Once near the next corner, throw a blue portal up on the left wall, just past the panel, but also an orange one in the same place. Then rest between the two portals, then go up to the platform that will bring you near a fire pit to avoid. Throw a blue portal on the wall overlooking the landing ahead, then place an orange portal on the wall to the right, slightly below you, then jump off the platform to pop out onto the landing, safe from fire and flames. Then put a blue portal on top of the wall, an orange one on the ground and jump into this to be able to be thrown out at full speed from the upper one, thus crossing the fire pit without making a scratch. Follow the corridor to the left, open the door at the top of the staircase, go up another flight of stairs, put a blue portal behind the gate and enter the nearest orange passage to go to the other side and reach the door that will allow you to to move on. Get past each blade by placing a blue portal on the wall behind the wheel and entering the nearest orange one, then make your way to the landing on the opposite side of the room. Once you get there, turn around, notice the walkway in the center of the area, place a blue portal on top of the wall on the other side of the room, jump into the nearest orange portal, and when you land, enter the door on the left. Throw a blue portal over the half-destroyed platform, then enter the nearby orange portal to reach it, then place another blue portal in the top corner of the left wall and an orange portal on the floor below, so you can drop down and pop out. full speed from the other portal. Advance up the staircase, then look down the railing and drop into the container to be transported to the next area, then go left to the glowing particle field, climb the red switch on the ground, throw a blue portal in the open door and an orange portal on the wall. close, where you will have to enter to cross the passage and find yourself in front of a hole at the end of the corridor, in which you will have to descend.
Then jump on the piston in the corner of the room, then jump to the ledge ahead, follow the signal, finally launching a blue portal over the barrier. Then go back to the previous room and enter the orange portal to get around the obstacle, then proceed to the next area, once there throw an orange portal on the wall to the right of the ledge, enter the nearby blue portal and jump diagonally to land safely. , then proceed down the corridor to reach a room with several pistons. Jump to the one in the middle when it's down and climb to the top, throw a blue portal into the passage near the ceiling, then drop down, create an orange portal and enter to pop out in the upper area. In the new room, place a blue portal on the soft colored surface between pistons, then place an orange portal on the ceiling above the pistons to the right, then jump on the plunger and enter the portal. Be careful not to get crushed by the pistons on this second floor and quickly jump to the platform on the left, launch a blue portal on the surface to the right and an orange one on the floor, then drop into it and, once you come out, try to head there again to acquire the momentum needed to reach the upper floor of the room. With the pistons of his next rooms you will have to behave in a similar way. Then follow the strategies above to end up on the ledge from which you can proceed to a glass tube.
Follow it to the room full of slime, go down another pipe, then go past the plunger and kneel under it, then launch a blue portal over the spot hit by the plunger, then crawl under it again. Look in the portal to see when the piston on the left is sent up, then jump into the portal to land on top of the plunger and reach the upper floor of the room. Climb the railing further ahead, proceed into the following corridor and the row of pistons present in the next room, reaching after a while a room with three doors. Put an orange portal on the nearby wall, then wait for one of the three doors to open to launch a blue portal behind the turret inside the other room and deactivate it once you get there. Follow the same procedure with the other two turrets hidden behind the remaining doors, then reach the hole in the ceiling of the room which is accessed by the third door, launch an orange portal in the room above, then look for a blue portal and enter to reach the area alongside. Then create a blue portal above the glass tube, enter the nearest orange passage, then jump to the other side of the platform and proceed to the hole. Go down behind a turret, deactivate it, then proceed to the next room, put a blue portal on the upper surface of the top panel, then create an orange one to land on it, then shoot another one directly below you and jump into it. in order to acquire the momentum needed to leap out to where the blue portal is. Pass a glowing particle field, then press the switch in the next room, dodge the rocket launched by the robot, jump to the other side and take it to fire another shot that destroys the second glass in the room. Go ahead, look for a passage to the right, put a blue portal on the wall to the left of the latter, follow the following corridor, place an orange portal on the wall opposite the glass, then have the robot launch another rocket inside the portal . Go through the shattered glass, move the orange portal on the ground under the glass tube, go inside and have the robot launch a rocket, then exit, retrieve the cube from the glass tube and use it to climb on it and reach the small space on the left.
Go through it, launch a blue portal on one of the walls behind the blade, enter the nearest orange portal, proceed from one side of the sewer using the portals and avoiding ending up in the mud, then once you reach the trench, put a portal orange on the nearby wall and a blue one upstairs. Once you reach the top, hide behind any useful element so as not to be seen by the turrets, which you will have to deactivate in the usual way, popping up behind them. After clearing up, throw a blue portal into the alcove at the top of the room, climb up there via an orange portal, then place a blue portal on the slightly upward facing surface on the other side of the room. room. Then throw a portal to the ground, jump inside to gain speed, then while you are still in the air after popping out of the blue portal, launch another one on the upper surface of the angled panel which is higher than the first. At this point, throw yourself back into the orange portal to land on the upper ledge, eliminate the two turrets that will protrude from the ceiling, on which there is a hole, under which a blue portal will be placed. Go back to the room you came from, create an orange portal on the ground and jump inside to gain speed and be thrown out of the blue portal. Your goal, when you are in the air, will be to reach the platform that is higher up. Follow the walkway and open all the doors until you find yourself in the last room. Let GlaDOS tease you a bit, retrieve the piece that will fall to the ground, then place it near the incinerator, then place a blue portal on the nearby wall, turn left and shoot an orange portal on the wall near the small staircase. Teleport there, enter the small room at the end of the walkway, press the switch inside to temporarily open the incinerator, take the piece recovered earlier and throw it into the flames before the cover closes. GlaDOS will get angry and summon a bot that, as before, you can use to your advantage.
Place a portal bu on the ground under the boss and put an orange one on one of the nearby walls, then get the robot to launch a rocket into the portal, thus hitting GlaDOS and dropping another piece of the "creature". The element will fall on a difficult-to-reach pipe, which will force you to place a blue portal behind the pipe and an orange one in your vicinity. Go and retrieve it, open the incinerator again and then throw it in, then follow the same procedure as before with GlaDOS. The third piece will reach a platform at the top of the room, which you can reach by creating a blue portal near the ceiling and an orange one on the ground. Throw yourself into the latter, gain speed, then once you pop out of the blue one, keep falling to be thrown right where you want to go. To collect the last piece, place a blue portal on a wall near the ceiling, then create an orange one to exit there and retrieve the flying element. Throw it in the incinerator to finally end the game.
Video of the solution - First part


