


Please note:
The solution is based on the US version of the game. There may be divergences with the Spanish version. Since The Sleep of the Dragon differs from the common graphic adventures for its hybrid nature of Action-Adventure, not even the solution could be structured in an orthodox way: in no way detract from your enjoyment, we have set ourselves to reveal the bare minimum on the plot , offering only a series of schematic information that is easily available and divided by setting. This guide will not help you that much in the arcade phases of the game, in which you will have to rely on your reflexes and find the right times, but will still provide general indications, suggesting the simplest moves from time to time. Obviously, it will take you step by step in solving the puzzles: for the more complex ones, first of all a description of the situation or goal to be achieved will be provided, then a clue to lead those who do not know exactly where to start and only then the real solution on the right path.
Before starting, some general advice ...
The really nasty puzzles are few, but you may encounter some difficulties due mostly to the game interface, which in certain situations is anything but immediate. To avoid crashing stupidly, just keep the following in mind:
- Configure the controls as you like best: keyboard control will remain a hindrance, but by customizing it you will reduce the inconvenience to a minimum!
- When two or more elements to interact with are active at the same time, you can switch between them with the Page Up / Down keys.
- Nico's help is essential for some puzzles: if you don't get it by interacting directly with her, remember that it also appears in the inventory if necessary.
- Action Events often start treacherously, in the middle of a movie: the trick is to never lose sight of the lower right corner of the screen and be ready to intervene as soon as the four circles of action commands appear.
GEORGE IN CONGO
In the plane
Examine and activate the seat belt that binds you to the seat (by pressing the corresponding buttons, indicated in the action controls at the bottom right). Explore the plane and collect the beer on the floor.
- To get to the front of the plane: if you attempt to reach the front of the aircraft, it will swing dangerously.
* Hint: you need a counterweight, look around ...
On the left is a chest, secured by a strap. Examine and operate the latter to be able to move the crate in the queue: you will first have to drag it to the center of the plane, positioning yourself to the right of the crate, and then push it towards the bottom (the crates are moved by pressing the key assigned to the fist icon in the action commands - usually S - and the arrow key corresponding to the desired direction).
Examine the cockpit and the pilot, Harry, on whom you will find a bottle opener. Pair the latter with the beer in the inventory to open it and wake it up. Exhaust all topics of conversation with him. The only way to get out of the cockpit is to break through the glass with the fire extinguisher on the ground in front of you: pick it up and, holding it in your hand, press the Page Up / Down buttons to be able to interact with the glass and throw it at us (if in the action commands only the hand icon is shown, it means that the fire extinguisher is still selected and, by pressing the corresponding action key, you would do nothing but put down the fire extinguisher). Try to exit through the breach and you will hear the plane swing again. Here we go again! Talk to Harry about it - maybe he's more useful as a ballast than a pilot ...

GEORGE IN CONGO
On the rocky overhang
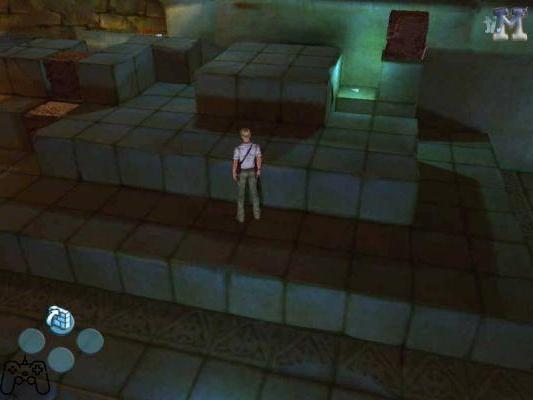
Climbing and jumping from one platform to another is simple: just approach the edge of a rocky ledge or the support you want to reach and press the right button from time to time among those indicated in the action commands. Join Harry and chat with him until he has nothing more to say to you. Continue to the right to run into the first ACTION EVENT: the ground will collapse under your feet and you will have to quickly move to the next platform to avoid falling. Keep climbing the rock face until you reach a recess that houses the entrance to a cave: when you cannot climb or jump from platform to platform, remember that George can also cling to protruding ledges or flatten himself against walls and crawl in. apparently impassable spaces ...
NICO IN PARIS
Vernon's apartment
Look around and take the pencil leaning on the bulletin board to the left of the door.
- How to enter the apartment: obviously, the door to the hacker's apartment is tightly closed. You will have to find another way of access.
* Clue: Nico is also agile as a cat and able to cling to railings and ledges.
Exit to the balcony on the landing. Drag the bird tank towards you, climb up and over it, then push it against the left railing. Use it as a platform, turn your face to the wall and grab onto the eaves, sliding to the adjacent balcony. The French door will not open, but you can take a peek inside. Climb the railing and go to the next balcony. To open the door, use Nico's reporter card.
There is nothing interesting in the bedroom, go to the living room and you will find the corpse: examine it, get the business card, and pick up the bullet casing nearby, in front of the bookcase. Finally, examine the computer.
ACTION EVENT: As you cross the threshold of the kitchen, you will discover in spite of yourself that the killer has not yet left the apartment. You will find yourself with a gun pointed at your head and you will have to act quickly: it will simply be interacting with two objects in the vicinity, pressing the right button at the right time (as soon as the action commands appear in the lower right corner of the screen).
You will pursue the killer later. For now, go back to the kitchen and listen to the three messages on Vernon's answering machine. Take advantage of this to call the newspaper and your friend André. Examine the waste bin on the right, next to the sink, and you will find a statement. You can examine the carpet under the kitchen entrance arch, to check the creaking plank: you will discover the hiding place of a safe, but for the moment you will not be able to open it.
NICO IN PARIS
In the Vernon neighborhood
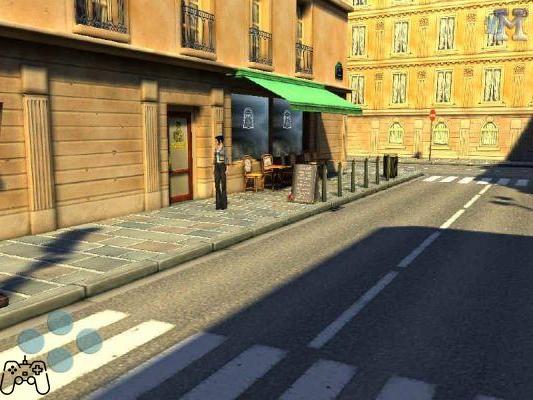
Go back to the kitchen balcony and go to the alley below by going down the fire escape stairs. Pick up the newspaper from the ground. Climb the left wall, pick up the wig near the bench and examine it in the inventory. Go back into the alley and then go up to the top right of the screen, into the street where the front door to Vernon's apartment is. Interview the woman cleaning the sidewalk in front of the Brasserie and then the boy with the skateboard strolling down the main street. Retrace the latter to the left and enter the park, behind the policewoman (ignore her for the moment). Talk to the girl sitting on the bench at the back. Go back to the policewoman and exhaust all the topics of conversation: she will refuse to cooperate, until you show her the bullet casing, but then she will prove valuable.
In the apartment with the police
All topics of conversation with the inspector have been exhausted.
GEORGE IN CONGO - Part 2 °
In the cave
Hear poor Cholmondely's last words. Pick up the magnifying glass and postcard from the table in the upper right corner. Read the postcard in the inventory.
- To go through the door on the far right: opens with the pressure plate at the bottom right, but not long enough for you to enter.
* Hint: You need a weight to hold the footplate down.
Push the crate nearby over the pressure plate.
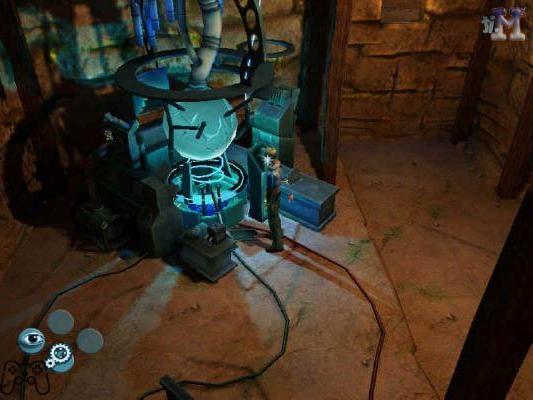
Explore the newly opened room and examine the large machinery on the right. Turn it on by operating the left controls and pulling the right lever, which connects it to the gas cylinders.
- To exit the cave: to reach the opening on the back wall, you will need a support that acts as a step and the cash box on the pressure plate would be ideal ... if it did not serve to keep the door open.
* Clue: From inside, there is another way to lock the second cave door.
Pick up the lever that detached from the machine after the explosion from the ground and insert it into the slot next to the door (it does not need to be operated). Drag the crate from the other room and place it under the opening to the left of the machine. Now pull the lever out of the slot and let the door close again. Exit the finally accessible opening by climbing the chest. Just outside, above your head, you will find a nest: pull it down with the lever. Walk down and around the corner, flattening yourself against the wall. Climb up, grab another ledge and slide to the left. Continue following the light.
GEORGE IN CONGO - Part 2 °
In the jungle
Take a look below.
- To distract the three threatening types: you will have to create a diversion.
* Hint: There are already remains of a fire on the statue in front of you, maybe you should try to warm the situation up a little ...
Place the dry nest on the remains of the fire in the statue and use the lens to light it.
ACTION EVENT: As soon as Harry signals, run to the Jeep (by pressing Shift together with the directional arrows) and jump on board (S key to interact with the vehicle).
GEORGE A GLASTONBURY
If you meet a well-placed man on the street, Colonel Butley, stop and talk to him for some information that will come in handy later.
To the Cosmic Elf
Take a look around: you will notice postcards identical to the one found in Congo. Look at the book of poems on the counter, the one with the silver-plated coins set on the cover, and read lines from it until George comments on them. Then talk to the owner, Tristram, especially insisting on postcards and Bruno. For now, you can't go upstairs to check out those suspicious noises ...
From Madame Zazie
Talk to the sorceress, who will agree to reveal more to you about the postcard only in exchange for silver. Cross the street.
At Eamon O'Mara, opposite the pub
Cut out any conversation topics with the man sitting in front of the pub.
To the Cosmic Elf
Talk to Tristram about O'Mara's schedule and he will give you a copy of his work. In the inventory, use the lever on the poetry book to extract the coins.
Again from Eamon O'Mara
Talk to Eamon about Tristram and have him read some poems from his book.
To the Cosmic Elf
At the appropriate time, while the two continue to argue, go up the stairs to the left. Exhausted all topics of conversation with Melissa. Then go down and have a chat (blackmail) with Tristram, until he gives you Bruno's boxers.
From Madame Zazie
Now that you can pay, submit the postcard to the sorceress and, when she asks you about Bruno, give her the boxers and get her to examine them.
- To access the burning warehouse: to open the door at the back of the pub, to Eamon's left, ask for Eamon's help. Once in place, you will find that the only way into it is an opening at the top, on the facade of the building in flames.
* Hint: the crates under the window are certainly not there by chance ...
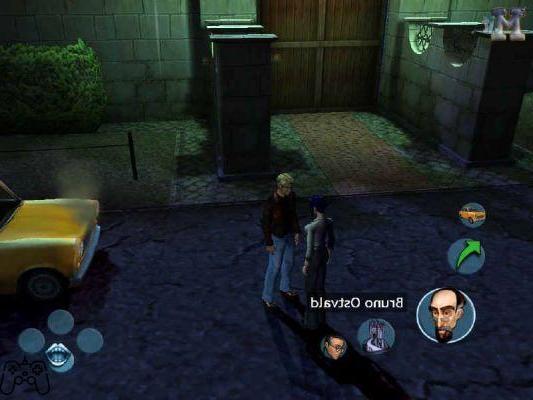
Line up the individual crates under the window to create a platform that allows George to better position the crate higher up and reach the opening. Once inside, untie Bruno. Now squeeze it like a lemon!
NICO IN PARIS - Part 2 °
Nico's apartment
Listen to the messages on the answering machine and call André and the newspaper. Before leaving, you can take a look around for some nice memories from the first two chapters of Broken Sword.
Vernon's apartment
Go to the door of the apartment building where the hacker lived and talk to the nosy neighbor, Edith, and the woman from the Brasserie who is in her company.
- To return to the apartment: if you attempt to re-enter Vernon's apartment, you will reluctantly discover that it is closed, as is the French door on the landing.
* Hint: the last time you were here, you discovered a third way of access and perhaps that is still viable, with a little trick ...
Go to the alley at the back of the building and up the fire escape stairs to Vernon's kitchen balcony. Examining the door, you will discover that the key is still in the lock: slide the newspaper under the threshold and push the key out, inserting the pencil in the lock. All you have to do is collect the key from the newspaper, and then open the door.
Examine the sink and take a tissue. Revisiting the crime scene, you will hear someone crying in Vernon's bedroom. Go inside and talk to Beatrice: to break the ice, hand her the handkerchief. Especially ask her about the safe and then rush to open it, using the information you just got from Beatrice. Leave the apartment with the loot.
ACTION EVENT: on the main road, the infamous red car will try to run over Nico. You immediately press the right button to throw yourself to the side and you will get away with little.
Nico's apartment
Insert the disc found in the safe into your DVD player. Call André to consult him: discuss with him all the elements that emerged from Vernon's film, until Nico says he knows where to find the necessary information. Call the newspaper to find out your next destination. André may have something else useful to tell you. Now go to the theater.
NICO IN PARIS - Part 2 °
At the abandoned theater
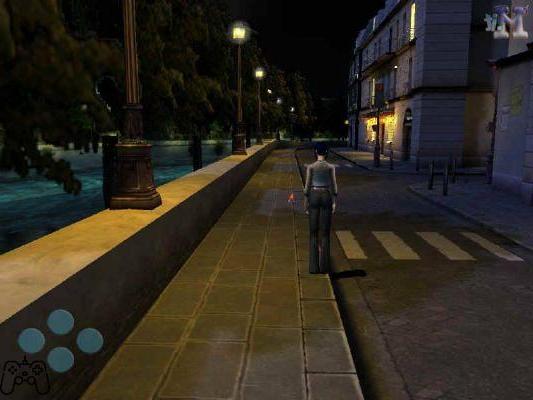
The main entrance is well closed. Walk around the building passing from the right, until you reach the intersection with a road on the left, turn the corner and you will find yourself in a clearing at the back of the theater. Go to the end of the street and you will find the red car parked: on the passenger seat is the theatrical mask that put us on the trail of the blonde killer.
- To access the theater from the back: the fire escape is not reachable and all doors are closed so we will have to find another way to enter.
* Clue: Scaffolding is known to be dangerous for thieves ...
Walk along the scaffolding of the building opposite, to find a hold and climb the first scaffolding. From here, reach the second by climbing the ladder; follow it around the corner and go up to the third level. Walk along the latter until you find an access point to the fourth scaffolding. Turn the corner and jump down to the third level again. Here you will find a ladder, go up it and notice the sign on the right. Go up another level. Examine the sign and untie the rope it is attached to. Retrace your steps to the ladder of the second level, under the sign, but instead of going down the ladder, jump to the other side of the scaffolding. Follow it to the end and from here go up to the one above. Nearby you will find a crate: move it so you can climb on it to get to the upper scaffolding. Examine the sign and unhook it from here as well. Interact with the fallen sign to have Nico use it as a bridge. Climb to the roof of the theater, using the fire escape, and go down one floor with the ladder on the far left. Finally a door that opens!
Inside the theater
Leave the warehouse you are in by going down the stairs and you will reach the hall of the theater. Explore it, until Nico hears a noise and ...
GEORGE IN PARIS
Book storage
Talk to Bruno and look for an alternative entrance: go through the arch on the other side of the road.
- To access the building: there seem to be no doors or windows open, but carefully explore the courtyard.
* Hint: there is a way of access, even if it is not visible. Try interacting with each active object along the walls ...
Push the crate into the right corner of the bin. Climb up to examine the lid closely and close it. Behind this is a hidden window, broken and easy to open. Take a seat!
Inside the warehouse
Leave the first room. You will find yourself in a room full of books, in which there are three doors: take the one on the far left.
- To reach the light switch: it's too dark in this room, but the switch is covered by the boxes to the left of the door.
* Hint: Yep, it's time to move more crates!
Drag the crate at the other end of the room near the two blocking access to the switch. Retrieve a second one and align it with the others, creating a gangway that will allow you to move the one in front of the switch, which can then be operated.
Now you see some marks on the floor, just below the middle crate: before you can free the trap door below from it, you'll have to move the crate above it again. Now go through the hatch.
Inside the theater
Follow the tunnel and climb the metal ladder. Another staircase and George will find himself in the room to witness what looks like a show. For now, stay away from the stage and head towards the theater hall, walking down the back corridor of the room to the left, and then reach exactly where Nico was pinched, behind the counter. Here you will find the glass that betrayed her: pick it up.
- To save Nico: now that Nico is left alone with Flap on stage, it's time to intervene.
* Hint: You will have some hope of catching Flap by surprise with just an "air strike".
Sneak up on the wings, passing to the right of the stage and staying as much as possible in the shadows along the wall. Climb the ladder and reach the gallery overlooking the stage. The walkway in the center is impassable: along the wall, reach as far as possible, grab the rope hanging from the lights and, once the frame is approached, grab it and slide to the other side. Reach the two sandbags on the front walkway: unhook the nearest bag, making it immediately follow the other, so that Flap centers in full.
GEORGE AND NICO AT THE THEATER
Go down the steps to the left of the stage to reach the floor below, where there are deposits and dressing rooms. Take the corridor to the right of the stairs and from here enter the magazzino to your left: on the cashier to the left of the elevator, you will find some greasepaint. Take the corridor again and turn right, then enter the first room on the right, a changing room: Examine the safe under the table and go out. Go back a bit of the corridor and this time go straight ahead until you reach a door to it basement. After the cutscene, retrace your steps and take the corridor in front of the stairs, then enter the first door on the right to find yourself in the room under the dressing room: examine the beam in the center and try to move it.
- To open the safe: thanks to George's brilliant connections, we know we are in the room directly under the dressing room and we know this beam holds the pressure of the safe. It does take a lubricant to move the beam, though.
* Hint: By heating something in your possession, you could get a makeshift lube.
Go back to the stage of the theater and approach one of the spotlights. Combine the greasepaint with the glass recovered behind the bar counter in the hall, to use it as a container, and then bring it to the stage lights: the greasepaint will melt with the heat. Go back to the room under the dressing room and use the resulting lubricant on the beam. Try to move it again, but George alone will not make it and will have to ask Nico for help.
Collect the card and the bizarre object that came out of the safe and leave the room, walking down the hall to the end. Examine the mangled body and the elevator. Use the card you just found on the panel to the right of the metal door.
GEORGE AND NICO AT THE THEATER
Omega generator
Walk the tunnel to the end and enjoy the show. Approach the pillar of light and let George pick up the omega stone suspended in midair.
ACTION EVENT (arm yourself with patience, because you will have to repeat it a couple of times): before the elevator arrives with Susarro and Petra, run to the opposite edge of the bridge and grab onto it ("Shift + arrow keys" to run and then "A" near the edge). Approach Nico and go up the bridge. As soon as you regain control of George and Petra puts the gun back on you, follow Nico running down the corridor as fast as possible, without stopping to the elevator (the shots will complicate things a bit and you will have to orient yourself quickly).
While Nico holds the elevator open, use the bottle opener to lock the doors. You will have to leave the theater through the trap door that George used to enter it: you will not be able to go up to the stalls via the stairs that appear to the left of the stage, as they are manned by Susarro's guards; then go to the magazzino under the stage and use the elevator that comes out directly on the stage (lower the platform, mount it and operate the mechanism to get back on the stage). From here, jump down and head to the ladder in the back corridor to the right of the tech booth.
In Nico's apartment
Exhausted all the topics of conversation with Nico, Bruno and André, taking stock of the situation, before leaving again for the Congo.
OMEGA TEMPLE (CONGO)
Cholmondely laboratory
- To force the laboratory door: unfortunately the main entrance is closed.
* Hint: You will certainly have something with you to force the door, even if you will need a hand ...
Use the metal bar on the door and you will find that it does not go through. Ask Nico to help you and she will pull the door, so you can put the bar in and leverage.
Enter the laboratory, stand in front of the door with the Omega-shaped cavity in the center and insert the Omega stone.
Threatening corridor
Better to avoid walking down the corridor: even if Nico will save your skin the first time, it would be a careless move, given the terrible spikes that overlook the wall and the corpse on the ground! Grab the ledge on the wall to your left and scroll to the end of the hall.
- To examine the corpse: the temptation to search the pockets of the unfortunate annoyed in the middle of the corridor is unstoppable, but you must first find a way to reach it avoiding an equally unpleasant end!
* Hint: There is something on this side of the corridor that could help you block those dangerous spikes to get to the body undisturbed ...
Push one of the nearby stone blocks in the first part of the corridor until the wall of nails pops forward and stops. Then bring the second stone block there too, leaving a space between the two: position yourself in this space, bypassing the first block, and push the other into the second part of the corridor, in order to protect yourself from the other nailed panels as well. Now you can climb over it and quietly search the corpse. By examining the swag of cloth found on the body in your inventory, you will discover that it contains a metal disc.
- To let Nico cross: after the earthquake, the ledge with which you passed the corridor was made impassable, so you will have to find another way to get Nico to join you.
* Clue: on this side of the corridor there is a mechanism that controls the spiked walls ...
Go back to the end of the corridor and approach the cogwheels at the top of the screen. Slip the bar between the gears. Enter the next room.
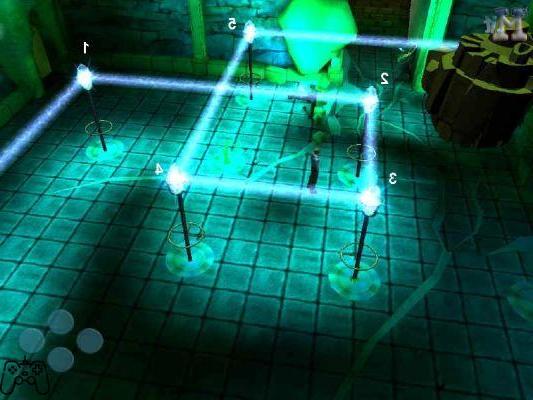
Enigma of decorated tiles
The huge chessboard in this room is made up of tiles decorated with stylized animal designs. The empty tiles are safe, meaning you can climb on them safely, but you risk reducing yourself to the state of a hamburger by stepping on the decorated ones, unless they are illuminated. To make the decorated tiles light up, you have to step on one of the pressure platforms located near the entrance: for example, by climbing on the platform that bears the fish symbol, you will activate all the tiles of the chessboard decorated with the same motif. To get to the other side, you will have to start from the only empty tile in the first line and activate the right path each time to get to the next empty tile.
* Hint: One person cannot walk across the board and activate the pressure plates at the same time!
Go to the first empty tile and open the inventory; from here, ask Nico to help you by climbing the pressure plates in this order (always make sure you are on an empty tile before changing):
1. fish (lead George along the 6-tile path thus activated and stop him on the empty one at the end);
2. scorpio (cover only 7 tiles and stop on the first empty one);
3. snake (go to the empty tile);
4. fish (go to the empty tile);
5. bird (go to the empty tile);
6. scorpio> (go to the empty tile);
7. snake (take the path that goes to the left and leads to the empty tile closest to Nico);
8. bird (go to the empty tile);
9. fish (go to the empty tile);
10. scorpio> (go to the empty tile);
11. snake (leave the board).
Climb onto the raised platform and exit.
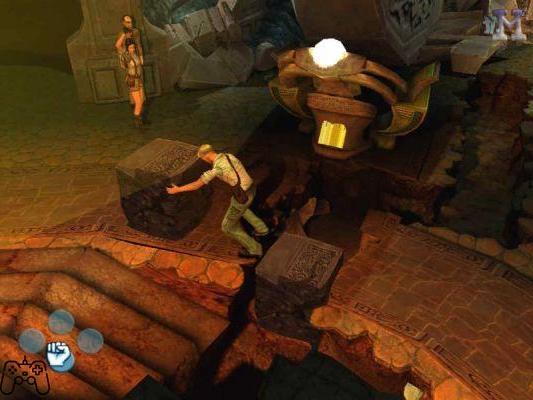
Collapsed corridor
Approach the edge of the gap in the lower area of the screen and drop down. Jump to the nearby platform. Grab the edge of the latter and slide to the right. As soon as possible, let yourself fall to the ground. Go down one more level and exit.
Cave
You have to reach the raised door on the right but, if you try to cross the slab in precarious balance on the stalagmite, it will tilt causing you to fall ruinously.
- To counterbalance the stone bridge: you will have to find something that acts as a counterweight and block the end of the slab resting on the platform on the left.
* Hint: Some of the stone blocks on the large left platform are movable and may be for you ...
On the platform on the left you will notice three pink blocks placed on three different levels and it is the one at the top on the far left that will act as a counterweight, so the goal of the puzzle is to drag it up to the top of the stone bridge in the center of the cave. To do this, you will have to fill in the empty spaces between the fixed blocks of the platform at the levels below, moving the other two pink blocks from time to time: the block on the 1st level will be moved in order to allow the movement of the block on the 2nd level and this will in turn support the movement of the block on the 3rd level. The four images in the box on this page illustrate the precise positions in which the three blocks of pink stone must be placed from time to time.
Now you can safely cross the bridge. Jump to reach the far right door.
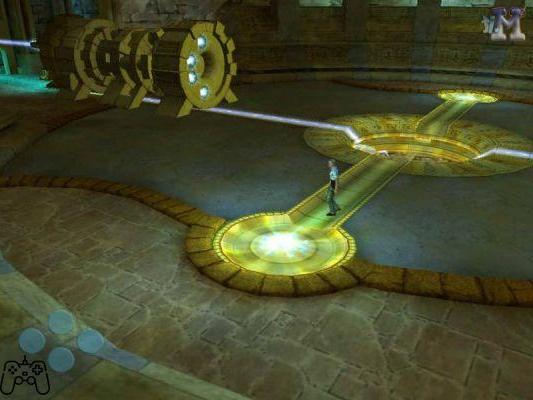
Hall of machinery
Explore the room and examine the four strange machines that occupy it.
- To activate the machinery: interacting with the console located on the opposite side of the entrance, it is possible to move these large devices. Obviously, to work, they must be positioned in a very specific way. Only the one at the top right, closest to the arch leading into the other room, is fixed. On the control panel you have 3 commands available: the two arrows allow you to rotate the central disk of the structure clockwise and counterclockwise, consequently modifying the direction of the light beam; the gears allow moving the mobile units in the same direction as the aforementioned beam.
* Clue: Judging by the shape and arrangement of holes and crystals, these devices would look like interlocking pieces ...
You will have to move the machines one at a time to the central shaft (after pointing the beam in that direction) and then change the direction of the beam again, so that it points towards the unit already positioned in the upper right and that each piece is oriented in the best way for the joint. Do it in this order: first the bottom right piece, then the top left piece, and finally the bottom left piece.
You will find that you have assembled a kind of cannon, which will direct a beam towards the adjacent room. Go there, after examining the panel at the front of the machine, which allows you to reverse the direction of the beam (for now, it must point towards the other room).
OMEGA TEMPLE (CONGO)
Hall of Mirrors
There seems to be no way out: only a closed door at the top right and steps blocked by a large wreck to the north.
- Mirror puzzle: the energy beam from the other room is reflected by a mirror and deflected against the wall. All mirrors can be rotated clockwise and counterclockwise.
* Hint: By orienting the mirror surfaces in the right way, you could use the beam from the other room to your advantage ...
Note: The numbers in brackets refer to the images below and indicate the order in which the mirrors are moved. Orient the mirror on which the beam bounces (1) so as to project the latter towards the mirror on its left (2); turn this second mirror by deflecting the ray towards the one below (3); bounce the beam from the latter to the mirror on its right (4); rotate the fourth mirror so that the beam hits the highest one (5) and from this make it bounce against the wreck on the left, which will be moved. Now go back to the mirror in the middle of the room (3) and turn it so as to pass the beam in the left alcove, hitting the mirror in the upper corner (6) and, from this, aim it against the mirror on the far left. (7) and then the next one (8); finally, throw it back against the scrap above. Go back to the other room and reverse the direction of the beam, interacting with the panel at the front of the cannon: re-enter the hall of mirrors and the wreckage will be removed once and for all.
Both control panels at the top of the room are now accessible, as are the stairs to the north. Climb them and go to retrieve Nico. Examine the panels and ask Nico to work with you to operate them simultaneously and open the door on the right. Leave the room.
OMEGA TEMPLE (CONGO)
Alpha generator
Before entering the generator, you will pass through a cave and find yourself in a room on the floor of which the familiar symbol of lightning stands out, also reproduced in relief on the wall. The most instinctive thing to do is to use the metal disc recovered on the corpse, which bears the exact same symbol: by applying the disc to the relief on the wall, you will be able to open the door for a few moments, but the disc will be immediately thrown out. Picking up the disc, you will find that it is hot.
- To keep the door open: you will have to find a way to keep the disc in place, without burning your hands.
* Clue: the metal disc with the lightning bolt symbol was not found naked and raw ...
Try to reinsert the disc and immediately interact with it to keep it in place: nothing to do, it is too hot. Repeat the operation and, to protect your hands, this time use the Templar scarf that wrapped the disc.
While Nico holds the door open for you, slip into the generator. Collect the Alpha stone, return to Nico and leave the room.
ACTION EVENT: Run to the exit to escape Petra. When George and Nico stop to catch their breath and there is another earthquake, run to the edge of the platform and jump to the other side. Now leave the cave.
NICO BACK TO THEATER
Nico's apartment
Discuss all topics of conversation with everyone present.
At the abandoned theater
Since the door for it basement it's closed now, go to the changing room and go through the hole left by the safe. Enter the room from which the cries of Susarro's henchman panicked the last time you were here came and you will find yourself in a office. Examine the paperwork on the cupboard near the door. Cross the latter to go to the other room and ....
ACTION EVENT: As soon as you regain control of Nico, press the indicated action key.
Enter the room undisturbed and examine the report on the desk. Interact with it to find what you are looking for.
SUSARRO CASTLE (PRAGUE)
Entrance to the castle
Ring the intercom and the guard will not allow George to enter: let Nico do it and hide behind the left wall while she keeps the guard busy. As soon as Boris has his back to you, sneak up behind him (Ctrl + directional arrows) and head through the gate.
Guards at the entrance with dogs
Study the movements of the guards before you move: the one to the right of the entrance always remains in the same position, but will see you if you try to pass through there; the one on the left, on the other hand, moves constantly. You have two options: wait for him to give you his back and head to the left, paying particular attention to the dog and always staying in the shadows, or keep away and climb over the walls and gardens on the left (which is safer). Cross the arch to the far left without getting caught and moving slowly (in the shadows you will be practically invisible, even at close distances).
SUSARRO CASTLE (PRAGUE)
Courtyard with reflector
Scrupulously avoiding the areas illuminated by the spotlight, go down to the garbage bins and examine them all: you will find some twine, a piece of tinfoil and the remains of a hamburger. Continue to skirt the perimeter of the courtyard, until you find an exit.
Courtyard with crates
A part of the wall in front of the arch from which you entered is not protected by a grid: arrange the three small boxes so that you can reach it and climb over.
On the castle walls
Go down and at the corner go up to the ledge, then proceed to the right. Continue until you reach the facade of the castle and climb over the railing to cross the balcony with the glass floor. Climb the railing on the other side and continue on the ledge on the right, up to the courtyard near the guard and the dog.
Right side of the courtyard
Go down the steps and enter the tree-lined area. Look out over the courtyard on the right and study the movements of the guard, then stealthily reach the archway opposite at the appropriate time.
Another courtyard with boxes
Move away the crates next to the one closest to the left wall and pull the latter over, so you can climb up and climb over the wall.
Guard with dog in cage
Using the container as a cover, get as close to the cage as possible. Throw the burger at the dog to keep it good, then crawl behind the guard and reach the opening on the right. Alternatively, if you haven't taken the burger from the backyard trash can with the reflector, you can approach and make the dog bark: the guard will turn to the cage and you can crawl behind him (but that's more risky).
Parking
Stay away from the guard, walking around the perimeter of the courtyard, and go to the gate to talk to Nico. Continue along the wall, passing behind the trucks, in front of the booth with the button and behind the helicopter, up to the jeep raised with the jack: take the remote control from the glove compartment, go back to Nico and open the gate. Approach the cage again with the button in the corner and press it. Ask Nico to hold it down, while you take a look inside: take the handle stuck in the door and pick up the piece of coal from the ground if you want (it is not essential). Use the handle you just found on the jack inserted under the jeep, remove the handbrake and push it against the wall. Now you have two options: go to the limousine parked in the recess of the opposite wall, get on it and use the jack to force the window, through which only Nico will pass; another access road to the castle can be reached by climbing on the hood of the jeep and climbing the tower on the right. Here, however, only George will be able to climb the eaves at the top left (if Nico has not already entered, he will have to collect the bracket fallen from the gutter and force the window over the silt). It is up to you to decide who to let in first.
NICO IN THE CASTLE
Winery
Nothing interesting here - walk out the door by going up the steps.
Hall and rooms of the castle
After the dialogue between the guards, continue to the left and enter the kitchen: the cook is intractable and does not let you take the whitener. Go back to the stairs in front of the cellar door and go up to the first floor. Taking the entrance to the hall balcony, you will make a plank creak: Nico will automatically hide. Walk the entire balcony in the shade to the opening on the opposite side. In the corridor leading from here, only the door to Petra's room, the last one, can be opened.
- To dress up as Petra: considering what the guards said, this is the only way to wander around the castle undisturbed.
* Hint: in Petra's room, you should find almost everything you need ...
Open the trunk at the foot of the bed and pick up the hairdryer. Go around behind the screen, open the other chest and take the wig. Examine the trunk again to discover a double bottom: Nico will find a button, but it is too small to press with your finger. Use the pencil to do this. You will find Petra's collection of knives and a knife sharpener. It's time to buy the cook's trust: go down to the kitchen and talk to him about Petra's knife sharpener. He will be so enthusiastic that you can safely get hold of the whitener while it is being shot. Go back to Petra's room and enter the bathroom: put the wig in the sink and pour the whitener over it. Finally, use the hair dryer on the wig and Nico will turn into a beautiful blonde.
Go to the balcony and you will be stopped by a guard ...
GEORGE STILL OUT
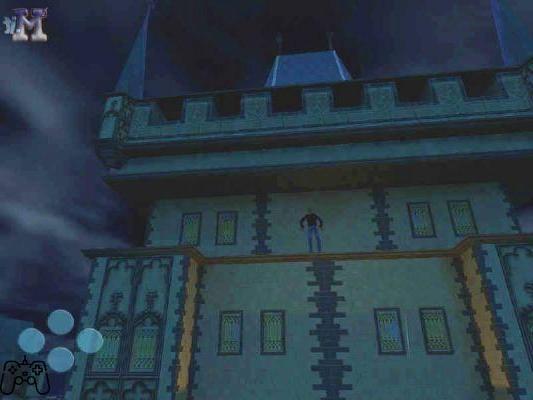
Roof
You will find a chest to the right near the wall: place it in the opening that breaks the bridge on the upper level and go up. The nearest door is closed, so go in the opposite direction. At the top of the stairs, you can walk on the ledge on the right, until you find a statue that blocks your way: it is broken and can be pushed down. Keep going, circling the building and flattening yourself against the wall if necessary, until you find yourself on a balcony overlooking the garden: drop onto the balcony and then grab the pipes in the upper right to continue. As soon as possible, drop down and go through the open window.
GEORGE STILL OUT
Old warehouse
The oil lamp on the left leaks if operated. The speakers at the top of the screen block access to a window - move them and exit. Continue to the patio with the trees below.
Wooded patio
Examine the drainpipe near the mouth of the stairs you came from and take the cup used to catch the leaks. Explore the patio until you find a grate on the ground between two trees: if you try to lift it, you won't be able to.
- To raise the patio grate: the old grate is rusted and it seems impossible to move it.
* Hint: To loosen it a little, it would take a lubricant ...
Go to the old warehouse and turn on the lamp, then collect some oil with the cup. Go back to the grate on the patio and use the cup full of oil to grease it. Now you can pick it up and enter.
NICO DRESSED AS PETRA
castle hall
The disguise works and Nico can have some fun and explore the lobby better. Try to open the door to the left of the guard sitting at the desk and you will find that it is protected by a card reader. Talk to the guard and ask about the door and Bruno.
Courtyard
Take the steps on the far right and go to either side of the door that is under sight of a guard. Under an arch overlooking the parking lot, you will find the guard who keeps your security card: take advantage of it.
castle hall
Try to open the door to the left of the desk with the card and you will find that it must be validated. Go through the hall and enter the door on the other side, look around and then talk to the woman sitting at the PC: make sure you have your card validated and retrieve it from the desk. Finally go to open the door to the dungeons! underground
Go down and examine the first cell. Keep going until Nico hears a noise ...
IN THE UNDERGROUND OF THE CASTLE
Laundry
Of course, the exit door is closed. Examine the trolley at the end of the hall and drag the old washing machine in the corner over it. Push the weighted carriage against the door to break it open.
underground
Following the tunnels in the basement, George will come across a door that definitely stands out from the rest: you need a card to open it. Continue to the end of the tunnel. After the pleasant reunification, exhaust all the topics of conversation with Nico. Turning left, you will be blocked by a guard post. Go back to the security door and let Nico open it with the security card: you will enter a locker room. Grab a uniform from the corner locker and have George wear it. So you can both get past the guard post. Go straight and you will notice a combination door. Enter the next area used as a warehouse: on the partition wall of the next room, you will see an air vent. To get there, conveniently move a crate under the grate, from which Bruno's groans come.
- To open the grate: now that the office is free, it's time to take a look to find out more about Susarro's plans and find a way out. Too bad that the grate is firmly screwed.
* Hint: Have you ever found yourself struggling with a screw with your bare hands? What can be used as an alternative to a screwdriver?
Use the silver coin from Glastonbury's poetry book to unscrew the grille. As usual, you'll need Nico's curvy physique to get through the vent. She will open the door on the other side for you.
Susarro's office
Look at the dragon lines map and examine the office: to open the secret passage, look for a button under Susarro's desk. Go away!
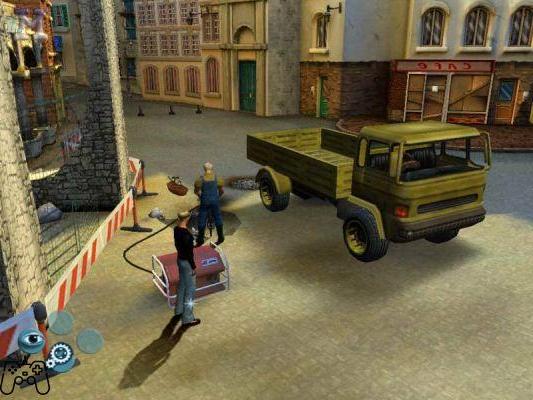
GEORGE A MONTFAUCON
Go behind the van and examine the manhole. To steal the key from the nearby toolbox, you'll first have to distract the worker (an old acquaintance, Flobbage) by circling the vehicle and turning off the compressor. By inserting the key in the manhole, you will still find that you cannot lift it. Reach the public services at the other end of the square.
Pissoir
Talk to the caretaker and enter to use the services. Go out and complain about the lack of cleanliness: the woman will go and check for herself. Take advantage of the fact that she is busy and head to the right, skirting the scaffolding and going up the corner, where it will be possible to climb. When you reach the first walkway, go up the ladder. Follow the walkway to the end and jump to the other side. Continue to the end of the platform and go down one floor: here you will find a rope, collect it. Now you can go back to the manhole.
GEORGE A MONTFAUCON
- To uncover the manhole: you have the key, but not enough strength to lift it.
* Hint: George himself gave us a little hint, when he couldn't lift the manhole himself - more "horses" are needed ... and what's around there?
In the inventory, match the manhole key with the rope found on the scaffolding and use them on the manhole: George will tie the other end of the rope to the van. It is useless to try to wake the driver: talk to old Flobbage and you will learn that his colleague Alphonse is terrified of earthquakes. Play a joke on him and you will reach your goal ...
GEORGE IN THE COVO OF THE TEMPLARS
Sewers
Coming down from the manhole, you will find yourself in the sewer pipes under the square. Cross the plank below and examine the inscriptions on the three arches. Continue around the corner and stand in front of the door with the skull in the middle: to open it, insert the stone cylinder into the mouth of the skull.
Corridors of the lair
Always go straight, until you reach a sort of chapel with a heavy door at the end: approach and you will hear two of Susarro's henchmen talking amiably. Go back to the intersection you passed and take the corridor to the left. Follow the trail of blood and at the intersection turn left (on the right you will find only a closed gate). At the end of the corridor, in the kitchen, there is a guard eating and you will not be able to continue following the trail of blood. Back up to the two doors facing each other and enter the one on the right.
Boudoir
Search the body behind the door to get the key.
- To distract the guard: if you try to operate the microwave oven in the upper right corner of the sitting room, you will immediately understand how to attract the attention of the guard. The problem is to prevent him from discovering you and to find a way to sneak into the hall at the end of the corridor.
* Hint: by finding a good hiding place nearby, you will be able to lure the guard and trap him.
After having activated the timer of the oven, you will have to act quickly: you will have 10 seconds to run and hide in the room opposite, wait for the guard to go and check the microwave in the sitting room, close the door behind him and use the key to trap him (it is convenient for you put it handy in your inventory before you start).
Kitchen
Now you can safely enter the kitchen. There is nothing of interest here, but follow the trail of blood to the wine cellar: you will find that they stop in front of a grate with 5 bottles.
- Enigma of wine bottles: examine the 5 bottles, paying particular attention to their origin. You will need to extract them from the grate in a precise order to open the secret passage they hide.
* Hint: do the names on the bottle labels remind you of anything? Perhaps, the last few pages of your notepad you have in inventory will refresh your memory ...
Take out the bottles in this order: green, Spanish red, German red, white and blue. Go through the passage.
GEORGE IN THE COVO OF THE TEMPLARS
Locker room
You will enter it through the only available door in the corridor where the corpse of your Templar friend is located. Pause to examine the broken clock and go out through the door on the right.
Cathedral
Here the most irritating stealth phase of the game awaits you: you'll have to get to the door on the opposite side, sneaking past the guard patrolling the altar steps. Study his movements carefully before starting and move only when he has his back to you: along the way, you should stop and hide behind the pulpit, the altar screen and the pillar in front of the steps at the opposite end of the altar. as a last stop before reaching the door. Once you get here, wait for the guard to walk away before entering.
Office
Examine the clock and try to set the time the broken one stood in the Templars' dressing room, but nothing will happen.
- To set the right time on the clock: examine the three statues in front of the clock and above all the central one, carefully reading the inscription taken from the Book of Revelation on the plaque at the foot of the statue.
* Clue: We are in a church after all, where can we find out more about this verse?
Yes ... there was a Bible in the cathedral pulpit! Go back and read it but, as soon as you know that is the right passage, SAVE: if you are caught during the next crossing to the office door, you should start all over again, while with a rescue you will save yourself a trip and you will find yourself directly in front of it. at the door with a lot of verse in hand. Interact with the clock in the office and set it according to the Bible verse relating to St. Stephen. Go through the secret passage.
In Vernon's apartment
After updating the others, contact Nico. On the satellite map, select the 3 stones one at a time based on their similarity with the conformation of the Egyptian territory (in order: Psi, Omega and Alpha).
EGYPT
The ruins
Follow Nico, going left and hiding behind the ruins. Wait to get close to where she has attracted attention, until the guard and the dog have moved away - the dog can spot you even at some distance, so make sure it is far away and turned before you move. At the appropriate time, run to the left of the mound to where Nico is. Talk to her, proceed to the left and examine the slab that stands out from the rock face. Use the jack to push it aside and open a passage.
Temple
- Proof of authority: you simply have to prove to Anubis that you can open the golden door at the bottom.
* Clue: Just look at the shapes decorating the door to know what to use ...
Use the three Psi, Alpha and Omega stones on the door.
- Proof of wisdom: as soon as you enter the second room, listen carefully to the story of Horus (you have to ferry 3 people to the courthouse bank in 7 journeys; Horus can only carry one at a time, but he must not leave his brother and the suspect or the suspect together on the bank and the witness). Approach the tub in the center and the three figurines on the right. By interacting with them, you will access the menu with which to select the character to be charged to Horus and / or the command to make him make the crossing.
* Hint: always keep in mind that you will have to solve the puzzle in 7 journeys and that the only characters who can be left alone on either side are the brother and the witness.
1. Ferry the alleged killer first.
2. Return Horus to the other shore.
3. Load the brother and have him disembark at the courthouse.
4. Reload the killer and take him back to the starting shore.
5. Ferry the witness, leaving only the killer down.
6. Return Horus to the other shore.
7. Finally, take the killer back to court.
Armillary
ACTION EVENT: as soon as Flap prepares to fire and you regain control of George, press the indicated action key (S) to jump; press it again as soon as you see the gun on the ground.
- To find a way out: after all this effort, you are certainly not going to rot in there! You will have to explore the area to find an exit.
* Clue: Somewhere around there, there must be an opening that the bad guys will have used to get in and out of the Armillare ...
All topics of conversation with Nico and Bruno have been exhausted. Retrieve the Key of Solomon from the podium. Go up the steps on the other side of the Armillare and go left: walk along the upper balcony, until you find the remains of the excavation made by Susarro and him. Examine the area carefully and in the upper right you will see some dynamite. ACTION EVENT: As soon as the cutscene starts where George notices the danger and the railing icon appears, press the corresponding action key.
- To make your way through the rubble: the explosion has severely limited your movement within the Armillary, but it could also have opened a way for you ... the point is to get there!
* Hint: Look around and look for something that will allow you to climb the debris block at the bottom ...
Locate the two pink stone blocks: the first is to the left of Nico and Bruno, inside the crack; the other at the bottom left of the screen. Push the first one in front of the podium, using it as a bridge to bridge the gap along the central ring surrounding the Armillare, and then drag the other block onto it (image A below). Push the latter to the right and then upwards, making it pass between the podium, Nico and Bruno, and then bring it closer to the right edge of the crack as high as possible: you can make it cross the crack on the ground again, always using the first block as a bridge. When the block on the surface is to the left of the crack, push it under the slab at the top left to climb up (image B). From here, keep going up and you will be outside.
EGYPT
Temple
To have any hope of getting out, you'll have to tease Horus by interacting with the three test statuettes again.
GLASTONBURY
On the main street
Get away from the plane and walk down the street in the opposite direction until you reach the barricade. Enter the courtyard of the building on the right: behind the wall in front of George, the Tor awaits you.
- To climb over the wall: upon entering the courtyard, you will surely have noticed an opening in the wall. You will need to arrange the crates so that you can reach it.
* Hint: the difficulty of this puzzle is to manage three levels of crates. Those on the first level that rest on the ground can be moved freely, while the one on the third level (which will allow us to climb over the wall at the end) can only be moved by approaching the only crate on the second level, which is initially located on the wooden platform. under the window.
1. Start from the single crate on the far left, just below the opening in the wall: drag it up and then to the right, above the column of three crates.
2. To the right of the aforementioned column of three, there is a dividing wall and to the right of this one another single crate: place it to the right of the crate you moved earlier.
3. Align the crate in front of the wooden platform with the one resting on it.
4. Bring the crate on the far right below the crate you just moved.
5. Drag the crate resting on the wooden platform onto the one below.
6. Arrange the crate you moved in step 4 so as to line up with the others and obtain a row of four contiguous crates on the first level (as in image A below). 7. Now drag the crate on the second level onto all of the crates in the first, bringing it to the far left, above the column of three crates.
8. Move the single crate adjacent to the column of two you just got, placing it just below the opening in the far left wall.
9. Move the last single crate to the right away, so you can push the one next to it.
10. Move the latter to the left, placing it next to the column of two, then up, again to the left and down.
11. Now you can finally drag the chest to the second level under the opening in the wall.
12 You just have to go up the dividing wall at the bottom, to push the crate to the third level against the left wall and climb over it (image B).

GLASTONBURY
The tomb of King Arthur
Examine Excalibur, beyond the king's tomb. Use the Key of Solomon on the stone where the sword is stuck and pull it out.
- To defeat the dragon: you will have to act quickly, as the beast will immediately start shooting at you fireballs.
* Hint: look around and locate possible cover along the path that separates you from the dragon ...
At the first flush, jump to the right and try to reach the nearest shelter. From here you will have to progressively approach the dragon, running in a zigzag to avoid the fireballs: start running to the left and, as soon as you see the fire approaching, change direction abruptly and then again, until you reach the second pile of rubble on the left. After three bursts, the dragon will stop for a moment: at that moment it will be vulnerable and you should approach it as quickly as possible and finish it off with the sword!
Video of the solution - 1st part


