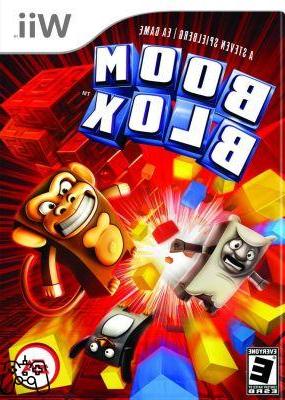
Gem Kingdom - Part 1
Gem tower
Bronze: 6 casts
Silver: 2 casts
Gold: 1 roll
The block that you will have to hit immediately to destroy the entire tower is on the right, and is the second one from the bottom.
Hover manor
Bronze: 6 casts
Silver: 3 casts
Gold: 2 casts
First you will have to hit the bomb that is closest to your position, so as to destroy all the gems that are in the central section as well as in the two rows immediately adjacent to the bomb. Second thing, on the right, there should be several towers: you have to aim for the right block in the middle of all the towers, shoot a lot of gems and all the towers should quickly fall.
Skull Keep
Bronze: 6 casts
Silver: 3 casts
Gold: 2 casts
On the right, you will notice some blocks that are located right in the middle of several towers. So there will be several towers left; on the lower section of one of them there will be a block with the ability to disappear, you will have to hit it to destroy the remaining parts of the level.
Rampart ruin
Bronze: 6 casts
Silver: 4 casts
Gold: 2 casts
First, you need to aim for the tallest tower, and hit the vanish block next to the chem block. Only three towers will remain; you will therefore have to aim at the one on the bottom left, covering the block that is in the right position opposite to the vanish block. However, avoid hitting the latter as you would put yourself in a rather complicated situation.
Ruins of Old
Bronze: 4 casts
Silver: 2 casts
Gold: 1 roll
Towards the top are two towers which contain chem blocks; inside there are vanish blocks that you will have to destroy. Destroy both vanish blocks with one shot and you will probably be able to destroy all the towers in the level.
Ye Olde Fort
Bronze: 7 casts
Silver: 6 casts
Gold: 3 casts
Right in the middle, looking at the level from above, you can see a large block bomb, which you need to hit first. Second, one of the smaller bomb blocks, which are positioned along all sides. So the one on the opposite side from the one you selected first. With three hits you should therefore be able to complete the level and win the gold.
Ye Gems
Bronze: 4 casts
Silver: 3 casts
Gold: 2 casts
There is a vanish block on the tower, which can be hit using the bomb block on top. This will also drop another bomb block on top of a row of gem blocks, thus causing a large amount of them to explode in no time.
Toppling towers
Bronze: 4 casts
Silver: 3 casts
Gold: 2 casts
Near the bottom of the tower, you will see a vanish block, which must be hit using the chem block at the top of the tower, surrounded by bomb blocks. It should cause a chain reaction that will destroy most of the level. Then target one of the remaining bomb blocks to destroy the rest of the gem blocks.
Monolith
Bronze: 8 casts
Silver: 4 casts
Gold: 3 casts
The first shot will have to be aimed at the vanish block right at the base of the structure, trying to hit the adjacent gem block as well. On the right, there will be a similar structure that will also be eliminated in the same way. It is possible that these two hits destroy the entire structure; if this is not the case, you will simply have to repeat the procedure.
Stealers
Bronze: 1 gems
Silver: 5 gems
Concerns: 8 gems
The enemies are not very many (27) and not too strong either. It is recommended to bomb the cells adjacent to a gem that turns red, as the different coloring indicates that the gem is about to be stolen. The goal is to keep as many gems as possible, and this simple strategy should ensure success.
Gem theft
Bronze: 1 gem
Silver: 5 gems
Concerns: 8 gems
Destroy the tower with the chem block. which belongs to the brownings. Then change the position of the camera so that you have a complete view of your gem range, thus not letting you miss a thing. You have to pay close attention to the zero bandits, as they are much more dangerous than brownings. Destroy them by placing a bomb in the middle of the group if necessary.
Gem Kingdom - Part 2
Ransackers
Bronze: 1 gem
Silver: 5 gems
Concerns: 8 gems
First you will have to change the camera angle, the original one does not allow you to have a complete view of the playing field. A bird's eye view is certainly the most usable. The enemies are many, as usual they will be more easily identified when they are in possession of the gem, given its red color. Quantitatively speaking, they are very strong, so you will have to throw your bombs in the middle of a group of them for maximum effectiveness. But be careful not to let the walls collapse.
High heist
Bronze: 1 gem
Silver: 5 gems
Concerns: 8 gems
Position the camera so that you can observe all sides of the play area. Enemies will come right from the corners, so you just need to aim your bombs in those directions to take them out systematically.
Kidnap Keep
Bronze: 1 gem
Silver: 5 gems
Concerns: 8 gems
Here, too, the enemies will come, more or less, from the corners of the map, so the key to success lies in the accurate positioning of the camera. First, of course, you need to aim for the enemies in possession of the gem. These two tricks will make completing the level pretty easy.
Final victories
Bronze: 1 gem
Silver: 5 gems
Concerns: 8 gems
There are four towers on the outermost part of the level, equipped with chem blocks. They must be your first target. Then the usual recommendations apply in this kind of levels, that is to aim primarily at the gem bearers, then trying to eliminate them when they are organized in large groups, so as to maximize the efficiency of your explosion.
Fight Beck
Bronze: 3 casts
Silver: 2 casts
Gold: 1 casts
The first shot will have to be aimed at the junction of the two monkey towers. In this way it is possible to destroy everything with a single blow.
Collateral
Bronze: 4 casts
Silver: 3 casts
Gold: 2 casts
Two shots for the gold: you will have to aim at the block dominated by two gems; you will see one for each of the two walls that will drop down. Aim for the block in the middle: after this procedure for both sides, everything should collapse in no time at all.
Bluster
Bronze: 5 casts
Silver: 4 casts
Gold: 3 casts
The first shot will have to be aimed at the central part of the side block, featuring two monkeys and the gem blocks. Then the other two shots will have to aim at some vanish blocks: one in the middle, and one in the back at the junction with the highest block. Accurate hits should bring the entire structure down quickly.
Iron Gates
Bronze: 6 casts
Silver: 4 casts
Gold: 3 chains
The first shot will have to be aimed at the chem block which is in the middle board, in order to make it go towards the junction point between the chem block behind it and the normal blocks. By being able to aim for perfection, it will be possible to destroy most of the level with a well-placed shot. So dedicate yourself to killing the monkeys and gems around them.
staggered
Bronze: 3 casts
Silver: 2 casts
Gold: 1 roll
Immediately aim for the block bomb above the monkey, most of the level should drop. If everything falls, you will have won the gold, otherwise you will have to waste another shot on the rest.
Indefensible
Bronze: 6 casts
Silver: 4 casts
Gold: 2 roll
The first thing you will need to do is re-position the camera, so that it is directed towards the center of the structure. Three hits will need to be aimed right in the middle, should be enough to make him completely collapse.
Gorilda RescueEscape
Carpenter
Bronze: 0:01 seconds
Silver: 0:40 seconds
Gold: 0:42 seconds
Take out the sandy colored blocks to be able to proceed initially. Then the blocks vanish, so proceed along the rest of the steps.
Interruption
Bronze: 0:45 seconds
Silver: 1:10 seconds
Gold: 1:17 seconds
First, position the camera in such a way as to make the view from above. Then remove the block near the guild, and then the one to the left of the three you need to remove. At this point there will only be two left, which will be really easy targets.
Magic Carpet Bronze: 0:01 seconds
Silver: 1:00 seconds
Gold: 1:11 seconds
Take a look at the level from a bird's eye view: you will immediately notice a vanish block positioned right next to the gordila. The platform next to him, on the other hand, will be assigned to his mother. After that, there will be an obstructing block, which clearly needs to be finished quickly. Then destroy the immediately following vanish boxes. Let the gordila proceed for the next stretch, then take out all the other vanish blocks to let them complete the path without worries.
Coil Toil
Bronze: 0:01 seconds
Silver: 2:00 seconds
Gold: 2:20 seconds
Immediately use the bird's eye view. Immediately pull out the block on the right, just in front of the gordila. Now remove the block on the right, next to the little gordila; then move the one furthest to the left of all, then move the one closest to the gordila but still to the left, then move the one furthest to the right, slightly down - it will be practically impossible to err. Speed is the decisive parameter for obtaining the gold medal.
Congestion
Bronze: 0:30 seconds
Silver: 0:45 seconds
Gold: 1:00 seconds
Always keep the bird's eye view. Pull out the block near the gordila. Then take out the blocks between the two tikis - you'll have to move them up and down to be able to get them out. You will notice, at the top, a block that will be particularly visible due to the moves you make. Pull it out, then pull out the block near the tiki. You will now be practically free, and you can pull out one of the long, narrow blocks that are on your left and right, practically in all directions. With this last part of the procedure done, you should be done.
Air Lock
Bronze: 0:10 seconds
Silver: 0:20 seconds
Gold: 1:00 seconds
The preferred view will be the bird's eye view. Pull out the block just near the gordila, then the one to the side of the two blocking the gordila's progression. As soon as the latter passes the first part of the wall, put a piece back in the passage so that no one can penetrate. Have the gordila continue forward until the end of the level.
Crossing
blocked
Bronze: 1:00 seconds
Sivler: 2:40 seconds
Gold: 2:46 seconds
Hit the block near the gordila, block that blocks the advance of the gordila. Then you can see another one right in the middle, which you need to hit. Try to speed up the gordila's pace.
Burden
Bronze: 1:00 seconds
Silver: 2:40 seconds
Gold: 2:46 seconds
The best position from which to view the level is the lateral one, trying to position yourself on the same level as the group of blocks that make up that kind of central arch. The first block to be destroyed will be the one to the right of the Gorilda. So the one on top of the arched structure, then the one right in the center of the structure itself. By eliminating these two you should easily get your Gorilda going.
Boomwich
Bronze: 1:00 seconds
Silver: 2:30 seconds
Gold: 2:36 seconds
Position the camera at the bridge along which your gordila will proceed. The first block you need to clear is the long flat one, which blocks other small short blocks right next to the gordila. This will free up access to the bomb block. Now you have to hit the block just ahead of the gordila, then the one in front of the little ones. These two small moves should completely free access the rest of the way to your gordila.
Weighty
Bronze: 1:30 seconds
Silver: 2:22 seconds
Gold: 2:36 seconds
The camera should be positioned to the side, so that most of the central section of the layer can be seen in relief. Hit the block near the top corner, then the one just below. Now aim for the pillar near the two blocks near the center, and then the blocks on the left, in order to release the gordila.
Cross Brace
Bronze: 1:00 seconds
Silver: 2:32 seconds
Gold: 2:36 seconds
The best view is from the side. You will notice 3 blocks blocking the via del gordila. Hit the block closest to the gordila first, in the middle. Then hit the block obstructing the gordila's initial line of sight. He will immediately start moving when his path is clear. The two remaining blocks will have to be destroyed in the same way. New Clear
Bronze: 1:30 seconds
Silver: 2:26 seconds
Gold: 2:39 seconds
The camera must be positioned in such a way that the view is lateral. Hit the chem block near the gordila, in order to make it come out. Then hit the chem box near the baby gorilla. Now go to the chem blocks at the top of the central structure, then the lower ones, and then the one in the middle. Now the gordila will have gone a little further, and will have positioned itself near a chem block, which you will clearly have to tear apart. It will be the last piece that separates the gordila from the goal.
Rescue
Trapped
Bronze: 1 character
Silver: 3 characters
Gold: 4 characters
Your view should immediately focus towards the top of the level, trying to notice the gem block, which should be especially noticeable from a side perspective. Take it out, taking one block at a time, then line them up on the pillars at the top. Then take out each pillar from the central platform, so as to easily clear the entire path.
Quartered
Bronze: 1 character
Silver: 3 characters
Gold: 4 characters
The best view to complete this level is the bird's eye view. You will have to take out one of the gem blocks that are right on top, also trying to make sure that it does not hit the platforms below, as they are occupied by the gert. So remove the support to the four pillars positioned at the corners of the level to get the better of it.
Trick Brick Bronze: 1 character
Silver: 3 characters
Gold: 4 characters
Look at the wall from a side perspective, so that you can see all the blocks that make it up. Grab the two longer gem blocks, and pull them out of their location. Then the same procedure will be performed for the other two blocks directly above the latter. Now for the gem block on the other side, and you can get gold.
Insect Bones
Bronze: 2 characters
Silver: 3 characters
Gold: 4 characters
At the top you can see a tower, which has to be destroyed piece by piece, starting from the top. After picking up the pieces in the upper section, focus on the gem blocks. Place them on the parts without blocks, so as to protect the central part. In this way you should pass the level without excessive worries of mind. Fire Altar
Bronze: 2 characters
Silver: 3 characters
Gold: 4 characters
Take a look at the top of the structure which is made up of pairs of gem blocks on both the left and right. Take out the ones that are higher up, and then take out the one on the other side as well.
So there will remain two gem-blocks, which will have to be pulled out in random order, in short, as you prefer. Two will remain at the bottom. Take a look at the level from a side perspective, in order to locate a long block obstructing your vision. Pull it out by taking it to the other side. The same will have to be done for the other side, the accuracy should guarantee you gold.
Lava Bomb
Bronze: 2 characters
Silver: 3 characters
Gold: 4 characters
Aim at the top turret, and destroy it. Then aim for the second gem-block, on which the four gerts are stationed - it will also have to be pulled out. The other blocks on this level should be treated in the same way. Then take out the gem blocks near the baby gerts, then after a re-positioning of the cameras you have to pull out the gem block on the side.
Now you will have to perform a new rotation of 180 degrees and you will have to take out the block-gem that will be visible from here. The last two gem-blocks will be visible from the same perspective, or rather their prolonged parts will literally come out of the central section of the structure. Pull them out, and everything will turn out well.
Boots n' BanditsGold Mine
Mine Time
Bronze: 20 nuggets
Silver: 50 nuggets
Please inform me: 100 nugget
Throw all the bombs to one side, then once you get the gold, look towards the highest peak of the whole structure - you will notice a hole. Inside the hole, you will have to throw some balls: obtaining the 100 goal, that is gold, at this point depends only on your luck.
Stove Pipe
Bronze: 15 nuggets
Silver: 35 nuggets
Please inform me: 50 nugget
Hit the top of the level structure, in such a way as to create a small hole, inside which to insert your usual balls, which will try to get as many gold bars as possible. Clearly, as with all levels of this genre, it will take some luck to get the gold.
mine shaft
Bronze: 40 nuggets
Silver: 50 nuggets
Please inform me: 64 nugget
Looking from the side, you will notice a 3x3 block bomb. Destroy the block that is right in front of this quadrant, in such a way as to detonate all the bombs in one hit. Kill one of the cows, in order to free up a space, then throw the balls inside the building. Obtaining the gold medal is subject to the overturning of all the symbols representing the wood, which must become gold. Luck will be essential: if you want to get the world champion medal, you will almost certainly have to repeat the level a few times.
Lucky Bounce
Bronze: 50 nuggets
Silver: 60 nuggets
Please inform me: 75 nugget
In the upper section of the structure, you will be able to see the central part of a small block, which clearly needs to be hit with skill. In this way, you can easily see the central part of the structure, in which to throw a bomb. At this point most of the work will be done.
Honey
Bronze: 120 nuggets
Silver: 180 nuggets
Please inform me: 190 nugget
As has often happened lately, your view should first be directed towards the top of the block structure, then towards the central part. Destroy the central part, creating a hole. In the hole, you will have to throw a bomb, then the typical bouncy balls. It should be enough to get the gold medal.
Rich Vein
Bronze: 100 nuggets
Silver: 135 nuggets
Please inform me: 150 nugget
Look up immediately. You will notice that in one place the ceiling is made up of a large amount of small tiles. Hit this whole in its central part, so as to create a hole. Inside, you will have to direct the usual flow of bouncy balls, which will have to do their job by creating gold from wood. By trying to get a good ball entry angle, you should also be able to change the nature of a large number of beacons.
Blastin' Site
Bang
Bronze: 50 nuggets
Silver: 200 nuggets
Please inform me: 400 nugget
The bomb must be placed between the two platforms characterized by a block-point. You will then have to wait for the sweet Boots to light the fuse of the bomb, et voilà!
Bridge
Bronze: 180 nuggets
Silver: 300 nuggets
Please inform me: 440 nugget
You will need to place a bomb block inside each free block. So the last block-bomb will have to be placed on the shorter side of the block building, and then blow everything up sympathetically.
luxury hotel
Bronze: 80 nuggets
Silver: 150 nuggets
Please inform me: 230 nugget
The first block must be positioned at the bottom, while still trying to stay in the center of the screen. The second, on the second level starting from the bottom, trying to remain adjacent to the first. The third, immediately above the latter, between the two 10-point blocks, near Boots. This will cause a chain reaction that can destroy the entire level.
Bombinoes
Bronze: 20 nuggets
Silver: 40 nuggets
Please inform me: 90 nugget
Two bomb blocks will need to be placed between the two blocks holding up the tallest pyramid of blocks. The last, in the central part of one of the sides of the pyramid itself, towards the ground. This should cause a good chain reaction.
Bricks
Bronze: 50 nuggets
Silver: 180 nuggets
Please inform me: 300 nugget
One of the bomb blocks will need to be placed inside two of the support blocks that are next to each other. So you need to place another bomb on top of just these other blocks. At this point, use the services of Boots to blow everything up.
Pea shooter
Bronze: 50 nuggets
Silver: 300 nuggets
Please inform me: 320 nugget
Two of your bomb blocks will need to locate in the small slots between the 10-point block, on the exact opposite side of the large chem block. One of your bomb blocks will have to locate between the 10 point block and the small chem block. The last one must be placed on the base of the opposite side to that of the large chem block. At this point, light the fuse to cause the usual devastating chain reaction.
Bandit Blast
Outskirts
Bronze: 1 cow
Silver: 3 cow
Oro: 5 cow
The first objective will be to hit the Babadoo, then all the block bombs. It is possible that it is not all over and exploded: in case you find yourself in difficulty, you will simply have to hit any Babadoo left in the area.
foundations
Bronze: 1 cow
Silver: 3 cow
Oro: 5 cow
First thing: hit all the Babadoo that you will see immediately in the level. Then the blocks below, which will cause the main structure to collapse. All Babadoos that appear in the game area will be immediately terminated.
Scary Boss
Bronze: 1 cow
Silver: 3 cow
Oro: 5 cow
The first shot will need to be aimed at the foundation of the square block, at the top of the back of the level. So go find a Babadoo, it's hidden, it will have to be destroyed, as it is likely to knock down a bomb block. Then complete the work of destroying the platforms, and therefore you will have to eliminate all the remaining Babadoo.
Downtown
Bronze: 3 cow
Silver: 4 cow
Oro: 5 cow
Warning: the level features a bomb-throwing rascal that is positioned in the back, on the right. At some point you will see some block bombs flying towards you, which must be eliminated immediately.
The block bomb closest to you will have to be eliminated immediately in order to kill all the Babadoo around. The same will be done for all the bomb blocks present along the level, which will also kill the remaining cows.
Gate Guards
Bronze: 2 cow
Silver: 3 cow
Oro: 5 cow
You will immediately see a Babadoo approaching. Eliminate it. So focus on the bottom row. You should see several different colored blocks - hit them. Then continue in the action of eliminating the Babadoo. Their entry will on some occasions be signaled by the presence of blue smoke coming out of blocks in the lower section of the level.
Danger Zone
Bronze: 1 cow
Silver: 3 cow
Oro: 5 cow
The first shot will be aimed at the block bomb to the right of the leftmost tower, below. This way the tower itself should explode. Eliminate all the Babadoo, then the blocks with the stars. Just remember never to blow up the cows, and you'll have a very easy time.
Haunted NightSpooky Woods
Tricky Trail
Bronze: 1 kitten
Argento: 3 kittens
Gold: 5 kittens
First, shoot the zombies, then shoot the vanish blocks near the pumpkin block. Then take care of the remaining zombies, which shouldn't be too bothering anyway.
Terror Trees
Bronze: 1 kitten
Argento: 3 kittens
Oro: 5 kitten
The first target must be the demons, then the block-bomb. Monkeys will also arrive, but the spawn location won't be particularly difficult to spot, so you shouldn't have any trouble taking them out. Soon all the animals will arrive around the pumpkin block.
Limb to Limb
Bronze: 1 kitten
Argento: 3 kittens
Oro: 5 kitten
First thing: hit the block blocking the way for the animals. Then destroy the monkeys and zombies - monkeys first, as their gradient of approach to your animals is higher. The various turrets present in the level can be destroyed using the chem boxes scattered along it.
Fear of Fog
Bronze: 1 kitten
Argento: 3 kittens
Oro: 5 kitten
The first move must be to hit the block bombs in the tower, the second from the right. Then move on to the enemies, and then to the chem block on the right tower, then back to the enemies. Now the block bomb on the right tower, and then the enemies again. You will have to follow this procedure and you will be able to eliminate all the towers present in the level, completing it without too much difficulty.
The Green Road
Bronze: 1 kitten
Argento: 3 kittens
Oro: 5 kitten
A somewhat particular level, in the sense that it does not allow the use of particular tactical moves, preferring instead pure brute force: you will have to continue eliminating monkeys and zombies until your animal has reached its destination. The zombies will never attack as a group, but always one at a time, which will clearly be a great advantage as you can always keep them fairly under control.
Rancid Rain
Bronze: 1 kitten
Argento: 3 kittens
Oro: 5 kitten
First, destroy the block occupying your pet's street. Beware of the chem blocks that will literally begin to "rain" from above: you will have to hit them as soon as they get close to your pet. Of course, it goes without saying that at the same time you will always have to keep at bay the zombies and monkeys who will try to make the skin of your dear fellow adventurers. But this task will now be a formality for players who, if they get to this point, will surely be experts. Speed is the key parameter for getting the gold medal.
Lost Kitten
Build A Wall
Bronze: 0:01 seconds
Silver: 1:05 seconds
Gold: 1:10 seconds
The first move towards victory will be to pull out the block that occupies the puppy's street; then put it back in line with the block wall that is towards the top of the screen. So you should make sure that the Grimms do not have access to your play area, at least until you have made sure that the puppy has finished its path.
Discovery
Bronze: 0:01 seconds
Silver: 0:45 seconds
Gold: 0:55 seconds
The first thing to do will be to move the blocks with the puppies, placing them towards the bottom of the screen. More precisely, they will have to be placed between the last and the penultimate row of chem blocks. So create a new wall right behind them. In case the zombies are bothering you, use chem blocks to neutralize them. This structure should guarantee you the gold medal with some ease.
Pyramid Path
Bronze: 0:01 seconds
Silver: 0:45 seconds
Gold: 0:50 seconds
The blocks with the kittens must be placed to the side, like a wall against the zombies. The next step will have to be the progressive destruction, piece by piece, of the pyramid. The start will be marked by the two blocks right next to the kitten, right at the top.
So the pumpkin-shaped block, and then concentrate on building walls to avoid an invasion by the zombies, which will prove to be quite aggressive. Place the wall on the outside of the level: it will always be possible to move it towards the inside, but it will be difficult to "extract" the zombies from the hot area in case they manage to penetrate.
Rise Above
Bronze: 0:01 seconds
Silver: 0:25 seconds
Gold: 0:45 seconds
Do you see the blocks right next to your pet? Move them to the second cloud block, just aligned with the pumpkin block. There are also two towers near the pumpkin block next to the animal; they will be moved towards where the pet begins its journey, in such a way as to make them walk towards the lower section of the level.
You basically have to create a path that leads the animal directly to the pumpkin block, while cutting out the zombie horde. The point from which the zombies could easily penetrate is the highest side of the path, which therefore must be placed under observation, and possibly modified to obtain greater safety.
Slimy Stairs
Bronze: 0:01 seconds
Silver: 0:25 seconds
Gold: 0:45 seconds
One of the levels where the first movement will have to be the change of the camera angle. The shot will have to be, in practice, from behind the stairs: this will allow you a perfect overview in the direction from which the zombies will be introduced into the level.
So you have to move the blocks that are on the ground, towards your animal, so as to form a kind of small wall in the direction from which the zombies arrive. Detonate two chem blocks, then once you get the animal down the steps, you can use the blocks that made them up to create a more effective wall.
Mattresses
Bronze: 0:01 seconds
Silver: 0:10 seconds
Gold: 0:35 seconds
After starting the level, you will have to immediately use the block from which your animal begins to move: therefore you will have to immediately pull it away in order to stop the advance of the zombies.
Then make them explode using the chem boxes, which will already be in a good position to make you succeed in this intent. The vanish blocks that form a tower can be blown up with a chem blox, or possibly used as a wall against zombies.
Grave Battle
Grave Yard
Bronze: 1 kitten
Argento: 2 kittens
Oro: 3 kitten
Use the ghost gun to take out the zombies. In case you see that they are too numerous, you can use one of the bomb blocks scattered along the level to make them explode en masse.
Standoff
Bronze: 1 kitten
Argento: 2 kittens
Oro: 3 kittens
On the back, on both sides, monkeys will appear which must be immediately hit by you. Then you will have to try to hit the block bomb, clearing the walls when there is no more risk of enemies penetrating through them.
Surrounded!
Bronze: 1 kitten
Argento: 2 kittens
Oro: 3 kitten
Here you will have to pay close attention to the zombies, destroying them as soon as they approach you. Remember that their attacks will be launched one side at a time anyway, which means that you will have some time to rest between attacks, at least to manage your forces at best. Avoid destroying the walls: they are the only real barrier between zombies and your animals, their destruction would make them extremely vulnerable to enemy assault.
Invaded
Bronze: 1 kitten
Argento: 2 kittens
Oro: 3 kitten
As in the previous level, the focus will have to be the destruction of the zombies, while avoiding the accidental deconstruction of the protective walls, which would almost certainly cost you the loss of the level.
Along the level itself, various bomb blocks will be scattered: instead of using them immediately, wait for the appearance of larger groups of zombies, which would be difficult to pulverize with the usual strategies.
ghostly
Bronze: 1 kitten
Argento: 2 kittens
Oro: 3 kitten
The first shot must be aimed at the vanish block, in this way the chem blocks on the four sides of the level will explode at the same time. So, as before, focus on the zombies. If larger groups form, use bombs to break them up. Speed is the key to the success of the level, and since speed is directly related to your level of experience, you have to get to this point having had some experience to be sure of being able to complete it.
ghosted
Bronze
Bronze: 1 kitten
Argento: 2 kittens
Oro: 3 kitten
The first thing you will need to do is destroy the chem blocks, destroying the vanish blocks. As in the previous levels, you can now start killing zombies - using the chem and bomb blocks only in case there are unusual accumulations of zombies themselves in a particular spot. However, it will take some luck to be able to complete the level, even if you do everything right - this means that it may take a few consecutive attempts to reach the intended goal.
Solution summary
Gem Kingdom - Part 1
Gem Kingdom - Part 2
Gorilda Rescue
Escape
Crossing
Rescue
Boots n' Bandits
Gold Mine
Blastin' Site
Bandit Blast
Haunted Night
Spooky Woods
Lost Kitten
Grave Battle


