


Please note:
The solution is based on the American version of the game, so it is possible to find differences for the Spanish version.
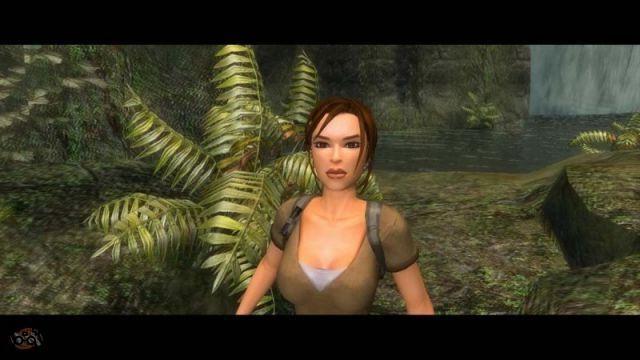
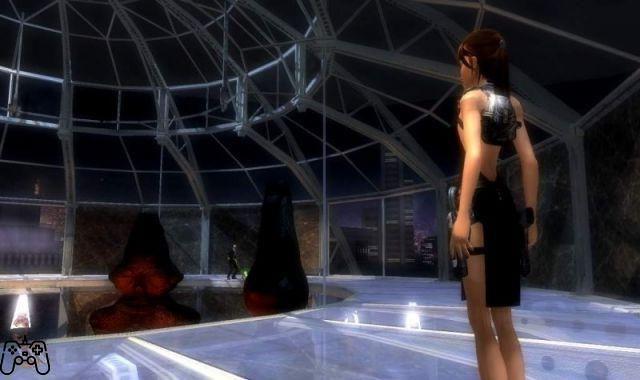
BOLIVIA - TIWANAKU
Run forward jumping over the hole. Then run to the left, heading towards the shadow. Now swim, then go up to the other side, and go up the next platform. Press the triangle button to grab the rock, then press it away. Drop down to find the bronze medal. Now go back by jumping over the hole again. Climb up, then right, then take the rope, turning Lara so that she is facing left. Dive into the quarry, then turn on the light, then follow the tunnel and get the silver medal. Jump down at the end of the tunnel, then turn left, running out of the tunnel, then jump to the platform in front of you, climb up and grab onto the piece of rock to swing towards the waterfall. Now jump back to reach a rock next to the waterfall. Climb up, staying to the left of the water. There is a rock in front of you, you will have to pay attention to it as it will start rolling as you get close. Then jump on the rock that you can see on your right, from here jump ahead of you, and then cross the stream. Run over to the guard, open fire to kill him, grab everything he has left, then go around the corner on the left and grab the bronze medal. Run to the end of the rock, then jump to take its edge, climb the platform, approach the rock, drop it down, jump down too, and you will see a piece of the same rock that you can now use to climb up. After that, run forward, use the hook on the circular tablet to drop it, and continue. Run to the guards and open fire, grab their items, now head to the water, jump off the rock, then head left, then once you reach it, jump to the back and start moving forward and backards. Grab the piece of rock, jump to the left, then climb the platform again, look around and grab the rope, use it to get over the water, then grab the bronze medal. Head to the next platform, swing towards the pole, then back to the platform that you can observe around. Kill the guard, follow the path, go through the hole and the corner, take the bronze medal with your hook, look at the cutscene. Shoot the rocks to make them fall towards the two guards, then run down, then run forward, then right, grabbing the next artifact. Now to the left, take care of the two guards, continue up using the rope to get to the other side, then finish off the six guards, grabbing the items they dropped. Before entering the temple, take the silver medal. Shoot the wall on the left, then enter the temple. Kick one of the rocks ahead, then jump to the floor, pressing X again to use your hook. Go up the stairs, go to the passage on your left, take the bronze medal, climb the chain in the middle, then jump on the one on the left, then continue on the one in the center again. You will observe that on the opposite side of your position there will be another chain, and it is your next target. Follow the path, jumping into the water. Get out of the water as soon as you can, grab the bronze medal from the platform, jump back into the water, following the underwater passage. Now go down the corridor, kill the leopard. Take the cage, push it towards the boulder. Use it for protection, then follow the new path to a large room. There are three switches and three boxes, you have to put them in the right order to open the gate. First take the one on your right by bringing it to the nearby switch. Now jump to the lower floor, watch out for the leopard. Once dead, move the box to the right, then you will see a flat rock. Bring that cage close to the cage under the rock, then grab the latter. The fortress will thus form a ramp. Bring a box to the top of the ramp. Climb to the upper floor, towards the central part, from here jump to the back of the rock to throw the crate in the air. Head to the crate landing spot, then bring it to the center button. Repeat the process with the ramp and the other box. Once the boxes are all upstairs, you will need to bring them back to where they were originally located. Press the box on the left towards the switch on the left, then do the same for the one on the right, and the one in the middle. You will now have to change the mechanism a bit to get the gold medal. Go to the box in the center and pull it away from the switch, doing the same for the one on the right. Now push the middle one towards the other switch. Head right, and keep looking at the rotating mechanisms on the right. Turn 180 degrees, then hit the box on the switch again. Now head to the gate, climbing the chain on the left and then jump to the platform. At the gate, go up to one of the platforms nearby, and then jump through the gate. Get the gold medal. Then drop down, go left, jump to get the platform, swing right, and climb up. Get the silver medal, now go back to the gate and crawl under it. Continue along the platform, take out the assault rifle, and shoot the leopard in the room below you. Then enter the room, and press the rock until it goes further. Now release the rock, and follow the path to your right. At the end of it, take the silver medal. Go back to the previous room, and head to the right, climbing the small rock. From here, head left and head towards the statue. Jump to make it rotate. Now towards the next, then towards the wall, holding on to the platform. Rock to the right, attempting to grab onto the next platform on your right. Now jump back, grabbing the pole. Using it, you will arrive in an alcove with the silver medal. Now drop down and repeat the whole procedure, but instead of going to the alcove, go to the platform above you. Now swing to the right, then go around the corner. Drop down, climb to the upper platform, then follow the path. Run forward after the scene, then jump.
Time Trial
This level turns out to be one of the easiest time trials, although still not extremely easy if you have not yet become quick in the movements. You can safely ignore the enemies. The hardest part is remembering where the death traps are; mainly, the helicopter, the keystroke, and the jaguar. Once you remember to be careful in the jumps so you don't die, you won't waste that much time, and you will complete the level quickly.

PERU - RETURN TO PARAISO
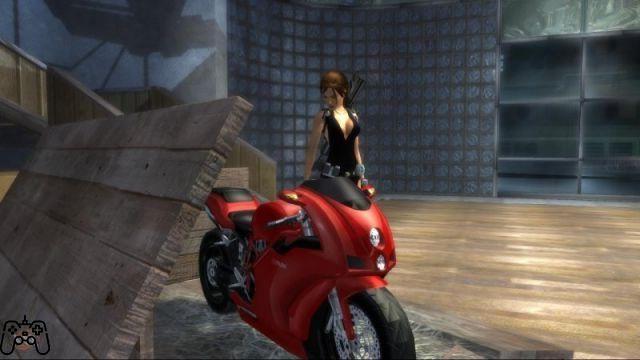
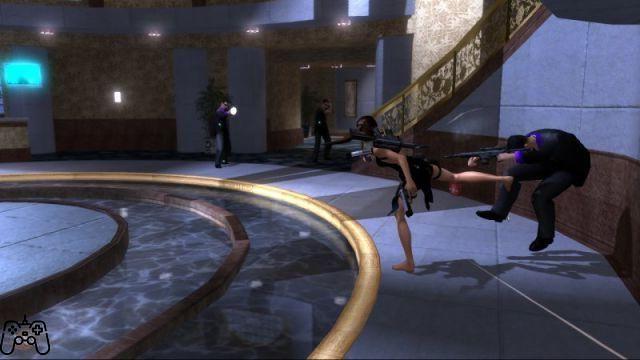
You can find a medal hidden among the buildings near the starting point. Locate the protruding piece of wall that gives you access to the ceiling, and use your hook to get there. From this point, dive to the other side of the street to get the medal in the hidden alley. You will have to drop down to get it; the alley, precisely, is located near the insertion point. After completing this objective, as soon as Anya takes off in her yellow Cherokee, shoot the transport truck and kill all the enemies in the courtyard with this move. The last enemy, who may have sometimes been "cloned" due to some game bug, has a shotgun, so pay attention a little more. Once there are no more opponents to bother you, try to explore the surroundings. You can find a bronze medal on the top of one of the buildings; that is, on the roof. To get there you will have to use that machine that is near the truck, and then jump to the medal itself. Next to the previous building, you can find two more medals; one of them is located behind the building above, to be more precise you will find it on the ground; the second, on the other hand, is located inside the second floor of the building. Then use the flag to go to the exit, and get the medal in the building; then press the action key to open the doors, to find the medal inside the room; then take your hook, and use it to overcome the road so as to get to the room with the shotgun, take the grenades, and fight with all the enemies present in the streets all over Peru. No dai. While fighting with the aforementioned guards, you don't have to worry too much about using complicated tactics, as they don't turn out to be particularly useful against these characters; you should, instead, use the assault rifle, and learn how to use the sniper mode. This last point in particular can be a difficult task especially in the particular case of guns. The only thing you have to pay attention to is to try to avoid the final part of the road, where you will find the motorcycle. In fact, once you find it, you will have to replay the entire level again, in order to reach the medals that are in the streets. Medals can be found on the ground, near the building near the flag, as well as on the roof of the building near the rope. Use the burritos stand to reach the upper level. As for the silver medal, you will need to head inside the building near the flag pole. This must necessarily be done before taking possession of the motorcycle. Now, having done that, grab the bike, and start exploring the streets without having any worries about the possibility that there are enemies wanting to shoot Lara. There is a medal in an alley where the road makes a corner turn to the right. The truck with the gun is visible, in fact, but the motorcycle is not so. You can use both the assault rifle and the shotgun, without any problem in deciding the alternative. The assault rifle is more useful, however, as a general guideline. To get the medal you will have to head into an alley adjacent to the road where you found the motorcycle. However, it is an easy task, as the medal is on the ground. Now you will have to tackle the level concerning the motorcycle; it is self-explanatory, and is a much shorter level than the next Siberian. Hold down the shoot button, and you'll have to automatically shoot enemies as they turn around. The action key will smash the explosives to make you pass obstacles without having any problems. Unlike Prince of Persia, however, you can stop and make sure you prevent accidents. There is no medal in this level, but you can use med-kits and pickup replacements on the truck itself. There is now not much else to do but run forward, shoot the enemies, and continue with the strategy just suggested to the end. Once Lara has killed everyone in the convoy, use the "Knight Rider" with the bike to get to the next truck without cover, then continue to the next area of the level. Here, Lara can neither attack nor use any torch, and therefore she is the Lara of the old Tomb Raiders.
Follow the tunnel to the young explorers until things start to go wrong. The hole in the floor can be passed easily with the hands, and most of the puzzles will turn out to be very easy in nature. There are two very easy medals to get in this area where you will play as the young Lara, so you will have to try not to lose them. You will be able to see them very easily in case you rotate your camera; one of them is in front of you after the first block and and the puzzle. Move the balls and blocks by turning them on and off to make the traps move in position. Some broken traps cause the object to move off the plate, while others have a kind of tip that serves as a bar, which moves the object towards the plate. None of these puzzles are particularly difficult. The difficult part, however, is the section in which you will have to face the supernatural and impossible to kill entities, which are found immediately after killing the student named Kent. During the cutscene, you'll need to stay close to Lara and control her. You will have to run away from the monster, and jump over the two obstacles to be able to leave. Drop down the hole to escape. Then go up to the upper level in order to activate the trap using the stone ball in the room. After passing the door, you will come to a checkpoint; pay attention to the platform behind it to get a medal. So, go right outside, and get back to reality after seeing the cutscene. You will then return to play as the usual Lara, older. Go search the old campsite to look for and find two medals. One is located in the wooden structure, inside a box, while another is located in the open tent in the pool. They are the last two bronze medals. If you are missing any, it means that you have been through it before. More precisely, one is in a wooden box near the start, and to get it you have to destroy all the wooden boxes in the campsite; while the other is, as mentioned before, in the broken tent. The next section is entirely about swimming, with a small and quick puzzle in between. Use the keys wisely to surface, dive, and swim faster. There are many places where you can get some air, so you shouldn't have any difficulty with that. Try to keep the camera behind Lara; this is a good idea to be able to maintain a sense of direction. As soon as you approach a checkpoint while under water, you will have reached the main room of the ruins. Try to get the water out of the main room by using all four blue switches, which are located under the water. You will need to be able to activate all four with one breath, so try your best. Once the water is gone, look through the tunnels for a medal. Grab it, then approach the break in the wall to get to a checkpoint. In the next section of the level, you will find only one gold medal remaining, in case you have already taken all of them in the previous steps. You will therefore have to focus on survival for now. To climb into the sloping areas, jump and use your hook at the same time. You will not be able to use it while on the ground, however, as Lara must be in the air for the move to be effective. On top of the rooftops, you will have to do a puzzle, which will start immediately after the checkpoint. Press in the direction you want with the joystick, then the keys in the sequence in which they appear to be able to escape. Press UP, then JUMP and then ACTION. The puzzle you will find will seem incredible at first glance. However, this is very easy once you have found all of its parts. Use the hook to bring down the statue near the checkpoint. This will bring you to a stone ball. Now use the second stone ball with the first to make the middle and right floor panels go down. You will come to a statue with ladders that reach the next floor, which has a third stone ball on top. Press it away to complete the puzzle. With the goal of reaching the top, use the platforms that you can see in the mouth and body to overcome the ladder. The ray of light will not kill you. The tunnel that takes you to the fourth ball can be easily seen as you move towards the string. On the pedestal near the rope, you can look up to see a hole and a platform on the right towards which you will need to aim from the rope. After the story sequence, you will find yourself in very dangerous territory. You won't have any save points until you reach the hills you passed earlier, and there are many items and enemies that can easily kill Lara. Climb to the upper floor, and drop down with the rope. The easiest way to go back is to follow the same path you did to go. However, there is also a piece of rock above the fallen platform, to the left of the rope, using which you can swing towards a tunnel where you will find the fourth ball we were talking about earlier. Take her down the hill and make her break the wall like this. Follow it until you get to the central pedestal to get the medal, this time gold. You will now have to escape from the ruins; you will have to climb up and over the broken floor, letting yourself fall down towards the rope. Kill the mercenaries on the way back; use the assault rifle as your main weapon.
Time Trial
The longest part of the level actually turns out to be the motorcycle part. In fact, by dying only once you will return to the previous checkpoint, thus losing a lot of time, and making your mission impossible. The good news is, once you earn them, the codes work. In particular, you can use the code to kill with a single clpo. Once activated, you can use your pistol to efficiently kill enemies with a single, aimed shot anywhere on their body. Lastly, the code makes it possible to save time by providing you with a leftover which can be used to take the jumps more calmly so that you don't die in one of them.
JAPAN - MEETING WITH TAKAMOTO
Lara can't fight right now; So, follow the script and meet and talk to the bartender, to unlock the door that leads to the head of the company Nishimura. Once you have completed your speech, Lara will start behaving as she usually does. You will first have to kill all the enemies in the party room, in order to have access to a new cutscene. The TV screen can be used to kill enemies, but it is not necessary to do so. Go to the small elevator on one side to be able to continue. It is located on the opposite side of Nishimura's office. You will then arrive at the roof; on the roof, there is a lot to do. All medals are inside the room with the motorcycle; one is on the actual roof. Smash the generator, and climb the pole to go up. There is a medal in the roof box, while the other is located under the stairs next to the red motorcycle. Enter the motorcycle room using the grappling hook on the light, then pulling yourself up. There is another medal under the stairs, and a third one behind some boxes. Collect all three medals, then use the motorcycle and head to the gangway to do a keystroke sequence. You will have to press the keys that are indicated on the screen; that is the one dedicated to the grapple, then jump, then avoid. At the other side of the street, the section begins by continuing along the shelving and taking the medal from the box on the lower level. So go back and continue to the top towards the end where you will find a rope waiting for you. Go to the center of the upper walkway area by shooting at the obstacle, then using the rope. Once this is done, you will come to a checkpoint. The third medal is in fact found on the lowest walkway of the shelving. Beyond the street now. Use your grappling hook to bring the window washing platforms closer to Lara so she can jump onto them without fear of falling. While on one of these platforms, you will need to use your grappling hook to swing towards the anchors around the exterior of the building. Follow the path around it to the right until you reach solid ground. Once this is done, you will have to fight some Yakuza guys and some dogs. Then jump onto the slightly raised platform, as the dogs won't be able to attack Lara from here. Either way, the explosives and gunpowder can reach Lara. You will arrive immediately after the Takamoto building. In there, go down the stairs to get a medal. Now go back up again to get a second one, which requires more work. Use the pipes to reach it. More specifically, the first can be found in a wooden box after going down the stairs, while the second can be found on the pipes at the top of them. The next area consists of a Japanese office; the exit is in the middle door, which leads to an office-like setting with many enemies inside. Kill all the enemies in the room, and don't miss the two medals in the compartment. One is in the corner of the office, in a small box on the floor. The second is inside the locker which can be reached by climbing the stairs to reach the upper floor. Once this is done, escape the office using the grappling hook on the TV screen. In this way you will see two metal hooks which hold the screen; shoot both of them to make him fall so he can continue to the exit. While you're here, however, you may want to grab a shotgun, as it can come in handy in the next boss fight. The fifth bronze medal can be found in the wooden box on the ground floor, in a corner near the large TV screen. The third, silver, can be found inside a silver metal cabinet. It is easy to find them in case you have enough time to look. The next area is the outer part of the skyscraper. There are no medals for a while. You simply need to climb up the sides of the building using the poles, pipes and grapple supports. It doesn't turn out to be a difficult task, so climb up without bothering yourself. Occasionally you will have to go back to one of the bars you have been on previously. This is not a mistake. At the top, the pipes and bars will start to break apart, so you'll need to be able to find a foothold on which to be sure, and then move at the first possible moment to have some safety. It's not as difficult as Prince of Persia, however. At the entrance to the art room you should find a checkpoint to save to. When you get to the museum, kill all the enemies inside; you can shoot the candlestick using the ACTION key. However, it is better to head to the second floor and use the assault rifles to kill the enemies. You can get your shotgun later. You will find a medal on the balcony, and a second one inside the small room with four lockers; the first is in bronze, the second in silver. The following corridor is full of various kinds of traps. You can avoid the lasers in case you can spot them by using that kind of watering can to be able to see them. Alternatively, you can simply roll the stone down and use it as a shield against the turret. After getting to the turret, wait five seconds for the turret to run out of power. Then release the ball and go forward to the dragon room. Here, you'll have to deal with all the enemies after the cutscene, and take possession of the shotguns in case you want to. Use the hook on the dragon, then use it as a stick to break the glass. Kill all the enemies that come; there is another medal that can be found in the ornate cabin on the upper level. Break it by knocking it off the platform so you can grab the medal inside. You will then arrive at the boss, personified in Takamoto. The boss turns out to be pretty strong, especially if you don't avoid his green energy balls. Go behind one of the statues and climb the pole to get to the boss level. This way you will avoid the turrets on the lower level. Use the shotgun on his face from close range to hurt him. The boss will try to run when you get close to him; however, he can attack you if you get too close, doing a lot of damage. The statues block some of his shots, but most of the time you can avoid the fire by simply moving around.
Time Trial
The fight with Takamoto is the biggest problem regarding the timing of this level; with the exception of flips on the shelves right after the party scene, which may take you some time. The outside of the skyscraper is easy, unless you really want to do it too fast, losing life from falls. The very high number of enemies, however, increases its difficulty. Try to use the one hit kill code. Although with this code you cannot use that to have infinite ammo, you can still kill all enemies, including the boss, with a single shot and without any waste of time. In this way you will have a lot of time for the jumps, which become easy.
GHANA - PURSUING JAMES RUTLAND
Start the level by diving off the waterfall. You will have to head inside the ruins of the temple. The complex is large, but the puzzle is not difficult. Use the rope to unlock the gate mechanism, then use the grapple on the bridge to open the main door. Before entering, you will need to get three medals underwater. On the island with the mechanism, one is found by diving to the right starting from the temple door, the other instead diving to the left, always starting from the temple door. A third is under the island itself. It can only be taken after the cutscene that opens the entrance to the temple. Once you have taken the medals, enter the temple. Get over the water using the raft together with the ropes. After that, you can simply swim, especially when the current becomes less intense. Kill your enemy, and overcome the broken traps. The enemy here has a gun; be careful therefore. Then enter the large room to fight with the enemies. Here you will find another enemy; it is a machine gun. However, it does not have a broad reach. Go to the side and jump to the machine gun location, killing the enemies and then shooting the stone pillar near the moving water. While in the main room, you can also grab a medal, it is located in the upper corner near the aforementioned submachine gun. Now, you will have to make the wheel move, which is now dry. Start by using the bars on the wheel itself to gain access to the platform at an angle. Once there, use the rummy to get the metal car to get to the other side. Go through the opening with the ropes, and the pipes towards the ladder to the upper level. Then climb to the top, and head to the dry room where you can see a raft. Grab the raft with the grappling hook to bring it to the entrance, then jump on it and fight the jaguar. There is a medal under the two moving blocks. Then use them to reach the upper floor. From here, you can see the water in the reserve. You can simply dive in or use the raft below you. In the reserve there is a corner with a dry area that you can lean on. Medal, on top of the second set of moving stones, on the right. A silver medal can be found in the water reservoir, you can find it in a place below. Another on the corner. Then go through the gap using the platforms and stay on the floor to get to a rather large block. This is a shortcut from the dry room in case you fall. To free the water goddess you will need to place a block on the second floor. This way the piece of metal will move. To open the other piece, stay on the first floor and pass the statue in front of you before the gap closes. Then use the grapple on the breast of the statue to return to the water wheel room and go to the corridor where the pistons are. The corridor that was previously blocked by traps can now be passed, as the traps themselves are no longer there. Roll or run through each set of pistons, then as soon as you get to the scissors use the block on one side of them. Be careful when you reach the end of the corridor, Lara has to stop. Release the block and jump to continue. A second is in the wall and can be used to get to the next set of scissors. After that you will come to a checkpoint. Beware of the boulder. Skip the first set of traps, then run under the second, then jump over the pit. As soon as the boulder passes Lara, you will have a shortcut to get to the island. Go down the ladder to get a medal, then go back upstairs and cross the gap to continue forward. Use the coffins and platforms to move to the outer face of the Ghana temple. Many times rocks will fall and kill you, so be quick to move to the next available element. If you don't, in fact, you'll have to restart the level. Use the action key while on the platforms to quickly move to the next point, or you will be blocked. Most of the time, in case you hear a strange noise when you land, quickly move away. Now go through the entire front of the temple and keep moving forward avoiding the rocks. Jump on the elevator. At the checkpoint, save, then watch the cutscene. Then use the torch to light the way, and then use the grapple to overcome the gaps. Kill all the enemies on the bridge, then get to the upper block and break the bridge itself. To take full advantage of the checkpoint system, you'll need to have at least one grenade, so head outside, use the pipes to get to the lower platform, then jump over the falls to get to a small island with a brown door. Smash the door with an explosive, grab the medal, then head back to the bridge you passed earlier. You will need to return to the checkpoint at the beginning of this section and then return to the checkpoint after the rope so there is no need to return to the medal every time you die. It is very easy to take this path, most likely there will be no chance of dying. Use the bars and platforms to reach the top of this interior. Try to avoid the self-propelled pools of water, as well as the explosive red barrels, then go over the bridge and kill the enemies. The only enemy who does not have a SWAT uniform has a grenade launcher, but it is more practical to continue using the shotgun to kill him anyway, although it can prove difficult. Cross the bridge with the rope to smash the bomber, then the sniper rifle from a distance. One kick will cause the bomber to perish permanently, and you can simply move to the final room without any problem. At the next area, kill the jaguaro after the checkpoint, then go up the stairs, jump to the rope to avoid the boulders, and a third will appear on the stairs to the right. Use the nearby alcove to avoid getting hit. Stay on the floor at the top, but don't leave for now. As soon as you get to the door at the top, head back down the stairs, then enter the room under the floor to get a medal. So go back up, grab your guns, go out the door and be ready for the boss. This is Rutland; he cannot be killed until you have solved the puzzle in the room. Attack the boss first until he begins to regenerate his life points on the platforms in the arena; the boss has quite powerful and painful melee attacks, so try to avoid them and jump to avoid getting killed. As we were saying before, once the boss starts respawning use the action key to destroy the four stones that are on each platform. This will reveal a hidden stone that you can use your grapple on. By destroying all four platforms, the boss will no longer be able to regenerate. Once the boss continues to attack you closely, use your shotgun to get to the westernmost point.
Time Trial
The fight against the boss is, as always, the crucial point to be able to get a good performance in terms of time. The blocked area to try to counterattack the scissor blades is another point that you will need to watch out for to avoid getting killed. Once you get past the boulder, everything will be much easier, as long as you can kill enemies with one shot. Use the one-hit kill code if you like, giving you more time to jump over traps efficiently and effectively.
KAZAKHSTAN - PROJECT CARBONEK
Jump off the hill, then use the SMG to kill the enemies. Use the pipe to get over the rooftops, then go back once you see too many enemies so you can cover up and fight them. On the roof you can find the bronze medal in a wooden box in the roof of a building next to the machine gun from before. Inside the bunker, get all the weapons, then enter the building. Inside the supply room, climbing the ladder, you will find the second bronze medal. Kill the enemies by going down the watchtower. Break the chest near the gate by taking the silver medal next to the watchtower. Enter the building near the weapons, then use the code to open the gate. Beware of the grenade launcher. Go up the hill, avoid the explosive barrels, enter the building, climb the ladder, smash the enemies, then take the bike. You will be on a train; go out and kill as many enemies as you can. At the end, you can find a single medal on the ground once you get past the wreckage. Use the hydraulic cranes to, starting from the starting point, get to the entrance of the tunnel. There are several platforms all over the place, which you can use to not waste time. To find the third bronze medal, you will need to go down before passing the wall of fire, and look for the box in the corner. Shoot the fan, then go down one level. As soon as you start swinging, stop for a moment and drop down so that you can get the medal. Then go back up to exit. In the generator room, you'll need to stand directly in front of where you entered, and head to the left. Open the gate to access the silver medal. To then start the generator, you will have to follow the walkway to get to the switch. In the next room, avoid the green gas by using the pipes and platforms. At the corner, use the platforms to continue. Enter the next room at the end of the corridor. Go down the broken bridge, killing the enemies. There is a medal that you can get by looking carefully throughout the area. It is located at the lowest point of the main reactor. At the checkpoint, go up the generator tower. Use the ground pole to reach the checkpoint. Use the poles with electricity traps to reach the dead body, at which there are checkpoints. At the top, move Lara to give her a chance to shoot the targets in the chest. Shoot the barrel to get the silver medal. Follow the path down to the ground to the next corridor. Try to avoid the gas by killing the enemies and solve the puzzle. Climb to the top of the control tower and use the ladders and pipes to get through the room. This way Lara can use the central platform. Shoot the explosive barrel to get to the next checkpoint. Use the lever in the control room, drop down, and head to the generator. Tear apart the door, immediately coming out of the main generator. Go through it all, then open the main generator doors, trying to get through the trap doors, arriving at the checkpoint. Save your game, then approach the doors near the Tesla Gun. Use the red switches to kill the three enemies, trying to aim for the head. Hit "shoot", then reload the game in case you miss, as you have few shots available. To get to the final medal, you will have to use the Tesla Gun. Grab the platform, and pull it towards the elevator as it approaches you. Once the metal platform is on the correct spot, take out the four metal boxes next to the Tesla Gun. The box on the ground should be brought up to the gap. This way Lara can cling to the platform. Use the toric to reveal the path. Pick up the medal once around the corner. Again, go back to the Tesla Gun, and take the metal platform to the bridge. Use the hook to move the elevator. Shoot the obstructions, then head inside the door. There will be a boss to fight. You can't kill him, so just try to avoid his hits by heading to the switches near the balls to unlock the second part of the puzzle. So head to the Tesla Gun, aim at each sphere and shoot them into the electric field. Try to hold down the shoot button. Once the boss is finished, you will need to take the motorcycle.
Time Trial
The motorcycle ride is the longest and most tedious section of the entire level, together with the section on the core of the power plant. Use the one hit kill code to quickly complete the bike level. Without it, in fact, you will lose an enormous amount of time, which is instead necessary to take the subsequent jumps calmly.
ENGLAND - KING ARTHUR'S TOMB
Go to the box under the shaft, then go inside, get the medal. Exit outside, then use the window frames to reach the switch. Then go back to the pool, using the door to go back into the parking lot. Use the switch to enter the room. Enter the shaft near the enemies, then grab the medal and head back outside. Use the pipes to reach the bridge and then cross it. Aim for the boat, then head to the other side looking for a conduit that leads to another medal. Use the sword on the switch to reach an anchor. Open the door, go forward until you get to a puzzle. Use the elevator carefully, as the boxes below must remain upright. Move one of them to the corner under the duct, then take the second one and move it to the first. Raise the box so you can use it to enter the conduit and take possession of the medal. Smash the tomb directly in front of the ramp to get the second medal. Use the elevator to get past the traps, then enter the professor's office to get the medal, using the two boxes and the elevator to get to the shaft. For the second, you'll have to break the sarcophagus. To exit the clearing, jump, so you'll need to get three medals in the next area. To Lara's right, at the top of the column, you can find the fourth medal, beyond it the fifth, then the sixth inside the tunnel. Once you start going down, beware that the ground will start to collapse. Move to the fire, then take the cage with Lara to the room with the blade. You can use it to protect yourself. On the left of the entrance, a medal. An optional puzzle in the trap room. Take both cages, and use them on the sides of the central area. Go to the side, and flip the switch. Move the boxes through the blades, and a corridor of fire will appear. Both pits form a fireproof path. Enter the room with the candlesticks, and use them to break the barrels in the alcove. Go to the coffin, to return to the switch, then go down and pull the coffin on the switch itself to open the gate to continue. In the room above, opening the grate will lead you to a medal. Entering the water, use the switch to open the gate, then grab the coffin and have Lara return to the starting point to continue to the next tunnel. Grab the medal immediately below the starting area before continuing. In the second part, the medal is located under the coffin. Ignore all switches in the next zone; head to the entrance, then shoot your hook at both torches, and climb to one side, to continue along the rope, and use your arms as tubes to continue. At the top of the time, look for the medal in the corner. After the cutscene, locate the tomb, then you need to make the candlestick go towards the position of the camp. Once the candlestick starts to go this way and that, step on the rope of the bell, and make some noise. You will then have to face a boss. You cannot kill it, you will have to finish it by shooting the bells that are near the four pillars. Stay dry, aim and shoot. Once killed, use the carcass to reach the upper platforms. You will have to overcome a short sequence of jumps and hooks, nothing difficult. So aim for the rope. Climb up, and drop onto the platform to get the medal. Afterwards, go back to the exit. Go through the blades, and the room with the enemies. Use the cages when it comes to activating the switches. Press the switches in a 1-2-3 order in order to open the hidden wall and take the gold medal. Then head to the mercenary elevator, use the control panel to go up, and kill the enemy at the top. When you get to the main room, take apart all the enemies in the room to continue. You will then have to kill a few waves of enemies, which is a simple but tedious task.
Time Trial
The most tedious section will turn out to be the one where you continue to die in the elevator. Try to do it slowly, using the usual one-hit kill code. The other problem concerns the boss, who can easily kill you, thus wasting a lot of time. Try to have many medkits.
NEPAL - THE GHALALI KEY
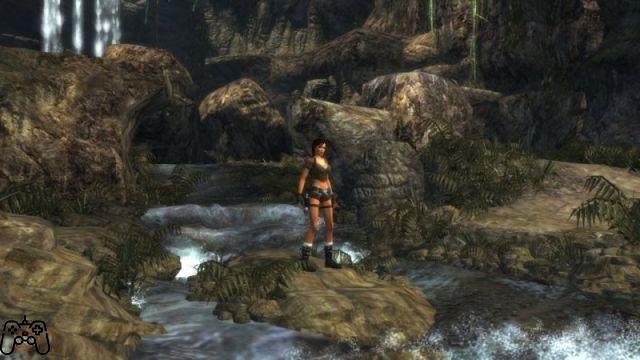
In this level, falling platforms await you, bars that come at you from nowhere, and columns that break in your mere passage. The medals are not hidden under these obstacles, however. However, you will have to learn how to make Lara move fast to overcome all the obstacles listed above. Press the action key between the platforms and columns to make sure that the traps have no effect on you. From the insertion point, continue forward to the first checkpoint. Drop off the ledge to get the medal. Climb up again, and keep going. Swing towards the stalactites. You will have enough time to rotate Lara, so that she is facing the opposite direction from the one she was facing previously. This gives Lara the ability to jump from piece of ice to piece of ice. Under the platform, at the first checkpoint, the medal. So after the ice chunks, but before breaking the ice wall. So break the wall, and head towards the precipice that overlooks the point where the plane crashed. Lara has to go down to avoid being caught up in the collapse. Use the hook to swing to the other side of the quarry, and then stop. Turn around, and smash the ice to get the medal. Jump to get to the other side, you will probably have to try a few times as the jump is not particularly easy. When you get to the point where the plane crashed, use the platforms on the plane itself as well as those you can see on the ice wall. There is a medal passed the propellant; take it, and overcome the obstruction. Then go down, killing the animal, and then locate a point on which you can use your hook and let yourself fall down. Now swing to get to the next medal. For a more detailed account of how to get to the medals: for the bronze one, jump down, going under the propellant immediately after the appearance of Rutland's helicopter, but before reaching the engines that were destroyed. As for the silver medal, go to one side of the plane's body; there is a small passage blocked by the airplane's carcass. Throw the carcass to the side, then jump to get the medal. Once inside the cockpit, use the hook to grab onto the engine, so as to get off the plane before you have gone too far into it. You will arrive at a checkpoint in case you have done this correctly. Then press the action key, then press the up key on the joystick, then avoid the hit, and then jump again so as to exit. In the next area, use the ice shelves and bars to reach the bottom. Everything you see in your surroundings will fall apart, so try to do everything right. As soon as Lara lands on solid ground, use the hook on the medal behind her, then enter the cave. There is another medal on which you can use the hook, which is inside the cave above, together with another one which is located after the platform on which it says "don't slip ". After the latter, therefore, you will return to place your feet on safe ground. Rotate the camera 180 degrees, then grab the ledge. By doing so you will arrive at the hidden medal. Go back then, and go through the whole cave jumping from platform to platform. More accurately, to get the gold medal you will have to cross the sloping platform, then drop off it and swing until you get to the reward. When you get to the next area, kill all the enemies, then grab the grenade launcher. There is nothing else in the area, except for a medal behind an ice wall. Destroy it and then jump before grabbing it, using the rope. There is nothing in the water, so don't bother diving or you won't have any medical kits. The medals: one is on the ground, near the lake, but not in the water, while the other is on the edge of the rope. The silver one is behind an ice wall. Shoot everything you find near the rope, jumping to the medal will be easy. The following area consists of an ice pit. To get the medal, shoot the ceiling when you can no longer continue forward. Then head to the next quarry, following the ice flow to the source, to get the second medal. Exit the dark tunnel by going to the temple, and then to a checkpoint. When you get to the next temple, kill the animal, and go down the stairs you can see on your right. A wall that you will find on the lower level can be broken to get a medal. After that, go back and use your grappling hook to swing towards the statue puzzle. Once there, you can take one of the two roads to explore the place where you will find the latest medals of the game. One of them is located on one side of the temple balcony; you will first have to cross the opening; the other is obviously on the opposite side of the balcony; here too, cross the passage. The silver medal can be located inside the temple instead, but before going through the gap, go down the flight of stairs on the right. A breakable wall awaits you on the lower floor, which hides the medal. The door in the next zone will be locked. Place the smallest box you have on the elevator. The bigger one, on the elevator on the opposite side. Instead, place the medium one on the lift together with the small box. Lara adds some weight on each side, so the bigger box can still make it to the top. Place it on the plate on the floor and take the weapon. You will therefore have to escape; in case you want to try to avoid the dialogue, save in order to manipulate the checkpoint. You will have to use Lara's new weapon to the fullest in order to get out.
Time Trial
Nepal turns out to be pretty easy as a time trial, especially if you decide to ignore all the enemies that are after the point where the plane crashed, since they are all killed by just one shot anyway. The longest part of the level appears to coincide with the section in which you will continue to die immediately after the sword, or in an attempt to overcome the gap near the puzzle. Try to go slow in these two sections. It is better to continue not too fast but with balance rather than throwing everything away. The main problem turns out to be having time to waste for the final part, as there isn't much else you can do there but get lucky, and have good jumping ability. In any case, it would take you a few minutes to reserve so as not to have excessive pressure; to do this, however, you should be able to not die anywhere else on the level. As for the longer passage, remember that height is a determining factor, as is Lara's ability to swing.
BOLIVIA - THE LOOKING GLASS
This is the last level, and will not be particularly problematic. Use your sword to kill the enemies, get the medkits. The boss turns out to be deadly only if you let the shots connect with each other. Instead, use the pillars to block them and try to dodge them. Beware, that the pillars are destroyed with a few hits from the boss. Use the sword to damage it. Not much more to say. You have finished the game.
CROFT MANOR
Lara Croft owns many villas among her estates. Abbington's mansion is the one that also appeared in the Tomb Raider movies. It's not about the level of practice; in fact, this level will have to be tackled after the completion of the mission in Bolivia. Enter the technical office and use the laptop on the ground. This will open the lock to get to the hook. Before you leave, use the hook on the bars above the office, and also grab another medal on the upper level using the grappling hook on the switch. The medal is located near the stairs. To get the second one, use the grappling hook with the switch to reveal a medal hidden in the wall. Then go to the bedroom on the second floor; the door is on the left. If you get inside the liberia, then go back outside. There is nothing here that can kill you. To get the third medal, go behind the bed. For the first silver medal, go to room 2F, after getting the guns, as you will have to shoot the switch to get it. The guns are in a small box that can be opened by two dagger-shaped switches located in the bedroom. Now head to the pool which is located in the lower levels. There is a medal in the water, and a switch that can be pressed to open the underground waterway. There are also three statues that you can shoot, as well as some bars that you can use later. Use the hook to pull the bars and Lara to pull out the statues. There is a medal behind one of the statues, and one near some chairs. So use the statues to reach the upper level; sway between the bars and jump across the platforms to get to the second level with two rotating statues. Rotate the statues to get past the spears and hit a switch. This will open the gates in the underground tunnel. Grab the medal nearby, then go to the other side using the bars and hook. This way Lara will come to another balcony. Grab the medal behind one of the statues, and move the stone ball to the switch. So go down the stairs, and then go up on the candlestick. Use the grappling hook to swing the candlestick, then head to the pool to get the medal. So go to the underwater tunnel that you opened in the pool. Take the medal; then go to the gymnasium. In the small pool there will be another medal; there are several bronze and silver medals here. If you have the grappling hook, you can use it to move easily between objects around you, and then grab the medal by moving along the various platforms and bars. None of the medals are difficult to obtain. Complete procedure to get the ninth bronze medal: starting from the entrance of the gym, go forward, then to the right. Use the beginning of the bar, then grab the bar near the slope. Jump on the bars and pipes on the slope. Now from here, towards the platforms, also using the poles to get lara up to the medal. As for the tithe, position yourself towards the entrance to the gymnasium, then go forward and then to the left. Use the bar to jump, then the grapple to reach the next platforms, and the medal. Now the eleventh; always starting from the entrance of the gym, go back, and then left. Back again and left 4 times, then continue to the platform. Use the stargate pole to make Lara reach the alcove from which to get the medal. For the twelfth: always start from the entrance, turn towards the water, then use the platform to jump. You will have to make sure that the pole of the Stargate is horizontal, and the ladder must necessarily be perpendicular to the wall, in order for Lara to reach the niche. Now you have to aim for the thirteenth; always from the entrance to the gym, go back and to the right. Back on the rock, and climb the horizontal pole then go along the wall and get the medal. The fifth silver is located at the water level, it can be taken following a similar path to that of the ninth medal. The sixth bronze is located at the top of the elevator. Use the rock platform to jump towards it. The seventh is above the entrance to the gym. Still helping you through the rock, go to the second elevator. The final jump is pretty tricky, use the grappling hook to get Lara close before jumping. Now is the time to head to the next area, which is the studio. This is the other door on the second floor of the library. Go inside, and you will find a torch on the table. Use the grappling hook and the pistol to unlock most of the secrets here. In fact, shoot the grappling hook towards the wall near the entrance to the library on the first floor to get to another library. Grab the medal next to the broken wall, and move both bookshelves to the switches. This will open a new secret tunnel. Before entering, take the two medals on the bookcase on the second floor; one is outdoors, the other behind a switch on the wall. Collect the medal in the next secret tunnel, inside the wooden chest in the corner. Then head to the switch, which will give you a clue leading to a puzzle. The second switch gives Lara an exit from the bedroom, but if you have enough weapons, you don't need to press it. The silver medal is located in a breakable wall on the first floor. The clue we talked about earlier is the key to the final medal. Go back to the face-shaped switch in the pool; only with the clue from the secret tunnel can you rotate the statues of the Spear Sisters to make the shields face each other. Once this is done, you will have access to the second clue. Go to the library; The final clue will be received when you use the books, in this order: blue, yellow, green, red. Once this is done, go back to the main room and use the two switches on either side of the second floor. To get them to open simultaneously, you'll need to swing from side to side. Once the Athena statue has been lifted up, turn it so that it is facing the sun, then step on a switch near the stairs.
Video of the solution - First part


