


Please note:
The solution is based on the American version of the game, so there may be differences for the Spanish version.
MAIN EXCAVATION
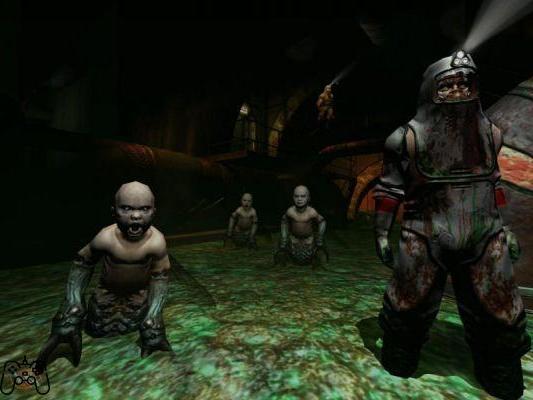
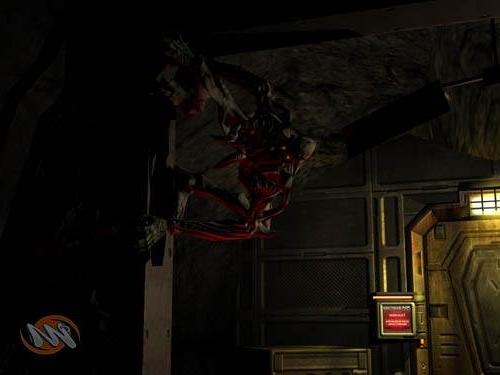
The level begins shortly after killing the Cyberdemon in the original game. Switch to the Pistol and proceed to start a cutscene sequence. After seeing it, enter the hole on the right to find a Shotgun, then exit there and take the passage in front of you. Go ahead and, on the corner with a med kit and platform, you will be attacked by a Forgotten One. Kill him and proceed down the hall. Just before reaching the next corridor, another Forgotten One will appear. Always use the pistol to kill him, so go ahead, kill another creature and grab the Shotgun ammo near the generator. Take a look at the generator screen and select "Remove". The action will spawn another Forgotten One that you will, of course, have to kill. Proceed along the path and go up to the platform, at the top of which you will find a small medical kit and some papers. Pick up, then head back down, and move on, collecting all the ammo you find, plus the Video CD that is a large stone. Go to the generator and enter the Cell you took earlier. This will activate an elevator that will take you to the next area. Climb up, listen to McNeil's communication and kill the Forgotten One that will jump on you. As soon as you get off the elevator, go to the metal grate on the left side of the gorge, next to which is a large med kit and two magazines for the machine gun. Go back to the opening, take the machine gun and other clips, then enter the door, the one indicated by the orange symbols and, on the platform ahead, you will see a dead Marine with some cartridges next to him. Go get them, then take out the two Forgotten Ones that appear, then drop off the ledge, enter the door and proceed up the stairs to the right or left. Go ahead to see an Imp appear. Destroy it with your weapon of choice, then climb to the platform to the right of the room to retrieve clips and a large med kit. Drop down and go to the back of the room to start an intermission sequence. Look at it, then proceed down the stairs and, using the Grabber, take out the crates and enter the hole. A Forgotten One is there waiting for you, so grab it with the new weapon and throw it away. Proceed down the dark corridor, killing or throwing the creatures away, then reach the large room with the metal grates. Grab the Security Armor on the path to the left, then kill the Forgotten One that will attack you, then go back and enter the path to the right. You will find a large medical kit and cartridges. Get them, then go up the stairs, not before killing the creature that will jump on you.
EREBUS: DIG SITE
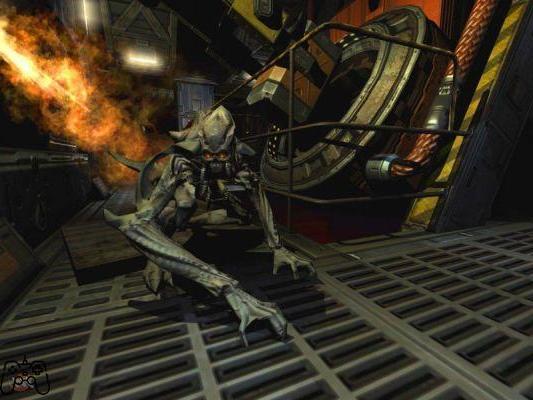
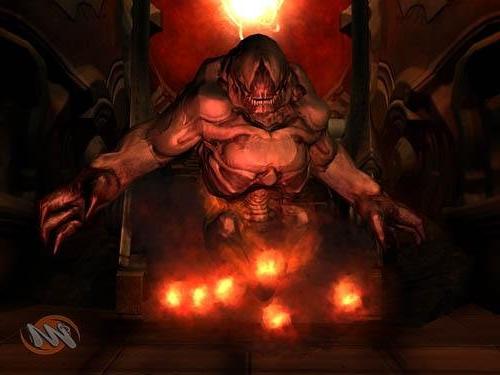
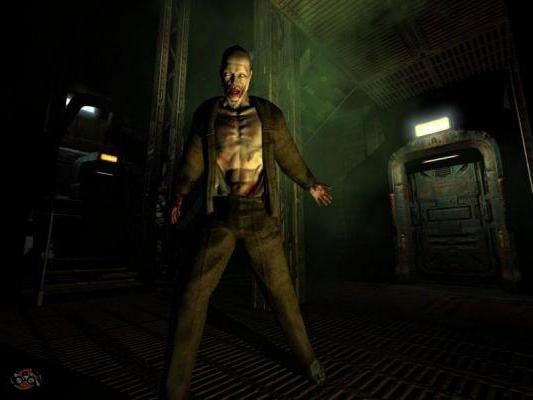
You will start the level inside an elevator. About halfway along the way, the elevator will stop due to a power failure, and everything will be plunged into darkness. The green emergency lights will activate and the monster's scream will be heard in the distance. Exit, grab the cartridges and magazine on your right, then go behind the elevator and go up the stairs. Take the grenades from the chest and enter the cage. On the wall there will be a healing station, while inside you will find cartridges, a video CD and a PDA. Talk to the man hiding in the locker, then go out. Kill the IMP that appears in front of you and you and go down the stairs, also eliminating the two that will hinder you on the way. Crawl under the door with the UAC logo, and get ready to kill a new enemy, the Vulgar. Enter the opening on the left to find some large med kits and pieces of armor, then exit and reach the door, using the PDA to open it. Proceed down the corridor and go through the other door, then kill a Vulgar and a Trite. Climb the large stone stairs and get ready to enter the cave of the first boss, the Hell Hunter. Enter the area, obviously trying to dodge the monster's attacks and, with the Grabber, take one of the two cannons on the right or left and throw it at the creature. It will not be hard to understand that you have hit him, because in these cases, the boss will emit a strange scream. You will have to hit it five times like this if you want to destroy it. Upon his death you will receive a special ability, called Hell Time, the first power of the Artifact, which will allow you to slow down everything around you, in the style of the Matrix. Enter the door on the right side of the room and grab the two large med kits and three corpses to load up your Artifact. In the next room, there will be three pneumatic doors, which you have to go through using the Artifact and slowing down time. Whichever door you choose, you will eventually collide with a Z-Sec Zombie. Kill him and grab his Shotgun, then enter the next room, and grab the ammo and cartridges on the ground, as well as the pieces of armor on the grates. Remove the energy cell from the generator and run through the set of doors. Proceed up the grates until you reach a door completely blocked by the boxes. Use the Grabber to pull them away, then enter, eliminate the Imp that will appear shortly after and use the Artifact on the body above the chair. Then proceed inside the door, and take the grenades and the magazine that are in the trunk, then kill the Zombie Z-Sec nearby and collect the ammo it will drop. Upon his death, a Vulgar will appear, which you must eliminate. Then enter the door at the back of the room, go up the stairs, collect the pieces of armor and cartridges in the corner, then enter the room. Kill the Vulgar and the IMP that will greet you, then open locker # 029 with code 516 and take everything inside, then go through the open door. Grab the large medkit if you need it, then move on. Take out the two machine gun-wielding Z-Sec Zombies, grab the cartridges at the top of the stacks of stairs using the Grabber, and the magazines on the walkway. Then enter the door, kill the two Z-Sec Zombies and then the IMP on the stairs, then grab the box of cartridges on the left and the small med kit on the right. Then go down the stairs, take the useful items and enter the other door on the walkway when you have collected everything. Kill the IMP on the right, then go down the stairs and pick up Gregory Martin's PDa and the large med kit. Go to the screen that says 'Excavation Ladder' and scan your PDA. A ladder with two creatures attached to it will descend; Kill and climb up, then grab the pieces of armor and enter the door. Kill the Z-Sec Zombie hiding near the crates with a nice grenade, and grab the med kits around. Proceed through the door, kill the Vulgar and go forward, then insert the energy cell into the generator, then go to the screen and call the elevator.
EREBUS: LABS
Get off the elevator as soon as it reaches its destination, then head down the stairs as well to find a backpack with cartridges, bullets and magazines. On the walkway nearby you will also find more ammunition as well as two medical kits, large and small. There will also be various ladders, all directed towards platforms full of useful things. While you rest, watch out for all the Forgotten Ones that spawn to harm you. Once you have finished refueling, head to the orange door on the opposite side of the room and enter. Once inside, kill the six Wraith, in groups of three, who will welcome you warmly, as well as the couple of Trite that might show up. Go up the stairs, approach the left wall, and proceed on the narrow ledge, then jump on the green chest you will encounter and then on the platforms, then climb on the railing to find some grenades. Head back down after grabbing them, then go around the area and go up the stairs indicated by some rotating lights. Kill the Wraith that appear there and get the med kits and cartridges in the box next to the door, then enter the orange door. When you open it, there will be a Trite there waiting for you. Kill him and the other creature that pops out from behind the box, then deal with the two Wraiths that appear shortly after. Grab the two small med kits and the three pieces of armor on the platform, then enter the door. Pick up the PDA near the body, then watch the cutscene. Pull out the Artifact, use the Hell Time and quickly run into the passage that has opened to the other side of the room. Go up the stairs, watch another cutscene, then kill the Vulgar that appears there, and go up the platform to find clips and a small med kit. Jump on the brown pillars and then the walkway to find some cartridges, then head back down and grab the pieces of armor below. Then enter the door, take the remains for your Artifact if you need it and enter the door. Collect the cartridges and magazines on the right, then use the grenades to kill the Z-Sec Zombies hidden behind the crates. Quickly take out the two Vulgar who will show up too. Grab the Security Armor from the broken elevator ahead and get on the working elevator, not until you have any ammo nearby. So go upstairs, enter the door and kill the Zombie Z-Sec, then go right, take out another Zombie and use the healing station to recover energy. Go through another door and kill the two Zombies that will come out of the X-ray machine, as well as the one that will emerge from a small alcove. Then enter the door next to the machine, kill the human who will turn into a zombie and grab Preston Glenn's PDA nearby. Before leaving, also remove the energy cell from the generator and then go back to the room before, the one with the locker, and open it with the code present in Preston Glenn's PDA (769). Take everything inside, then go to the 'Site 1 Research' door you saw earlier which was closed. Kill the Vulgar who will try to kill you, then through the PDA open the door. Pick up another PDA, Steven Crane's, and enter the door on the left. Kill the three Zombies and enter the offices, go up the ladder, heal yourself with the healing station, and then enter the door at the top of the ladder. Kill the 4 Zombies near the cars and go through the door ahead. Kill the Z-Sec Zombie behind the crates to the right of the door, and enter the glass-enclosed area where a human was just killed. Open the PDA, read the email from Stuart Jackson and use the code (428) to open the locker that will have the side-by-side inside. Take it, as well as the magnetic card, and exit the room, heading to the back. Use the tile, and take the energy cell from the generator, then kill all the Zombies that jump out and exit the room. Use the Shotgun or the Machine Gun to eliminate the six Zombies that appear, then exit this other room, go down the ladder and enter the room in front of the offices, the one called 'Artifact Storage'. Take out yet another Vulgar, then go around the corner, deal with two other creatures and take the magazines and cartridges in the suitcase, then enter the door at the end. Take the Armor and insert the two cells into the generator. Go to the terminal and press the button that says 'Vent Gas'. At the end of the operation, exit the room, killing the Z-Sec Zombies and a Vulgar, then enter the first door, pick up Victor Kharkov's PDA and take the item called The Primitive, to complete a mission objective.
EREBUS: CONTROL
Wait for the hatch to open and go outside, taking the medical kits from the racks. A man will talk to you through the ventilation duct, telling you that you will be able to escape after finding two power cells for the generator. Go up the stairs, kill the IMP and enter the door, then take out the Zombie and collect the pieces of armor and bullets on the shelf. Take care of the two Z-Sec Zombies, then enter the room with the flashing lights to find some cartridges. Exit, then enter the next door, take out the Vulgar and go behind the pillar to find shells and an armor. Proceed along the path and take the two medical kits from the suitcase if you need them, then enter the doors and kill the IMPs that appear. Collect the grenades in the opposite corner of the locker, then go down the stairs, grab the pieces of armor between the crates, and enter the hole to access the next area. Kill the Z-Sec Zombie, Imps and Vulgar that appear, then grab the ammo and med kits before entering the next door. Go ahead, grab Ron Gibbons' PDA, then the magazines and cartridges from the shelf, don't forget to kill the Zombie that will bother you. Use the PDA to open the door nearby, then go back to locker # 408 and use the code (937) to open it and get what's inside. Go back, open the second locked door with the PDA, then deal with the Zombies and Imps in the nearby office, collecting the medical kits, cartridges and armor present nearby. Exit and proceed down the corridor to the next room, while killing the Vulgar that appears in front of you. Get the magazines and cartridges in the suitcase next to the door and kill the Zombies in the room, then exit. In the dark, you'll find a couple of med kits and a Flaming Zombie. Kill him and enter the next door, then throw the grenades at the Z-Sec Zombies hidden behind the crates. Proceed through the next two doors, then eliminate the Vulgar that will appear next to the generator's energy cell. Take Mac Smith's PDA and go back to where the door was closed that needed the PDA to open. Go inside, kill the two Zombies and the Z-Sec Zombie in the room, then open the locker with the code used earlier (937). Collect everything inside and take the energy cell in the back of the room, then kill the two Vulgar and run to the elevator that needed the cell to activate. Climb up, push the button, not before killing another Vulgar, and jump down before being crushed, then proceed to the next door. Enter the corridor and then the other door, then kill the Zombie Z-Sec and grab his ammo. Collect Nathan Reynold's PDA on the floor and kill the two Vulgar and the Zombie who show up. Use the healing station if necessary, then enter the door, take out another Z-Sec Zombie and move forward. Kill another Z-Sec and get all the bodies you need for the Artifact, then go through the next door. Kill another IMP and go down the stairs, then use the PDA to enter the door. Head to the screen and press 'Release' to extend the bridge. Kill the IMP that appears on the other side of the structure and go down the ladder to your right, then take the energy cell, go up the stairs and proceed inside the next door. Then kill two other Zombies, a Vulgar and then move on, taking out all the creatures that will stand in your way. Enter the first room, insert the cells in the generator, then go up the elevator and, once at the top, go up the ladder. Proceed inside the vents to find another ladder, which you will have to go through to find the guy at the beginning of the level completely covered in his blood, then dead. Grab the clips, then go down the ladder and proceed to a room with some pieces of armor and an elevator.
EREBUS: RESEARCH
Get out of the elevator and go forward. Take care of the creatures that pop up, then head right to the crates to get the pieces of armor in between. Go to the other side of the walkway, grab the large med kits, then enter the door. Take out the two Zombies hiding nearby, and then kill the two IMPs that pop up shortly after. Look to the right, kneel under the pipe to find some grenades, then exit the door across the room. Then go up the stairs to access the next room. Watch the cutscene sequence, during which you will be given a key card, the arsenal one, then go back, heading towards the room with the door that needed the card to open. Go up the stairs, take the magazines near the body and enter, then kill all the creatures in the room, while collecting the cartridges and magazines in the suitcase. Head down the stairs to the computers, then grab the pieces of armor under the stairs and use the healing station if you need it, then go up the stairs and enter the next room. Kill the Zombie and Vulgar that appear, then grab the ammo, proceed to the next room, kill the Imp and another Vulgar, then grab the Machine Gun near the door and enter. Go down the stairs, kill another Imp, grab Sean Gibbons' PDA and the large med kits near the body if you need it. You will also find grenades and a small med kit under the walkway in the reddish area. Collect everything, then proceed to the next door. Kill the imps that appear and head to the fenced area, take out your Grabber and grab one of the boxes nearby to place it next to the bigger one. In this way, you can take advantage of a kind of ladder to go over the fence and thus take a lot of stuff, ammunition and medical kits in the first place. Go to the next door, enter using the PDA, then kill the IMPs and enter the door across the room. If you haven't noticed, you are back in the room at the beginning of the level. Kill the IMP that will fly into the room and use the magnetic card to access the arsenal, inside which you have to kill a Vulgar. Take the staggering amount of stuff in the room, and most importantly, the Chaingun. After that, use the PDA on the door to exit. Go down the stairs, enter the door, watch the cutscene sequence, during which you will be wearing a special suit. After the animation, take out the Chaingun, and get ready to kill a lot of monsters. Run across the room until you reach a flight of stairs with a walkway.
EREBUS: STATION
Exit the hatch, then run to the other part of the Martian base, killing the Vulgar and Cacodemon along the way. When you arrive at your destination, you will find a ladder. Get the air bottle nearby, and then climb up. Run, killing in the meantime the various Vulgar that will appear, collecting all the cylinders you find. Head to the next hatch and press the button to enter, then open the door to the next area. Listen to what the guy has to tell you, then grab the small med kits and the pieces of armor scattered around, then enter the door. Take out the Vulgar who will try to drop an object on you and get the cartridges near the next door, then enter. Eliminate yet another Vulgar and another Zombie, then take the pieces of armor in the alcove next to it and enter the door. Turn left and immediately shoot the Zombie, then also kill the Vulgar who will go up the stairs to attack you. Enter the door at the bottom of the stairs, grab Fred Grossman's PDA, then destroy the Zombie to the left of where you got the PDA. Grab the chargers and the large med kit, then open the door using the PDA. Inside, take advantage of the lockers by opening them both with code 134, collecting everything you find inside. Heal yourself if necessary with the healing station and return to the room with the two flights of stairs. Kill the Revenant, then enter the door where the PDA is needed. Grab pieces of armor and large med kits if you need them, as well as reload the Artifact with the bodies scattered around the room. Follow the Sentry Bot, killing all the monsters you encounter in the meantime, as well as grabbing the ammo and medical kits that appear along the way. Once at the bottom, grab the Chaingun ammo, use the healing station if you need it, and climb the ladder. Proceed through the ventilation ducts and enter a room, to trigger an intermission sequence, which will precede the second fight with a boss, another Hell Hunter. Immediately take out the Artifact at the beginning of the battle and, when its chest opens, activate it and, with any rapid firearm, shoot in slow motion at the orange object inside it. Repeat this procedure for a few times, obviously avoiding his blows, and you will defeat the creature, obtaining the second power, that of Quad Damage, which will multiply the firepower of your weapons by four. Grab all the bodies that are left in the room and get on the monorail, then press the button to finish the level and head towards Phobos.
PHOBOS LABS: TELEPORTATION
Get off the monorail, turn right and go already by the ladder. Grab the rockets for the Rocket Launcher near the body, then go up the ladder, collect all the ammo, med kits and pieces of armor you find in the area and then enter the door. Go up the stairs again and go through the other door, then use the Double Shot to get rid of the Zombie Commando that will run at you. Proceed into the room, pass the terminals, go up the stairs and kill the two Z-Sec Zombies hidden there, then collect the ammo near the healing station and heal if necessary, then proceed inside the door near the stairs. Kill the Zombie once, inside, then take care of the Vulgar that will pop up behind you, then think of two more Zombies, then go forward in the corridor and enter the door. Go down the stairs, kill the Vulgar that will come down from the ceiling and enter the next room, then deal with the Zombie around the corner. When you try to use the lift, it will not work due to the power shortage. Grab the large med kits and go down the ramp to enter the next door. Advance towards the barrels and first take out the Zombie Commando who will open fire towards you, then a Vulgar. Go down the stairs, then go left to the metal door with the UAC logo. For the moment, you can't enter, so pick up the rockets and the large med kit, then deal with the pair of Vulgar who will try to kill you, then enter the door where the Zombie Commando came out. Another one will come, which you will have to get rid of by firing a good shotgun in the chest. Run up the stairs, enter the door, grab the magazines and the small med kit on the left, as well as the pieces of armor and grenades on the far right. Kill the three Z-Sec Zombies and the Fat Zombie at the top of the walkway, then climb up and enter the small, blood-covered alcove. Grab the Security Armor, not before you've knocked out a Zombie and two Vulgar. Enter the nearest door and go forward, then deal with the Pinky who will try to get in your way before turning the corner. Use the Shotgun to take him out, kill another Zombie and then enter yet another door. Throw a grenade down the stairs, killing a Zombie Commando that would attempt to attack you. Also throw two or three more towards the Zombies hidden behind the crates. Grab the large med kits and chargers near the door, then go down the stairs. Run past the teleporter and enter the room, where you will finally find the Rocket Launcher. Head to the computer screens and press the buttons to start searching for various destinations, then select Pad 1. After completing the objective, a Hell Knight will appear to the right of the teleport, and two Revenants, which you must get rid of as quickly as possible. Then go up the stairs and enter the other door, knock out the Zombie in the alcove and advance into the room with the pipes. Kill the two Vulgar inside and two other Z-Sec Zombies who will try to take you out of the stairs, perhaps by throwing a nice rocket at them. Go down the stairs, go back to the door you used to enter the place and turn right, then cross the walkway and eliminate the two creatures that will attack you from both sides. Proceed into the dark corridor, killing the Zombies and enter the door, inside which there will be three more Zombies and two Vulgar. Eliminate them, then enter the door on the right, and get rid of the Pinky who will jump on you just inside. Enter the small hole and crawl through the ducts then, at the bottom, take Bernard Fresko's PDA, which will contain the locker code # 042, the one you saw earlier. Also take the key card inside and then go back to the locker room, open it with code 714, and take the cartridges and ammo belt for the Chaingun, as well as the rest of the room. Then take the elevator and enter the door near the ramp, then deal with the Hell Knight from earlier using the Rocket Launcher and Revenant nearby. In this area there will also be the door for which the magnetic card is needed. Use it, then before you get on the monorail, get off the pipes on the floor. Then crawl below to discover a Plasma Rifle and some cells. Go up the ladder, enter the monorail and press the button. The monorail will stop roughly in the middle, for you to see a good murder by a Hell Knight.
PHOBOS LABS: MOLECULAR RESEARCH
Exit the hatch and look for the sign indicating 'Research Facility', then enter the door following the direction of the arrow. Enter the room called 'Gallery', take the Security Armor behind the case and exit the room, then proceed into the corridor and enter the next room. Once inside, go to the small alcove to the right of the door and use the Grabber to move the barrel and spawn some small magazines and med kits. Exit, grab the pieces of armor next to the dead Marine and head to the door with the 'Research Sector A' sign. Grab the ammo for the Chaingun in front of you and then turn left, raiding everything you need from the offices and, of course, James Owens' PDA from the meeting room. Four Vulgar and two Revenants will attack you, but not at the same time, so kill them then leave the room. A Bruiser will appear in the back, so use the Artifact's Hell Time to take him out. Use the PDA to open the door with the 'Research Sector B' sign, enter, go down the ramp, and then go into the room next to the Sentry Bot to meet with Dr. McNeil. At the end of the intermission sequence, you will have an extra key card, which you will need to access the next destination. Collect all the med kits you find, then follow the corridor, enter the door, take the rockets and large med kits from the suitcase, and enter the other door. Grab the med kit and cartridges, then open the hatch. Run left, taking out the Shotgun, to take out the various creatures and get the air canisters. Dodge the Revenant rockets by killing them in one shot with the shotgun and go up the stairs. Once at the top, use the card you received to enter the door. Cross the walkway, then go up the stairs, then deactivate the pumping station. Go down the two flights of stairs, turn left, and grab Seth Killian's PDA, then kill the two Vulgar and the two Revenants who pop up. Run to the end, heal yourself with the healing station and enter the next door. Cross the catwalks to get to the other side of the Martian planet, killing the Forgotten One and the Cacodemon on the way. Close the hatch and enter the door, then kill the Vulgar, grab the cartridges near the broken door, and run across the hall. Enter the room, kill the Vulgar and go through the door on the right. Heal yourself with the healing station if necessary, collect the bullets and magazines in the corner, and enter the next door. Kill all the Z-Sec Zombies with the weapon of your choice, and enter the door in the back of the room, near which you will find ammo and pieces of armor. After refreshing yourself, exit and proceed down the corridor, killing all the Z-Sec Zombies and collecting all the ammo and med kits you find, before entering another door. Grab Keith Noordsy's PDA in the corner, along with the cartridges and bullets, then go through the door in the wall. Before proceeding, clear the shelf, then use the code found in the last PDA (281), kill the three Z-Sec Zombies and make your way to the computer screens. Once there, activate the elevator, then go back to the room where the Vulgar came down from the ceiling. Enter the door, grab the armor and med kits and call the elevator. Climb up, grab the Plasma Rifle and the Cells, then enter the door, to fight the third and more complicated Hell Hunter. Enter the arena, watch out for the four poles that energize the Hell Hunter, each of which has a screen. Three will have a red screen, the remaining one a green screen. Press the green one to make an energy core appear and blow it up with the most powerful weapon you have. At this point you can do damage to the Hell Hunter, using the Artifact and continuing to hit it. Repeat the same procedure with the other screens and destroy it, to get Invincibility as a reward. If the Artifact were to download, go to the right side of the arena, inside which there will be a healing station and several corpses. After completing the objective, exit the back door and use the elevator to get to the other side. Grab the large med kit and ammo, then enter the door. Kill the Revenant, grab the Shotgun, some cartridges and pieces of armor near the door, then go inside. Collect the Cells, and hit the terminal screen. The closed door will open, revealing a Bruiser. Use the Hell Time to kill the creature after entering, then go through the metal detector-like machinery and then through the door. Kill another Revenant and enter the door next to the one marked 'Gallery', then take out two more Revenants and open the hatch.
PHOBOS LABS: MAIN REACTOR
Get on the monorail and press the button inside to activate the carriage and reach the next area. Enter any of the doors with the 'Reactor Operations' sign and kill the Zombies you find inside. Then enter the door marked 'Plasma Storage' and collect all the cells on the shelves. In this level you will want to use the Plasma Rifle, as you will find a lot of cells. Heal at the healing station if you need it, then go out, kill the two Vulgar and the Revenant that will suddenly appear, and go up the stairs to reach the walkway, then enter the door. There are pieces of armor to the right. Grab them and go to the door on the other side of the room. You will then find yourself in the Reactor room. Watch out for monsters, because they will spawn infinitely from the blue laser beam. With the freight elevators you can reach the lower part of the room and enter the only door that has green lights. Grab the Chaingun and the Machine Gun near the healing station, then go down the ladder to the next area. Go down the ladders until you get to the terminals, and there take Nicolas Haag's PDA, cells and Security Armor. Go up with the elevator and exit the room. Always use the freight elevator to go up, killing Cacodemon and Forgotten One in the meantime. Use the PDA to open the locked door and enter. Go down to the terminates and press the button that says 'Initiate Shutdown'. This will shut down the reactor. Before leaving, use code 492 to open locker # 009, inside which you will find Armor, ammo belts and magazines. Exit the room, reach the computer screen and activate the bridge, then cross it going to the right and then enter the door. Grab the box of cartridges next to the dead Marine and kill the three Z-Sec Zombies around the corner. Grab the ammo, cells and pieces of armor next to the freight elevator, then use it to go down. Kill the four Revenants and the Pinky who will attack you, perhaps using the Artifact, in order to have an easier life. Get the rockets and magazines on the right side of the room that you will reach with the elevator. Then enter the door to the left of the freight elevator. Follow the Sentry Bot as it activates in the dark, killing Wraith and Vulgar along the way. Once at the bottom, use the elevator to reach a hatch. Before entering, grab the Plasma Rifle and the cells, then open it and proceed to the next hatch. Go inside, kill the two Z-Sec Zombies, healing yourself with the medical station if necessary, and then go down the two flights of stairs. Below the second, you'll find ammo belts and pieces of armor. Enter the elevator when you have cleared the area and go down into the Cargo Tunnels. Have the rocket launcher ready because you will need it in the next rooms. Proceed into the tunnel and open the door, opening the shutters on the sides if it is too dark, using the button next to the terminal. Kill the Hell Knight with the rockets and run to the end of the tunnel, then open the passage and enter. Run to about the middle of the tunnel to find another pair of Hell Knights appearing from outside a set of crates. Kill them both with the rocket, then proceed into the tunnel, past the burning elevator, and perhaps switch weapons. You will have to get rid of a Pinky, before you can access another room inside which, in the middle of the crates, there will be several plasma cells. Grab them, then get rid of the Revenant and the two Z-Sec Zombies that will attack you, picking up the large med kits and cartridges near the stairs. Climb to the top and go through the tunnel, then kill the Vulgar who will show up from a side ladder, which you will have to use to reach the door at the top. Head to the wall and then take the door on the left. Press the button on the computer screen to initiate shutdown of some systems, then exit the room and proceed into the corridor.
PHOBOS LABS: REVISITED
Exit the hatch and take the two boxes of cartridges, then enter the door that is nearby. Kill the two Z-Sec Zombies that will charge you from the stairs, and the two Vulgar that will follow soon after. Collect the cells, then go through the next door, get the pieces of armor, ammo belts and Ronn Jolson's PDA. Go up the stairs, and collect the magazines and rockets, then go down and use the door next to which you found the PDA. Go left, take the Armor and the cells on the ground, then go up the stairs to the walkway and enter the door to avoid the three Bruisers in the room. Go down the stairs and take out the pack of Z-Sec Zombies who are there to get your skin on. Also get rid of an Archvile and two Revenants further down the tunnel, as well as a couple of Vulgar before the door, at the bottom, at the top of the stairs. Take everything you need, go inside, kill the Bruiser that will attack you, using the Artifact properly, pick up the small medical kit and the box of cartridges next to the door, then go up the stairs. Once inside the new room, grab the large med kits, then go up the stairs, get rid of some more creatures and, at the fork, take the tunnel ahead of you. Kill an Archvile, collect the rockets and the Armor, then go back and enter the other tunnel, killing the three Wraith that will appear in the passage. Pick up the pieces of armor and med kits, then enter the door, behind which four Revenants and a Bruiser will be waiting, one after the other. Take them all out, and enter the next room, then activate the teleporter and do a search to see if there are any active receivers. Select 'Pad 1 - Delta' and enter the teleporter, then press the button to teleport to Delta Labs.
DELTA LABS
You will find yourself in the Delta Labs, one of the areas where you were already found in the original Doom 3. At the beginning of the level, go ahead, kill the Flaming Zombie that is walking in the area, then go behind the terminals to the right of the transporter and take the cells there. Kill the Forgotten One and the Hell Knight that appears and head to the bottom, to get the powerful and powerful BFG 9000, as well as its ammunition, the cell for BFG. Go through the next two doors, then kill the Revenant at the top of the stairs, as well as the Zombies. Keep going up, killing the Flaming Zombie that will pop out of the door on the right when you are at the bottom, and enter the one on the left. Take out two more Zombies and proceed, then also take out the Hell Knight who is on the catwalk. Also get rid of the Forgotten One in the area and the Revenant that will attack you. Then enter the light rays to be transported to the next area. Kill another Flaming Zombie, then head left and kill another trio of creatures. Enter the room on the right to collect cells and ammo belts, then enter the door which will appear as 'Unlocked' on the screen. Grab the BFG 9000 from the room and proceed through the next door. Kill the Zombies on the left and the Flaming Zombie running towards you on the stairs. You will also need to get rid of a Revenant. Go down the stairs, get the cartridges, then go to the other side and turn left to find cells, both plasma and for the BFG, then enter the nearest door. There will be Ticks and a Revenant waiting for you. Kill them all while collecting the cells and medical kits, then enter the light beams to be transported to the next area. Go down the stairs, splice the Hell Knight that will attack you, then proceed, and also get rid of the Zombie that will jump out of an alcove. Grab the cartridges inside the alcove, then move forward. Kill the other Hell Knight who will attack you from behind before entering a small room, inside which there is a very useful PDA, that of Patrick Hook, as well as medical kits, ammo belts and magazines. Then proceed along the path again, go through the destroyed door and collect the rockets and pieces of armor, as well as other rockets at the end of the corridor. Enter the nearest door and kill the trio of creatures that will attack you, two Vulgar and a Flaming Zombie. To the left of the operating table you will find a room with two lockers, which can be opened with the code 634. Grab everything inside the closets and the room, then proceed into the corridor on the other side. Then enter the next room, killing some creatures, and then proceed to another room, inside which there will be Ticks in quantity. Then take the door on the left, and once inside the room, take out the Zombies and collect the cells in the corner. Activate the elevator and get to the top, then go down, proceed in the corridor, enter the door and, inside, kill five Zombies. Reach the terminals and grab the Armor, then go down the stairs and proceed into another corridor, where you will find a Vulgar and two Hell Knights.
HELL
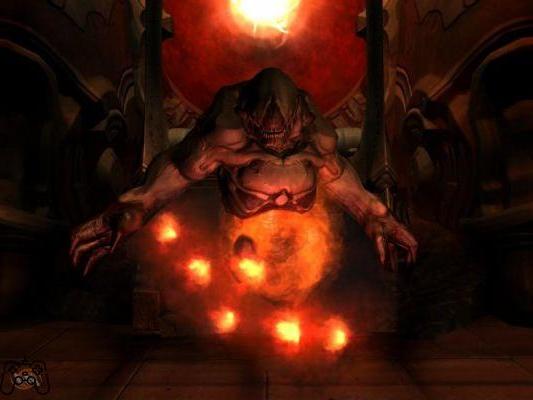
The final level of Doom 3: Resurrection of Evil is set in Hell, a place where you were already roughly halfway through the original game. The advice to follow in Hell are few but basic: you can always run, as you enjoy infinite resistance, and you have to try to save ammunition as much as possible, because there are not many. At first you will find yourself in the center of a large pentacle, on a small island surrounded by a sea of lava. Go ahead to exterminate a few groups of creatures that will appear one after the other: starting with two Cacodemons, followed by a Hell Knight, two Wraiths and a trio of Cherubs. After you have eliminated them all, go ahead and enter the hole that you will find in front of you. Go ahead and get rid of the Ticks that will come down from the ceiling, then go ahead and get ready for a battle in which you will have to face at least a dozen creatures. Going forward, you will meet two IMPs, who can only go to one end, which is to die. Head right to see two horrible Cherubs appear near the orange teleporter. Kill them, then collect the cell for the BFG and the large med kits, then enter the teleporter. The end point will be an arena full of pillars, located on a small island surrounded by lava. It goes without saying that if you accidentally fall down, you will die instantly. You will have to deal with ten Hell Knights, ten Mancubus and ten Imp. The Double and the use of the Artifact will be essential to win the fight. If your infernal weapon should dump you, don't worry, as you will find a couple of corpses in the area. After clearing the area, enter the green teleporter to leave, then go back to the crossroads and go to the one you didn't go to before. Jump to the other side of the stones floating on the lava, meanwhile killing the Forgotten One and grabbing Armor and Medkits on the way. Once on the other side, get rid of a few more creatures, then go ahead, open the door at the bottom and take out the Hell Knight that is just inside the door. Then go ahead, kill another Hell Knight and reach a small room inside which you will find two Wraith, both to be destroyed. Then enter the tunnel, go forward and, at the end, you will find yourself in a large room with three Cacodemons, all to be killed. Follow the path on the lava, getting rid of the five Vulgar that will emerge from the infernal wells and the other creatures. You will understand that you are now at the end when you find yourself in front of a gigantic green teleport, with dead and ammunition scattered everywhere, as well as armor and medical kits. Heal yourself if necessary, grab whatever you need, and then enter the transporter. The final boss is Dr. Betruger, in the form of a creature from hell, the Maledict. The head of the mad scientist will be visible on the tongue of this hideous monster. Listen to what the doctor has to tell you and then prepare yourself for this final fight, decisive for the fate of the earth. Activate the Artifact immediately, to have both Hell Time and Invincibility. Then take out the most powerful weapon you have, the BFG-9000, load it up and start shooting the Maledict until you have thrown it into the volcano. After a while, the infernal creature will come out of the crater, and will try to make you die, trying to set you on fire. Reactivate the Artifact (there are corpses scattered all over the area should you need to reload) and continue unloading your firepower on him. When you hit it sufficiently, the Maledict will die, starting the final animated sequence, which we do not want to reveal to you, because it is very beautiful and interesting.
Video of the solution - First part


