


Please note:
The solution is based on the US version of the game, so there may be divergences from the Spanish version.
Prologue
After the cutscene, proceed through the nearby door, reading the newspaper available in the bathroom. So examine Joel's bed.
Go down the stairs, examine the cell phone in the kitchen. So, while you are in the car, observe the surroundings and zoom by pressing the L1 key. Then press the square button repeatedly, exiting the machine. Go down the ladder, staying close to Tommy. Keep following the road, turn the corner, pass the truck and enter the alley on the right. Follow Timmy, entering the restaurant.
Quarantine zone
Listen briefly to the couple's conversation, then following Tess down the main street. Talk to the couple on the right, then approach the security guards inside the armored vehicle. Listen to their conversation. Follow Tess to the gate, entering the nearby building. Continue to the back, helping Tess.
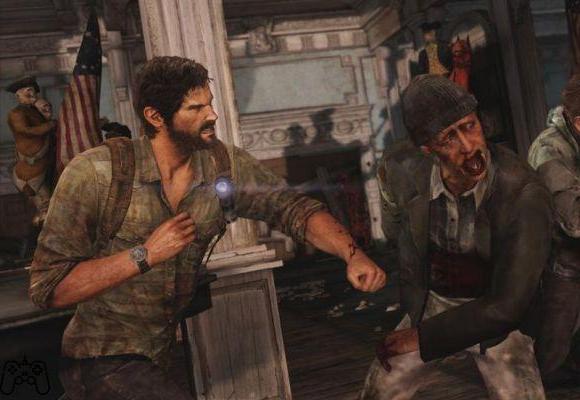
Pick up the corner armor. Project Tess up, entering the building. Follow Tess to the next area, locating the ladder. Place it near the building, enter. Get the shards in the kitchen. Go down the stairs, go down the corridor. Go through the hole in the wall, removing the pipes to proceed. Grab the two ammo, killing the guy in the next area. Strangle the first of the three runners, the only way to finish it quickly. Ignore the next two, instead entering the kitchen and retrieving HP's "bar".
Go up the stairs, entering the room behind the closed door. Remain crouched, retrieving the two notices. Follow Tess, entering the hole in the wall. You grab yet another medkit at the end of the catwalk. Drop down, then continue to the end of the alley, reaching a small square. Enter the next building with Tess. Go through the market, then the bus, to a small square. Go through the alleys while continuing to follow Tess. Drop into the nearby hole. Move along the street, approaching the windows. When the two guards have completed the conversation, continue to the nearest one and strangle her. Take the key to the warehouse from the corpse. Get the HP bar from the next room. Follow the next guard as he climbs the stairs, strangle him. Grab the HP kit from the corner.
So approach the underlying subject. Left, strangle the last guard. Open the garage door by pulling the chain. So kill all the guards in the area, trying to proceed along a preferably "round" path, that is, without throwing yourself completely forward. Then left, pass the containers, arriving near one of the guards. Strangolatela. Continue to the hangar. Hide behind the container to take out the first guard. Wait for the second to arrive, repeat the process. Continue to the opposite side of the hangar, also here you will find a perfect container to hide and finish the guard nearby. There will only be one left, placed in front of the office, to be finished with a quick "melee" move.
Then enter the office and start chasing Robert quickly. Having taken it, you will be able to observe an intermission scene. Then examine the table in the center, recovering the objects. Drop off the roof, scanning the next room to retrieve some components. So help your companions in opening the next blue door, helping Marlene to proceed towards the outside.
So strangle the guards in the area. Go up the stairs, proceed inside the next building. Examine one of the cabinets for a blade fragment. Go back, jump over the window, crouching near the next guard. Wait for the last of the guards to return while you hide behind some crates, then quickly hitting the guard.
Then go down the stairs, following Marlene through the building, observing the cutscene. Ellie will join your group. Examine one of the bodies. Go down the stairs, proceed along the alley. Pull the nearby container towards you. Go up the stairs, entering the room at the end of the corridor.
The Outskirts - Intro
After waking up, examine the small table with the associated lantern. Enter the next room, talk to Tess. Activate the generator. Let yourself be transported down the elevator, examining the right side of the room and retrieving the maps in the area. Go through the tunnel, go up the ladder, observe the next cutscene. Go through the hole, hiding behind the vehicle, then behind the car on the left, drop down the trench. Project yourself forward, moving along the tube. Go down and hide behind the wall. Move to the left, avoiding being seen by the guards. Approach the rock wall, then curve over the corner, running towards the second pipe. Drop to the left.
Quickly up, right, retrieve the blades from the hill. Approach the next stairs, drop down, go to the next garage. Approach the car, then right. Move behind the guard examining the nearby section, jump on the truck, continuing towards the end of the road. Follow the pipe to a hole in the wall.
Continue down the corridor, trying to keep to the left side, going down the next tunnel. Continue under the viaduct, starting the ascent. Drop to the "closed" area. Examine the flowers, then continue to the fork. Go down again, retrieving the summary for the evacuation. So follow Tess and Ellie. Examine the truck on the left, recovering some fragments. Enter the next building. Grab the pendant, then throw the bottle to cause the pendant to fall.
Continue forward, examining the corpse. Proceed beyond the previously closed door, next to the stairs. Examine the table, go up the stairs, then ignore the door and continue all the way up, grabbing the blades. Go down to the fifth level, removing the Clicker placed to block the door. Examine the back drawer, then go under the cupboards to reach the office next door. Get Tess to help you unlock the nearby door, so watch the cutscene.
Then examine the closed door, near the adjacent room. To unlock it, we recommend examining the storage room just behind it. Then go through the main corridor, entering the door at its end. So let Tess go up, climbing up too thanks to her help.
After the cutscene, you'll need to reach the scaffolding on the opposite side of the room. To distract the Clicker, we first recommend throwing bottles around the room. Another easy way to kill the Clicker is to use your gun. Therefore, examine the area in detail.
So go up on the scaffolding to proceed. Then go down the stairs, pulling up the wardrobe to clear the passage. Follow Tess and Ellie outwards to the lower level. Go through the door, turn right, grab the piece of wood and the revolver. Continue to Tess and Ellie. You will therefore find yourself in front of a group of Runners; we recommend that you slowly approach the various "corners" in the area, so as to be able to take all the Runners by surprise. Then go back to the corner you came from, observing the corridor in the distance, locating a Runner placed on his patrol. Continue to the left, move along the corridor to the intersection, then approach the nearby table.
When the Runner thunders, follow him forward to strangle him. So go back to the table in the previous corridor. So go back to yet another corridor, proceeding to its end. Don't get too close to the corner; wait for the Runner to turn in the opposite direction, then kill him in speed. Then take the items around, and move the closet, so as to allow Tess and Ellie to pass. Jump ahead, explore the room.
Continue down, crouching and moving forward along the marble floor. Move through the next tunnel, which is characterized by the presence of a skeleton. Reach a sign that says "Oliver LLF". Examine the surrounding areas to retrieve various weapons, as well as a map in the immediate vicinity of the elevator.
Continue past the opening on the opposite side of the room. Pick up the Shiv from the closet on the left. Continue to the left, locating a female Runner. Then take an HP bar from the nearby destroyed shop. Continue along the corridor, then turn around and proceed towards the entrance. Continue to the right, avoiding interacting with the Clicker.
So take the fragments from the lock, project yourself to the opposite side of the game area, hiding there until everything has calmed down. Then go back to the corridor on the far right, reaching its "far" side. Kill the Clicker, then approach the ladder and use it to proceed to the next area.
The Outskirts - Museo
Back outside, proceed upwards, getting into the truck on the right. Enter the house on the right, eliminating the Runners. Then examine the inside of the truck, then open the garage door to observe an intermission scene. At the new room, open the garage door to observe an intermission scene. Examine the work table next to the door in the left corner. Then take the revolver in the next room, entering the door on the opposite side.
Examine the right side of the next room, grabbing the blades from the floor. Continue up, still jumping to the left side of the floor, and continue forward to retrieve a pendant. Go up the stairs, going through the various rooms. So help Tess and Ellie by lifting a pipe for them. Follow the tunnel, reaching the Clickers. Get rid of it, then go back to the inside of the tunnel, waiting for the Clickers to leave.
In case you suffer serious damage, we recommend that you examine the cafeteria on the left, recovering a "supply" of health points. By examining the surrounding areas, you can also retrieve a variety of other useful items. Then follow the main corridor, up to a flight of stairs. Go through the next door, kill the Runner, watch the cutscene. Grab a bottle and quickly kill the other Runners as well. Talk to Tess and Ellie, listening to the conversation. Go through the corner window, making your way to the roof. Place one of the wooden planks on top of the railing.
The Outskirts: Capitol Building
Go down the stairs, retrieve the items. Move towards the portal, following the main path and proceeding along the watercourse. Locate the Capitol Building on the right. Enter to cause an intermission scene to be triggered. In the following corridor, examine the table and go up the stairs to the left. Go over the balcony, get the blades from the next room. Drop into the adjacent building. Take the shotgun from the body, continuing down the hall.
Hide behind the crates to the left as the enemies arrive on the scene. Wait for them to proceed forward, then move along a "curve" to strangle the guard. Enter the room on the left. Quickly strangle the guard. So wait for the last one, which will arrive shortly, and can be strangled at speed.
Then go down the stairs, letting yourself fall down. Continue to the end of the room again, hiding behind the table until one of the enemies arrives. Position yourself around the corner, finishing it immediately. Approach from the right, strangle the closest enemy, then position yourself behind the closest of all. Back outside, go down the stairs on the left, running further down
. Grab the items on the right, then kill the next enemy. Then follow the subway forward, until you reach a completely flooded area. Jump into the water and swim forward. Proceed along the nearby side walkway. Dive in and swim down the corridor, going up to the warehouse.
Then go back through the main "pipe", taking the raft to easily transport Ellie. She will drop a ladder for you. Then go up the stairs on the corner, reaching the exit.
Bill's Town
Right, continue to the pipe, reaching a fence. Make your way up the path, then using the wood to get to the next building. Grab the pipe, then drop to the opposite side and examine the barrels for blades.
Drop again, going down the stairs near the nearby area. A second clicker will reach you, then go back and take the brick near the barricaded door. Throw it at the nearby creature, using the pipe to finish it off. Continue inside the nearby building, picking up the various components. Go back outside, dropping down near the stairs. Then project Ellie up, gaining access to the main road. Go down to the left, examining the area behind the fence.
Back in the main area, approach the police car and go up the emergency stairs. Pick up the items on top. Continue along the road. Enter the shop at its end, taking everything you can. Exit, proceed further along the alley. Go up the stairs, go down towards the street.
Take the nearby ladder, placing it next to the truck. So move along the wooden planks. Place one of these next to the building. Go up, then take one of the nearby axes, and place it as a "bridge" to get to the next building. Always forward, then go down under the wire. Enter the door on the left, go up the stairs, get rid of the Runner. Back outside, grab a bottle and throw it at the trap.
Keep going, taking the revolver. Go back, grab a bottle and throw it at the trap below. Take the brick, go around the corner. Take the revolver, continue beyond the door. After the cutscene, you'll need to protect Ellie from the constant arrival of the Runners.
Follow your companions and enter the building, getting rid of the Runner. Pick up the baseball bat outside.
Video - Launch Trailer
Bill's Town: Safehouse
Proceed along the street to a "safe" building. Recover everything you can from the surroundings. Follow Bill up the stairs. Collect the blades, then continue following Bill into the next building. Pick up the components from behind the table. Keep following Bill, back to the street.
Get rid of the enemies with the hose. Take another one from the right. Follow Bill to the portal on the left as you enter. Go up the stairs, examine the area to the left for some fragments. Enter the cellar.
Bill's Town: Graveyard
Collect everything you can, also examining the back of the room. Follow Bill up the flight of stairs, grabbing the piece of wood from the back. Go up the stairs, going down the main corridor, and retrieving the items from Bill's room. Go through the window and then walk along the courtyard.
Get rid of the various Clickers. Bill will then unlock the gate for you, and you will return to populate the streets. Get rid of the Runners, go down the alley to the left. Collect the parts near the garage of the house, then continue forward along the play area. Get rid of the nearby Runners, then continue forward along the nearby courtyard. Collect the items in the area, then go back to street level, and go through the building next to the truck. Ellie will unlock the door for you.
Then hit the Clickers outside, preferably with an arrow. Then take the various "parts" near the storage room. Exit to the outside, climb the camper. Drop from the hut, then examine the corner on the left to collect everything you can. Continue beyond the house, examining the drawer and retrieving the ammo inside. Go up the stairs, then wait for Ellie to arrive. Talk to her, then head down the stairs and get the two arrows from the garage. Help Bill open the garage door.
Bill's Town: High School Escape
This area will be literally "haunted" by the presence of Runner, which you should preferably eliminate silently. The first of the Runners will walk towards the block of marble in the center of the room; hide behind it and wait for it, then finish it in speed. Then repeat the procedure on the second enemy, preferably placing yourself behind the school bus.
Then continue forward, proceeding in the middle of the school buses. Then jump to the top of the black vehicle so you can quickly dispose of the oncoming Runners. Launch Ellie to the top of the school bus, making her take a ladder. Drop down, following Bill to the windows and observing the following cutscene.
Once you enter the building, continue towards the main corridor. Take the brick, strangle the Runner. Go up the stairs, then proceed forward leaving only the Clicker visible nearby. Wait for the nearby Clicker and Runner to move away from you, then enter the next classroom. Proceed straight along the classroom, then go through the door at the end of the corridor, triggering a cutscene.
So beware of the Bloater that will appear in front of you. Kill the two nearby Runners initially, only to focus on the Bloater later. "Throw" then Bill upwards, making him reach the container near the windows. Get rid of the three nearby Runners, then climb the nearby ladder, causing an intermission scene to trigger. Collect all possible items from inside the neighboring house.
Enter the kitchen, continue to the car, then talk to Ellie. Then go back, "pressing" the machine. Push back the Runners and Clickers who will try to attack you. Jump to the back of the car, then continue forward again.
Pittsburgh: Alone and Forsaken
After the cutscene, try to stay crouched, getting rid of the Marauders one by one. Collect some alcohol from the nearby shop, then the ammunition for the revolver from immediately under the cash register. Then, examine the building on the opposite side of the road to get some blades.
Open the garage door, entering the next room. Collect all the items nearby, then go up the stairs and examine the room to the right. Exit, go up the stairs, letting yourself fall down until you reach the main road. So place yourself in the vicinity of the car on the right, talking to Ellie again. Continue to proceed along the path, until you hear a shot. Hide behind the car, to the left of the rusty truck. Move along the left side of the car. Get on the nearby bus.
At the checkpoint, pick up the items nearby, conversing with Ellie again. Proceeding down the alley to the right, listen to the quick conversation between the Hunter neighbors. Having killed everyone present, examine the play area. Enter the alley on the right, examine the nearby checklist. So locate the office on the right, patrolled by one of the Marauders. Hit him quickly, taking the abandonment notice.
Go past the burning barrel, up the stairs. Get rid of the four marauders in the area, preferably by hitting the one on the right with a headshot. Move to the right, killing yet another Marauder. Continue to the back, hitting a third. Move along an imaginary "curve" to finish the fourth, always trying to position yourself behind the bookcase, so as to remain hidden anyway.
Continue beyond the burning barrel, going down the stairs. Follow the road slavishly, climbing the stairs and dropping on the opposite side. Follow the alley to the next larger street. Right, locate the poster, thus listening to the conversation that follows. So examine the door with the red cross, open it to take everything you can inside.
Always forward along the main street, swimming to the raft and diving for ten shards. So swim towards her Ellie, making her get on the bus. Move along the container, swimming towards the stairs, arriving at the second floor. Take the notice next to the mattress. Drop to the first floor, gaining additional information about Joel. Move along the wooden planks to get to Pittsburgh.
Pittsburgh: Hotel Lobby
Drop down, examining the area to the right. Locate the lock nearby, which unfortunately requires a code to be opened successfully. Pick up the alcohol on the left. Examine the coffee machine, then locate the ladder near the nearby shelf.
Before placing it on the corner wall, place it on the scaffolding and retrieve the fragments on top. So go up the ladder to reach the next stairs. Go through the nearby destroyed stairs, on your right, trying to walk close to the wall. Take the notice from the suitcase, which also contains the combination for the lock. Then go up the stairs, proceeding towards the outside. Go all the way up the roof, entering along the window on the opposite side. Turn the corner and strangle the Marauder in the area. Continue along the corridor, then take the HP bar near the destroyed vending machine. Go down the "alternative" corridor, strangling yet another Marauder inside one of the rooms.
Hit the next Marauder, then grab everything you can from the rooms on the left. So go back to the main corridor, turn the corner, go up the stairs. Wait for one of the Marauders to arrive, hit him quickly and continue down the corridor.
Locate the next Marauder, who examines the rooms on the left. Go along the nearby corridor, strangle the marauder visible in one of the rooms beyond the wide corridor. Exit, jump over the window, hide behind the bed until the nearby Marauder passes. Strangolatelo. Go down yet another corridor. At the crossroads, you can choose whether to go back along the main corridor, or explore the rooms in the surroundings. You can then quickly talk to Ellie, near the bathroom. Also recover the fragments in the room characterized by a "hole" in the floor. Return to the main corridor, then quickly move towards the burning barrel. Turn left, go up the stairs until you reach an elevator. Take the contents of the nearby suitcase. Open the nearby doors, proceed downwards, then throw Ellie upwards.
Go down again, taking the 10 fragments. Deviate along the path to the right, taking the blades and continuing beyond the door marked with the "Exit" sign. Dive into the water, go through the nearby door, continue swimming around the room, reaching a door on the opposite side of the room itself. Take everything you can, then return to the previous larger area. Place Joel so that he is facing the large door. Dive in and swim through the tunnel, passing the portal. Continue to proceed along the next tunnel, entering the first room and recovering everything possible inside it.
Having activated the generator in the adjacent room, proceed up and examine the table in the room. The room on the other side of the corridor will allow you to retrieve the hotel keycard. Then kill the nearby Stalkers. Go down the nearby corridor, examining the table in the nearby laundry. Then deviate to the left, proceeding along the stairs. Continue to the corridor, containing some spores. You will then notice a locked door. To unlock it, you will have to activate the generator near the room visible at the level exactly lower (compared to yours) of the game area.
Unfortunately, you will soon find yourself in front of a Bloater. You must therefore initially lead him to the laundry, and then quickly run towards the exit and "block" the opponent in the area. Then go up the stairs, examining the bathroom for some ammo. Collect everything you need from the adjacent room. Near the opposite side of the corridor, you can get various fragments, potentially very useful for upgrading. Go through the door at the end of the path, moving towards the back of the fridge, while the two neighboring Marauders will arrive in the area. The first will immediately begin scanning the nearby warehouse, and you can then immediately strangle him.
Therefore two other Marauders will arrive on stage. Wait for the one closest to you to examine the right side of the room, strangle him when he turns your back towards you. So check out the benches on the right corner. Place a ladder on the corner near the wall. Going up, you will be able to observe an intermission scene; quickly press the square button to proceed.
After the cutscene, move through the next rooms, then turning left. So approach the wall, reaching the area beyond the destroyed floor, recovering the various fragments in the area. Go back to the corridor, go down the stairs. Examine the second room on the left, taking the pendant. Continue down the corridor, taking the explosives from one of the nearby drawers.
Jump across the table, then continue straight down the corridor. Enter the dining room, examining the corner featuring a screen that emits light. You will be able to recover the fragments, thus proceeding towards the piano. Move around the balcony, recovering the nearby fragments. Continue beyond the last room, then triggering a cutscene at the end of the path.
Pittsburgh: Financial District
Exit and move left. Follow the first enemy, then killing him only when he is behind the car, so that his body can stay out of the enemy's line of sight. Then move towards the back of the concrete bench, quickly pulverizing the second Marauder. Then move to the building on the right. At the cafeteria, go up the stairs, moving towards the emergency exit on the corner.
Following the balcony, quickly get rid of yet another Marauder, hitting him from above. Go down the stairs using the cafeteria to pass, reaching the street. There will therefore remain only one Marauder, in the building on the opposite side of the same road. Kill him while he is examining the back alley, preferably by placing yourself behind the wall in the center. So go back to the road, pulverizing the rest of the Marauders.
Get the shotgun ammo, then the components from the building across the street. Continue to the farthest area, examining the table just behind the truck for some fragments. Open the garage door on the right, retrieving the fragments from the closet. Move the cart to the opening in the corner, then climb onto it. A little further on, you will be able to view an intermission scene.
So go through the nearby corridor, go up the next stairs, hide behind the door and quickly eliminate the two incoming Hunters. Exit the building, down the street, where you will locate other Hunters. Enter the building closest to you, taking some swords. Go back outside, hiding behind the cars and concrete blocks. Enter the passage next to the police car, go up the stairs and take out the Hunters above. Take the explosive from the table, then the attack warning from the corner.

Go back to the building on the opposite side of the road, proceeding along the corridor and always trying to be "slow" enough to avoid contact with the wire. When the Hunter is far enough away from the car, proceed quickly in that direction. Then move to the front area of the armored vehicle, examining the two Hunters on the opposite side of the road.
When the hunter closest to you is positioned to the right of the armored vehicle, we recommend that you wait for him to return to your area so that you can quickly strangle him. Proceed to the front area of the armored vehicle, paying attention to the two hunters on the opposite side of the road. You will also find a third one, completely on the opposite side of the road, near the crossroads.
Wait for the patrolling hunter to proceed in the opposite direction from you, then move quickly towards the concrete blocks, hiding behind the orange block. When the patrolling hunter approaches you, wait for him to turn around, then jump over the concrete blocks, and quickly strangle him.
Examine the ground below, near the graffiti, to retrieve any nearby objects. Then have Ellie go up the fire ladder, near the end of the road, so that she can reach the opposite side of the wall. Then examine the nearby garbage can, grab some alcohol and a wig. Continue down the alley, listening to the conversation of the Hunters. Go further along the alley, taking the pipe next to one of the cars on the corner. Strangle the Hunter. So move behind the car, in the middle of the road. Enter the nearby buildings, and kill the Hunter inside. Examine the small office nearby, recovering the blades and the wig. Move to the back alley, quickly hitting the two Hunters in the area. Enter the building on the opposite side.
Go up the stairs, examining the first room on the left, recovering some alcohol. So take advantage of the fire ladder to go up one more level. Then proceed inside the open window, reaching a bed. Collect the nearby fragments, then examine the bathroom, then the living room, recovering the blades. Go through the window, making your way up the wall to complete the chapter.
Pittsburgh: Escape the City
Examine the kitchen for some components. Go down one floor, opening the nearby door thanks to a Shiv. Here, too, make up for what you can. Go down the stairs, scanning the shop to get as many items as possible. So hide behind the nearby crates, three other hunters will begin to examine the game area. Move to the right, hiding behind the crate.
Strangle the subject in the area, then hide behind the truck in the center. Get rid of the Hunter on the left. Get the shards from the nearby closet. Climb into the nearby truck, reaching the roof of one of the nearby buildings. Get rid of the two Hunters nearby. Enter the architect's office, taking the pills from the play area. Enter the next room, triggering an intermission scene.
Continue down the corridor, taking the components from the warehouse on the left. Go down the stairs, get rid of the two Hunters near the barrel. Jump forward, then move along the concrete blocks on the road, then jump to the gate (while waiting for the light from the other to not be directed towards you). Deactivated the generator, run along the road, hiding behind the blue object. Get rid of the hunters arriving in the area, trying to catch them two at a time.
So open the gate. Proceed up the road, getting rid of the nearby Hunter. Throw Henry up, then open the nearby garage door. Examine the various cabinets, recovering the explosives. In the next room, quickly kill the Hunters before they can hit Joel and Ellie.
Exit the area, trying to "pull" the cart away from the glass doors. So move forward, then running along the road to activate an intermission scene.
The Suburbs: Sewers
Locate the blades in the nearby shop, then the pendant in the ship slightly ahead. Jump to the top of the ship, open the door, then start climbing the cliffs, up to the pipe. Continue to the fork, then go right. Quickly "open" the fence so that Ellie can unlock the warehouse door. Take all the content.
Follow Henry along the path to an area completely filled with water. Dive into the water, examining the ground next to the vehicle. Take the pendant. Swim under the portal, go up the steps, then enter the hole on the right. Go up the stairs, then drop the wooden raft. Examine the warehouse behind the door. Get rid of the two Clickers. Grab everything you can, then bring the raft back for Ellie to proceed. She will activate the generator for you so that everyone can proceed to the opposite side of the play area.
Continue along the tunnel again, examining the first room on the left and recovering everything possible. Go through the double doors, examine the table to the left. Still ahead, along the corridor. Pick up the "rain catcher" notice from the nearby room, then go up the stairs. Examine the closet, taking the three fragments. Go through the door on the left, taking yet another note.
Going back down the stairs, examining the area below for some alcohol and a wig. Go through the door, observing an intermission scene. Then take the objects next to the door, then eliminating the nearby Clickers. So use your gun to pulverize the Stalkers in the area, preferably with headshots, which are most effective. So examine the whole area. Grab the items from the closet near the stairs at the end of the corridor. Continue to the opposite side, examining the laundry room. Take the child's drawing out of the closet. Tell Sam to drop the ladder, thus triggering an intermission scene.
Throw yourself to the end of the corridor, helping Henry push. Open the door, proceed along the pipe. Go up the stairs, examine the room at the end of the corridor. The nearby door will be blocked, and several enemies will then shoot towards you. Push them back to the bitter end, while Ellie and Sam take care of opening the door from the opposite side from the current one.
Wait for the first group of enemies to appear, thus preparing to launch a Molotov cocktail towards the door, thus blocking the first wave of opponents. So use the baseball bat to finish the next ones as well. Once the door is unlocked, throw yourself towards it to proceed.
The Suburbs: Centro
Having taken the fragments, proceed forward. Examine the second house, then quickly go back to the first, then move to the opposite side, talking to Henry. Continue to the inside of the nearest house, then go down further down the street, talking quickly to Ellie.
"Throw" then Ellie towards the ceiling, retrieving the manual. Go up to the bathroom, examine it, doing the same with the bedroom. Go back to street level, examining the brick near the garden next to the house you came out of. Look up, take the pendant. Continue to the end of the street, examining the "Firefly" logo on the corner, triggering an optional conversation. Move along the courtyard, jumping along the steps to get to the second area of the city.
You will now have to proceed forward, without being killed. Move to the left, trying to stay crouched enough. Move to the left corner. Get rid of the Marauders, then continue to the next house, at the top of which you can spot a sniper. Proceed all the way up, so you can hit the sniper without any problems. So look at the subsequent intermission scenes.
Tommy's Dam
Proceed along the road, up to a dead end. Collect what you can, then drop down and follow the path until you reach a bridge. Now locate the vehicle on the right, quickly retrieving the newspaper called "Foreign Element".
Move under the bridge to the hydroelectric plant. Use the valve above to cause a gangway to extend. Take as much as possible beyond this walkway, then go back outside and dive into the nearby pool. Swim inside the cabin, then grab onto the raft, letting Ellie proceed beyond the reserve. She will turn the valve, allowing you to proceed.
Examine the grassy area, taking what you can. Proceed upwards, positioning yourself under the tree. Examine the area under the bulldozer, then examine the cabin, retrieving the map of the plant. Examine the gate to the power plant, then make your way to the horses. Enter the nearby building, talking to Tommy. Then go up the stairs, examining the room on the left. Continue outside, following Timmy. Talk to the nearby woman. On the opposite side, examine the crates on the right, then interact with the dog.
Collect the blades from the nearby table, then examine the work table in the next room. Go down the stairs, moving to the back of the generator room, grabbing everything you can from the warehouse. So follow Tommy to the room next to the stairs.
So start eliminating the bandits, one by one. Take the production zone blueprint after clearing the enemies in the zone. Immediately outside, you can also retrieve an ax, an alternative weapon to your "pipe". Near the bridge you will instead notice a large number of bandits. Jump behind the nearest cover, and go straight ahead past them without too much trouble.
Once inside the building, get rid of the rest of the bandits once you go down the stairs, taking the ammunition they released.
Tommy's Dam: Ranch
After the cutscene, let the horse carry you along the road. Kill the bandits, paying attention to the sniper in the distance. Get what you can from the nearby house. Jump back onto the horse to proceed, arriving at the ranch. Go inside and examine the bathroom, recovering what is possible here as well. Then examine the kitchen, and the nearby trophy room. Go up the stairs, examine the bedroom on the left, pick up the comic. Move to the room at the end of the corridor, triggering a cutscene. Kill the bandits, then project yourself towards the exit.
University: Go Big Horns
At the beginning of the chapter, turn around and gallop to the final area of the road. You will locate a semi-destroyed car, with a wrecked truck associated with it. Locate the "Free Radicals" magazine on the machine itself. Continue to the university, so wait before jumping over the blocks along the way. Instead, examine the building on the right, passing the door to reach the stairs, arriving at a balcony to explore. Examine the corner to retrieve as many items as possible.
Go back and examine the garage to retrieve the flamethrower and associated parts. Make your way along the road to the fork. Right, examine the tree with the yellow leaves, recovering the associated pendant. Enter the building on the left, with respect to the intersection. Unlock the portal by examining the panel on the right. Also take the associated memo. Near the next table, you will find 12 fragments. Go up the stairs next to the door, retrieving the pills from the table. Continue forward, trying to approach the corridor on the opposite side of the play area.
Four "disabled" Runners will remain in the zone. To get rid of them, you should preferably use your crossbow, hitting them in the head. So, before you get to the barriers blocking the square, look at the building on the right. Use the container to enter and examine the room, obtaining the necessary items.
Continue towards the large square with the statue placed in its center. Move to the right side, then up the stairs, past the window to get to the roof that connects to a large next room. Pick up the items inside. Always forward, therefore, along the campus, until you reach a portal. Examine the left side of the road, recovering the logo. After the dialogue, go through the dormitory and retrieve the fragments. Go up the stairs, examine the rooms on the left, taking all the components.
At the end of the corridor you can locate spores. In any case, you will have to let yourself fall down. We recommend using the nail bombs to hit the Bloater with maximum effectiveness, perhaps also using Molotov cocktails or Shotguns in combination. It will also be necessary to get the blades from the immediate vicinity.
So move beyond the double doors visible at the end of the corridor, go up the stairs, thus examining rooms 209 and 208. Continue towards the outside, moving towards the back of the corridor and passing the nearby door. Go to the opposite side of the square, taking both the blades and the alcohol. Open the nearby gate, moving the trolley-generator towards the wire, and then activate it.
Jump back to Callus, and proceed forward. When you reach the square with the curtains associated with it, examine the first of them, recovering both the blades and the alcohol. So approach the portal, noting how closed it is. Move the cart towards the portal itself, then the cart next to the truck, entering the building.
Video - TV commercial
University: Science Building
Take the fragments from the closet, then examine the area near the work table. So, before proceeding through the doors on the opposite side of the appointment room, proceed to the end of the corridor and grab the shards from the room on the left.
So continue beyond the closed door, halfway down the corridor, arriving near the stairs. First, however, you'll need to read the cards on the crates that will be analyzed by Ellie. Then go up the stairs, opening the door on the left, reaching a corridor.
Continue to the end of the room, locating the X-rays. Go through the door on the corner, from where you can proceed. Examine the lab recorder visible in the next room. Examine the closet on the right to get the pendant. Continue to the last room, thus activating an intermission scene.
You will therefore have to go back to the outside; Meanwhile, a group of Hunters will have entered the building, so you'll have to push them back en masse. To do this, you will have to use a combination of two-handed ax and El Diablo. Another possible option is the Shotgun. Once in the corridor on the first floor, you can observe the cutscene and then kill the Hunters nearby.
Lakeside Resort: The Hunt
You will take control of Ellie here while hunting a roe deer. Quickly open your backpack, examining the objects available to Ellie, making her comment one by one. So follow the roe deer, trying to hit it with an arrow, making it bleed and thus making it easier to follow. You will then reach an abandoned house. Move to the room on the left, then along the house, observing the cutscene. Examine the closet inside the room for a HP kit. Kill the Infected coming through the window. Go up the stairs, examine the corner of the room to retrieve the HP gauge. Exiting to the outside, examine the green cabin for some blades. Follow your mate, all the way to Ellie's "descent".
Move right, grab the explosives and the wig. Wait for the Clicker to leave, and follow him hitting him with a quick stab. Follow the next tunnel, preferably hitting the nearby Clickers in the head. At the end of the tunnel, take the blades and the alcohol. Locate the ladder on the left, climbing up to go back to your partner. Take the explosive on the left as well as the blades on the right.
Tell your partner to project you up, starting from the right side. Follow the walkway, retrieving a brick from the corner. Throw the brick at the Clicker, then throw yourself in the direction of him. Grab the items from the nearby warehouse, then go down the ladder, following your partner through the corridor.
Go up the nearby steps, grabbing the items around. Examine the bodies of the enemies for ammo, then talk to your partner, observing the subsequent cutscenes. At the final area, run to the small warehouse, jumping through the window. Once in the living room, some Hunters will examine the play area. Remove the blades from one of the drawers.
So kill the Hunters, one by one. Examine the log cabin to the right, taking the pendant. Continue to the area above, then continue through the village, locating several Hunters. Kill them with the shotgun, then grab the alcohol from the right. Proceed to the semi-destroyed walkway, following the nearby path. Then move along the nearby pipe.
Locate the "Negentropy" comic. Then when you reach the gate, take the garbage container, pulling it in your direction. Turn the corner, continuing through the pipe, thus clearing the path. Approach the "Bear Creak Lodge", killing the Hunters in the area. Pull the two containers sideways, revealing the presence of a small opening. Jump and examine the room, then - at the restaurant - examine the alcohol tables and the blades.
Go through the glass door, shooting at the Hunter near the window. Take out the explosives and the blades. Move down the corridor to the left, fending off the next two hunters. At the exit, you will be able to observe an intermission scene.
Lakeside Resort: Cabin Resort
Collect the Revolver ammo, then examine the garage above. Kill the Hunters, then move forward. Move around making a "curve" around the small cabin. Observe the cutscene. Take the map of the lake.
Move down the alley, around the corner, entering the next building. Crouch under the cupboards, grab a HP kit. Pull the cart towards you, continuing forward. Move along the abandoned shop, go through the nearby alley by jumping through the window on the left. Go ahead, turn left and examine the drawers, retrieving the Medkit.
Drop into the nearby window, then hide in the alley. Wait for the Hunter to pass, then cross the road and the burning barrels. Turn left, go up the stairs. Wait for the Hunters to pass, proceeding along the road, passing the fence. Then enter the back alley on the left, entering the final hole. Jump through the window on the left.
Cross the road, hiding behind the car. Proceed to the burning barrel, continuing to the burning barrel again. Enter the alley on the left. Jump on the container, drop into the nearby building.
Grab the first HP kit, then immediately after the second on top of the nearby crates. Try to exit through the door on the opposite side of the restaurant, locating David. You will now have to try to hit him three times with the knife - you will not find any technical difficulties in doing so, it will be enough to chase him. Move under the next barrier after killing the Hunters on top of it. Turn the corner, getting rid of three more Hunters.
Go down the alley, always aiming for the burning barrel. Go through the open door near the final area. Collect the items inside, then proceed along the building, observing the cutscene.
Bus Depot: Highway
Examine the camper near the highway, locating some family photographs. Continue towards the end of the highway itself, examining the road next to the van, recovering some components. Get off, pass the bus, jump over the railing on the left, examining the ground next to the orange barrels, near the car, recovering the pendant.
Take a look at the area next to the destroyed highway, taking the items there. "Climb" along the various vehicles, passing the portal. Enter the next building, examine the locks on the corner, then grab the wig and the notice to the wife.
Then move to the right, asking Ellie to take the ladder. So follow it to the roof, causing an intermission scene to activate. Then go down the stairs, examining the bar for some alcohol. Go out, get what you can from the nearby tents.
After positioning yourself next to Phaedra's tent, walk forward past all of them. So locate the pendant that "hangs" from the large lantern next to the green curtain at the corner. Move to the nearby bus.
Bus Depot: Underground Tunnel
Proceed through the bus, exiting the window. Proceed downward, examining the green car wheel, taking the arrows. Examine the area just behind the bus to find a pendant.
Then enter the tunnel, moving towards the truck. Examine the walkway to the right, picking up the Alcohol next to the truck. Observe the corner on the far left, recovering what is possible here as well. Also free yourself in this area of the enemies present. Leave the others alone, proceeding further down the tunnel.
Examine the right side of the walkway, recovering some gasoline for the flamethrower. Kill the first Runner in the next corridor. Also get the blades in the next room. Then go down further along the tunnel, locating the two Bloaters, Clicker and Runner. Examine the walkway to the right of the tunnel. Wait for the enemies to pass, then project yourself along the same tunnel. Have Ellie go up and she will throw down a crate for you.
At the next tunnel, swim under the truck, taking the ladder down for Ellie. Move along the walkway in the upper left, then go down and examine the corner of the walkway, collecting the ammo for the revolver next to the skeleton. Throw Ellie up again, killing the Clicker. Take the blades out of the room.
You will now need to use a Shiv to open the door on the right, retrieving the items inside. Turn around the corner to the right, swimming forward until you reach a new room. Proceed up to reach a ventilation shaft, reach the elevated walkway, then drop down the raft, causing Ellie to proceed forward. At the next tunnel, move towards the walkway, until Joel falls into the bus. Then press triangle to move forward, thus swimming towards Ellie and observing the next cutscene.
Fireflies
Jump over the window, grab the blades and alcohol from the nearby table. Continue to the end of the room, then jumping inside the window. Turn left, continue forward beyond the nearby window, arriving at a balcony. Hide immediately below. When the guard is gone, proceed to the opposite side of the balcony and hit him quickly. Collect the contents of Ethan's body.
Continue inside the room, along the corridor. So kill yet another guard in the area, always preferring a wait-and-see approach. Grab the wig, jump over the lab door. Stand back, hiding. Strangle the fly closest to you, then the other two in the immediate vicinity. Continue beyond the laboratory, further examining the room in the center of the play area, also taking everything possible here.
So move along the west wing, hiding behind the large table, letting the three Firefly pass through. Collect the nearby items, then examine the nearby office, grabbing the surgeon's tape recorder. Collect all other items from the room to the right as well.
Immediately behind, you will notice a door, now closed. We recommend using a Shiv to open it, thus being able to retrieve all the objects inside it. While waiting for the Firefly to pass, proceed to the interior of the next room. Wait for the sequential arrival of the two Firefly, near the nearby door, to be able to finish them in speed. Two Firefly will remain, hidden behind the last barrier.
We recommend taking out the remaining guards using repeated headshots. There will therefore remain only two guards, to be pulverized at speed. Once you have passed the last door, enter the room on the right, taking Marlene's last tape recorder. Move to the end of the corridor, passing the last door.
Epilogue
Follow Joel, proceeding under the barbed wire. Locate the pickup near the rock wall, on the right, recovering the comic called "Singularity". So follow Joel beyond the rocks, cross the river and let yourself be projected to the opposite side of the game area, where you can see the real ending.


