


Please note:
The solution is based on the US version of the game. There may be deviations from the Spanish version.
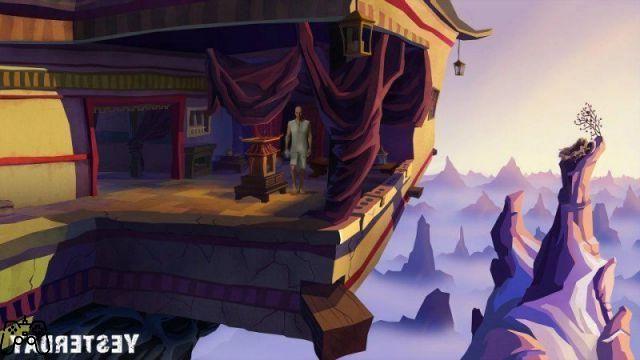
Chapter 1 - Cadway Station
You will initially find yourself near the left side of the ramp leading to the train platform. Quickly scan your inventory, locating ID card, flashlight and phone. Therefore, examine the mosaic visible on the wall on the left. So move on to analyze the staircase slightly ahead, almost completely destroyed - a suitcase will block the passage. Now locate the light coming out of the train car, and enter it. So examine the mannequin sitting on the bench, take the fragment of the handrail visible on the floor, as well as the (empty) can of beer still on the floor.
Also retrieve the electric cable on the left seat. Then move towards the end of the car, check the door, noting how it is blocked. Proceed to the left side of the train, use the electric cable in combination with the suitcase stuck in the rubble. The cable will be wrapped around the pillar: combine the iron bar with the cable, thus removing the suitcase from the rubble. Enter the inventory, take a look at the suitcase. With the cutter, duct tape and screwdriver retrieved, return to the train and exit on the right side of the wagon. Examine the toy box slightly below, on the left; therefore recover the telephone (toy) as well as the electric keyboard.
Then analyze the rubble near the initial part of the wagon; recover the puppet shaped like a battery, then combine the screwdriver and this puppet. Recover the batteries, then quickly combine them with the keyboard. So look at the phone near the pillar in the center of the play area, noting how completely both the keyboard and the receiver are missing. So, turn your gaze towards the wall at the top left of the ladder, as well as towards the basket on the pillar on the right.
Go on to analyze the machine on the right, noting the presence of a coin stuck in the corresponding slot. Continue towards the top of the stairs, noting a gate with a padlock associated with it: use the cutter, combining it with the beer can; in this way you will get a small strip of aluminum. So combine the aluminum strip with the gate lock. Now proceed into the room that will be unlocked. During Choke's interrogation, we recommend that you answer as follows: 1) "Tell the truth about who you are"; 2) "Tell the truth about your family"; 3) "To help the congregation"; 4) "Higher Intelligence".
During the chess game that follows, you will have to make the following moves: 1) Bishop on E-7; 2) Pedestrian on G-3; 3) Standard bearer on E-7. So look at yet another cutscene; you will therefore find yourself locked inside a train car, together with Boris. Come closer to him and exhaust all conversation options. So, go into the inventory and combine the cutter with the toy phone, thus obtaining the receiver. So give the receiver to Boris; after the phone call, exit the carriage on the right - by the time Henry will have retrieved the receiver from Boris's pocket. So combine the token with the vending machine, visible on the right. The coin will then be unlocked and you will automatically get 0.5 dollars.
Now combine the handset obtained from Boris with the telephone set. You will therefore notice how the phone is still functional. Now combine the batteries with the toy keyboard; Henry will dial a number using the musical tones visible on the keyboard, and you can consider the level completed.
Video - Teaser
Chapter 2 - Cooper's Rescue
Under the guise of Cooper, quickly answer the phone to hear Choke's voice. Take a look at your inventory, then also examine the badge to automatically view a movie. Then click on the van, retrieve the matchbox, as well as the nearby key (near the back of the van). Combine the key with the van itself. Therefore, recover both the baseball bat and the tank associated with it.
Examine the nearby tunnel, while viewing a cutscene linked to the scout leader. Since Cooper is afraid of the dark, a flashlight will need to be made. Examine the billboard near the top of the bridge, then the basket next to the fence. In this way you will get a rag. So turn your gaze to the fence made of barbed wire, examine the barbed wire for a piece. Now combine the rag with the baseball bat, you will automatically get a torch (turned off). Combine the torch with the tank, thus soaking the rag in the petrol contained in the tank. Combine the cloth with the baseball bat further, thus obtaining a lit torch. Then go through the next tunnel, reaching the train car. Look around, recover the cable from the rubble, then the iron bar leaning against the nearby pillar.
Now examine the door of the wagon: you will find it locked. So combine the iron bar with the door, unhinging it. Proceed to the inside of the wagon. Look at the mannequin, retrieve the bullets from his pocket. Then examine the pockets of the mannequin's coat, recovering the receiver. Exit to the right, look at the play area around you - check the basket, retrieve its contents. Then examine the rubble visible to the left of the stairs; remove them, thus displaying a door. Approach the door, which is associated with a padlock: you now know how to do it, that is, combine the iron bar with the door to unhinge it.
After yet another short cutscene, enter the room, noticing how the floor has completely collapsed. Look down, noting a bar and a tube. Change the orientation of your gaze again, this time looking at the clothes rack on the exact opposite side of the room; a revolver will also be visible inside the holster - how do you manage to get it? So combine the basket with the cable, creating a grappling hook. Combine the grapple with the pipe on the ceiling.
You will then reach the other side of the play area, while losing the grappling hook at the same time. Retrieve the revolver instead, and combine the bullets with the pistol, thus loading the revolver itself. So look at the game area on the left, moving your gaze even slightly downwards. Retrieve the iron shelf, combine it with the bar in the center of the floor. So, go back to the front door - you will exit automatically.
Go up the nearby stairs; you will therefore be automatically stopped, given that an intermission scene will be displayed on the screen. Then examine Boris, Henry, Choke and the nearby gun (visible on the altar). Combine the revolver with Choke, starting a cutscene.
Talk to John, learning how John lost his memory, only to be hospitalized. Try to exhaust all the conversation options, so as to obtain all the information available.
Chapter 3 - In Paris
Observe the play area around you, then use the phone to call Ms. Yesterday. So check out all the paintings nearby - more specifically, the painting that can be located between the bathroom door and the desk. After the flashback, keep looking at the paintings - this time aiming for the one just above the desk. Another flashback, then take the notebook and the fountain pen from the right side of the desk. Also retrieve the letter from the left side.
Exit to the left, reaching the balcony. So look around you, especially when looking at the Eiffel Tower and the Hotel Nationale. Therefore, carefully examine the postcard to which Champagne is associated; after another brief flashback, we recommend that you retrieve the nearby welcome note. Then check out the hot tub as well as the horse head sculpture. Go back inside, then quickly enter the bathroom. Retrieve the bottle of rosemary oil, then the hand cream. So check out the scent just behind the hand cream, thus getting a flashback that has to do with Henry. So get the soap and towel from the right side of the sink. Open the tap on the left, associated with hot water; you will notice how the steam is quickly sucked by the fan, visible on the ceiling. So combine the letter opener with the fan. Noticing that you are unable to proceed, exit the bathroom by clicking on the image of the door. Then continue to the balcony on the left. Combine the letter opener with the horse head sculpture.
Once the edge is sharpened, go back to the bathroom and combine the letter opener with the fan. Then use the towel on the same fan, automatically repositioning the lid. So open the tap on the left, going to visualize the word "Alchemy" on the mirror. Once out of the bathroom, combine the letter opener with the paintings scattered around the room.
Then open the safe door again, combine the letter opener with the back of the Doré painting. Retrieved the card, enjoy the following cutscene, then go out to the balcony. Click on the tab with the view of the Eiffel Tower carved into it, noting the word Revolution there. Go back to your room, use the phone to get in touch with the reception. Talk to Albert as well as the maintenance man; communicate the two words Alchemy and Revolution.
After receiving the envelope, open it and read the short press release; then take possession of the goggles. Use the phone to have a conversation with Henry White. After you are interrupted by Cooper, proceed to the balcony and interact with the whirlpool - you will need to use the control panel visible near one of the corners of the play area. The tank will light up, combine the goggles with the now illuminated tank, noting a kind of grid formed by 8 squares on each side.
So combine the sharp letter opener with the whirlpool tub. You will automatically go to remove the E-7 tile, as Henry explained to you. So take the plastic bag, open the package inside the inventory, recovering a key. Now go back to the inside of this game area, making your way to the safe, just behind the painting; combine the key with the safe, recovering a business card from the "Le Tour Petit", which is an antiques shop. With this action, you will end the chapter.
Chapter 4 - Antiques
Talk to the girl in front of you, or the woman you had contact with during your "memories". Once you have all the information you can, you will also receive a key from Pauline. So examine the play area around you, carefully checking the shelves - one by one - as well as the points with which you can interact, clearly marked on the screen. So retrieve the scissors from the central table, which is associated with a statue. Then retrieve the candle holder from the table located in the far left area of the screen. Now converse with the man dressed in red - named "Marcel Drissard".
Now examine the upper right shelves, more specifically the bird. After the short cutscene, start talking to the tourists in the area; also examine the tapestry hanging on the right side of the nearby landing. Yet another cutscene linked to a memory, so combine the key that was given to you by Pauline with the door visible in front of you.
So retrieve the cross that you can see hanging on the wall behind you; on its back, will be four pins - for now, just make a note of them. Go on to examine the shelf associated with the duck-shaped statue in the center of the room. You will then automatically pick up an oil lamp. Now move on to take the box, which is associated with a satanic symbol, near the lid next to the left wall. After opening this box, you will notice some peculiar pieces of wood associated with strange symbols. Failing to understand their meaning directly, move on to examine the face of Notre Dame, visible right next to the door. Try touching it, causing an intermission scene to automatically activate. Retrieve the graphic representation associated with the "alchemy" symbol from the wall near the desk. This will trigger another cutscene associated with a memory. So open the small door just above the desk, recover the ultraviolet light. Also recover the wooden bar on which a Y is engraved, visible near the table, immediately to the left of the huge red cross.
So go up the stairs, noticing how unfortunately the door to the upper level is blocked. Observe therefore the large cross exactly in the center of the room: it is characterized by the presence of holes on each of its four "extensions", as well as one exactly in the center. So combine the small cross with the large cross, immediately noticing how easily the holes fit together - however, it will first be necessary to free them from the dirt that clogs them. So combine the pins with the cross. So, click on the alchemical table; make sure that the four pins correspond to the four "empty" areas of the cross following the indications of the tapestry that you have been able to see near the shop.
Once this is done, further combine the small cross with the larger cross, this time managing without problems to make them coincide. This will open a secret compartment: retrieve the diary from it. Open the diary, causing various memories to be triggered. After viewing the associated footage, exit the room and talk to Pauline three times. Then examine the diary again; combine the scissors with the diary to get the rubber band that previously covered the diary. So, combine this rubber band with the wooden bar that has the letter Y inscribed on it. When the rubber band is wrapped around the bar, combine the ultraviolet light with the bar. Several scrambled words will then appear.
After the cutscene and the escape to the back room, we recommend checking again the flap visible just above Pauline's desk. You will then get new keys. Combine them with the door (previously closed) on the nearby landing; after opening it, you will notice how it needs oil - as it squeaks. Then click on the oil lamp, opening it without causing any squeak. Continue towards the statue of the Samurai, recover the Katana on the left; try to touch the Katana to cause the start of the umpteenth cutscene, which this time ends the chapter definitively.
Chapter 5 - Tibet & New York - First Part
After the opening scene, converse with Olhak Adirf, the blind master, seeking information regarding the use of the sword. Unfortunately, he will not be easy to convince: he initially wants you to provide him with so-called "flowers of truth". Immediately examine the box on the right, then the table in front, then switch to the Katana in the mouth of the dragon. Then check the window on the left, as well as the next one just behind the master.
Retrieve the mug from the water jar on the right. So talk to the blind master, trying again to convince him - not this time you will succeed either. Proceed outward, then, examine the incense burner along with the brick parapet, as well as the lego protruding from the corner. So examine the nest as well as the nearby bush. Then go out using the central entrance; examine the dry bushes visible under the steps.
Retrieve the rope, visible near the sled, next to the door. To the right of the bridge you will therefore see a pulley: examine it. Therefore, recover the boards positioned both on the left and in front of the bridge. Examine the head on the left side of the bridge itself. So go back inside, examine the door leading to the meditation room, noting the presence of hinges and screws on the door itself. So go back and combine the razor with the door of the meditation room. Retrieve both the screws and the hinges; try to combine them with the boards in the inventory: they will not be enough.
Then go back to the meditation room, talking again with the blind master. So try to play with the master, however, almost immediately noticing how normal it is to always lose. So take the Katana from the mouth of the Yak dragon, use it in combination with the window on the left. The light will then enter the room, creating a shadow. Now try again to play with the master: you will notice how the shadow actually goes to show the fingers that are held behind the back by the master; in this way, you will be able to win the game with certainty. We recommend playing three consecutive games in order to win all available treasures.
Then reposition the Katana inside the Yak Dragon, go outside. Now combine the hinges with the boards - their number is now sufficient. It will form a long "rod". Unfortunately, it will not be enough to reach the bush via the balcony. So rush towards the area on the far right, trying to reach the bell. Examine the nearby wheel, spin it. Therefore, check both the bell and the beater used / usable to ring it. You will notice that a support cord is missing, as a result the sash fails to function. So get the cereals and legumes out of the sack on the floor. Retrieve the grain from the nearby open sack. Combine the axis with the bell leaf, forming a lever. Place the sack of legumes on the right side of the plank, then combine the rope with the sash. Click repeatedly on the knocker to ring the bell.
Finally, the master will agree to teach John the art of the Sword. Having gained this experience, return to the antique shop. So visualize the cutscene that leads to the second part of the Chapter.
Video - Launch Trailer
Chapter 5 - Tibet & New York - Second Part
After the dialogue with Boris, click on the roof of the warehouse, causing John to jump. So talk to Boris about this and that. After Choke's voice is recognized, you'll need to pause the action for a short time, watching a few consecutive cutscenes. So check the gate outside the warehouse, automatically obtaining subway tokens. Recover the tires visible near the second lamp on the left. Right, activating the red arrow. Check the enclosure of the train carriages, then examine the gate, noting how it is closed by the presence of a clamp. Use the tokens to "loosen" the clamp slightly, then take it out. Also recover the piece of wood visible in front of the gate; open the wagon, then examine the boxes nearby. Retrieve the camera from the boxes on the left; also recover the roll of adhesive tape, visible in front of the boxes on the right.
Then return to the warehouse, proceeding left towards the tower. Examine the dustbin to its right, where you can get a circular blade. Also examine the tarpaulin that acts as a cover for the left area of the tower; take the cloth, under which you will find a tripod. So also retrieve the tripod, and place the camera on it (which you should find in your inventory).
Try using the camera, then check the logo on the tower wall. Combine the piece of wood with the circular blade, then secure the blade using the zip tie; therefore use this kind of "ax", combining it with the logo on the wall of the tower. Click on the logo, thus climbing up to its top. Grab the paint can at the top of the tower. Combine the camera with the tires, then cover everything with a tarp. Make sure that all this is held together using a roll of tape, thus obtaining a kind of camera protected by a sheet. So combine the can of red paint with the sheet that covers the camera. This way, John will paint a Y on the camera itself.
Throw the whole envelope towards the warehouse roof, then jump. After being found, examine the basket on the left; then take the cable from the basket in the center. So examine the controls of the oven, in the center of the room: you will notice how they are broken. Then check the fire locker on the right. Combine your tarp with the glass of the cabinet, thus recovering the ax. Proceed quickly towards the illuminated area; check the oven on the right, press the red button to the right of the oven door, causing it to open.
Since nothing will happen, proceed behind the console on the left, then examine the cabinet - noting how it is wedged. So use the ax on the cabinet, retrieve the electronic circuit diagram. Now combine the red arrow with the console. You will notice how the monitor is broken, and how the connections are completely missing. However, you do have a schematic of a circuit: the center panel (with the switches in alphabetical order) exactly matches the schematic in your inventory. So combine the cable with the video output, characterized by the name "OUT".
Therefore, use the red button repeatedly, scrolling through the various security cameras, positioned in different game areas. When you get to six, you will notice how you show Cooper along with Boris. Click on the monitor to enlarge the image. Then combine the electronic scheme of your inventory with the control panel associated with the letter A.
You will thus obtain information regarding the correspondence between zones and switches: the switch associated with the generator room is "F". Operate it; the light in the corresponding room will go out. After the cutscene, press the green button visible on the control panel.
Return to the "standard" view by moving the cursor to the left behind the panel. Press the red button, to the right of the door; you will notice a fire. To reach Boris, combine the sheet with the oven door. Boris will be saved and you will be able to enjoy the cutscene at the end of the chapter.
Chapter 6 - St. Fergus
Click on the area below the cross, noting the large amount of dirt. Then click in the center of the cross, locating a circular lid. Check the ground ahead of you, noting a mound of earth. So check the stained glass window of the ruined church. Continue to the right, then check the vortex on the ground, from which you can see the ruins of the church.
On the left you can also see a tombstone, on which an object is placed. Get it. It will therefore be necessary to look for the batteries: unfortunately, their positioning is made random by the game itself. However, there are some places where the chances of finding them are higher: the ruin visible below you; the top of the mountain on your left; the highest (left) part of the mountain on your right; the wide path visible near the mountain in the center of the screen at the bottom. Having recovered the batteries, proceed towards the interior of the church. In conversation with Pauline, you will have to ask her several times for some information regarding her diary. So turn your gaze to the pedestals on the left, recovering all the substances visible in the area - alcohol, cobalt, zinc, mercury, gold, salt, sulfur, vinegar.
So retrieve the pot, as well as the shovel. Exit this first game area, recover the water from the lake using the pot. Then return to the ruins, towards their innermost area. Combine the pot of water with the vinegar, then place the pot on the stove with the water. Combine the lighter with the stove. The pot will heat up; when it is hot, take it. So go back to the (dirty) cross, use the mop on the pot containing vinegar and water, so that it gets soaked in a vinegar compound that allows you to clean the cross. Having completely disinfected it, combine the shovel with the mound of earth around the cross itself. You will notice how it is part of a tombstone; after a short cutscene, you will be able to retrieve the so-called "judgment coin".
After another brief flashback, place the salt on the circular plate, visible near the raised "arm" of the cross. Unfortunately, one of the holes that allows you to use the mechanism properly is blocked: use your knife to unlock it. Next, place the mercury on the circular plate on the right arm of the cross. Place the sulfur on the left arm, then pour some alcohol on the circular plate at the bottom. Combine the lighter with alcohol; this will trigger a mechanism inside the cross, causing the gear to move. A trap door will also open under your legs, and you can get out. Meanwhile, 3 vans will arrive in the area, full of enemies: use the lighter to illuminate the back of the nearby altar, noting the presence of the letter "Y". During the next conversation, respond as you please to Miguel de Castro.
After the cutscene, jump to the speed generator and turn off the lights. Another cutscene; therefore, examine the three bowls positioned in front of the "Master". Remove the block of butter from the central bowl. So, retrieve the honey from the mug on the left; also recover the Katana from the dragon-Yak. Exit the room, proceed to the right, reaching the area of the bell. Grab some grain from the sack - minimum two portions, then head back to the balcony. Pour the honey on the bricks of the railing. So combine the corn with the bricks; you may notice a bird coming to the area to eat the grain; throw some grain again on the railing, in this way the bird will have to forcibly release the seeds of the so-called "flower of truth" on the same railing, which will stick to the honey.
Retrieve them, proceed outside, examine the (dead) bush visible immediately below the steps. Then use the katana to dig a ditch, plant the seeds of the flowers of truth there. So examine the crank to the right of the bridge: unfortunately, it is rusty. So, combine the block of butter with the crank, making it more mobile. Turn the repeater crank, then use the katana to retrieve a bucket with a rope attached to it. So examine the head of the dragon visible on the left side of the bridge; several icicles hang from it. Combine the bucket, with the rope, and finally with the dragon's head.
After the cutscene, cut the icicles using the katana. So go back inside, use the bucket with the icicles on the upper section of the incense burner. Now take the bucket of water, use it on the seeds outside. You will therefore be able to enjoy a long cut scene; when it's over, talk to everyone present.
Conclusion
Before making your decision, we recommend that you save your game so you can enjoy all the possible endings. So choose one of the three possibilities that are provided to you to get the ending associated with it!


