


Please note
The solution is based on the English version of the DLC, so there may be differences from the Spanish version.
Home
After loading the DLC, visit Whiterun, as soon as you pass the main gate you will be joined by a couple of weird people wearing a mask and a tunic, if they do not appear, do a few levels or go on with the main mission of the game. Once these individuals are in front of you they will speak to you, but regardless of the answers you give they will attack you. Kill them and then check the corpse of their leader, read the orders and you will be directed to the Windhelm dock. Travel quickly to the Windhelm Stables and cross the river that crosses the piers, look for Captain Gjolund on the ship called Maiden of the North, and after paying or somehow persuaded him you will begin the journey to Solstheim.
Solstheim
Once you arrive in Solstheim and get off the ship, you will be joined by a dark elf named Adril Arano, ask him a couple of questions about Miraak, he will direct you to the stone of the earth nearby. Go around the harbor and go up a large hill, you will find the stone that emits a ray of light towards the sky, then approach it and you will meet Neloth. After talking to him you will discover that Miraak has been dead for some time, he will then direct us to the temple of Mirrak. Make your way through the town to the top of the mountain in the center of the island, when you approach you will hear people working on the stones in the area, you will find the temple nearby; Climb to the top, then go down to the area in the center, you will find another stone similar to that of the earth. Analyze the stone to find that it is the stone of the tree, now activate it. Nearby you will meet a woman named Frea wearing armor, she is the only person who is not working on the temple, talk to her and then enter the huge structure once the gate opens.
The temple of Miraak
Start down the ramp, but watch out for a couple of cultists similar to the one you encountered in Whiterun, kill them and enter the door at the back. You will then finally find yourself inside the actual temple, there will be some doors in the main hall, open and explore if you wish, once done, continue in the hall until you reach a room with a large gate on the opposite wall; right in front of the passage you have just crossed there will be a platform to press, pass over it to avoid the darts and continue into the next room. Kill the cultists and continue to the semi-circle room, then continue to two platforms, do not go over them, but walk between the columns, at the end of the room turn left and pull the chain to the right of the gate to open it. You will enter a square room with a well in the middle, jump into it and reach the bottom, there will be some other cultists who shouldn't be too much of a problem, then go to the other gate and look for the lever to its left to open it; in the next room you will see a path marked by blue carpets, following it into a room that leads to a trap, so be careful. When the carpet is finished you will see a door with thorns on the left and a pressure plate not far away, turn the right wall to avoid the platform and take the path in front of you, move quickly because walking you will activate several traps behind you, you will find yourself in front of a door. Enter to find yourself in a very long room with many oscillating blades, your goal will be to pass two of these blades and stop under the architrave which represent a safe point, then take the time to pass unscathed through the other blades and stop under the another lintel, don't try to use the tornado, you won't need it in this case. Once you reach the opposite side, press the lever on the right to open the gate, go over and enter the door, continue until you are in the middle of two walls with a passage, go over and turn left then towards the left wall, you will find yourself in front of another lever that will open a door, enter. You will find yourself on a walkway, hit the ropes to lower the bridge and go into the next room, when you get off the wooden bridge on the lower level, beware of the pressure plates. You will now have to clash with several Draugr, kill them and go in the direction they came from, you will find yourself in front of the doors, enter one of them to enter the next wing of the temple. Go down the stairs to the caged bridge, you will collide with a small group of skeletons that will not be very hard to kill, behind them you will find yourself in a corridor with some coffins and a Draugr, when you fight against them, beware of the pressure plate to avoid activating the trap with the wooden logs. Continue your path and go up the ramp, turn left in the cave to reach a very large room, use the hurricane to run and go around the left wall, go down the stairs and run to the next platform, from here turn left as a group of cultists will reach you from the stairs. Once you have killed the enemies, make your way to the lower floor, turn left and you will find a wall with an inscription, you will learn the scream of the Aspect of the Dragon, as soon as you learn the new skill, the coffins inside the room will They will open freeing several Draugr, take them all out and look for the corpse of the gate keeper, you will find a key that opens a door hidden in one of the coffins. Go through the door to enter the banquet area, go forward until you are in a smaller hall, then go left to find yourself in a larger banquet hall, in the opposite corner you will see a passage to exit, turn behind the wall of right, on the right there will be two ravines, in the second you will find a lever to press to open a door. In the next room you will find a large metal cover in the center, enter the next room to find another similar metal cover, but this time if you look carefully you will also find a lever that opens it, go down below, continue through the rooms with the fire pits until you reach a cave, reach the end and look for a button on the left, press it to open a passage on the wall. Go down the stairs and enter the door on the lower floor, you will find yourself in a huge room with the statue of an undead dragon in the center, go up the stairs and take out all the Draugr you meet, when you reach the top you will find the chest of the boss behind a large sarcophagus, open it and go through the hidden door behind the wall.
The Fate of Skaal
After talking to Frea, she will lead you out of the temple, follow her without running forward until you reach the village of Skaal. Once you reach the village Frea will go and talk to his father Storn, wait for them to finish and talk to Storn too, he will tell you about Mirrak and you will discover that you will have to learn everything he learned at the time if you want to have even the slightest hope of defeating him. . Storn will direct you in the far north to a dragon's nest and a word wall. Follow the mountains to the north and try to stay on the peaks, once you reach the wall try to throw yourself in front of it thus avoiding the whole climb. In this area you will find several Draugr and skeletons and obviously a nice dragon, take out all the enemies and go to the wall to learn the new scream. Start walking back towards Skaal, on the way you will find the wind stone and nearby a building similar to those of Skaal, equip the new scream (learn it with a dragon soul if you have not already done so) and scream against the stone of the wind, the nearby building will soon explode, leaving room for a creature called the Lurker. This new enemy at a good range at a distance, so don't feel safe even from a distance, so keep moving around during the fight and you shouldn't have too many problems, the attacks are slower on the sides, try not to be on them too close when he unleashes his strength so take the right timing before slashing. Once you have defeated this enemy as well, return to the village of Skaal and go talk to Storn, it could happen that you are attacked on sight by the inhabitants (probably a bug of the DLC) if this happens, travel quickly somewhere else and wait about four days, however, by talking to Frea's father you will learn about the black book and the wizard who lives in the south called Neloth.
Purify the stones
Scattered around the island there are six stones such as that of the wind, the tree and the earth, at this point of the game you will have already purified one, and you will already know the location of the other two, the stone of the tree is a coincidence now lost, but Storn will be convinced that now that you have weakened Miraak's hold on the island, you can purify the rest. The four stones will be indicated on your map, the one in Ravenstone, one north west of Skaal, one north of Ravenstone, and the last one between Skaal and the village of Noleth. Cleansing the stones will require the same process you followed to purify the wind stone, go to the stone you have chosen, use the scream and defeat the Lurker. Once you have purified the stones you will have to deal again with the Lurker and with the cultists, each time you go to a new stone the difficulty of the fight will gradually increase, so between one purification and the other take some time to fix your equipment and maybe get some experience. After this task you can go directly to talk to Storn, or do the mission "The Path of Knowledge", after which you will still go to talk to him.
The Path of Knowledge
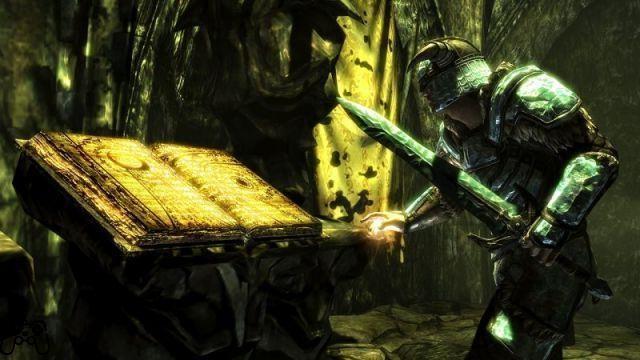
Starting this mission does not require that you have already purified all the stones, if you are behind that task leave the sun stone as the last one, as it is the closest to the village of Noleth. From Skaal you start your journey to the southeast, when you arrive in Tel Mithryn you will meet Noleth's apprentice practicing outside, you will not have to talk to him, but you can still do it, once you are ready enter the magician's house . As soon as you enter you will see a blue ray emerge right under your feet, activate it to start levitating upstairs, once you reach your destination you will find yourself in front of Noleth himself, talk to us and let us tell you something more about the black books, you he will also say that the book he owns will be useless, but he knows where to find the right one. Follow Noleth out of the house (and be sure to levitate downstairs so as not to die), he will inform you to go to a Dwemer ruin northeast of the Sunstone. Once you reach the place you will have to fight against a decent group of raiders, slowly make your way through the enemies to the area in front of the building, once the enemies are killed go to the opposite side of the ruins to meet with the wizard, in these ruins to open the Most of the doors you will have to use the levers scattered in the area, and you will also have to use a special cube, when you have opened all of them, enter the building. You will immediately find yourself in a room with a black book in it, however it will be under lock and key, and you will have to activate the gears to open the lock and take it. Be patient with the magician, in some places he will start talking and you will have to wait for him to finish in order to continue, at some point he will open a door for an elevator that will lead you to the lower floors of the ruins. Once you get out of the elevator walk further to find yourself in a place with some cars and pedestals, unfortunately you will have to wait for Noleth to finish speaking; now wait for him to position the cube on one of the pedestals and lower the water level, after that, collect the cube yourself and continue to follow the magician, you will find yourself in front of other contraptions, Noleth will inform you that he has found other cubes in the inside the ruins, follow it to the next door and open it with the cube. As soon as you enter, you will notice that the pedestal is red instead of blue, this color means that you can place the cube on it and open a new door, after which you can remove the cube and the door will remain open; the blue color instead indicates that once you have positioned the cube and opened the door you will have to leave the cube on the pedestal. Now go through the door to enter the workshop, continue forward and turn left to a pedestal on an intersection, pick it up and go down the ramp soon after, as soon as you get off a couple of Dwemer spiders will attack you, they can be safely killed from a distance also because the explosion caused by their death could do you a lot of harm; once you have killed the enemies, continue on the same path until you reach a bridge inside a large room, cross the bridge until you reach the opposite side, put the cube on one of the blue pedestals, keep the other in the second hand. You will notice that on the floor below the water level has dropped, there will be a red pedestal in the center that will still be half submerged, not far from it you will see a bridge to the upper floor, on that side there will also be the red pedestal with which you can raise the bridge, activate it; once this is done, pick up the cube you just used and place it on the pedestal in the center of the floor, you will exit a flight of stairs, go up and cross the bridge until you reach a door. You will find yourself in front of a crossroads, on the right you will enter a room with a chest, on the left you will find, instead, a room with a single blue pedestal and a cube, collect it and go back to the larger room, take the other cube from the pedestal in front to you, this will raise the water level, in one side of the room you will notice a passage, upon entering you will be able to swim over the broken walkway, continue along the hall until you exit the water. You will enter a very large new room, follow the only path available and check to the right for a blue pedestal, collect the cube and continue; now the water level will rise again and a Centurion Dwemer will activate behind you, kill him and look for the ballista at the top of the stairs. You will find yourself in the highest point of the room, in the center there will be a red button, activate it to lower the bridge; this will lead you to the garage entrance, from here take the door to Nchardak's main room. Go back to the main chamber, place the two cubes on the pedestals at the top, this will lower the water level further, in this way you will gain access to the pair of doors below, follow Neloth to the right and use the dark ones to open the door. 'access. You will find yourself in the Nchardak aqueduct, walk towards the center of the room and turn to see two ramps that lead to the upper levels until you reach the door you came from, then go up on the platform, you will notice three red pedestals, these will be used to lower all the bridges until you can reach the door on the right side, then activate the leftmost pedestal then the rightmost one, go down to the lower level and pass the left bridge, take the stairs that go up to the upper bridge, then go down again and cross another bridge below, but watch out for the spheres and the Dwemer spiders. Once you reach the opposite side, go up the stairs and place the cube on the blue pedestal, in this way you will lower the water level in the center of the area, jump to the lowest floor then, open the furthest door with the red pedestal, go up the ramp and follow the hall in front, as soon as you see a room, stop as you are about to fall into a trap, there will be several blades waiting for you after the entrance, take the right timing (or use the hurricane) and cross. In the next room there will be a blue cube, be ready to run back to the main room, as once you have collected the cube the water level will rise flooding the entire wing you are in, once you reach your destination with the cube in hand, let Neloth pick up the other cube and raise the water level allowing you to reach the path to the exit, then you will have to swim under the platform with the three pedestals to find the door. You will be back in the main hall, go up the ramp until you reach an area with four pumps, at the base of each of them there will be a blue pedestal, put a cube on each of them, to do this you will also have to remove the cube on the pedestal at the upstairs, when each pedestal is in place you will have to deal with a centurion Dwemer, take him out and check the room he came out of, you will find a chest, when you are ready take the elevator to go up to the first level of the ruins.
The cultivator of men
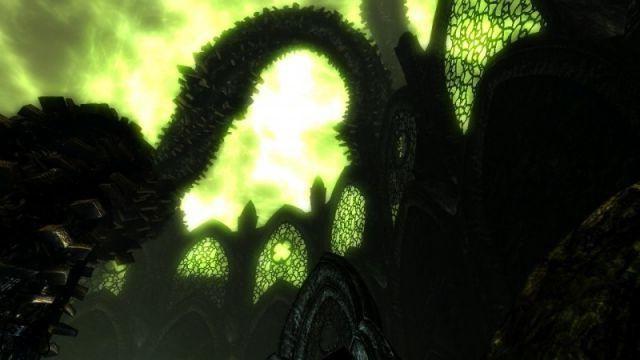
Unlike the last visit you made to this realm, this time you will have some work to do, when you regain control of your character go on to the small building, activate the mechanism and let down a bridge, through it go up into the hall, but be careful not to fall into the liquid and the tentacles that will hit you as they cause a lot of damage, reach the opposite side, and once you reach it wait for the corridor to move and jump on the platform, activate the second mechanism and wait for the corridor . Now you will be able to reach the platform as the corridor reaches the central position, so jump on the bridge and move to the platform where there is a new book, read it. You will be thrown into a long tube, walk to the end and activate the mechanism, you will also activate a bridge, face the three seekers, keep moving around the area paying attention to their bullets and take them out; then look for the new mechanism under a blue sphere on the wall, activate it to open a door, enter and start reading the new chapter. The new area consists of a group of platforms connected by bridges, go forward to the two platforms and you will be attacked by other seekers, the first will be on the platform to your left, the second will appear at the top of the stairs in front of you, once killed go up the stairs to the top. You will find yourself in another area with a moving corridor, wait for it to be in front of you and jump into it, go forward to the end and activate the mechanism to open the door, inside you will meet several seekers, take them out. At the end you will see another moving corridor, wait for it to be in front of you and pass it until you reach a point where a bridge will lower, you will find a lurker on the platform, kill it and you will be able to access a new moving corridor, continue until you reach a mechanism that open a gate, enter the cave and face the seekers, you can avoid them or kill them at your discretion, at the end you will find the new chapter. You will find yourself in the previous area, a bridge will lower in front of you, if you activate the mechanism on the right of the bridge you will open it allowing you to pass over it; the big sphere in front of you will open and you will find a big book on a pedestal, open it and read it, you will meet Hermaeus Mora, talk to him and you will learn the second word you need, after the dialogue the book in front of you will begin to shine. Past the book there will be three spheres, each one has the power to modify one of your screams, you can come back here simply by reading the book again, remember this since you can only use one scream at a time; then choose which scream to edit and once ready read the book to return to Nchardak. Leave the ruins, but be ready to face a dragon just outside, kill the lizard and return to Skaal, talk to Storn, he will be convinced that Hermaeus Mora is the right person to help you in the mission.
On the top of Apocrypha
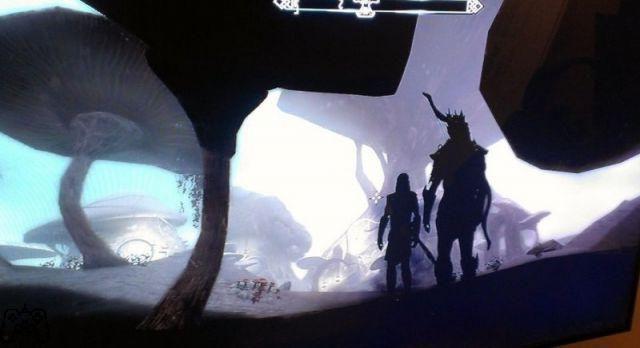
Once you have learned the new word of power, read the black book of walking dreams; when you are inside Apocrypha, walk in front of you and go up the platform to find the second chapter. You will be in an indoor area, go up the stairs on your right to the top, you will find yourself in the outer ring of a room; you will now have to face some seekers so be ready when they materialize. Keep moving inside the ring until you find a bridge on your left, cross it and go up the stairs to the end, you will find a book, collect it and cross the bridge again. Once on the other side go up the stairs to the left, you will no longer see the door, but an opening in its place, this will happen in each chapter once you get the book, go through the passage to reach chapter 3. You will find yourself in a corridor, go down then to the left, be careful as you will be surrounded by small tentacles, take out the seekers throughout the area; the room consists of three horizontal corridors between which you can move. Start by going left and at the end turn right twice, go down to the center of the corridor, after this turn left twice, go up to the top of the stairs, you will find a book on the left, take it and go back to the entrance of this area, do not read the book yet as it will bring you back to the previous chapter, then check to the left for a new corridor, enter it and activate the device, this will make the corridor move until you reach a ramp that goes up, then go up and you will find an intersection in front of you, go right and you will enter a large circular room connected to several bridges, on the left you will see a contraption, use it and go up to the central bridge, there will be many paths but you will have to look for the one that leads to a new book . When you reach the center of the area, take the first left and you will find the book, return to the center and take the next left to reach the next chapter. You will be on a platform, if you go to the edge and look down you will notice a couple of stairs leading down, there will be some seekers, take them out and keep going down; on the right side of the bottom you will see a long corridor, go through it but don't be surprised when it starts to turn, when this happens try to reach the other path anyway; you will fail on both sides, then go back to where you came from and you will find that you are in a new area. As soon as you come out, watch out for the enemies that will come towards you from the left, kill them and take the stairs that go upwards, collect the new book, go back down the stairs and turn behind the wall to the right, you will find yourself in a new corridor. Enter and walk forward, when everything starts to move turn left to the end and exit to a new area; take out the seekers, go up the stairs, then cross the bridge and go up on the platform with the contraption, activate it and go back downstairs. Reached the lower floor you will find a new entrance, in the next corridor go to the end and turn left, you will find yourself in a large room with a well and tentacles in the center, go through the opening to enter a smaller room. A lurker will come out, take it out and look for the door nearby, looking at the door turn left, you will find another contraption, use it to open the door in the previous room, open the chest and go back, go through the opening and you will find yourself in the chapter 5. You will start in a cave, continue to the end to enter a large room with a column in the center and four rays, between the rays in the outer ring there will be pedestals, each of them has an image drawn above which indicates which book to go positioned at that point; the first has drawn a mouth with teeth here the book of grinding blades must be placed, on the left there will be the pedestal where you will have to put the book of globes, on the left of this you will find the one where to place the book of boneless limbs and on the last pedestal put the one of the digging bits. Once all four books have been placed, another pedestal and a book will appear, this book will lead you to the last chapter. When you land, pass the books that block the passage and go outside, in the distance a group of seekers will reach you and behind them a wall of the word, but the word instead of being engraved on the wall will be written on moving paper, so learn the new level of the dragon aspect scream, a real dragon will appear, use the scream to tame it. Climb on the huge beast, you will not have direct control over it and you will be led by Miraak, the dragon will also help you in the next fight; the game will give you instructions on how to target enemies and how to use the breath of fire, if you still need instructions check the help section in the menu.
Boss: Miraak
This fight won't be anything complicated at first, the boss will use exactly the abilities you can expect from any dragon blood, namely the screams and some ranged magic attacks, and of course a nice sword for close combat, do it anyway be careful as his attacks deal massive damage, and it may take some patience to get through this part of the fight. When his life bar has dropped by about a quarter, a dragon will descend from the sky, Miraak will kill him and absorb his soul by healing himself, he will do this three times and if you are not careful the dragons could attack you. As long as you keep an eye on your life and keep moving you should be able to survive, also if you need to take some time you can go down the stairs, you will not be protected for long but a few seconds of pause may be of vital. Once you have also killed Miraak, the first dragon blood in history, collect everything from his body and from the bodies of the various dragons that were killed during the fight. Now a building will rise from the ground, inside you will find another book, open it to be able to assign all the skill points of your character. Congratulations You are now the only dragon blood in Tamriel again, so return to Skaal and talk to Frea.


