Please note:
The solution is based on the American version of the game, so there may be differences for the Spanish version.
Prologue
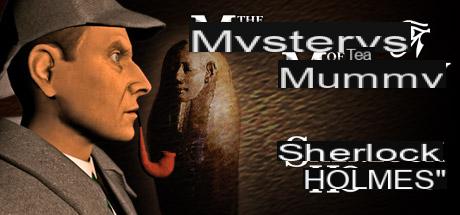
Sherlock Holmes: Mystery of the Mummy is an interesting adventure full of mystery, full of puzzles (many of them timed), which takes place entirely inside a private Egyptian museum, which also doubles as an impressive home for Lord Montcalfe , passionate about archeology as well as occultism. The disappearance of Lord Montcalfe gives way to this adventure, and you Sherlocks are called to work by your distant cousin, Lady Elisabeth, daughter of Lord Montcalfe. Lady Elisabeth inherited from her father the passion for mysteries and archeology, but she will not take an active part in the adventure, and you cannot even rely on the faithful Watson, but you will be alone with your proverbial intuition to try to solve the mystery of the mummy. So, good luck Sherlock!
1 LEVEL
LEVEL 1.1: THE ATRIUM
First, go around the hall and examine the sarcophagi. Make a note of the dates given to you. The dates can be: AE 2200, ME 1650, NK 1069, BE 0332 or OK 2200, MK 1650, NK 1069, LD 0332. When you have marked the dates, head to the opposite door, you will see lion-shaped statues on each side of the room. Go to the left side of the room and press the statue, it will open a secret compartment on the wall. It's time to solve the game's first puzzle, but nothing challenging anyway. You have to enter the dates in the right place and press the diamond-shaped button on the right. If you have done everything right a panel will open. Head to the panel and grab the key, then move to the other side of the stairs and pick up the seal of Anubis.
LEVEL 1.2: THE EXHIBITION ROOM
Look around, then use the key in the locked doors behind you. Enter the room, go left and pick up the second seal which is under the seated statue, towards the end of the room on the left side. Approach the sarcophagus with the mummy in the center of the room. Look down, open the toolbox and pick them up. You should find a bottle of oil, a hammer and a screwdriver. Turn around and look up to examine Khaepaseth's mumia. Take a look at the wall, you should see the notice board dedicated to the curse of the mummy. Check the glass container, the documents are illegible. Do you notice all the scraps and scraps of paper scattered around that someone has been rummaging around? Go to the door at the back of the room, turn right and pick up the gold tie pin (found under the blue stool). Go back, then head left and enter the next room. Go ahead and to the right until you get to the black Anubis sculpture. Collect the third seal from the floor on the left. Turn slightly left and examine the sacrificial dagger, it is located in the lowest shelf of the locker (remember where it is for later). Pan around the room, and as you advance towards the center look at the large statue of Amenophis. Approach the end of the room, you should see a double door to your left and one in front of you. Examine the paintings between the doors and collect the photo of Elisabeth Montcalfe. Click on the image, then on the enlarged image (if you lose track of it, you will find it in your inventory). Look down on the floor in front of the door on the right and the one in front of you, pick up the piece of blindfold. Cross the room, and take a look at the glass container of the mummy. Now go back to where the double doors were and check the symbols carefully. As you may have guessed, it will be necessary to find four seals before you can go through those doors. At the moment we have three, just one is missing. The other door is closed, we need to find the key. Enter the room before and exit the door which is on the opposite side of the room, go through the next room. The door to the stairs is on your left, open the door to see another area dedicated to the exhibition. Go left and examine the extract from the "Book of the Dead" from the glass container. Examine the burial urn on the chest to the right. Go forward then turn left and examine the showcase portraying images of various Egyptian gods, you will have to write down their names and functions. Look closely at the small statues. The door at the end of the room is unfortunately closed. To the right of that door, you'll need to examine a strange hieroglyph. The camera will move to the next door, but look carefully and pick up the fourth seal which is on the bottom right of the floor. The next door is also closed. Turn right, pass the open sarcophagus and click the second statue on the wall, from the left side. The statue will move, revealing a hidden compartment. Use your screwdriver, open the hiding place to find a silver key. After doing this you will lose your screwdriver, but don't worry so much it won't be needed anymore and you have much more important things to worry about. Go back to the left, use the bottle of oil on the closed doors, then use the silver key you just found to unlock the doors. Open the doors, you will immediately realize that this area has certainly never been used for an exhibition, it looks more like a storage area, a sort of warehouse. Advance around the room until you come to a large mirror and take a look at it. Continue to the right, and examine the chests, it appears that one of them may be open. Use the hammer to open one of these crates to find the sprockets and a fifth seal. Be careful to click on the chest again to add some wood to your inventory. Go to the end of the room and look at the large cupboard. Use the tie clip from the inventory to unlock the doors and collect the whiskey bottle. Leave the room, turn left and go forward through the two adjacent rooms and then to the end of the third where you will find a double door at the end and another door to your left. You've been here before, turn left until you get to the door with the four seals. To enter you will have to place the four seals in the right order, here it is: 1) Sobek (looks like a crocodile) 2) Ibis (looks like a bird) 3) Nout (a woman) 4) The twins.
LEVEL 1.3: THE STUDY
Make your way to the desk, then examine the newspaper and papers. Also read the article "A Strange Philanthropist" found in the newspaper. Approach the other desk which is located to the left, from there you will have to retrieve the matches and take a look at the document, as you will notice some pages are missing. Use matches to light the candle. Go to the opposite wall, turn left to see a stove. Open the hatch and put the papers (retrieved from the desk first), the pieces of wood found here, and the whiskey bottle inside the stove. Now turn your attention to the strange mechanical device near the door; you will have to use the gears found earlier. Turn the gears, then set the stove on fire with matches, after the cut-scene the first closed door will open and ...
2 LEVEL
LEVEL 2.1: THE LIBRARY
As you enter, turn right and take the blue book (the history book) from the column. Go up the spiral staircase, then make your way to the library with the blue books. Use the blue book found earlier at the end of the second shelf from below. At this point you will no longer have the blue book, you will have a green one (the religion book). Find the bookstore that has the green books and repeat the operation, ie insert the green book at the end of the second shelf from the bottom to get the red book (the geography book) in exchange. Go back down the spiral staircase, look for the library with the red books and repeat the usual operation to get a light blue book (the philosophy book) in exchange. Now go to the right of the spiral staircase, in the second shelf of the library change the book you bring with a black book (the law book). Go up the stairs again, you will immediately find the shelf of black books. Insert the book at the end of the second shelf from the bottom to get the yellow book (the science book) in exchange. Go down the stairs, go right to find the shelf of yellow books. Again, swap your book for a new book, this time blank (the philosophy book again). Exchange this book for another white book located on the third white book shelf, right in the middle. Inside this book, you will finally find what we were looking for and that is a key. But wasn't it better to hire a bookseller to get some order? Go to the table and examine the newspapers, then go back to the spiral staircase and use the key to open the locked door near the gallery.
LEVEL 2.2: THE CORRIDOR
Look at the statue, Sherlock will immediately realize that it is fake. Remember this statue, because although it will seem useless for a long time, it will play an important role later.
LEVEL 2.3: THE LIVING ROOM
Turn around and enter the green door right in front of you, you will find yourself in front of the wooden doors. Turn left and go to the corner to examine the empty sarcophagi. Look to the right and examine the shotgun on the wall, then move forward and turn right and open the curtains to reveal another door. Look near the sofa to find a note from Elizabeth. Look at the lock on the door, to see that the key is in the lock on the other side. Approach the fireplace and take a look at the lion's head, certainly a hunting trophy. Look at the family tree picture and the photos on the wall, then look at the closet. Move to the left, and open a cabinet to find the vacuum cleaner hose. Return to the entrance to the living room, and look at the pictures on the wall of Montcalfe in Egypt, then leave the room. Turn right and go forward, turn right again and enter.
LEVEL 2.4: THE STUDY
Immediately turn left, look down and pick up the false note. Look up and bring your attention to the left, there should be a closed panel, this time you will not be able to open it. Continue to the right and look at the fireplace and the painting above. You will also see the hand icon indicating that you can do something here, but at the moment you don't have any suitable items, you will come back to them later. Go near the desk and look at the telescope, then click on the window to see a mysterious cut-scene. Go around the desk and read Edward's letter. Before you leave here, notice the erased blackboard to the left of the door, who could it have been? Exit here and enter the door on the right, you should be in the bathroom.
LEVEL 2.5: THE BATHROOM
Collect the soap from the sink. Before you get out of here, examine the bathtub, the water is still hot, but how is that possible? Who's been there recently? And who was stupid enough to take a bath and leave the water there? Empty the tub, will there be a residue of sand similar to that seen in the mummy's sarcophagus, that needs a freshening up and took a bath? Either way, we've been struggling a little too much already and it's time to get back to our mission. Leave the bathroom and go back to the living room. First use the false note under the door, then the soap on the lock, then the vacuum cleaner hose and you will have dropped the key. Retrieve it, open the door and you will arrive in Montcalfe's bedroom.
LEVEL 2.6: THE BEDROOM
Walk to the left, around the bed, there are objects nearby that you will need to examine. They are the colonial helmet on the bench, the puzzle on the bedside table and the closed drawer. Go to open the closet, clicking on the jacket you will notice some sand. Go ahead, go out through the side door that leads to the corridor, stop and turn to the right near the door of the study. You should be able to see a fork between the footboard and the floor. Collect it. Now go back to the study, where there was the picture above the fireplace (remember?). Examine it to notice that it has small holes, use the fork to open the usual secret compartment and find a book in it. Examining it you will find Montcalfe's authentic note and a cane. Quickly return to the living room. Use the stick you just found on the lion's head above the fireplace. You will find a hidden package for Elisabeth, open it to find the missing puzzle pieces. Go back to Montcalfe's bedroom, you have to arrange the pieces of the puzzle in the right order. The right order is: 1) the eye 2) the woman with the ankh 3) the leopard 4) a man with the stick. Now open the drawer and take a look at the letter that seems to portend the existence of a curse. Go to the center of the room and look up to the fan. You should be able to notice a small white button that cannot be pressed, in fact you need something long. Do not lose heart and go near the table where Montcalfe's helmet was, there is a panel in the wall that reproduces the symbols of the puzzle, click them in the same order. Grab the scepter, and use it to click the small white button on the fan that previously couldn't be pressed. From the corner of the door then pick up the golden scarab. Now leave the room with the double doors, go right, forward and then left towards the hall to return to Montcalfe's studio.
LEVEL 2.7: STUDY, AGAIN
Approach the desk. You should notice some sort of open panel. Click on it and this will reveal a hidden mechanism, clearly you will need something to open it. Use the scarab and turn the knobs twice to open it, you should find two notes in it. Now turn your attention to the door and observe the mechanism on the right. Click on it and another puzzle to solve will appear. This time it's a classic 15, you simply have to rearrange the figure to form the image of the pharaoh. Once the puzzle is solved you will be rewarded with another key. Collect it and head back to the living room (where the lion's head is), and once there open the wardrobe (to the left of the fireplace) with the key you just obtained, you will find a false scepter. Now go to the end of the corridor (where the fake statue was) and use both scepters right on the fake pharaoh statue.
3 LEVEL
LEVEL 3.1: THE CELLAR
Sherlock is now in a dark, cold and damp cellar. Go to the end of the room, look left and pick up the matchbox. Examine the remains of food on the table, then pick up the bottle of water found there. You should see a bed over there, turn it up to see a trap door. After Sherlock's comment click on it, obviously you need something to open it. Head to the opposite side to where the barrels are, and between the first and second you will find a hammer, pick it up. Turn around until you see shelves full of corner bottles. You will need to recover some bottles to solve the next puzzle. First of all, looking to the left you will find a bottle of liquor and a bottle of gin. Look at the shelf now and Sherlock will notice that there is something strange, it almost seems like some circular object needs to be inserted, well don't worry about it now. Now look to the right, and above you will find a bottle of bordeaux. Check the shelves again to find a bottle of touraine, in the left corner, five shelves up. Halfway up the shelves, pick up the bottle of Burgundy. Finally, a little further on you will find a bottle of Spanish wine. Pick up the stick leaning against the wall from the shelf next to it. Go back to where the bed was, raise it again and give a hammer to the hatch to open it, inside there will be a small statue of Anubis. Turn around and paying attention to the surrounding environment pick up a second stick. Now go to where you found the bottle of bordeaux (also the gin and the liqueur), turn around and looking down into the triangular opening of the bottle holder in the center, pick up the first rag. Turn around and head towards the wall, then left and forward again until you pick up an empty bottle from the bottle holder in the center (turn your back to the shelf where you got the bottle of burgundy). Now go to the opposite side, with your back to the barrel and from the triangular space take another rag. At this point you will have to make some torches. Use the rag with the stick to make the torch and soak them with gin. Use the matches on one of the torches, if you need the other it will be ready for use. Go back to the shelf where you found the bottle of gin and in the empty space insert the bottles in this order: 1) Bordeaux 2) Bourgogne 3) Touraine 4) Spanish wine 5) Liqueur. If you have done everything right a new puzzle will turn out. I advise you to exit the puzzle and immediately save the game as you will have limited time to solve this puzzle (although more than enough). Once the puzzle is solved, press the button and hear a click coming from somewhere in the room. Turn left forward to find a new room it almost seems to be ...
LEVEL 3.2: THE LABORATORY
Continue along the left wall until you find a glass case containing a strange occult book. Continue to the desk at the end of the wall to examine a letter, and read another note on Jonathan Parker. You will also find a last note on ancient Egyptian legends, read that too. Apparently Lord Montcalfe had begun to cure his nerves with laudanum, read the related note located in the upper left corner of the desk. From now on it is advisable to save the game often due to the presence of many timed puzzles. At the entrance of the room, at the bottom right next to the closet there is an earthenware vase that must be broken with a hammer, inside it will reveal the first key that you will have to collect. Now move diagonally to the opposite side, look down to collect the sand. Stop here and get the second flashlight ready if you haven't done it before. Go to the work counter on the left to find the second key inside a wooden box. Bring your attention between the bookshelf and the center table. Double click on the floor and pick up the oil bottle from under the table. Now run to the desk, take the chair and place it on the left side and click on it to go up, turn to the wall and collect the third key from the niche. Get off the chair, and turn right towards the door. Use the oil bottle on the lock because it's rusted, then open the door with one of the three keys you found. But before you go to explore this new room, the desk drawer in this room has yet to be opened. But be careful because the slightest mistake will be fatal and you will blow up, so save your game. Now that you have reduced the keys from between to two (having opened the door) everything should be easier. Put the key with a G on its head in the right lock, and the other in the left lock. Click on the outer arrows of both locks, then on the button below. By doing so you won't blow up but Sherlock will finally have opened the damn drawer that contains ... another statuette! Collect the paper inside the drawer as well, then go to the door that was opened earlier.
LEVEL 3.3: THE WAREHOUSE
Advance until you find an oil lamp on the ground. Go left to find another bottle of oil on the shelves. By combining the bottle with the lamp you will finally have unlimited time to solve the puzzles as the primitive torches will disappear from the inventory. In this room there are pedestals with vases. By clicking on one of them you will hear a message from Sherlock which obviously tells us that we need a sequence to solve the puzzle. Each vase has a sound and a symbol that will help us in solving the puzzle, which is based on the four elements of nature (fire, water, earth, air). It is necessary to insert in the external vases, thus excluding the one in the center, the empty bottle (air), the sandbag (earth), the water bottle (but go?), The matches (fire). If the element is the right one the vase will accept it otherwise you will have to change it. When you have done it you will hear the usual noise indicating that something has clicked. In this near the door a new puzzle has appeared. Before trying to solve it, save your game. This time it is a riddle, the solution of which is contained in one of the laboratory books. The exact order should be B, K, V, S but since the riddle says that the last will be the first you will have to reverse the order of the letters, so the correct sequence to enter will be S, V, K, B. Before we can insert the b there will still be a cut-scene. A hidden niche will open on the floor under the second column on the side of the door, then collect the third statuette of Anubis. Go through the laboratory and head to the door that was previously closed. Open it and Sherlock will make one of her usual comments ..
LEVEL 3.4: THE CHAIN ROOM
This is a strange room, start by familiarizing yourself with the environment. In fact, you can only move by clicking in the center and then turn in the desired direction. The goal is to reach the four statues placed on the wall. Once this is done, a compartment will open near the door you entered, inside is the fourth statuette of Anubis. It is important to note that in order to leave this room you will have to read the riddle written on the opposite door. Then go back to the warehouse passing through the laboratory. Go to the central vase and use the "B" seal from your inventory, the seal will disappear, and Sherlock will comment that maybe Brahman is the solution to the mystery. Return to the room of chains, where you have read the puzzle to be solved. You will now be able to access the first far door, open it.
LEVEL 3.5: THE ANTICAMERA OF THE TREASURE ROOM
It's time for another puzzle. This time you will have to place a bucket with 4 liters of water on the stone, having one of 3 and one of 5 liters available. First, fill the small bucket and empty it twice into the large bucket to have 5 liters in the large bucket and 1 liter in the small bucket. The second move is to empty the large bucket into the drain between the scale and the tub. Pour the small bucket into the large bucket, then click on the bowls to place the large bucket. Take the small bucket and fill it into the tub, pour the small bucket into the large bucket and finally use the large bucket on the scale, then save your game. A chessboard will appear in the center of the room, not even time to rest phew ... This puzzle is not too complex, however. You will have to place the four statuettes of Anubis at the top of the board and after doing this a finished movie will start which you will have to act quickly so be careful!
4 LEVEL
LEVEL 4.1: THE DEMOLISHED ANTICAMERA
Look around and collect both buckets, the small and the large. Then look down to see a busy scorpion, and yes, you have to catch it. To do this, select a bucket and imprison it. Go ahead to the door. Attention look down because there is another scorpion around, which of course you will have to imprison with the other bucket left. Then press to the left of the chess puzzle, then collect both the wooden plank and the bag that is next to Parkey's corpse, it contains the fifth statuette of Anubis. If you have difficulty solving the scorpion puzzle, simply reverse the order of the buckets used. Quickly return to the chain room, in the meantime the floor will have collapsed. Look to the right, then down. Use the wooden plank on the iron beams to create a kind of thin bridge to reach the statue in the corner. Collect a gear from the statue's feet. Turn left and pick up the chain. By walking the plank again, you return to the door you came from. Head to the center of the room, look up and use the chain on the ring on the ceiling. Drop the chain to notice a niche opening to your left, click on it to watch a cut-scene. It's time to go to ...
LEVEL 4.2: THE SEMI-DESTROYED CELLAR
The cellar is also in poor condition. Advance to the wine barrels, watch them for the pointer to become active, then click on them. Gunpowder will come out instead of wine. Use Parkey's bag to collect some powder. Now head to the left, where there is the pile of broken bottles. Collect one. Turn right and pick up a lantern from the table. Look to the right, pick up the brush, you should see a door with stones, it's your next puzzle. Use the brush on the central stone at the top, the number 3 will appear, obviously you should click every third stone to open the door, the problem is that we don't know where to start counting! However, here is the solution to the puzzle, which is one of the most difficult in the game; start with the first stone at the bottom RIGHT, count three stones and click on the third, to understand 1 - 2 (no) - 3 (no) 4 (YES!), the second stone to click is right under the stone corner, then the stone to the right of the central stone, then the stone that is to the right of the stone in the left corner (always count three stones), then counting the corner stone as number 1, count 2 and 3 from below left side and press. Count the last three stones always continuing from the left side and press the second stone starting from the bottom. You did it !!! However, the important thing is to have the stone to start, then the rest is easy, just count the three stones and that's it.
LEVEL 4.3: THE DESTROYED ATRIUM
The lobby also looks really bad, and here you will have several actions to take. First use the lantern on the candle that has remained lit and put everything back into your inventory. Advance up to the steps of the ladder, lower your view to find some gray hair and sand. Then go up the first flight of stairs, and turn right on the first step you should find a hairpin, pick it up. Go back down to the hall and make your way to the sofa, then examine both the papers on the coffee table and the books. There should also be a piece of scorched paper on the floor, pick it up. Turn around and go to the dressing table, it's time to use the hairpin found earlier. Go to the candlestick and use the dirty piece of paper on the candlestick to reveal a map. Go up the first flight of stairs and look at the painting right in front of you, pull the flashlight on its left to open a panel. Another enigma. Each lever has three positions, to solve this puzzle you will have to position them as follows:
1) position the three levers all at the bottom 2) position the middle lever all the way up 3) position the lever on the left in the median position 4) position the lever on the right also in the median position. Then continue up the stairs, turn left, and enter the door by clicking on the wall that will have appeared, the place will be familiar to you ...
LEVEL 4.4: THE HELL CORRIDOR
The situation is getting really tough, explosions everywhere, room on fire, you have to move carefully. To go back to the hall again you will have to turn around and click on the painting on the wall. Keep in mind that some rooms will not be able to enter due to the flames, and that in the living room you risk suffocating from the smoke. First, carefully examine the corridor, then moving the view down you should see some female footprints and broken glass, here Sherlock will make one of his usual comments. Proceed to the end of the corridor, look at the painting next to the burning door and double click on it. You will find an encrypted message to decrypt by replacing the ankhs with letters. At the end you will have: YOU WILL FIND (in the Spanish version TROVERAI), IF YOU CUT (in the Italian version SE INTAGLI). At this point, turn to the bathroom and look at the painting, it says EGYPT WILL HELP YOU (Egypt will help you). Advance down the corridor until you find a painting with a knight, click twice and another cryptic message will appear this time even longer. The phrase this time is: UNDER THE RELIGION THE PLACE SHINES. Immediately save your game, because soon you will have to enter the smoke-filled living room, with the risk of dying. Take a deep breath and enter the living room, you will immediately notice the hourglass, it indicates the time you have left before suffocating, when you have little air, go out of the living room to breathe. Enter the living room and head to the right, where there is the door with the curtain. Using the broken bottle, tear off a piece of curtain to put on your lips as a mask. Go out for some air. Go back in and click on the shield located above the sofa, be careful because you will have little time for the puzzle. The solution is: (supposing to play the Spanish version).
1 line: IF YOU CARVE
2 line: YOU WILL FIND
3 line: empty
4 line: UNDER THE
5th line: RELIGION
6 line: THE PLACE RELEASES
Once you have solved the puzzle click on it, an X will appear next to the family tree, memorize it. Collect the spearhead on the floor near the lion's head and use it on the dark spot to the right of the picture, then collect the three weights, the small key and the letter from the alcove. At this point, take a deep breath and head to the studio. To the left of the door you will notice a clock, be very careful because it is a bomb. Save the game. First, apply the three hooks you have in your inventory to the weights of the clock, then apply the gear in the center of the clock, then you need to arrange the three newly found counterweights in the right order. The silver counterweight goes into the hook on the right, the gold counterweight goes into the hook on the left, and finally the blue one goes into the hook in the center. The clock will open, click on the key to wind the clock. Quickly turn left, and head for the door between the shelves which is closed. Don't worry, take the bag with the gunpowder and put it on the door, then use the lighted lamp on it and enjoy the cut-scene, this too is done, you are ready for the last part of the game.
5 LEVEL
LEVEL 5.1: THE ELECTRIFIED LIBRARY
Start by saving the game, then make sure you don't touch the railings, because as the title of this level tells us, the library is electrified. Go to the shelf with the blue books, turn slightly to the right and press the blue book, a cut-scene will start and the shelf will retract to reveal a Faraday machine that produces electricity. Pick up the shovel on the left, and then use it to collect the embers. Then use the lever to the right of the boiler to turn off the power. Then go down the spiral staircase and on the left then go up the ladder. Head to the opposite side of the room, and use the ladder where the red books are to find a receipt for some explosive material and a dynamite book. On the right there is a pipette, collect it. Go down the ladder, and head to the double doors to return to the study, as soon as you enter, collect the candle from the candlestick on the desk to the right.
LEVEL 5.2: THE DILEMMA IN THE STUDY
Look around, observing on the left the same wall from which you entered you will notice a puzzle that you will have to solve later, in fact you will have to explore the other rooms to collect objects that you will need later. Leave the room and enter the first exhibition hall. Advance until you find the mummy with the broken glass, look down, move the carpet to see a trap door with a strange mechanism, for now you can not do anything but remember where it is. Go back to the room where there was a display case, and pick up the sacrificial dagger. Go forward, turn left and move the blue urn, picking up what is hidden there. Turn around and enter the next room through the double doors. There are many chest of drawers that can be forced open with a dagger. Open them until you find the white stones and the black stones. Notice that the mummy in the center of the room is gone, pass it and pick up an ax from the floor. Advance to the next room and go to the left side to grab two small containers and a pan using the knife. Head to the end of the room where there are statues, some of them have fallen to the ground. Search there to find an old lamp. Go back to the room where the mummy was in the center of the room to find an oil container. In the next room you should find an orange locker, open it to find more stones. If you are ready go back to where the puzzle was to be solved and if you have collected everything, Sherlock will make a comment. Unfortunately for this puzzle there is no univocal solution because the image to be composed changes, basically it is necessary to reconstruct a figure using and alternating the stones having numbers as a reference. If you really can't solve it anyway, click on the gray box at the top left and the image will compose itself. Solved the puzzle, take the lever. Go back to the trap door with the strange mechanism and use the lever you just found. After the cut-scene you will see a sarcophagus moving into one of the rooms nearby. Make more light by combining the oil lamp, then go to the room where the sarcophagus has moved. Reach him in the center of the room, and click on the open sarcophagus, then go down the hatch, you will find yourself in the warehouse. Go to the left corner of the room to collect a rope, then turn right and enter the door.
LEVEL 5.3: THE LABORATORY
Go to the end of the table leaning against the wall and pick up the wooden box. Turn around to see a passage that opened just behind the closet that fell. Save your game because you have arrived at the final puzzle.
1) First, use the box you just found above the chest to the left of the boiler.
2) Use the barbell with the wooden box.
3) Use the bowl on the left side of the bar.
4) Place the pipette in the center of the barbell.
5) Place the candle on the right side of the barbell.
6) Combine the ax with the rope in the inventory.
7) Place everything on the hook above the boiler.
8) Light the candle with your inventory lamp and exit the room to be safe and watch the final cutscene!


