


Please note:
The guide is based on the US version of the game. There may be divergences from the Spanish version.
Classes of Heroes
Here are some indications on how to use the hero classes.
Bounty Hunter
The Bounty Hunter is one of the best players when it comes to controlling positions on the battlefield. We recommend placing it in the front areas, starting from the second row on the right. The class is focused on dealing damage and causing "bad" effects to enemies. For these reasons she cannot be counted among the best "tanks", indeed we do not recommend using her in this role, excluding the moments in which she will have the right mix of skills and equipment.
As for the moves at his disposal, we recommend using Like Hiter, Uppercut and / or Flashbang to charge the hordes of enemies. We also recommend moving opponents with a considerable range of action to the front area, avoiding them using their most powerful attacks.
Use the "Mark for Death" move to clearly signal the enemies of the Bounty Hunters and their companions. Instead, use "Collect Bounty" to deal large amounts of damage to enemies marked on the screen. Finally, the ability "Finish Him" will remain, capable of causing a 33% increase in damage to the enemy, inflicting the "stun" status.
Crusader
It is one of the best tanks available in the game, thanks to its remarkable strength and solid armor, as well as a remarkable variety of skills that allows it to heal, perform buffs, and hit enemies in a large game area.
He is also a character who can be effectively exploited in "second in command" positions, where he can act as a buff and heal his companions. He works best as a "shield" to the rest of the party. We therefore recommend placing him in the front area of the play area, where he will be able to successfully use most of his abilities. He is able to effectively defeat "non-sacred" type enemies. He will be particularly useful during the initial missions, when these enemies will appear more frequently.
The Crusader will work particularly effectively when there is another main "healer" in the party. We recommend using a combination of Battle Heal and Inspiring Cry to recover a good amount of life points from your party members.
Grave Robber
This is a class with considerable mobility, similar in many ways to the archetype of a thief. It can be used in different ways depending on the specific combination of skills available. In general, she should be used as an attacker, given her remarkable damage-dealing ability. She is also able to move across the battlefield without passing the turn, a skill that allows her considerable attack flexibility.
We recommend that you constantly use the "Lunge" and "Shadow Fade" abilities to stay mobile across the battlefield. The class in question can be used as a combination of a tank and a subject specialized in fast attacks. This approach will be particularly useful when your character has reached a good level of experience, thus obtaining an excellent dodging ability.
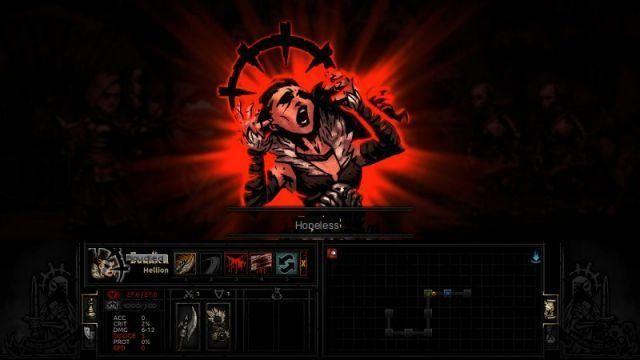
Hellion
This is the class of "barbarians" present in the game. She specializes in aggressive tactics, so she has slightly worse defensive stats than her colleagues. We recommend placing her in the second position starting from the right, there she will not receive any particular damage. She will also be able to clear all negative statuses inflicted on your characters.
Also remember his special Breakthrough abilities, capable of attacking three enemies at a time. Another important skill will be Iron Swan, perfect for hitting enemies from behind. They will be simple objectives for Hellion, not being endowed with particular resistance. If you want to heal your party, you will have to try to kill all but one of the enemies at the end of the fight. You will therefore have to use the YAWP skill! to stun the last enemy, while avoiding inflicting excessive damage on it. So heal the rest of your party, while the enemy will be stunned.
Highwayman
This is another "thief" class. It is focused on dealing "negative" damage and effects on enemies. It is capable of attacking both in melee and ranged mode, as well as with a pistol. It is particularly suited to offensive-type roles and is also endowed with excellent control on the battlefield. This combination of features make it a suitable subject for all groups.
In general, a Highwayman is capable of dealing a large amount of damage regardless of his position. This way he can be very mobile and a perfect companion for Grave Robber. Each melee attack can be equally inflicted by the front areas, so the character can also be placed without problems in those areas.
Jester
This is a character who specializes in "enchanting" enemies. We recommend placing it in the third available position. From here, he can play his tunes as well as make most of his attacks. We recommend making effective use of its "Battle Ballad" ability, which is particularly useful when using teams devoted to offense.
Jester will be particularly useful in dealing critical damage. We recommend massive use of Dirk Stab and Slice Off skills to maximize his critical hit "modifier". Jester will be particularly effective during long-duration missions, given its Inspiring Tune ability, which can reduce the stress of your party.
Video - The Campaign Trailer
Leper
Leper is a tank and a character who specializes in dealing damage. He is endowed with a large amount of life points, considerable stamina, and a good ability to deal base damage. He can also use his buffs to reduce stress and / or heal himself. However, he is not equipped with long range attacks, consequently he cannot be placed beyond the second position.
Leper can generally be considered the best tank available, so we recommend using him in this role. We recommend using Solemnity to heal him and to heal his main "healer" at the same time. You can also use Withstand to decrease the character's stress level. Avoid changing positions when Leper is in your party. In fact, he will only be able to attack from the first two positions, moving him towards the back will make him completely useless. Avoid combining it with Robber or Jester.
Occultist
This is the real "sorcerer" of Darkest Dungeon. It is a class based on magical abilities, so it goes to place itself near the rear area of the group. He is also able to move around the play area and heal party members. Unfortunately, he is also endowed with a small amount of life points. The most suitable position for this character is undoubtedly the third one starting from one of the two sides. The only skill he won't be able to use is "Hands from the Abyss". However, it will be sufficient to move it forward one unit to allow it to exploit it.
So use a combination of Weakening Curse and Vulnerability Hex to decrease the capabilities of the most dangerous targets. The "Wyrd Reconstruction" spell will be one of the most powerful at the Occultist's disposal. Deamon's Pull will be one of the best skills at your disposal, able to change the order of the "lines" of enemy opponents. He will be able to move an enemy, taking him from the third or fourth position up to the front positions.
plague doctor
This is a class with no real specific role. His attacks will mainly be based on negative "effects", such as. the bleeding and / or infection of the enemies that will damage the opponents slowly and decrease their attack capabilities. The Plague Doctor will also be equipped with some healing and buff skills. In general, the Plague Doctor should be used as a support character, given his low specialization.
The best position for this subject is the third. From this area he will be able to use his "Incision" ability, the only one not to negatively affect the damage inflicted. Plague Doctor is also equipped with one of the best abilities for controlling groups, namely Disorienting Blast. He will be able to move enemies "along" the positions, without them having a real influence on the continuation.
Vestal
Vestal is a simple priest, especially useful towards the undead. She is also able to heal your party members and use buffs to improve their stats. She is able to effectively heal any combination of classes. Vestal is capable of using two particular healing skills. The first is Divine Grace, which can be used on a single target. Finally, Judgment will be one of the most useful offensive skills, which will allow the character to attack enemies and revitalize Vestal's HP.
BESTIARY
Below, the indications relating to the bestiary that you will encounter during the carrying out of the missions.
Necromancer
This is a sorcerer with medium to long range magic, capable of making the undead "alive". All of his attacks are capable of hitting an entire playing area. The Necromancer is able to summon up to three undead in front of him, when that happens you will have to try to kill the undead quickly, as their attacks can inflict considerable damage. The recommended formation to finish the Necromancer consists of the Vestal, the Highwayman, the Bounty Hunter and the Crusader.
It is generally imperative to bring two character classes with you: Crusader and Bounty Hunter. The first will act as a tank, also dealing additional damage to the undead in the area. The undead will be indispensable due to their "Pull" abilities, which will allow them to carry the Necromancer to the front area. Then have the Crusader take care of the minions in the area. Try to keep the HP of your heroes high.
Swine
The Swine will be the second boss in Warren's. This is a huge pig that uses a large club as a weapon. Wilbur (his partner) is able to "mark" your party members. Two of the three boss attacks can only be activated when the target is clearly marked, while the last of them will have only a few chances of being able to hit the target.
We advise against any attempt to kill Wilbur before the main boss, they will fail.

After his death, the boss will unlock his powerful Enraged Destruction attack. This way he can attack the entire party in one round, going to stun him.
Overall, Swine is the easiest boss in the game. We recommend leaving Wilbur alone, focusing on the main enemy instead. He will stand in front of you, thus allowing your group to attack him repeatedly. We recommend that you pay attention to the heroes that will be "marked" by Wilbur, as they will suffer the most dangerous attacks. You will also have to suggest to the Bounty Hunter or the Occultist to "mark" the pig, focusing all your attacks on him. After his death, you can also attack Wilbur to finally complete the mission.
The Hague
Hag is the third Darkest Dungeon boss placed within Werald. He has the appearance of an old man with a huge sphere. The sphere can be considered a real weapon: in each turn, a (random) member of your party will be placed inside the sphere, with the aim of causing a decrease in his HP. After a short time, the sphere will come back to life. Also pay attention to the first attack of Hag that will place the hero inside the sphere, in case this is empty.
As for the battle strategy, you must first make sure that all your heroes can attack the third and fourth positions. Avoid bringing a Crusader or Leper with you, as their attacks will be focused on the first two positions. Instead, we recommend that you bring a Vestal or an Occultist, who can also take care of your party. Ignore the sphere, focusing all attacks on the main boss. When the hero is brought back to you, heal him as quickly as possible, then return to attack Hag.
The Eternal
Here are some indications regarding the construction of the city.
The Eternal
The city will be the only truly safe place in the entire game, serving as a refuge for your heroes. In this area you will be given the opportunity to hire new heroes, heal them or upgrade your equipment.
From this area you can also choose new quests. All buildings in this area can be "upgraded" using the Heirloom, which can be located within the various dungeons. We recommend making improvements inside these rooms, thus increasing the quality of services and decreasing the cost of their use. Buildings can be upgraded up to level six.
The Abbey
The primary use of the abbey will be to decrease the stress level of your characters. There will be three different types of activities in total: Cloister, Transept and Penance Hall. In some cases there will be a non-player character who will take care of these activities, while the player will not be able to have access to the activity until the following week.
The blacksmith
The blacksmith allows you to upgrade the armor and weapons of each of the characters in your possession. By upgrading the blacksmith you will have a reduction in weapon costs and you will have the opportunity to upgrade by reaching higher levels.
The Guild
The Guild is the area where you can upgrade your characters' abilities. Making such upgrades requires having several portraits and Crests. Each additional level increases your skills by increasing the multiplication factor of those skills.
The Carriage of the Nomads
The Carriage of the Nomads is the area where you can buy clothes, in exchange for gold coins. To perform these upgrades you will need the Crests. In general, clothes affect the characteristics of the person who wears them.
The Asylum
This is the only city area where you can freely decide to remove the characteristics of the characters by paying a specific price. Performing this upgrade requires the use of Bust and Crest.
Video - Games room
The carriage
The carriage, despite its harmless appearance, is one of the most important objects in the game. Using the carriage you can hire new heroes to replace the heroes that have died until now. Hiring additional heroes will not incur additional costs, but you will have an upper limit on the number of heroes you can hire. The specific heroes available will change every day.
Taverna
The tavern is the area where you can improve your characters' stress level. Similarly to the abbey, it will consist of three different areas: a bar, a betting area and a brothel. The tavern is a more "neutral" area than the abbey, so most of your heroes will have no problem accessing it.
General Guide to Dungeons
You will always have to start by selecting a mission that will define your goal. Each mission will feature a different difficulty level, different rewards and different types of enemies. All enemies will be randomly generated by the game based on your previous results, so you will never face a group of enemies that are too "powerful" for your current abilities.
The difficulty of each mission will be determined by three factors: the type of mission, the hero required and the length of the mission. The mission type defines the mission objective, usually killing a percentage of enemies and / or killing a specific enemy. Other types of missions require the activation of a specific item and / or retrieving particular relics. The required levels refer to the level of your heroes, while the last of the factors considered corresponds to the number of camps you will be able to reach. The shorter missions will not allow you to place yourself in the camp, while the longer missions will allow you to stay in the camp twice for each mission.
Completing a mission is not strictly required for game progression. However, completing a mission will allow you to get rewards that will make progression much easier. In the event that all heroes die or the player withdraws from the quest, it will be considered unfinished.
Exploration
During the first stages of the game you will have to try to learn the methods to move through the dungeons, a prerequisite for being able to reach the main objectives of the missions. The movement inside the dungeons will not be particularly complex, since the whole game is in two dimensions, so you can move right and / or left, then up and / or down. The rooms are connected to each other via corridors.
To reach one of the following rooms you will have to move along the entire corridor which will be guarded by some enemies (usually generated randomly). To select the room you will have to move to, you will have to click on the small map visible in the lower right corner of the screen. The layout of the corridors and rooms will not change in the slightest after your visits - there will therefore be no additional enemies and / or traps.
Combat
Combat will be another of the indispensable foundations of Darkest Dungeon. Each of the missions you are going to face will have some enemies inside. To be able to survive these encounters you will need to learn at least the "basics" of combat activity.
In general, all battles will start as soon as you encounter an enemy. Your group will then activate combat mode, positioning themselves to the left of the main enemy. The "human" player will normally take care of making the first shot. The maximum number of characters in line will be 4, and the characters will be positioned in such a way as to fill the front play area.
During the turn you can always decide whether to attack, change position, or use an item of your equipment. The fight will be concluded when all enemies and / or your characters hear a retreat order, as indicated by the flag on the map.
Camp
The camps are used to allow the heroes to rest. It will be possible to activate a camp only during missions of longer duration. One of the best ways to activate a camp is to use some firewood that will be provided to you for free before the quest. The camp can only be built inside the empty rooms.
During the early stages of the camp you will have to eat the provisions. The more supplies you have, the more life points you can get. After you've eaten enough supplies, you'll get Respite Points in exchange, which can be used to activate hero abilities. In general, they can be used to improve life points, decrease stress levels, or provide heroes with additional abilities. The "dream" phase will then be activated. After this, the whole group will return to the exploration phase, although even in this case the party may be attacked by some groups of enemies.
The Initial Phases
Your starting party will consist of a crusader and a highwayman. You will have to use them to proceed along the battles against humans. During the first fight, you will only have to eliminate one enemy; you will have to order the Highwayman to use his "Open Vein" magic while the Crusader will have to use Smite or Stunning Blow.
During the second fight, you will notice that the subject in front of you is too large.
So tell the Highwayman to use the Grapeshot to hit both enemies, while your Crusader will have to act as a tank to hit the main enemy repeatedly.
Once in town, proceed to the carriage to retrieve some other recruits. The first two recruits must be the plague doctor and a vestal. As for the initial supplies: we recommend buying 8 torches, 8 units of food and a shovel. Buying additional items will not normally provide you with any advantages. The shovel will instead have to be used to excavate the ruins.
City Planning
After the first two missions you will get additional options regarding investments that can be made in the city. You will need to have a plan before proceeding with the expansion. In general, until your characters have reached a level of 3, it will be useless to buy the Sanitarium or the Guild Hall. It will therefore be more convenient to invest your money in "straightening out" some negative character traits of your heroes.
During the early stages we recommend that you expand your carriage. You will therefore have to create a group of 15-17 adventurers, trying to get about 4 new recruits every week. At this point, you can choose to keep the best recruits and use the rest of the recruits as cannon fodder. As for the other buildings, we recommend continuing to expand the bar and tavern rather than the abbey, and then try to add a slot to the Sanitarium.
The Choice of Missions
During the early stages, we recommend that you only select short-duration missions. Each of these missions will cost you 1450 gold, eight torches, eight units of food and a shovel. Longer missions are more expensive and therefore riskier for you. For missions of Medium or Long level it will be essential to bring with you a healer and / or characters of at least level 2.
As for setting up camp, we recommend that you proceed to camp as soon as your injuries start to spiral out of control - it's much better to be cautious than to lose men.


