Please note:
The solution is based on the American version of the game, so it is possible to find differences in the Spanish version.
At the beach
Proceed along the path near the cottage to the north. Talk to the gentleman inside, who will point out the port as your next destination. Practice with the barrels you will find along the way. Enter the quarry, read the sign.
Exit outside and head west, then take the north path, where the enemies will be indicated. So go back to the man near the house to the west. Locate the bridge to the east of the map. Talk to the old man again, and return to the cave. Draw a 7 on the sign to complete the puzzle, in the next treasure chest you will find the sword, also take a look above the table, you will find a book.
Coming out of the cave, you will run into the need to train with the old man. After this tedious interval, proceed to the right, then always north eliminating all the enemies in your way. Destroying the trees, enter the cave.
Training cave
There are boulders in front of you that need to be moved; the key to open the door is on the right. Enter, you will be faced with a puzzle. Walk to the right, move the stone and take the rupee in the alcove, then return to the puzzle. The order in which you have to press the switches is 2 1 4 3. The key you get is to open the door to the north.
You will have to eliminate a rat. Position the boulder to block the exit from the hole on the wall, then wait for the mouse to arrive, and attack it by taking its key. Outside, proceed towards the port, then left entering the bar, where you will talk to everyone present, who will show you the next destination. Go up the stairs to the northwest for two sections, arriving at a castle.
Hourglass Castle
Enter the north door. You will have to save the pirate, select the first option in the dialog box, twice. In the upper left section of the map you will notice one of the switches on this level, shaped like glass balls. Destroy it with your sword and you will free the pirate. Go back to the entrance, talk to him, go back to the northwest door which will now be unlocked. Go and press the switch in the upper left corner.
You will have to quickly avoid getting hit by the claws before the timer reaches 0. Follow the path north to get to the rightmost switch, there is another one always to the right, by pressing them you can enter the blue door. Exit, go back to the port, talk to the pirates, you will get the map. Use the sylus on the most southeast island of all, making Crest 1, your new destination, visible.
At a time of the Blue Ocean
You will simply have to create a path starting from the ship and proceeding towards your destination, in this way the ship will start moving in the selected direction. When you arrive, select the first option. Explore the island a bit, talk to the skeleton in the east section of the map. Again, first option. It will show you the flashlight, note its position on the map. Given their importance, try to always mark their positioning. They are located in the house to the south, in the north section of the island, to the right of the mini-islet, and on the islet to the east.
Walk towards the house marked on the map. Go to the basement. Press the sign on the map. Press the mark on the wall, it is a map of the island. Select the first option that is made available to you by the woman. On the map you will need to locate the three places where you found the torches. This will open the door.
Always choose the first option, even when using the crystal ball. Proceed to the location marked on the map. Go through the door previously blocked by an electric field, avoid touching the enemy, go up the stairs, go to the volcano, blow into the microphone to blow out the candles on the sides of the entrance, so as to gain access.
Mt. Temple volcano
First floor
Follow the fireballs to the right, killing the chuchu. Overcome the lava, jump to the right, look at the graffiti on the wall that indicates the path you will have to take to overcome the labyrinth; mark it on your map. Continue south, kill the 4 animals, take the key, open the associated door. Follow the path previously transcribed on the map. In the final section of the path, do a spin attack while standing between the 4 switches. Go up the stairs that will have been unlocked.
Second floor
Proceed along the path to the left, arriving at a switch. Follow the path to the left, fight the enemy. On the right side of the room, aim for the switch on the pedestal and fire your boomerang, setting part of the room on fire. Go down the hall, avoiding the fireballs, by pressing the switches in the upper and lower left section of the room, still using the boomerang as an aid. Avoid the fireball by exiting the room, then boomerang on the switch, having the opportunity to go down the stairs.
First floor
Use the boomerang to kill the electric chuchu, the best position is to stay on the right section of the red blocks. Proceed south, enter the door, fight the two skeletons, and go up the stairs.
Second floor
The boomerang will also be useful here to eliminate enemies, as well as hit the switch at the bottom right, and jump to the platform on the right. Drop down to get to the next switch, then go to the door on the left. Boomerang on the mouse with the key. Still along the path, kill the Octorok, then aim for the next switch, unlocking the door to go up the stairs.
Third floor
Get past the fire, left. Read the sign. North, blow out the two candles. Use the boomerang to hit the switches in order, first lower right, then upper right, then upper left, then lower right, to get a key, which will be used on the southwest door. Left, you will be stuck in a room where you can face enemies. Kill the skeletons to finish the fire invasion, then proceed along the path, and hit the switch in the room in front of you to cross the gap. Take the key, go to open the boss door, and enter.
Fourth floor
Bring up the portal by reading the inscriptions, go up the stairs.
Boss: Witch
It will immediately split into 3, each part corresponding to a purple icon at the top of the screen. The number of horns indicates the order in which you will have to hit them to kill them. You will have to make sure that the boomerang passes through the icons, first the one with one horn, then two, and so on. Once reunited, quickly use the boomerang as they will split right away. Return to the portal entrance. Enter the fortune teller's residence building. Talk to the pirate near the harbor. Select the first option. Return to the island where you started.
First Challenge of the Castle of Hourglass
The old man will give you instructions regarding the Phantom Hourglass. Go up the stairs on the left. Enter the north door. You will be immediately assigned a time limit of 10 minutes. However, it will only pass when you are inside the fog. In the first room, run forward to the north door and open it, going down the stairs.
Underground First Floor
Watch out for the patrolling guards. Choose the first option in the dialogue with Navi. Proceed along the middle section, then right, then up, flip the switch, then away south avoiding the guard who is going north right now. Pass the boomerang through the torch, lighting the next one as well. Hide to avoid the oncoming guard, so as soon as he passes you run in the opposite direction. Destroy the red vase, it will create a circle inside which you will be invisible. Now still right, where you will find a switch to press, proceed along the path it unlocked, take the key, follow the guard trying not to get caught, and continue towards the two torches. Use the key on the locked door, go down the stairs.
Second Underground Floor
Here, too, you will have two guards to attend to. Destroy the glass switch. Pull the lever at the top of the platform on the right. Continue to the left, hit the next switch. Take the key. Stay on the left, running to the end of the corridor, and breaking the vase which will form a circle of invisibility. Pull your boomerang to the left, there is a switch that can release you from the fire. Wait for the guard to come from the opposite side of yours, then head down right into the alcove, then north again. Another section where the switches are used to lower the claws, while you get hold of the key with the boomerang. Invisibility, then raise the blue blocks and lower the red ones with the switch. Climb up and unlock the door with the key. Go down the stairs.
Third Underground Floor
Run down, then right, then up to the skeleton. Open the chest, take the triforce section. Proceed along the path to the left on the opposite side from the direction of the guard. Up the stairs, press a slot and insert the piece of triforce. Proceed to the lower left section of the map, pull the lever, enter the new area, wait for the guard to pass, open the hole, drop the guard, get past the claws, take the key, take the chest to the room of the triforce. The last Shard is in the lower right corner, inside a chest, there are no guards either, so north towards the stairs. Left, open the chest, take the new map. Enter the portal.
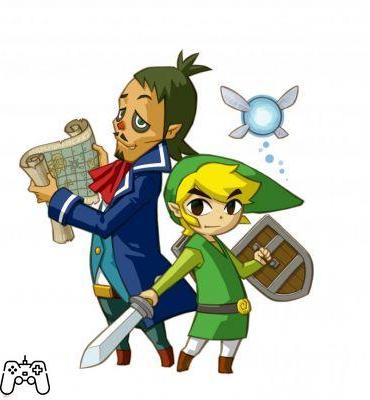
In Search of the Cannon
Go back to the harbor, and talk to the pirate. He will provide you with a map, which however will not be viewable due to dirt. Blow on it to clean it up, and select the first menu option. Head to the island to the southwest. Go up the stairs, talk to the red-haired man, who will open the gate for you. Following the path you will come to some stairs, which you will have to climb. Reach the quarry by proceeding south at the first intersection. Grab a bomb, throw it over the fence to detonate the obstacle blocking the boulder, which you can then move to proceed. Open the chest. Climb up back to the enclosure. The first boulder will have to be pressed until you can no longer send it forward, then pull up the second, and gain access to the second area. Grab a bomb, throw it at the boulder, go up the stairs. You will need to perform a similar move in the next section, but hide in the platform below you. Go back going right, down, then left and up the halls. Grab a bomb, drop off the platform to the north, and head right, firing the bomb beyond the fence to detonate the boulders blocking your path. Left, in the path. Enter the building.
First option in the dialogue, twice, buy the cannon. Exit, return to the ship, talk to the pirate by selecting the first option.Proceed towards the hole in the rocks, the ship will stop and you will see a new target, follow it, it will lead you to the boulders that you can then explode and then pass this section.
In search of the Pala
Create a route that allows you to follow the ghost ship. South, explore before proceeding inside the fog. Go to the island. Talk to all members of your clan. Use the boomerang to kill the guy who comes out of the water. Follow the path to the boom, enter the hole in the wall. Open the chest, take the shovel. Out, and then left. Mark the location of the stone tablets on your map. They form an X, go to its center, and read the book on the table. Take a look at the picture on the wall. Copy the map there. Take the right path, jumping to the other side of the cave. Exit to return to the surface. Go back, and once you reach the fog, use the arrow-shaped path that you found in the island along with the shovel, so as to be able to cross the location unscathed. Then proceed to the anchor on the island.
The Second Temple, and its Island
Look at the post, kill the enemies after going up the stairs, go through the holes, then get to the other side of the island go down the stairs, fighting with the enemies. Throw a bomb on the north wall. Open the chest, take the green crest, read the book. Also read the sign on the wall, copy the map that is shown to you in correspondence with it. Going back outside, go up the halls, jumping on the platform to the right, then back to the left, thanks to the power of the wind we will be able to get to a completely new section. Enter the door on the left. Pass the statues. Eliminate the enemies, take the map in the chest, exit the south door. Use the air to get carried up, jump to the left, climb up while keeping an eye on the sign on the wall, and copying the X on your map. Go back, then left.
Remove the dirt using the shovel. Continue on the central path of the north section. Cover the geyser with the shovel so you can get past it. Examine the mark on the wall, as always you will then have to bring it back to the map. Remove the boulder after going back, granting you access to the next section, where you will have to avoid running into the worm at all costs. The signs just transcribed from the wall will serve you to locate the thrusters; use your breath to activate them, once all three are lit you will have access to the next level thanks to the opening of the blue doors.
The Temple of the Wind
Continue forward as soon as the air opens up. Same thing on the other side. Grab one of the bombs and throw it towards the middle of the group of plants. Pass on one of the bridges thus created. Press the block on the right, stopping near the first jet of air, so you can press the switch near the second, and be able to run forward. Open the door, then you will come to a switch on the ground that you have to press in order to get past this area. On the right, there are some stairs on which you will have to climb, and then two air jets which must also be avoided. Fight the snakes, then to the left you will come to a block, enter the sandy room. Still to the left, take possession of the statue of air, pulling it to the left, and then let yourself be carried away by the wind so you can overcome the hole. In the next section there will be another ground switch to press, which will cause a blue colored door to appear, inside which you will find a flight of stairs to walk along.
Underground First Floor
Behind the boulders there will be 3 hidden enemies. Throw bombs to get them out. Enter the door on the right, go up the switch, enter the blue door created by it, take the ring in the chest, go back to the stairs, enter the blue door, proceed north, try to get to the top to get the chest, at the which interior there will be the crest you need. Take Link back to the blue door, your target must be the second jet of air, to be covered with one of the crates. Proceed to the right, follow the fenced area up to a flight of stairs.
Second Underground Floor
Blow up the wall with a bomb, go towards the center of the map, mark the X's on it, and dig in those spots. In this way you will light the torches, opening the doors. Enter the lower left one. When you get to the statue, move it up to the mark on the floor. Go back to the doors, this time taking the one on the north wall, destroy the blocks to allow access to the stairs.
Underground First Floor
Move the statue to the left, making it coincide with the sign, take the key that will fall from the sky, go back to the stairs, right, go down the next stairs.
Second Underground Floor
Enter the upper right door, get the crates, go out to the upper right corner, explode the crack in the wall, throw a bomb towards the geyser to shoot it up and free your way from the boulder, climb hence the stairs.
Underground First Floor
Throw a bomb at the geyser to create a chain reaction and enter the door. Kill the chuchus, plant a bomb on the tile, go up to the upper section, following the path to a door, up the stairs.
First floor
All the chuchu present must be pulverized. The usual bomb must be placed on the opposite side of the wall, on the tile isolated from the others. North, east, throw a bomb at the plants, open the chest near the door, take the key, left, leave the key safe, use the geyser to detonate the blocks with a bomb, climb up remembering to bring with you the key.
Boss : Vicious Vortex
Limit yourself to using the plants, one by one inside the vortex as the various shadows pass over it. Sometimes it will fall to the bottom section of the screen, where you can slice it. Every now and then try to dodge its tornadoes which can prove annoying. Take the heart and enter the portal made up of the panel. Set sail for the ship. South, pass the first island, then towards Hourglass Castle, enter.
The Second Challenge of Hourglass Castle
You will have to overcome the first challenge, trying to go as fast as possible to avoid losing precious minutes. Enter through the crest door, then go down the stairs.
Fourth Underground Floor
The flashing points on the map are alarms. Right, then down, fire the boomerang, hitting the switch. Down, then left, left again, attack the blue animal, left, left again, to kill the last of the blue enemies with the help of the trusty boomerang. Continue down, dig the garbage, and try to reach the switch, which will turn off all the vents on the map. Destroy the wall, hit the switch, grab the key, go to the door and go down the stairs next to it.
Fifth Underground Floor
Go through all the claws, go into the next step, destroy the electric chuchus, then right, take out the enemies, grab the gold, climb up and throw the boomerang at the switch. Go down the stairs that are beyond the location where the air jets were previously.
Sixth Underground Floor
Eliminate the blue enemy with the boomerang. Jump on the switch near the lower section of the map, stopping the air currents for a moment. Zoom in to see the layout of the room, where you can observe that you have to draw an hourglass along the rocks, in order to open the door, then approach the object resembling a sun, select the southwest quadrant of the map, close the DS and enter in the panel you will have created.
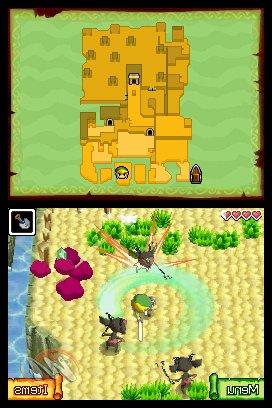
In Search of the Crane - Journey to the Bottom of the Sea
Sail to the island, enter the second room, talk to the blindfolded man, always answering the first option. When he stops talking, blow into the microphone to start him over. You can buy the crane for 200 rupees. Set sail for the green dot indicated on the map.
At the bottom of the Mar
Press the "treasure" icon on the menu. On the lower section of the screen you can see the mechanism that allows you to maneuver the crane. Watch out for mines and other obstacles. Avoid hitting objects. Move the chest to the ship, and take the key inside.
Go back to the island where you got the shovel. Hit the yellow eyes of the enemy you will have to face. Repeating this process 3-5 times will allow you to kill him.
Once on the island, go to the excavation site, jump into the hole, enter the sun door, go back out, go back to the stairs, left, go up the stairs near the stone head, use the boomerang to hit it. Follow the beam, right, smash the statue, turn it towards the temple door, left, destroy the creatures, smash the stone head, and turn it towards the temple door too. You will now be able to enter the temple.
Sun Temple
Immediately to the north, follow the path while staying adjacent to the wall so you don't run into the claws. Run towards the amorphous material with some blue blades, press the switch to open the blue door, go up the stairs, take the treasure chest. Go back the path you were earlier, use the bomb on the faded section of the wall, and walk along the path thus revealed. Get the key in the chest, kill the caterpillar creatures, enter the blue door and go down the stairs.
Underground First Floor
Destroy the creature on the second platform, then off on the passing block, still left, hit the switch with the boomerang, go up the stairs.
First floor
Get over the books. A bomb will need to be placed in the north wall. Examine the picture. Copy everything to the Underground First Floor map. Return to the main room. The bricks will have to be destroyed with a bomb, so go up the platform on the right, then left and go up the platform. Blow into the microphone to scare the voice. Attack it to retrieve a key, go back north and use it on the door here to gain access to the stairs.
Second floor
You will have to turn the switches in this order: north, south, east, west. Get the crystal inside the chest, go down the stairs.
First floor
Place the crystal on the floor, enter the door to the north.
Underground First Floor
Follow the invisible path that coincides with the arrow you have drawn. Attack the enemies. Use the arrow on the eye to create a bridge, then hit the blue light to position it to the right, then shoot an arrow that will come to a switch, and go up the stairs.
First floor
Shoot the eye on the right. Enter the door, go north, place the crystal in the second floor slot at the bottom left of the map, and go up the stairs.
Second floor
Shoot the octorocks. Cross the bridge. Jump to the second block, aim north. Shoot the eye, go past the central block, then the one on the right, north, shoot the eye, then go back to get the chest. Go back to the center, right, right, bottom left, cross the ravine, blow up the brown block, jump the hole, press down the block to kill the enemy, go back to the room on the left side, move the block to the right, open the chest, take the necklace, go down the stairs.
First floor
Go over the ravine, open the door, go down the stairs. Go ahead, circle the torches to the boomerang to light them, which will give you access to the north section. Kill the enemies, shoot the boomerang at the blue object, then hit the switch, and continue north, use your breath to disarm the Pols, go up the stairs.
Second floor
You will have control of the blue block: follow the path you draw on the map. Make it go through a circle that hits all the points where you have to pass. They must be touched following the exact same order of the levers: north, south, east, west. Go get the Boss Key in the chest. Bring the blue block to the lower left side of the room, where you need to open the door.
Boss : Crusty Crab
Flip it over to make the weak points visible. During the first section of the fight he will be invisible. However, you will be able to observe its perspective from the top of the screen, so as to trace its true location, and use arrows at will. As soon as the crab runs towards you, and sees Link's face, shoot to hit him full. The perspective at the top will disappear, and a map will appear in its place. Wait for it to come back invisible, then use the same method as before. You will break his armor, then you will have to hit the blue colored weak spot on his tail. Off into the portal.
Small mishaps
Returning to the port, collect the gift from the postman. The old one near the ship will give you a new Navi, and by combining it with the one you already own, you will get a new yellow Navi. Set sail, fire a warning shot at the ship and it fires one at you. You will be boarded, and you will have to face a fight with the captain. You will have to hit her when she makes the move in which she quickly runs forward and screams, you will have to execute it three times to win. Return to the ship and set sail.
It's time to go in search of the ghost ship. Head north from where you are, then at the top of the map, head northwest until you get to the rocks. Talk to the pirate. Ships will tell you when enemy ships are approaching. Let yourself be captured by Jolene. You will therefore have to fight against her. You will have to hit it while pressing it against the wall so as not to provide any loopholes. In some cases she will block your shots and launch immediately after an attack, you will need to avoid it quickly. Using the stylus on the screen (moving it back and forth) you will be able to make her sword fly away.
Return to Mercay Island. The shop allows you to sell your treasures. For more than 1000 rupees, you will get the Bomb Bag from Beedle's ship.
In Search of the Ghost Ship
Now you have to head to the upper left section of the quadrant, and from there continue north, inside the fog bank. Shortly thereafter you will have to deal with an engine failure, and you will have to manually steer the ship. Look at the reactions of the sprites to understand if you are wrong or not. The more excited they are, the better. Avoid the water mines scattered throughout the level.
Underground First Floor
Head south, open the chest and get the treasure. West, you will have to face a room inside which a large amount of fights against ghosts await you, which will only have to be hit when visible. Eliminate the spiders that appear as you proceed north by using the boomerang, which will have to hit the crystal ball to the north. Destroy the wizards to avoid being distracted in the process.
In Search of the Sisters
Let the nun follow you to the north. Jump over the ravine that you can observe to the north, after taking the triangular gem from the chest, which must be placed in the pedestal to the north, so as to allow you to lead the nun back to the person with whom she must speak. Use the boomerang on one of the spiders. Then with the two sisters back together, proceed to the southeast stairs leading down.
Second Underground Floor
Kill the Reaplings, be careful they can both see through walls and go through them. Continue east, then head north, avoiding all the traps in the path. In the vicinity of the third of the sisters you can flip a switch and then talk to her. Don't follow her advice though, just open the chest on the right. The switch is used to eliminate the claws present along the entire level; Also take the Round Gem, and take the last sister you rescued to the stairs that lead to the First Basement.
Underground First Floor
Thanks to the Round Gem you will eliminate the flames and you can freely escort the sisters. Go back down the stairs to the Second Underground Floor, and then immediately to the Third Underground Floor.
Third Underground Floor
Kill the wizard using the boomerang. Kill the spiders to the east, then turn the crystal ball you find to the north to free access to the room with the batteries. However, this is a trap, so don't go in that direction. It is best to proceed along the central section, north of the room with the barrels, where you will be given the code according to which to pull the levers in the room: 2,4,5,1,3. After pressing them, go back to the north side of the room with the barrels, and enter it, pressing the switch on the ground to free yourself access to the west wing. Avoid running into the Reapling, then take the barrels that you will find at your destination, so as to find the fourth sister. Again, be very careful to bring it back to the reference location as there are Reaplings swarming the area. You will have to bring her back up to the stairs, and then make her reach the First Underground Floor, killing all the spiders present.
Boss: Diabolical Cubus Sisters
The sisters will attack you with laser beams, from above. By doing a spin attack you will be able to reflect the energy. Hitting them in this way is the only way to seriously damage them. Beware that in some cases the ball will literally start to "bounce" between the enemies, and then end up towards you. You will come to a point where only one of the sisters will remain and she will start firing bullets. You will just have to hit the solid one (so that it bounces towards her). Take the Big Key, then enter the door on the Second Basement Level which will now be accessible.
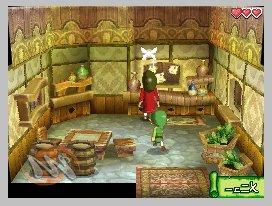
Zauz Island
Towards Linebeck's ship, continuing east. The island is located north of Gust, towards the very top of the map. Immediately after docking, you will need to proceed to the north section of the island, and take note of the location of the treasure.
Draw lines that pass respectively through the two west and east stones, extend them until they intersect and hollowed out at the point of intersection. Talk to Zaus to let you know about the Phantom Sword. You will need to retrieve the materials listed there.
The Secret Cave
Hit the eye of the statue with an arrow, killing the monster, then exit. Take the rupees inside the crates, and staying at the top of the ladders shoot at the eye, point the laser to the northeast, follow it, place a bomb in the point indicated by it, take the Wisdom Gem.
Ocean King Temple - Fourth Visit
Go back to the Ocean King Temple.
Underground First Floor
There will be ghosts that will give you a hard time. It is possible to make them momentarily vulnerable by using arrows towards their back.
Second Underground Floor
The key is in possession of a ghost in the southeast. Destroy it if you want to get it, a good method is through the red vase. So go ahead.
Third Underground Floor
Immediately to the southeast, stationing on the platform to lower the floor. Positioning now in the northeast corner, aim north, shoot the eye, take the chest.
Fourth Underground Floor
The target is the north-east corner of the map, where you will find an eye to shoot so that you can access the ventilation ducts.
Fifth Underground Floor
To get 100 rupees, press the switch located to the northeast.
Sixth Underground Floor
Run without worrying about keeping in the shadows. Draw the triforce symbol in the red door. You may struggle with the fact that the game does not allow lines to overlap. In the next location you will be placed in front of the Door of Courage. Open it.
Seventh Underground Floor
Jump across the cubes, using your shield to avoid being hit by the arrows coming in your direction. Avoid running into ambushes by ghosts. Head to the southwest side of the screen where you will find some stairs.
Eighth Underground Floor
Try to memorize the paths followed by the patrols, particularly of the ghost located below. Reach the east section of the level, marking the location of the triangular pedestal. Go down the stairs in the southeast corner.
East Underground Seventh Floor
You have to overcome the flames. Help yourself by taking the red vase located along the walls to the east, which will be used to be pulled on the switch when the ghost is facing the opposite direction. Head out west, open the chest, grab the Round Crystal, jump across all platforms, to the northeast corner, grab the Power Gem, shoot the boomerang, grab the crystal, go down the stairs.
Eighth Underground Floor
Take the crystal with you as you jump over the ravine, place it in its appropriate pedestal, then flip the switch, and go down the stairs.
Ninth Underground Floor
Open the chest to get hold of the Triangle Crystal, then immediately go back up.
Eighth Underground Floor
Move to the blast of air, get carried to the upper level, throw the crystal to the other side, take the triangle, place it in the pedestal, proceed along the walkway, take the Courage Crystal, then down the path, get the ball crystal, and use it to gain access to a door nearby, and then go down the stairs.
Ninth Underground Floor
Locate the invisible ghosts on your map. Kill the skeleton first with the boomerang. The same procedure can be repeated serially for all the ghosts in the area. Be careful never to turn your back on them, as in that case you would be roasted in two seconds. As you move around the map you will come to an arrow target, turn the directional contraption and shoot an arrow with the boomerang. North, destroy the blocks with the bomb. Wait for the Swift Phantom, hit it with an arrow, take the Square Crystal, again southwest, climb the plate, causing the destruction of the floor below, eliminate the ghost, take the chest, place the square crystal on its pedestal, and you can then avoid the flames by arriving at the floor below.
Eighth Underground Floor
Collect all the crystals in the level. The first is located on the pedestal, and is the Round Crystal. South, jumping into the air stream, throw the crystal over the ravine. Go back along the invisible path, take the crystal, placing it in the pedestal near the Ninth Underground Floor. Go back upstairs, get the crystal triangle, off to the northwest corner, get the square crystal. Go into the room, place the crystals as directed, and you will drop the floor down, enter the blue portal, and go back out. Add the Strong Cannon to the equipment available for the ship.
In Search of the Hidden Islands
Continue towards the southeast quadrant. Harrow Island
Nod-east, look for the quadrant consisting of three small rocks, which contains Harrow Island. You will be able to face a mini-game especially suited to obtaining treasures.
Hidden DS Island
This island is located in the southern section of the map. There will be large rocks near the edge of the explorable space. Docked, you can participate to get some rupees with the missions, or get a Courage Gem by eliminating the cyclops.
Crown Island
You will be faced with the need to fight yet another sea monster. Shooting repeatedly without following particular criteria you will be able to kill him with ease. You will then arrive at the island. Go ahead, talking to everyone present. Read the sign, continue north. Jump on the airjet to the platforms. Kill everyone and get the treasure map. Go back to the signal and yell into the DS microphone, then talk to the other Gorons in the area. Now go back to the chief.
Here you will have to pass a quiz, the order of the questions to which you will be subjected is random therefore precise indications cannot be provided. Go through, he will give you a Wisdom Gem and then you have to follow his little son Gongoron.
At the Temple
You will find Gongoron on a precipice on the west section of the island. Explore the whole maze and get the rupees. On the north side, you will find two irregularities in the terrain, by shooting here you will have access to a passage, where you can get the power gem inside the chest. Shoot the bombs at the wind monster, go up the stairs, enter the temple.
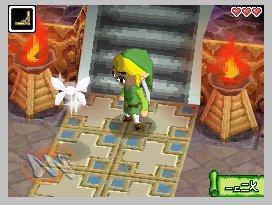
Goron Temple
First floor
Immediately head east, hitting the blue jams with your boomerang. Use the switch to avoid getting into the claws as you proceed towards the statue. Fire a bomb at the next statue to make it harmless. Go up the steps and do the same on the statue you find at their end. Get the treasure map. Continue west, destroying the statues with bombs. Hit the eye to get the rupees inside the chest.
In the Cave
You will need the switch to be able to return to the temple. Blow up the wall to the east, get the bombs inside the room you will gain access to. Enter, coming to a conduit towards the first underground floor.
Underground First Floor
Eliminate the skulls using the boomerang. Kill the Cyclops before proceeding to kill Gongoron. You will therefore gain the opportunity to control it. Taking his likeness, move south, smashing the rocks. Jump on the enemies to pulverize them. Returning to Link, follow the path south, coming to some wind creatures to be eliminated with the arrows. Gorgoron again, you will have to blow up the hole to the west, then making him stay on the platform here. Now go back to Link, who will have to reveal a chest with Bombchu inside.
With Gongoron, proceed to the lower right corner of the map, then take control of Link and enter the west door. Kill the enemies, get the Goron Amber in the chest. Get the Bombchu into the wall, and you can proceed to the next floor.
Second Underground Floor
Bombchus can be used to eliminate enemies before you can even see them. Destroy the rocks as well, in the end there will only be two switches left. You will have to stand on one of them, and send the bombchu to the next, giving a sword to the first as soon as the second has been reached, so as to free yourself access to the lower floor.
Frost Island
Your target is the northeast corner of the map. Destroy the ice shield surrounding the island with the cannon, pulverizing the enemies that attack you as you perform this tedious task. You will then arrive at the port. You will be prompted to go and speak to the village chief immediately. North, then dig near the east signal for rupees.
The Liar Game
Here you will have to understand who is lying. Since there is only one traitor, anyone who tells you that someone else is honest will be honest himself. Only Aroo, Gumu and Kumu remain to be controlled. After doing another double check, you will easily come to the conclusion that the traitor can only be Aroo. Get Aroo out of his house. Return to the village chief, who will allow you to access the cave. Crossing the Frozen Lands Enter the cave east of Anouki village by reaching the frozen surface. Kill all the Yooks by having them swallow a bomb, and then killing them with the sword. This will also unlock the passage to the temple. But before you get there, you'll have to kill a super Yook. Here too the technique will be the same, but you will have to repeat the procedure more than once.
Second floor
Go up the stairs to the north.
Third floor
Enter the hole in the ground that you can see to the south by shooting an arrow at the switch. Then pull the levers (from left to right) in the order 1,4,3,2. Go up the steps, ignoring the switches and instead concentrate on staying along the walkway until you get to the southwest corner of the room, grabbing the treasure chest that you can locate there. The switch must be pressed with the use of a bomb, in order to obtain the chest that you will need to take the Wisdom Gem inside.
Boomerang puzzle
Climb the middle platform after returning to the steps. Continue towards the one to the west, with a single sign above it, which must be read, and then use the boomerang so as to turn on the four switches in sequence starting from the northwest to the southeast. Take the Small Key that will rain down from the sky after performing this move, go up the stairs to which you will gain access.
Second floor
Here, too, you will have to pass a battle room inside which there are some Yooks. Take the hook that you will find in the chest, which you will need to cling to the column that allows you to overcome the ravine to climb the stairs.
First floor
The spiders will be eliminated through the hook, more precisely it will be used to destroy their helmet and then hit them with the sword. Then flip the switch leading to the main hall, using the hook on both tongues of the statues, which will lead to melting of the ice.
Underground First Floor
After destroying the wall, flip the switch and grab the rupees inside the chest. Switch next to it again, cross the bridge, activate the blue switch with a bomb. Create a rope to the east. Pull yourself to the switch and grab the crate. Continue northeast, stick your tongue at the statue, run south before the ice clears. Flip the switch, then north, take the Wisdom Gem, drop the red blocks by activating the switch.
Towards the West
West, create a rope towards the two posts south of the eye. It is possible from here to launch the boomerang in order to hit all four targets to the north, allowing you to pass thanks to the melting of the ice. Destroy the blue panel, then go to the tongue of the statue, and pull it along the ravine to have more time, then go back to the two poles to the west, and continue towards the door that will now be open, then go down the stairs.
Second Underground Floor
West, cross the ravine using the hook on the torch. Kill the enemies while avoiding the spinning blade. Create two ropes, one that leads to the north edge of the room, and one that leads to the west side of the platform. Position yourself in the middle of the switches and carry out the usual spin attack useful to press them all at the same time. Bomb the wall, then continue southeast.
The chest
Create a rope between the torches, jump to the platform above you, shoot an arrow at the eye, so as to allow you to proceed north. Jump on the small platform, then lean out on the north side, create a connection between the two poles, shoot the rope, so as to deflect the shot towards the eye and be able to take the chest with the small key.
Combat room
You will need the key to unlock the battle room, kill the enemies inside, get the rupees, enter the south door, climb the hill using the poles. Press the switch you will find shortly after, walk along the ice path, press the switch, open the chest, inside which you will find the Boss Key.
Boss : Gleeok, Two-Headed Dragon
Phase One: The use of the hook will be of primary importance. Immediately memorize the location of the columns along the room. Memorize the movement the dragons make as they try to shoot you a fireball so you can anticipate them. The strategy is to build a rope that connects the north-west to south-east columns as soon as the dragon on the left tries to shoot you, so as to reflect the fireballs towards him! The same strategy is mirrored against the other enemy.
After a while, they will retreat into the water, causing a flood. Jump on a column to avoid it. Try to avoid the ice by jumping from platform to platform, eventually arriving at the mainland.
Phase Two
The dragon's head will remain free of masks. So one head at a time will try to attack you. Avoid it, waiting for the moment in which they will start to load their tongues: only in that moment will you have to attack them, using the hook so as to hook the tongue to one of the columns and make them slam. Take the sand and the heart. Also take the Azurine at the top of the pedestal. Get all your stuff, and get out of the temple.
Ocean King Temple - Fifth Visit
Go back to the Ocean King Temple.
Underground First Floor
The hook and crossbow will allow you to unlock a chest with a Courage Gem, if used west of the door.
Second Underground Floor
Use a bombchu for the switch while blasting the wall in the northwest corner with bombs. In the chest, take the gem of wisdom.
Third Underground Floor
Using the hook north of the entrance, between the two torches, you will find an easy shortcut to the upper platform. However, it is essential to proceed to the southeast section to kill the patrolling Phantom by taking the key.
Fourth Underground Floor
Proceed to the northeast corner, shooting an arrow in the eye to clear the smoke jets, then position yourself adjacent to the north wall, and continue west. The bombchu can be useful for bringing down the claws. The door must be unlocked with the key that was provided to you by the Third Underground Floor.
Fifth Underground Floor
Pull out an airjet to go to the switch and press it, grab the treasure map, and jump to the next section.
Sixth Underground Floor
Continue to the door to the northeast, shooting the eye-shaped target, arriving at a treasure chest. Take the 30 second boost, head back out, and place the triforce symbol in its place.
Seventh Underground Floor
Jump across the platforms to the northwestern section, but avoid proceeding to the northeast corner. Pull up in the middle section with the hook. Open the chest, and grab the crystal, and walk along the platform, grab the crystal, and then drop down.
Eighth Underground Floor
Use a bombchu in the appropriate slot to reach the lower floor.
Ninth Underground Floor
The other two crystals you need can be found in this section. Kill the ghosts, and place the crystal in the pedestal. By eliminating the ghost you will get the square crystal which must then be brought back to the north-west corner of the map, and placed in the pedestal. In the chest nearby you will find the triangle crystal. First place the square one, then the circular one, then the triangle. Exit south.
First Underground Floor - Ground Floor
Throw a bombchu up the path to the east, so it hits the switch. Proceed along the path now free from claws. Press the boulder to the south, killing the ghost in the corridor, and grab the key. Continue to the northeast corner, jump and use the hook to get to the safety area. Press the boulder away and kill the ghost. Continue along the corridor, take the time bonus, bomb the area to the south, and enter the hole created. Once the last Phantom Eye is killed, you will see a large chest on the south side, which can be obtained by going back down the previous corridor.
First Underground Floor - 1
To the east, take the red vase. Throw it into the corridor, then continue to the northeast corner. Go back to the vase, then go northwest, pressing the switch. Board the airjet, then drop down after hitting the two switches. Continue southwest, hit the switch to the southeast of the room, cross the bridge with the help of the airjet. Hit the switch and go up the stairs.
First Underground Floor - 2
Hit the pots with the boomerang, and flip the switch, then walk to the northwest corner, grab the red pot and break it. Open the chest at the bottom right of the map, grab the Force Gem, and place it on the pedestal in the north room.
Hit the ghost with an arrow, then take the Force Gem, placing it on another pedestal. Go south-east, climbing along the passage, taking the last force gem, to be placed on the last pedestal in the central hall.
First Underground Floor - 3
Take the northwest sea map, and return to the ship.
I Mari di Northeast
Continue southeast, then head to the lower right corner a which leads to the isle of the dead.
Isle of the Dead
Enter the cave in front of you. Read the book. Head to the west section of the room, detonating a bomb will reveal a secret room. North, kill the bats, reaching the treasure room. Go outside by taking a look at the main section of the island. Enter the pyramid to the northeast, taking a look at the signs. Follow the advice you can read on the sign on the right, but first exit the pyramid.
The Hidden Quarry
Blow up the hole in the wall, get the treasure inside. Proceed to the exit of the room, take the treasure map, and press the switch. Go to the Tomb of the Six Sages, reading the signs, which read: go north through the first room, then east through the second, east again through the third, north through the fourth, and north again through the fifth. Return to the pyramid, following the instructions to Brant's tomb. Open the chest, take the key.
The Isle of Ruins
Proceed west to get to the island. Kill the warrior, proceed along the maze, then northwest, kill the worm in the alcove, east, go up the stairs that go northwest, pass the boulders, and enter the pyramid.
The Three Horsemen
Talk to Bremeur, exiting his pyramid, and proceeding along the bridge. Go up the steps, go to Doylan's temple to get a key to use in Bremeur's tomb. Now east along the river bed, press the boulder at the top of the ladder, then press the south one, smashing the one below, exit the screen so that it reappears in the right place and proceed towards your goal.
Max's challenge
Press the switch to the south, then enter the temple. East, inside the corridor. Go back to the maze. You will need to find the five signs inside it. The reference point will be to the northwest, where you will see a star sign advising you to proceed east. From here, south to the southwest corner. Northeast, then southwest corner, north, and the symbol will be created. In any case, the tablet in the corridor can indicate precisely how the symbol was built.
Mutoh Temple
First floor
You will have to pay close attention to the conspicuous presence of traps throughout the map of the level. Your starting point should be the west wing.
West Wing
Locate the switch in the room to the west by placing an explosive charge on it, then jump on the blocks that will be activated. Kill the enemies in the battle room and then proceed to the bridge.
Ala East
Blow up the wall south of the bridge, flip the switch, run across the bridge, then north again killing the skeletons, switch and ladder.
Underground First Floor
Walk east, then south, then go up the stairs.
First floor
Avoid wasting time with the turtles by simply climbing the stairs again.
Second floor
Kill the worms with the hook, then continue south, and go up the stairs.
Third floor
Killing all enemies will allow you to get hold of the hammer.
Second floor
You will have to immediately use the hammer to hit the switch, then go up the stairs, and be thrown to the top of the room, where you have to kill the turtles, and then come back down.
First floor
Press the switch after killing the turtles.
Underground First Floor
Destroy the boulders to the west, proceed along the path, hammer the skeletons, and enter the pit.
Second Underground Floor
Jump on the platforms while smashing the skeletons. Take the Courage Gem in the southwest corner of the map, go up the stairs, take the Small Key, go up.
Underground First Floor
Proceed north, open the door, go back down to find yourself in front of a puzzle. Press the switch in the middle in the bottom row first, then always in the middle in the middle row, then again in the middle in the bottom row. Walk south, grab the arrows, hit the pyramid-shaped switch. Punch the ground after moving south to open a nearby door. Continuing south-east you will come to the ladder that will lead you to your next destination.
Second Underground Floor
You will have to keep turning the switches until you get vertical lines made up of two Xs and an O, then jump to the O and turn the other switches to make the line even. You will unlock a bridge to the southeast.
Underground First Floor
The stones above you indicate the true configuration of the puzzles. Then position yourself on the platform by going up to the upper section. Point the arrow south, then shoot to clear the water. Proceed east. Here you will have to turn the blocks to make them match the figure indicated above. Enter the blue door, press the boulder, then with the hammer make him go up the stairs, arriving at the treasure chest. Proceed to the northeast corner. Unlock the door, throw the boulder to the next platform, continue with this procedure until you reach the top, where you will let it go down and take the key, then go down through the shaft.
Second Underground Floor
Place the key on the block, using the hammer to kill the skeletons, then move it to the door to gain access to the boss.
Boss : Eox, Ancient Stone Soldier
Phase one
Stay outside the ring, where he cannot reach you; however, you will still have to avoid the fire claws. Use the hammer on the platforms, trying to hit the targets on Eox's body while in midair. To be able to hit those on the back you will have to wait for Eox to shoot you, then quickly jump to the platform behind him, from where you will be able to deliver your shot.
Phase Two
4 more targets will appear. You will have to be able to hit them all; if you can do it in a single leap, it's better. Only his head will remain.
Phase Three
Jump on Eox's head by anticipating his movements along the platforms. By continuing to repeat the procedure you will be able to spread it out quickly.

Return to Zauz
Return to the northwest section of the map, to Zauz Island. Give Zauz the metals to make him create a sword. Go find Jolene's ship. Fight with her. Return to Zauz after defeating her, take the sword. To get the Phantom Sword, return it to Oshus' hut.
Temple of the Ocean King - Last round
Enter the temple, and use the shortcut to get directly to the seventh floor, go down the stairs.
Seventh Underground Floor
The Phantom blade will allow you to kill ghosts here. However, it is better to do it starting from their shoulders. Proceeding along the platforms you will come to a crystal, go down the stairs to the southeast.
Eighth Underground Floor
Use a Bombcuh to push the switch, and take the crystal north. Take it with you going down the stairs.
Ninth Underground Floor
Release the crystal on the pedestal. Kill the ghost, and place the crystal he released into the pedestal. Take the triangular one from the chest, then go and get the square one. Place them in the order: square, circle, triangle, then continue north.
First Underground Floor - Ground Floor
Hit the switch with the hammer, retrieving a chest containing a treasure map.
First Underground Floor - 1
Kill the ghosts, avoid coming into contact with the puzzles, preferring to go out the door to the east.
First Underground Floor - 2
Hit the switch, jump to the chest, get the treasure map. Kill the ghosts, get the gems.
First Underground Floor - 3
Take the red vase, throw it on the floor near the treasure chest. Let the ghosts pass, enter the blue door that has now been created.
Boss: Battle
Phase one
As his main attack, Bellum has a spit at his disposal that creates monsters from the ground that are easy to kill. The secret to killing him is to use the hook on the smoke present near his body so as to make him approach you and hit him with the sword. Follow him up the stairs.
Phase Two
His main attack here will be a slap, be careful because it is quite harmful. Shoot the eyes that go up the pillars, this way Bellum will return to the first phase.
Phase One-2
Same as above except for more smoke on Bellum's body.
Phase Two-2
The pillars are your salvation to avoid Bellum's new attack, a whirlwind of fists; you'll have to shoot the targets on his hands when they turn yellow. The phase then repeats itself, but at greater speed.
Phase Three
Ciela will give you the possibility to stop time through the hourglass. You will have to press the icon at the bottom of the screen, and then draw the hourglass symbol in the box that will appear immediately after. Bellum will just go around the level, you will have to limit yourself to avoiding him. Stop time and hit it.
Boss : Possessed Ghost Ship
The ship will shoot you with bullets that you will have to deflect, otherwise an entire heart will be destroyed. Free from worry, strike the purple and yellow eyes of the ship. After a few laps around the ship, you'll need to hit the eyes on the deck.
Boss: Battle Knight
Use Potions to restore your HP. Stop time, and head to Bellum's back, where her weak spot is located. Celia will be captured, and you'll need to trap Bellum on a corner of the platform and then hit him to free her. Beware of his attacks consisting of a sword from above the head, and a jump with blow from the side. After a while you will be head to head with the sword, you will have to use the stylus on the screen to win the confrontation. With the hourglass fully charged, you can attack Bellum's weak point. As the fight progresses, the difficulty increases due to a new attack available to Bellum, a tornado. The best way to know when it's coming is to memorize the sound associated with it. It will perish after a few more well-placed hits.
Video of the solution - First part


