


Please note:
The solution is based on the American version of the game, so there may be differences for the Spanish version.
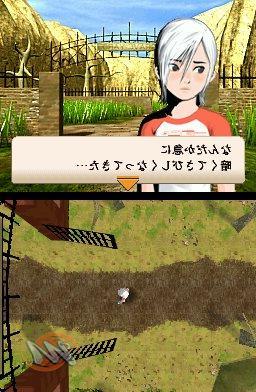
Chapter one: The meeting with D
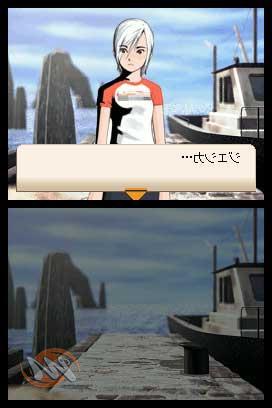
After watching the introduction you will start on a ship with Jessica. Approach her and press the blue symbol (talk) to watch her, press it again to talk to her. After you finish talking the ship will dock on Blood Edward Island. Jessica will go on her behalf to try to find Richard, Ashley's father. Talk to the captain, standing by the ship, she should give you some treats. Now follow the road until you come to a drawbridge which will rise to prevent us from crossing. Approach the bridge and search the area (press the "investigate" symbol in the screen below). Click on the drawbridge for a description. Then click on the crank near the right of the screen, a large image of a crank should appear in the bottom screen. Click the crank again and the image will change to a front view. Press on the actual crank and turn it twice. The bridge should close. Cross it to reach the next area. Keep walking until you notice a stone slab on the left. Examine it. Walk to the door and examine it, click on the broken placeholder until you get a bunch of broken pieces on the screen. Move and rotate them to put the signal back in place.
Walk right and keep following the road past the boulders and into the cemetery. Approach the tombs below and look at both of them. Walk right to the wall and examine it. Look at the stone slab. You will need to press the left side of the plate and move your pen to the right. Repeat until the stone is cleared. We should now meet the ghost of D. Talk to him and he will disappear. Walk right, through the hole in the wall, and follow the road. Go through the archway, walk up to the rails with a mine cart and examine it. Look in the toolbox to find a gear. Walk to the car on the left and examine it. Click on the machine and then on the metal plate. Try to clean it up a bit to find that you can't get rid of the rust. Walk right and look at it again, find another toolbox and pick up the metal brush with a little gray opra. Now you just have to go back to the plaque and use the brush to remove the rust, scrub until it is clean. Look at the logo, you will have to remember it to enter the building. Now go back to the gate and sign, look towards the gate and use the gear on the lock. Press the two symbols that match the logo seen on the plaque and sign. (for me they were top right and bottom center).
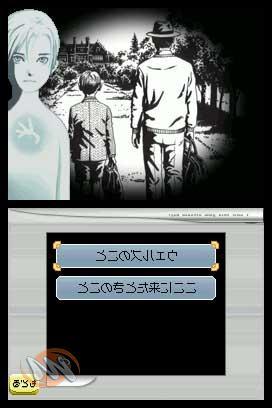
Now go through the open gate. Go to the large wooden door and examine it. Look at the sculpture of the hand on the left and then the one on the right, it should zoom in closer, click it again. Reach the small shed on the left. Inside you should take a look at the work uniform. Click on the uniform pocket and you will find a picture of Ashley and Sayoko. Look in the crates and you will find some iron balls, collect the smallest one. Look at the desk, click on the drawer and then on the paper to find the cover of the essay. Click on the books and then on the black and white deal. This is a DAS card that contains a message. You will find these cards scattered throughout the palace. Go back outside and talk to D. again. Click on the right hand sculpture and use the sphere on it. Now you have to press on the sphere to turn it in your hand. When you are done the door will open. Now you will be asked about the events that have brought you this far. Don't worry about getting the wrong answer, the question will simply be asked again. I think some questions are not asked if certain things have not been done, these are the questions I had to answer.
Quiz Answers:
Q. A few days ago I received a letter from my father. Before this I thought he died when I was three. Using the letter I looked for him as far as the island but when I arrived he was not there. The first person who had gone looking for him was ...
R. Jessica
Q. In the past there was a prosperous family who lived on this island. But they all died with mysterious causes leaving the island uninhabited. The family name was ...
R. The Edwards
Q. While I was looking for Jessica and my father I explored the cemetery. Inside were the tombs of the Edward family. The names on the graves were ...
R. Henry e Thomas
Q. After moving a table of rock from a hole in the cemetery wall I met a ghost named D. From before D had no memory of his life. But when he talked to me he remembered something. Something...
R. About his father
Q. I found Jessica's glasses on the gatehouse door. I went in to look for her and there I found a DAS card inside her that contained a message from my father. I also found a chest of drawers in there. Inside was ...
A. The cover of an essay
Chapter Two: The Lawrence House
Go up the stairs and enter the building. D will talk to you before going inside. You will now find yourself in the entrance hall. Take a few steps and D will talk to you again. Look at the door and try the lock, look at the paintings to the left and right of the room, then look at the larger versions. D should have a memory back. Take a photograph of both paintings using the DAS, you can click the camera button or press R. Now turn around. Click the DAS icon or press start. Click on the film to see the images. Click on one of the bird images and press the top icon to transfer it to the top screen, then choose the other image and press the bottom left icon to place them one on top of the other. Using the arrows, move the images to form a four-leaf clover. You should see a code, he gave me 1128. Click on the door above and give him the code. Enter and you will be in a corridor.
Walk forward and D will interrupt you, keep going until you get to the picture. D will remember another memory. Look at the picture and enter the upper left door, the music room. Try playing the piano, looking at the keys. Also look at the picture next to the piano. Go to the papers scattered on the ground to get the pages of the essay. Look at the bookcase near where you collected the pages, keep pressing on the white papers until you have to move them. Click on them (all of them) to find that you will need more books, we will find them soon. Look at the shelf to the right of the bookcase to find the DAS card 902. Leave the music room to enter the door on the right, the BUTLERS ROOM. Walk to the right of the desk, look at it and click on the small drawing on the right to find the DAS card 901. Click on the notepad on the desk and take the DAS card 01, click on the notepad and quickly shake the pen left and right. The pencil will break. Look at the bookcase on the left and you will find a white book. Click on the book to receive Book Y. Go to the bottom left of the fireplace and click on it to get some coal. Go back to the desk and use the coal on the notepad to reveal a message. Go up the stairs to the three cups. In the left cup you will find a letter, click on the central cup to find a photo album. In the cup on the right contains a notepad, a parchment and a puzzle with movable pieces. Read the book and the parchment by touching all the underlined names. Then try the puzzle. To do this you will have to slide the squares to the exact position. It can be problematic, you may find it easy or difficult. When you complete it you will get a silver medal.
Leave the room and return to the entrance hall. Look at the bird statue and place the silver medal on it, you will get the four-leaf clover key. Go back into the hallway and use the key on the lower right door. Enter the golden bird room. Look at the shelves with the books in the upper left and pick up Book E. Walk to the desk in the lower left of the room and look at the wooden gun box to get D to regain another memory. Look at the doll. Go up the stairs and look at the closet. Check the second closet window (the one on the right) and, in the lower left part there is a glass with the second four-leaf clover key inside.
Leave the room and go to the opposite door. Try to use both keys and you will see them both. Turn one key so that it is turned the same way as the other, then turn one so that the protruding pieces are opposite, now put them together and place them in the lock, then turn the new key.
Enter the silver bird room, go up to the right and look at the bookshelf to get Book N. Walk down to the left to find a bloodstain on the carpet, which will make D remember something, now look at the bird cage on the ground and will remember other things. Go up the stairs to the desk, look at it and take a look at the red book and a torn piece of paper. You will have to put it back in place by putting the various pieces back in the empty areas. You will find that it is the rest of the diary. Now go back to the music room and look on the bookshelf above. Using the books below you will need to finish spelling HENRYTHOMAS. Now look at the signs of the zodiac running along the top and you will have to copy them. Go to the piano and play the signs you copied or use the guide below that I have so kindly prepared for you.
Give an increasing number to the keyboard keys (start from 1 on the left to get to 8 on the right) and play them in the sequence below:
4, 5, 6, 5, 1, 5, 6, 5, 1, 6, 4
A library should move allowing you to go further into the building. At this point you will be darted into the events that led up to this point.
Quiz Answers
Q. I entered the building that was once occupied by the Edward family with D in hopes of finding my father. In the entrance hall there were two paintings and a sculpture of a bird. The key was hidden as a part of the bird sculpture ...
A. Key to the golden bird room
Q. In the wardrobe of the Butler's room I found that Leonard, the son of the owner of the building, left the house and had two children. Leonard fell ill and died young, so the owner, Lawrence, took the children, Henry and Thomas, into custody. In preparation for their arrival Lawrence has prepared two special rooms. These rooms were called the golden bird room and ...
R. Room of the silver bird
Q. Who was D's father? D still can't remember his name ... and I haven't found my father yet ... but I managed to find some traces that lead me to him ... the DAS card I found in the Butler's room said that dad was very much inside the palace. And the message that was on the notepad ... the name that was written on that note was ...
R. Bill
Q. So, in order to get deeper into the palace ... I had to solve the puzzle with the books in the music room. To solve the puzzle of the melody I found 3 books. There was the book Y, the N and ...
R. Book E
Chapter Three: Franny's Memoirs
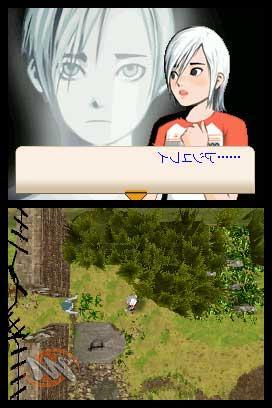
You will now be on the other side of the secret door. Continue for a while and D will remember other details, turn right into the art room. Go to the top left, look at the chest and click on anything, then leave it alone. Go to the top right and look at the drawing, take the DAS 02 card nearby. Now go to the back of the room and look at the image on the three-footed for D to find another of his lost memories. Start leaving the room and Ashley will start thinking. Exit and head into the room on the left, Henry and Marie's bedroom. Go left and examine the cloakroom to find the DAS card 904. Walk a little further left to the table. Look at the photos and the bottles, go back to the art room and take the hammer from the trunk. Go back to the bottle and use the hammer on the bottle to get a letter and the key to the golden bird. Go to the top right of the room and look at the little figures. Leave the room and move on. Enter the next door on the right, this is Franny's room. Go down and look at the locker. Take a look at the teddy bear and Ashley will remember something. Go back up to the bed and look at the pink bow to make D remember something else about her memories. Go to the top right of the room and look at the desk. In the desk drawer you will find the DAS card 903. Look at the sketchbook above the desk and then take a look at the wooden box to the left of the screen above the white shelves for stamps. Use the stamps on the sketchbook, then close the Nintendo DS. When you open it, the card will have been stamped. Do it again and the image will be complete. Leave the room and D will remember other details.
Enter the next room on the left. This is Henry's study. Go to the top right and look at the table, take a look at the pictures. To see them properly, mirror one screen on the other. Reflect the key on the book and look at the letters that form on the right of the screen (F, 3). Now look at the recorder in the background. Go left and look at the paintings above the fireplace, click on all the angels playing the instruments. Head to the lower left and look at the shelves with the books. You will have to find the shelf with the books of the letter F, the bottom row, choose the big black book at the bottom and you will get a key. Exit the room and go back to the music room and then go to the golden bird room (bottom right in the hallway). Go to the desk and look at the dolls, take the one that is holding the drum. Go back through the music room and enter Henry and Marie's bedroom (bottom left of the second corridor). Go to the top right and use the doll with the drum on the other doll, then use the key on them. Turn the key by dragging it from top to bottom then press the button under the drum, the flute and the horn. A secret door will open into the next room, Henry's study. Exit and go up. Look at the wall and the candles. Enter the upper left room, Henry's study. The fireplace moved to let us pass into the room behind it. Once inside look for a covered wooden box and you will find a baseball, look up and you will see a suitcase on a shelf. Use the baseball on the suitcase, you will have to hit it as you did earlier in the game. Hit it three times and you'll drop it. Take the shoe from the open suitcase to remind D of another of his lost memories of him. Look at the wooden boxes, pick up the matches and look at the photographs, remember the one that has an open door and look at the candles. Point at the candles in the second photo to make a red circle around them. You should hear a noise. Exit the room and go back to the corridor to reach the candles again. Use the matches on the candles and light them as you saw them in the photograph with the door open.
If everything has been done properly, a secret door should appear. Now it's time for another quiz.
Quiz Answers
Q. While I was looking for my Father and trying to bring his memories back to DI, we passed through a corridor and entered the art room. There was an old Franny drawing in there. The person who drew it was ...
R. Henry
Q. There was another drawing in the art room. It bore dad's signature on it. The drawing portrayed ...
R. Ashley
Q. After reading my father's message on the DAS card, we walked inside the building to look for his research laboratory. In Franny's room I discovered ...
R. The name of D's father
Q. On the bookshelf in Henry's study we found a key to the music room. I played the piano using the angel dolls that moved the fireplace inside the studio. We found a secret room behind it. In that hidden room was a suitcase. Inside we found ...
R. A shoe.
Chapter Four: The Reunion with the Father.
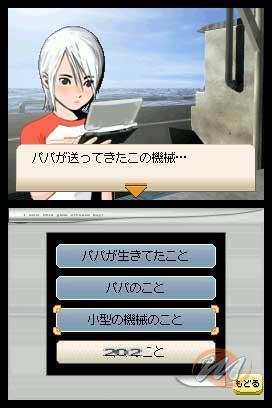
You are now in the dining room. Walk to the left of the table and look at the newspaper. Continue left to the fireplace, look at the burnt papers to collect the burnt essay, look at the picture, click on both boys and on the edges of the photograph. Head to the center of the table, bottom not top, and Ashley will remember something. Go out the door to enter the living room, you will hear a loud noise, it is interference coming from the radio. Then approach the radio and click on it until you can control the various knobs, now turn them to tune the radio. The right one should face down and the left one up and left diagonally. See what happens. Talk to the man and, after you are done, he will leave. Walk to the right and look at the table: pick up the lighter from the ashtray. Reach the corridor, walk left and enter the kitchen door. Go right and look at the sink, also take a look at the fabric next to it. Now look at the refrigerator and nearby cabinets to the left. Looking in the one in the center you will find the DAS Card 905. Walk left towards the locked and tied doors, you will need to find something to cut that rope. Go to the right of the oven, open it and take the knife that you will find inside. Go back to the door and cut the string by moving your pen up and down on the string. Enter the warehouse room to meet Jessica, of course talk to her. Go to the top and look at the dusty photograph, clean it of dust. Look at the picture and take a picture of it. Leave the warehouse and the kitchen. Look at the blue image in the wall below and take a picture of it too. Enter the DAS menu and click on the "photo" button, choose the photograph of the orange bay and press the button above, now overlay the photo of the blue bay and rotate it, you should see a code, that is 2369. Go to the far right and use the code on the door. Hey, it's quiz time again!
Quiz Answers
Q. After solving the mystery of the candlestick in the last corridor, we entered the dining room. Inside the fireplace we found ...
A. A burnt essay
Q. In the old newspaper I found on the dining table there was an article about my mother's murder. After reading it I remembered the night Mom was killed ... My recurring nightmare is from the night she died. The major suspect in the murder cited in the article is ...
R. Richard
Q. What happened next? Who was that person in my dream? My mind brooded as I walked deeper into the building ... and finally, in the living room, I met my father ... dad ... I asked my father about the things that were written on that article. I asked him who killed Mom. He replied ...
A. That he hadn't killed Sayoko
Q. After waiting for my dad for a while, I went to look for him. I headed to the back of the building. The door between the kitchen and the warehouse was closed and tied. What did I use to open the warehouse door?
A. A dirty knife
Q. Although Jessica was beside herself and exhausted, she was fine. I was relieved to have found her again. Who did this to Jessica? Was...
R. Bill
Chapter Five: The second Another
You are now in another corridor, head up and look at the door, then enter the door on the right. This is Lawrence's room. Go up and look at the photographs. Look at all three family members to bring back some of D's memories. Also look at the bookcase next to the photographs to get the DAS Card 906. Go back down to the desk and look at it. Use the golden bird key on the drawer to find Lawrence's diary. Look at the kaleidoscope on the table, turn it a little and leave it alone, you will need paper to make it work. Head down to the bed and Ashley will hear something, go to the top of the bed and look in the drawer to find a will. Now you will have to go back to the art room. (For those who have trouble finding their way back, exit the room, go down and enter the door, go left and enter the lower door, now going down and left you should find yourself in the dining room, go down and the art room is the stone door on the right.) Look at the chest and pick up the paper, exit and go back the way you have already traveled to Lawrence's room. Put the card inside the kaleidoscope and turn it quickly to see where the bird will fly (if you are playing for the second time it will be a ninja). Go to the bottom left, to the bottom of the bed and look at the painting, touch the spots where the bird (or ninja) landed, including the starting point. When you are done, a button will be revealed to you, press it and you will be shown a secret door.
You will meet another guy, touch his face to wake him up. Give him a candy and you will get some chocolate in exchange, then talk to him. When he's gone, take a look at the writing machine and look at the letter to Franny. Walk to the right and look at the safe, look at the nearby letter and look inside the safe in the account book. Leave Lawrence's room and the door at the top will open, go through it. You will find yourself inside the laboratory, approach the door and give it a look, look at the glass window and blow into the microphone to make the numbers appear. Type 5819831220 in the keypad. In the next area, walk up to the computer at the top and read all the files. Look at the photograph next to the monitor, click on Sayoko's face to get the white DAS Card, likewise look at the other faces as well. Walk down and look at the shelf on the right, look at the photographs, look at all 4 people and finally look at the teddy bear. Take the red DAS Card from the teddy bear and take the teddy bear with you as well. On the shelves to the right of the bear, just above the card box is the DAS Card 907. Walk to the right and look at the large drawing. Look at the open drawing to get another report. Look at the closed drawing above the open one to get the DAS Card 908. Now walk through the door and keep going until D starts talking. Walk the rest of the way to the large glass door and look at the keypad. Give him the two codes you got through the red and white DAS Cards. For speed the two codes are: ASH853LEY and SAY919OKO. As soon as you have entered the codes, press the small black box to confirm Ashley's fingerprints. Walk to Another and Richard, talk to him. Go ahead and talk to D, he will ask you a couple of things.
Q. Ashley, what are you going to do now? Do you want to know the truth? The truth about your mother and father?
A. Both: I want to know the truth or I am scared to know the truth
Q. Ashley, ... Do you think your father killed your mother?
A. No, he didn't kill her
For the first answer I'm not sure what the difference is when choosing one answer over the other. From what I know there should be no difference. In any case Richard will enter Another, use the white DAS Card with the machine followed by the red one. Now it's Quiz time!
Quiz Answers
Q. I went to the back of the building looking for dad. I couldn't find him in the hallway, so I went into Lawrence's room. In there I found Lawrence's diary and his will. I also found the portrait of ...
R. Three men
Q. We solved the mystery of the kaleidoscope and pressed the hidden button in the tree painting. The painting led to a secret room. The person down in the secret room was ...
R. Richard
Q. When I met Dad in the secret room there was a lot of confusion. I was shocked to learn that my father was present at the scene of my mother's death. In the confusion, Dad left, making me find Henry's last letter in the typewriter. It was headed to ...
R. Franny
Q. D and I went into the lab to look for my dad. Here I found the DAS Cards containing Another's activation codes and used them to recover dad's memory. We found that current memories of him were false. This false memory had been implanted in him. Shortly after we heard a voice coming from a loudspeaker. That voice was ...
R. Bill
Chapter Six: The Memory of the Right Hand
You have now lost your DAS card, if you want to save you better go back. Follow the staircase down to the end, stopping occasionally for short talks. Enter through the door inside the cave. If you have done everything as I have told you so far you should have information about what is going on from D. Follow the cave until you find D's other shoe, now you should have information about D.'s past. until you run into Bill, talk to him and he will tell Ashley that he witnessed her mother's death. Now you have to do a little Quiz.
Quiz Answers
Q. Now, Ashley ... Let's see if you can remember that night your mother was killed ... But just out of curiosity, the night your mother died ... what happened while you were with her?
A. Someone has entered the house
D. Sayoko realized that there was someone in the house. What happened then?
R. He hid me in the wardrobe
D. Keeping your father in mind, try to remember what happened that night. Ashley, while you were hiding in the wardrobe, what happened?
R. I heard the voice of the mother.
Q. Ashley ... what did Sayoko say? What did you hear?
R. "You can't have Another!"
D. Ashley. Take your time to remember the rest. This is the important part. Did you hear anything after hearing your mom's voice?
R. I heard a gunshot.
D. Ashley: "I ... looked out of the wardrobe.
Bill: "And what did you see?
Ashley: "I saw ... Yes, I saw it ...! I saw the face of the person who killed my mother! Indeed, no ... All of a sudden what I saw from inside that closet. .. it starts to look like a photograph as it develops. I saw a shoulder, then a tuft of hair, then ... a pair of stone eyes. " I will close my eyes to remember more precisely the image I have in mind. Hey! That face is that of ...
R. Bill
After a not very timely blow to Bill caused by your friend D, you can cross the bridge. If you have completed D's quest he will continue your story and he will tell you how he died. Continue out of the cave to complete the chapter.
Epilogue: The Miracle of the Blue Moon
Now you are on a beach on the other side of the island, run up to talk to D and find the captain. Run to the captain and talk to him too. D will run away and Richard and Jessica will appear. Run down to talk to them. Go up and talk to D. If you have done all there was to do with D now he will ask you to touch his hand so he will be able to ascend. You will have a flashback of the time spent with D. If you missed something he will be forced to stay on the island forever and you will not have some parts of the ending. Go down to the gang. Talk to them and you will see Sayoko's ghost in the sky. After a few more talks it will be time for the final credits, there are some images that deserve to be seen within them.
FINE
But don't forget to blow out the candles at the end of the credits, then you can save the game and play it again with the small changes. A little theory of mine is that the more parts of the game you have completed, the more candles you will find burning.
Video of the solution - First part


